XML configurations (MXConfig) are specifically used for Zebra devices as they provide a flexible and standardized way to define settings and parameters for the devices. XML allows for easy configuration management, as settings can be easily modified, deployed, and shared across different devices. XML configurations (MXConfig) can be remotely deployed to Scalefusion-managed Zebra devices, enabling centralized management and configuration updates across multiple devices.
This can be achieved via the Remote Commands feature on the Scalefusion Dashboard. All you need to do is create an XML config using Stagenow and pass the XML content through Zebra StageNow Config Remote Command to run on devices. Let us learn in detail how this can be done.
Pre-requisites
- The device should be enrolled in Company-Owned mode with Scalefusion.
- Download and Install Zebra StageNow software on a Windows PC.
- Basic knowledge of how to configure, export, and download XML config from StageNow to the PC.
Steps to deploy StageNow XML Config on devices
In this document, we are taking Datawedge Configuration as an example to explain how Stagenow XML Configs can be deployed on Scalefusion managed Zebra Devices.
Step 1: Create Stagenow profile using Xpert Mode
Step 2: Create XML file
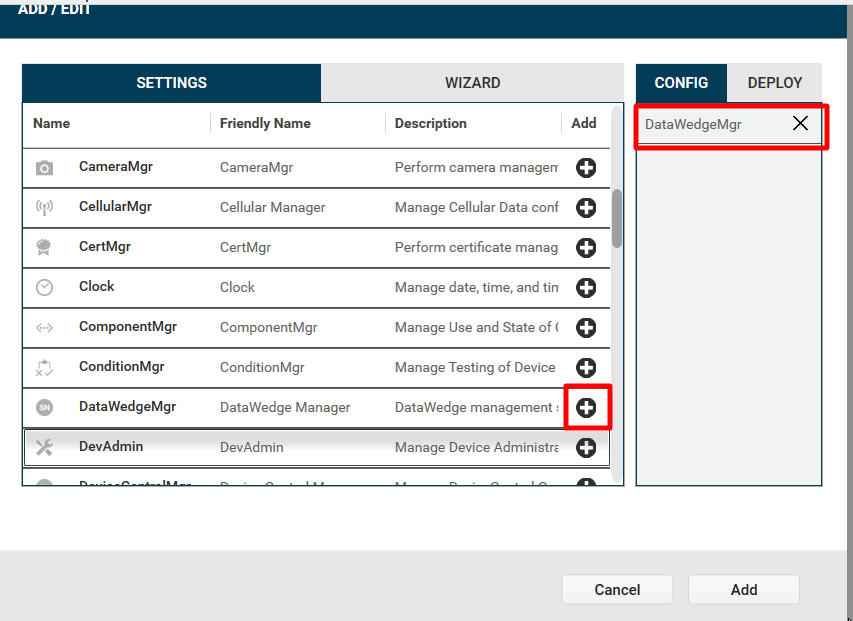
- Add DataWedgeMgr on Stagenow
- Enter the device's path to the /sdcard/datawedge.db file and select the button to turn Automatic configuration import to ON.
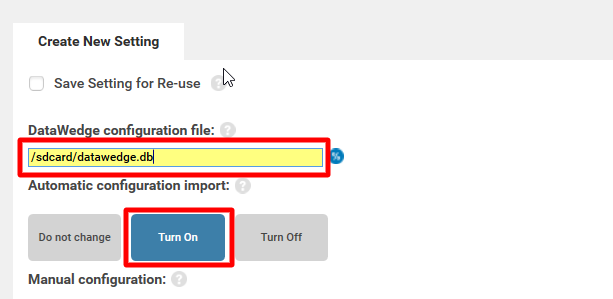
- Click on Continue button.
- Next, click on Complete Profiles button.
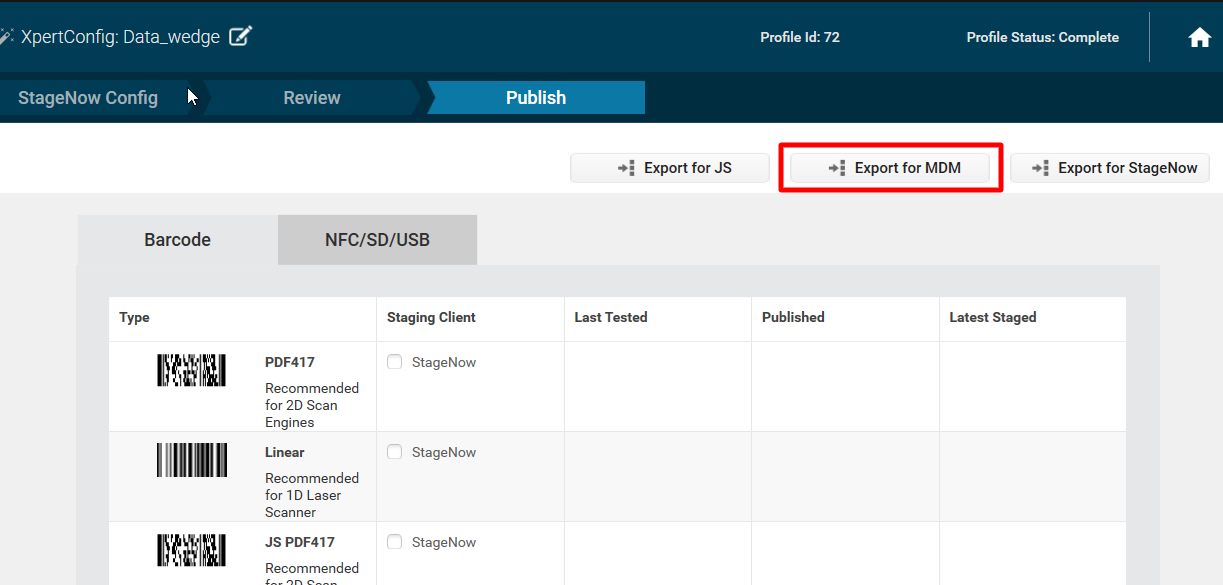
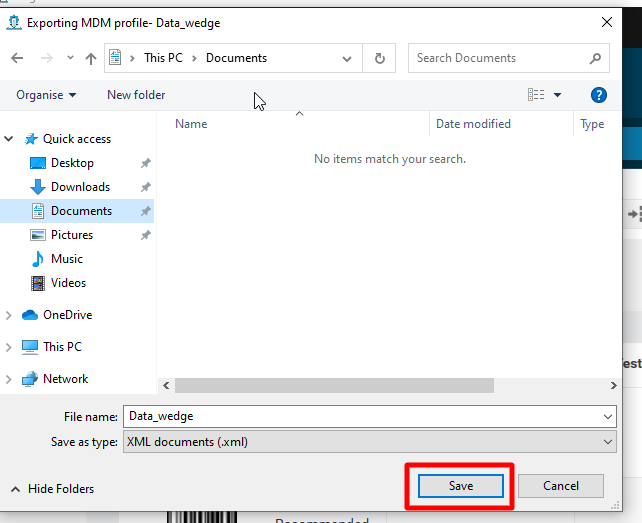
- Click on Export for MDM button to save the configuration as an XML file.
- Click Save to save the file on your Windows PC as an XML.
- Copy the XML content to deploy on Zebra Devices using Remote Commands on Scalefusion Dashboard.
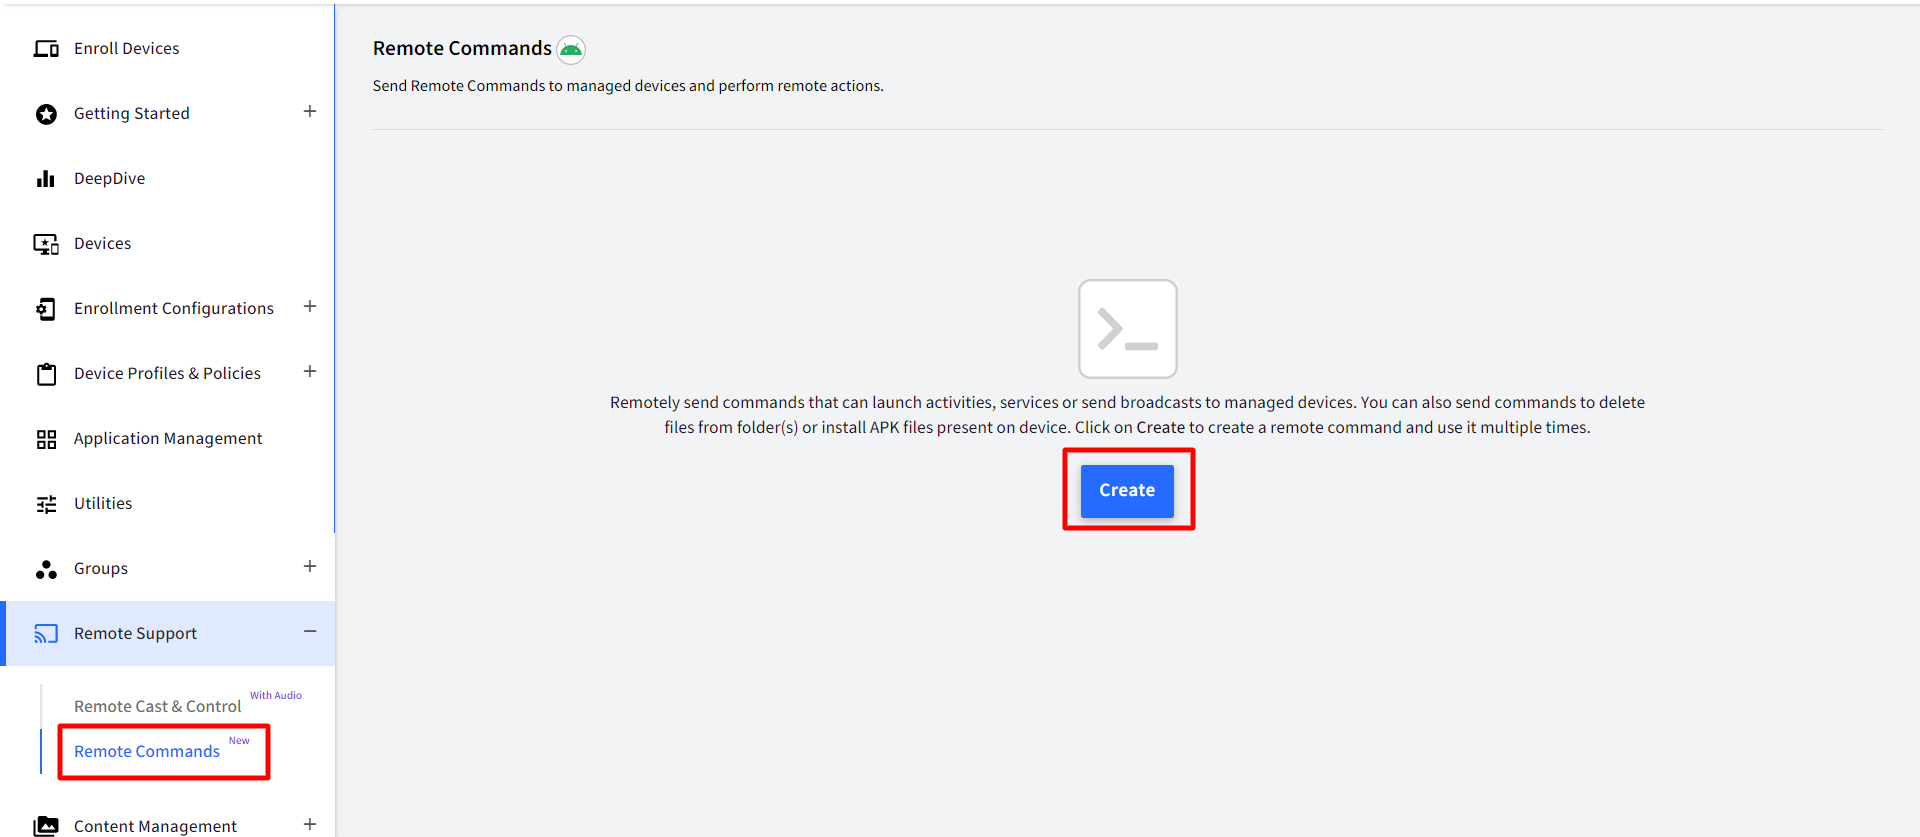
Step 3: Create Zebra StageNow Config Remote Command
- On the Scalefusion Dashboard, navigate to Remote Support > Remote Commands and click on Create
- This would bring up a pop-up with a list of commands to select from. Scroll down and choose Zebra StageNow Config.
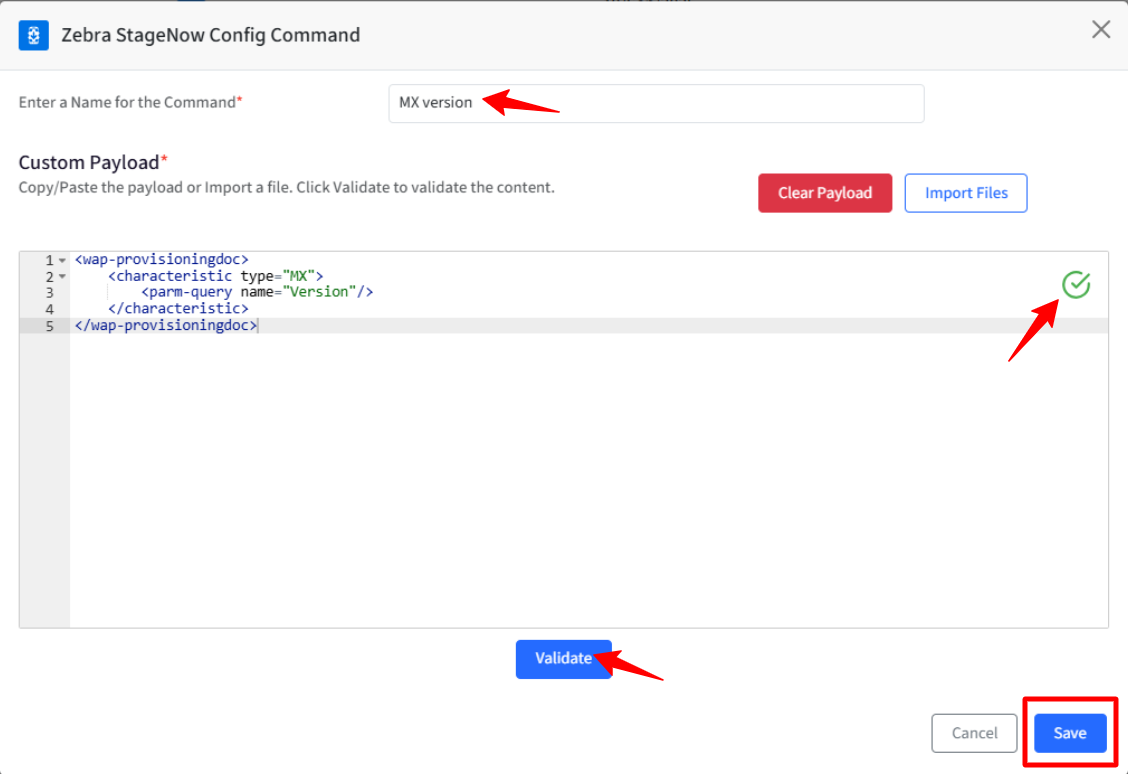
- In the dialog that opens, enter the following:
- Enter a name for the command.
- Custom Payload: You can copy/paste the payload, or if you have an XML file, you can import it.
- Click Validate.
- Once it is validated, click Save.
- Enter a name for the command.
Few XML Examples
- To get the MX version:
<wap-provisioningdoc>
  <characteristic type="MX">
    <parm-query name="Version" />
  </characteristic>
</wap-provisioningdoc>
2. To turn on/off Battery Saver mode: To turn on, use 1, and to turn off, use 2.
<wap-provisioningdoc>
  <characteristic version="10.1" type="PowerMgr">
    <parm name="BatterySaverMode" value="2" />
    <parm name="BatterySaverControlMode" value="2" />
  </characteristic>
</wap-provisioningdoc>
3. For Wifi Config:
<wap-provisioningdoc>
  <characteristic version="8.4" type="Wi-Fi">
    <characteristic type="System">
      <parm name="WiFiAction" value="enable" />
    </characteristic>
    <parm name="UseRegulatory" value="0" />
    <parm name="UseDiagnosticOptions" value="0" />
    <parm name="UseAdvancedOptions" value="0" />
    <parm name="NetworkAction" value="Add" />
    <characteristic type="network-profile">
      <parm name="SSID" value="SSID name" />
      <parm name="SecurityMode" value="1" />
      <parm name="WPAMode" value="2" />
      <characteristic type="key-details">
        <parm name="KeyType" value="Passphrase" />
        <parm name="ProtectKey" value="0" />
        <parm name="PassphraseWPAClear" value="Test@123" />
      </characteristic>
      <parm name="UseDHCP" value="1" />
      <parm name="UseProxy" value="0" />
    </characteristic>
    <parm name="UseHotspotOptions" value="0" />
  </characteristic>
  <characteristic version="8.4" type="Wi-Fi">
    <characteristic type="System">
      <parm name="WiFiAction" value="enable" />
    </characteristic>
    <parm name="UseRegulatory" value="0" />
    <parm name="UseDiagnosticOptions" value="0" />
    <parm name="UseAdvancedOptions" value="0" />
    <parm name="NetworkAction" value="Connect" />
    <characteristic type="network-profile">
      <parm name="SSID" value="SSID name" />
    </characteristic>
    <parm name="UseHotspotOptions" value="0" />
  </characteristic>
</wap-provisioningdoc>
Likewise, you can create different XML configs and run them on devices using this Remote Command.
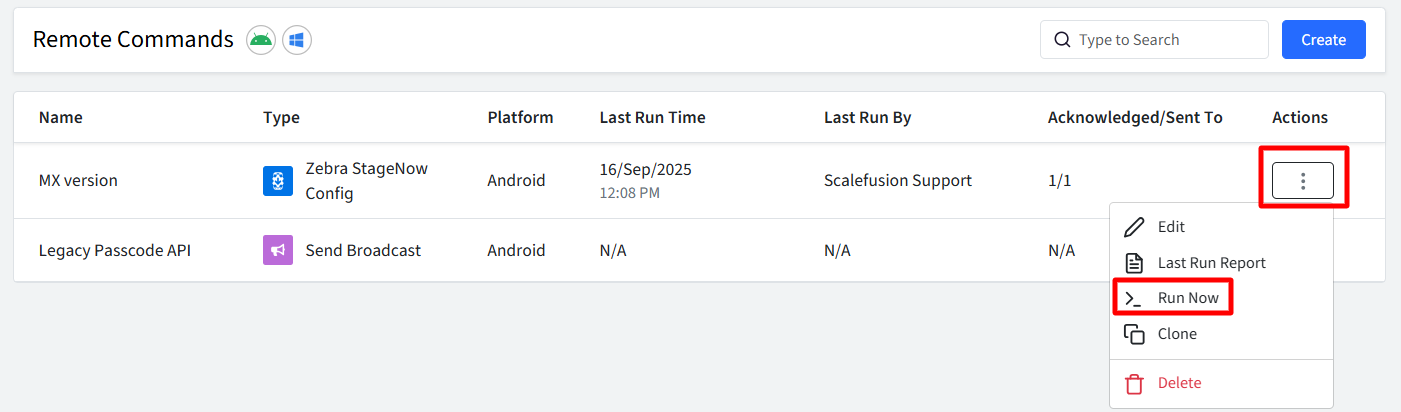
Step 4: Run the command
To execute this remote command on the device, run it from the Dashboard.
- Click the 3 dots under the Actions column and click Run Now.
- Select Device Group or Device and click Execute.
- Once done, you will be able to see the Last Run time and Acknowledgment status.
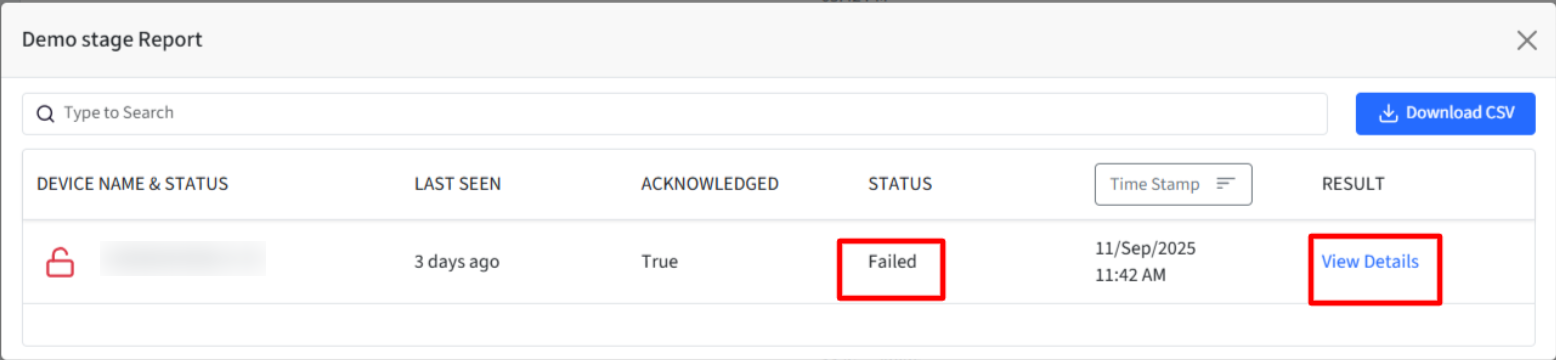
- Click the 3 dots under the Actions column and click Last Run Report to see the Status of the command.
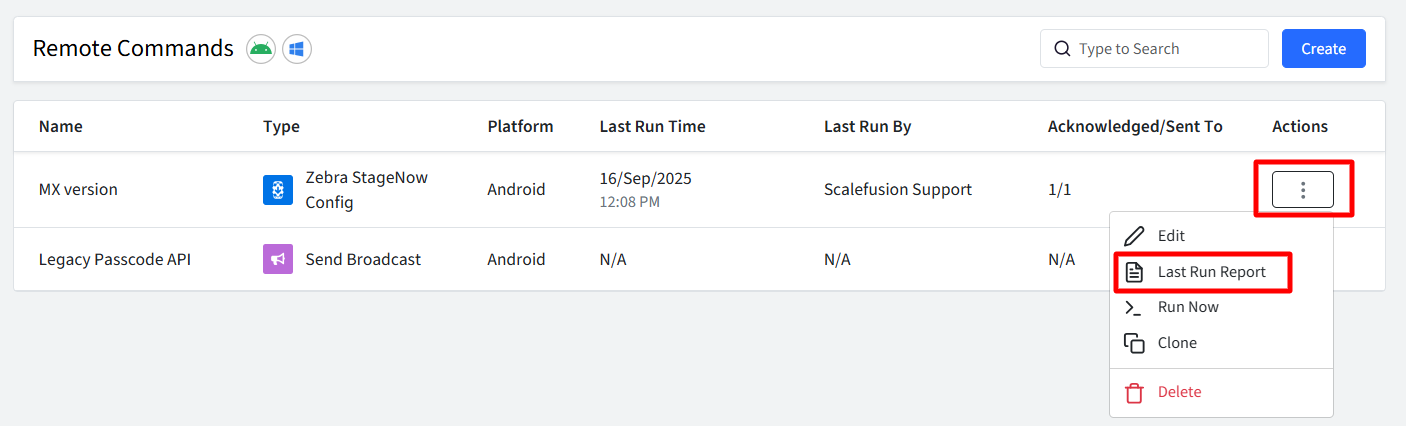
- If the command executes successfully, the Status will display as ‘Success’ and the Result will show as ‘NA’, since no output is returned by the stage upon successful completion.
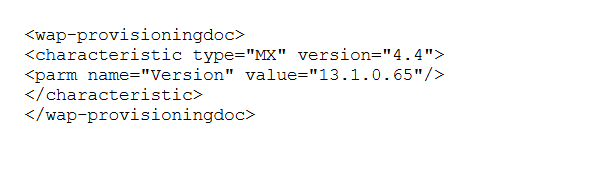
- There are a few exceptions; for instance, with MX version configuration, you can view details under Results. Click ‘View Details’ to download the output. Eg.
- There are a few exceptions; for instance, with MX version configuration, you can view details under Results. Click ‘View Details’ to download the output. Eg.
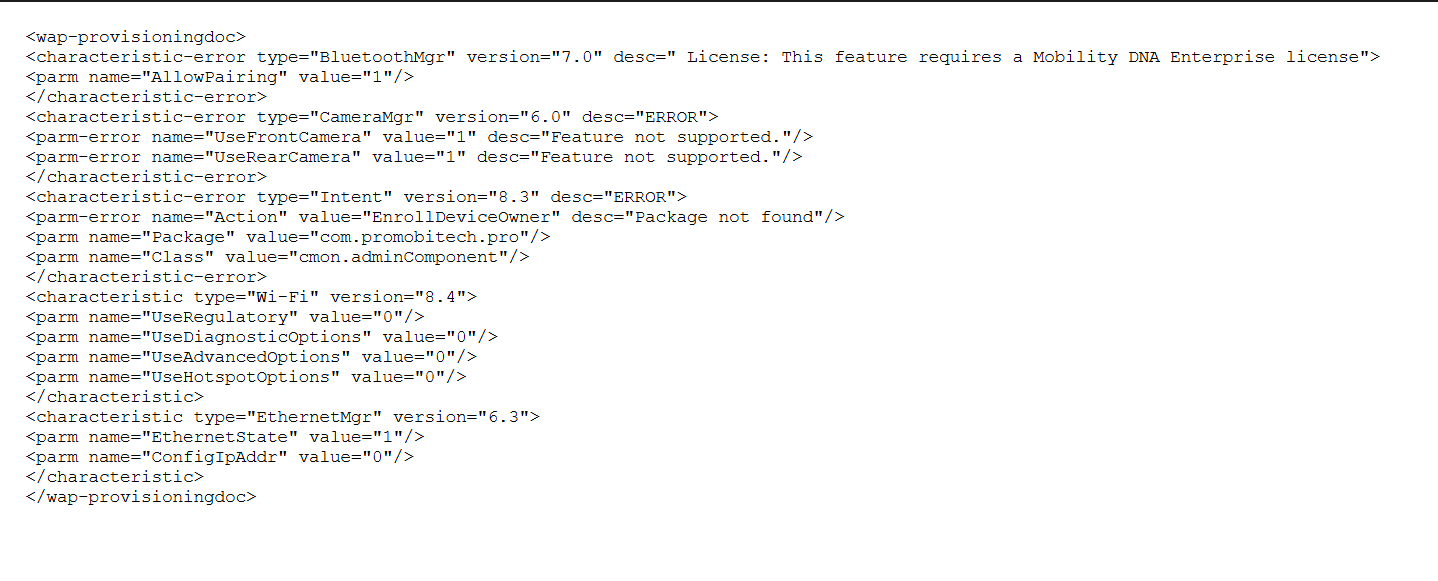
- If the command does not succeed, the Status will show as 'Failed', and you can click on 'View Details' under Results to see the reason.
- If the command executes successfully, the Status will display as ‘Success’ and the Result will show as ‘NA’, since no output is returned by the stage upon successful completion.