Zebra provides a wide range of mobile computers and devices that are widely used across industries. These devices include Android OS devices that need to be provisioned with an MDM/EMM solution like Scalefusion.
StageNow is Zebra's staging tool that makes it easy to create enrollment or provisioning profiles, which makes enrollment into Scalefusion a breeze. In this document, we will see how to create an enrollment profile using Zebra Stage Now.
Prerequisites
- Scalefusion Account
- Zebra device with,
- Android OS 8.0 (Oreo) and greater
- Minimum of MX 8.0
- LifeGuard patch 7 or greater is installed
- Download and Install Zebra StageNow software on a Windows PC
Step 1: Getting the Configuration Data Ready
Scalefusion offers multiple enrollment methods for corporate-owned devices, and in each enrollment method, the Scalefusion MDM app needs to be provided with the enrollment data, which can also be called as configuration data. Similarly, to create Zebra StageNow profiles, Scalefusion offers specific configuration data that needs to be captured before we start creating the StageNow profiles.
Follow the steps below before you start creating StageNow profiles,
- Sign In to Scalefusion and navigate to Enrollment Configurations > QR Code. Click on the QR Code configuration that will be used to enroll the devices and click Show Android QR
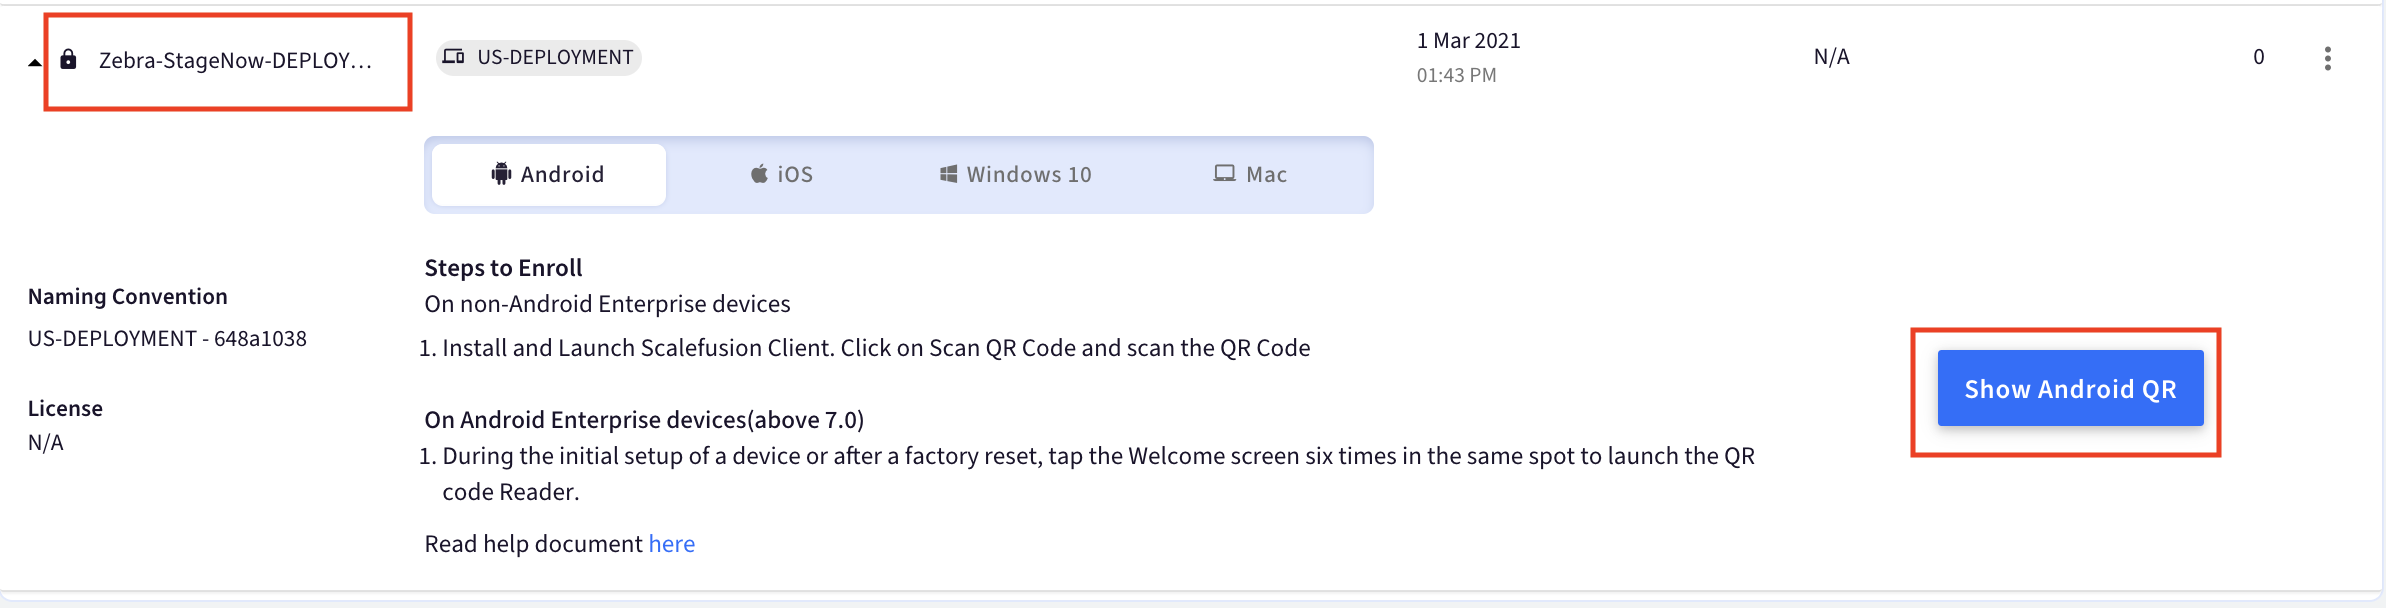
- The QR Code dialog has two additional information fields,

- APK Download URL: Use the Copy button to copy the URL and keep it handy. This will be used in a later part.
- Download Config JSON: Click on Download Config JSON, which will download the configuration file to your computer. This JSON file also be required at a later part, so please note down the location of the file.
Step 2: Creating the StageNow Profile
In this step, we will create the StageNow profile, at the end of which we will have the QR Codes or Barcodes that will be used to enroll a device.
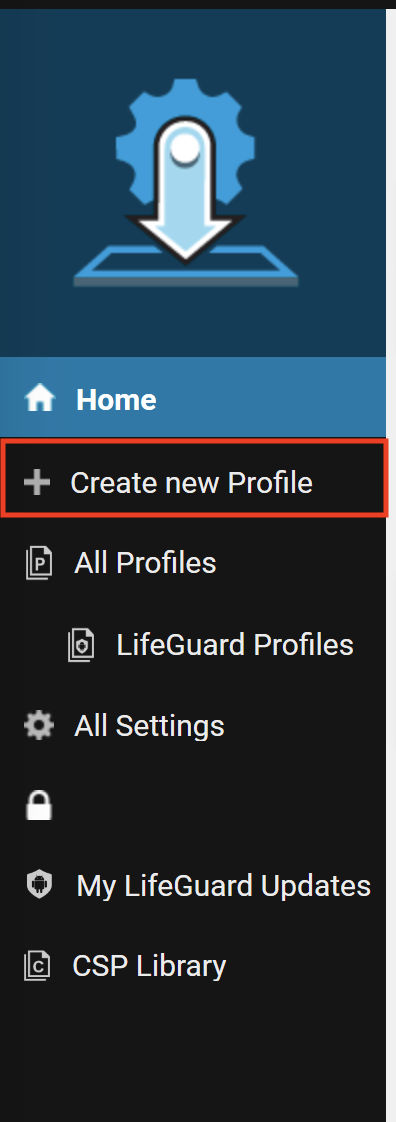
- Launch the StageNow application and click Create New Profile from the menu options to launch the profile wizard,
- You may be asked for the StageNow admin password that you created at the time of installing the StageNow tool for the first time.
- From the dialog below, select the appropriate options and click Create,
- Select MX Version: Ensure that you select the correct MX Version. For this document, we have selected MX 8.0. The MX Version can be found either from,
- Settings > About Device > SW Components
- Launch the StageNow application on the device and select View Client InfoIf the versions at i and ii are different, then select the minimum of i and ii.
- Select Wizard: From the list of wizard options shown, select XpertMode

- Select MX Version: Ensure that you select the correct MX Version. For this document, we have selected MX 8.0. The MX Version can be found either from,
- Enter a name for the profile and click Start

- Now you would see the wizard where we can add the steps that will be used to generate the enrollment QR Codes. We will add the steps that will be required to create the profile,
- Switch to the Wizard tab and select MDM Enrollment to add it to Config

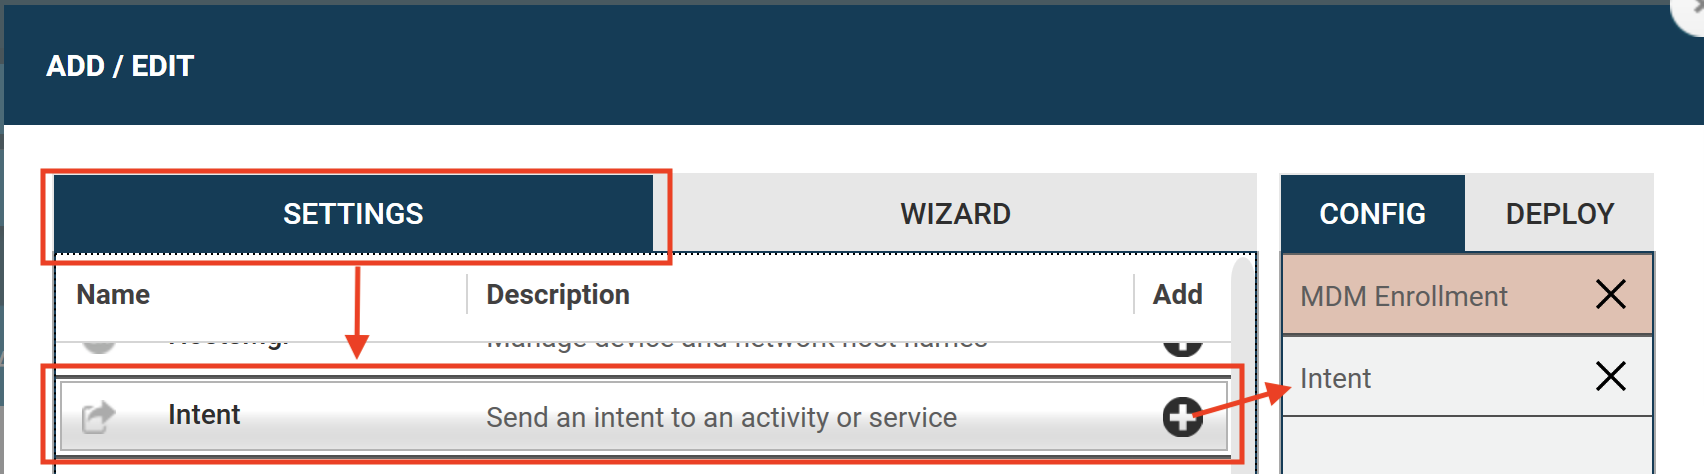
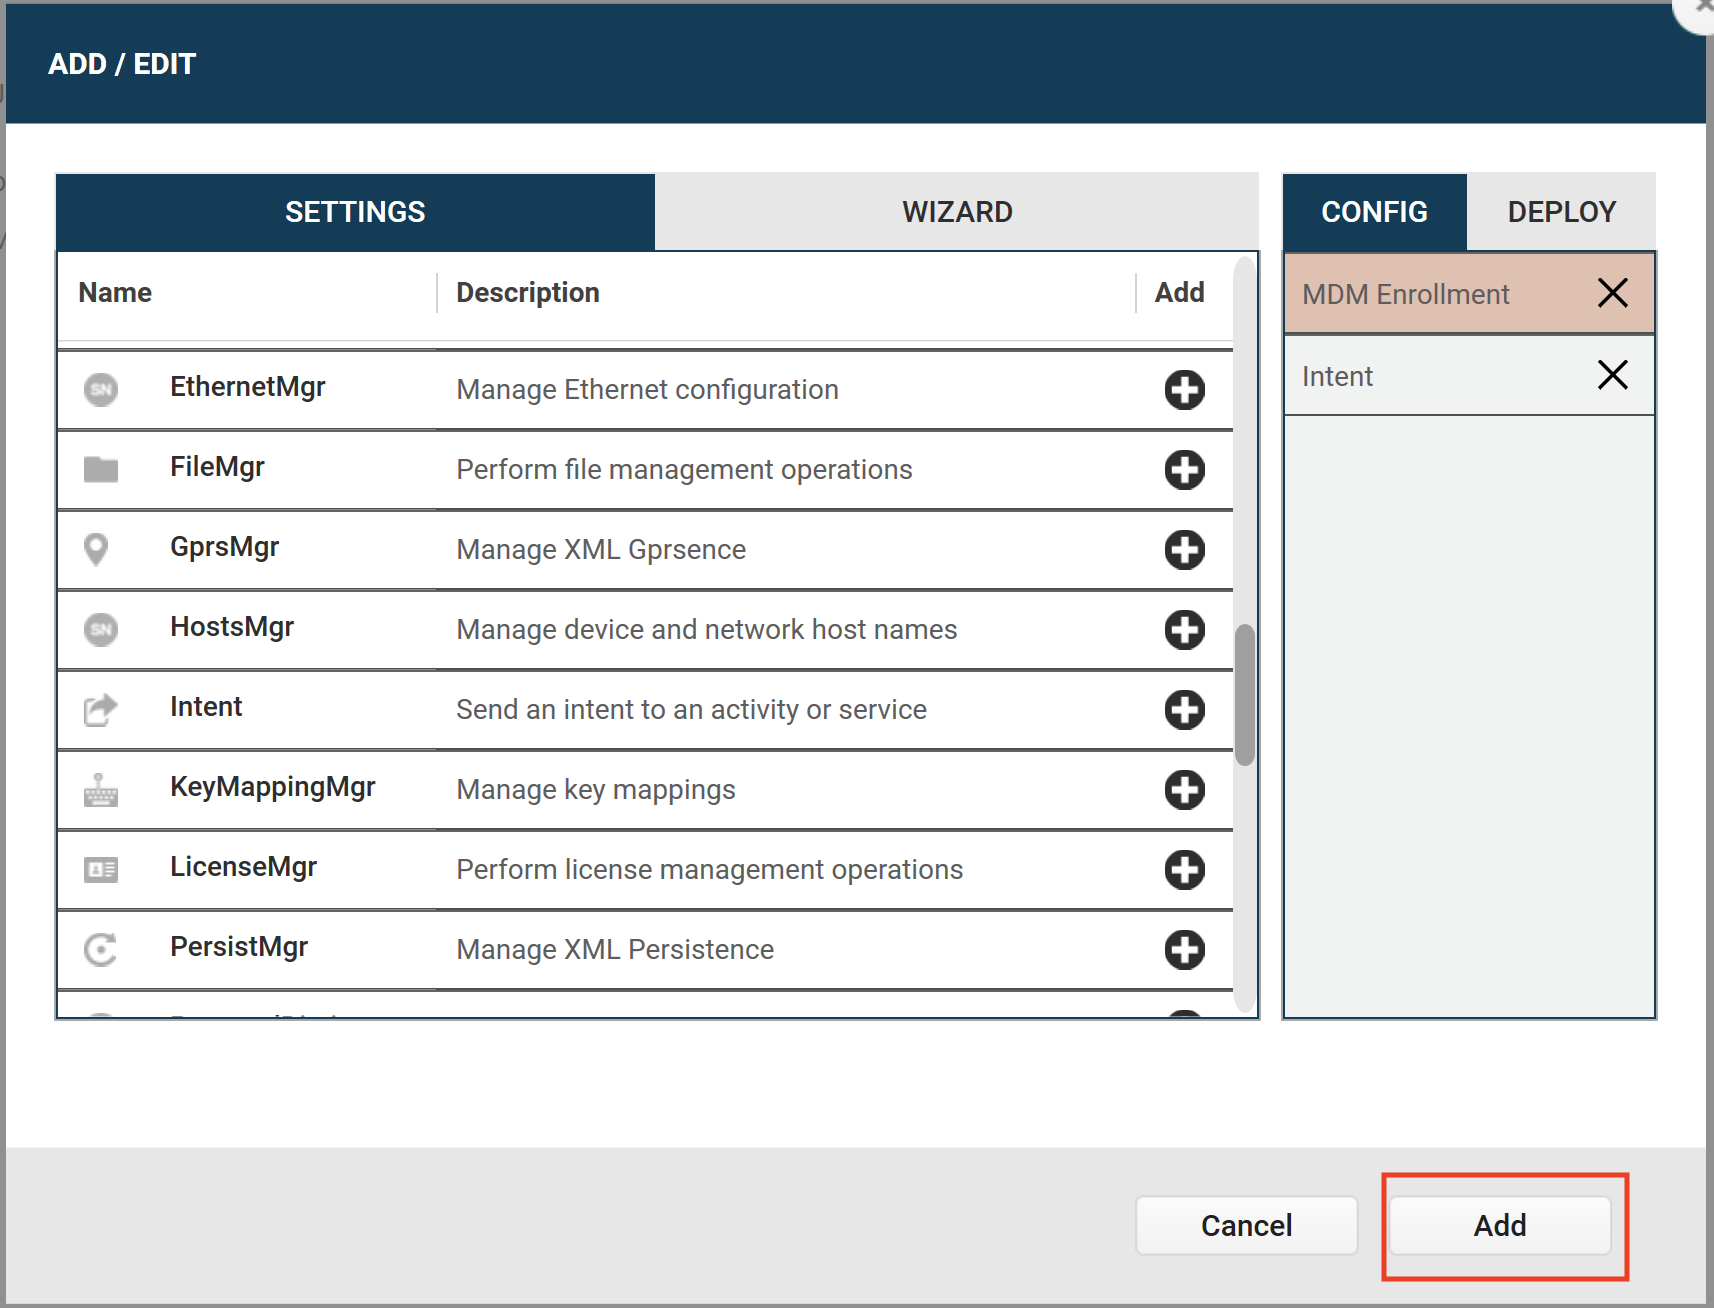
- Switch to the Settings tab,
- Select Intent to add it to Config. This will help in passing the enrollment information.
- Select Intent to add it to Config. This will help in passing the enrollment information.
- Now click ADD to start the profile creation process.
- Switch to the Wizard tab and select MDM Enrollment to add it to Config
- The actual profile creation is a multi-step process, and the following steps will guide you in completing each step.
- MDM Agent Type: From the drop-down, select Other and click Continue

- Enroll Method: In this step, select No, I want to Download the file to my device and click Continue

- Support App: Select No and click Continue

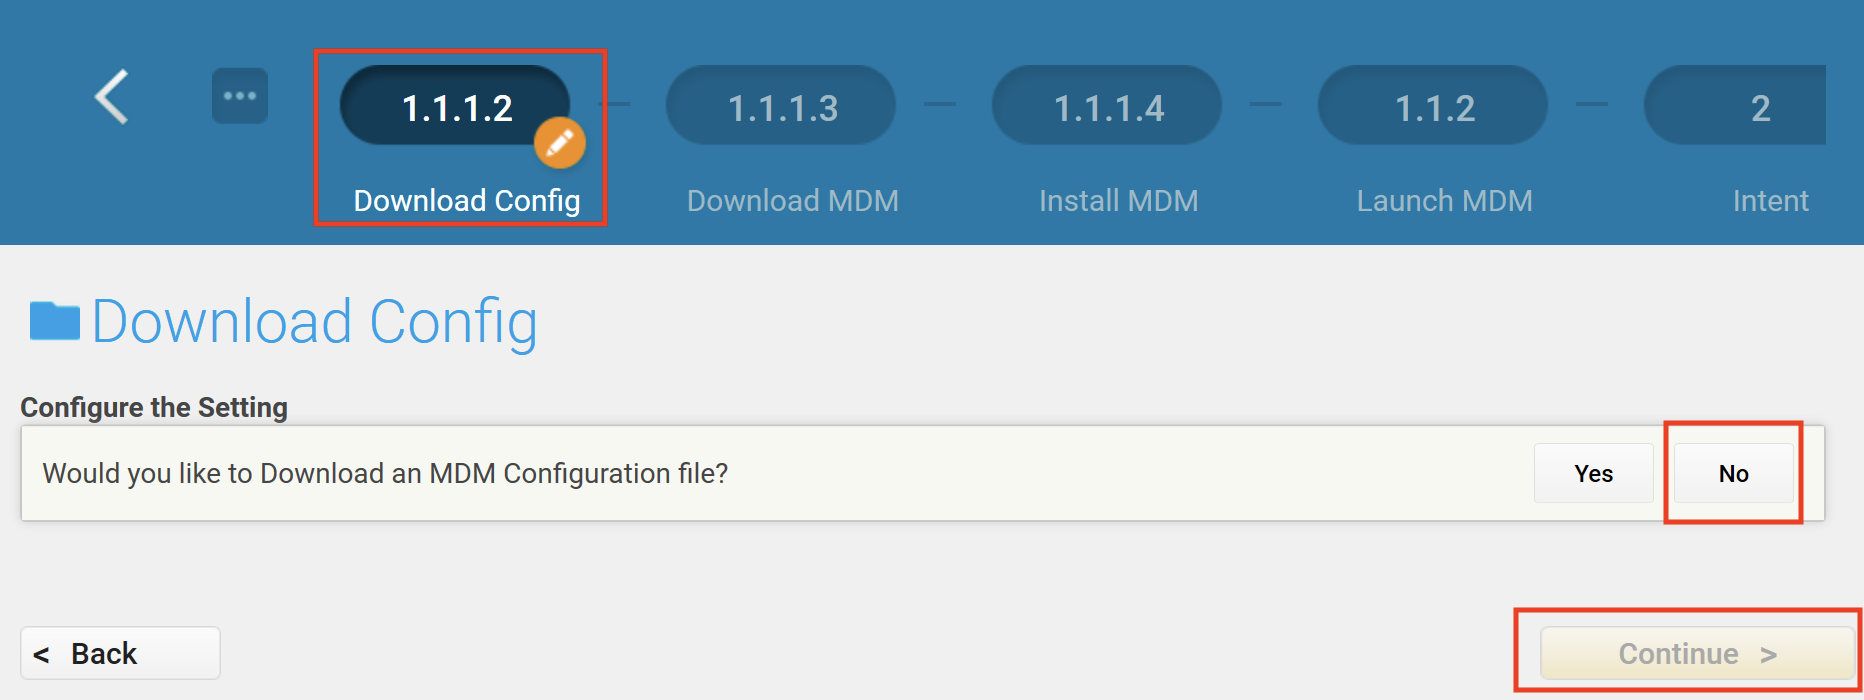
- Download Config: Select No and click Continue
- Download MDM Agent: Complete the section and click Continue,
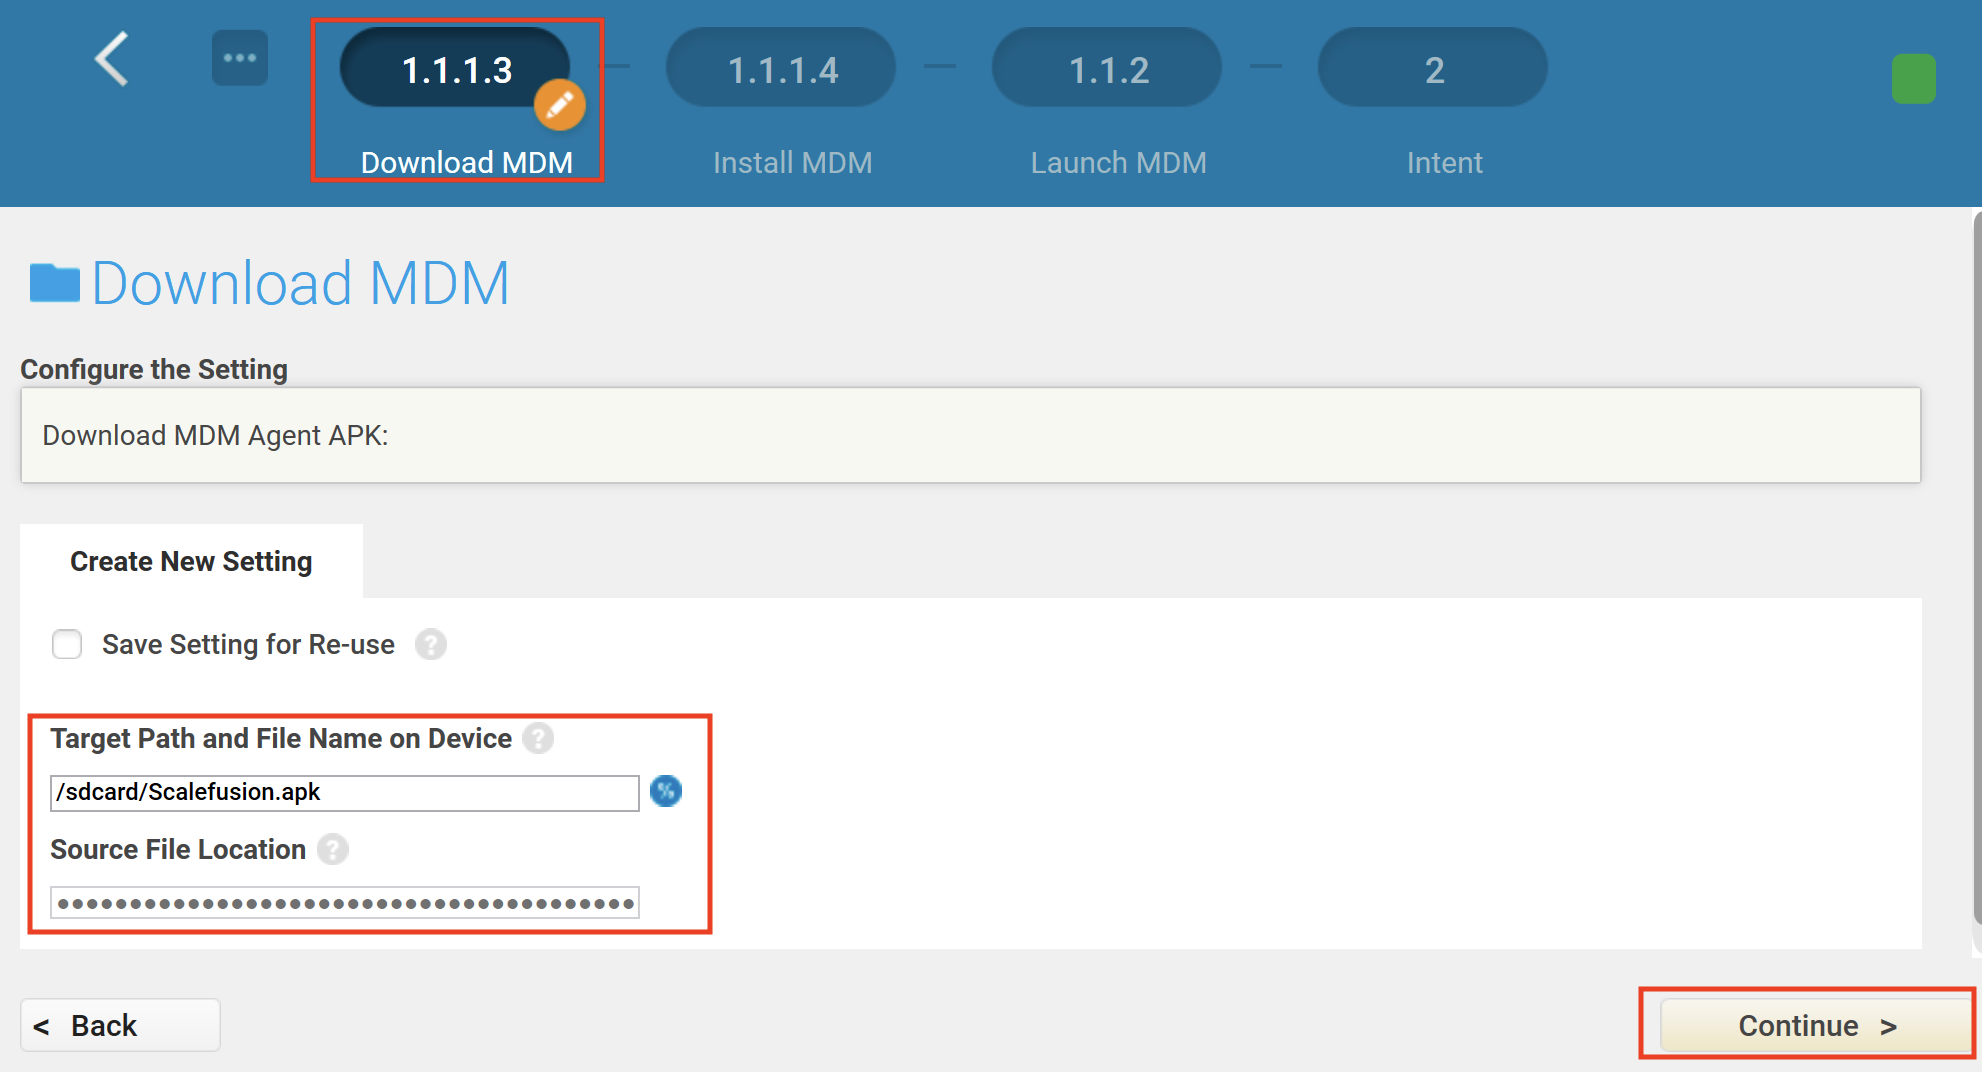
- Target Path and FileName on Device: Enter a target path for the Scalefusion APK to be downloaded. For ex: /sdcard/Scalefusion.apk
- Source File Location: Click on the 3 dots next to the input field and configure as below,
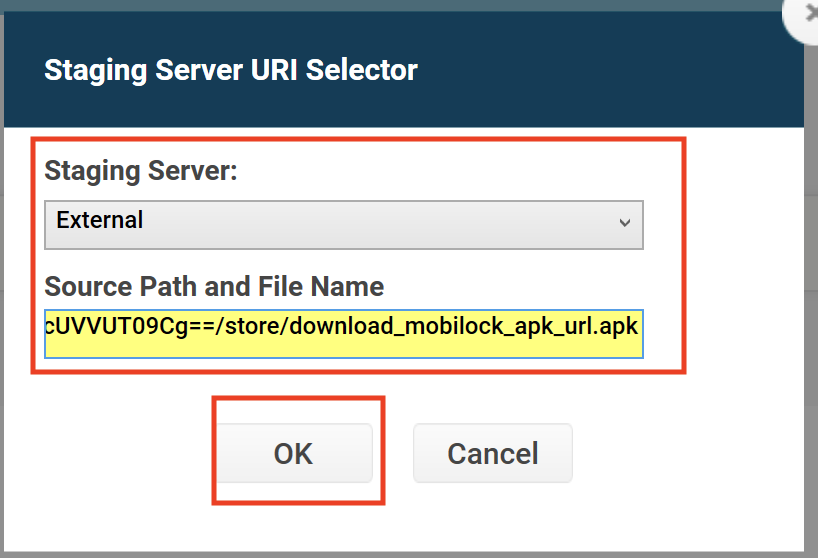
- Staging Server: Select External
- Source Path: Provide the APK path obtained at APK Download URL step in the section Step 1: Getting the Configuration Data Ready
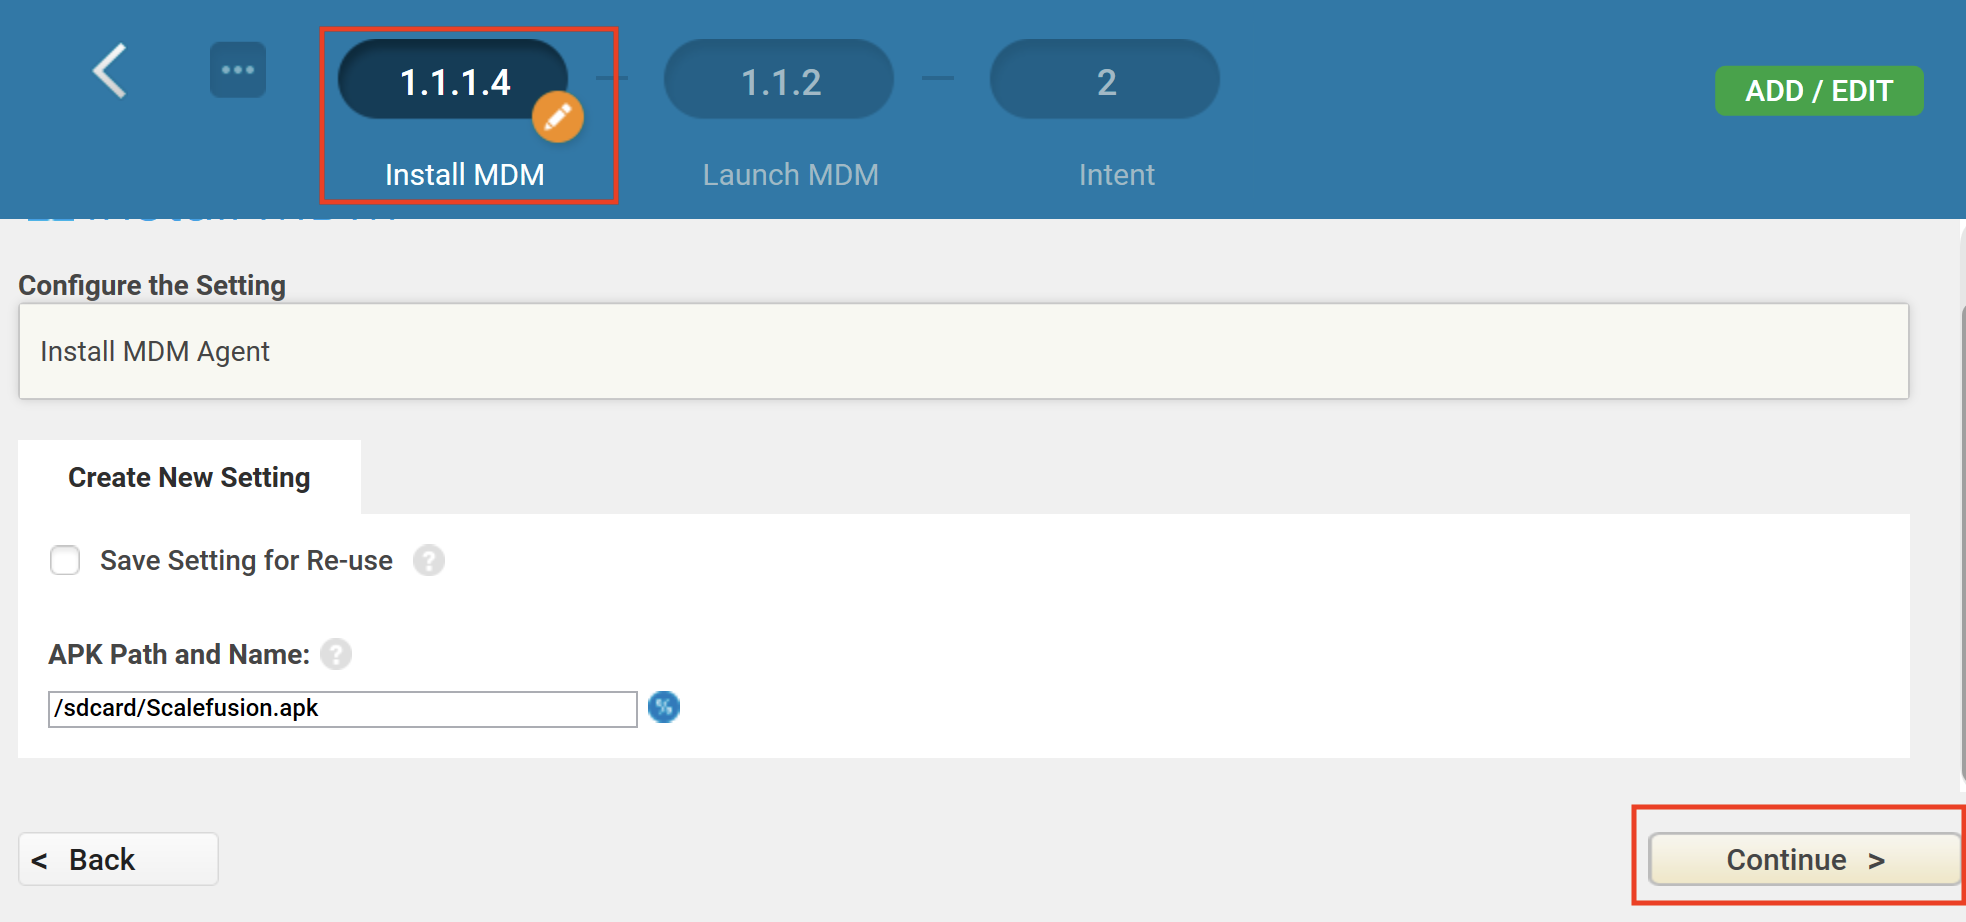
- Install MDM: Click Continue
- Launch MDM: Select No and click Continue

- Intent: Now, we will be configuring the enrollment data that will be passed to Scalefusion post-installation. Configure this section as shown below,

- Action: From the action dropdown, select Enroll a Device Owner
- Package Name: Enter the package name as com.promobitech.mobilock.pro
- Class Name: Enter the class name as com.promobitech.mobilock.component.MobilockDeviceAdmin
- JSON Values: Select JSON File and use the 3 dots option to select the file that was downloaded at Download Config JSON in the section Step 1: Getting the Configuration Data Ready
- Click Continue to complete the configuration process.
- MDM Agent Type: From the drop-down, select Other and click Continue
- We are almost there. To generate the enrollment QR Codes, click on Continue
- In this step, select the type of scanner that your devices have, select the QR Code or Barcodes to generate and click Publish

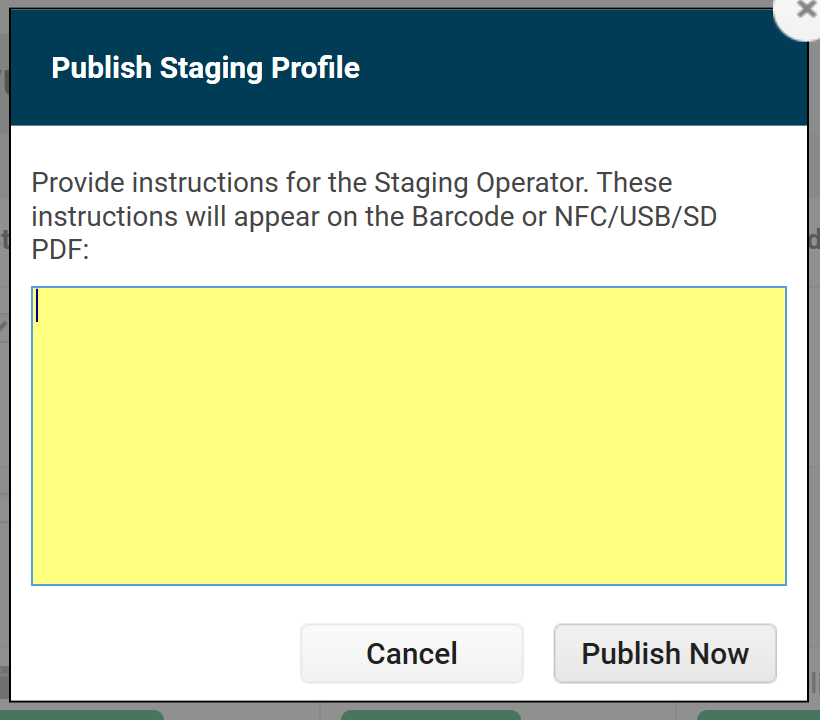
- Before the final QR Codes are generated, you can add the steps that can be added to the PDF. Click on Publish Now
- This would generate a PDF file with the QR/Bar Codes which can be saved to your PC and used for enrollment.

Step 3: Enrolling a Device
- On Factory Default Devices: If your device is already powered on but is in a factory default state with no 3rd party apps or other MDMs installed, then launch the StageNow app on the device to scan the QR/Bar Codes one by one to complete the enrollment.
- On Factory Fresh/Reset Devices: If your device is factory fresh/reset, depending upon the MX version and device support, a barcode may be generated, which can be used to bypass the GMS Android Setup Wizard. Once done, launch the StageNow app on the device to scan the QR/Bar Codes one by one and complete the enrollment.
