Scalefusion Dashboard gives you the ability to define custom fields and set values against them for each device. These custom fields can be used as wildcards when defining configurations for Play For Work applications or used in Device Profile to override the default URL.
This document helps you understand how to define the custom fields, set values for them and then use them for your Play For Work app configurations and specify a device-specific custom URL.
Before you Start
- Make sure you are signed into Scalefusion Dashboard.
- You have set up Android for Work and have some Play For Work applications.
Step 1 - Defining & Setting Values for Custom Fields
In this step, we will see how to define custom fields and set their values in bulk. These custom fields will be used as wildcards in the subsequent steps.
Method 1: For devices already enrolled
- Sign In to Scalefusion Dashboard.
- Navigate to the Devices tab.
- Click on the 3 dots menu and select Set Custom Fields as shown below,

- You will see a dialog as shown below. This dialog has two options,
- Field Name - You can use this section to create custom fields and define their types.
- Field Values - For each of the fields that you have defined, you can set values for each enrolled device.
- To define Fields and their types, click on the Field Nametab. Here enter the field name and select the corresponding type of this field. For eg. if the field is email id, the type should be Email. The field types can be one of the following:
- String
- Integer
- Boolean
Click on ADD MORE FIELD to add a new field
After defining field names, click SAVE.
- You can add a maximum of twenty (20) custom fields.
- To set values for these newly created custom fields, click on the Field Values tab and click DOWNLOAD CSV,Values for custom fields can also be set from Device Groups, which are then applicable to all devices in the group.

- A CSV file will be downloaded to your computer. The downloaded file name will have the "devices_yyyy-mm-dd-xx.csv" pattern. Depending on the number of devices that you have, it may take longer to download this file.
- Once the file is downloaded, locate the file on your computer and open it in an editor that can edit CSV files. I have used TextEdit on a Mac, as shown below.
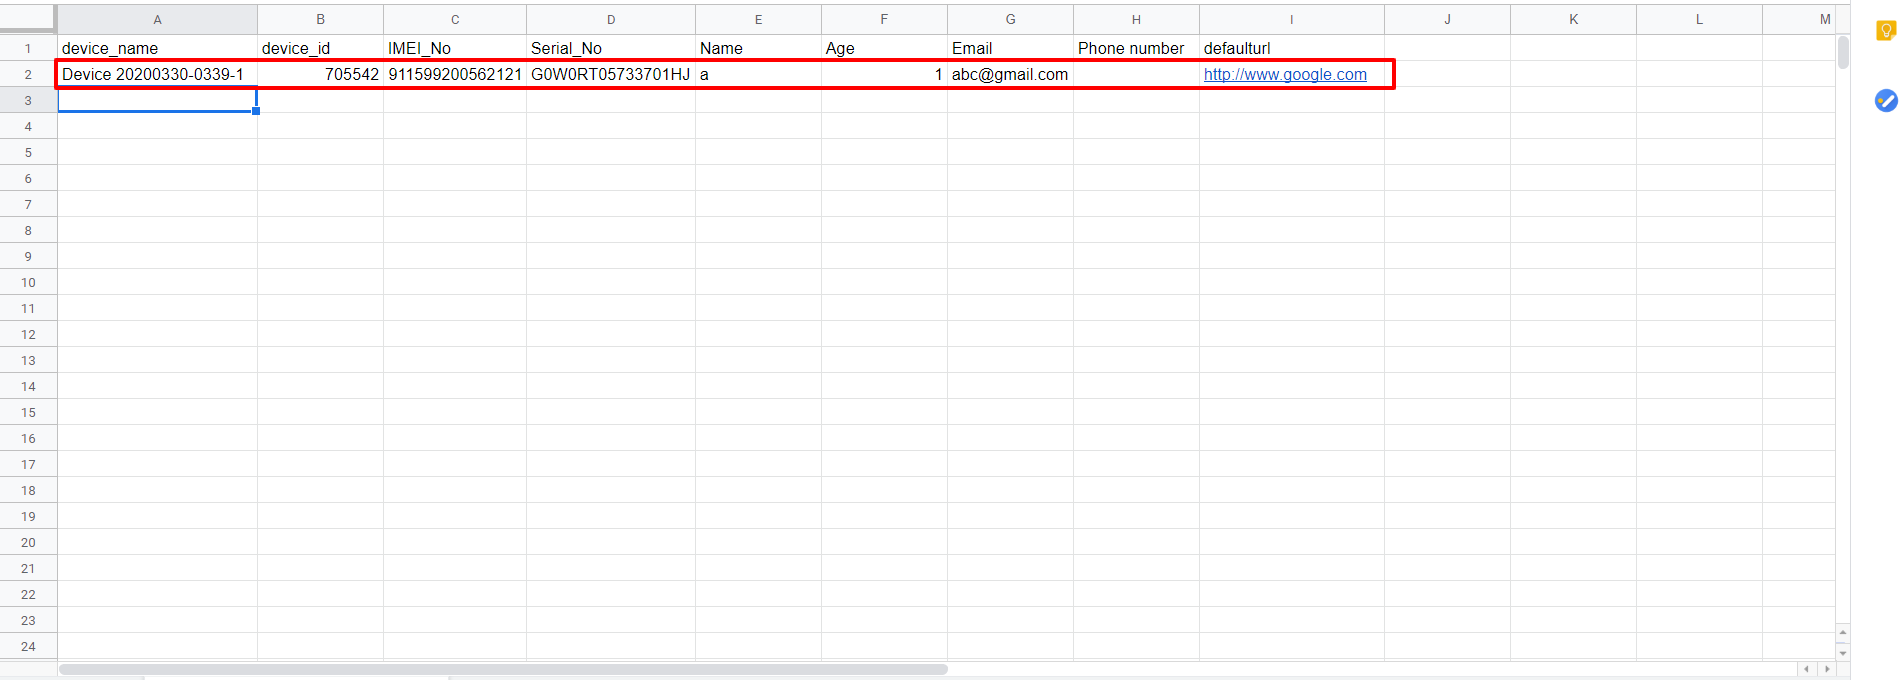
.png) Do NOT EDIT the first four fields, that is, device_name, device_id, IMEI_No, Serial_No. These are used as mappings against the device, and editing them will corrupt the file.
Do NOT EDIT the first four fields, that is, device_name, device_id, IMEI_No, Serial_No. These are used as mappings against the device, and editing them will corrupt the file. - You can add or modify the values of custom fields separated by commas, as shown. You can choose not to enter values for devices that you don't want to or add only the values required. In the screenshot below, I have added all values for FrontDeskTab, and CallCentreDevice, but left the device named Joe Root empty and for the Store Kentucky device added only the email and default URL fields. Once done, save the file locally on your computer.
.png)
- Now navigate back to the Scalefusion Dashboard and upload the file in the dialog shown in Step 7 above. If the CSV could be read properly and there were no errors, then you would see the following confirmation.

- That's it! You have successfully added new custom fields and set the values for them. You can check those values against the device by clicking on the device and on the device details page, clicking on the Settings Menu (Gear Icon) > Set Custom Properties
Method 2: For devices that are not yet enrolled
Custom fields can also be configured before the device's enrollment, and data can be uploaded using their Serial number. Once the device is enrolled, the custom fields with the data will be automatically assigned to it.
- In the Devices section, define custom fields as explained in #1 to #6 above and Save
- Now, navigate to Device & User Enrolment > IMEI/Serial # based enrollment and download the custom CSV. The fields you defined in Custom fields are visible as additional columns in the CSV.

- Now, add values for custom fields and upload the CSV again.
 You can follow IMEI/Serial Number-based enrollment by visiting here.
 - This is how data for custom fields can be entered before the device's enrollment.
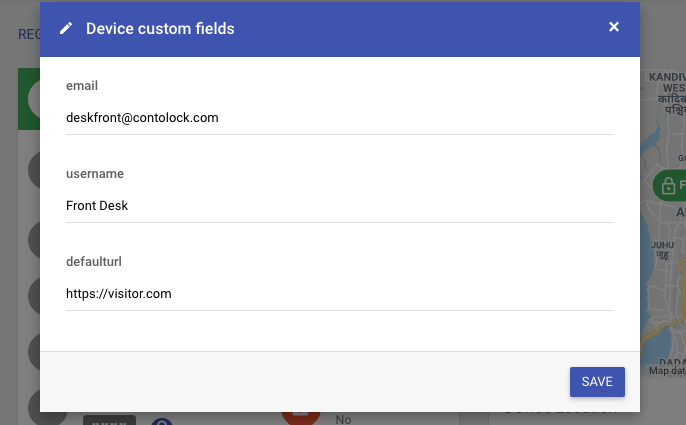
After enrollment, if you go to the Devices section > View Details > Settings (gear icon) > Set Custom Properties, the custom properties box that opens will contain the values under all the fields (as entered above).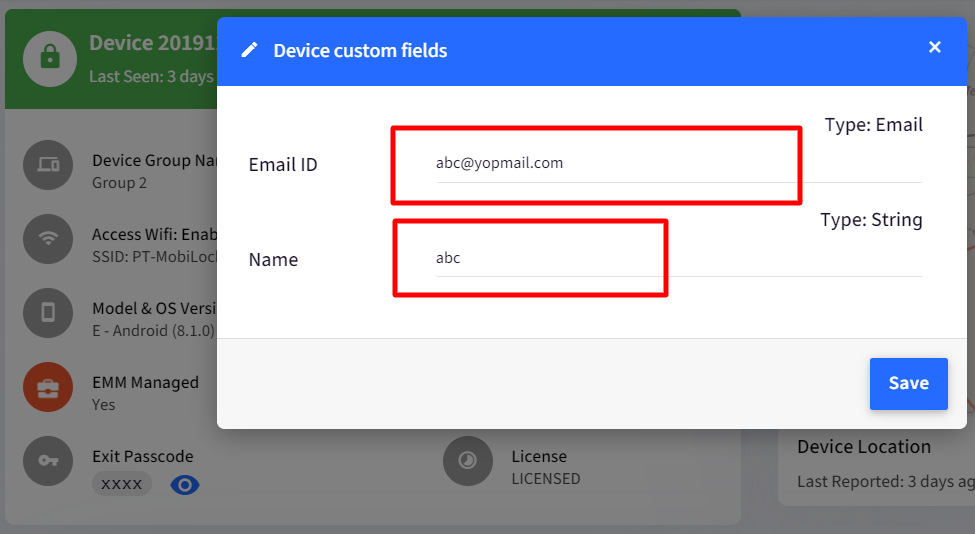
Step 2
Assuming that you have set up an Android for Work account and approved the GMail application to your Play for Work apps. In this step, we will see how to create dynamic app configurations using custom fields.
- In this step, we will see how to use the email and username custom fields that we created above in Step - 1 > 6.
- In Scalefusion Dashboard, navigate to Application Management > PLAY FOR WORK APPS,
- Click on Gmail to see the extended settings panel.

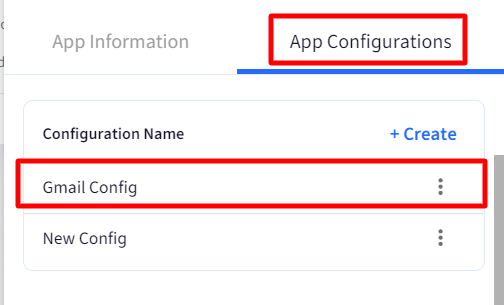
- In the Extended settings panel, click on the App Configurations tab,
- Click on CREATE to create a new configuration. You will be shown a configuration dialog.
- Give the configuration a name, and here in the fields for email and username, use $device.email and $device.username respectively,
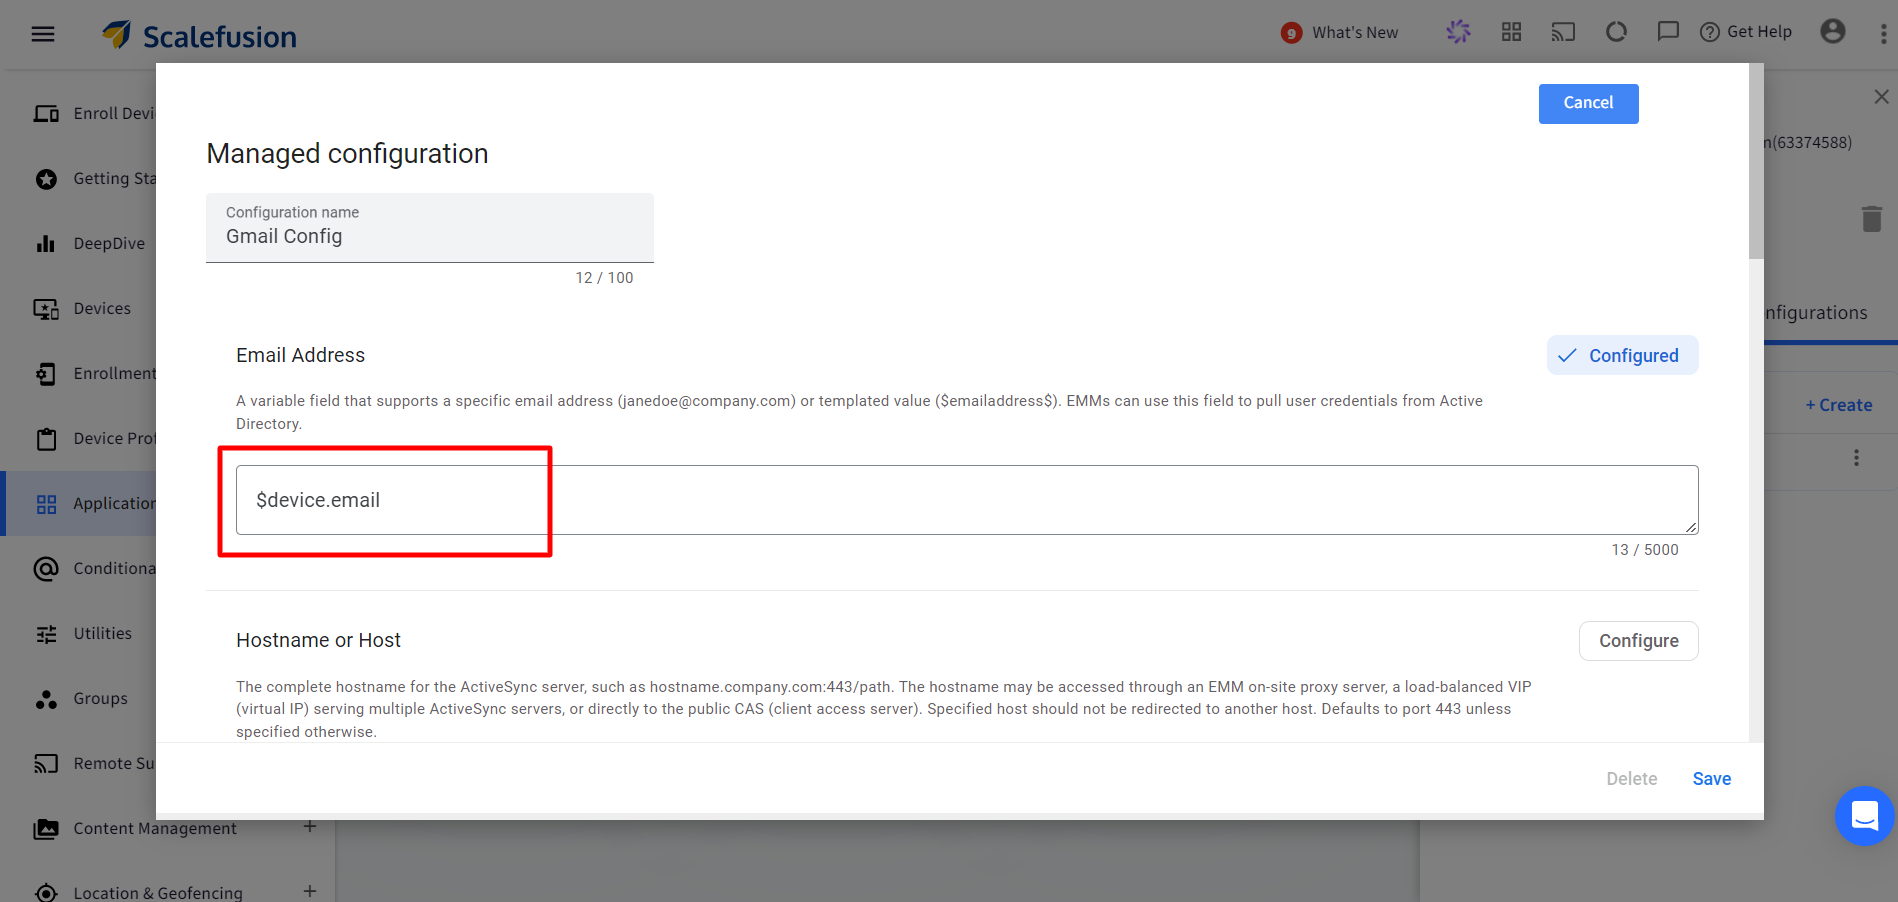
- Click on SAVE to save the configuration. Once saved, it will appear under App Configurations, as shown below.
- Now you can publish this configuration to your Device Profiles & Devices, where you have installed the GMail application from Play for Work.You can use the custom fields as wild cards for configurations of any Play for Work application. For example, you can use it to configure Allowed Websites in Chrome, or use it to specify Device-specific Dropbox tokens, or use it to specify Outlook client configuration etc.
Step 3 - Overriding the Default URL using Custom Fields
You might have a business use case where you are setting up Scalefusion as a Kiosk Browser at multiple locations, and at each location, you want a different URL to be the default URL. With custom fields, instead of creating multiple profiles, you can create one profile with a default URL and then choose a custom field to override that at a device level. This section describes how to achieve it.
- We will use the default URL field created in Step-1 > 6 above.
- In Scalefusion Dashboard, navigate to Device Profiles & Policies > Device Profile and start creating or editing a profile.
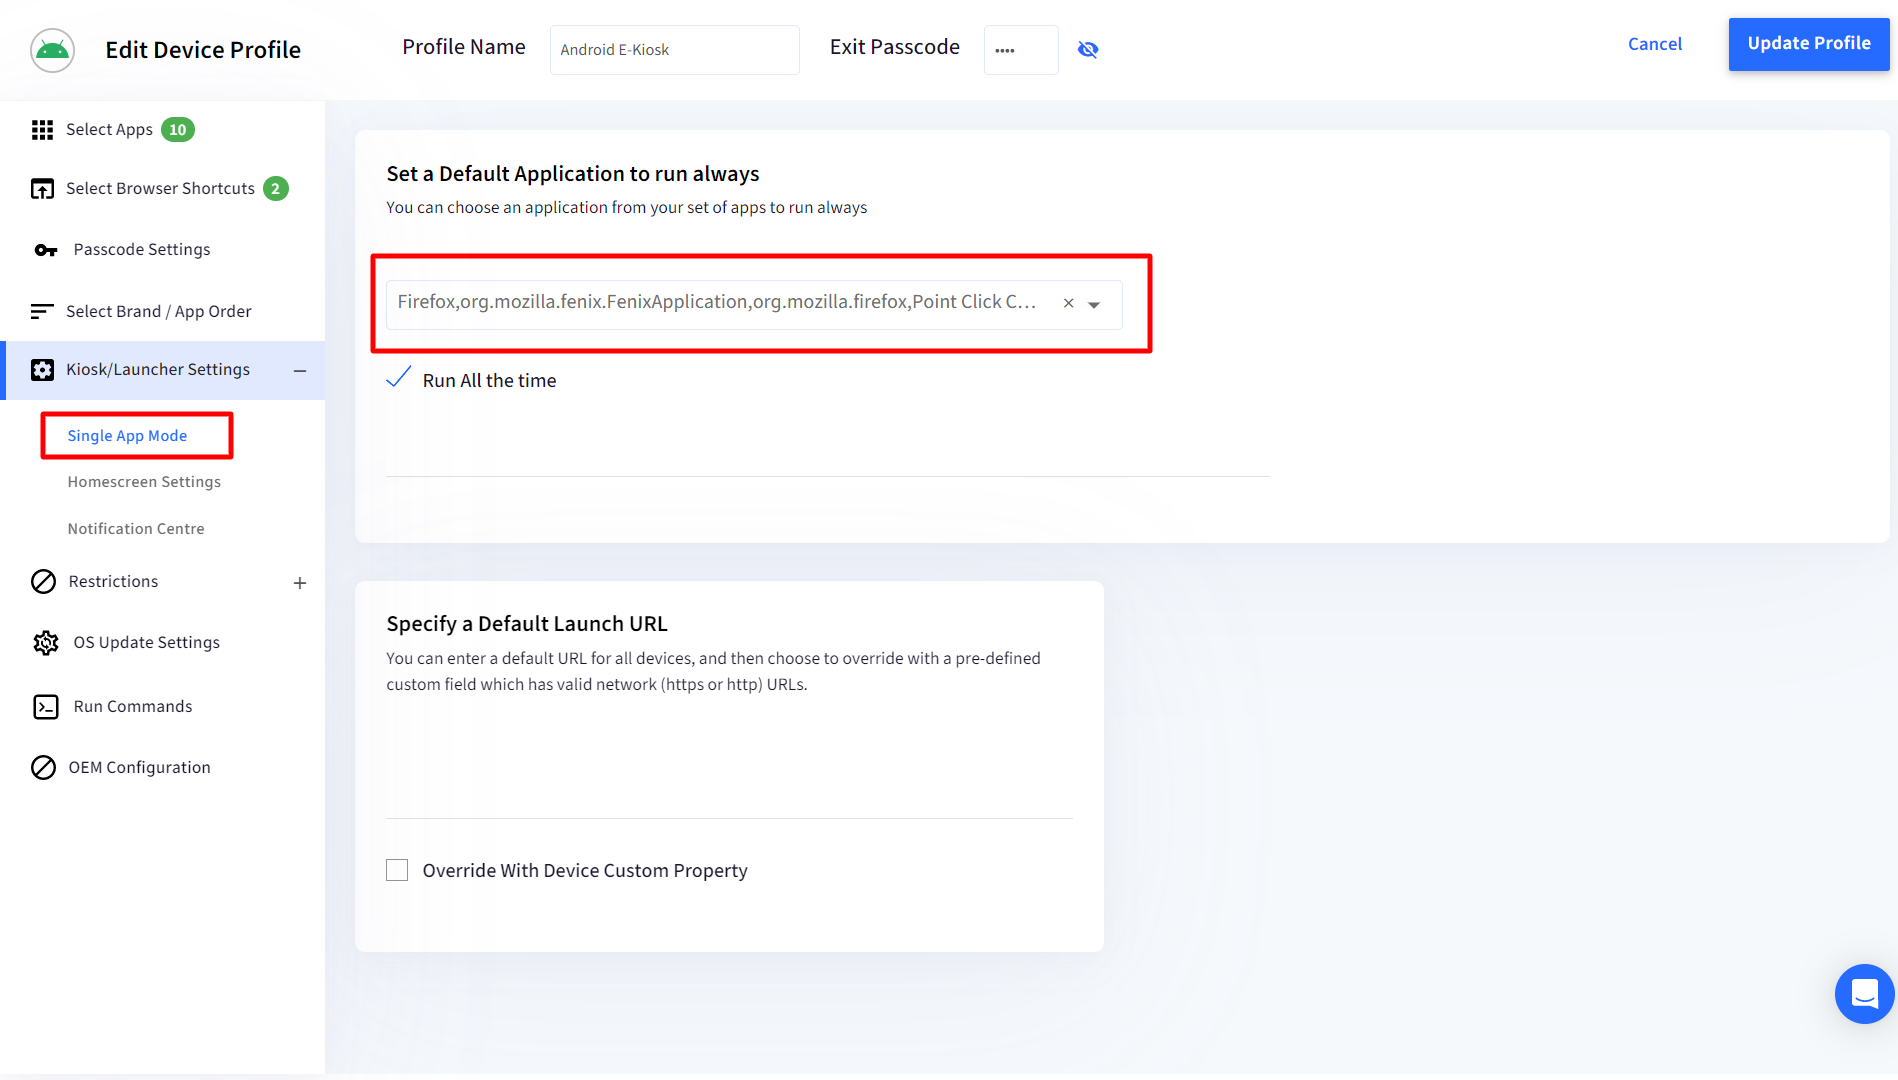
- Navigate to the KIOSK/LAUNCHER SETTINGS tab and click on the SINGLE APP MODE section.
- If you select Scalefusion Browser as the default app, then you will be shown the following options,
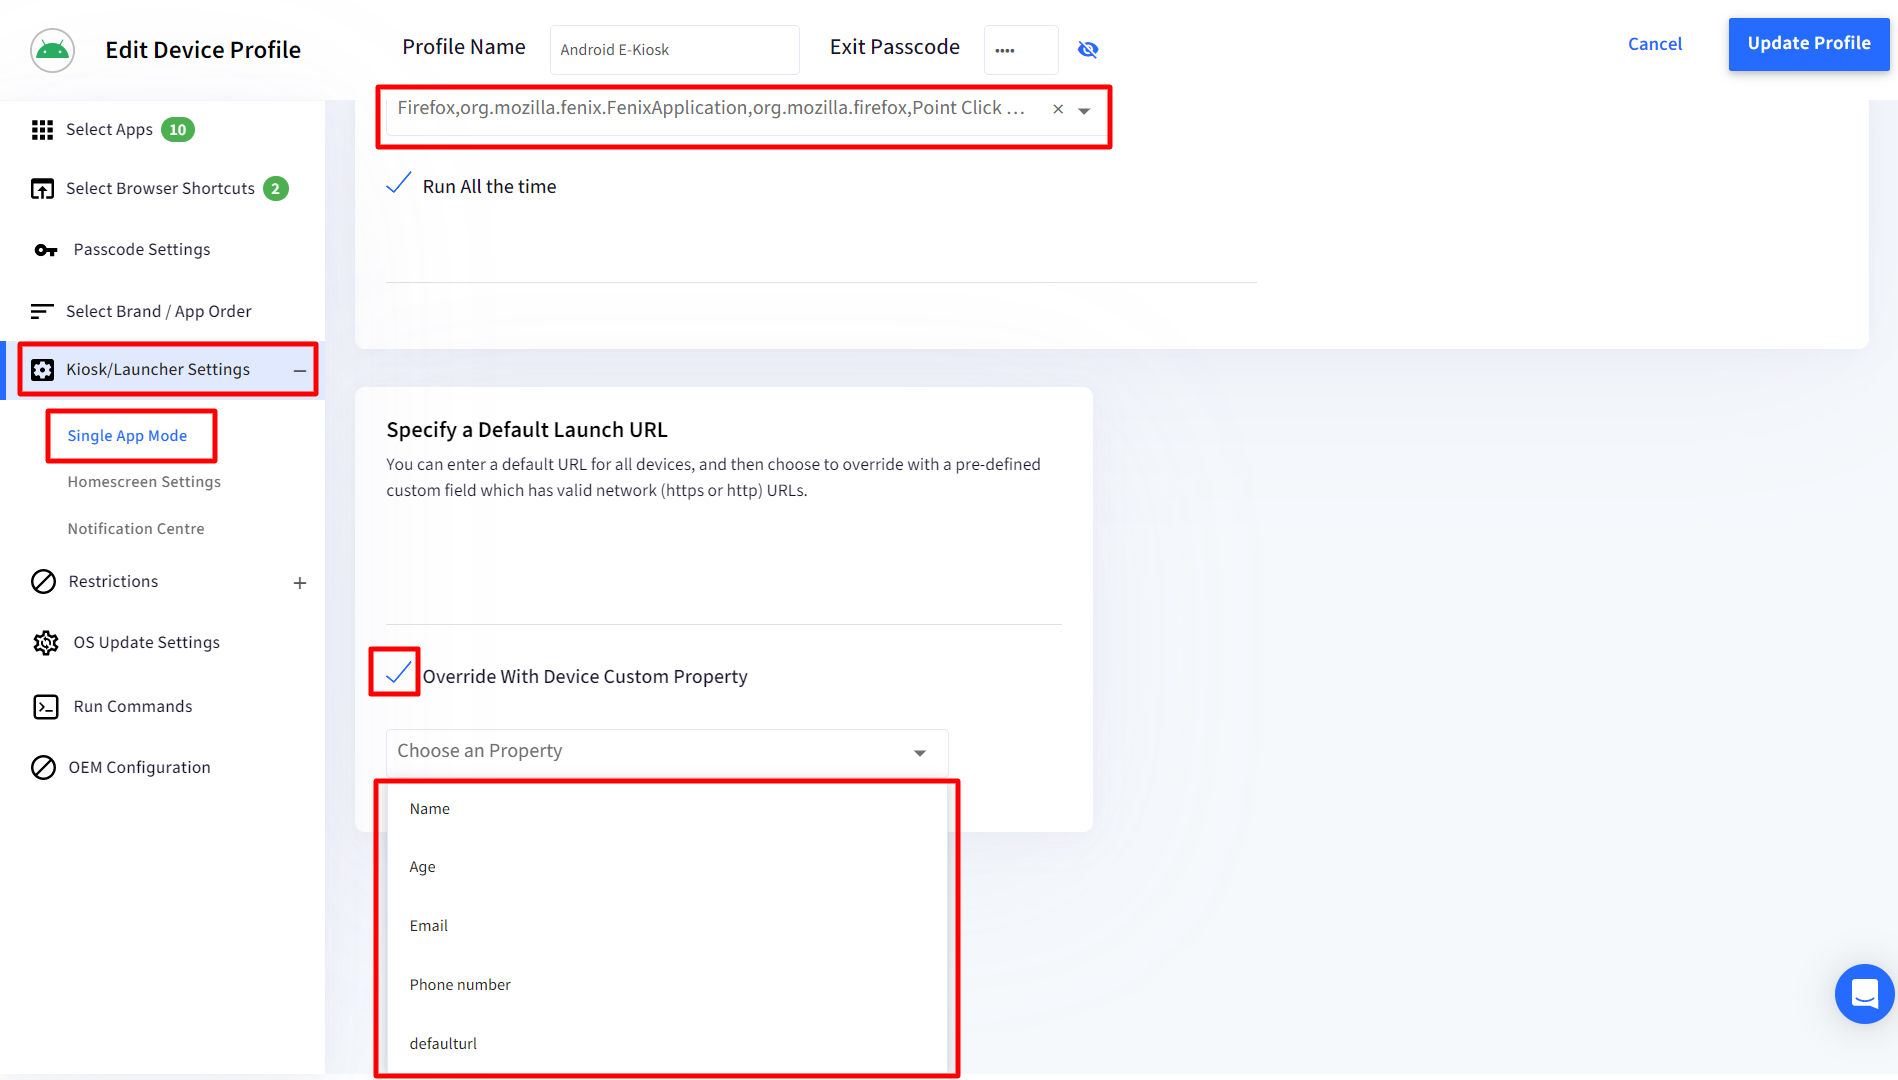
- Now you can specify a default launch URL, and additionally, you can choose to override with a custom field. Select Override With Device Custom Property and choose the property you want to use as shown below,
- Click on UPDATE PROFILE to save the profile. This will send a push to all the devices where this profile is applied, and the following can be observed on devices,
- For all the devices where the value for the field defaulturl is set on Dashboard, they will use this URL as the launch URL.
- For all the devices where the value of the field defaulturl is NOT set on Dashboard, they will use the default launch URL.
What are the other Configurations where Custom fields can be Used?
- Wi-Fi Configurations:
- The Wi-Fi SSID field and the password fields accept $device. And $user. custom fields.
- If, for a particular device, the custom property is not defined/available, then the Wi-Fi configuration is not pushed to that device.
- Hotspot Configurations:
- The Hotspot SSID field and the password fields accept $device. And $user. custom fields.
- If, for a particular device, the custom property is not defined/available, then the Hotspot configuration is not pushed to that device.
- Exchange & Email Configurations:
- The email/username and password fields accept $device., $user. And $group. custom fields.
- The email/username field accepts $user.email for an employee-owned device.
- If, for a particular device, the custom property is not defined/available, then the configuration is not pushed to that device.
- Play For Work App Configurations
- Use $device., $user. or $group. Custom field in any of the configuration fields. You can also use $user.email for your employee-owned devices.
- However, please verify that the data type of the custom field is correct. That is, if a configuration accepts String and you are specifying a Numeric value via the custom field, then it may not work.
- If, for a particular device, the custom property is not defined/available, then the configuration is not pushed to that device.
- iOS App Configurations
- Custom fields are accepted only for String and String Array data types.
- Use $device. Or $group. Custom field in any of the configuration fields. You can also use $user.email for your employee-owned devices.
- In the case of a String Array, make sure that there is NO space between two entries.
- Working Example: $device.bookname,$device.author
- Wrong: $device.bookname, $device.author
- If, for a particular device, the custom property is not defined/available, then the configuration is not pushed to that device.
- Windows Single App Mode
- Use $device. Or $group. To specify the username when you are setting up your Windows machines as Kiosk and have multiple users on the device.
- If, for a particular device, the custom property is not defined/available, then the configuration is not pushed to that device.
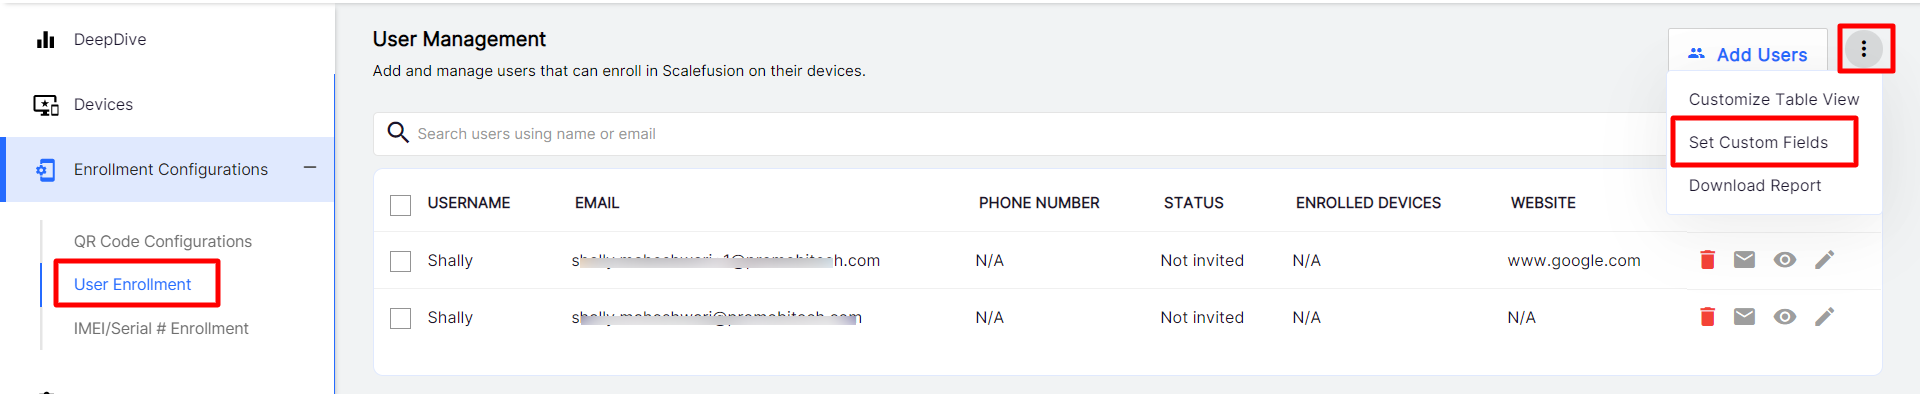
- User Management
- Create custom fields for users by going to the 3 dots menu in Enrollment Configurations > User Enrollment on Dashboard and add the values against each user in the User Details section or add values for multiple users in the Field Values section.
- Use $user. Custom field in any of the configuration fields.
- Create custom fields for users by going to the 3 dots menu in Enrollment Configurations > User Enrollment on Dashboard and add the values against each user in the User Details section or add values for multiple users in the Field Values section.
- User-Authenticated Enrollment of Kiosk Devices
- Custom Properties can also be used for user-based enrolled devices.
- Custom payloads
- Shell Scripts
- Custom Properties, defined for devices and users, can also be used in custom payloads for macOS Shell scripts.
- Use %$device.custom_property_key% or %$user.custom_property_key% in the script, and they would be replaced with the device or user-specific value.
As you can see, with the custom fields, you can make your configurations completely dynamic and use them across devices. Do let us know if you run into any issues while using this feature.