This guide walks you through setting up the SCIM integration with Scalefusion and provisioning users and groups via PingOne.
Pre-requisite
SCIM Connector should be configured on Scalefusion Dashboard.
Step 1: Configure SCIM in the Ping Identity Admin Console
Create a Workforce Environment
Navigate to Environments → Create Environment → Create a Workforce Solution.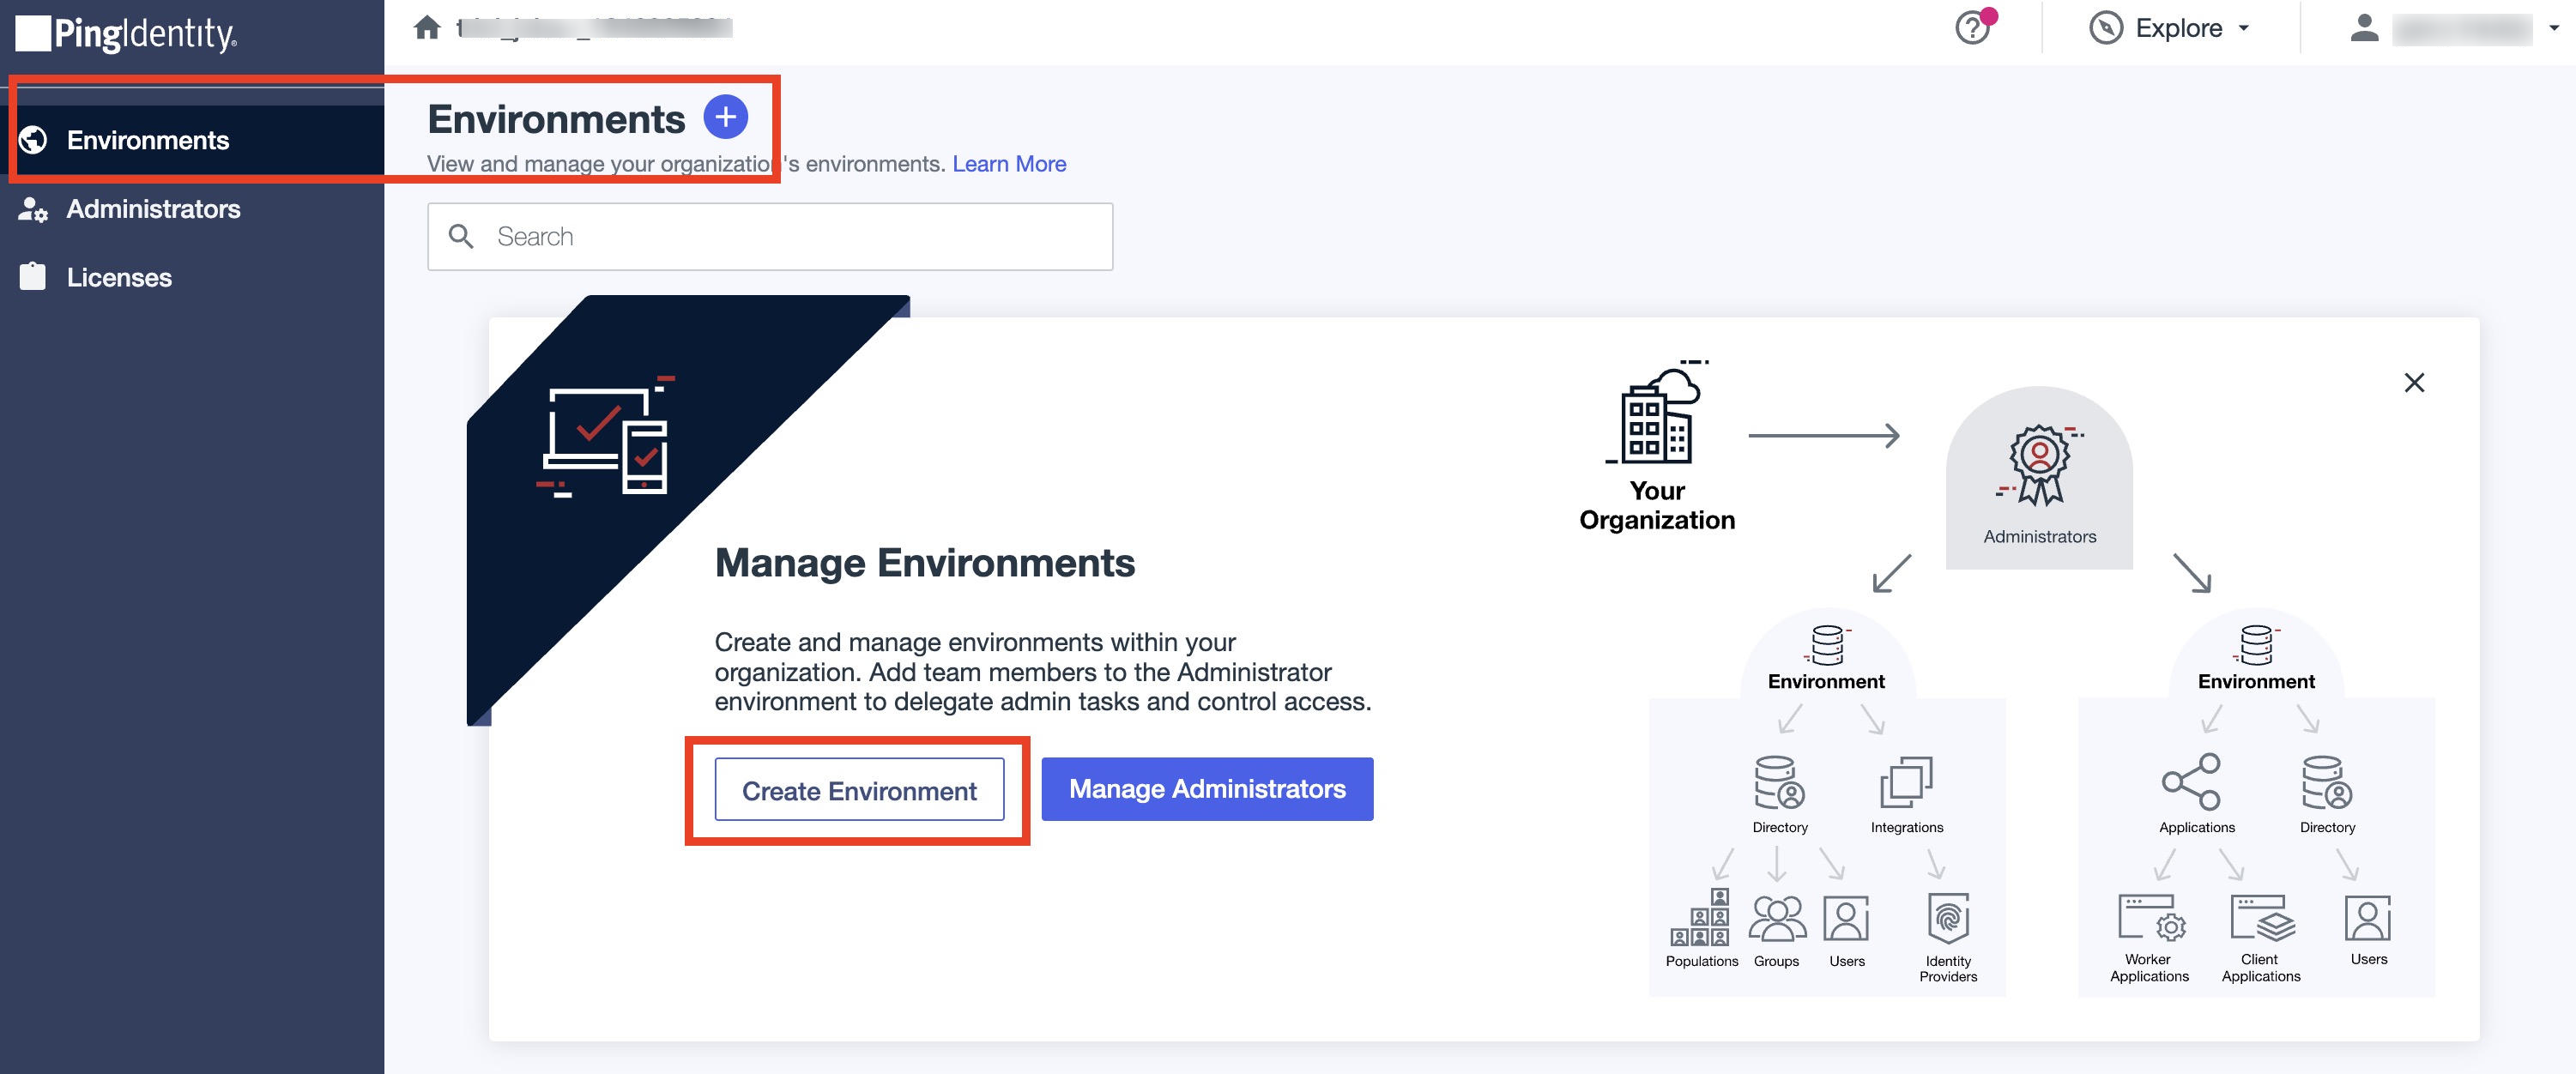
Name the Environment
Enter a Name and Description for the workforce environment. Click Save.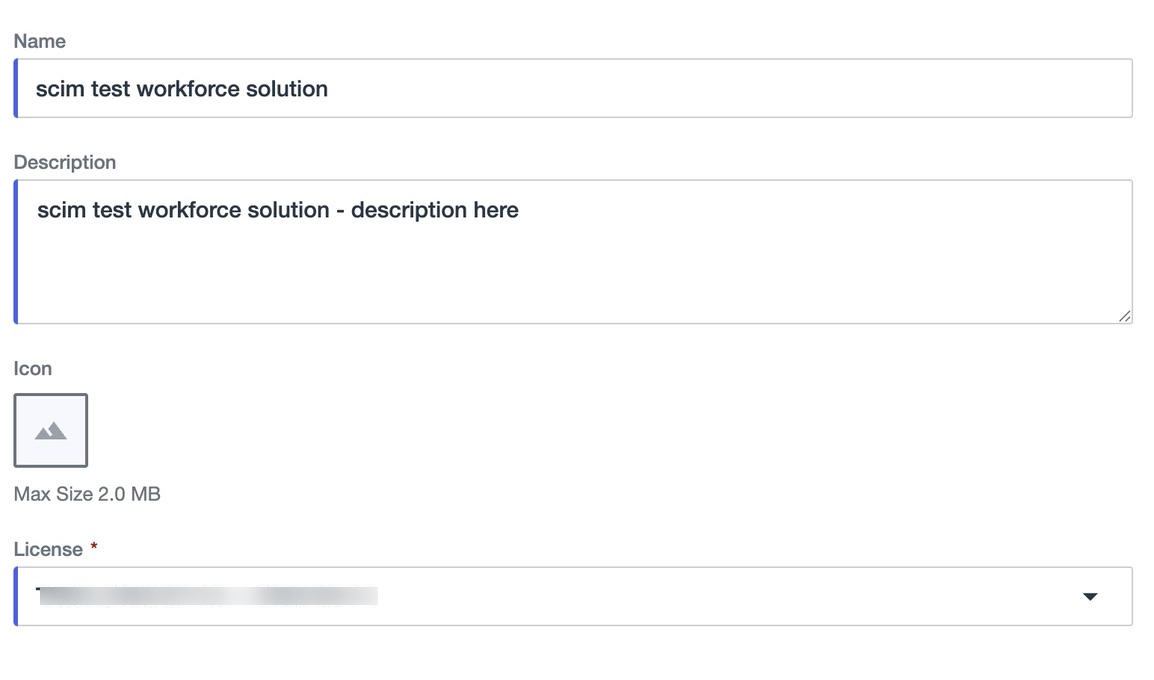
Assign SCIM to the Environment
Once created, click Manage Environment.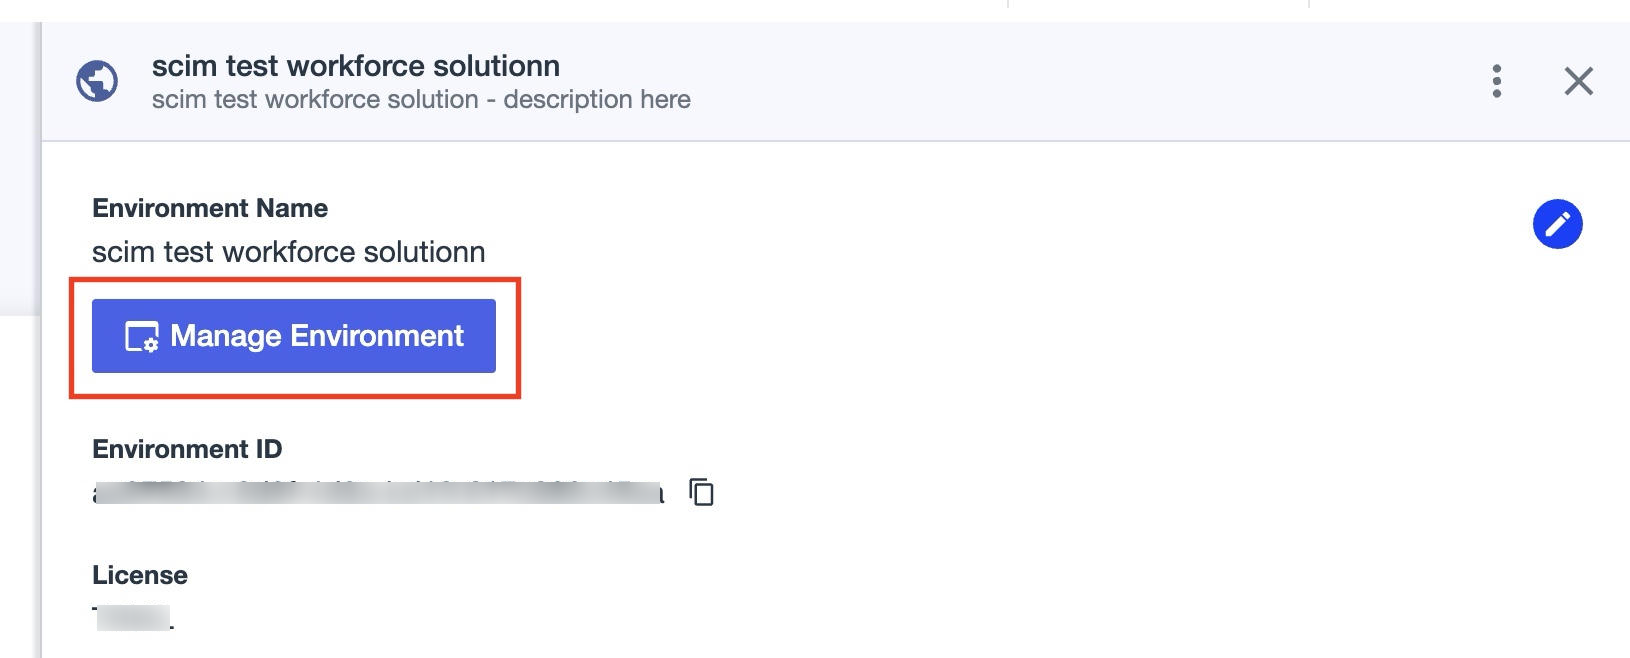
Enable PingOne Provisioning
Under Additional Capabilities, select PingOne Provisioning.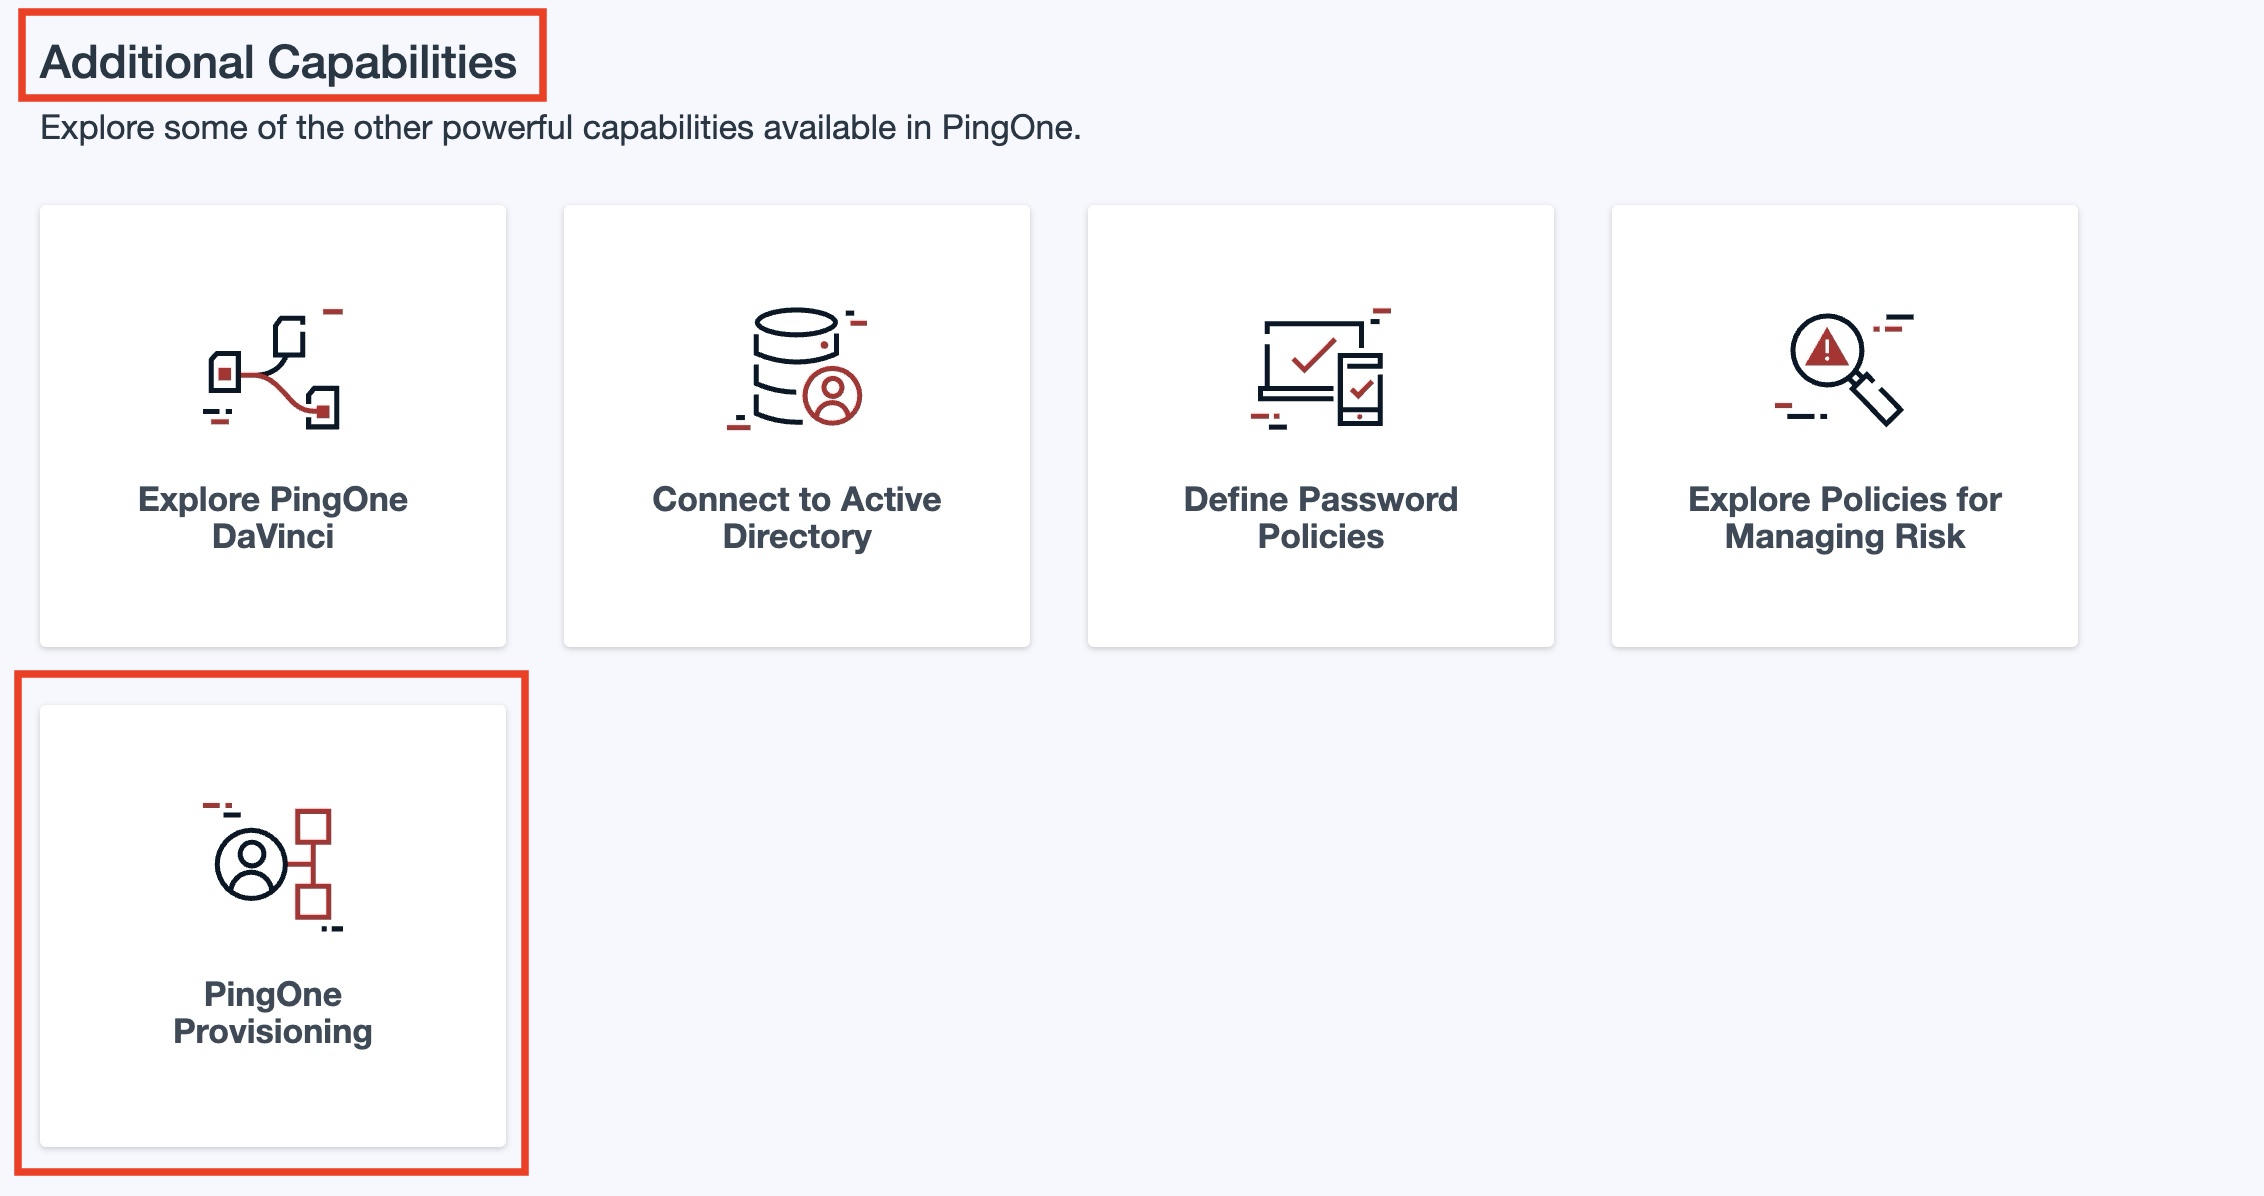
Create a SCIM Connection
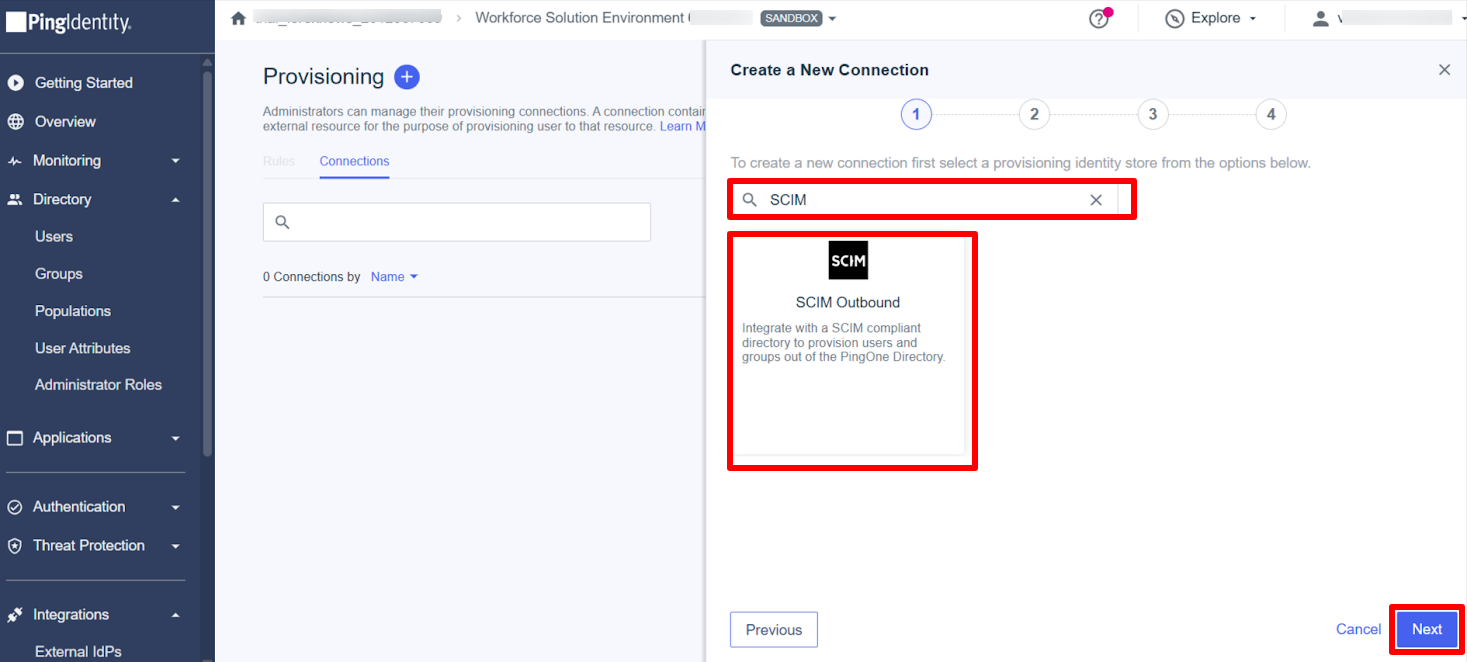
Click the + icon → New Connection → select your Identity Store → choose SCIM.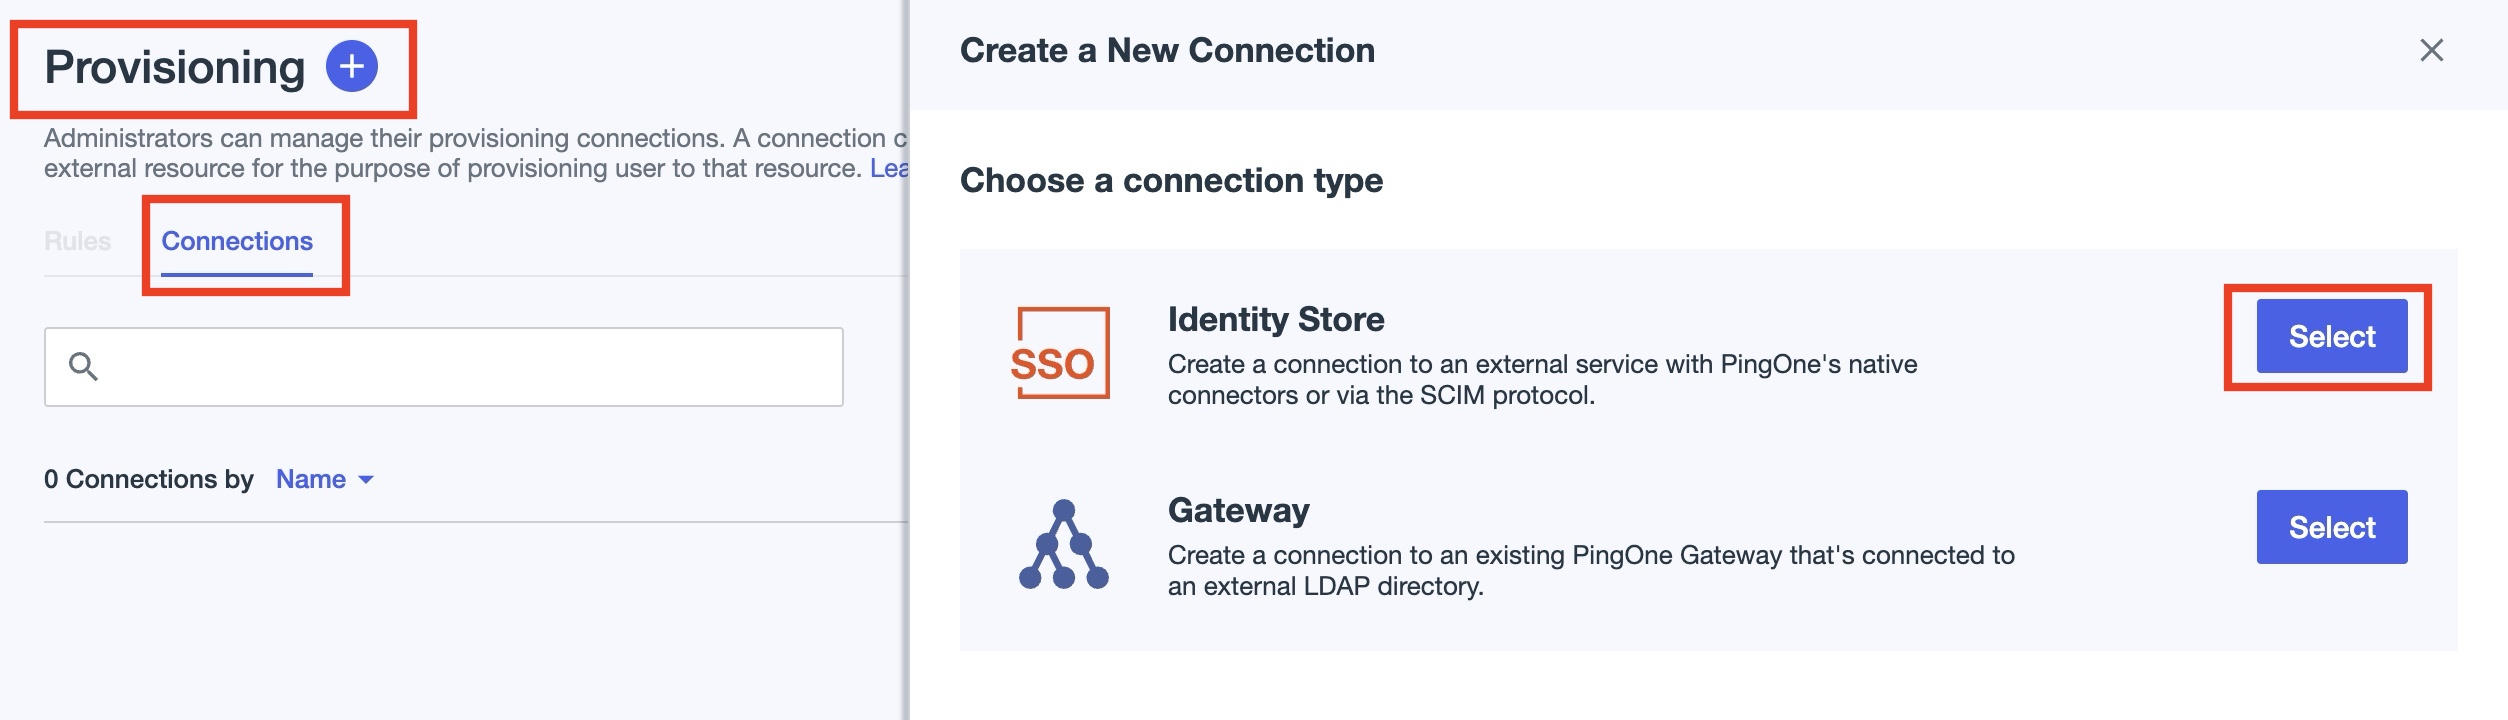
This will open Create a New Connection on the side panel. Here, search for SCIM, select it and click Next
Name the Connection and Continue
Provide a name for the new connection and click Next.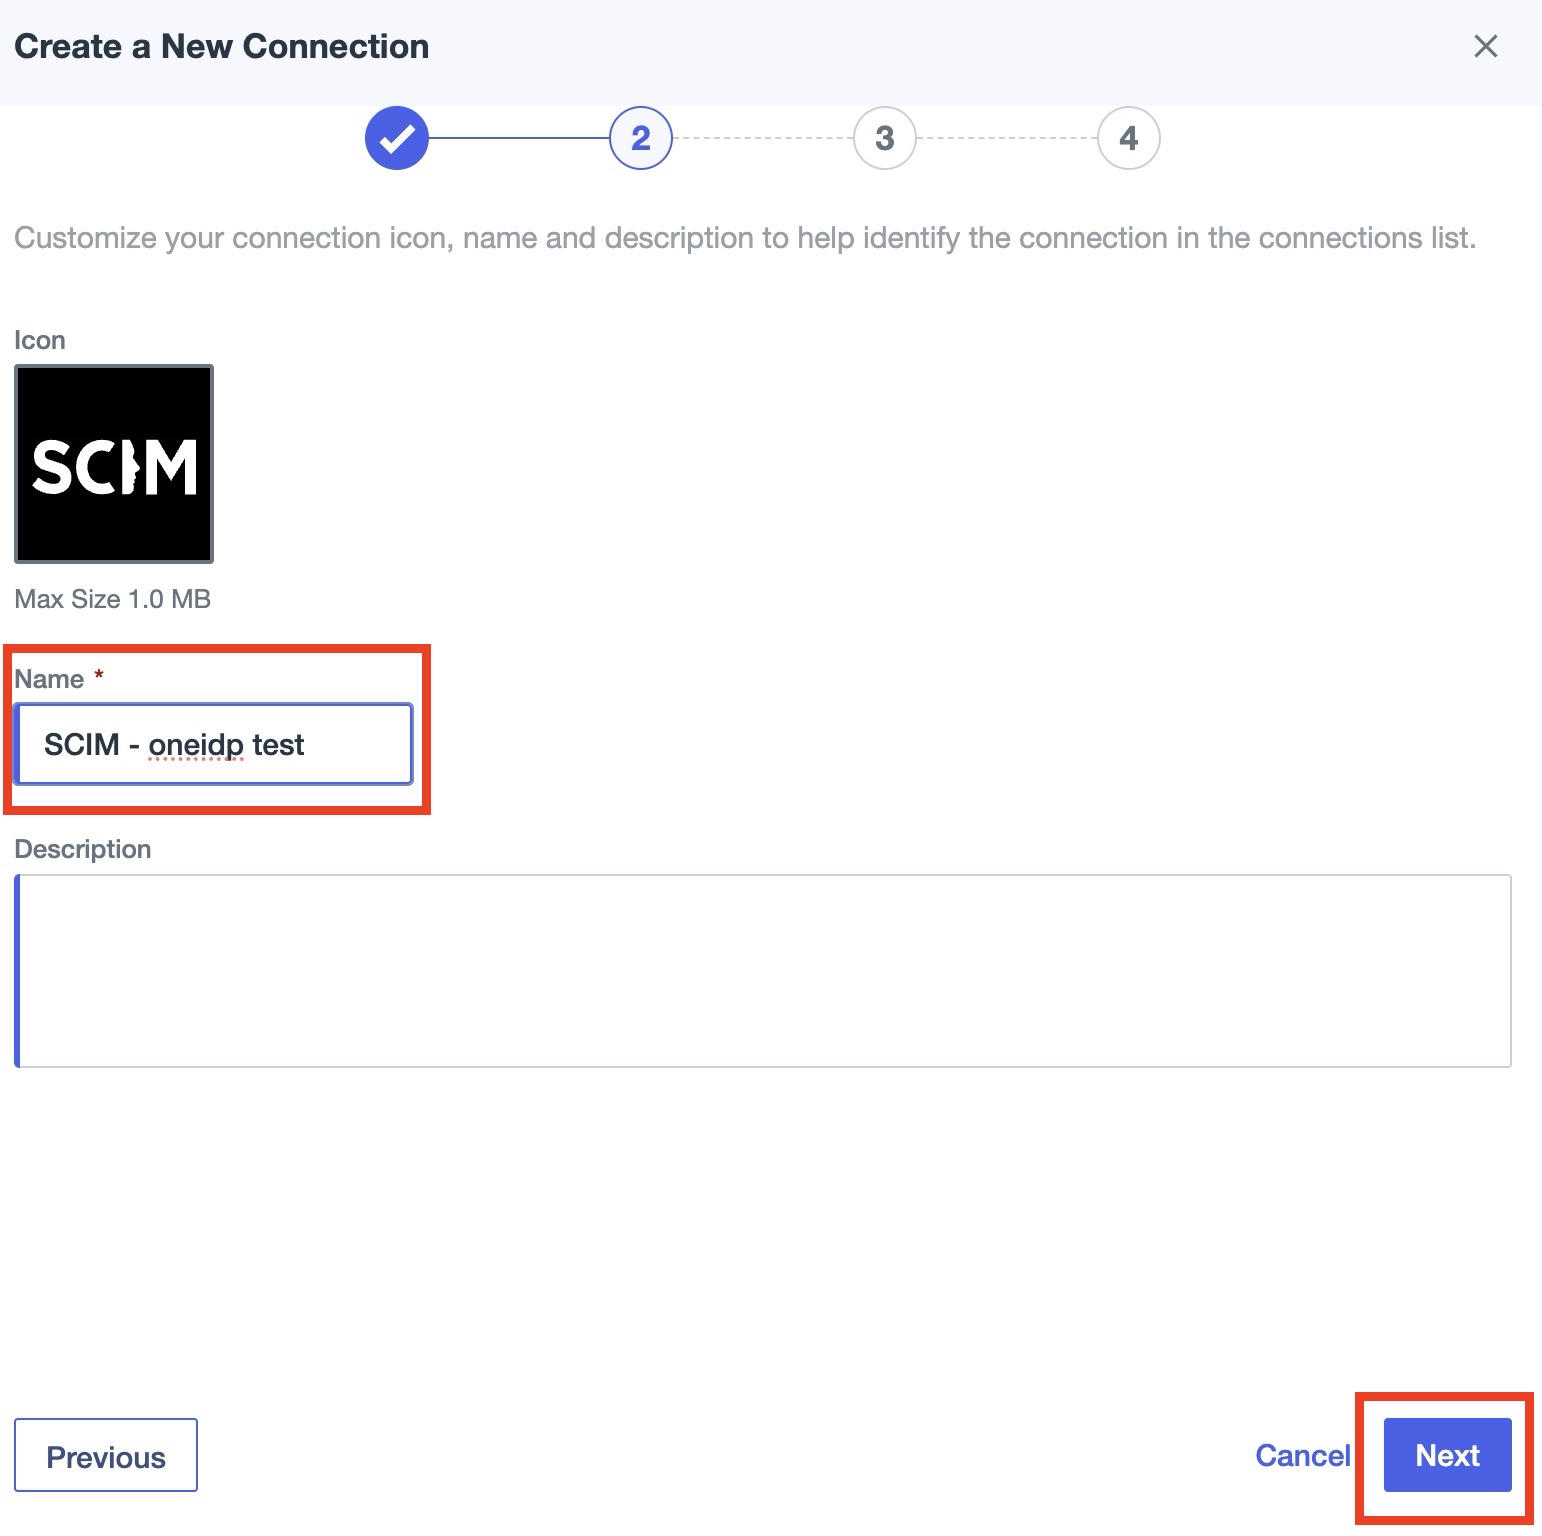
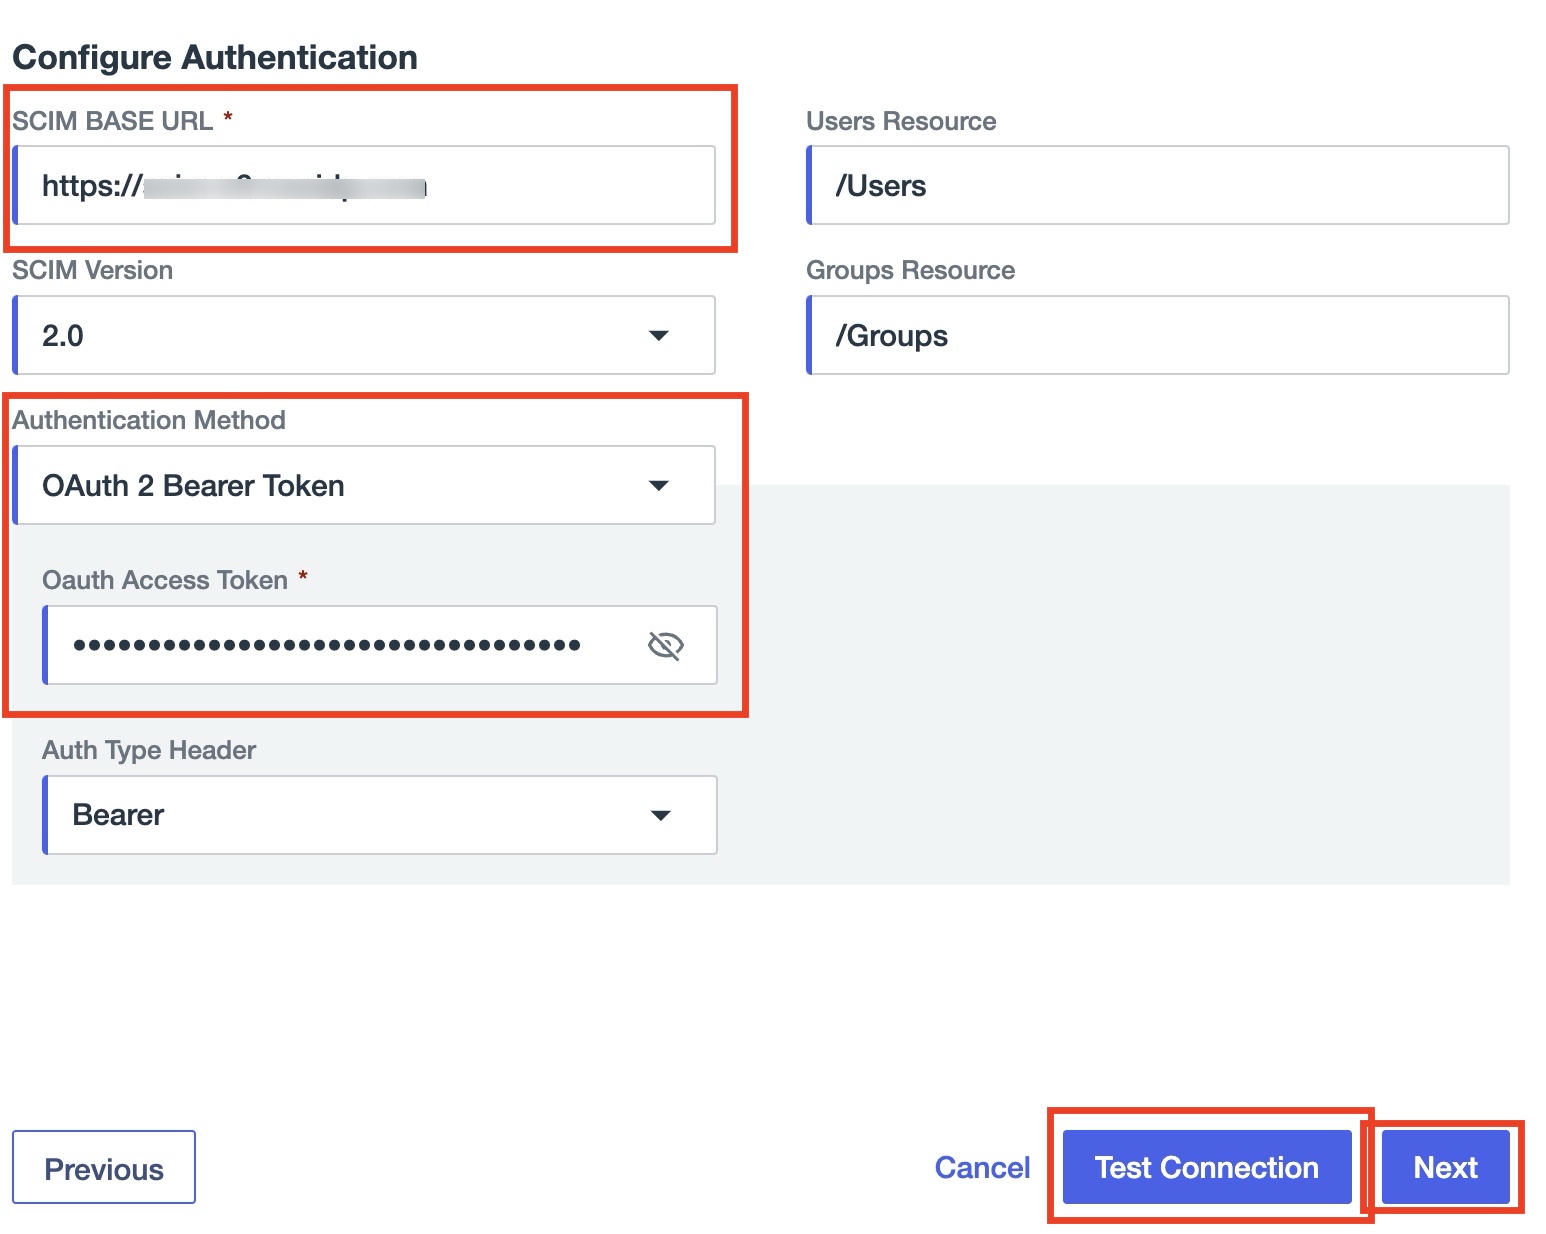
Configure Authentication
Paste the Base URL (SCIM API Endpoint).
Select OAuth2 Bearer Token as Authentication Method and paste the Bearer Token from the Scalefusion dashboard.
Test the connection and click Next.
Configure Preference
On Configure Preferences, click Save.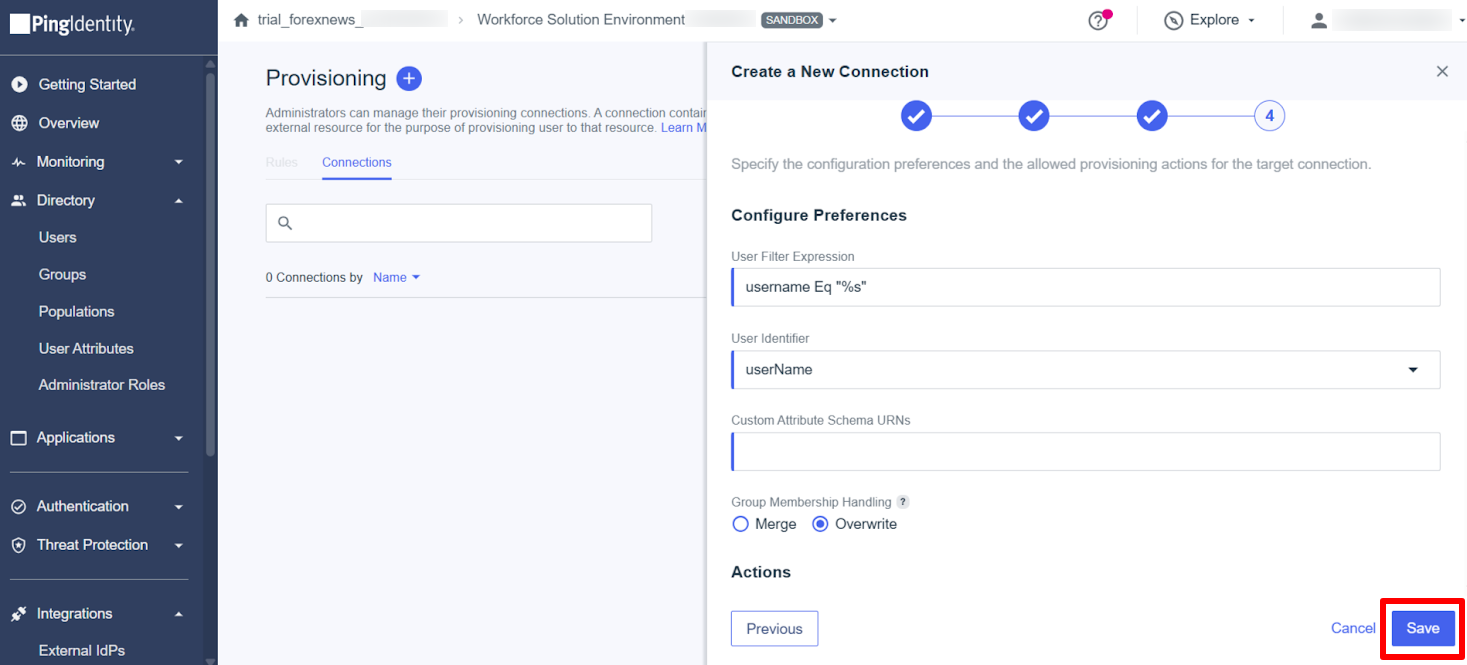
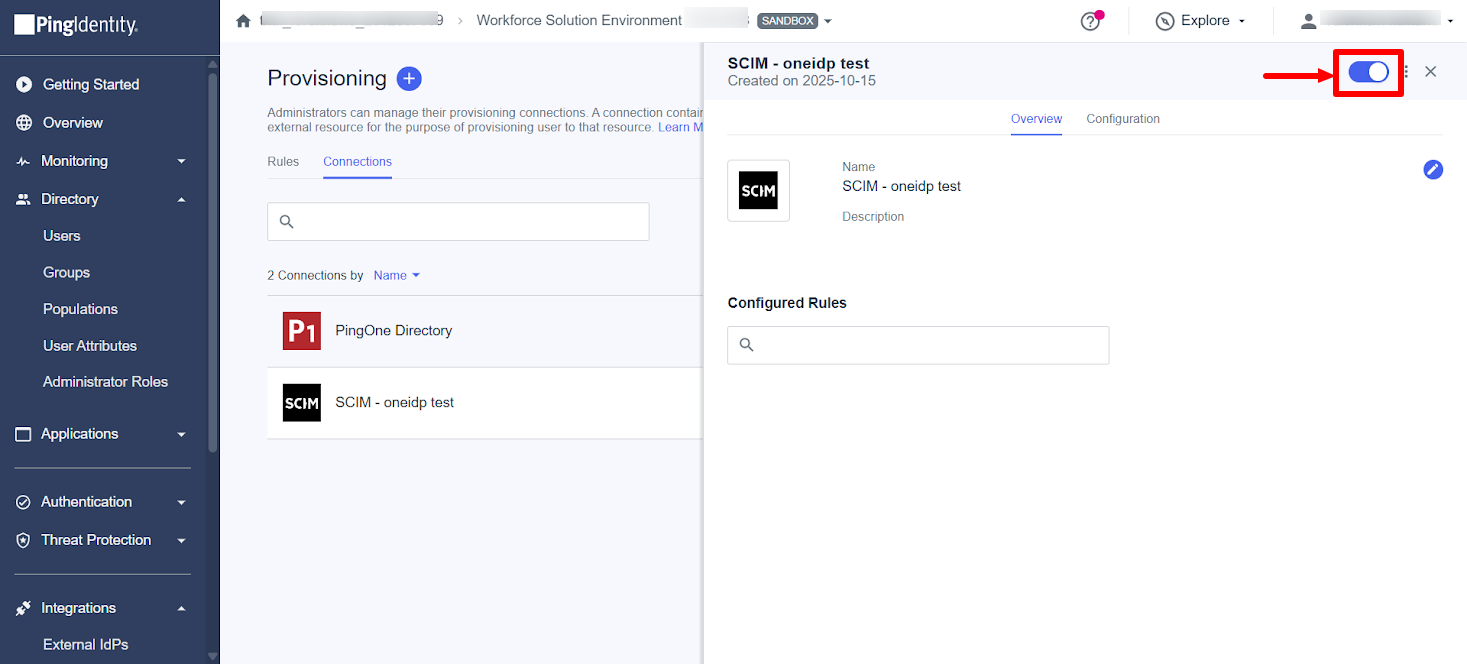
Now, toggle on the following (as shown below)
Create a Provisioning Rule
Under the Rules tab, click the + icon next to Provisioning, and select New Rule.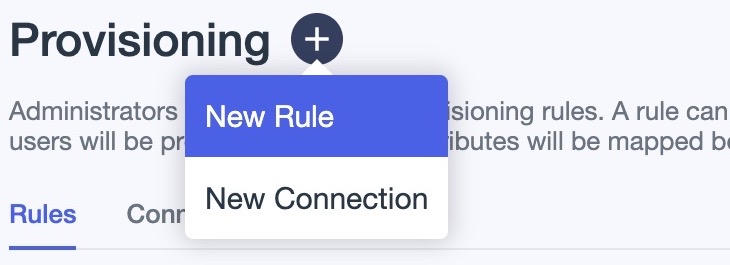
Name and Create the Rule
Provide a name for the rule and click Create Rule.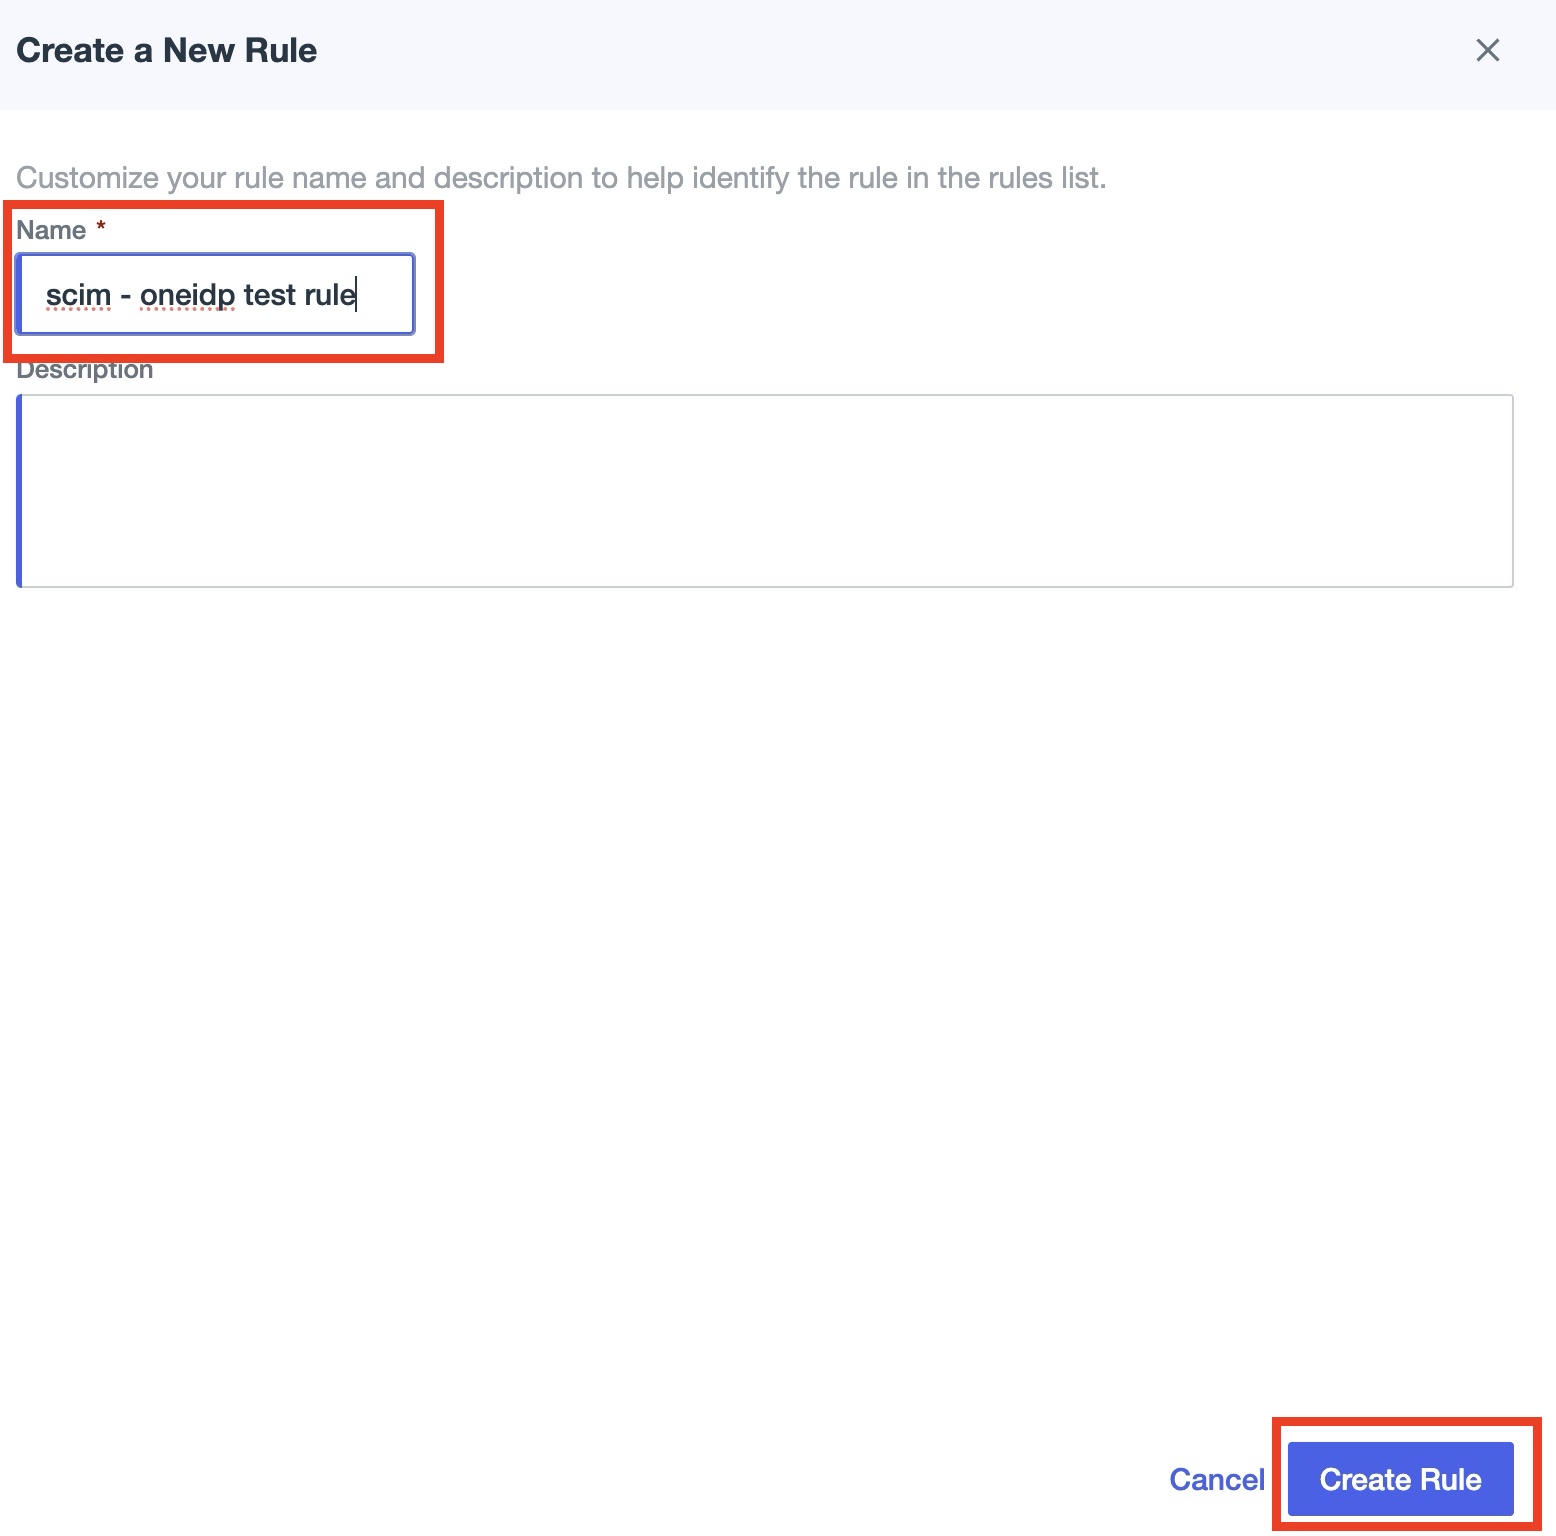
Under Configuration tab, select the connection you have created from the list of Available Connections
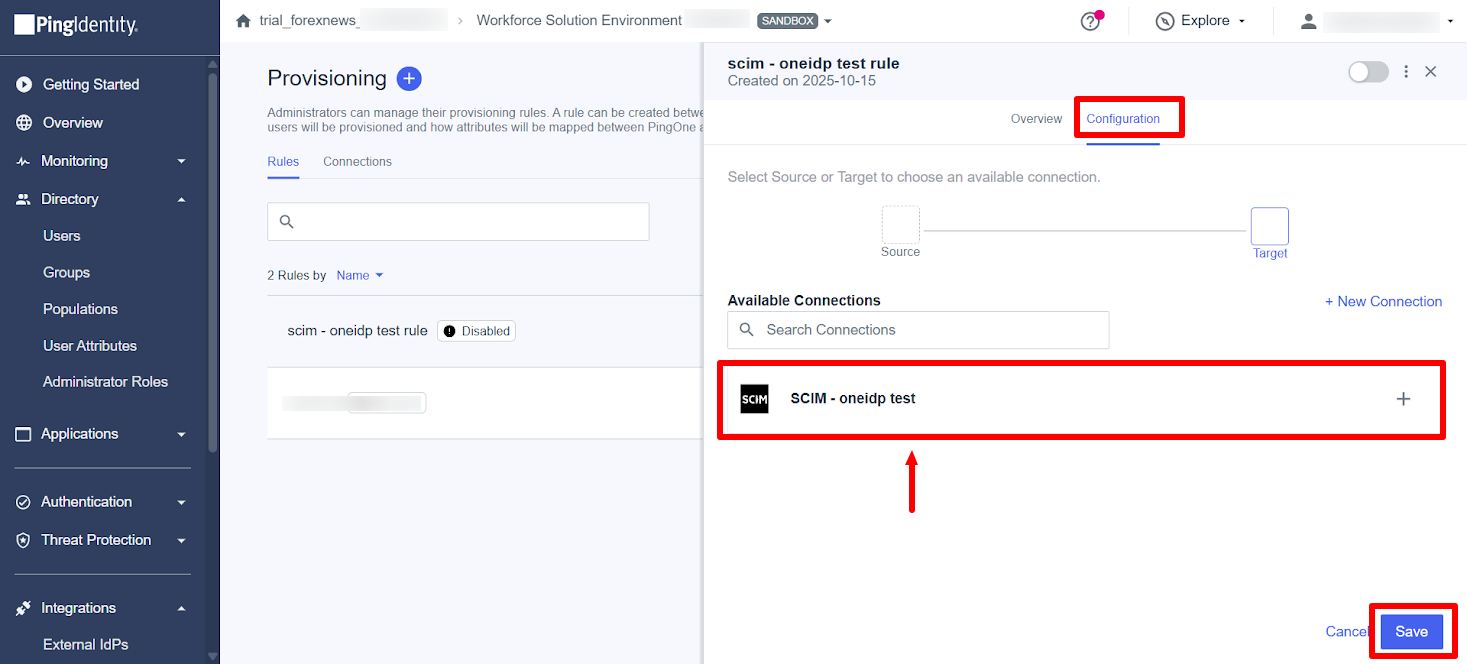
Assign the Rule to the SCIM Connection
Assign the created rule to your SCIM connection.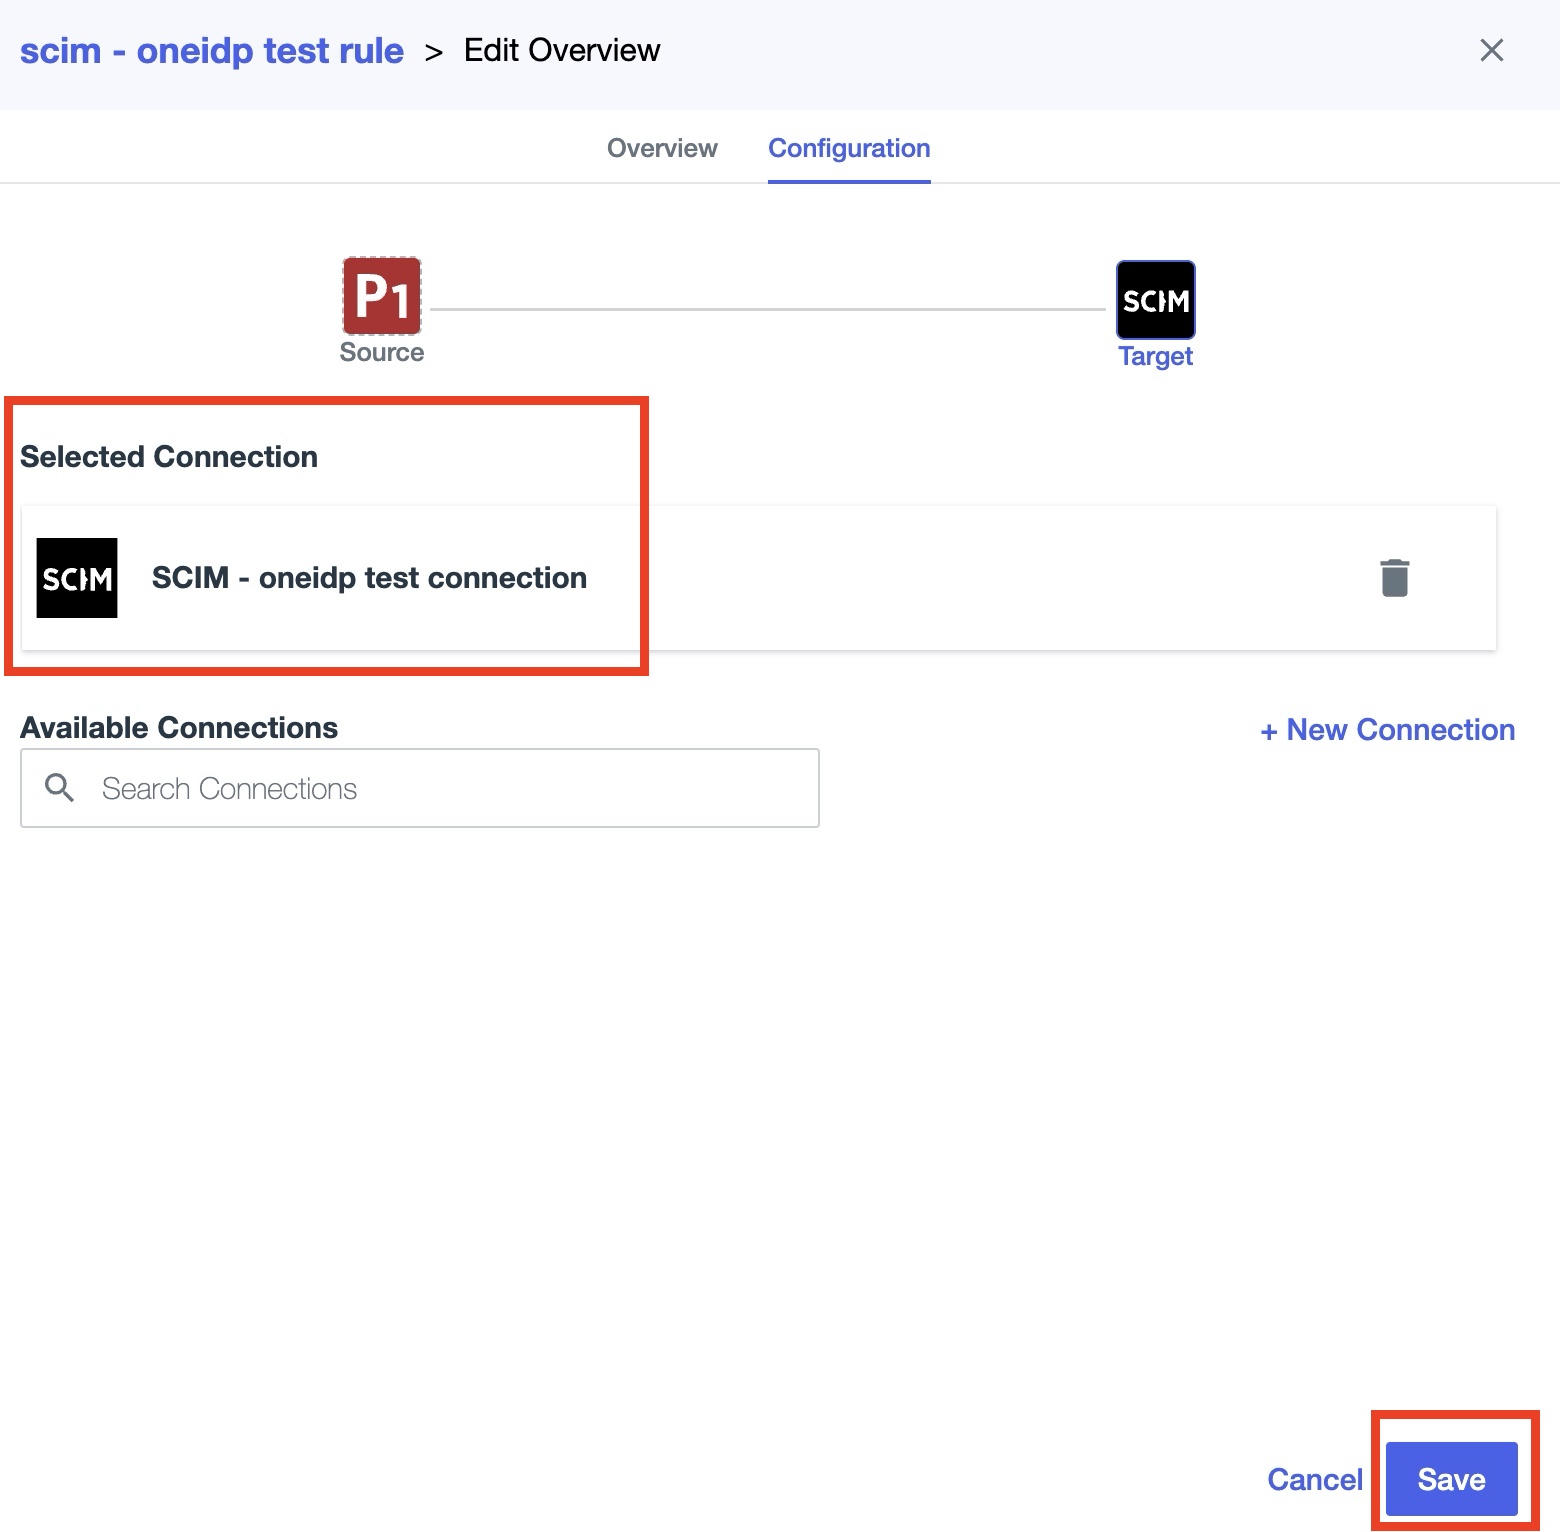
Step 2: Add Populations
Navigate to:
Directory > PopulationsClick on the + sign to add new population
Enter the population name and click Save.
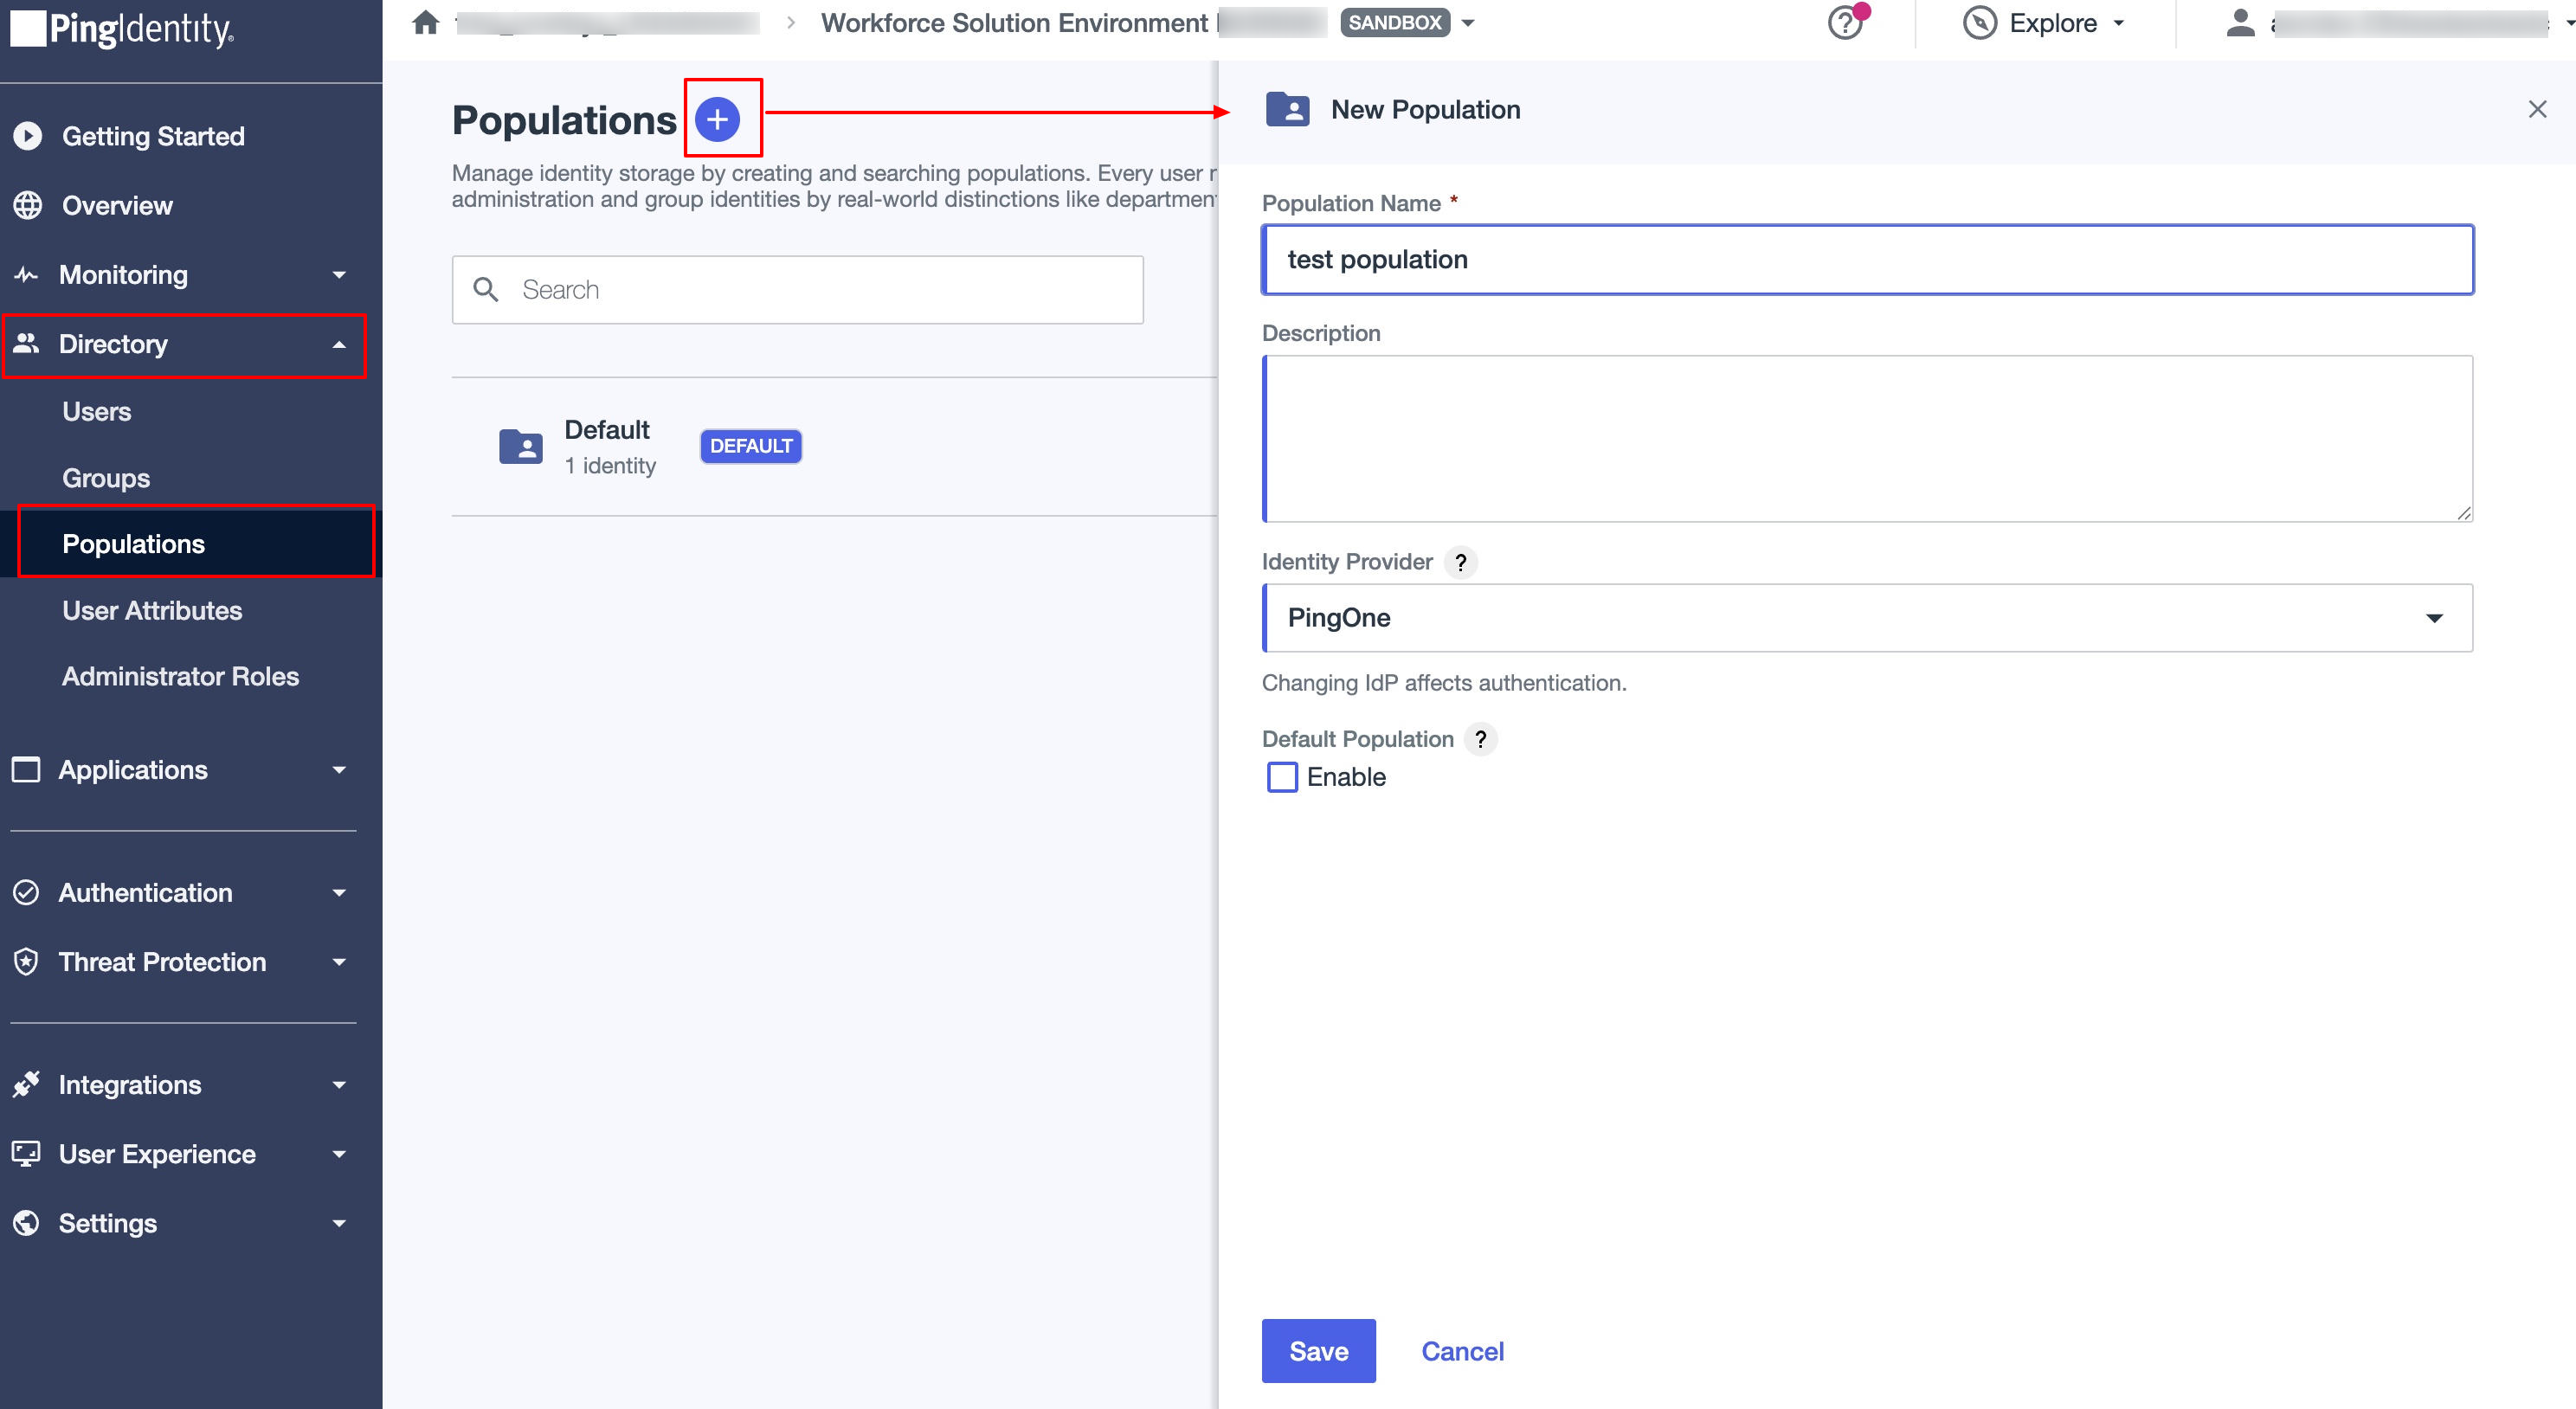
The new population will appear in the list.
Note:
Populations are mandatory for user existence in PingOne.
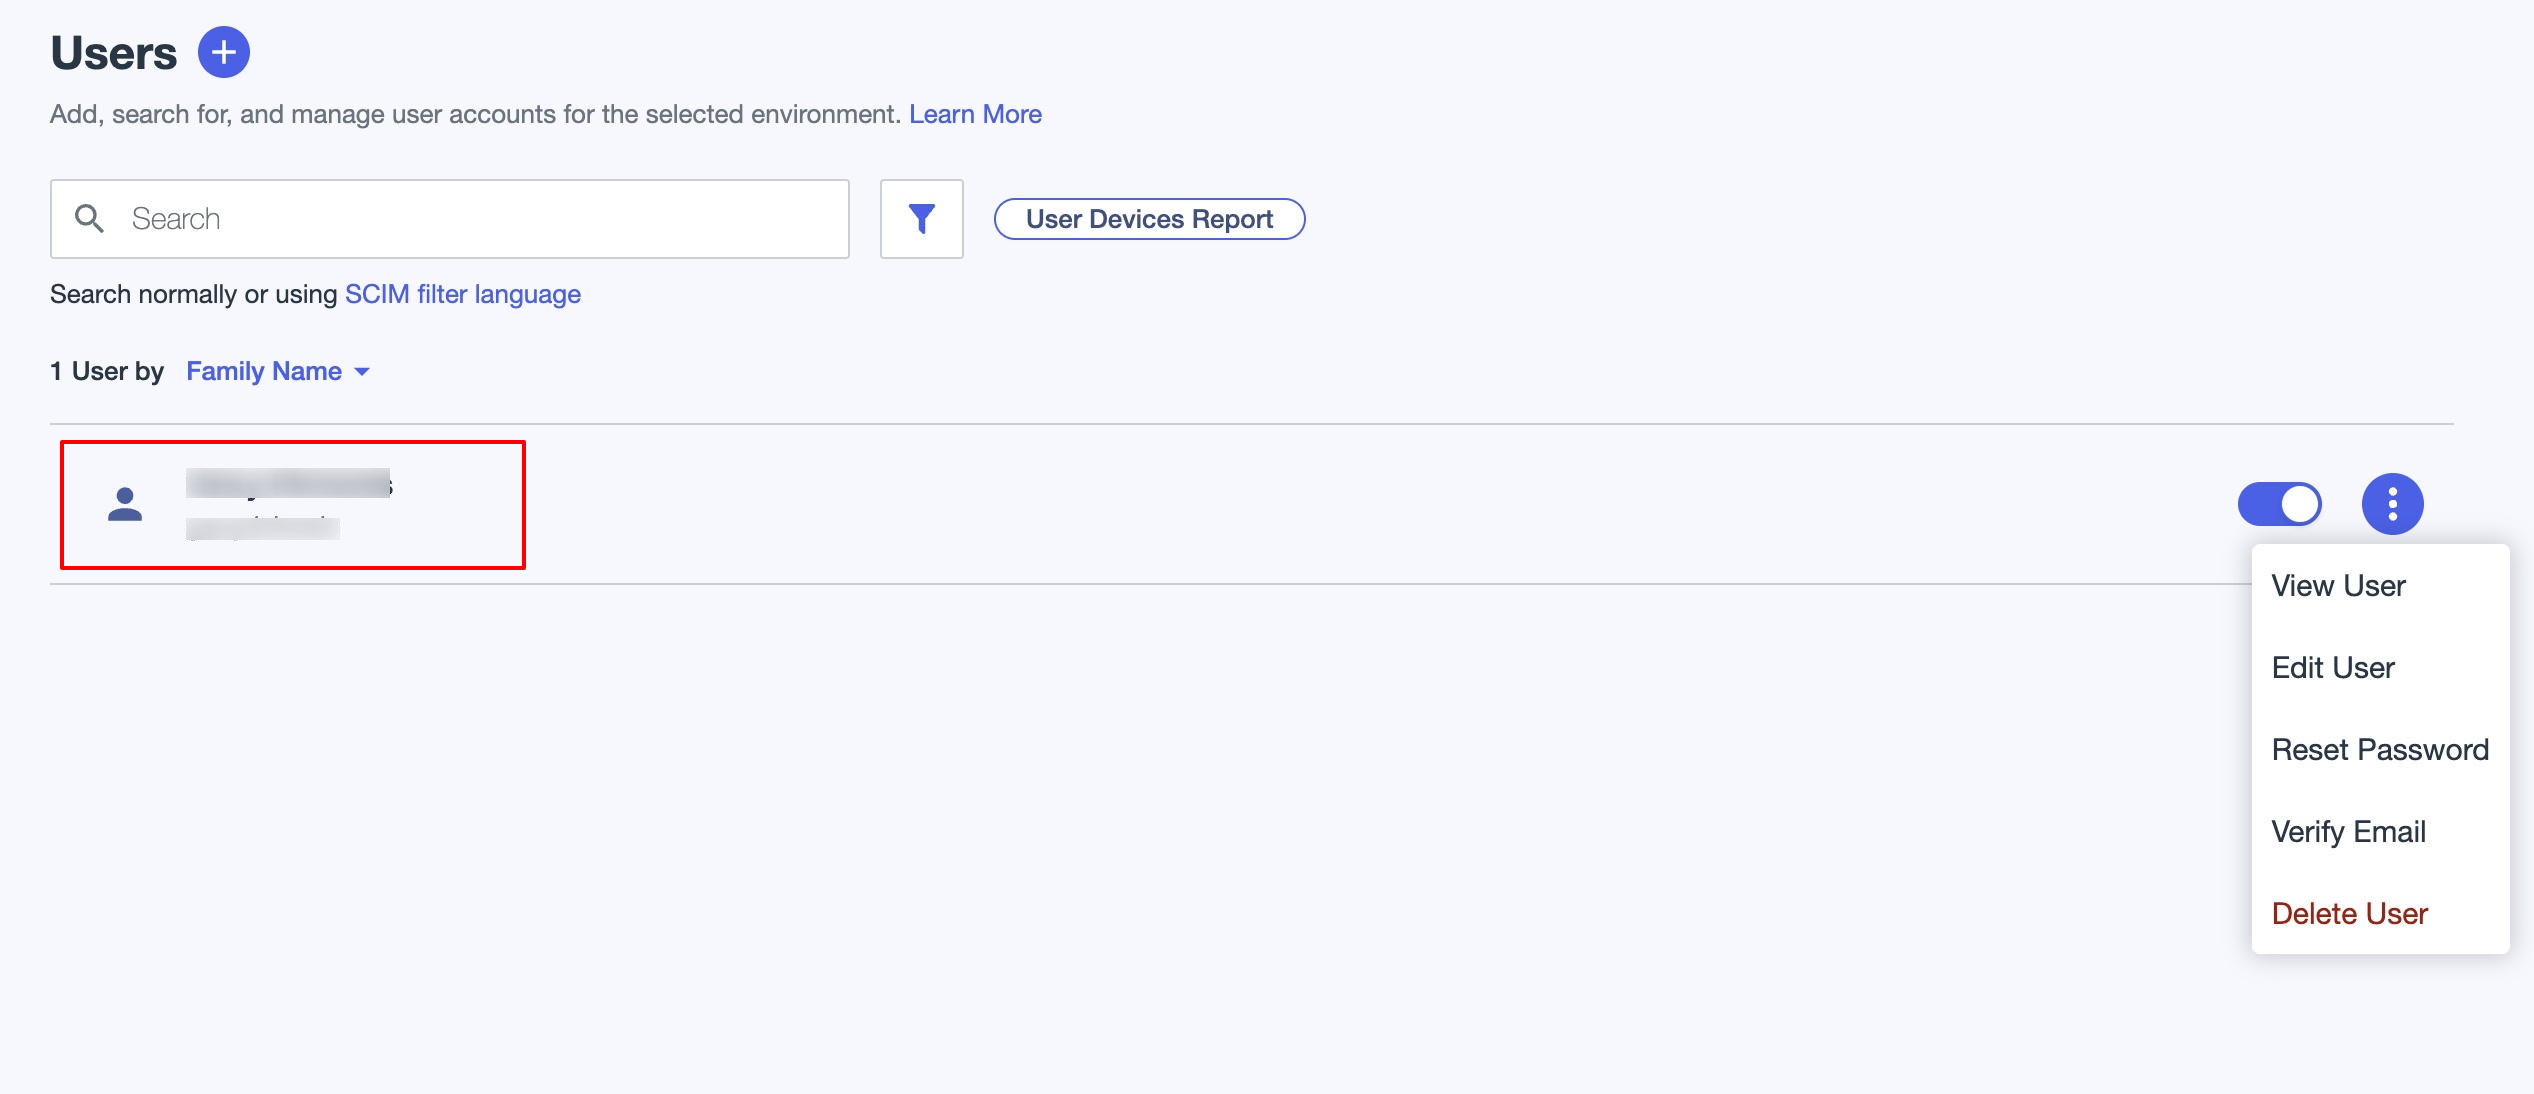
Step 3: Add Users
Navigate to:
Directory > UsersClick on the + sign to add user
Enter user details:
Given Name
Family Name
Username
Email
Click Save.
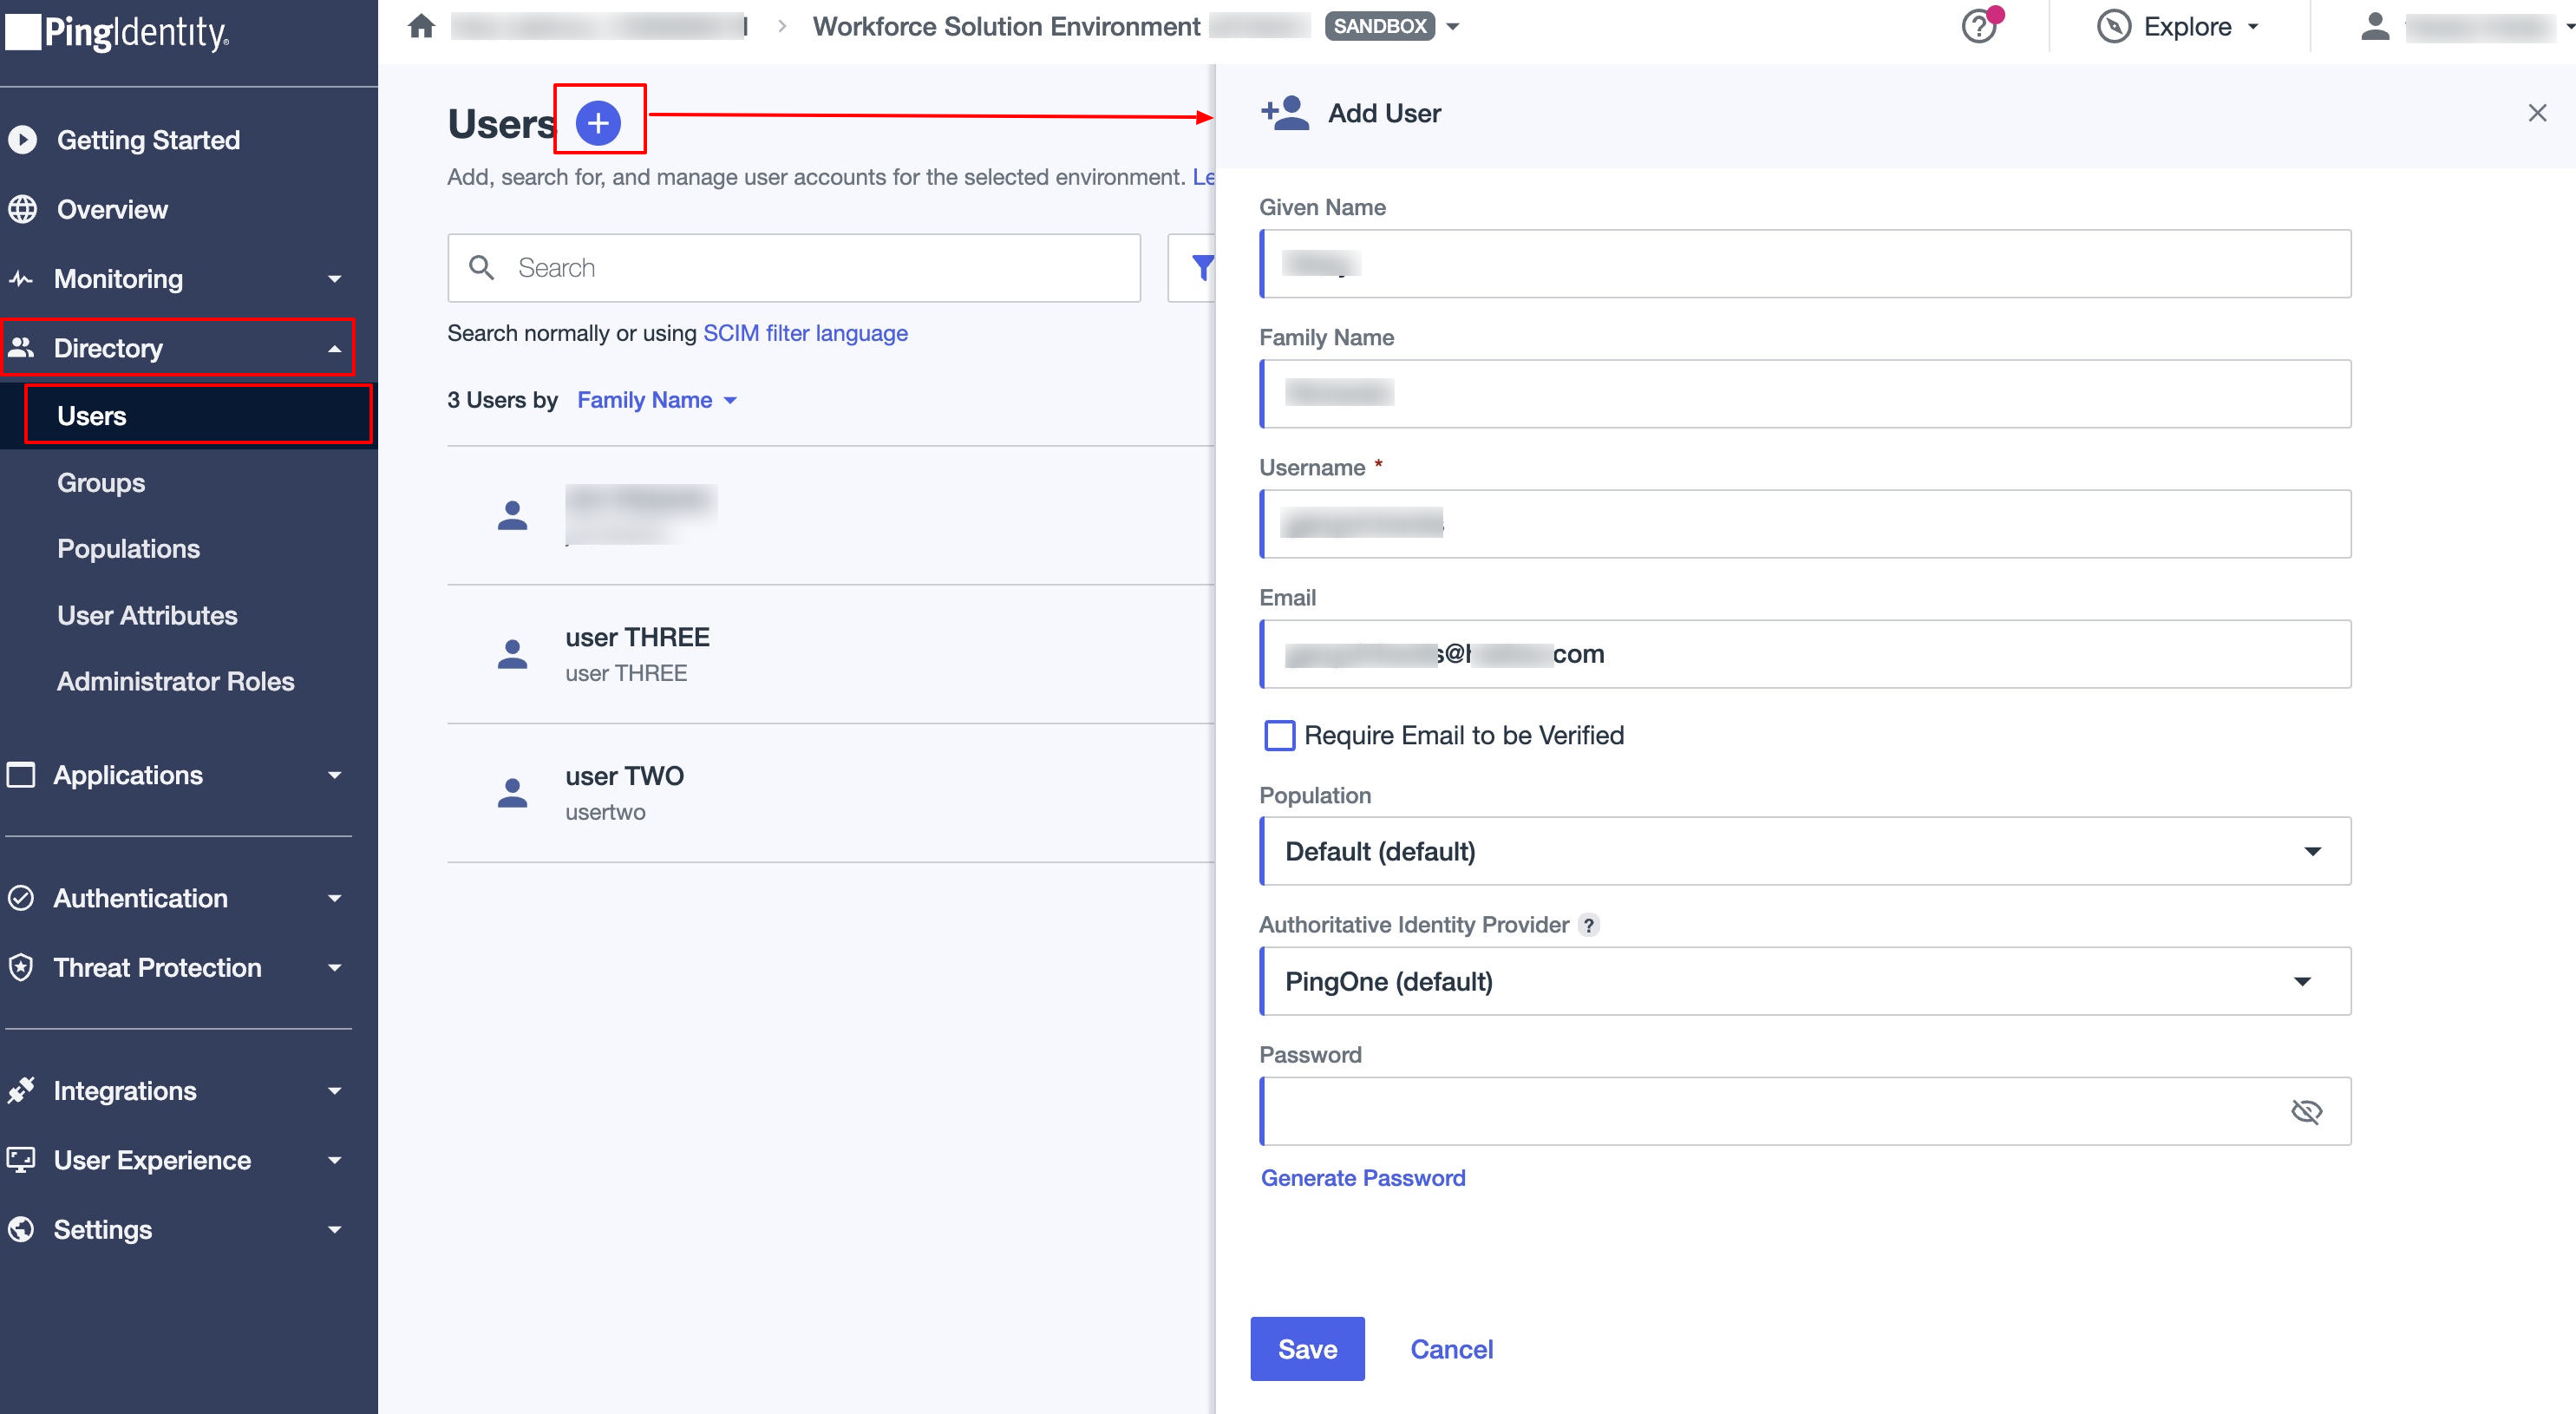
Important:
Users are assigned by default to the Default population unless a custom population is created.
Each user must belong to exactly one population.
The new user appears in the user list for further actions.
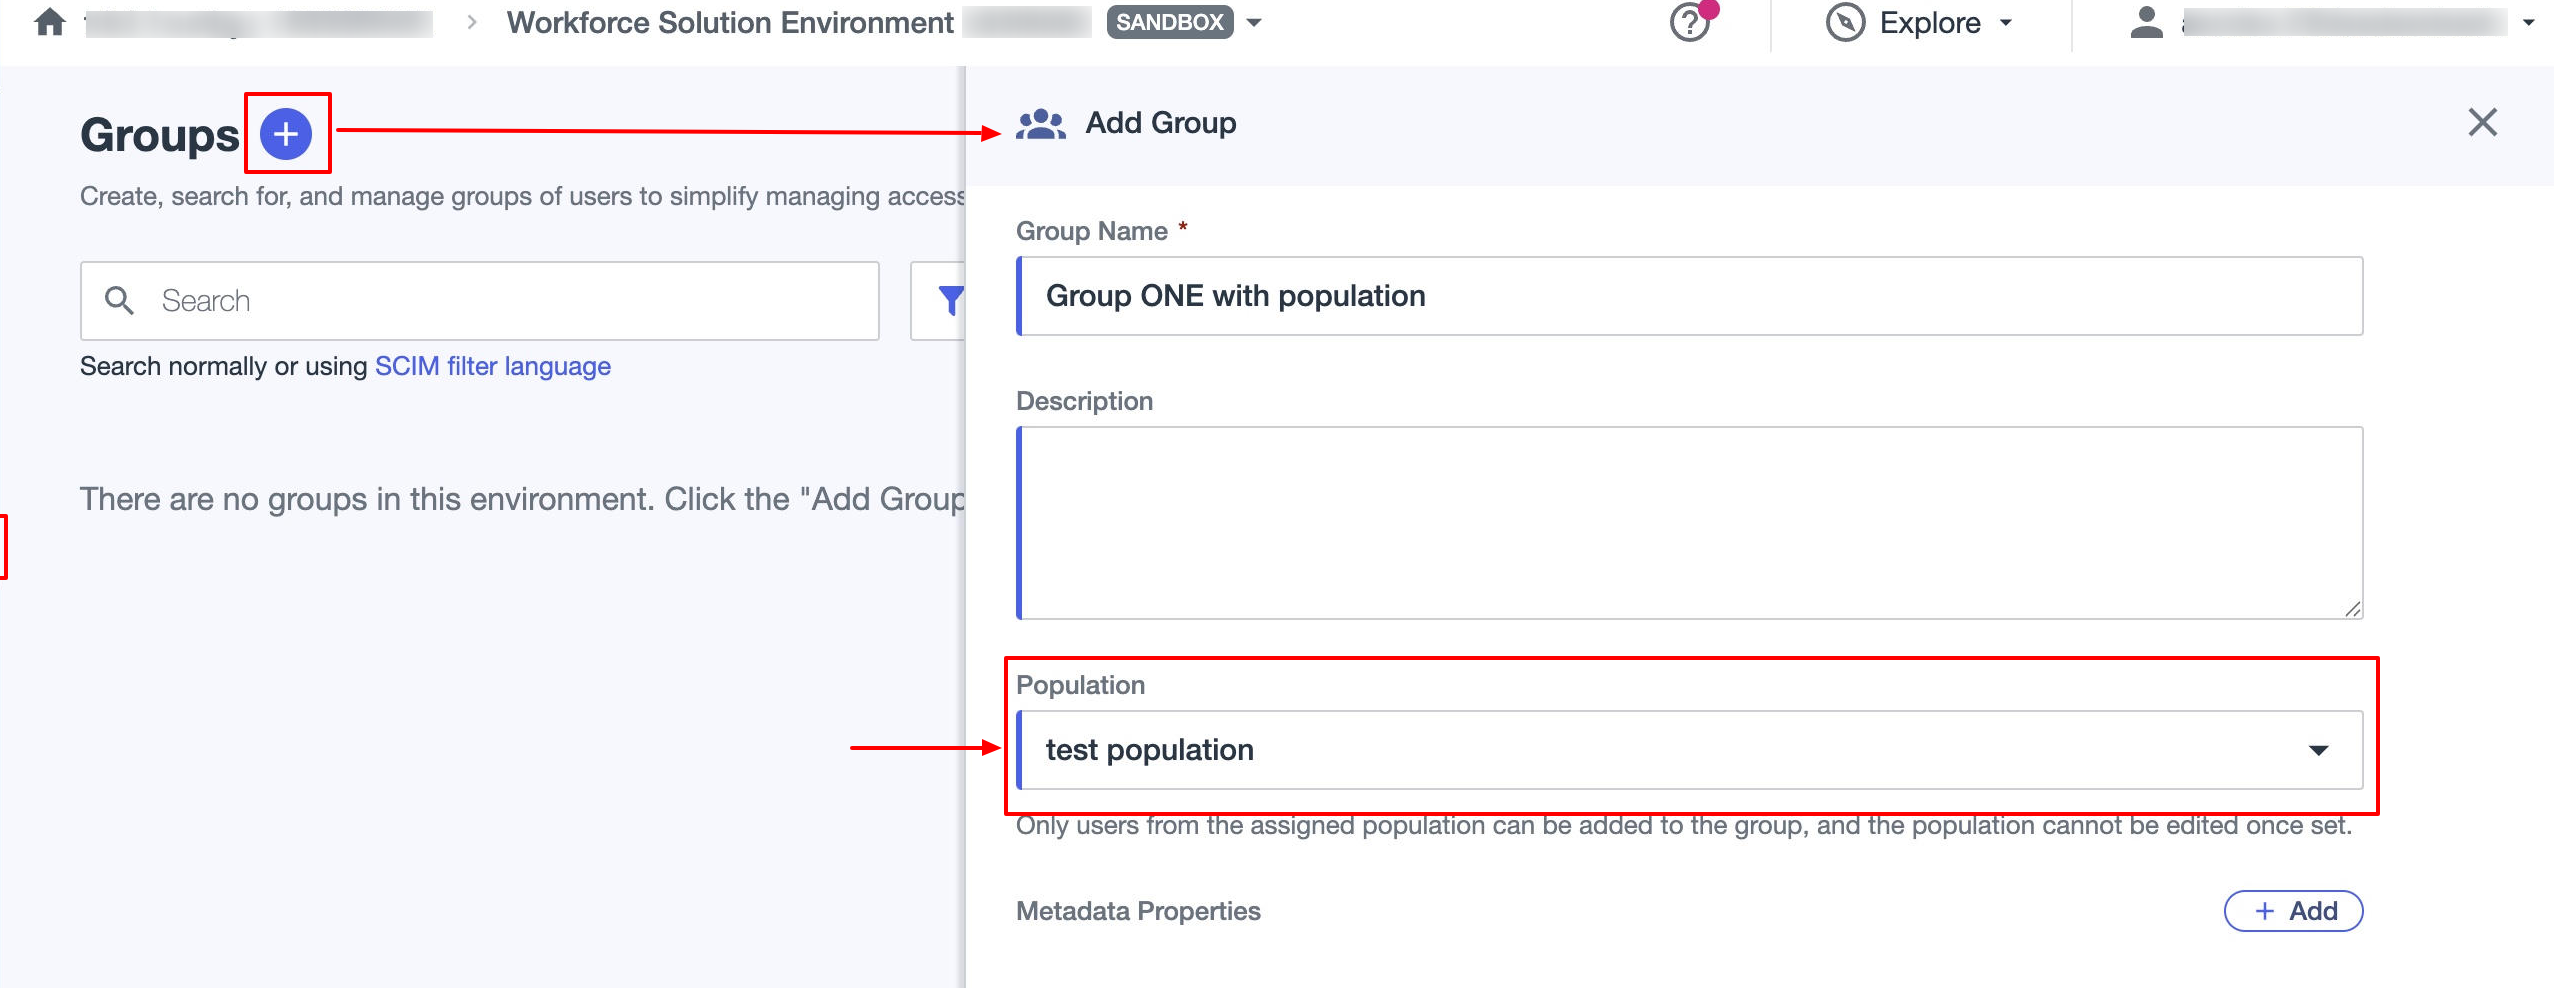
Step 4: Add Groups
Navigate to:
Directory > GroupsClick on the + sign to create group
Assign a population to limit group membership.
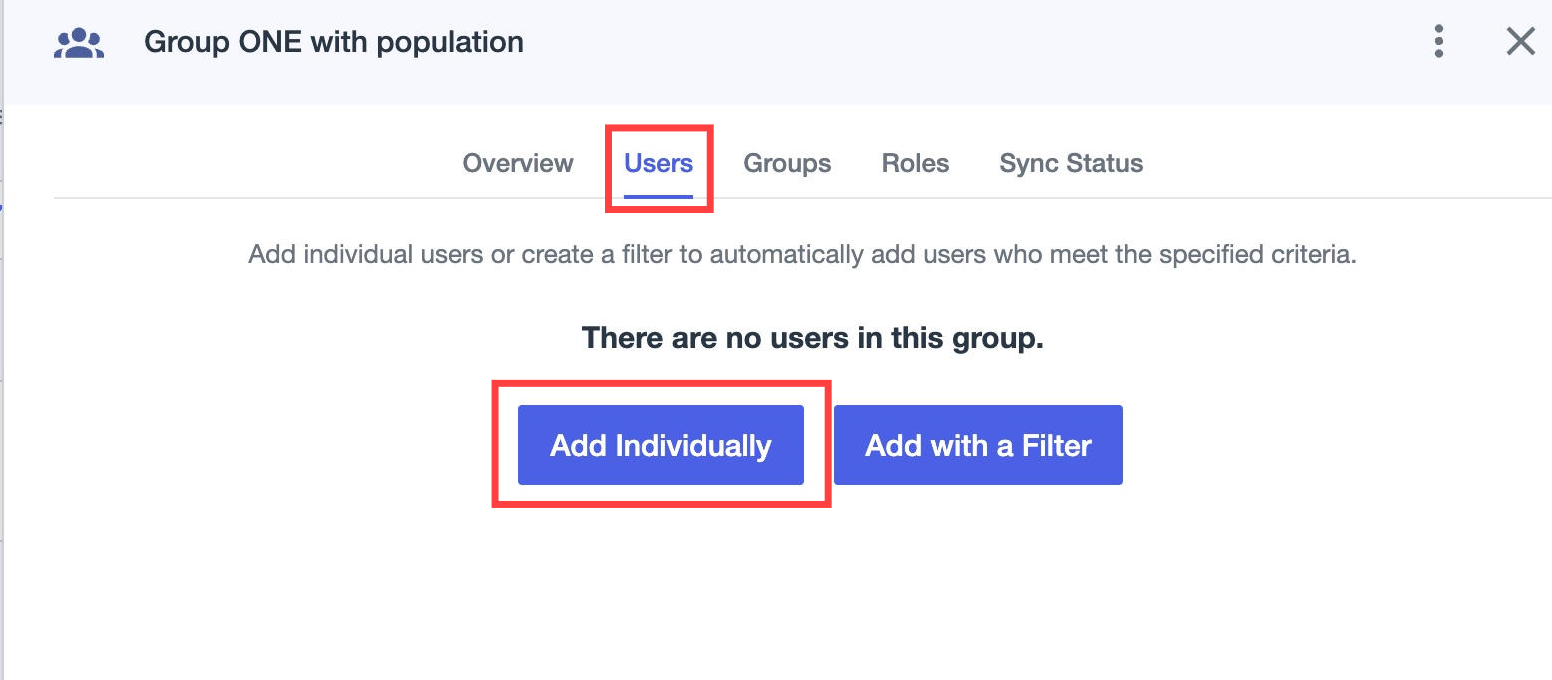
Step 5: Add Users to Groups
Navigate to:
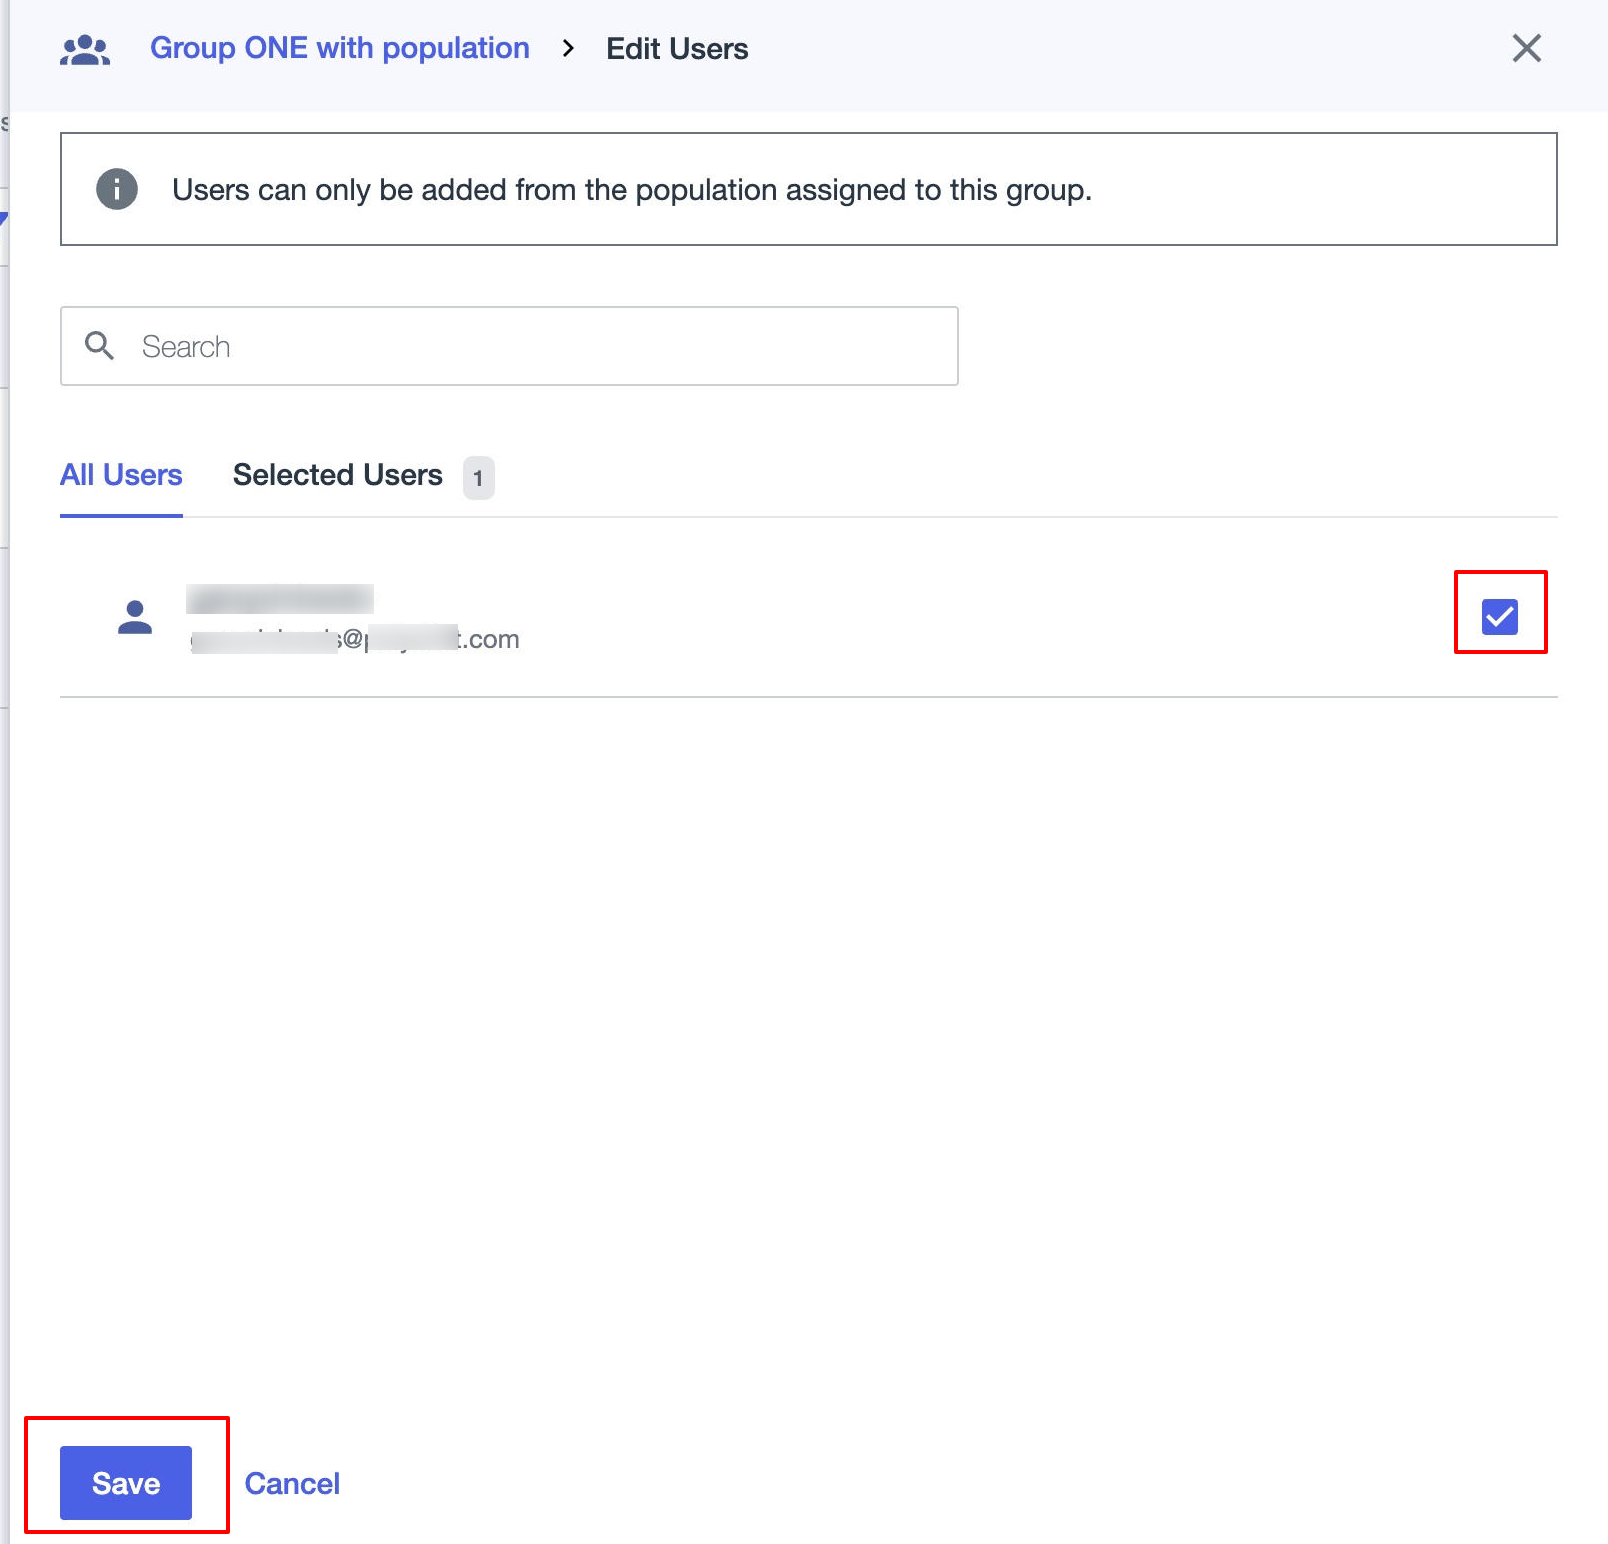
Directory → Groups → Select Group → Users tabClick Add Individually,
Select users, and click Save.
Step 6: Provision Users and Groups to Scalefusion
a) Provision Users via User Filter
Navigate to:
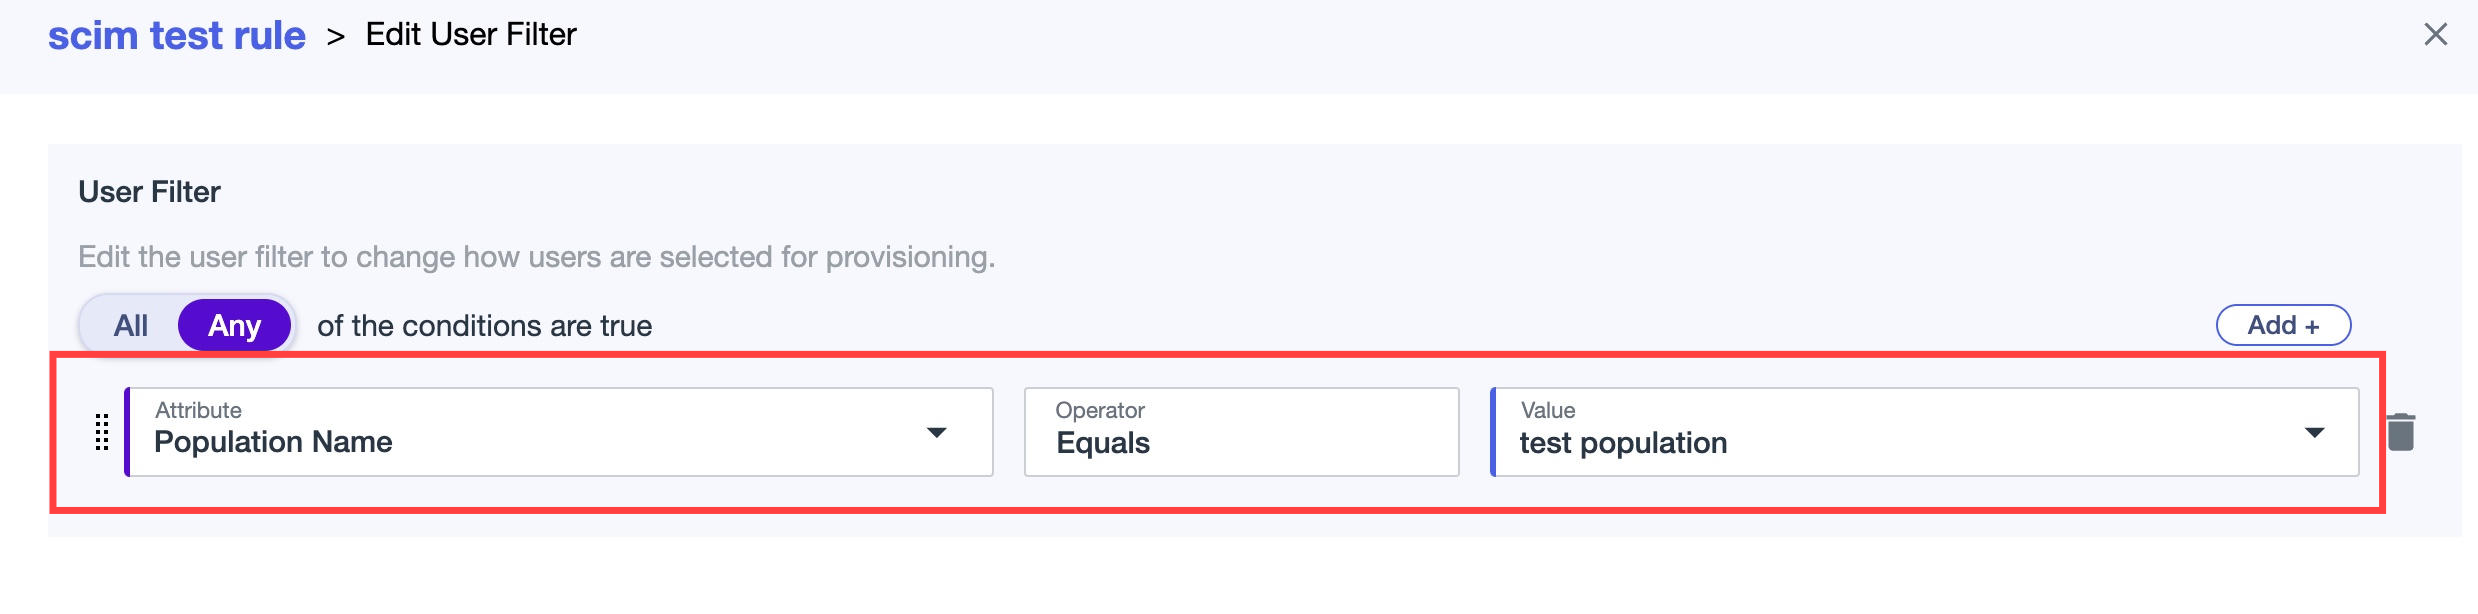
Integrations → Provisioning → Rules -> Click 3 dots next to your rule → Edit User Filter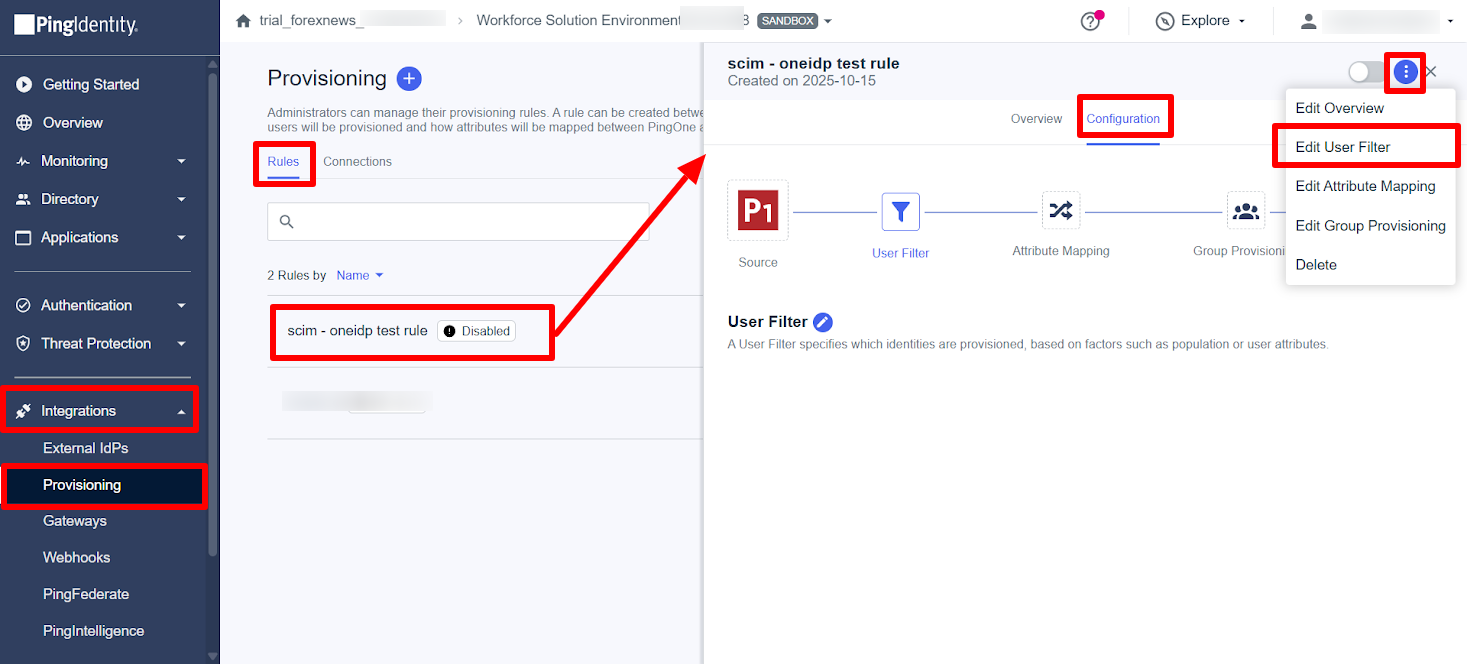
Assign by population name and click Save.
b) Provision Users via Groups
Navigate to:
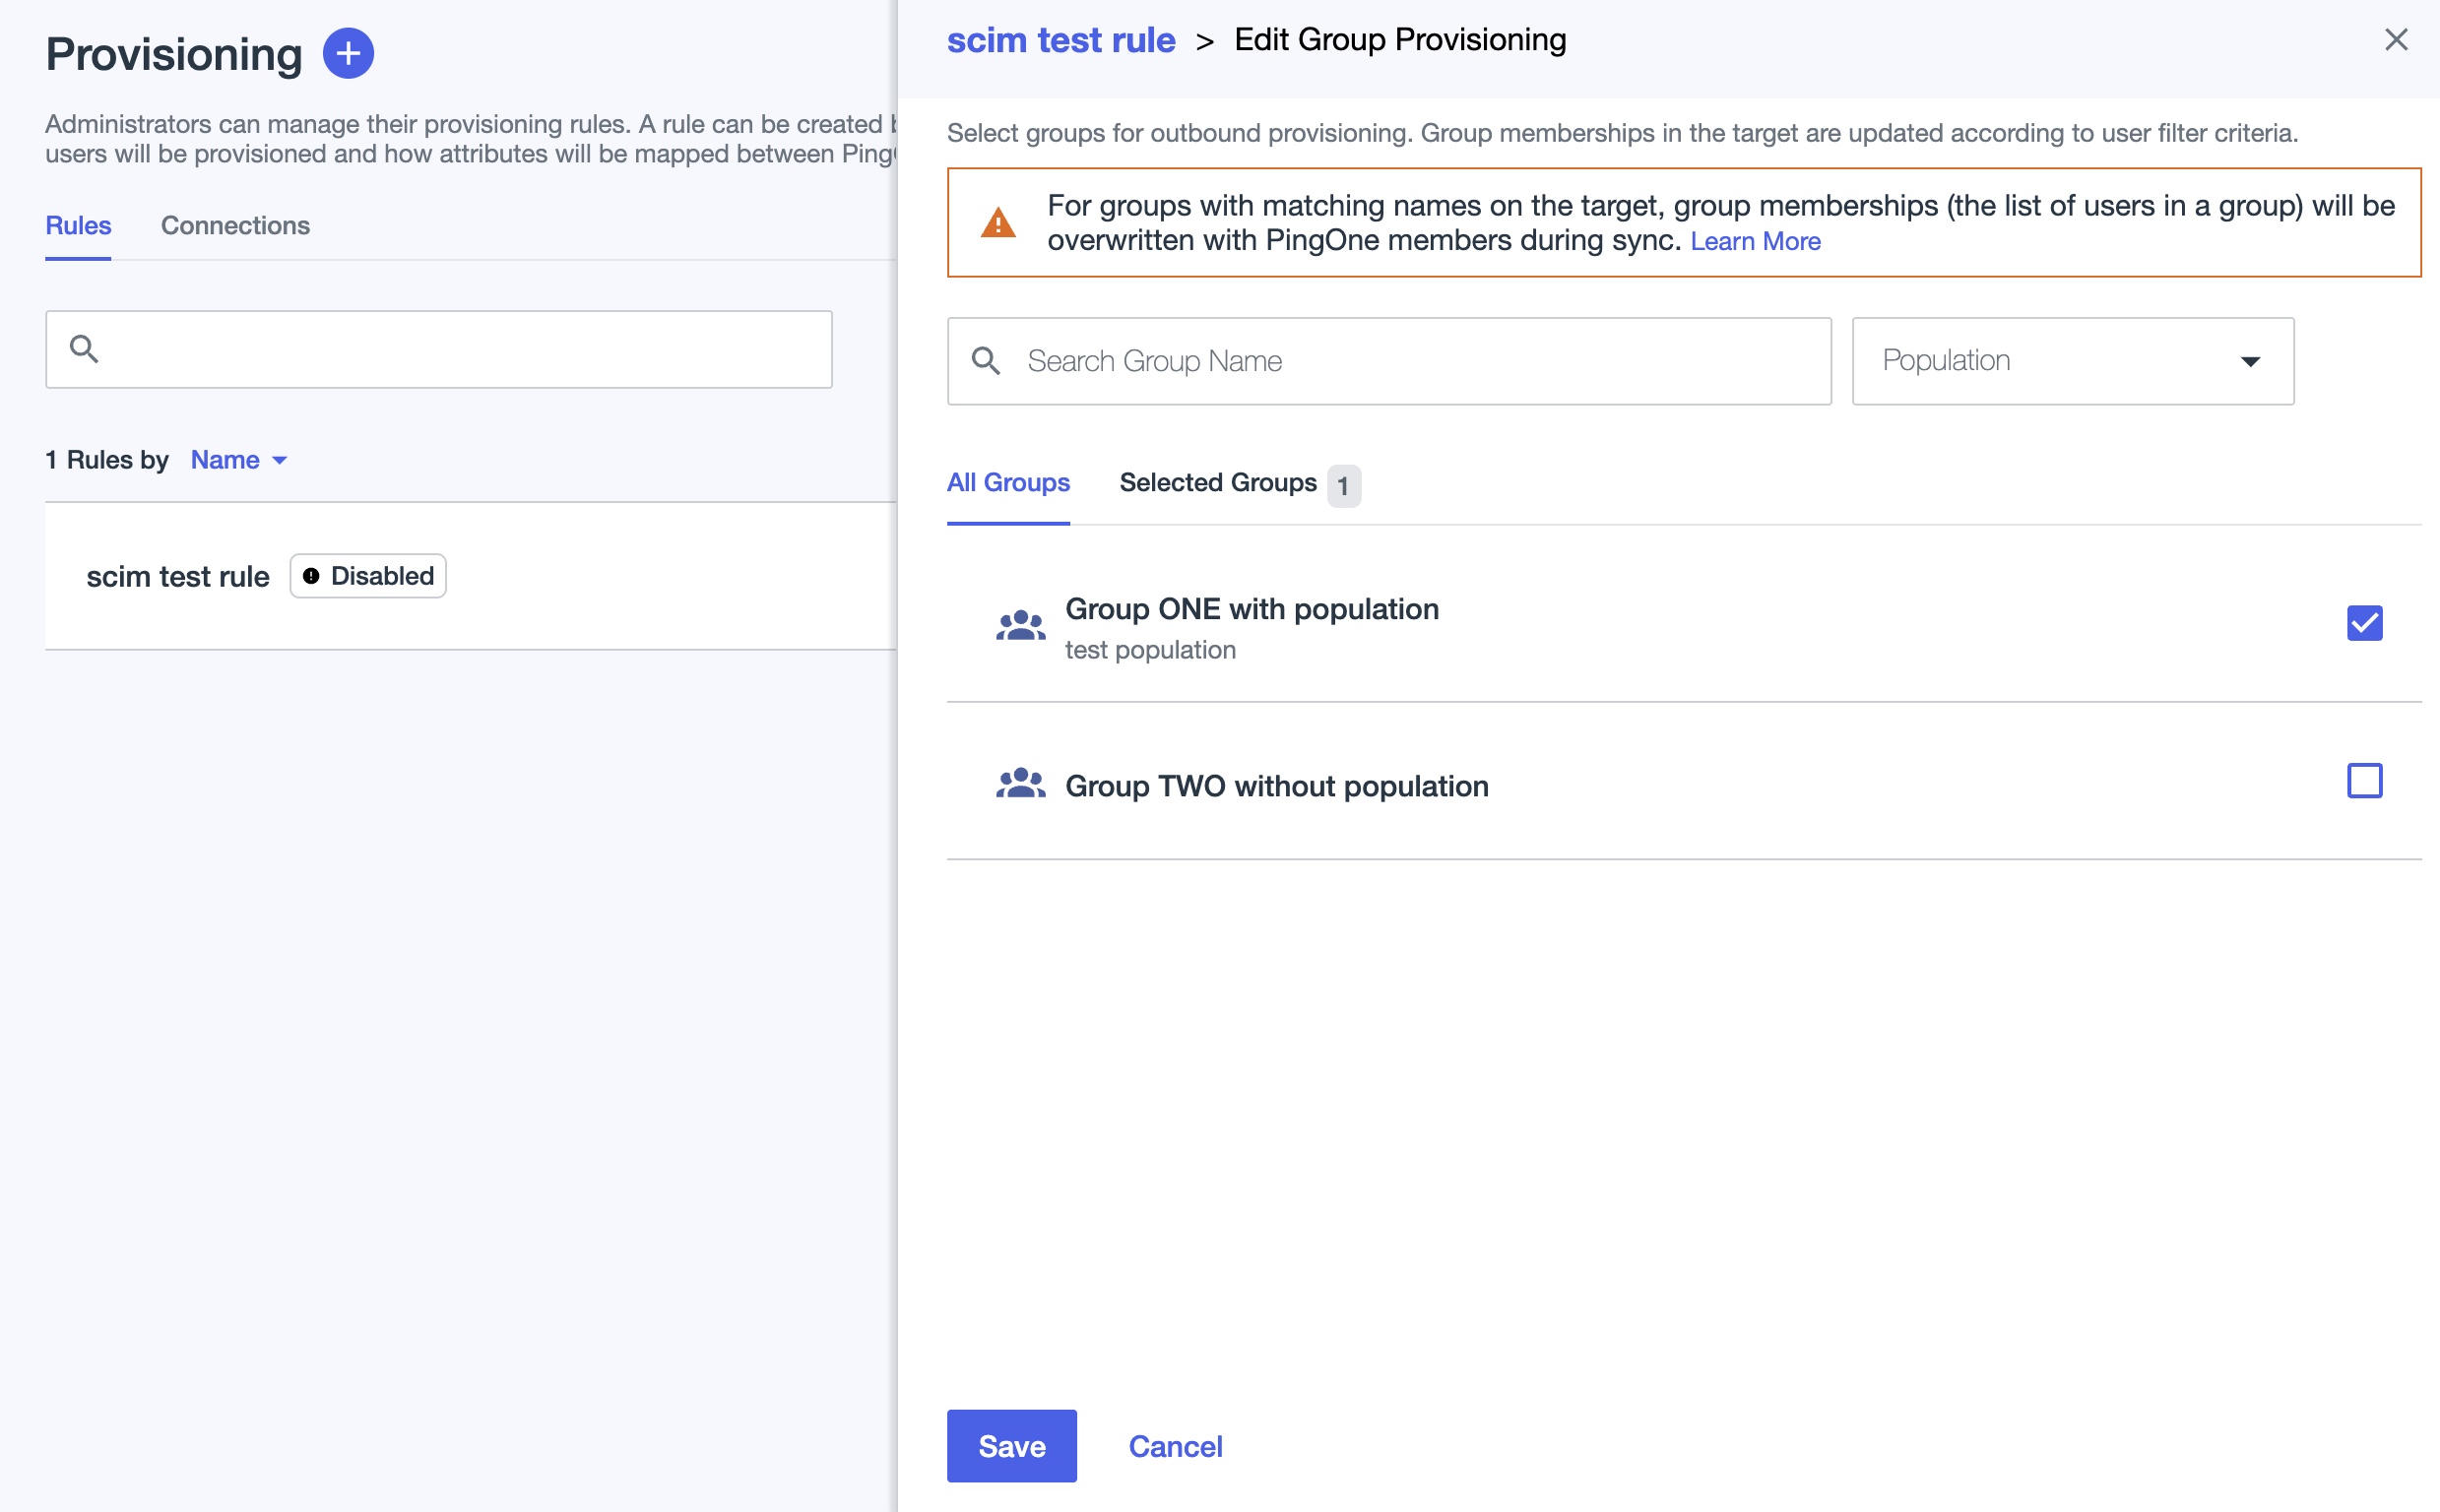
Integrations → Provisioning → Rules -> Click 3 dots next to your rule → Edit Group Provisioning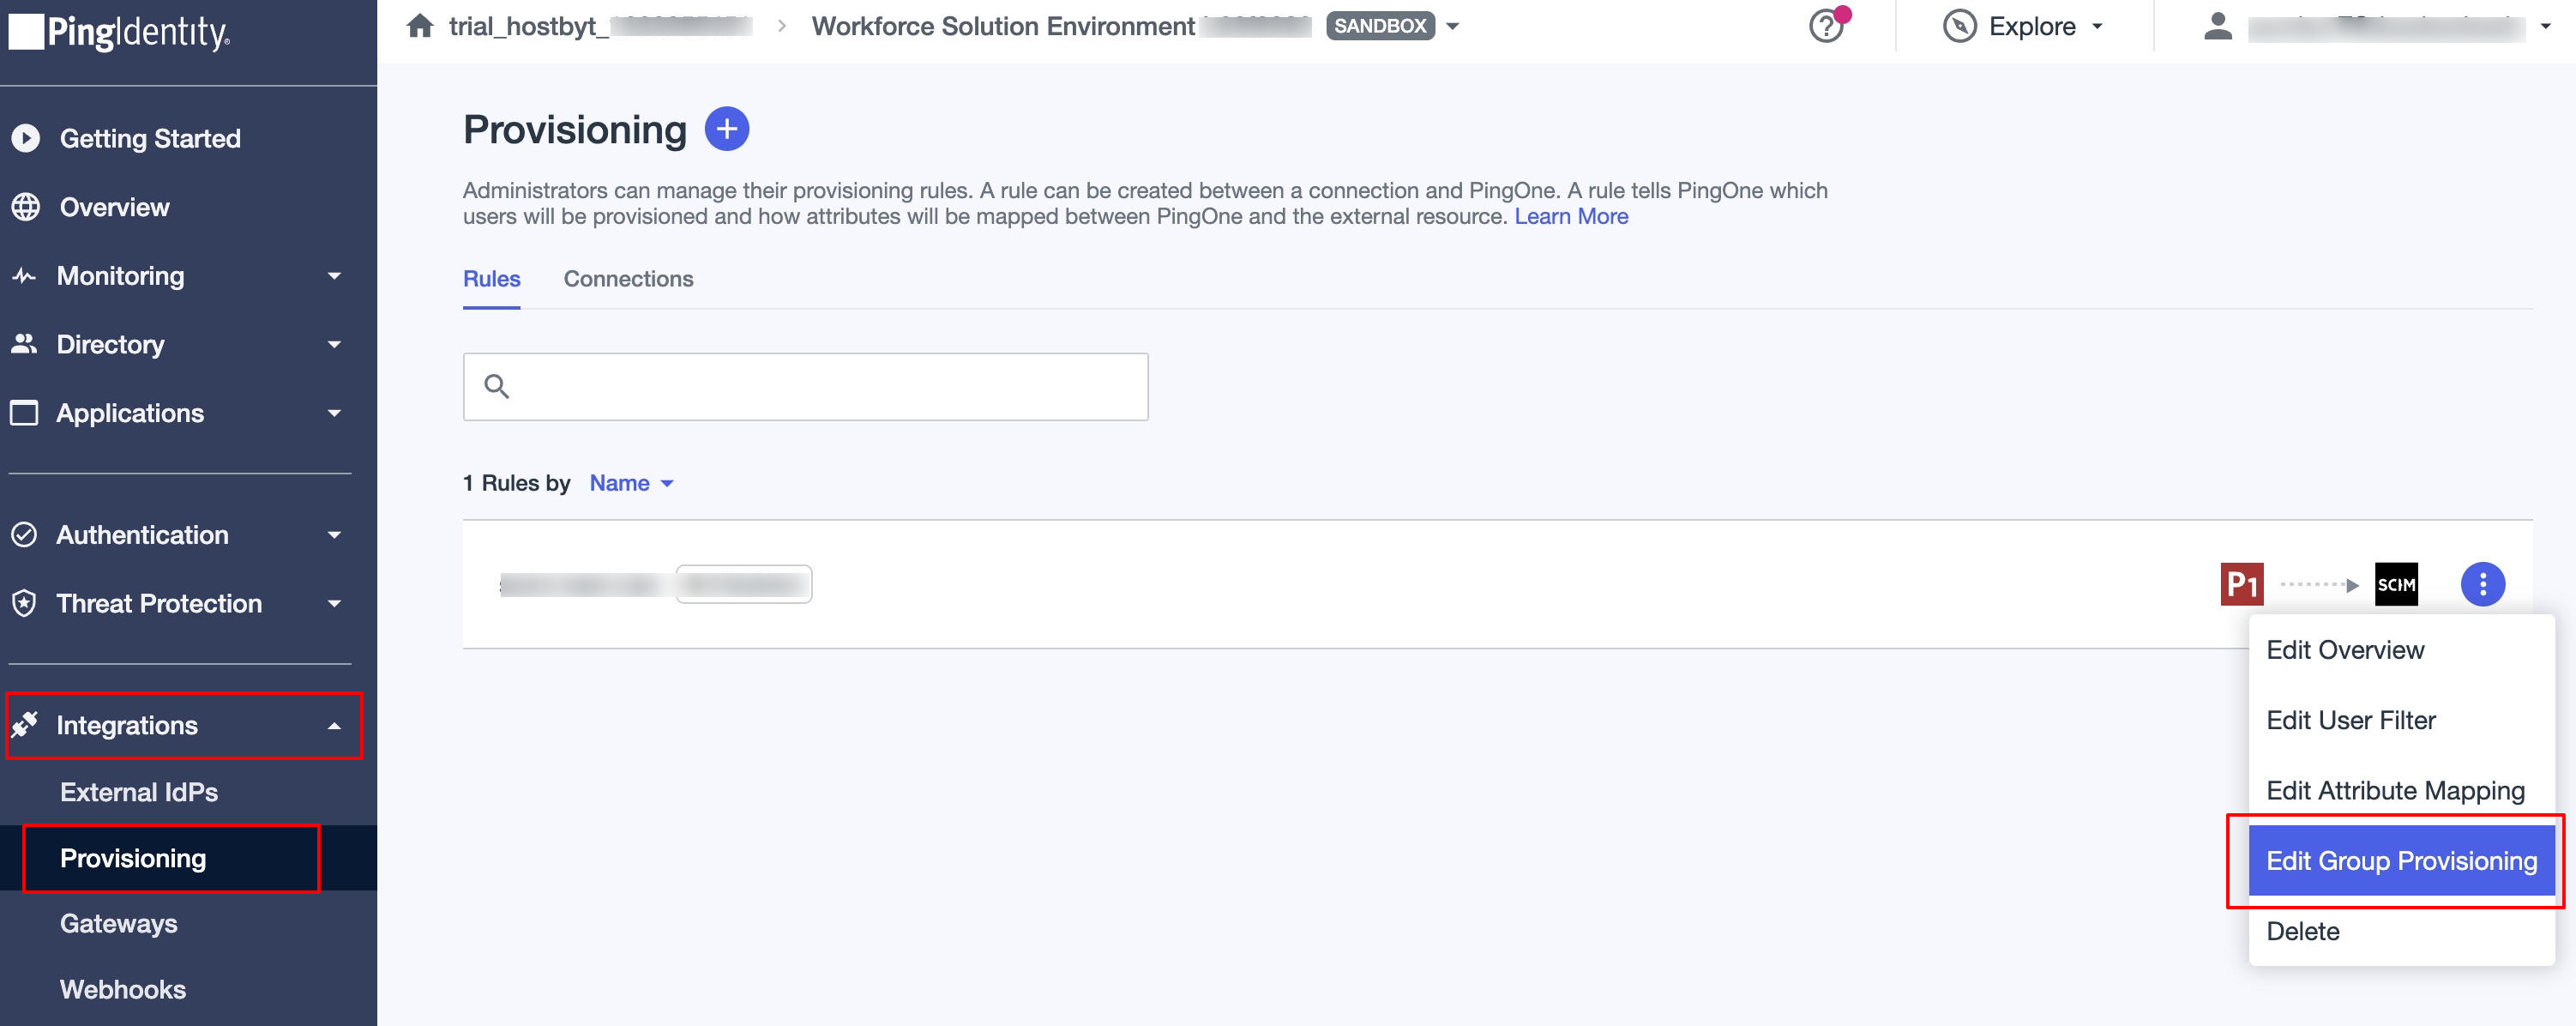
Select the group and click Save.
The group and its users will now sync to the Scalefusion dashboard. Once synced, the group and its users will appear in the Scalefusion dashboard.
If individual users are provisioned, they will be listed under the User Enrollment section.
When a group is provisioned, both the group and its associated users will appear under the User Groups section. The associated users will also be listed under the User Enrollment section.