This guide walks you through setting up the SCIM integration with Scalefusion and provisioning users and groups via OneLogin.
Pre-requisite
SCIM Connector should be configured on Scalefusion Dashboard.
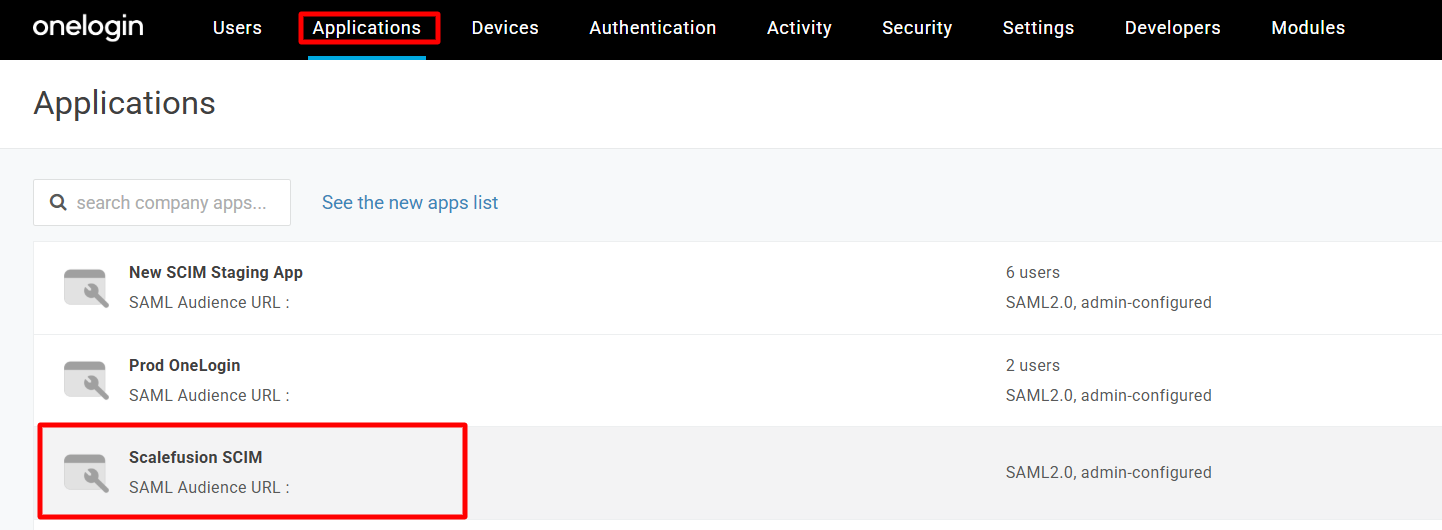
Step 1: Set Up the SCIM Application in OneLogin portal
Log in to your OneLogin portal, navigate to Applications, and click Add App.

Search for SCIM Provisioner with SAML (SCIM v2 Enterprise) and select it.
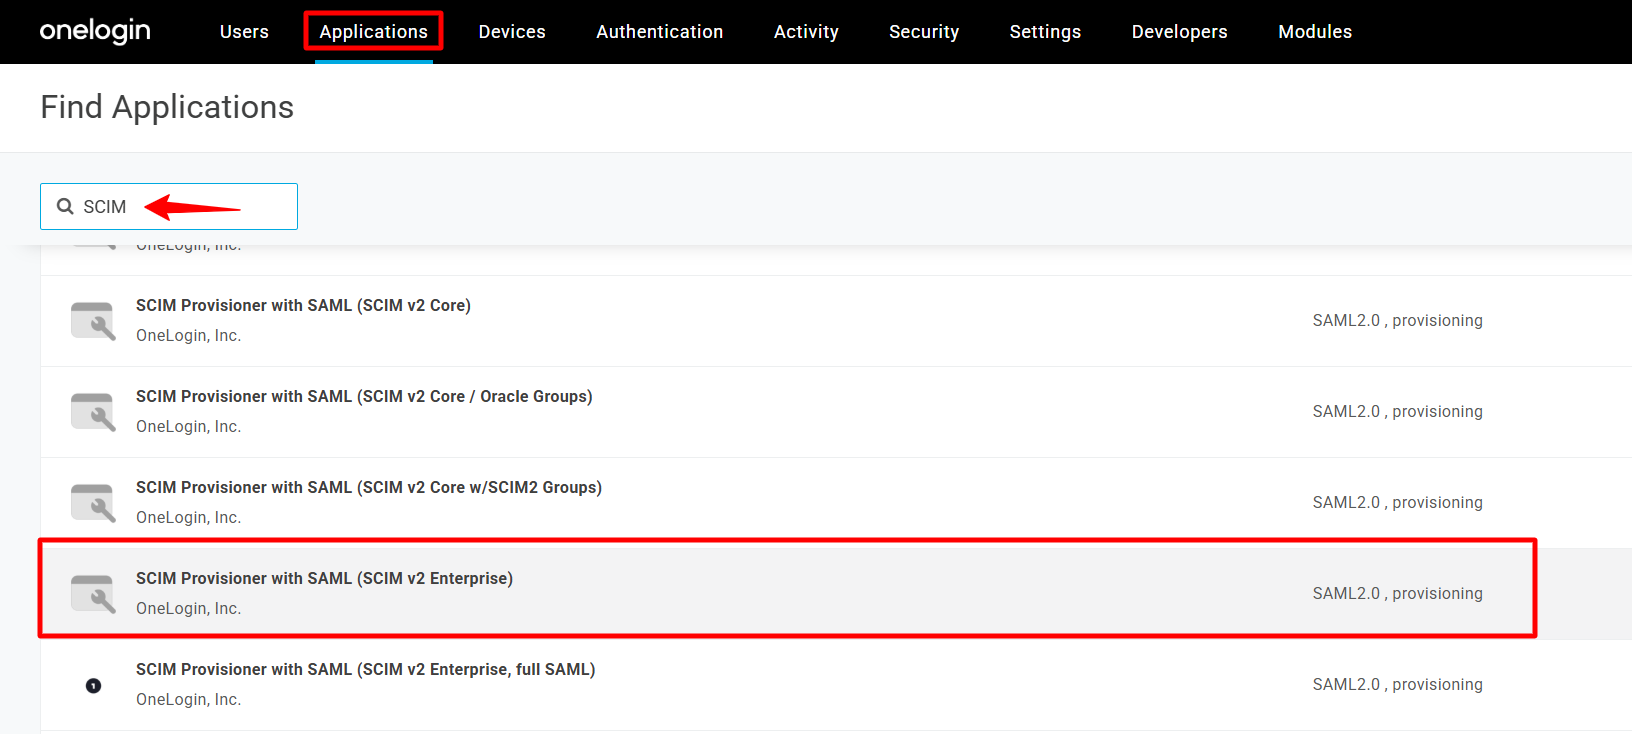
Enter a name and click Save.
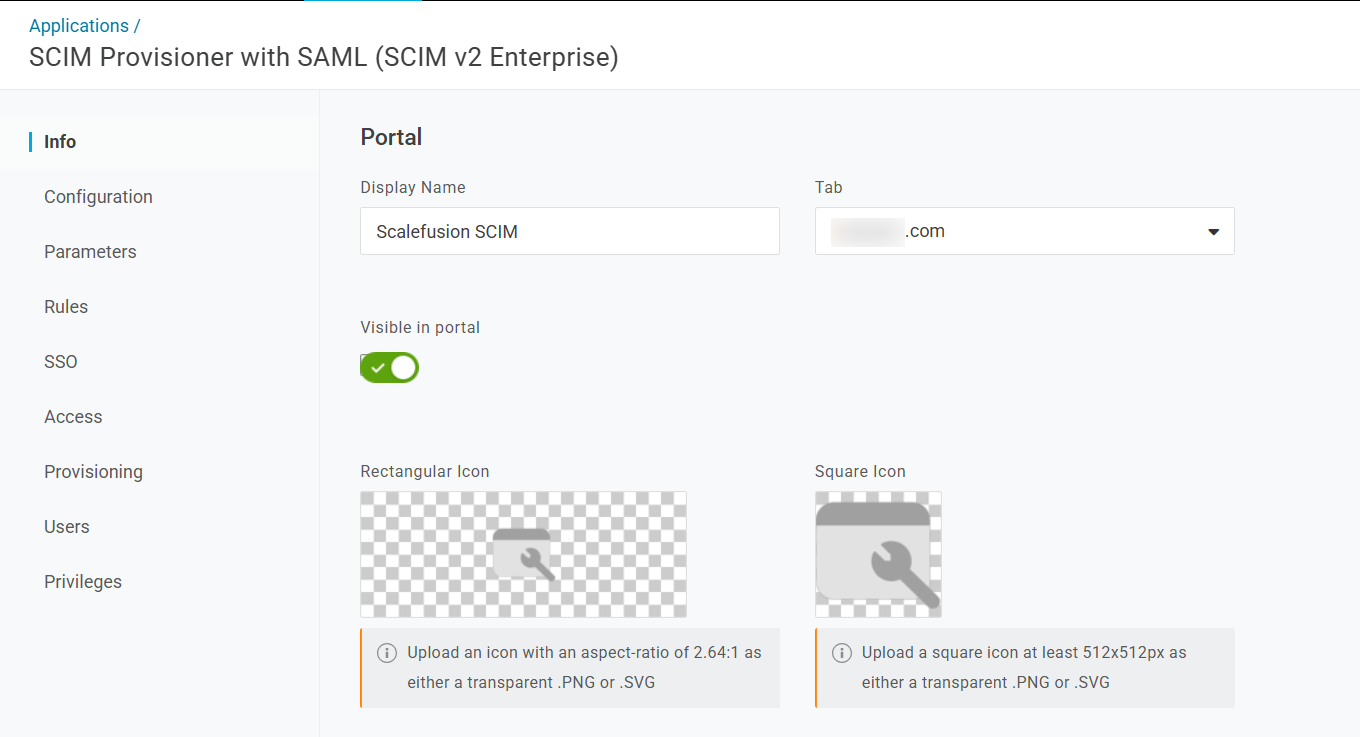
Once you save, you will see more sections to add data from the Scalefusion dashboard.
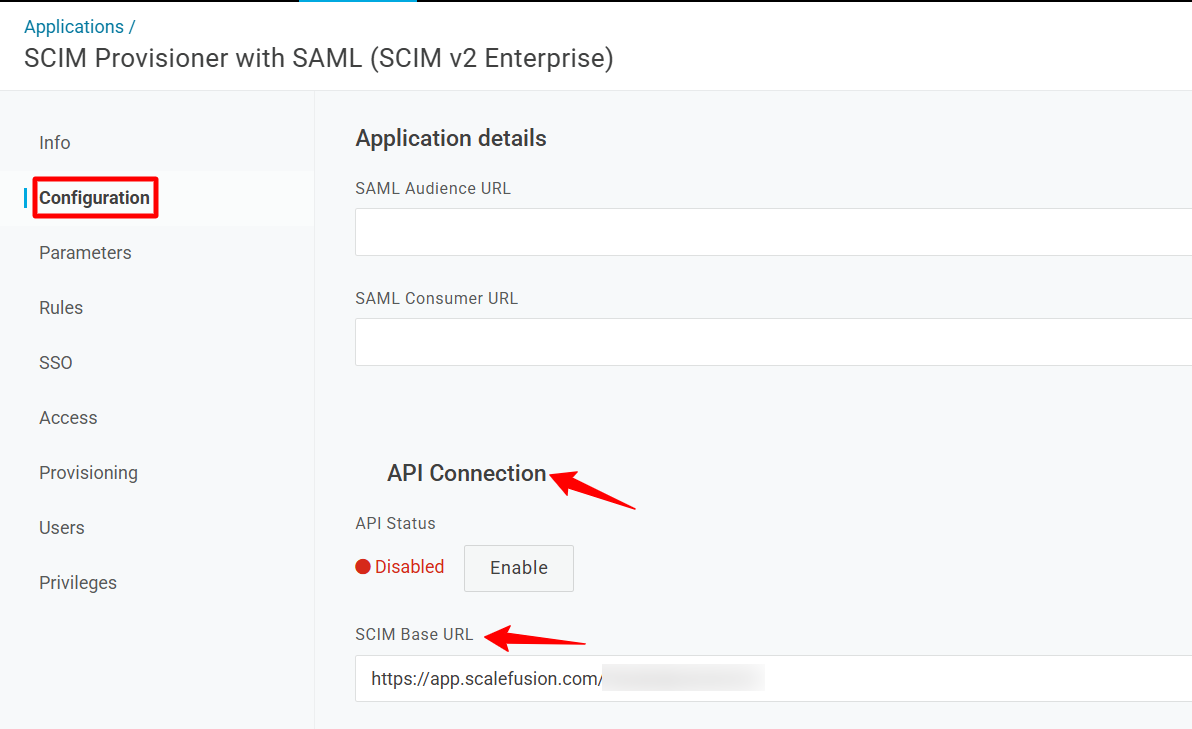
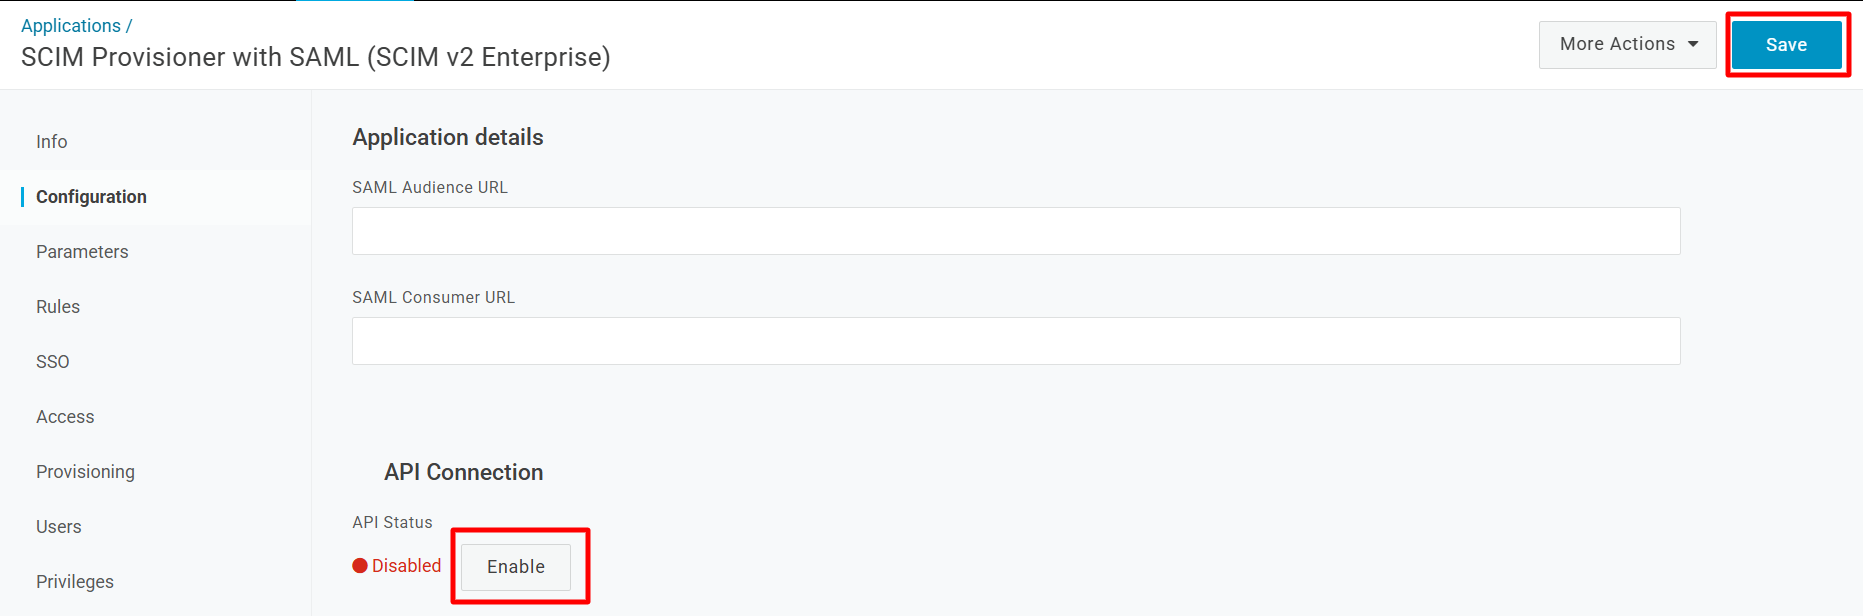
Go to the Configuration tab, scroll down to API Connection, and enter the following details:
SCIM Base URL: Copy the SCIM API Endpoint URL from the Scalefusion dashboard and paste it here.
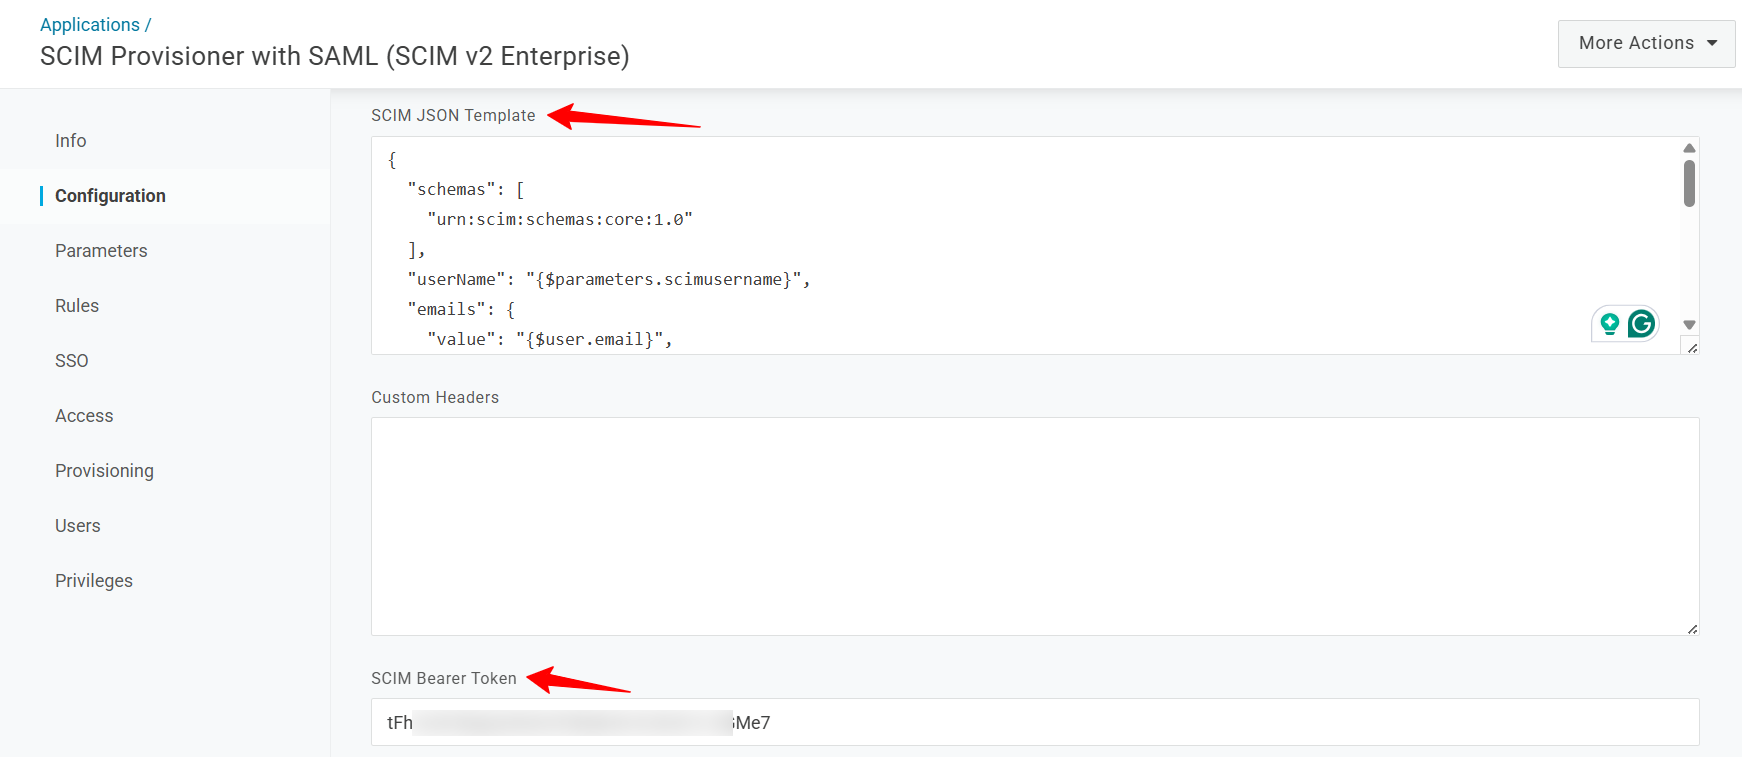
SCIM JSON Template: Copy-paste the following JSON payload here.
{
  "schemas": [
    "urn:scim:schemas:core:1.0"
  ],
  "userName": "{$parameters.scimusername}",
  "emails": {
    "value": "{$user.email}",
    "type": "work",
    "primary": true
   },

  "name": {
    "givenName": "{$user.firstname}",
    "familyName": "{$user.lastname}",
    "formatted": "{$user.display_name}"
  },
  "phoneNumbers": [
    {
      "primary": true,
      "value": "{$user.phone}"
    }
  ]
}
SCIM Bearer Token: Copy the Bearer Token from the Scalefusion Dashboard and paste it here.
Next, click Enable and Save it.
Next, go to Provisioning and select the Enable Provisioning checkbox under Workflow.
Uncheck the “Create user, Delete user, and Update user” checkboxes under “Require admin approval before this action is performed”.
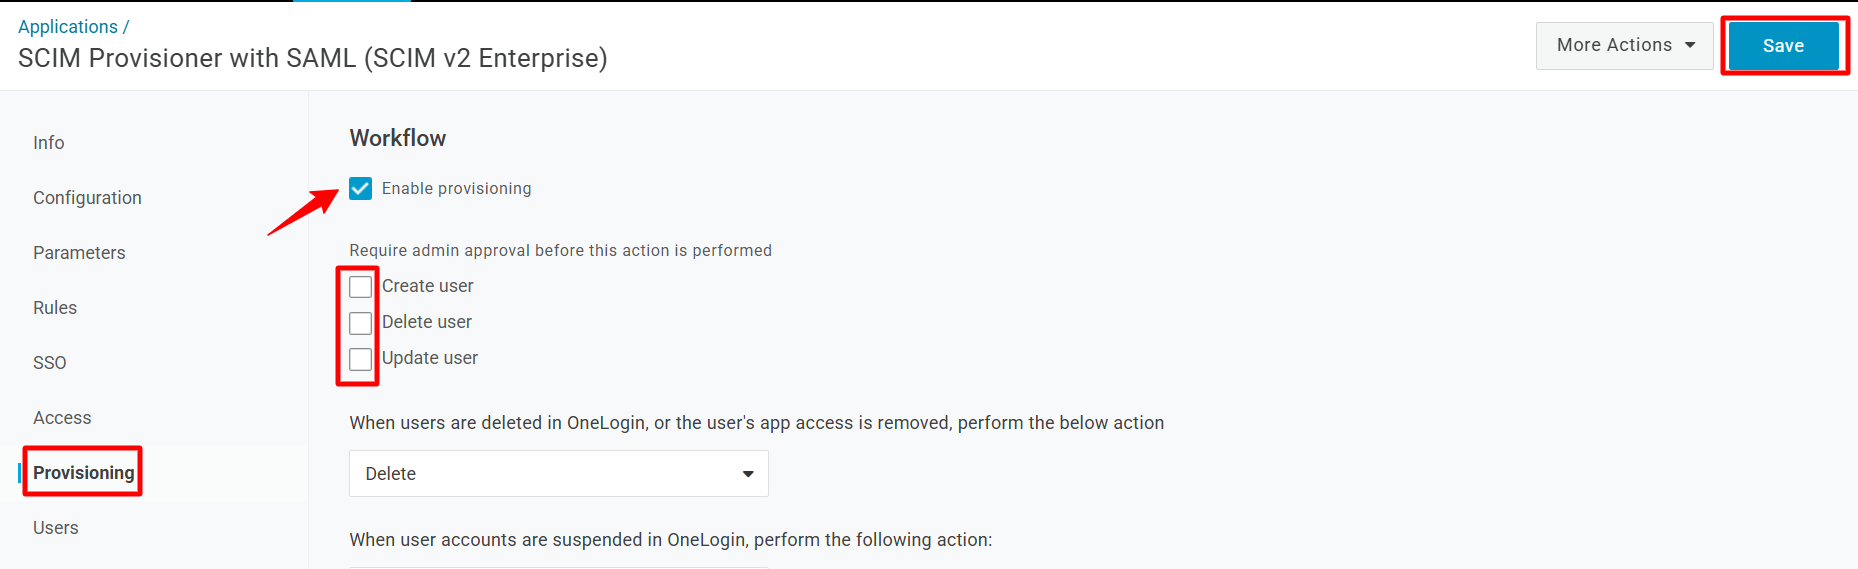
Click Save.
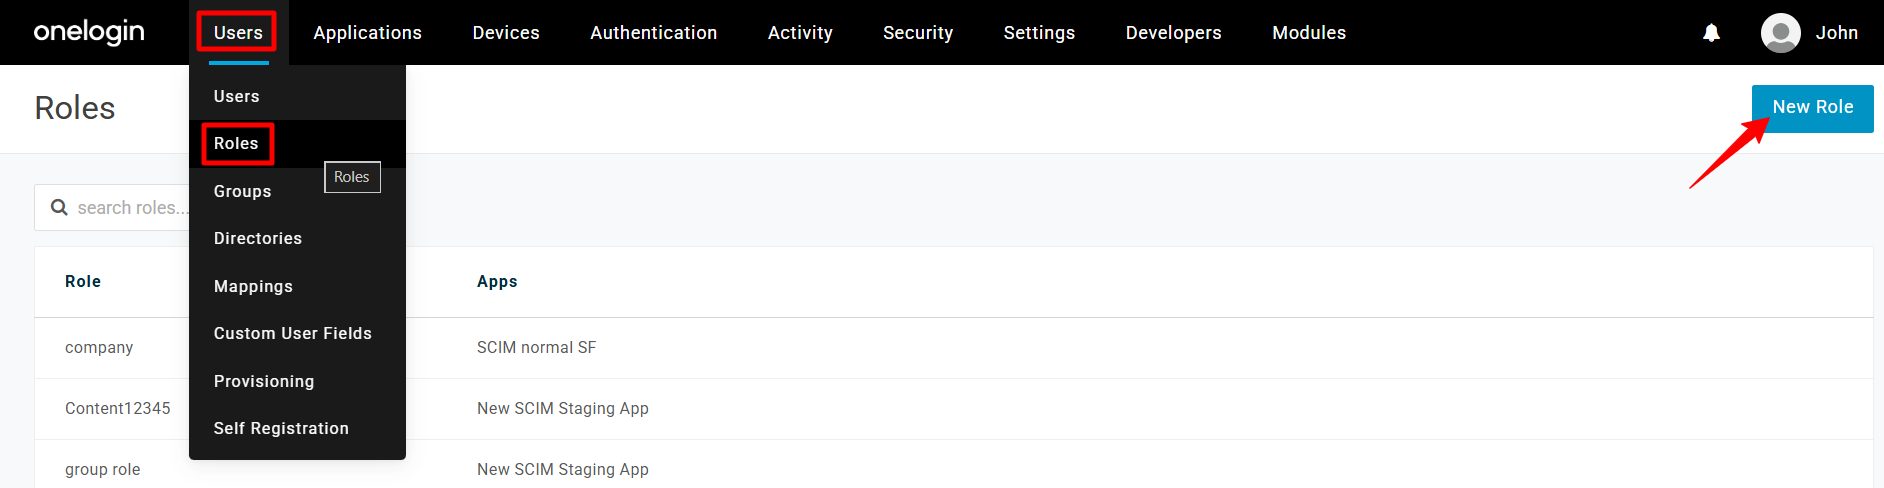
Step 2: Add Role & Map SCIM App to that Role
Navigate to Users > Roles and click New Role.
Enter a name for this role and select the App created previously. Click Save.

Next, go to Users and click New Mapping.
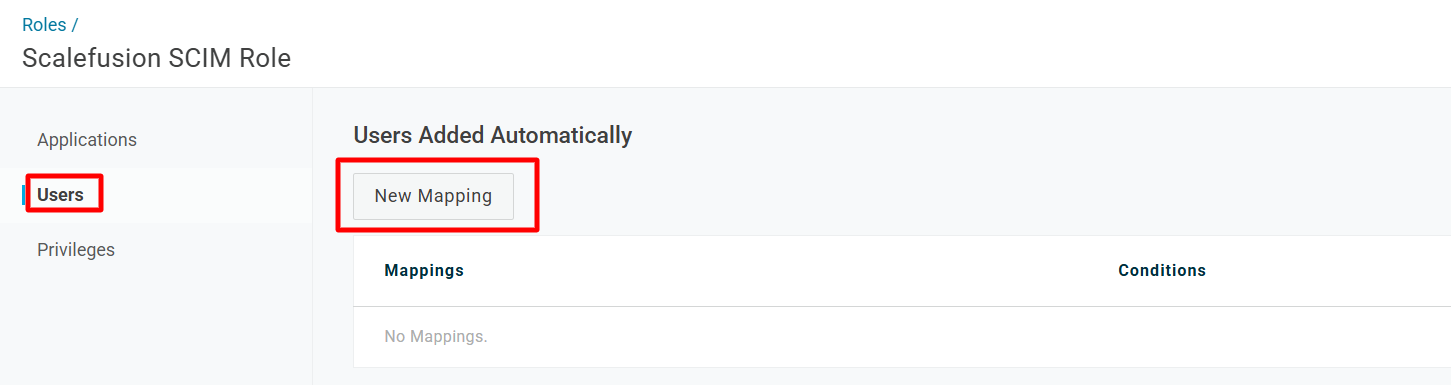
Enter a name for this mapping.
Under Conditions, select an element from the dropdown list, for example, Department equals <name of the department> whose users will be mapped to the SCIM app.
Under Actions, select Set role and select the SCIM app created previously for Scalefusion.
Click Save.
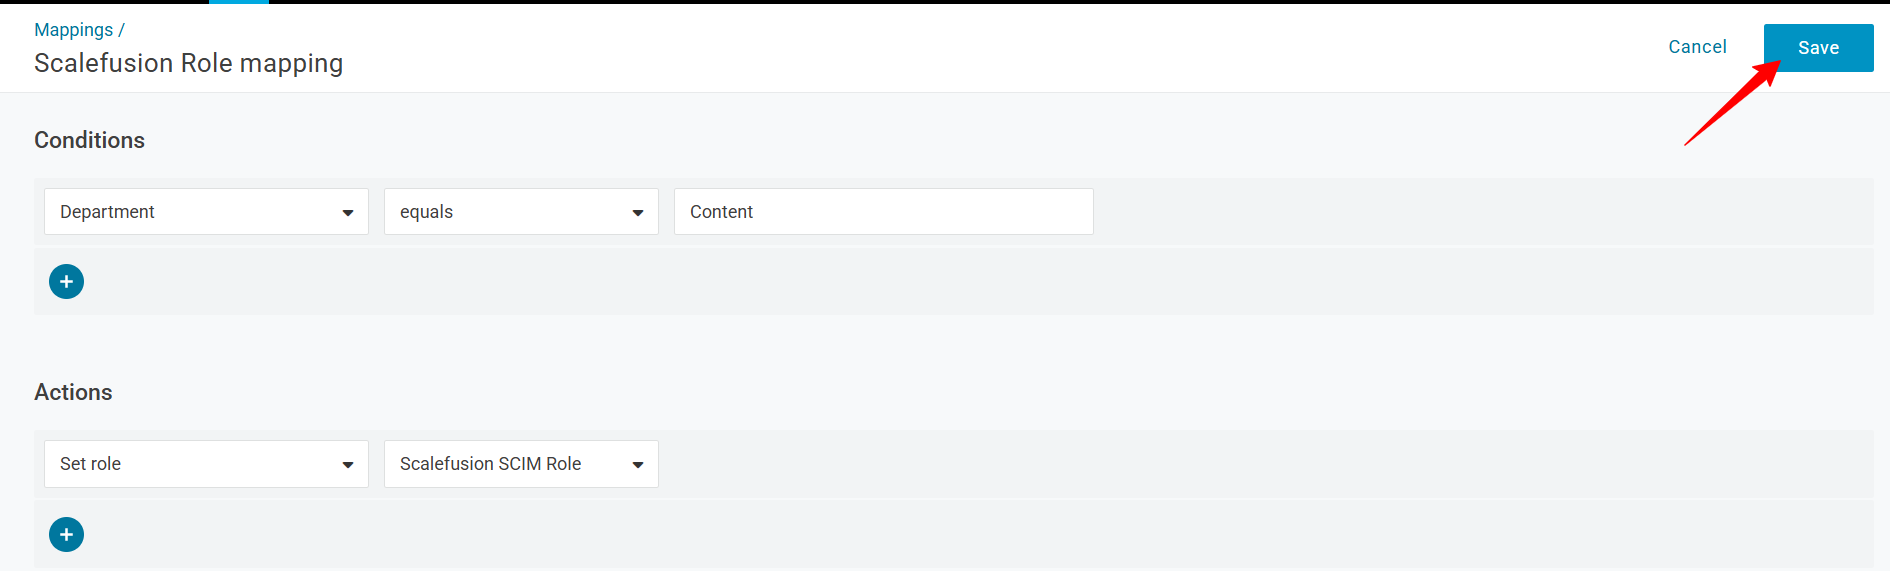
If this condition is met, then the users will be automatically synced to Scalefusion.
Step 3: Sync Users & Groups
Navigate to Users and click New User.

Enter the user's details, ensuring they match the conditions specified in the Mapping. For example,
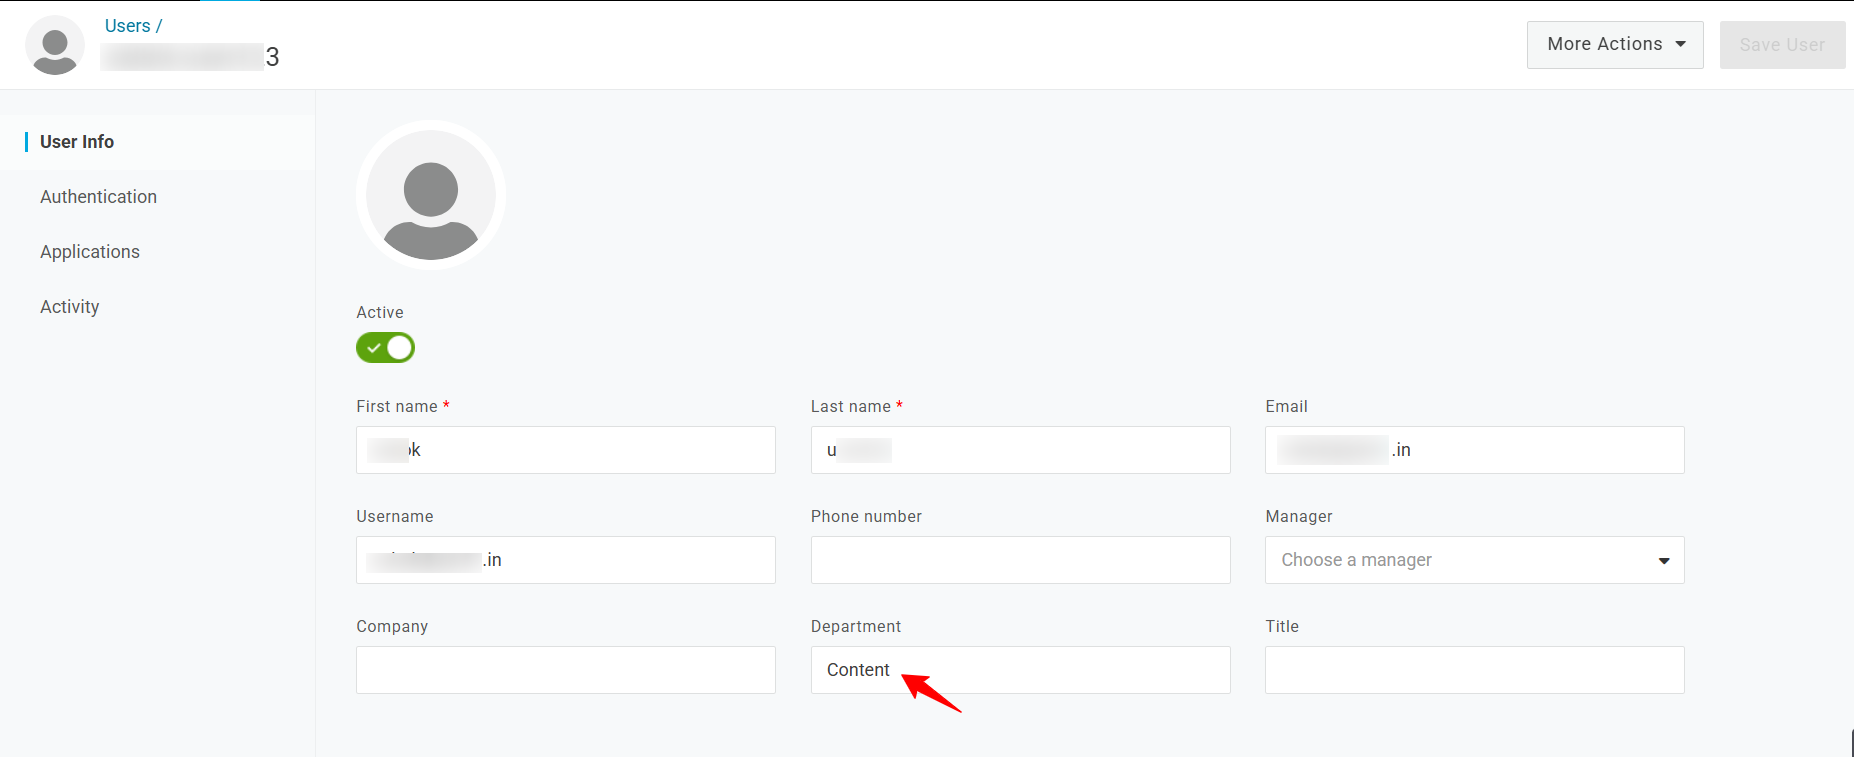
All the users that match the mapping will be synced to the Scalefusion dashboard.
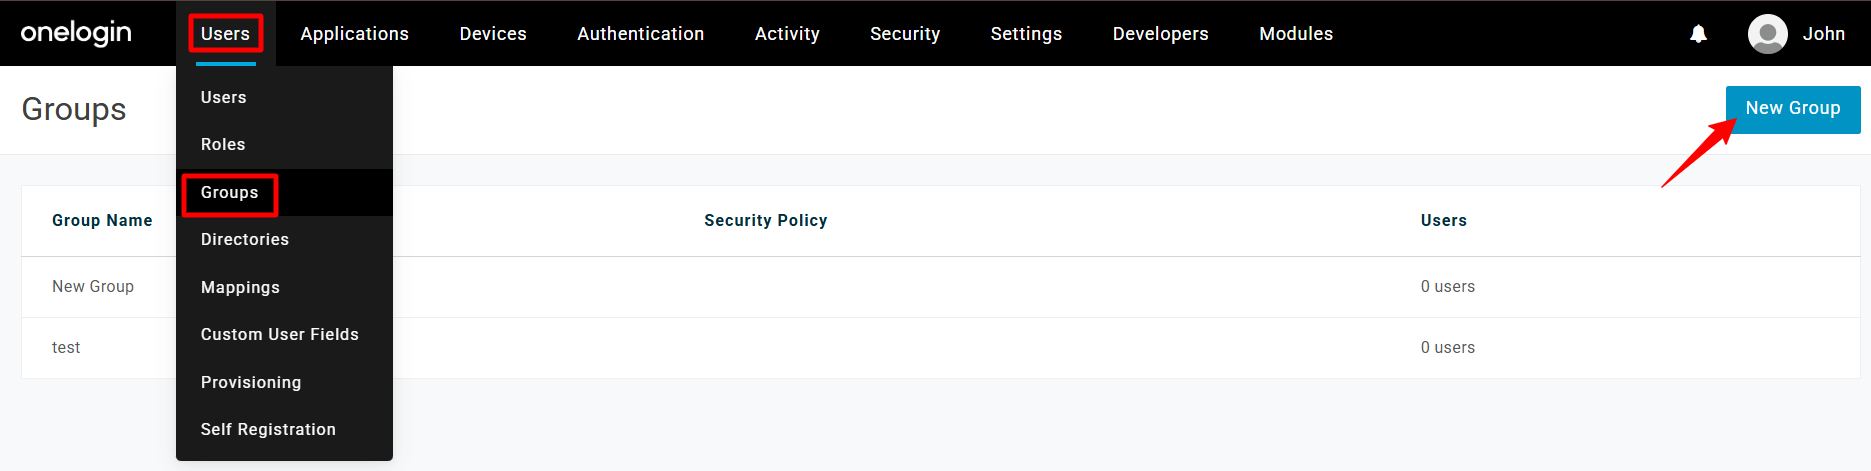
To sync group(s), navigate to Users > Groups and click New Group.
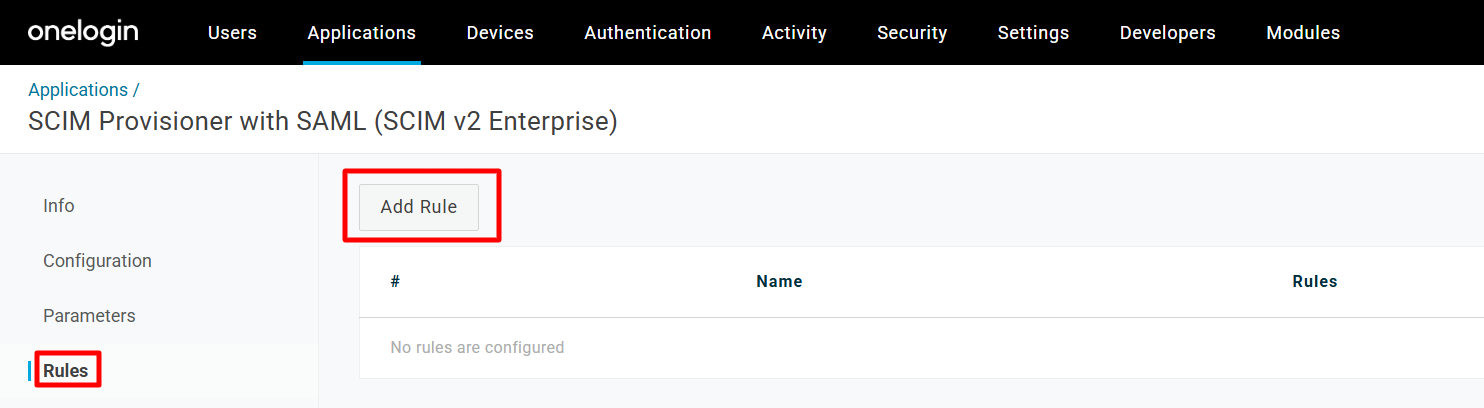
Once the group is created, navigate to Applications > the SCIM app you created previously.
Go to Rules and click Add Rule.
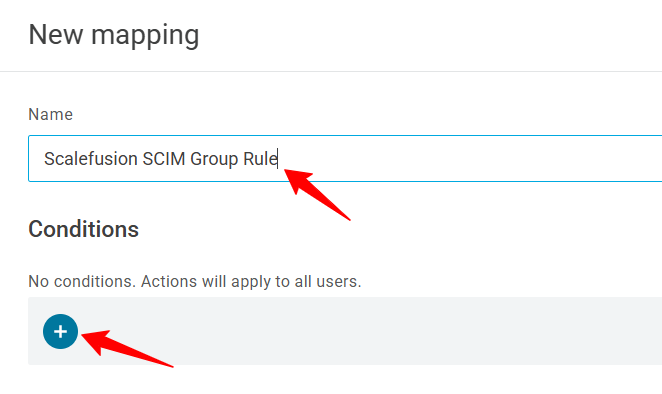
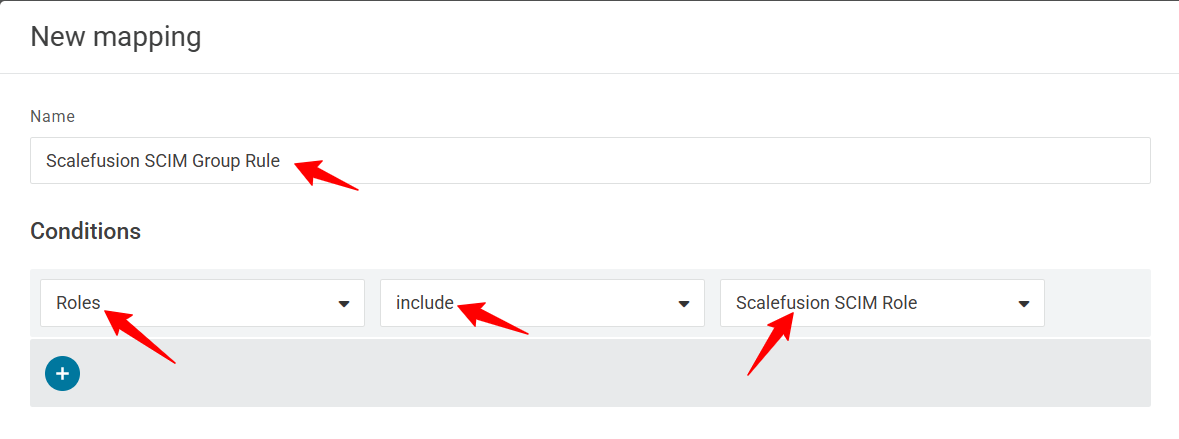
Enter a name for this rule.
Click the plus sign under Condition to add a condition in this rule.
Select Role from the dropdown list, select include, and select the Role that you created previously for this SCIM app.
Under Actions, search for group and select Set Groups in <your group’s name>.
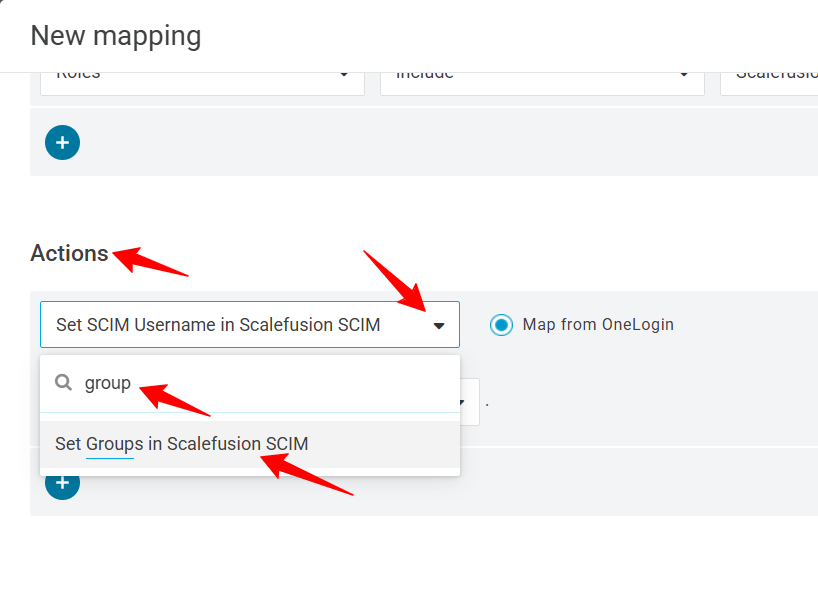
Next, select For each role with the value that matches .*
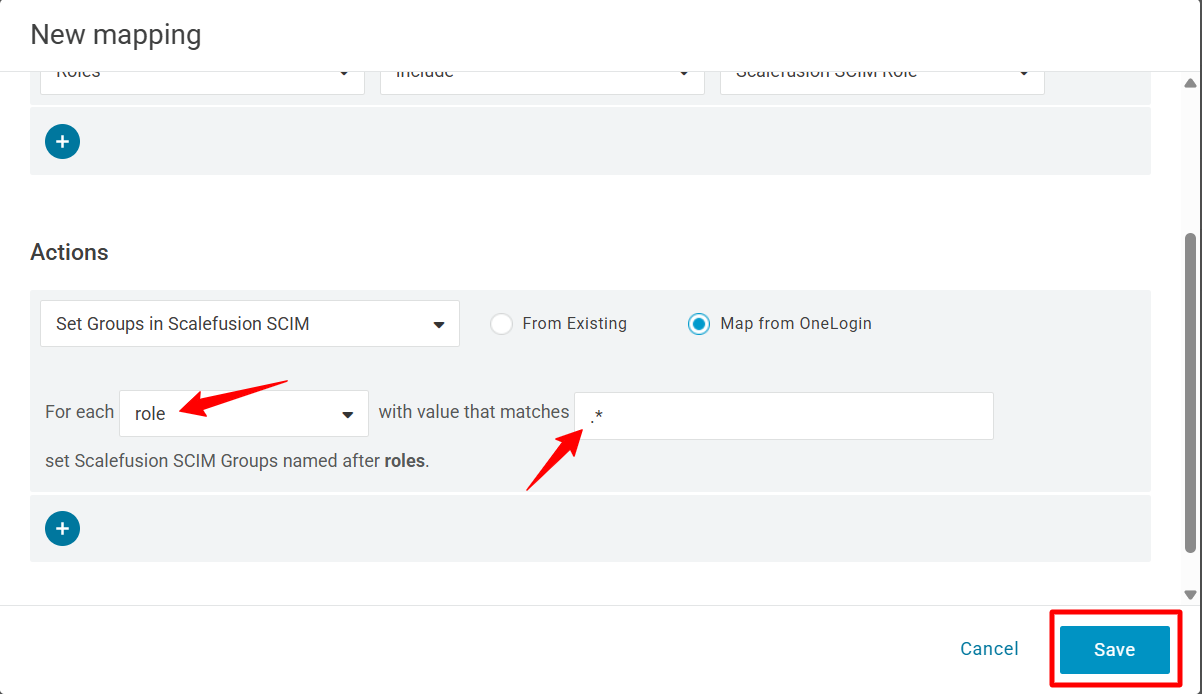
Click Save.
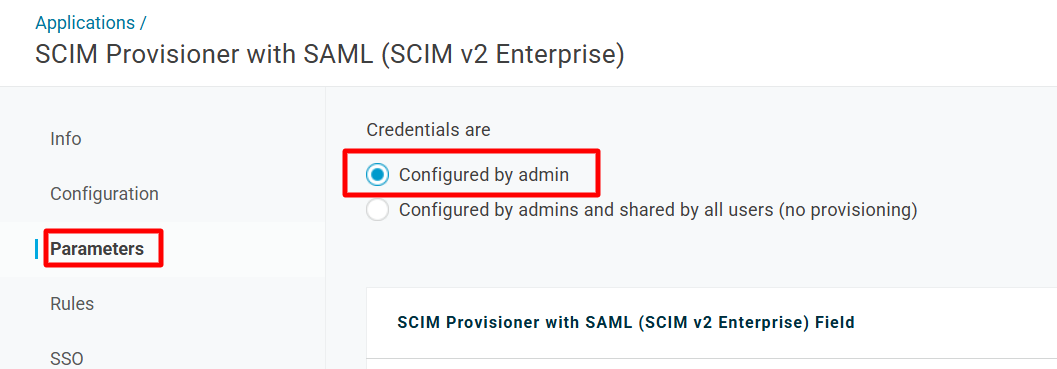
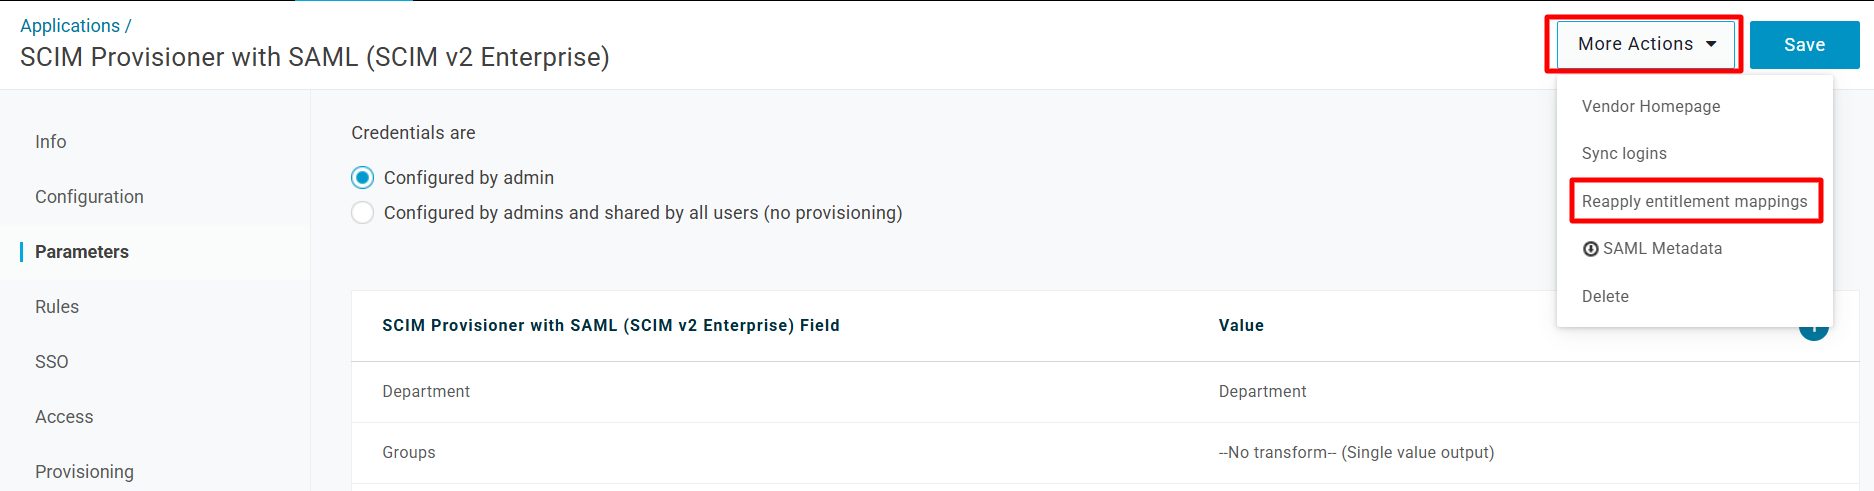
Next, go to Parameters and ensure that “Configured by Admin” is selected.
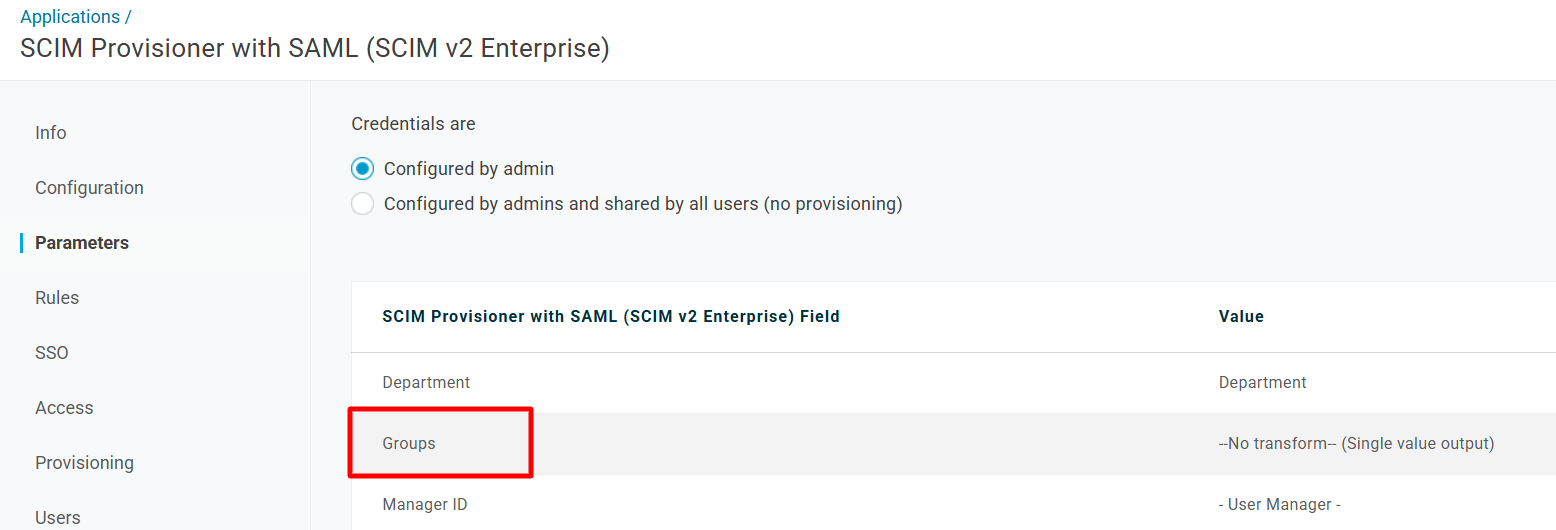
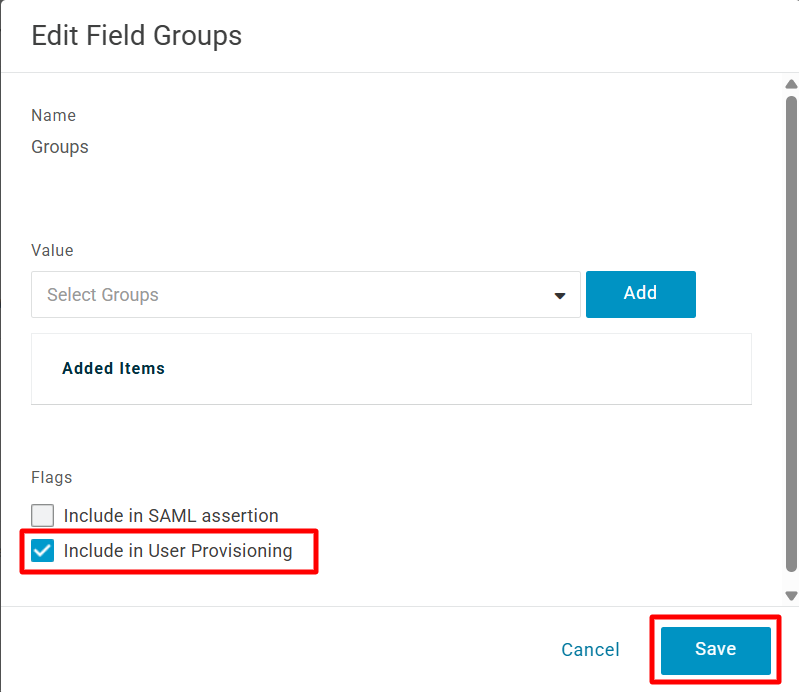
Go to Groups on this page.
Select “Include in User Provisioning” and click Save.
Click More Actions on the top right-hand side of the page and click “Reapply entitlement mappings”.
Once this is done, you will be able to see the Group synced to the Scalefusion dashboard.
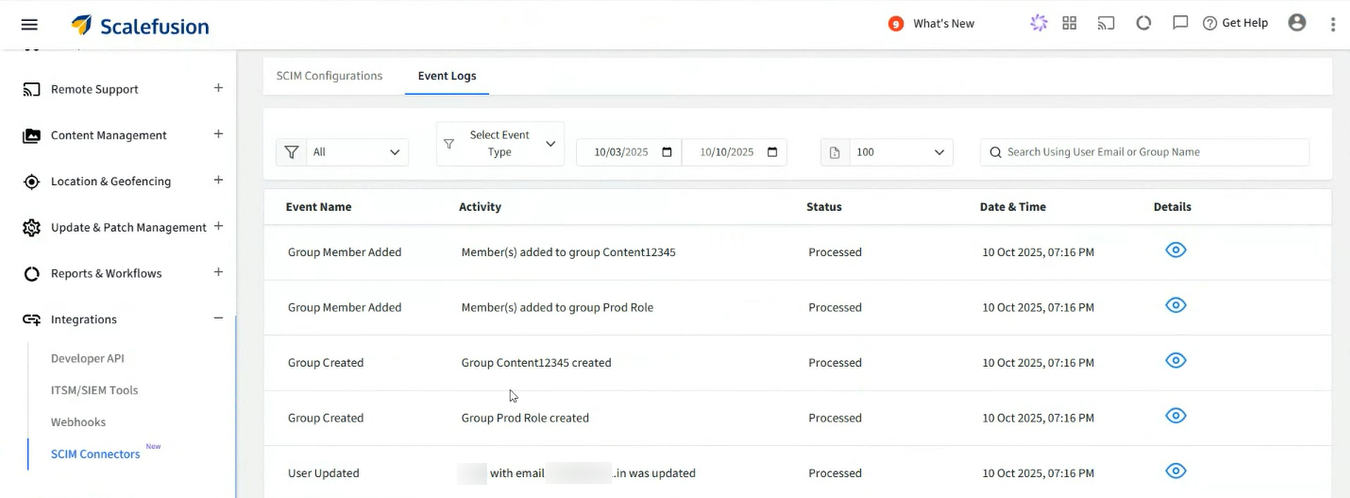
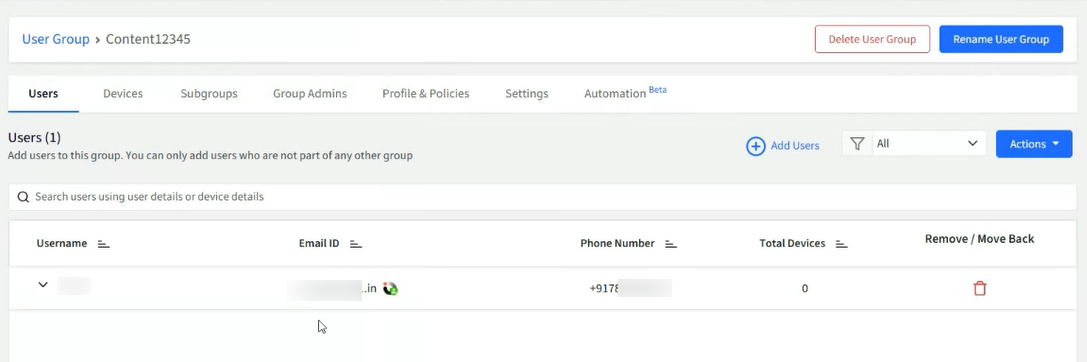
The synced group(s) will also be visible in the User Groups section on the Scalefusion dashboard.
Users who are part of this group will also be visible within the group.
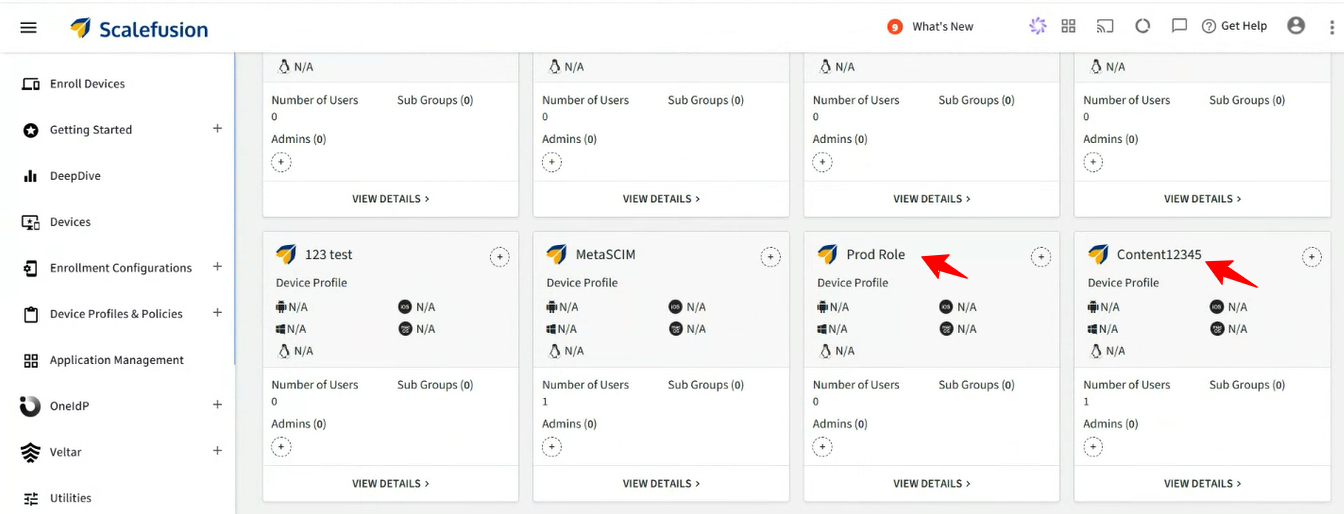
This completes the SCIM app configuration and mapping of users and groups to it. The group and its users will now sync to the Scalefusion dashboard. Once synced, the group and its users will appear in the Scalefusion dashboard.
If individual users are provisioned, they will be listed under the User Enrollment section.
When a group is provisioned, both the group and its associated users will appear under the User Groups section. The associated users will also be listed under the User Enrollment section.
Important Points to Note
The SCIM JSON payload must accurately map your identity attributes (email, phone, name) for Scalefusion to interpret correctly.
Enabling only required provisioning actions (create, update, delete) reduces unintended side effects.
Always test with one user first before bulk provisioning.
If you make any changes to the existing application, you need to reapply the mappings by going to More Actions > Reapply entitlement mappings.