This guide walks you through setting up the SCIM integration with Scalefusion and provisioning users and groups via Microsoft Entra.
Pre-requisite
SCIM Connector should be configured on Scalefusion Dashboard.
For automatic group provisioning admin should require Entra ID P1 / P2 license.
Step 1: Create SCIM Application & Basic Settings
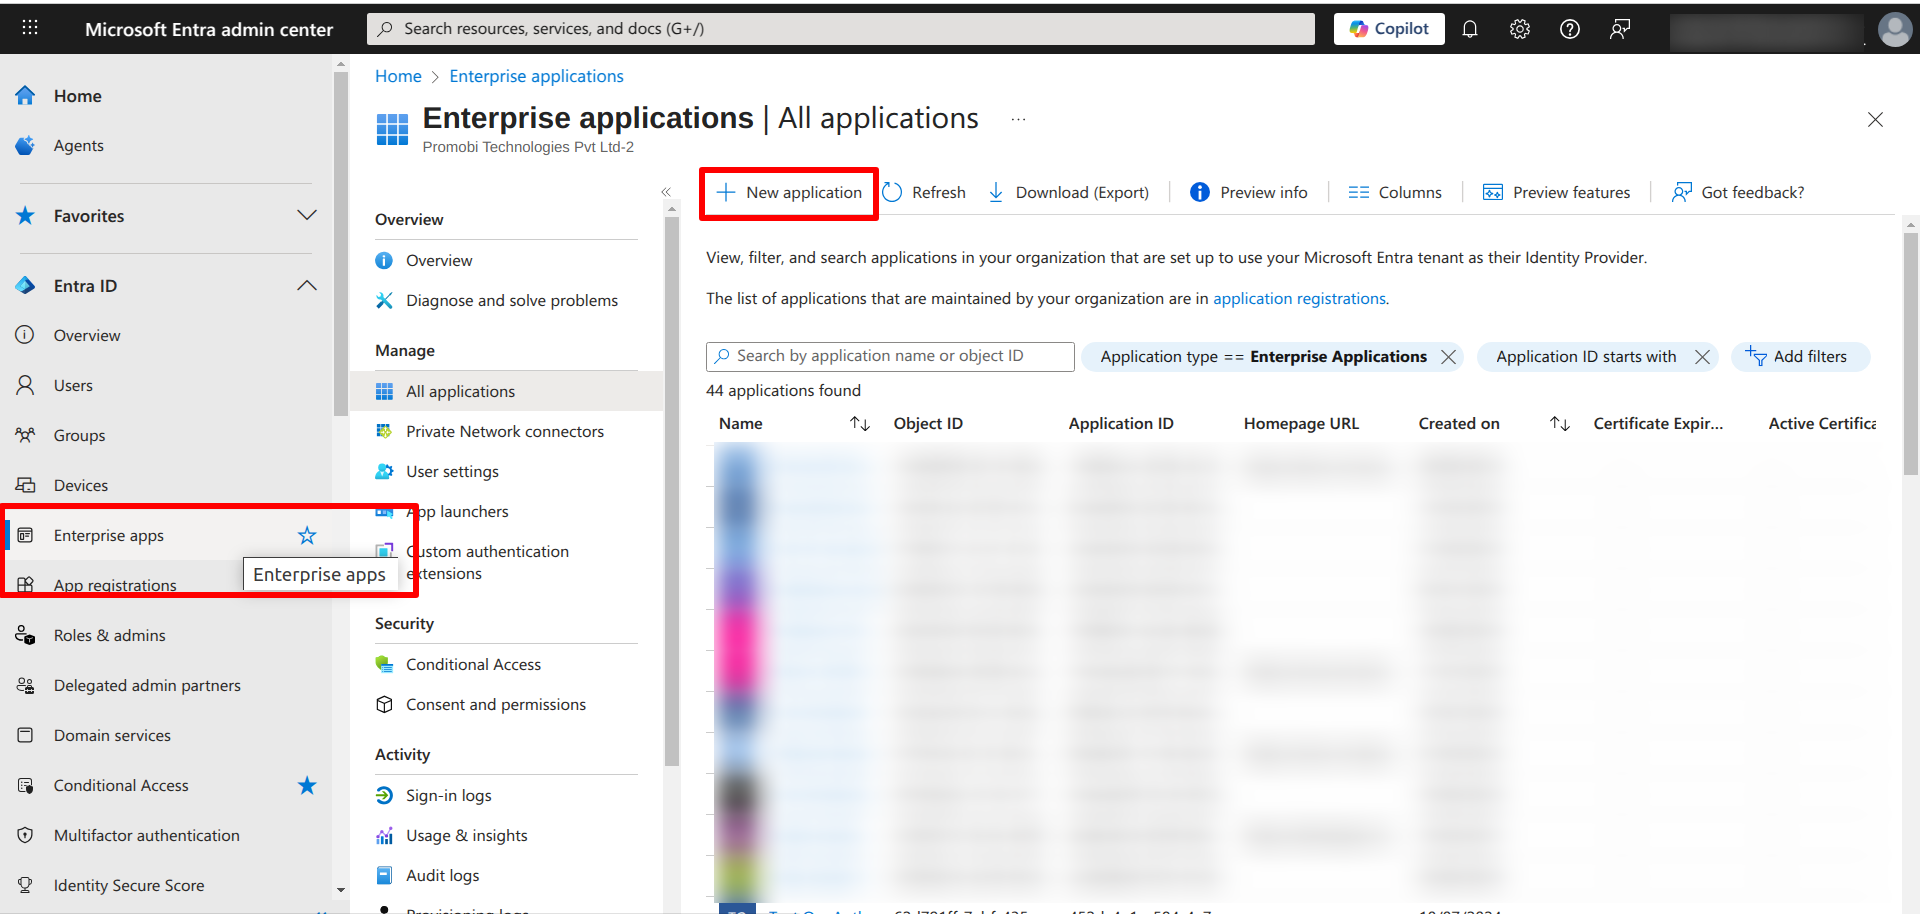
In Microsoft Entra admin console, navigate to Enterprise apps and click on New Application to add a new application.
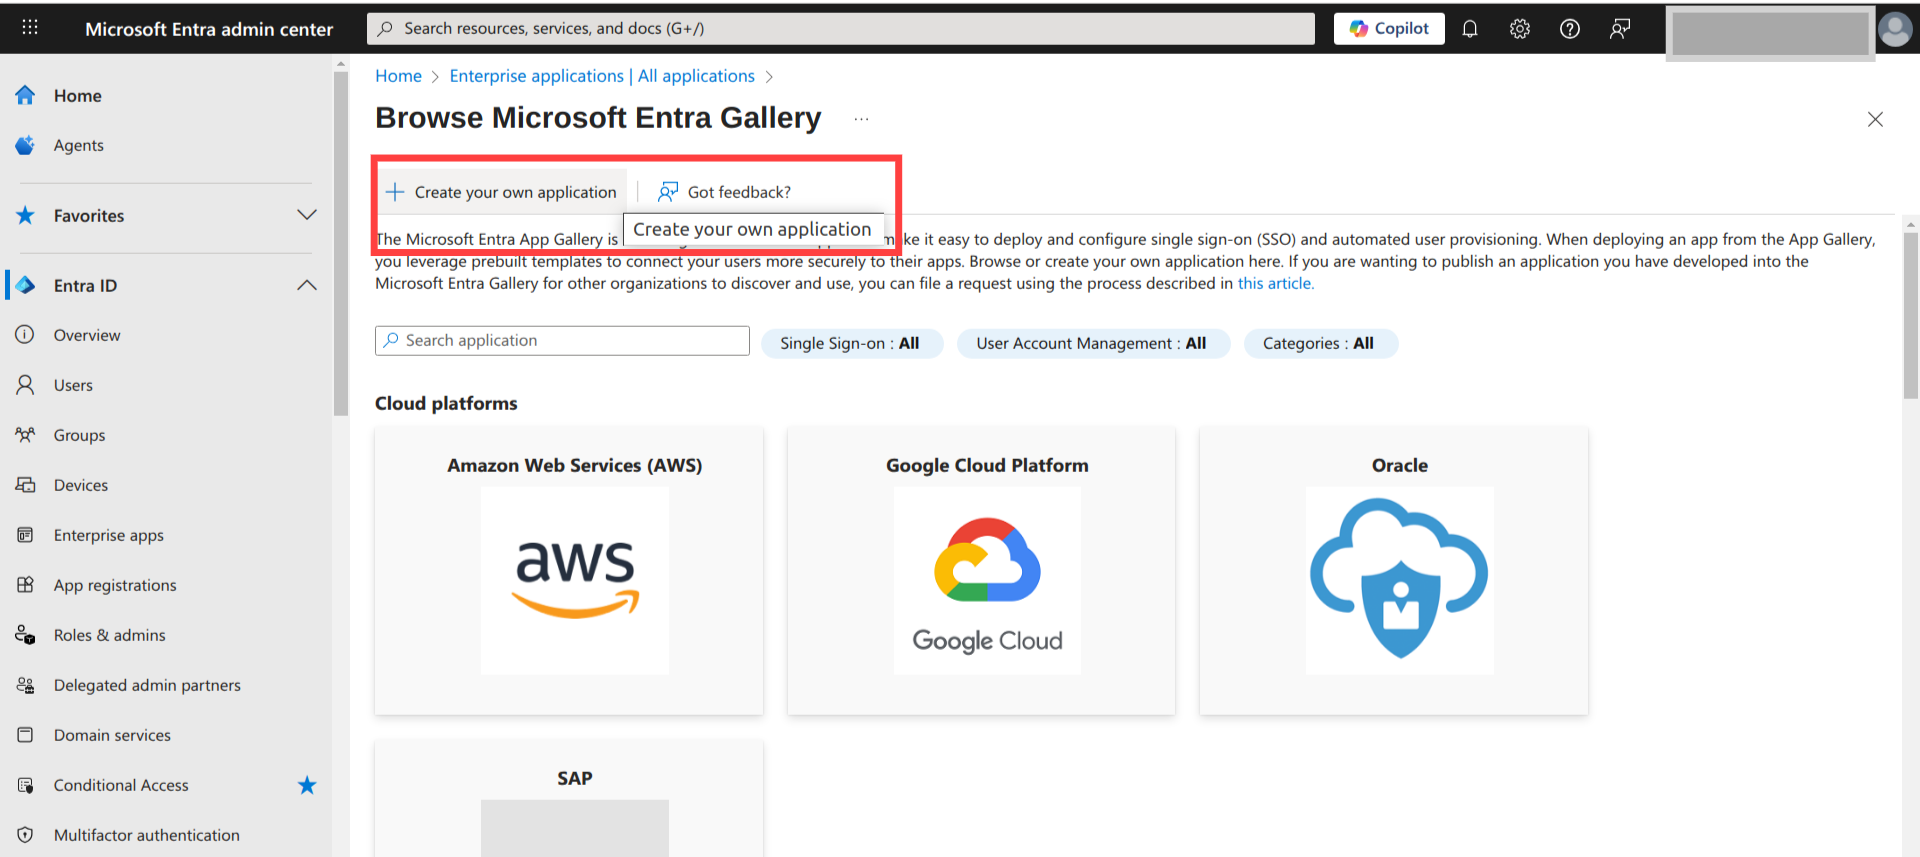
Next, click on Create your own application
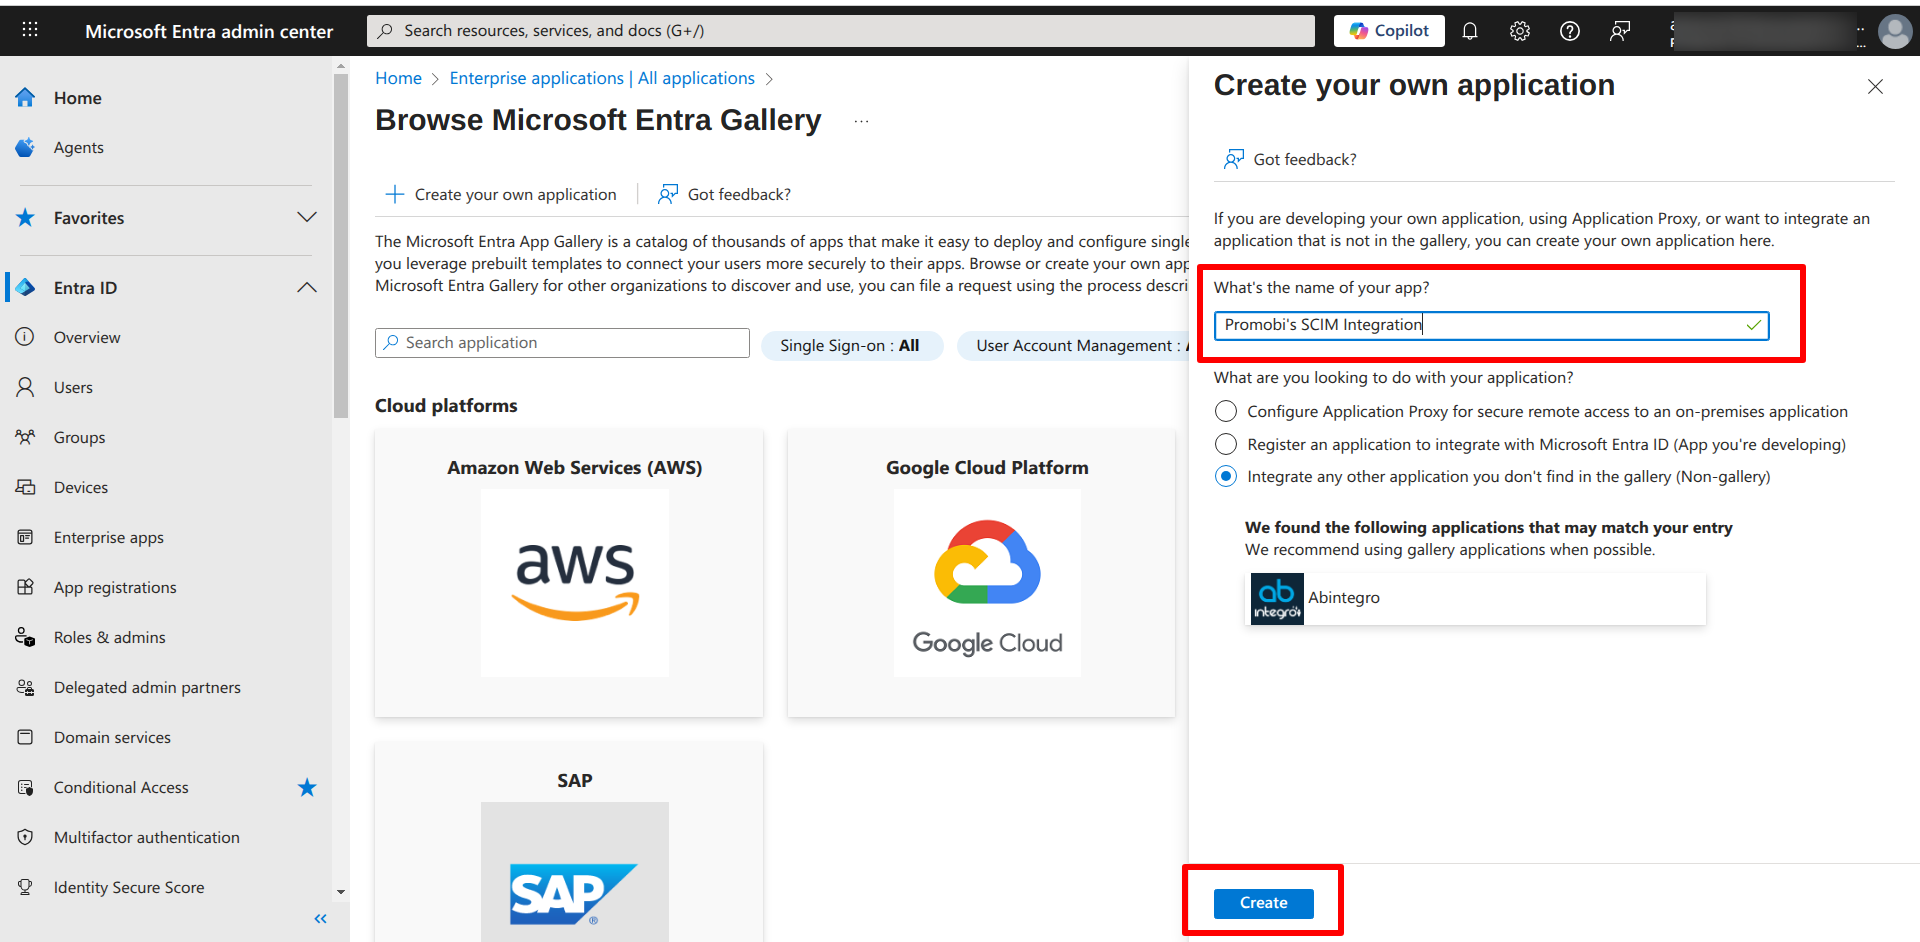
Provide a name for the application and click on Create
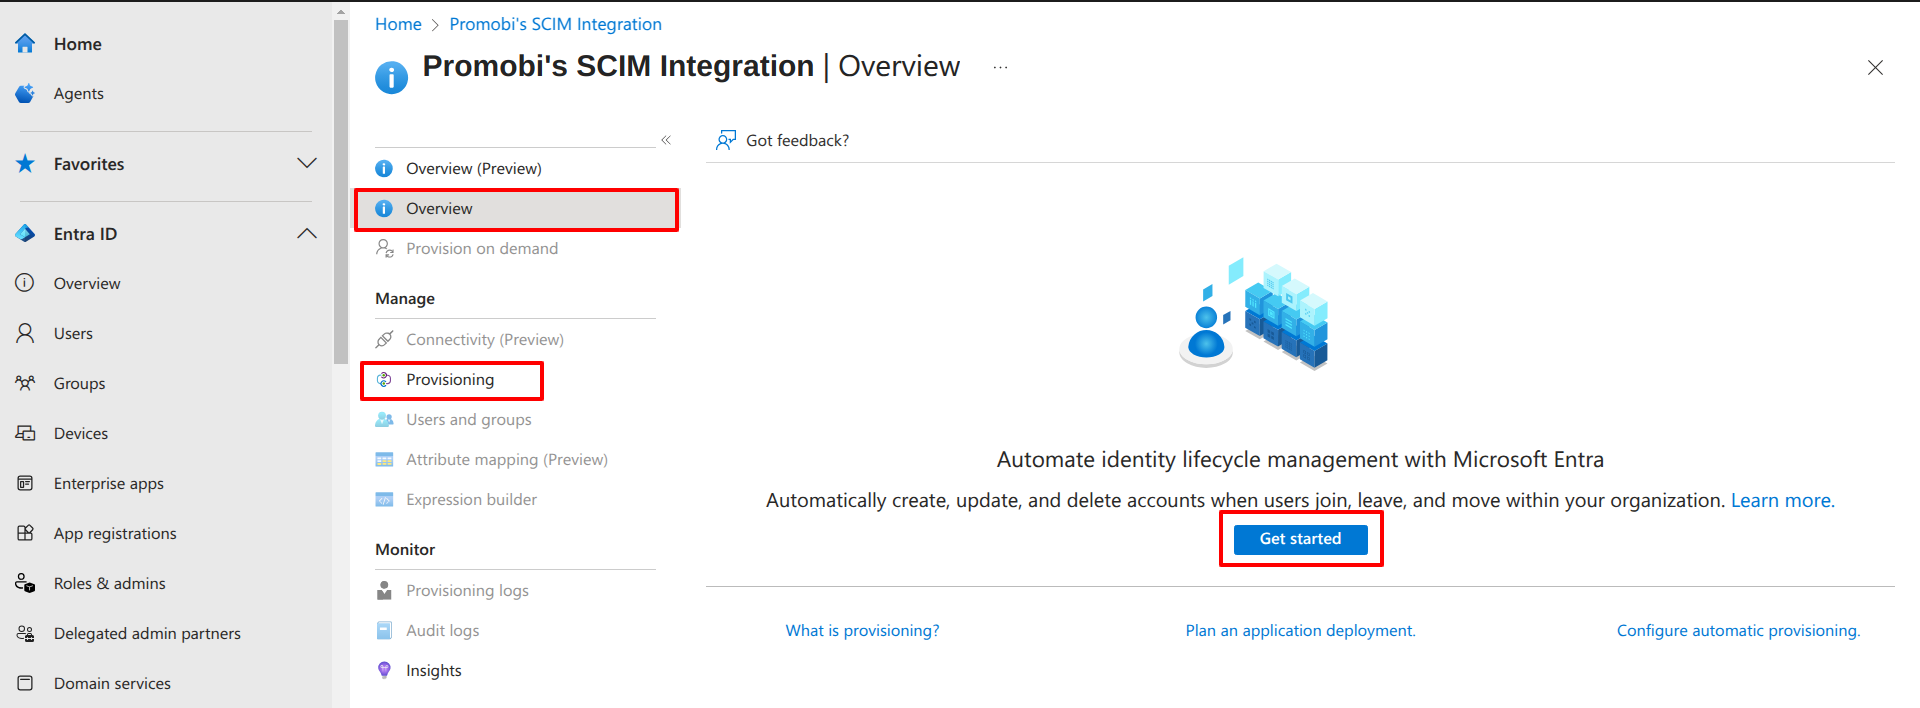
In the application’s Provisioning tab, click on Overview and click on Get Started
In the Provisioning Mode, select Automatic from the drop-down
Enter the Base URL / Tenant URL (Copy SCIM API Endpoint from Scalefusion Dashboard) for your SCIM endpoint.
In the Secret Token field, paste the token (Bearer Token from Scalefusion Dashboard).
Click on Test Connection to verify the Base URL + Token are valid
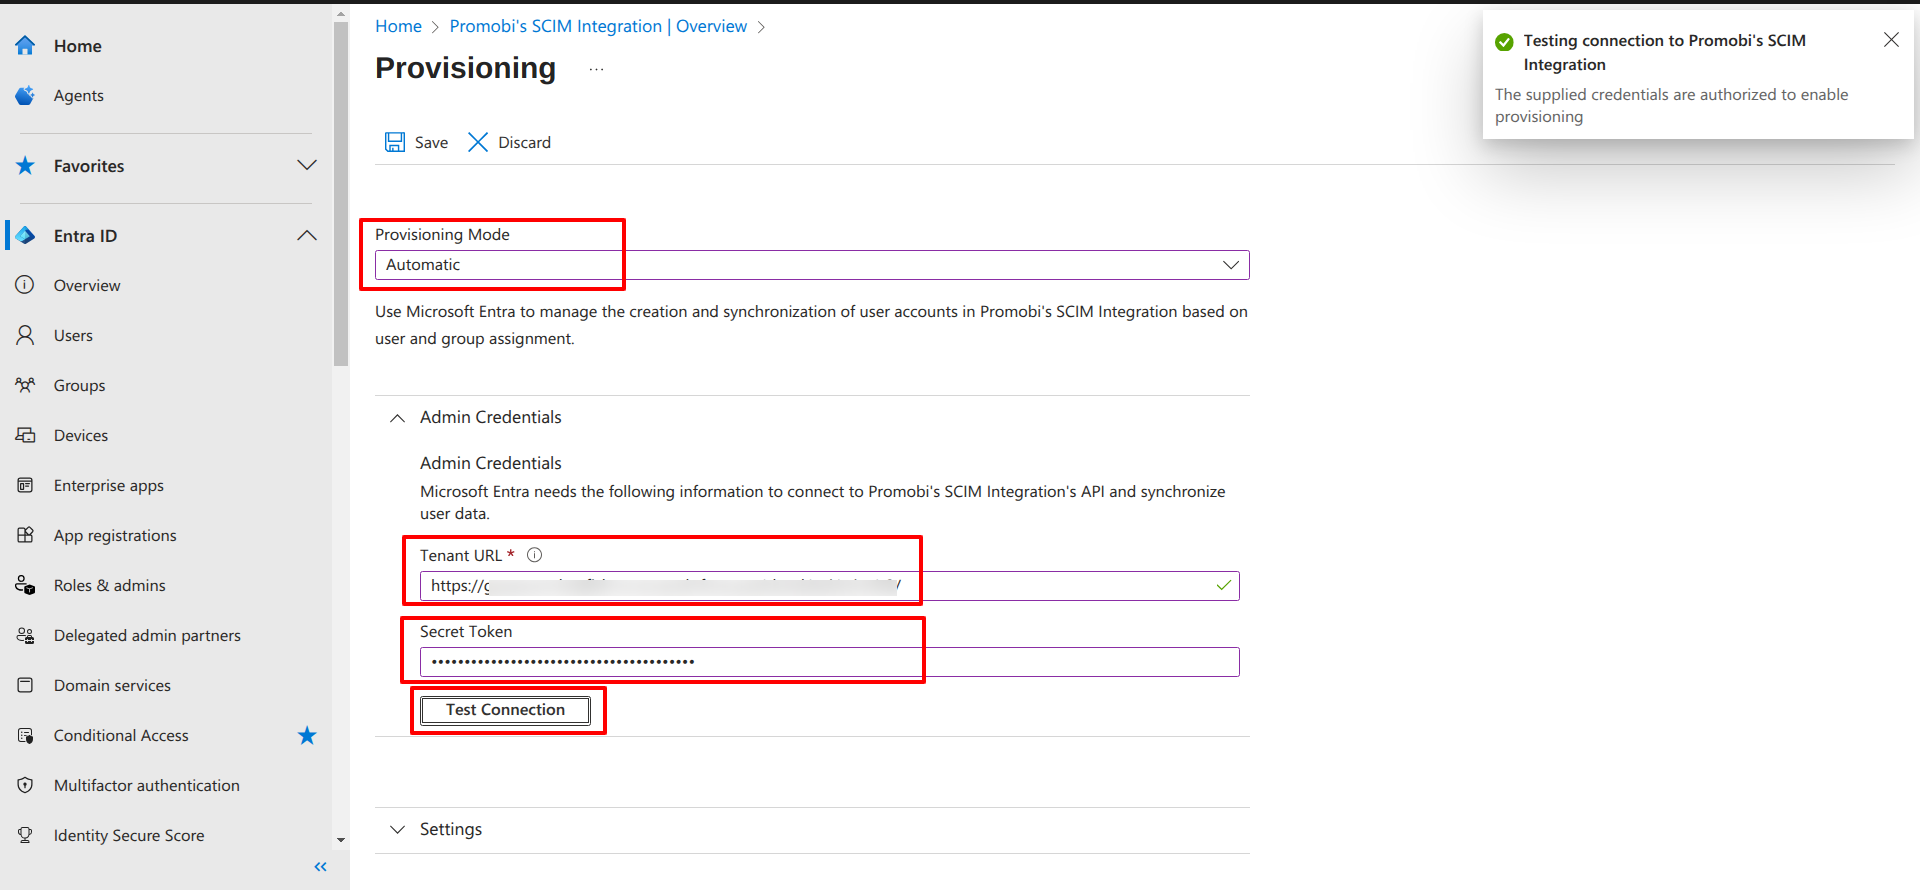
Once authorized, click Save on top
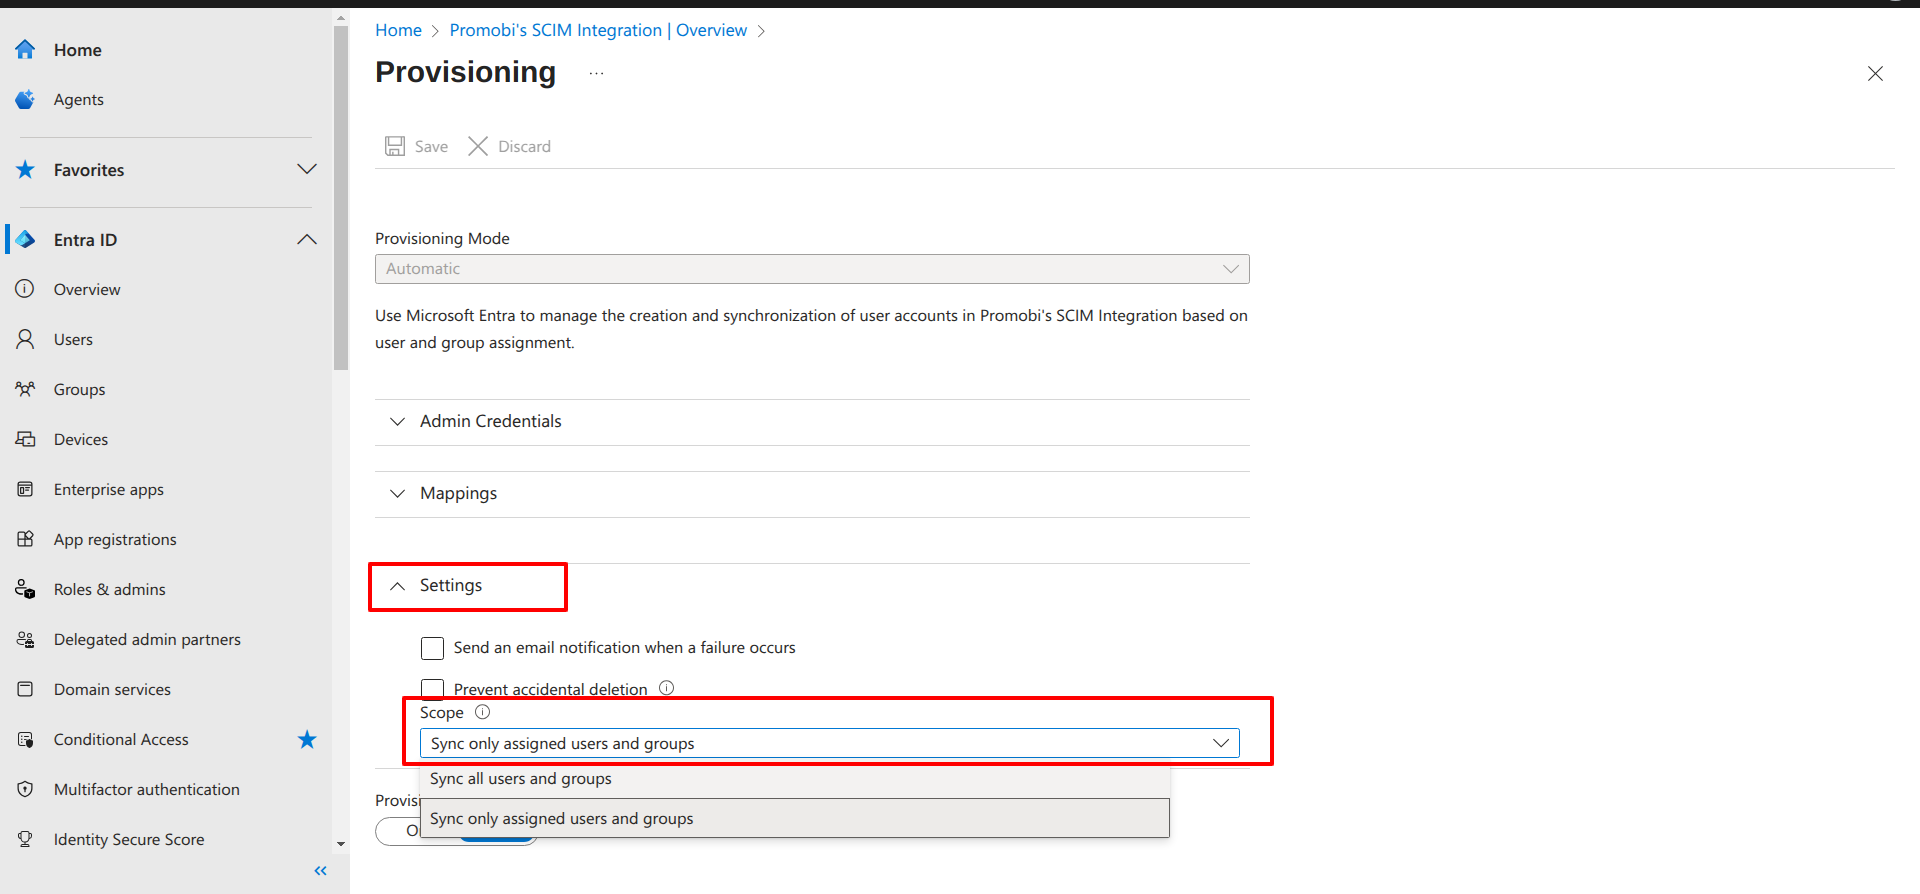
Now refresh the page
Under Settings > Scope, select Sync only assigned users & groups
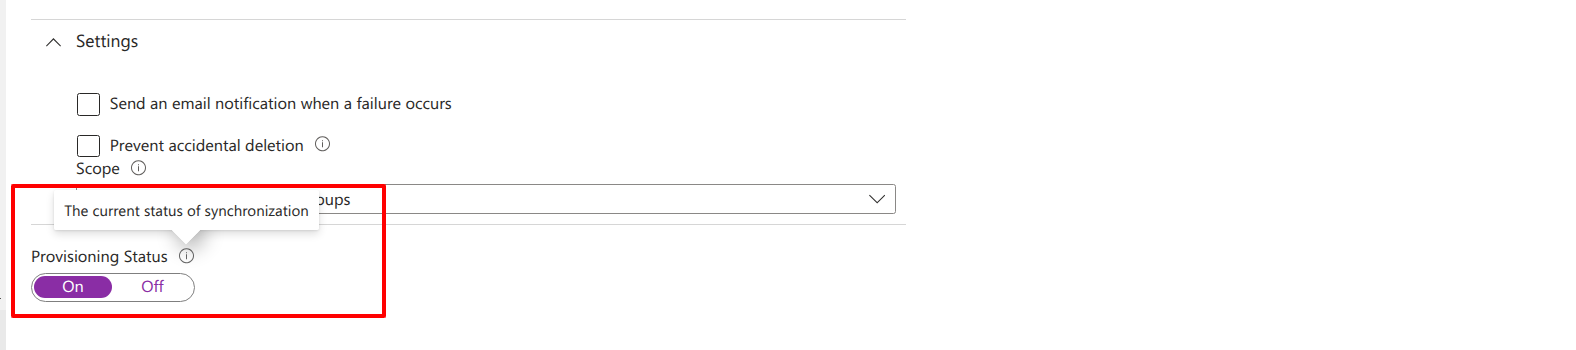
Set Provisioning Status to On
Step 2: Add Users to the Application
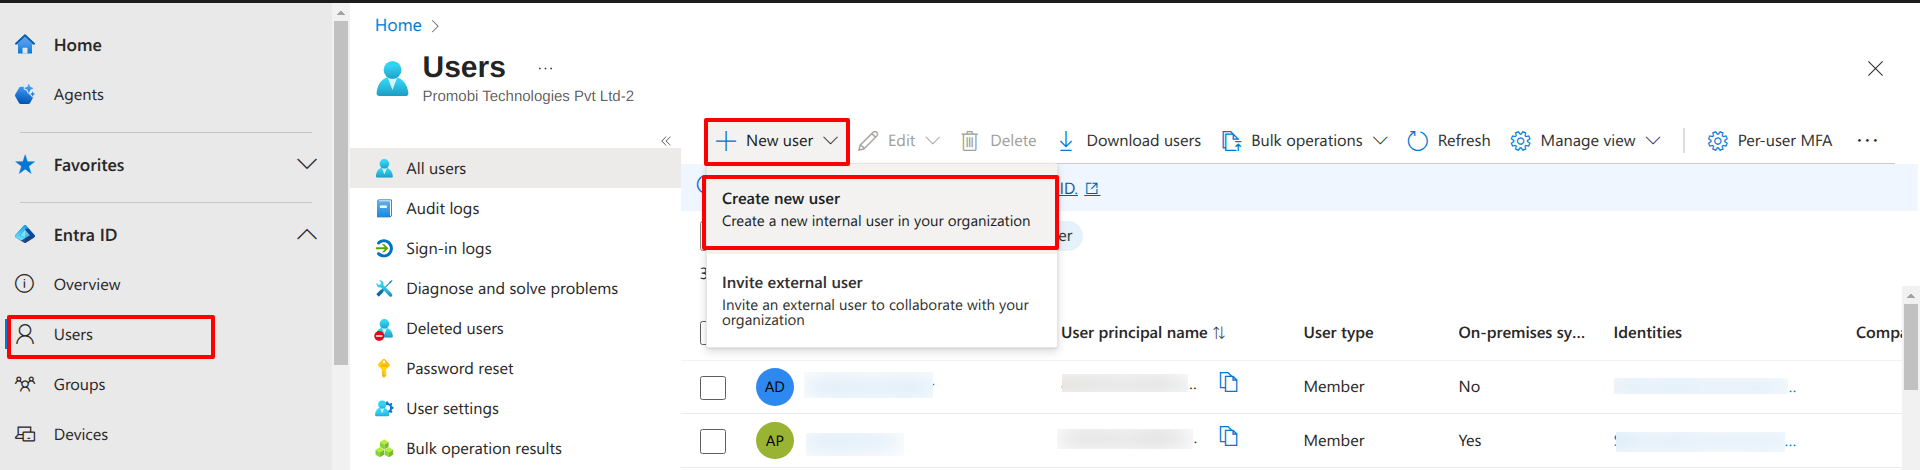
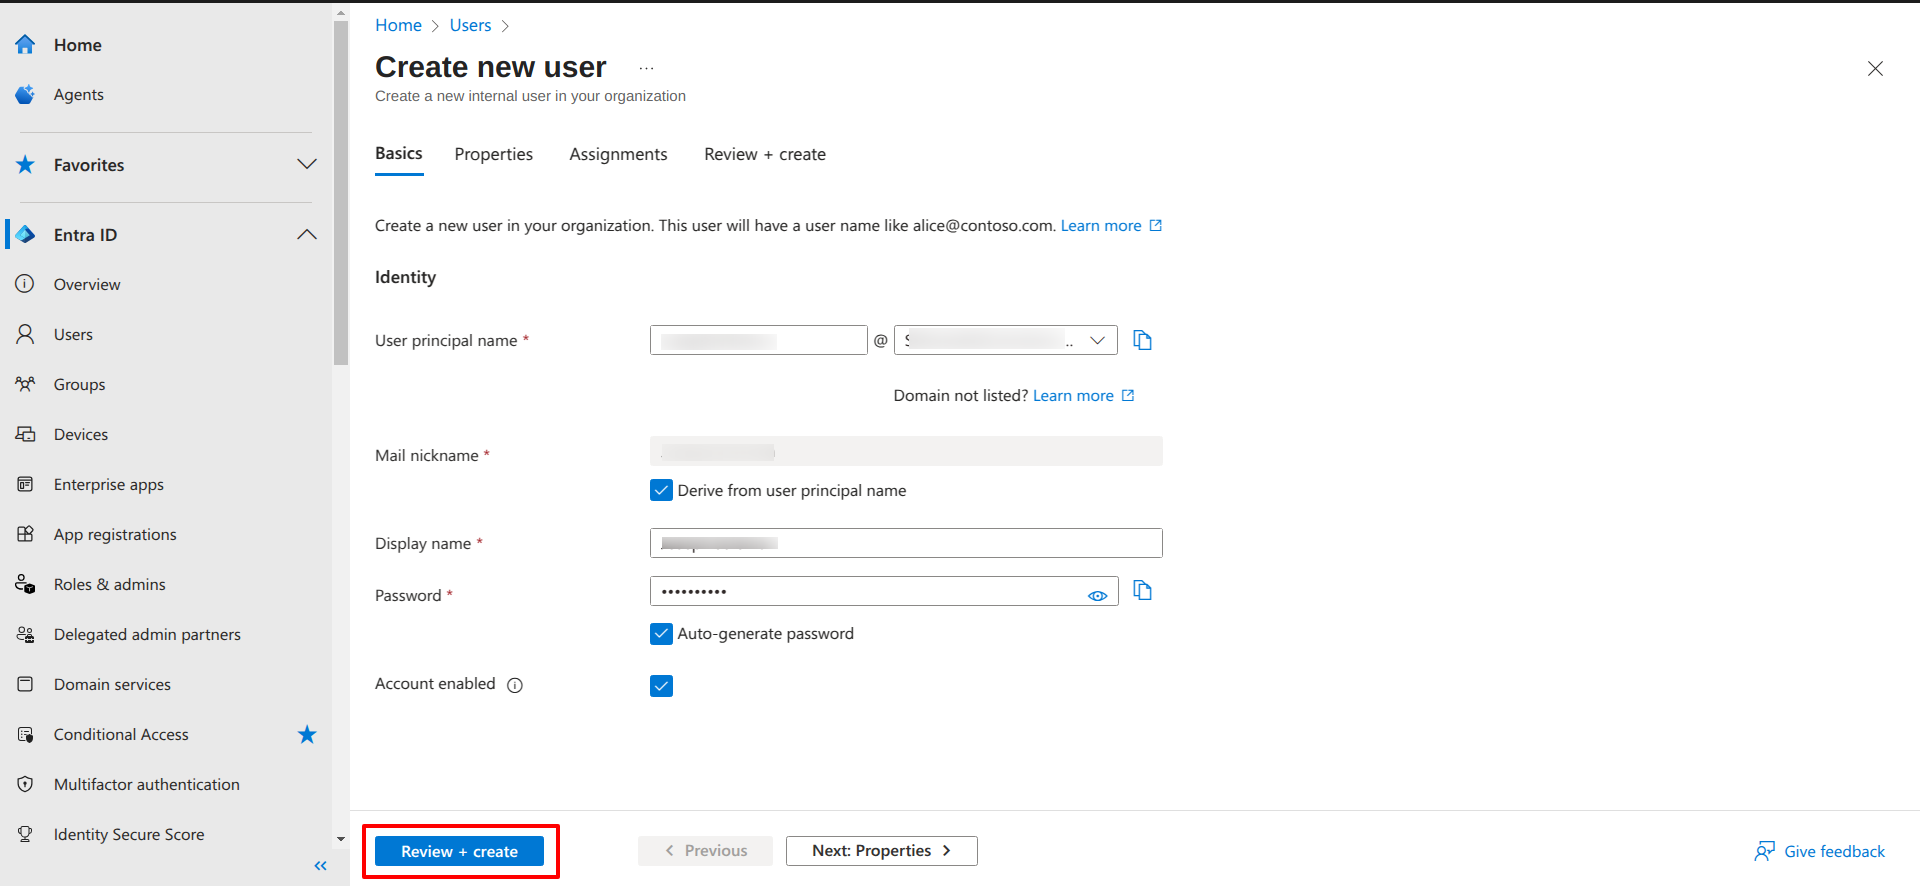
In Microsoft Entra console, navigate to Users > New User > Create New User
Fill in the user details and click on Review + create.
Review the details and click on Create
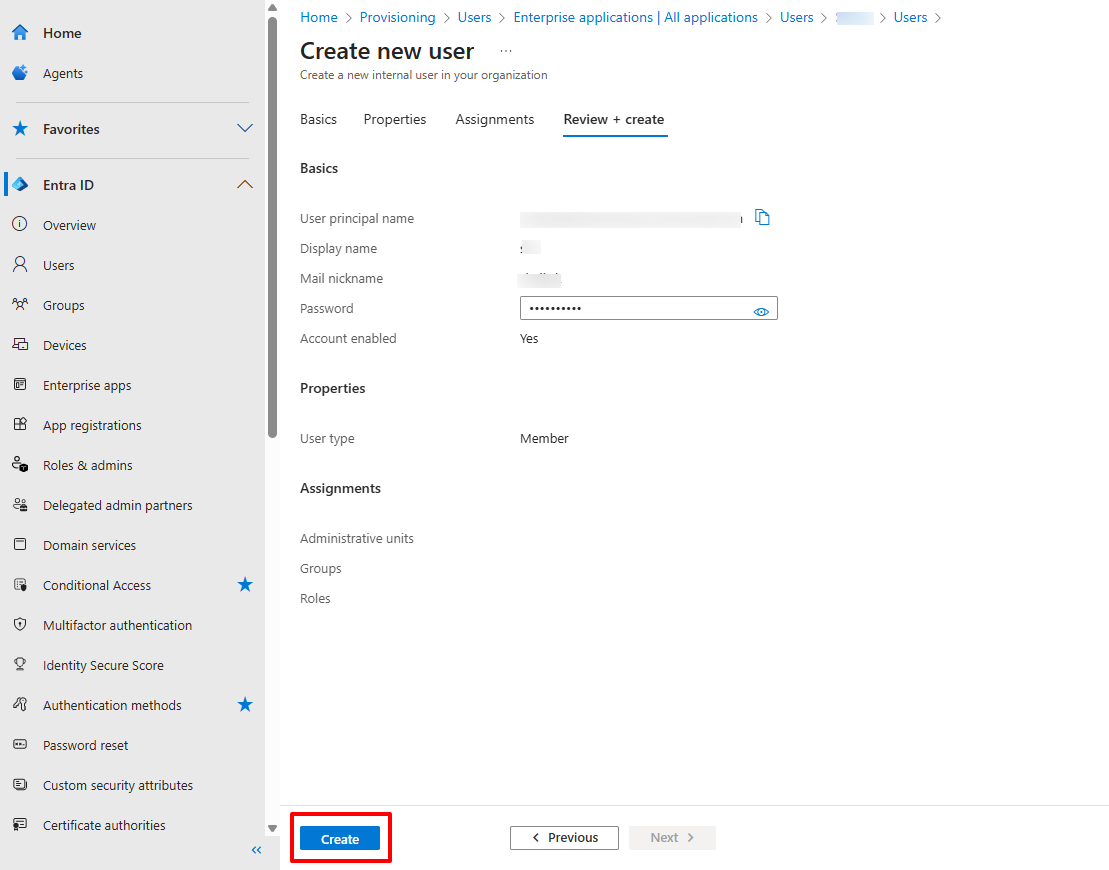
The user will be created and displayed in Users section.
Step 3: Add Groups & Assign Users to Group
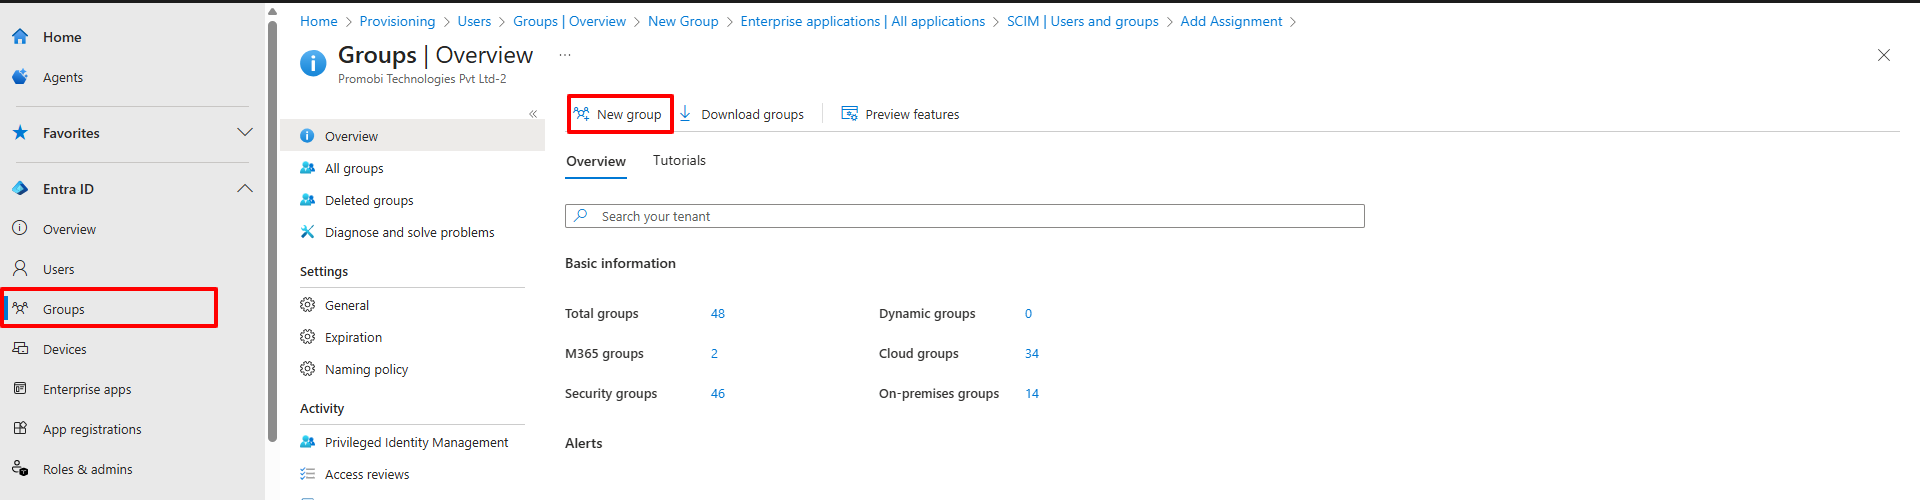
Navigate to Groups in your directory. Click on New Group
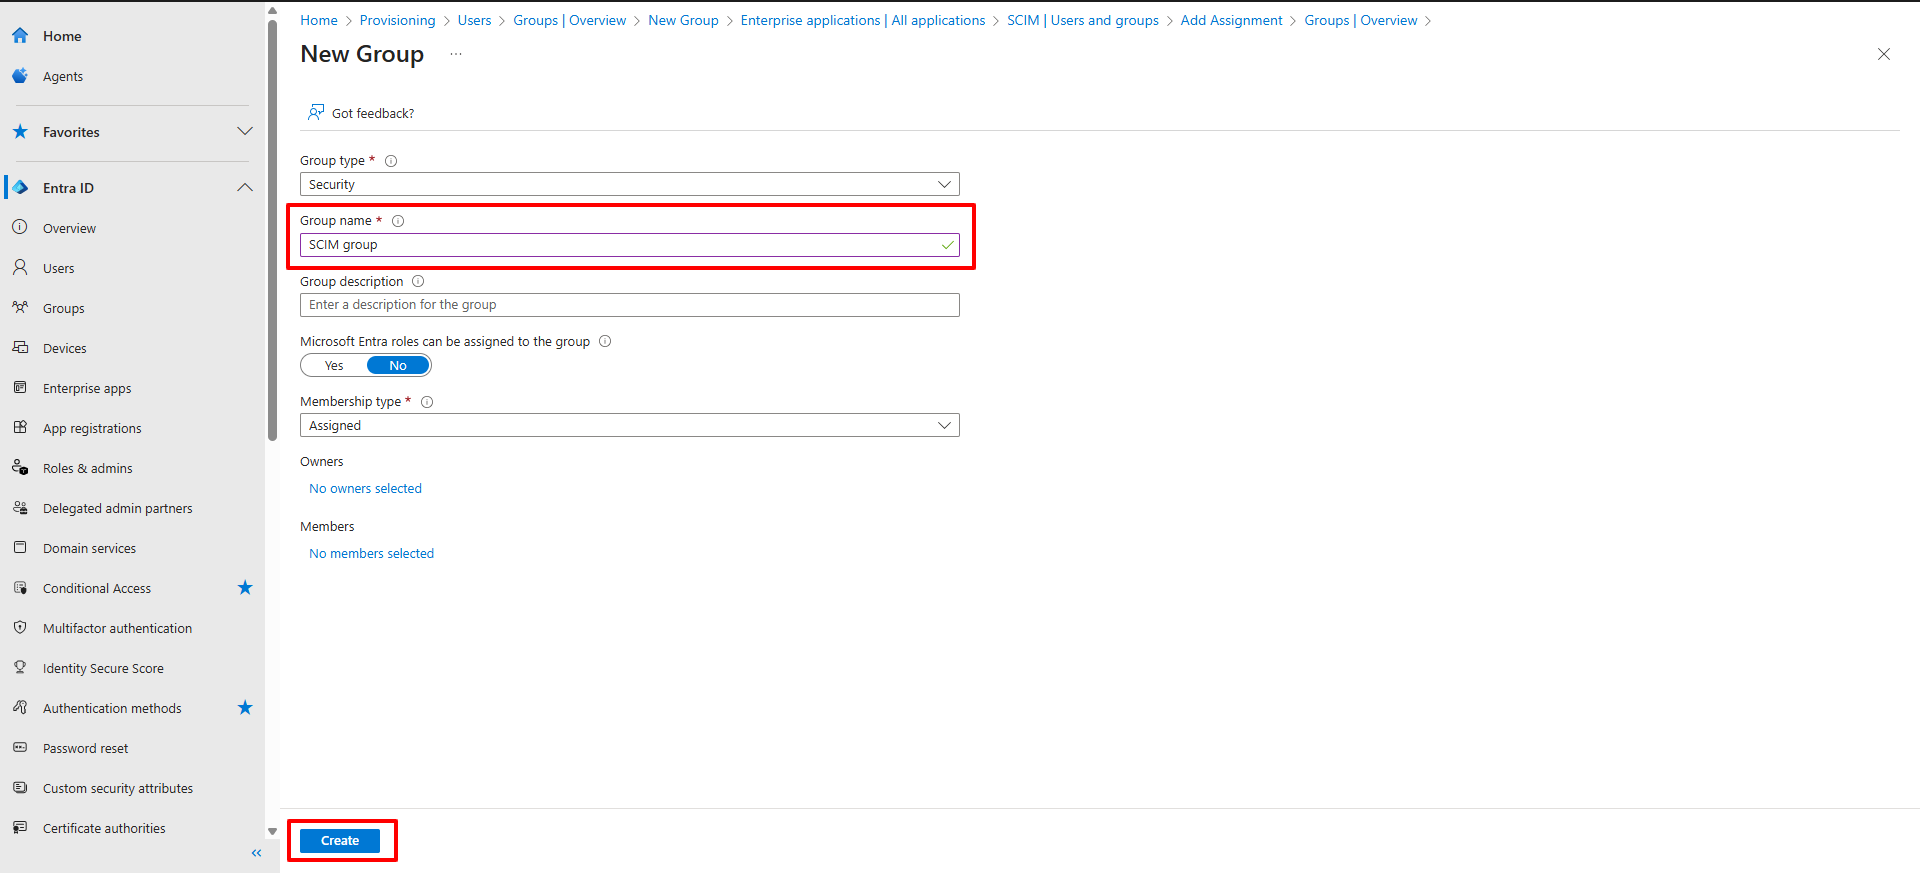
Provide a name for the group and click on Create.
Add the user(s) you created earlier, into this group. To do so,
Navigate to Users and search for the user you have created (in Step #2 above)
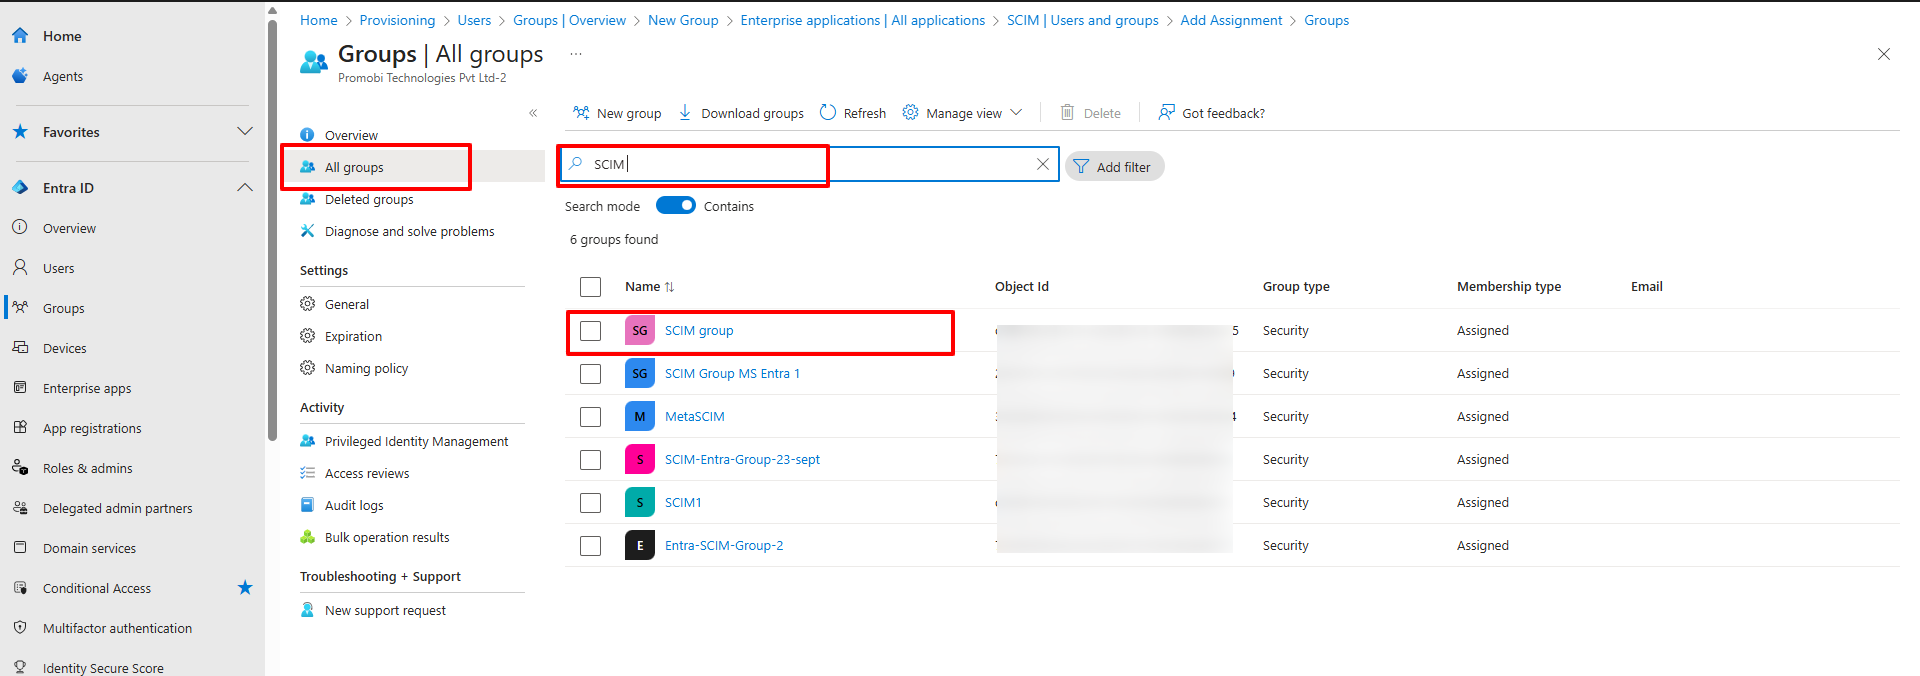
In Groups > All Groups, search for the group in which you have to add user(s). Click on the group name. This will open the group page.
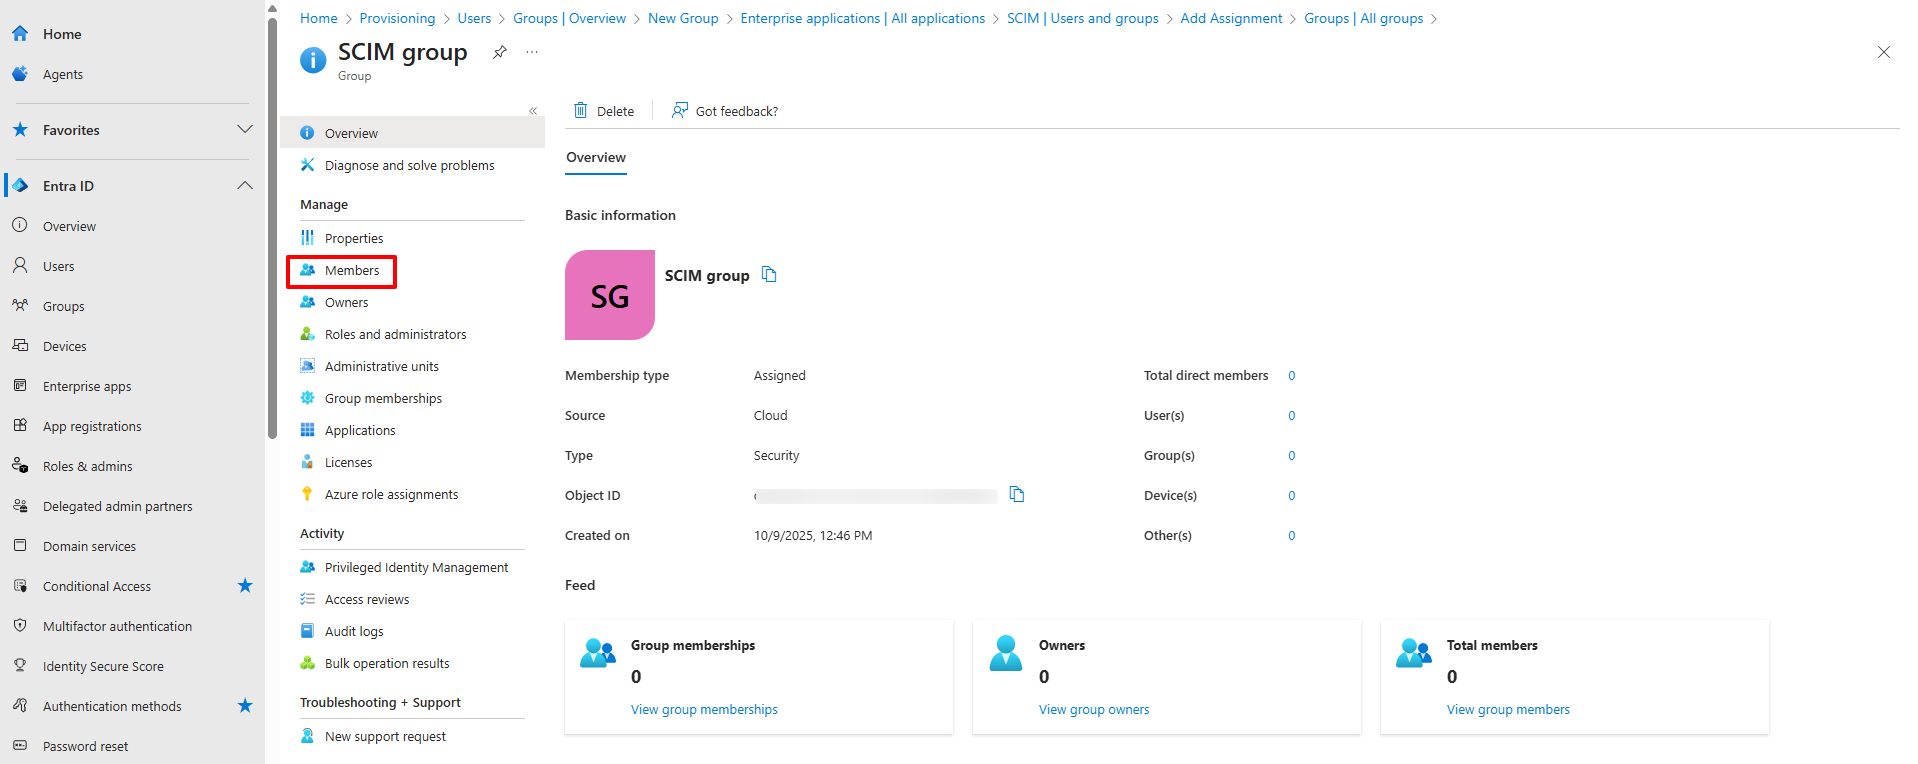
On the group page, click on Members in the left menu
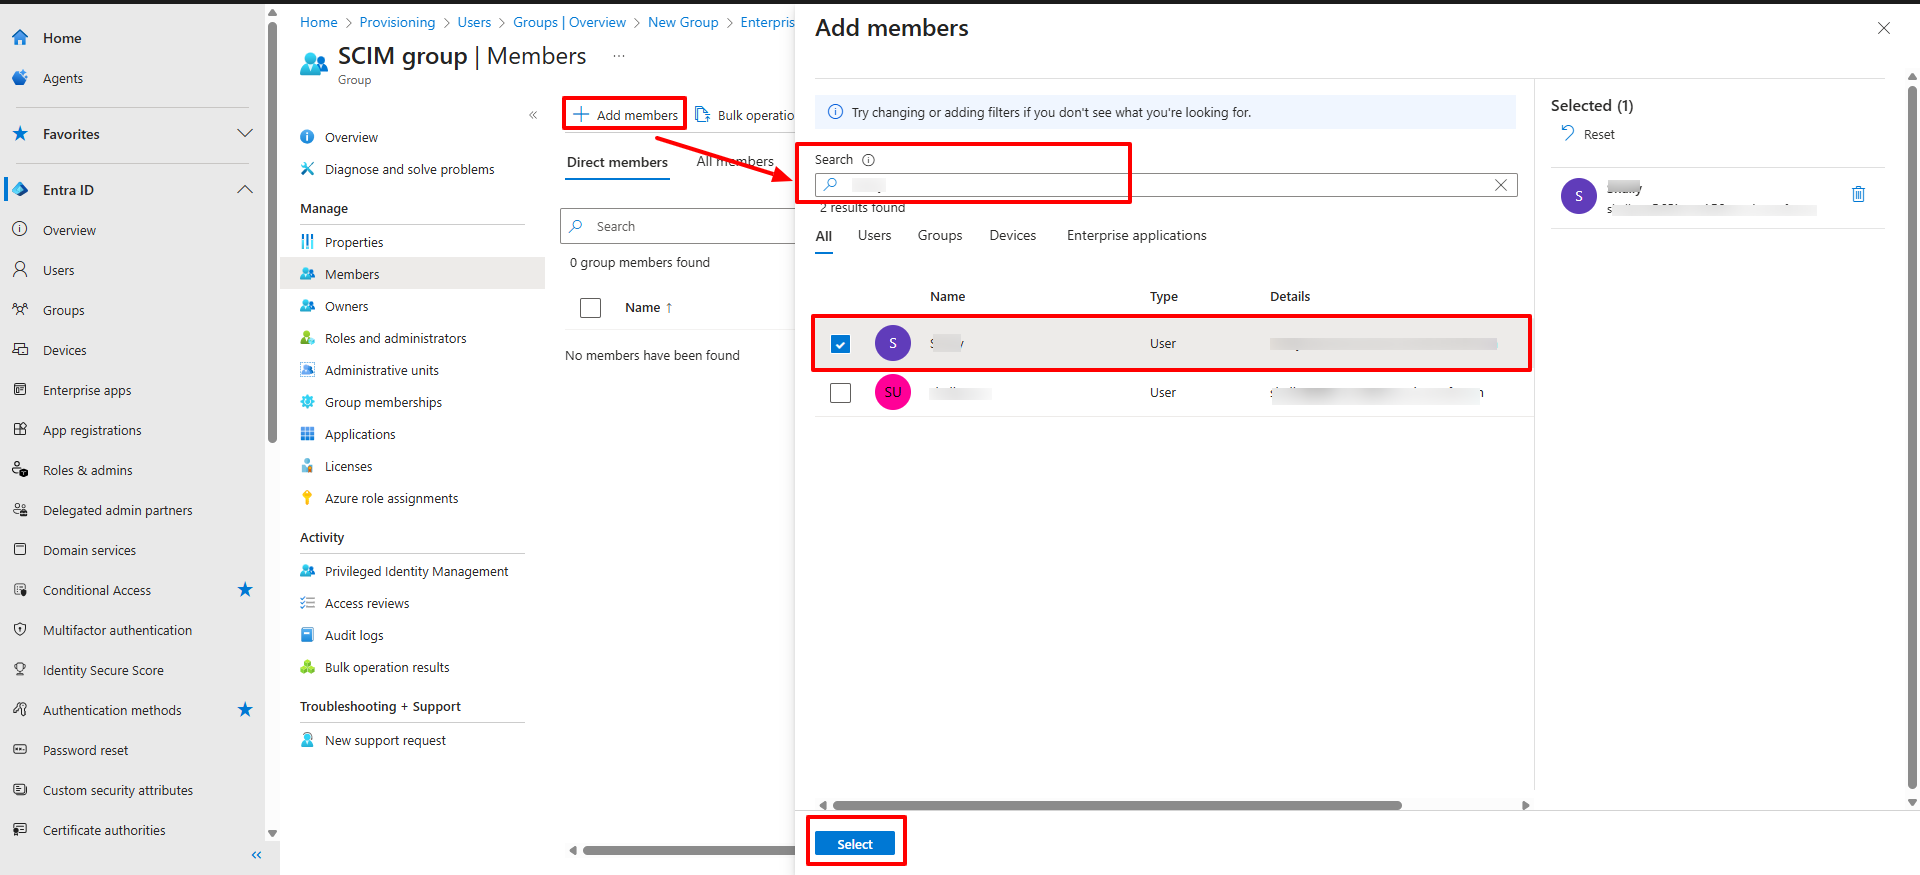
Click on Add Members. In the right side panel search for the user you want to add.
Select the user and click on Select button at the bottom
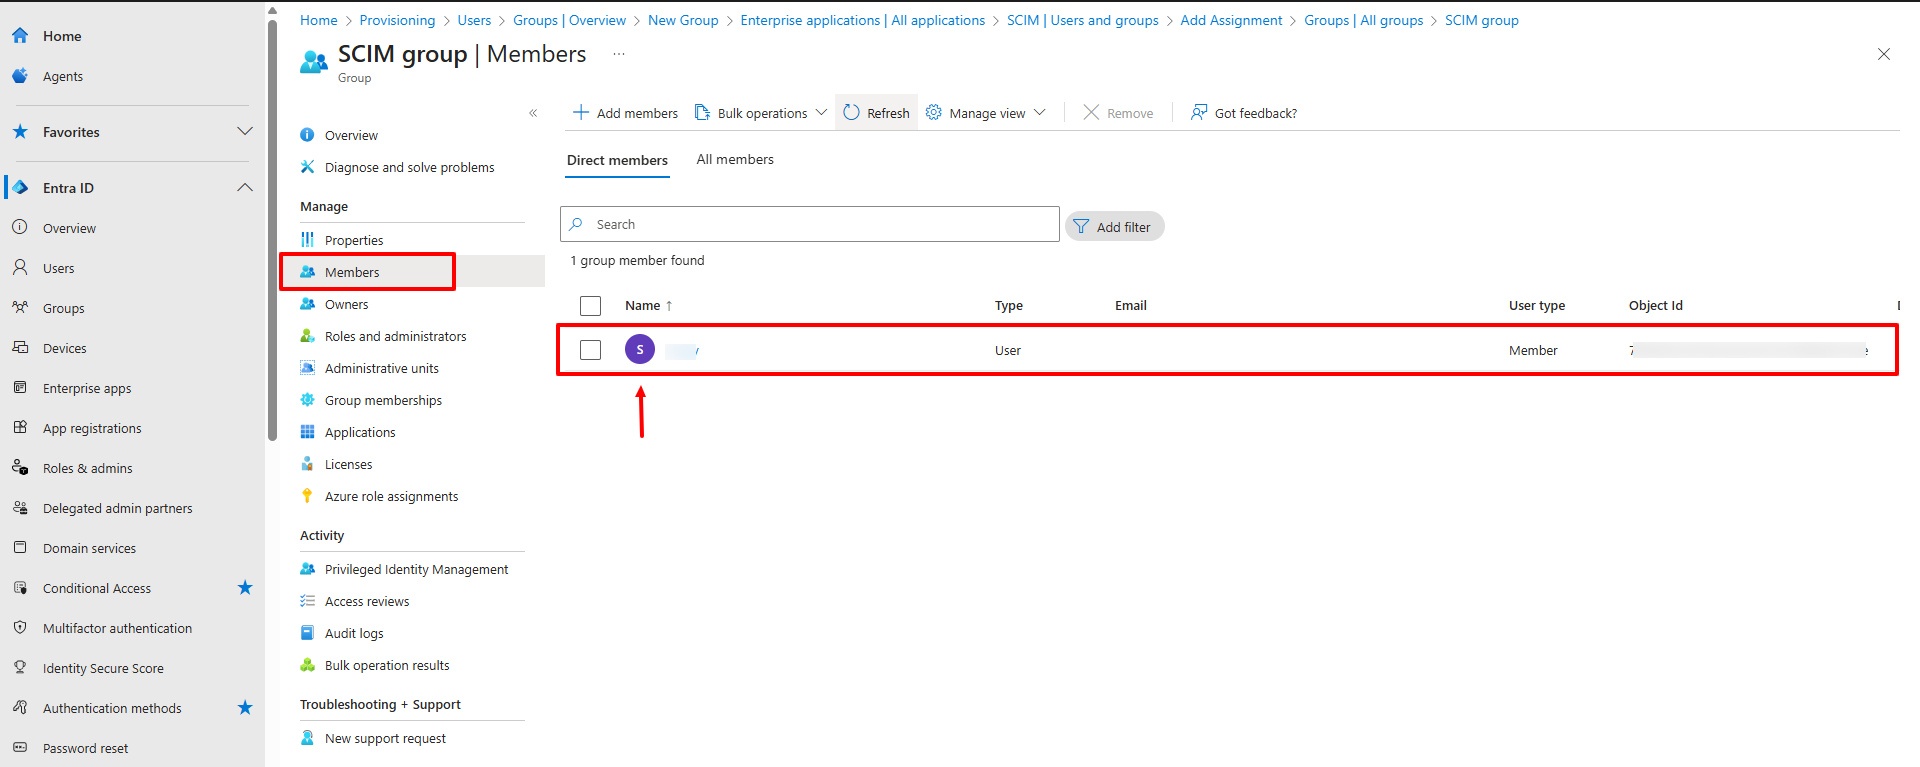
The user will be listed in the Members section under the group page.
Step 4: Assign Group to the SCIM Application
Once you’ve set up the group membership, the next step is to assign the group to your SCIM application. This ensures the group is included in the provisioning scope. To assign a group to the SCIM application:
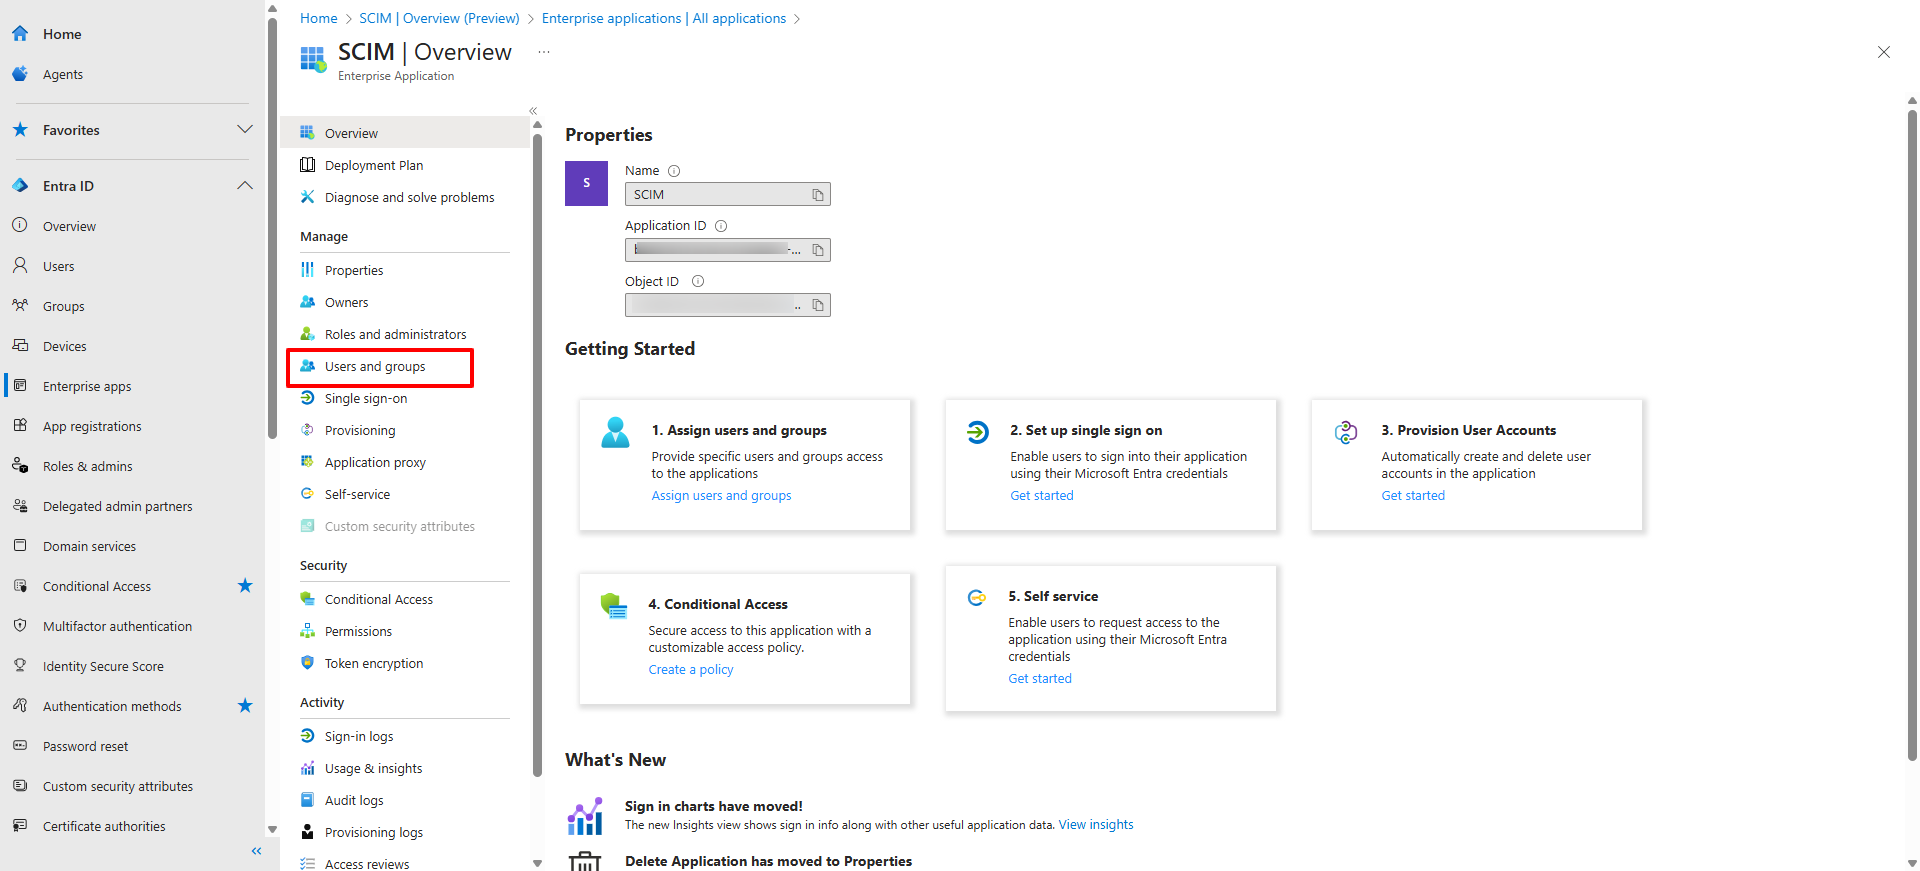
In the admin console, navigate to Enterprise Apps from the left-hand menu and search for your SCIM application.
Select the app, then go to Users & Groups.
Click on Add User/Group to open the Add Assignment page.
Click on None Selected to open the selection panel.
On the right panel, search for the group you want to assign.
Select the group and then click Select at the bottom of the panel.
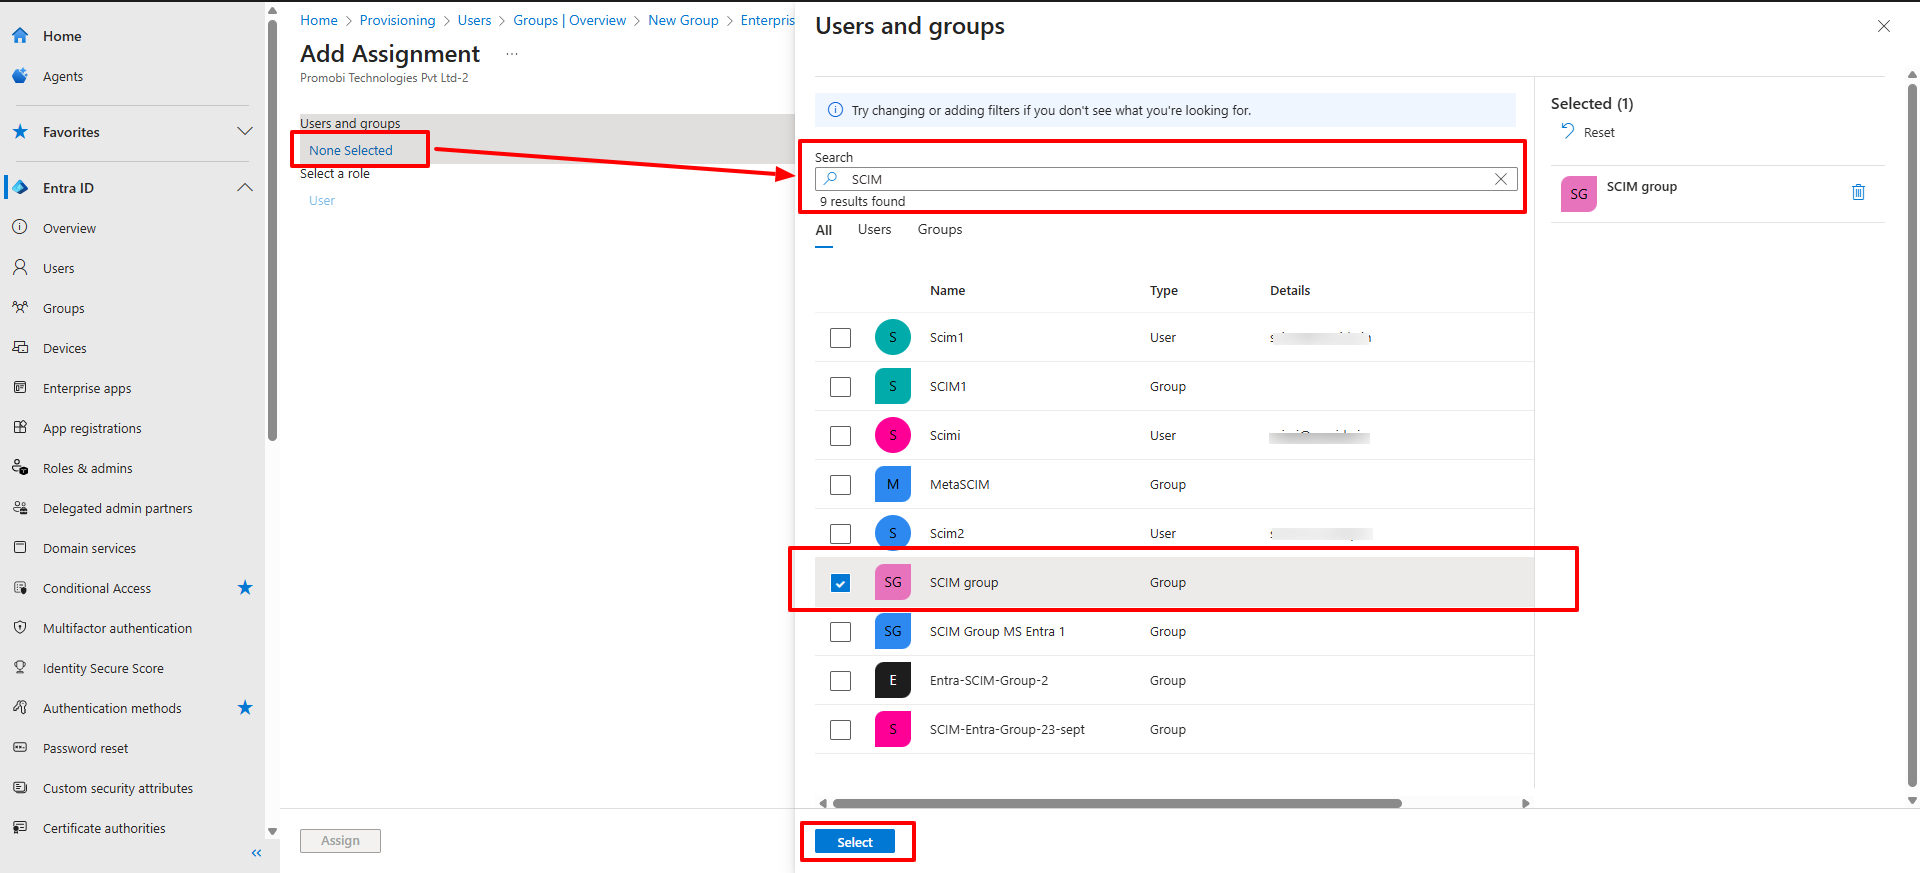
The selected group will now appear as assigned, showing 1 group selected.

Users can also be assigned in similar manner
The group and its users will now sync to the Scalefusion dashboard (in 40 minutes). Once synced, the group and its users will appear in the Scalefusion dashboard.
If individual users are provisioned, they will be listed under the User Enrollment section.
When a group is provisioned, both the group and its associated users will appear under the User Groups section. The associated users will also be listed under the User Enrollment section.
Provision on Demand
By default, user and group synchronization occurs automatically at a set interval of 40 minutes. However, if you need to trigger provisioning immediately without waiting for the next scheduled sync, you can use the Provision on Demand feature.
How to Trigger Provisioning on Demand
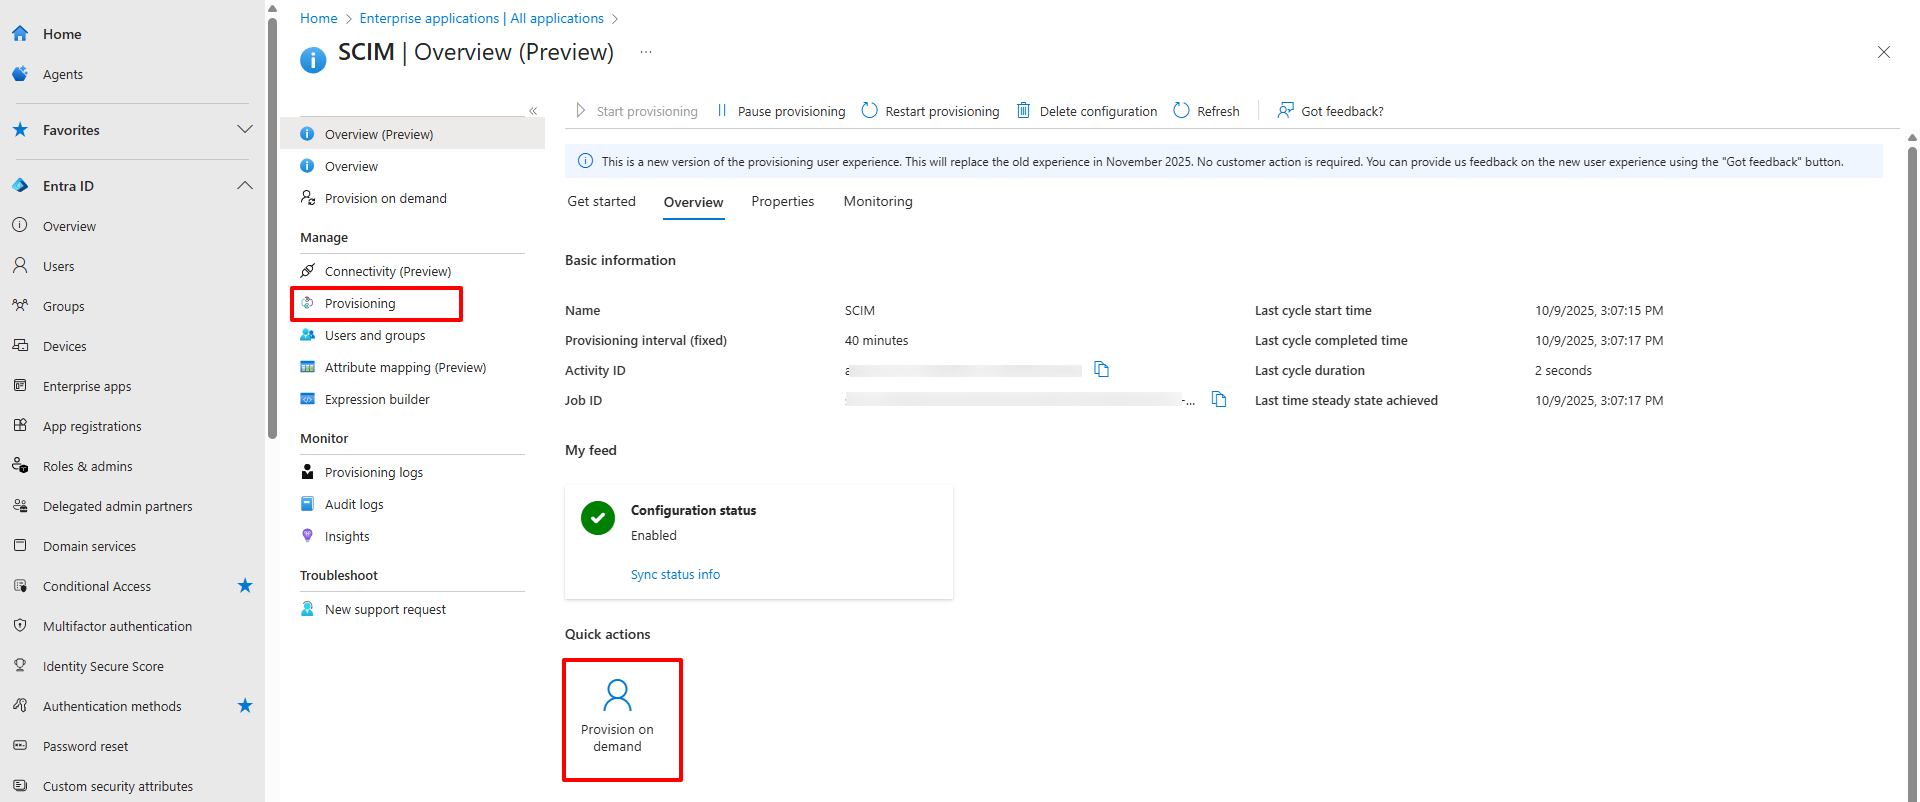
Navigate to Enterprise Apps in your admin console and select the SCIM application you have configured.
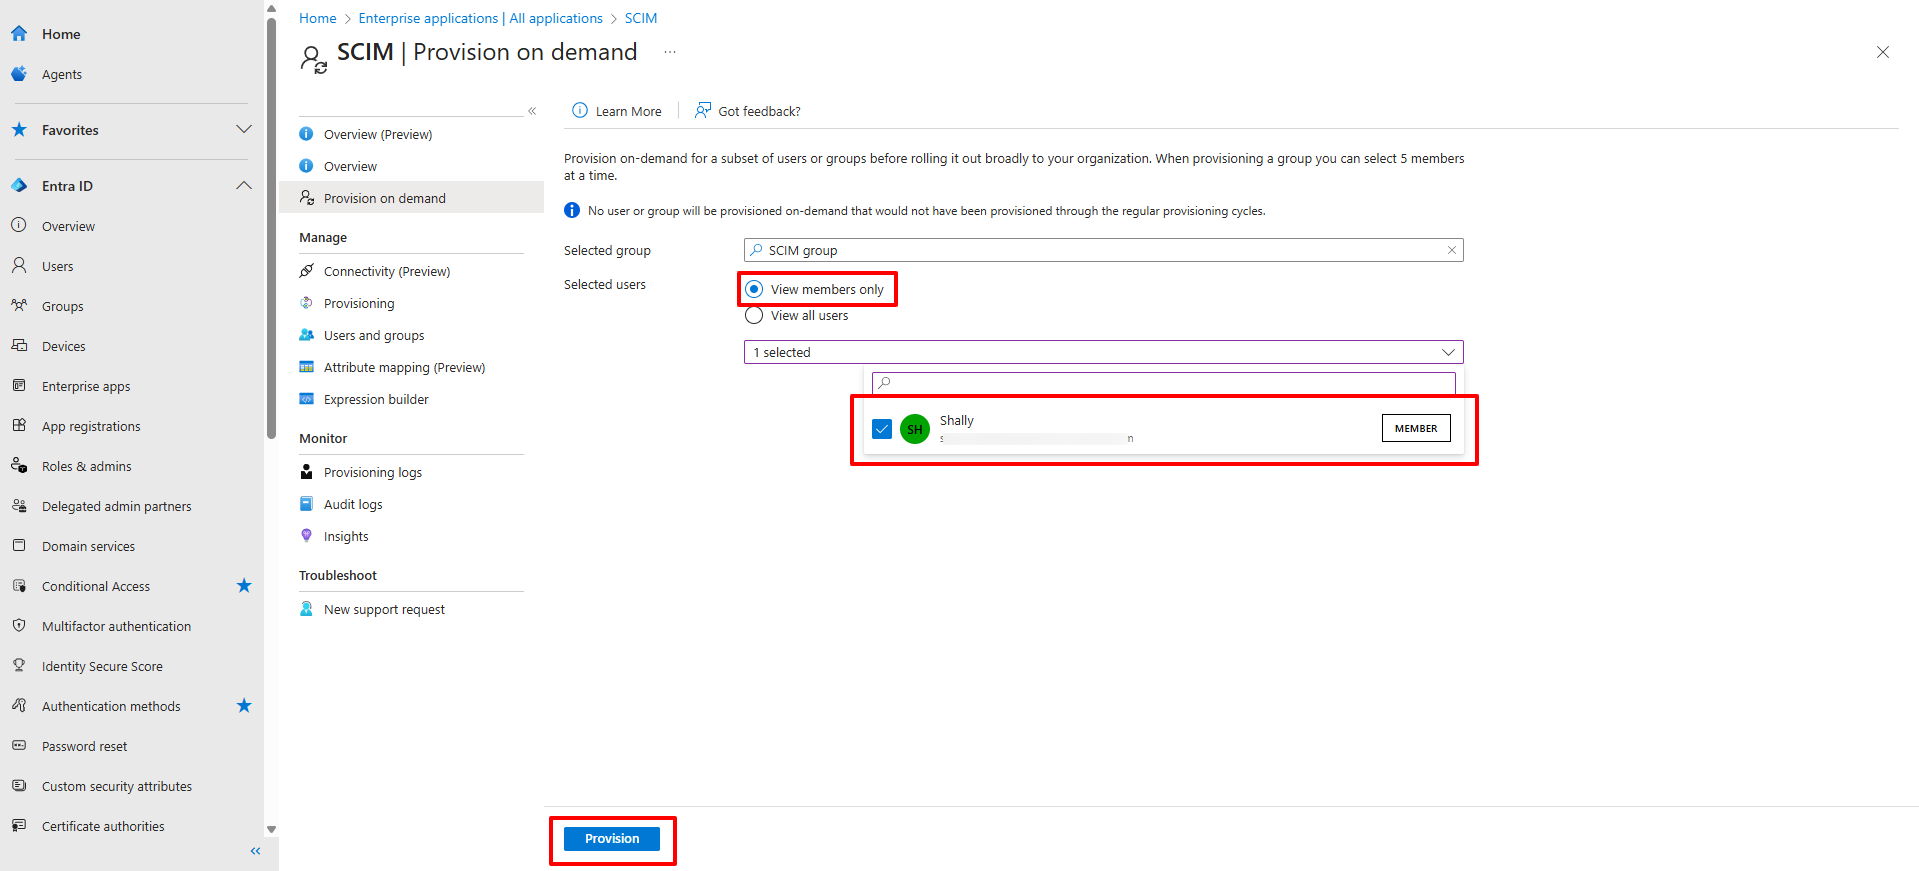
Click on the Provisioning tab, then select Provision on Demand.
In the Select a user or group field, search for and select the specific user or group you want to provision immediately.
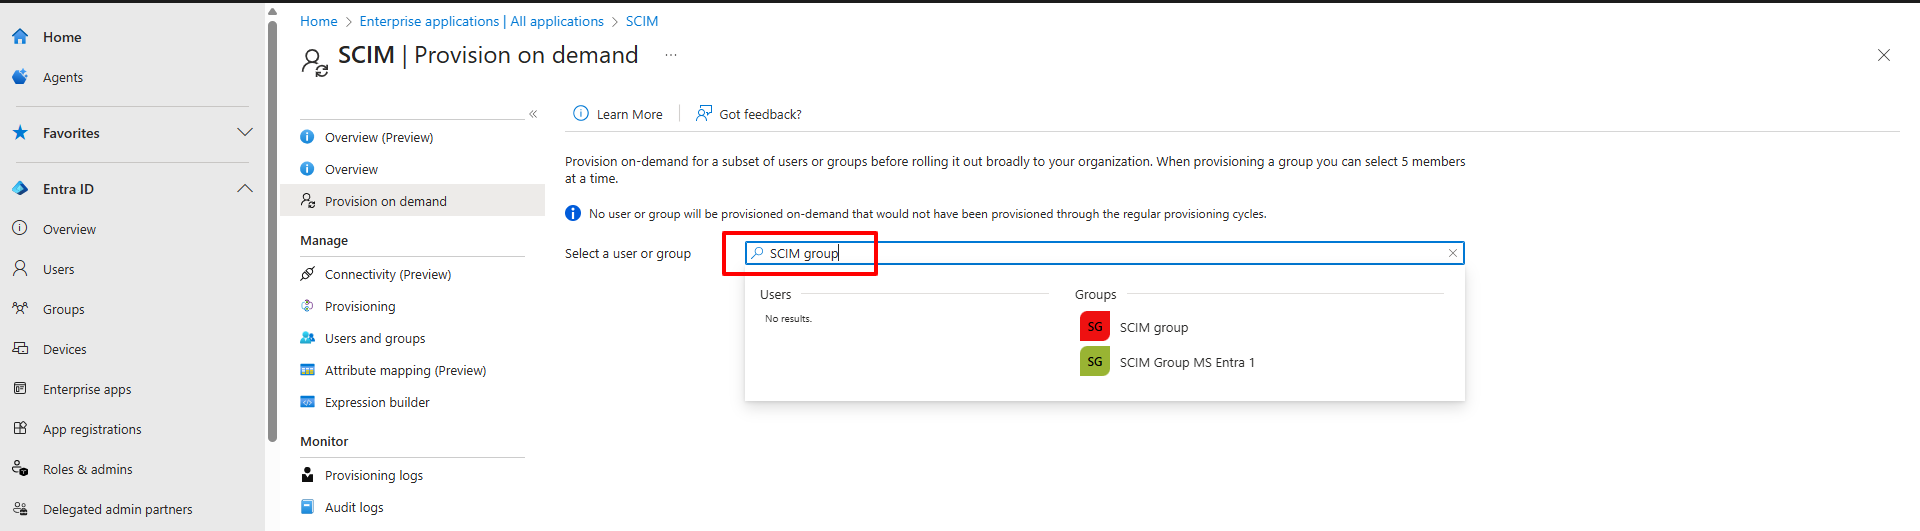
Note: When selecting a group, you also need to select the individual users within that group. The interface will show the selected users under View Members Only.
Once your selection is complete, click the Provision button at the bottom to start the immediate provisioning process.
This feature is useful for pushing critical updates or new users/groups to the target system without waiting for the next scheduled sync.