Scalefusion Remote Cast & Control enables Admins to remotely view, troubleshoot, and control managed Linux devices in real time. With the Remote Cast & Control, the experience is enhanced with improved device readiness visibility, file operations, automatic permission handling, session resilience, collaboration capabilities, and additional device controls.
This feature helps IT and support teams troubleshoot devices remotely, assist field users, and perform common device actions without requiring physical access to the device. This article describes how Remote Cast & Control works on Linux Devices and how to use the features in it.
Before You Begin
Before initiating a Remote Cast & Control session, ensure the following prerequisites are met:
Device Requirements: Linux device that has been enrolled in Scalefusion MDM with the latest Tux MDM agent, that is, version 5.2.0
The Browser should be running at the latest version
Permissions: Necessary browser permissions (Microphone and clipboard) on the Admin console.
Feature vs. Support Matrix
Step 1: Initiating a Remote Cast & Control Session
Follow the steps below to initiate a remote cast session on Linux device from Scalefusion Dashboard:
On Scalefusion Dashboard, navigate to Devices section
From the list of Devices, select the Linux device which you want to access remotely.
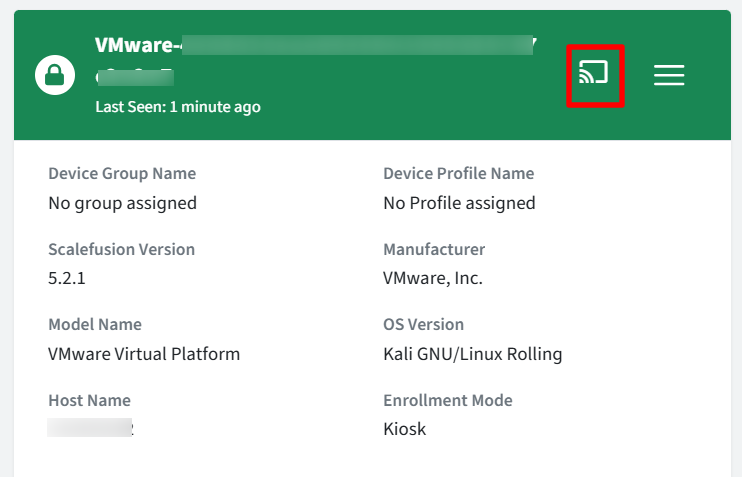
On the device details page, click on the screencast icon on the top bar.
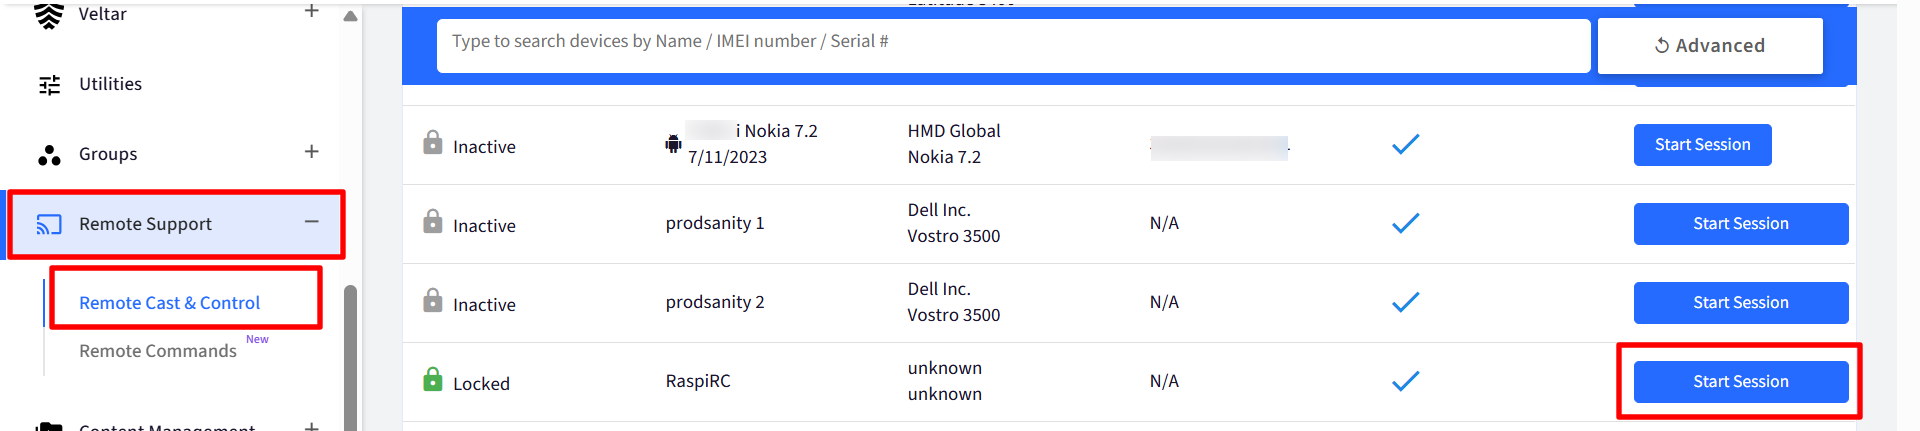
Alternatively, you can navigate to Remote Support > Remote Cast & Control. Here you will see the list of devices.
Click on the Start Session button next to the device you want to start a screen-sharing session with.
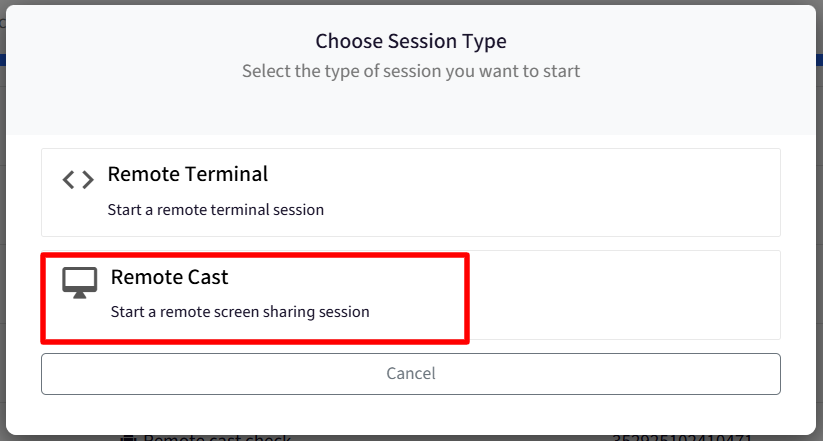
A pop-up will appear to choose the session type. Click on Remote Cast to start a remote cas session
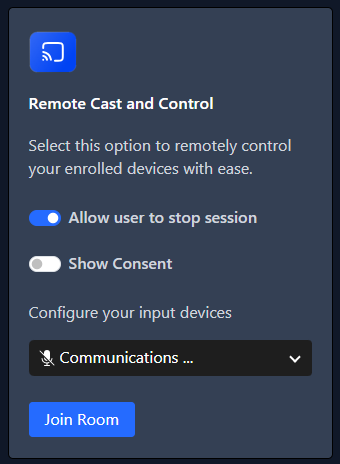
If end-user consent is required, an on-screen prompt will appear on the device asking the user to accept the incoming session request.
Click on Join Room
Once started, the session appears on the Dashboard under Active Sessions.

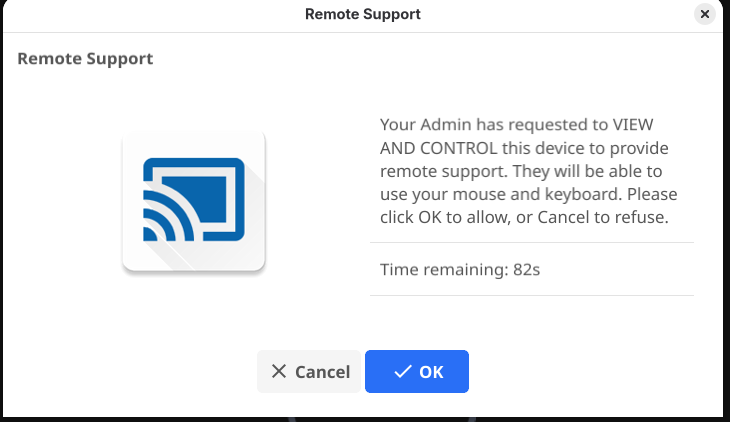
You will get the following screen. Click Ok
This screen will appear only if you have enabled Show Consent on the previous step
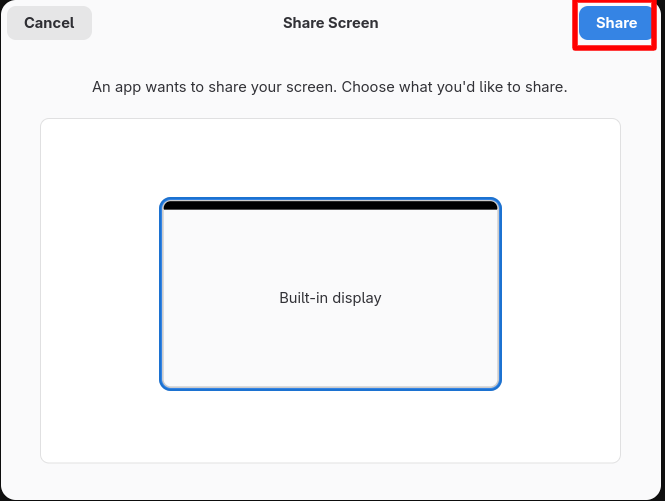
Next, click Share
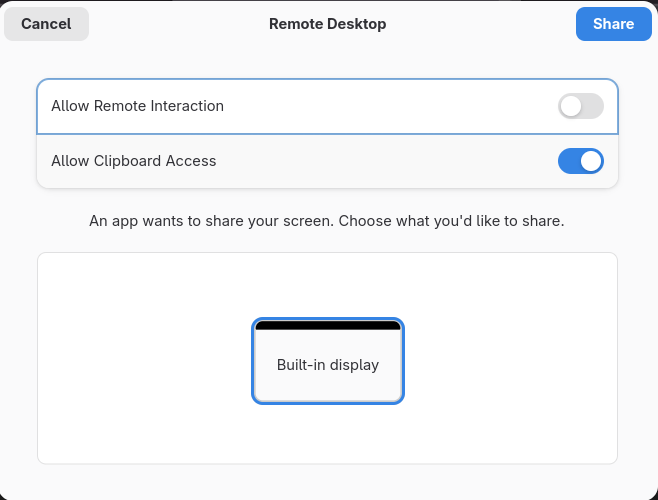
To enable remote interaction and clipboard access on the Linux device:
Turn on the following settings:
Allow Remote Interaction: Enables the admin to remotely control and interact with the target machine.
Allow Clipboard Access: Allows clipboard content to be accessed during the remote session.
Click Share to apply the settings and start the remote session.
The Share screens do not come up on Raspberry pi
Session Features
Once a session is active, the following features are available.
Auto Reconnect
Network Loss Resilience: If an active session drops due to network fluctuation or temporary disconnections, the system automatically attempts to reconnect.
1-Minute Grace Window: As long as network connectivity is restored within 1 minute, the session resumes automatically without requiring manual re-initiation.
Integrated Calling
Default Audio Support: Voice calling is enabled by default for all remote sessions.
Ease of Use: Admins can simply unmute their microphone in the console browser to speak with other attendees. Ensure browser microphone permissions are granted when prompted.
Admin Collaboration (Invite Other Admins)
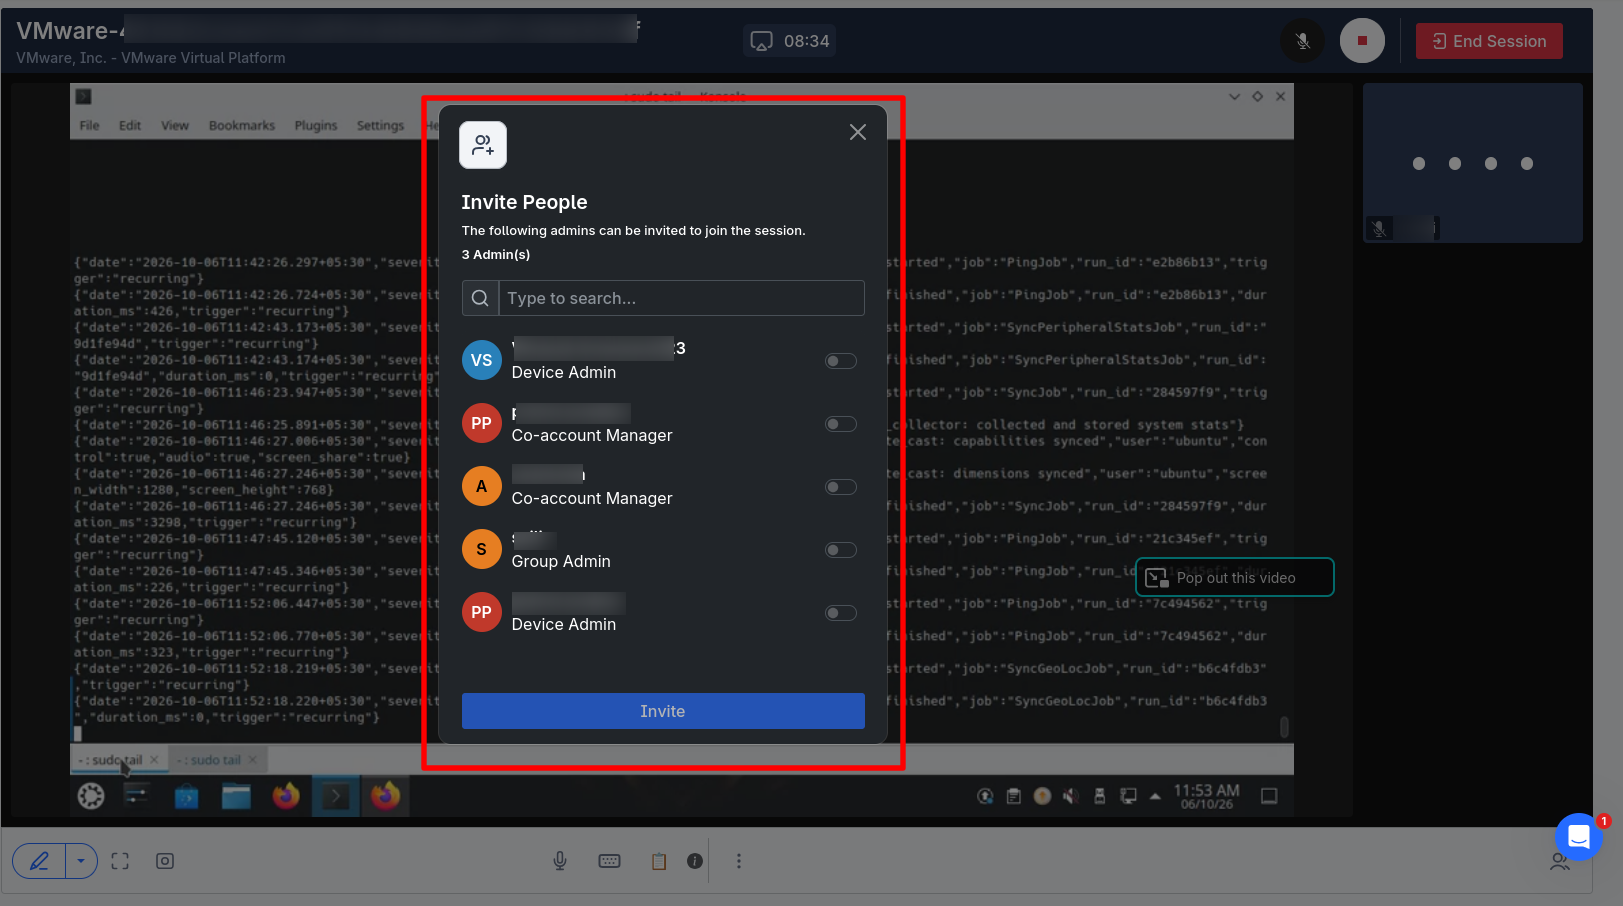
Multi-Admin Troubleshooting: The host Admin who initiates a session can invite additional IT Admins to join the active session. To do so,
The host admin can invite up to 3 additional IT admins to join an active remote session.
Click on the Add Participants button at the bottom right
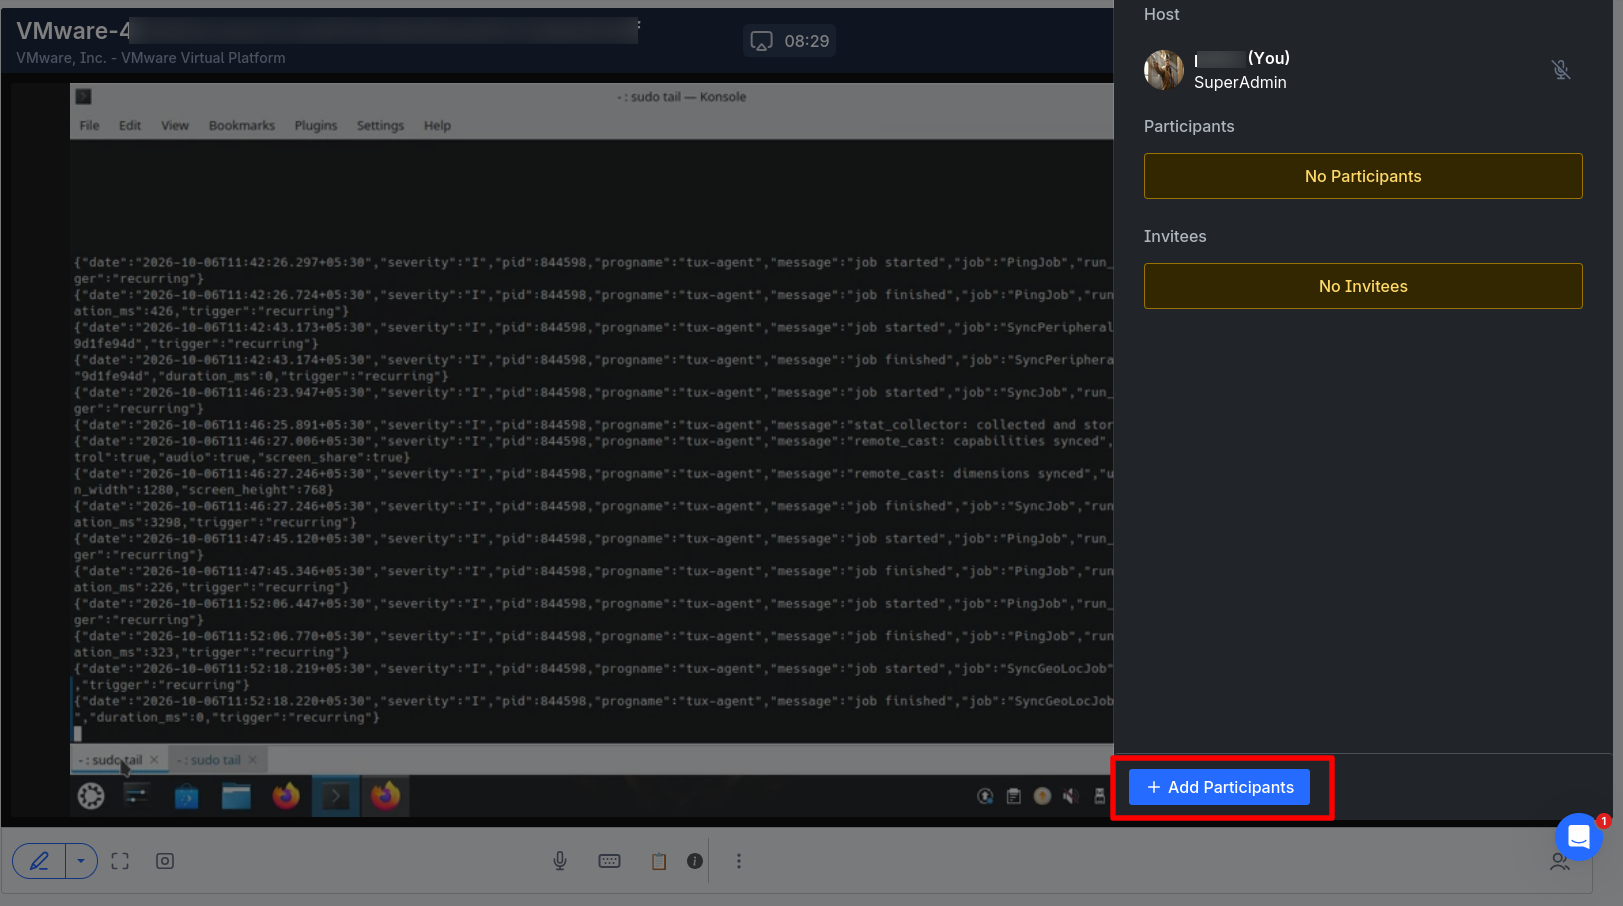
A new window will open. Select the admins to be invited and click Invite
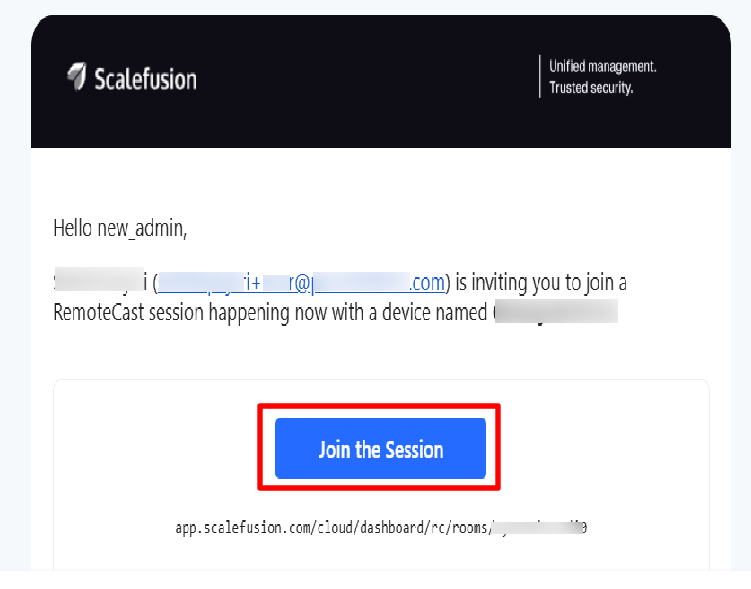
An email will be sent to the invitees. Click on Join the Session
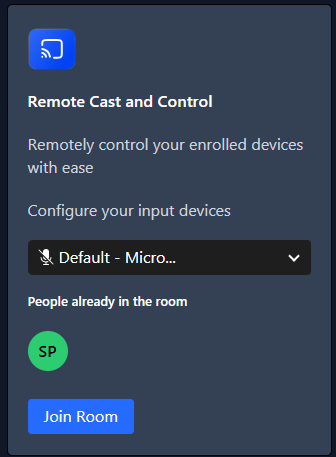
The following screen will be displayed.Click on Join Room
Note: Newly added admins will not be able to control the remote device. However, they can interact and collaborate with other admins during the call.
On-Screen Annotation (Admin-to-Admin)
Visual Collaboration: When two or more Admins are present in a session, annotation tools become available.
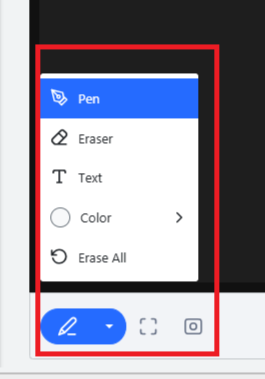
Drawings and highlights are visible only across the participating Admins' consoles for collaborative troubleshooting and do not render on the physical device screen.
Remote Input (Keyboard Capture)
Keystroke Redirection: Send numeric and textual inputs directly to the remote device using your desktop keyboard.
Toggle Control: Located at the bottom toolbar, toggle the Keyboard option to enable "Capture Keystrokes". You can enable or disable keyboard capture at any time during the session.

Quick Device Controls & Actions
The bottom action toolbar provides direct commands for rapid navigation and power management:
Navigation Keys: Dedicated quick-access controls for Home, Back, and Recent Apps.
Power Control (Lock / Unlock): Toggle device screen power state during a session (supported on Knox and Wingman devices).
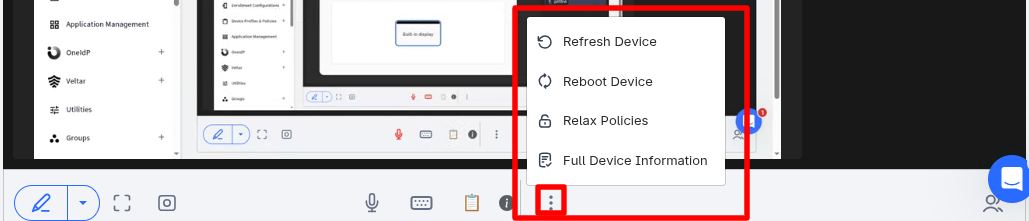
More Options (3-Dot Menu):
Refresh Device: Triggers an instant status update command via the Scalefusion agent.
Reboot Device: Remotely reboots the device.
Relax Policies: Relaxes the policies applied on the device
Full Device Information: Opens a compact pop-up window displaying hardware, battery, OS, and network details without navigating away from the session.
Other Additional Features
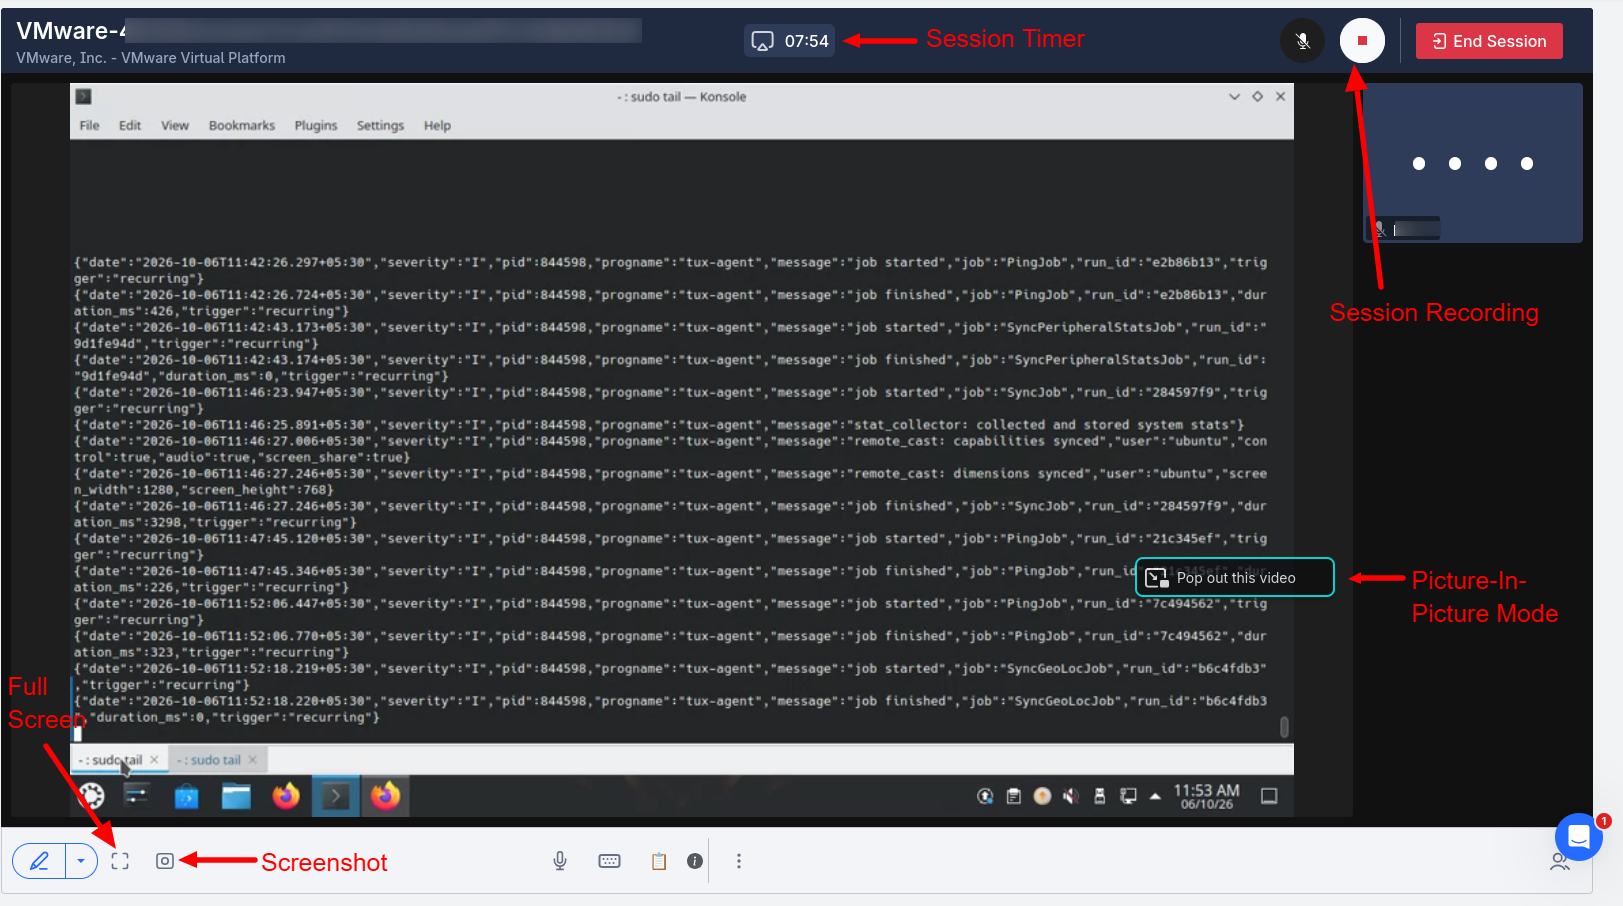
Full screen mode: Expand the remote session to full screen for a more immersive viewing experience.
Screen Capture: Capture a screenshot of the remote device’s screen during the session.
Screen Recording: Record the remote session for documentation, troubleshooting, or later reference.
Session timer: Displays the elapsed duration of the remote session.
Picure-in-Picture mode: Keep the screen-casting window visible in a floating, resizable window while working elsewhere.
Step 2: Ending a Session & Admin Feedback
Click End Session on the top right to end the session.
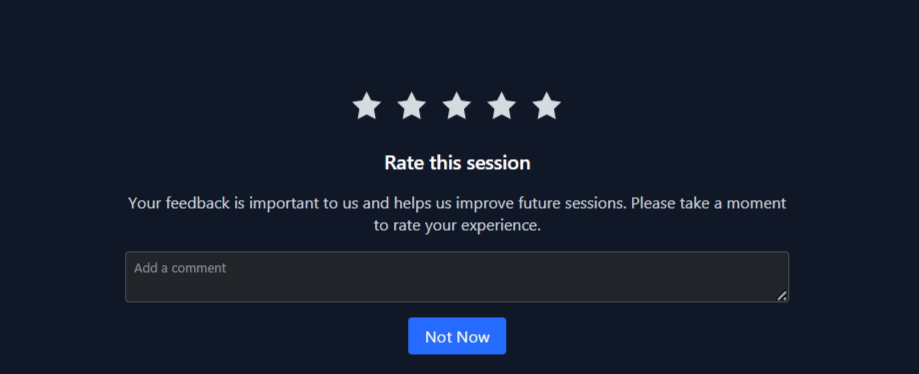
Session Feedback Screen: Upon ending the session, a feedback prompt will appear:
Star Rating: Rate session quality from 1 to 5 stars.
Comments / Notes: Submit optional feedback or log notes regarding the troubleshooting session for internal auditing.
Remote Cast & Control Session Reports
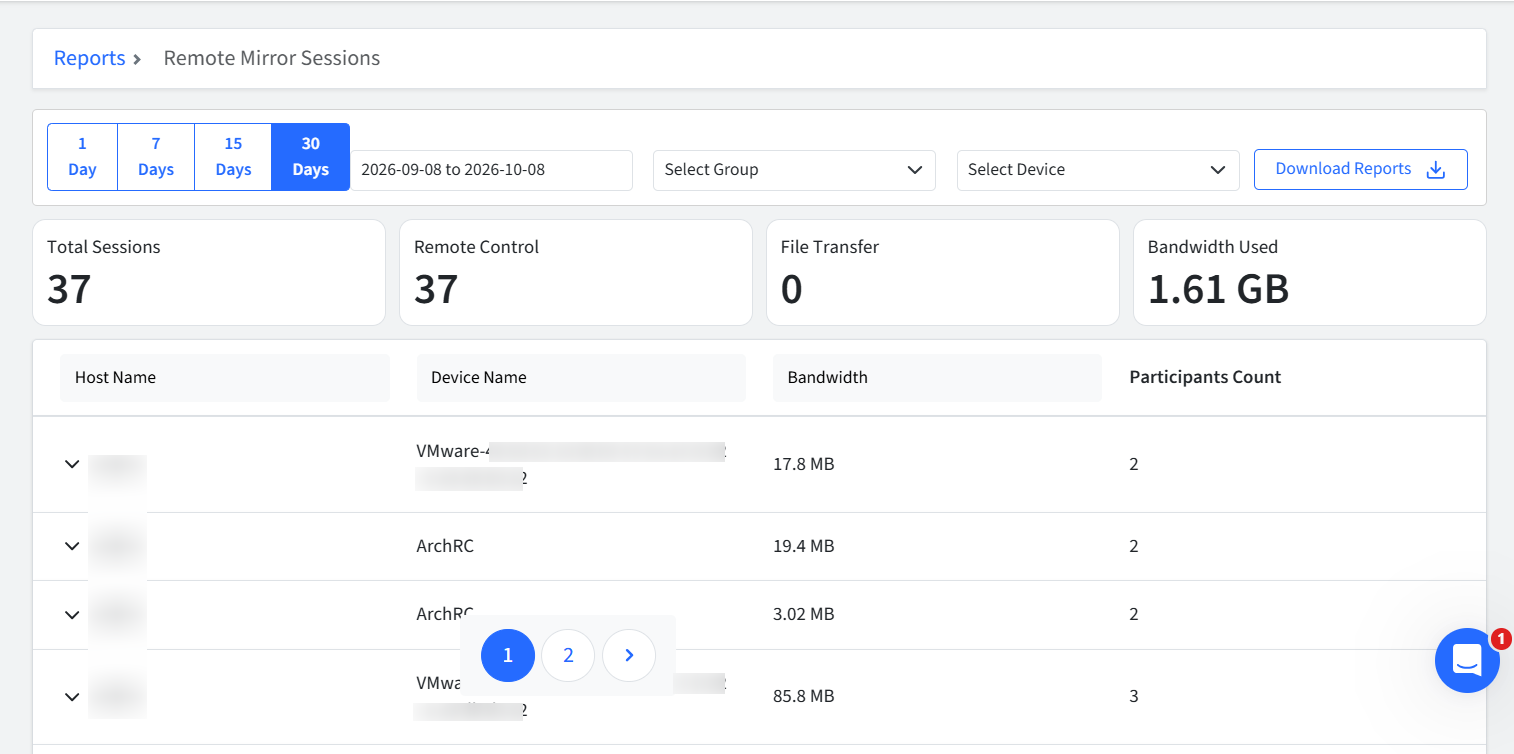
The Remote Mirror Advanced report (accessible from Reports & Workflows > Reports) provides administrators with visibility and auditing capabilities for all remote support activities conducted across managed Linux devices.
Key Metrics Summary
Total Sessions: The aggregate count of remote cast and control sessions initiated within the selected time frame.
Remote Control: The number of sessions where interactive remote control privileges (mouse and keyboard input) were utilized rather than view-only screen mirroring.
File Transfer: Tracks sessions where files were transferred between the administrator console and the remote Linux endpoint.
Bandwidth Used: The cumulative data transferred across all sessions during the selected period, encompassing screen streaming, input signals, and media data.
Session Details Log
The detailed log table records individual session data for auditing and compliance:
Host Name: The dashboard account/administrator who initiated the remote session.
Device Name: The target Linux device or virtual machine accessed.
Bandwidth: The specific network data consumed by the individual session (influenced by duration and display resolution).
Participants Count: The total number of active users connected to the session (e.g., administrator and local device user).
Frequently Asked Questions (FAQ)
Q: Will session annotations be visible to the end-user on the device?
A: No. Annotation drawing tools are strictly Admin-to-Admin features designed for co-admins collaborating during a session and do not appear on the end-user's device screen.
Q: What happens if a session gets disconnected due to poor Wi-Fi?
A: Remote Cast will automatically try to restore the connection. If the device reconnects to the network within 60 seconds, the active session will resume seamlessly.