Introduction
The Privacy Preferences Policy Control (PPPC) configuration allows administrators to predefine macOS privacy permissions for applications. This removes the need for end users to manually approve sensitive permissions and ensures consistent privacy enforcement across managed Macs.
Please note that the Privacy Preferences Policy Control (PPPC) configuration is available only on macOS.
Creating Configuration
Provide a name to this configuration.
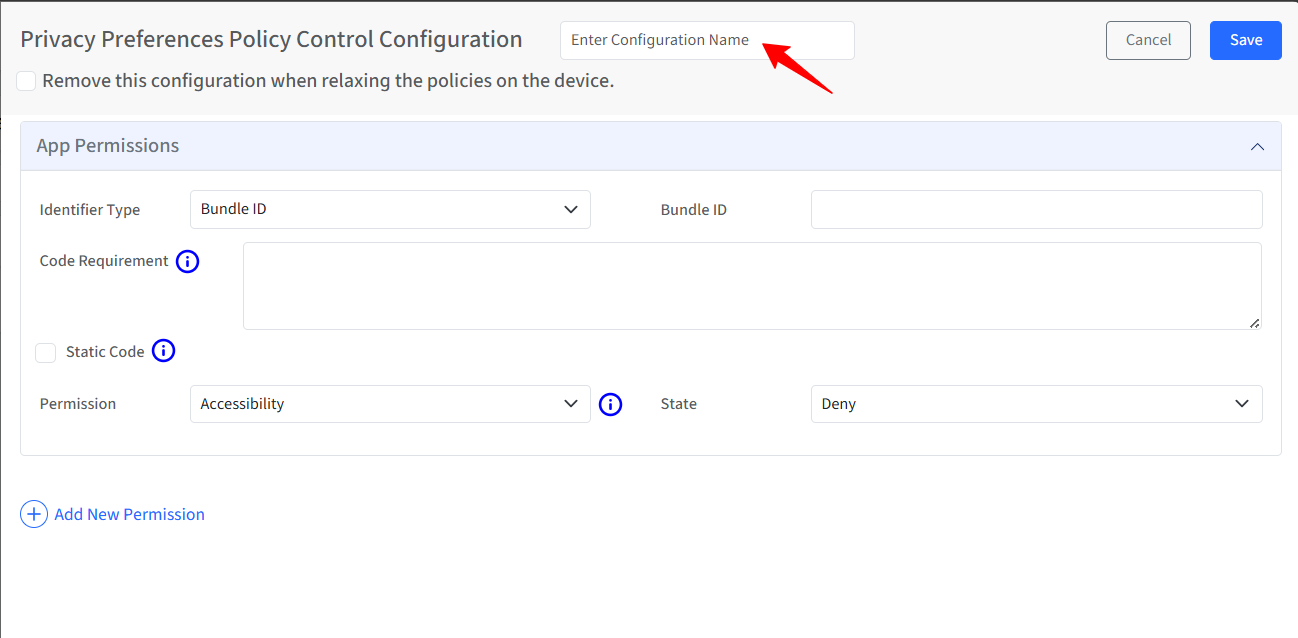
Remove this configuration when relaxing the policies on the device: When this option is enabled, the configuration will be automatically removed in the following scenarios: when policies are relaxed, or the device is unlocked via the dashboard, and when the device is deleted, all associated configurations and data will be cleared from the device.
App Permissions: In this section, you define the various permissions for the app(s), like accessibility, camera, microphone, etc.
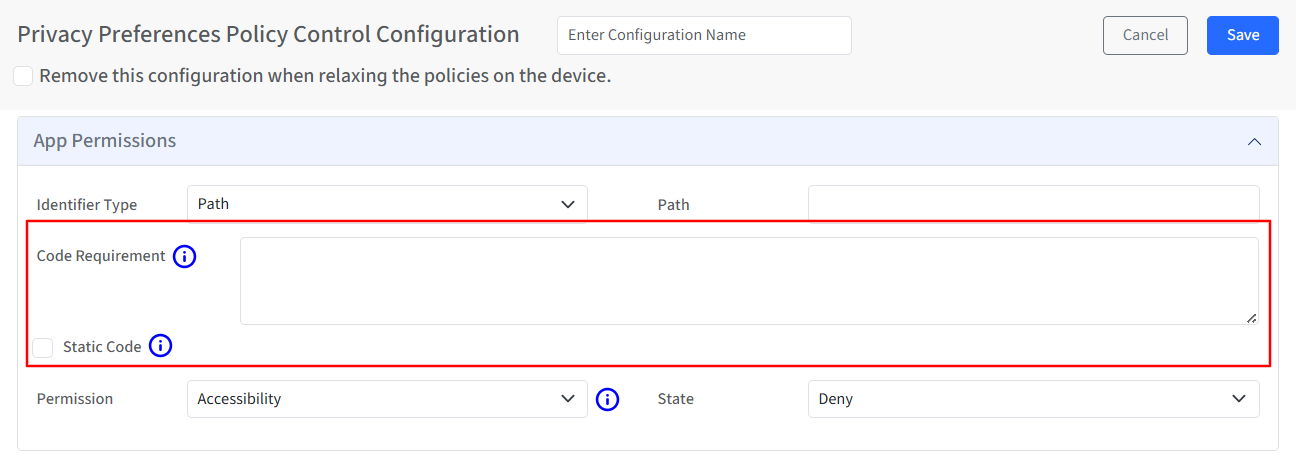
Identifier Type: Select how the app should be identified.
Bundle ID: Identifies the app using its bundle identifier (recommended for most apps).

Path: Identifies the app using the path. This is recommended when attempting to configure permissions for a command-line tool that does not have an app Bundle ID.

Code Requirements: Specify the code-signing requirement for the app. This is typically used when apps share bundle identifiers or when stricter validation is required. To fetch the code requirement, execute the command in Terminal: codesign - dr - “path to app”
Static Code: If enabled, macOS will statically validate the code requirement. When enabled, the permission applies strictly to the exact code signature specified. This prevents future app updates with different signatures from inheriting the permission. Generally, this is not required to be configured.
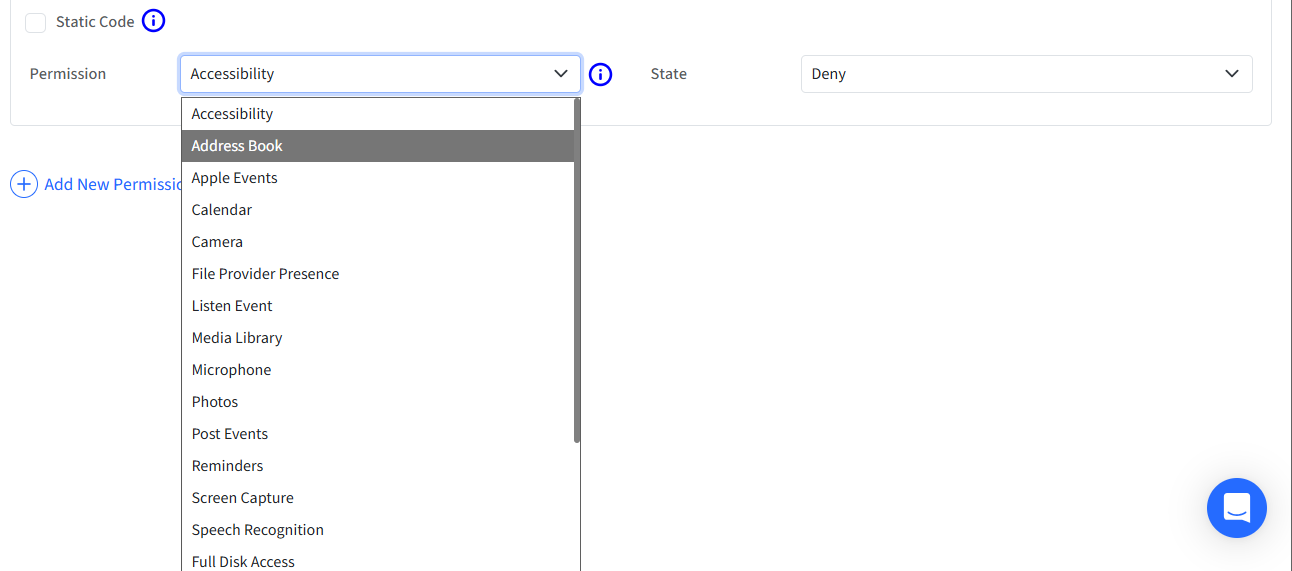
Permission: Select the macOS privacy service to control from the drop-down list. Specifies the policies for the app via the Accessibility subsystem.
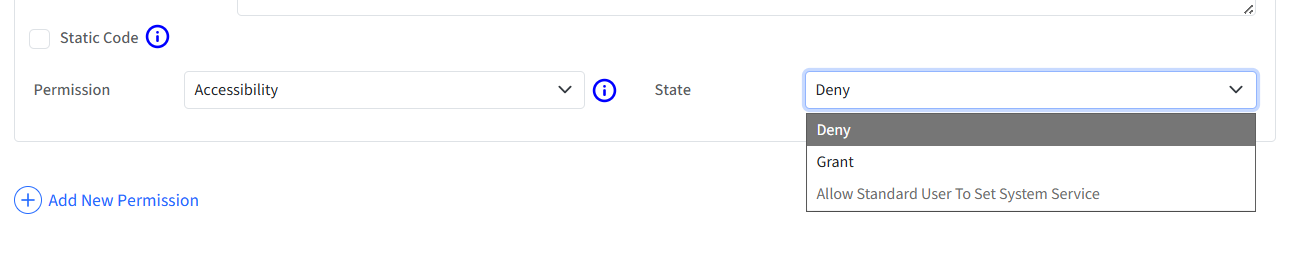
State: Define how macOS should handle the selected permission:
Allow: Grants the permission automatically without user interaction.
Deny: Blocks the permission and prevents the user from granting it.
Allow Standard User To Set System Service: This allows macOS to prompt the user for approval (if supported by the permission type).
The table below outlines the allowed permission states for each permission type. For example, for Camera and Microphone access, administrators are permitted only to deny the permission.
Permission
State
Deny
Allow
Allow Standard User to Set System Settings
Accessibility
✓
✓
x
Address Book
✓
✓
x
Apple Events
✓
✓
x
Calendar
✓
✓
x
Camera
✓
x
x
File Provider Presence
✓
✓
x
Listen Event
✓
✓
✓
Media Library
✓
✓
x
Microphone
✓
x
x
Photos
✓
✓
x
Post Events
✓
✓
x
Reminders
✓
✓
x
Screen Capture
✓
x
✓
Speech Recognition
✓
✓
x
Full Disk Access
✓
✓
x
App Management
✓
✓
x
App Data Management
✓
✓
x
Desktop Folder
✓
✓
x
Documents Folder
✓
✓
x
Downloads Folder
✓
✓
x
Network Volumes
✓
✓
x
Removable Volumes
✓
✓
x
Files used in System Administration
✓
✓
x
Add New Permission: Use Add New Permission to configure multiple permissions for the same app or to apply permissions to additional apps within the same PPPC configuration. You can repeat this process to manage privacy permissions for multiple apps in a single profile.