This guide explains how to configure High Availability (HA) for On-Prem Connector (OPC) using Microsoft IIS as a reverse proxy and load balancer. With this setup, IIS distributes traffic between multiple OPC servers, helping improve reliability and reduce downtime if one server becomes unavailable.
Note: This document is intended as a general setup guide and covers only the specific configuration steps. Steps may vary depending on software versions, environment settings, or future updates. Scalefusion does not provide technical support for third-party software or infrastructure configurations referenced in this document.
Any tools or software mentioned are shared for guidance purposes only, and customers should choose the approach best suited to their environment.
Overview
Configure IIS as a load balancer for OPC
Set up Cloudflare Tunnel for secure external access
Route traffic to multiple OPC servers
Configure health checks and failover support
The Traffic Flow:
User connects to the Cloudflare website.
Cloudflare sends traffic to our IIS Load Balancer via a secure tunnel.
The IIS Load Balancer checks which backend server is healthy and forwards the request to it on port 28767, keeping the exact URL path intact.
SERVER INVENTORY
Server Name | IP Address | Role |
|---|---|---|
OPC Machine 1 |
| OPC Server 1 (Listens on port 28767) |
OPC Machine 2 |
| OPC Server 2 (Listens on port 28767) |
Load Balancer |
| IIS Reverse Proxy & Cloudflare Tunnel |
PHASE 1 | INSTALL CLOUDFLARE TUNNEL (ON LOAD BALANCER)
This step securely connects your local IIS server to the public Cloudflare network without opening firewall ports.
Log into the Load Balancer Server (
192.168.14.182).Open a web browser and download the Cloudflare installer: Download Link
Run the downloaded
.msifile to install it.Click the Windows Start menu, type cmd, right-click Command Prompt, and select Run as Administrator.
Copy your specific tunnel token from the Cloudflare Dashboard and run this command:
cloudflared.exe service install <Your-Token-Here>The service will start automatically in the background.
PHASE 2 | INSTALL IIS & REQUIRED MODULES
We need to install the web server and the special Microsoft add-ons that allow it to act as a load balancer.
On the Load Balancer, open Server Manager and install the Web Server (IIS) role.
Open a web browser and download/install these two official Microsoft extensions:
Application Request Routing (ARR) 3.0
URL Rewrite Module 2.1
Once both are installed, close and reopen the IIS Manager so the new features appear.
PHASE 3 | TURN ON THE GLOBAL PROXY
If we don't flip this switch, IIS will look for local files instead of forwarding traffic.
Open IIS Manager.
Click on the very top server name in the left-hand menu (e.g.,
OPC-IIS-HA).In the middle screen, double-click Application Request Routing Cache.
In the right-hand menu, click Server Proxy Settings...
Check the very top box that says Enable proxy.
Click Apply in the top right corner.
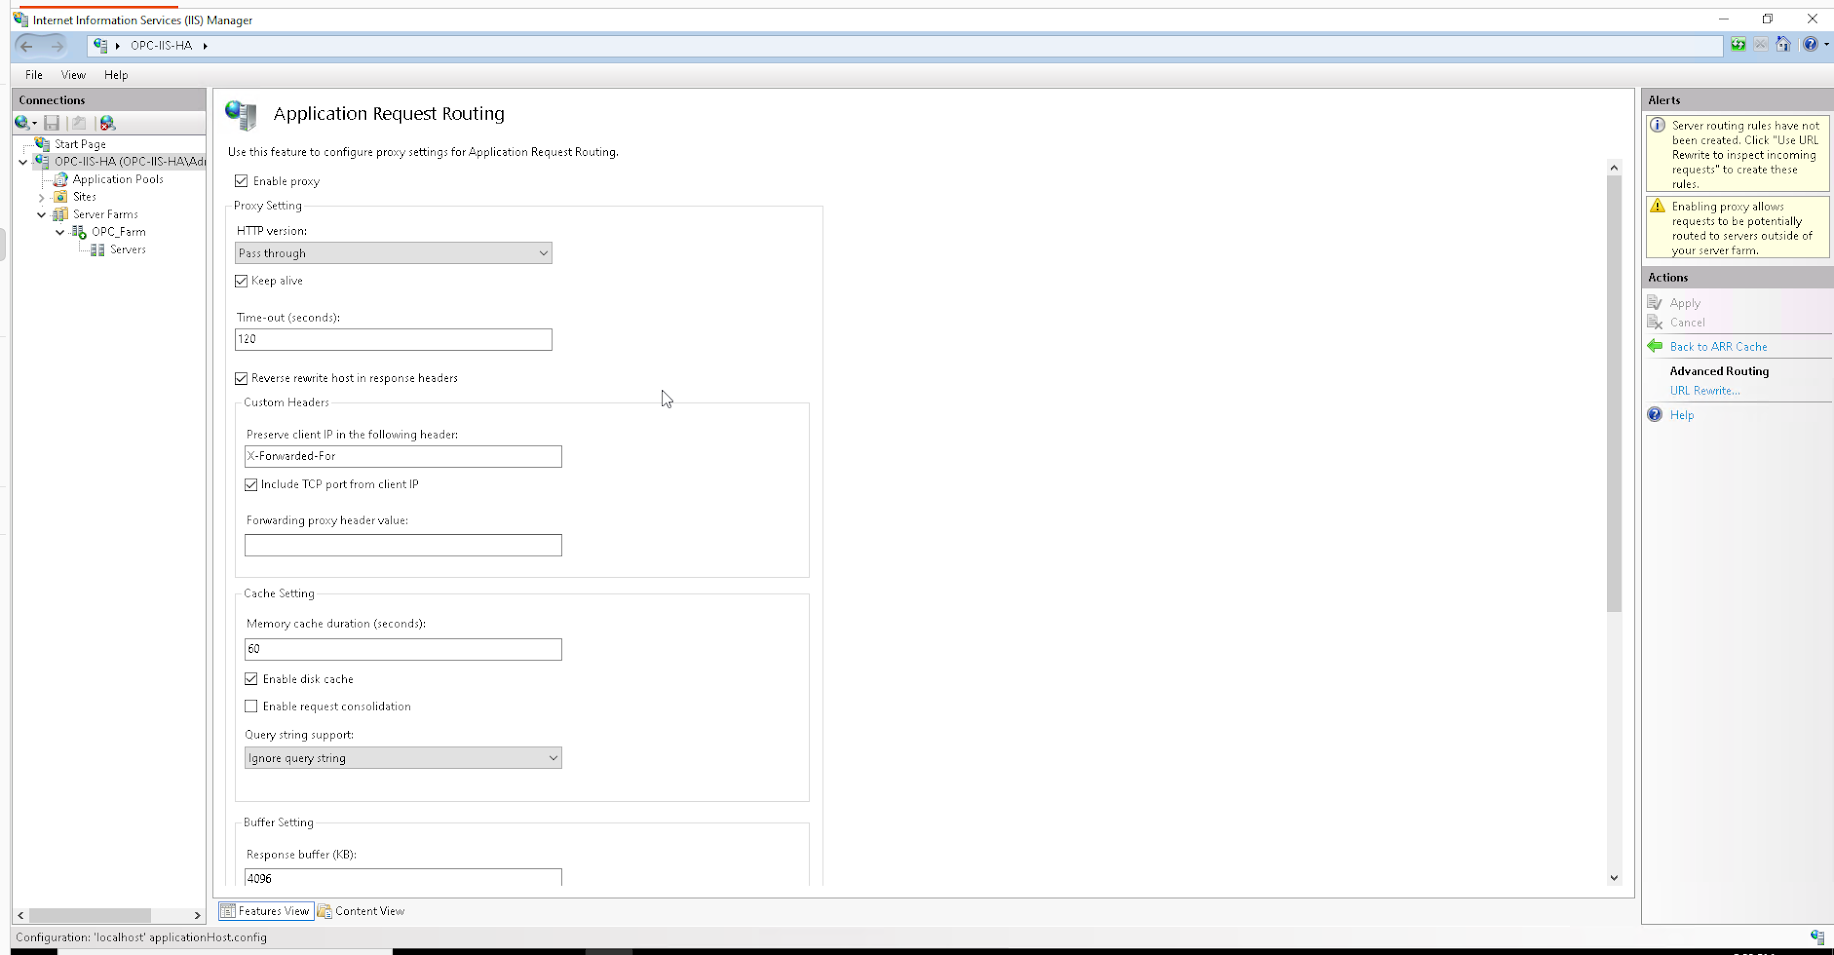
PHASE 4 | CREATE THE SERVER FARM & FIX THE PORTS
Here we tell IIS exactly where our two backend servers live.
In the left menu of IIS Manager, right-click Server Farms and choose Create Server Farm...
Name it
OPC_Farmand click Next.Type the IP of Server 1 (
192.168.14.157) and click Add.Type the IP of Server 2 (
192.168.14.217) and click Add.Click Finish.
A box will pop up asking: "IIS can automatically create a URL rewrite rule...". Click Yes.
If You Not get the Rule Already created follow below :
Go to server Farm → Routing rules > check the Use URL Rewrite box
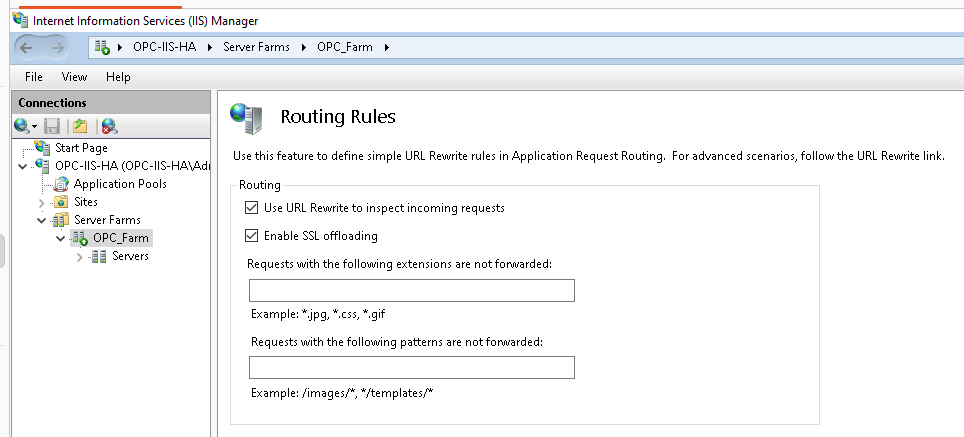
IMPORTANT: Fixing the Custom Port (28767)
The IIS screen has a bug that sometimes ignores custom ports. We will type it straight into the configuration file to guarantee it works.
Open Notepad as an Administrator.
Go to
File->Openand navigate to:C:\Windows\System32\inetsrv\config\Change the file type in the bottom right from "Text Documents" to All Files (.).
Open
applicationHost.config.Press
Ctrl + Fand search for<webFarm name="OPC_Farm">.Add
httpPort="28767"to the<applicationRequestRouting>line under both servers. It must look exactly like the image below.Save and close Notepad.
Before Changes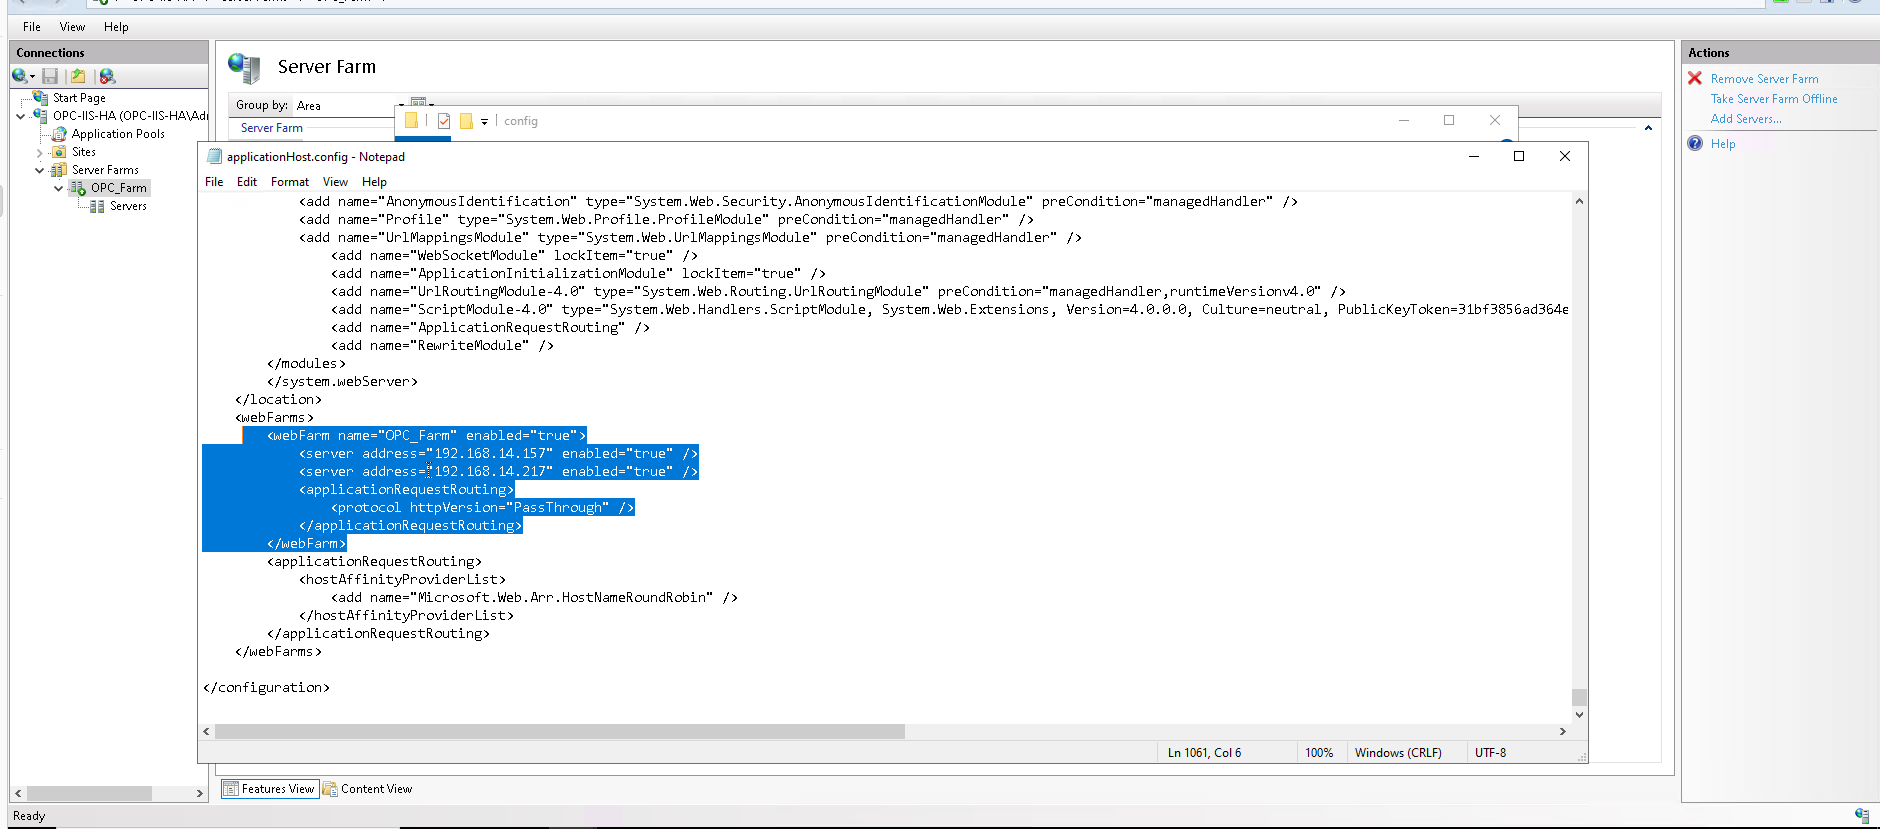
After Changes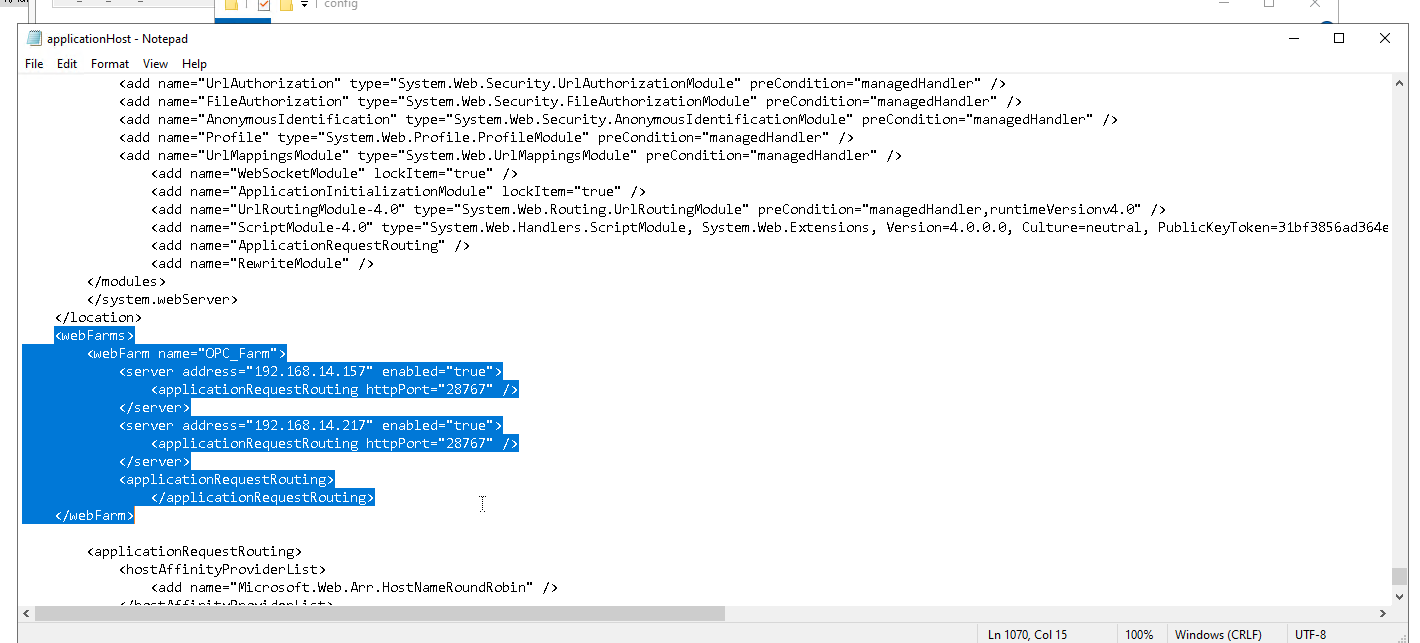
PHASE 5 | FIX THE ROUTING RULE (URL REWRITE)
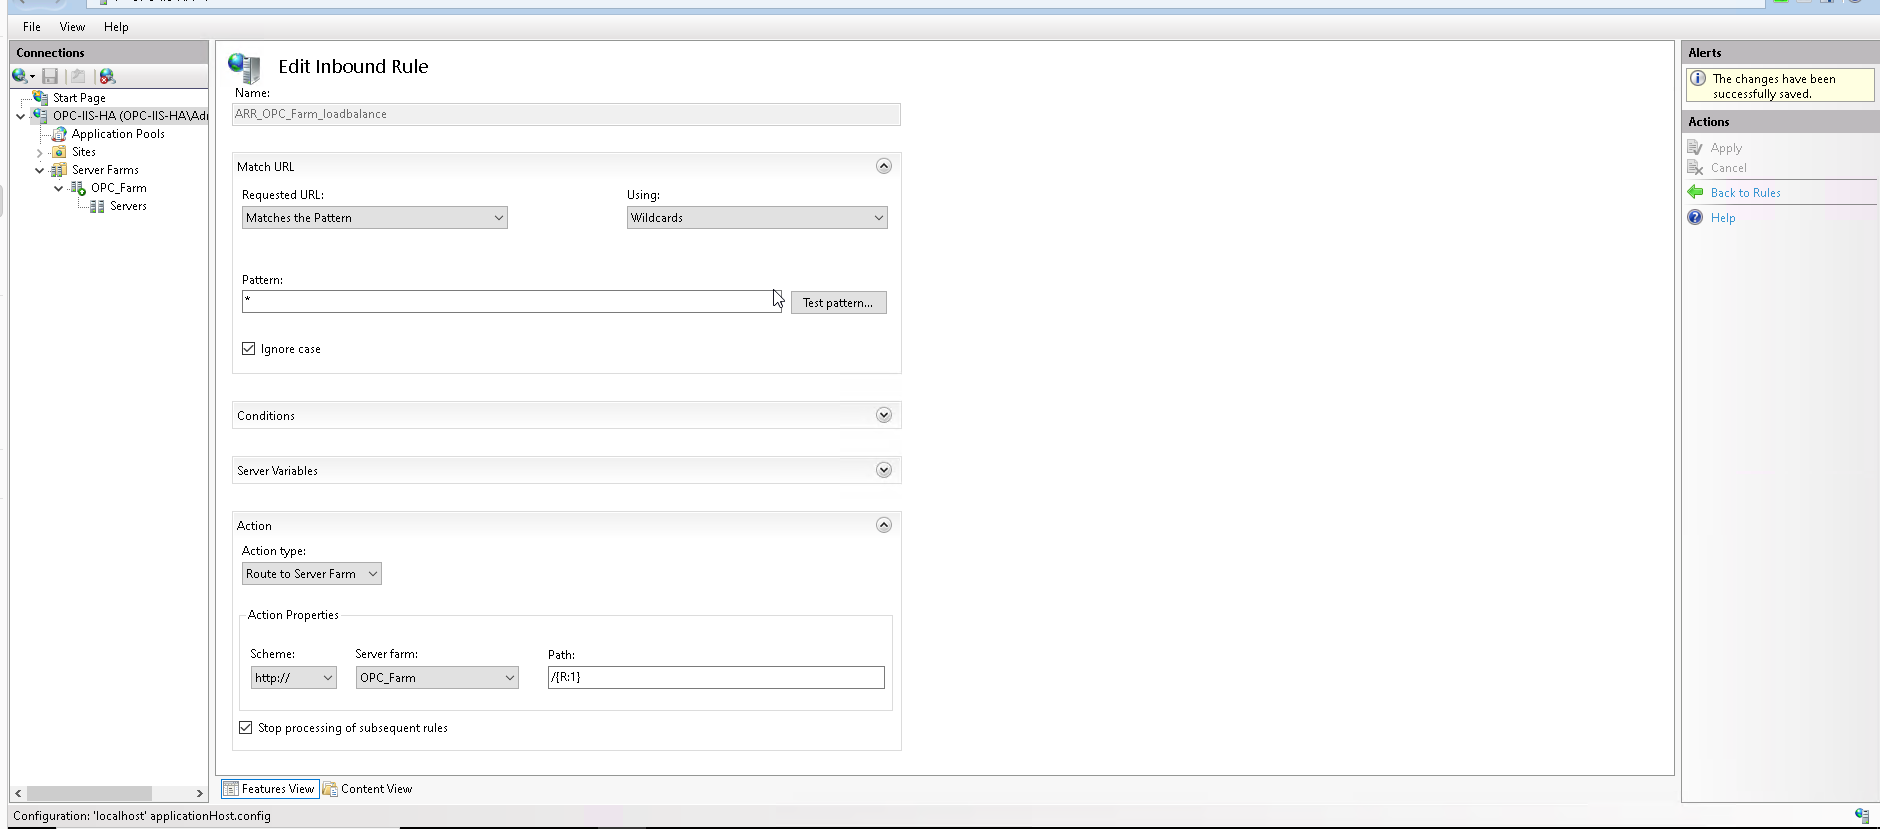
The automatic rule IIS created deletes the end of our URLs (like /opc/heart-beat). We must fix the rule to pass the full URL to the backends.
In IIS Manager, click the top server name in the left menu again.
Double-click URL Rewrite.
Double-click the rule named
ARR_OPC_Farm_loadbalance.Change the settings to exactly match the following:
Using: Wildcards
Pattern:
(*)Action type: Route to Server Farm
Action Path:
/{R:1}
Click Apply in the top right corner.
PHASE 6 | CONFIGURE HEALTH CHECKS
This tells IIS to stop sending traffic to a server if it crashes or reboots.
In IIS Manager, expand Server Farms and click
OPC_Farm.Double-click Health Test.
Enter the following URL:
http://192.168.14.157:28767/opc/heart-beat(Update the path if your specific heartbeat endpoint is different).Set the Interval and Timeout to 30 seconds.
Type OK in the "Response match" box.
Click Apply.
PHASE 7 | FINAL RESTART AND VERIFICATION
We must restart IIS completely to lock in the Notepad file changes.
Open Command Prompt as Administrator.
Type
iisresetand press Enter.Once the service restarts, open a web browser.
Type in your public Cloudflare URL (e.g.,
https://your-domain.com/opc/heart-beat).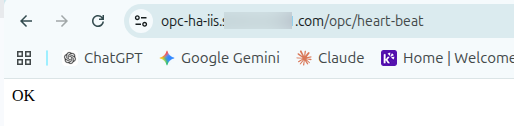
If the page loads successfully, the Cloudflare Tunnel is catching the traffic, handing it to IIS, and IIS is successfully balancing it across your two backend servers on port 28767!