With Channels feature in Eva Messenger admin can send message on devices that belong to a group or list of devices. At the same time, members who have subscribed to the channel can chat with each other. Once a user subscribes to a channel, he/she can start sending/receiving messages within the group.
This document describes how channels can be set up and subscribed to.
Before You Begin
- Make sure you have the Eva Communication Suite enabled for your account.
- All the devices have been updated to the latest Eva application -> Android & iOS
Setting up a channel
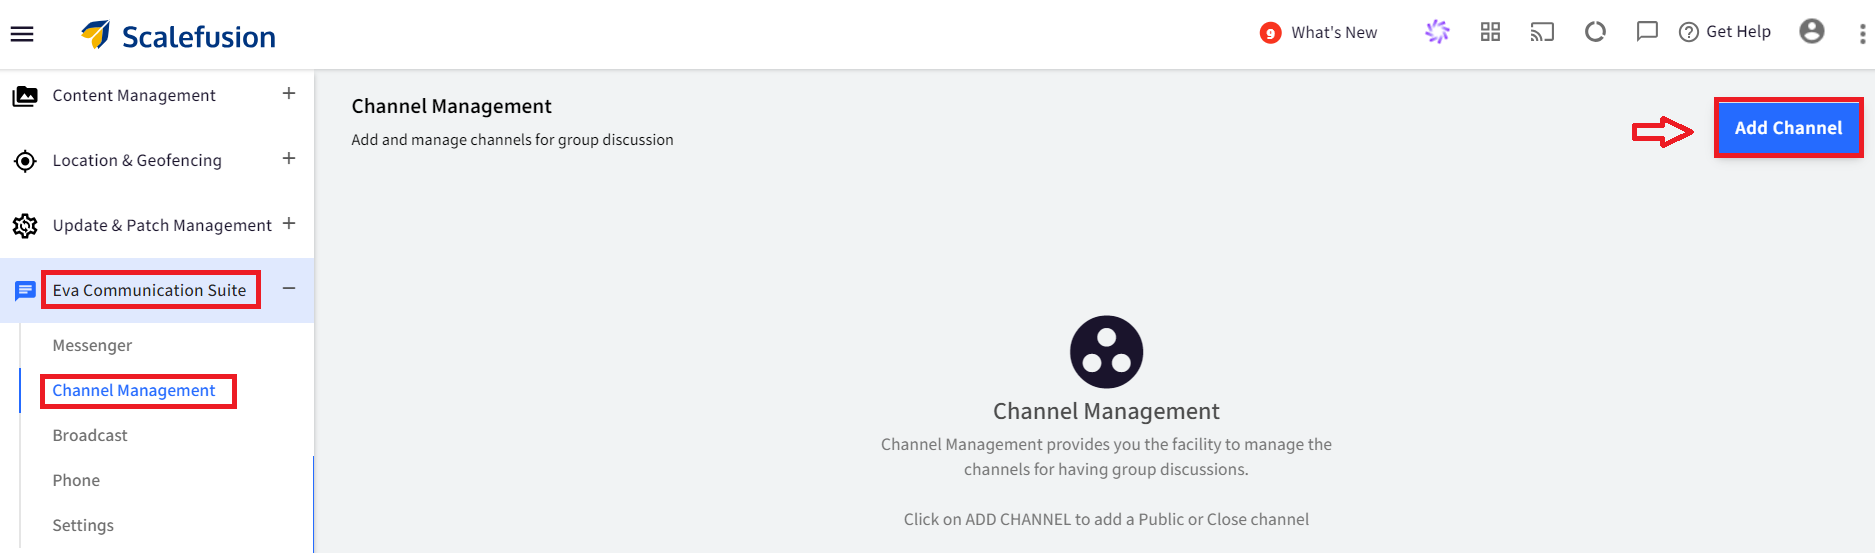
- Sign In to Scalefusion Dashboard.
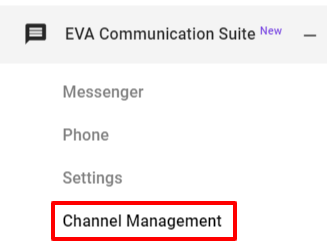
- Navigate to Eva Communication Suite > Channel Management
- Click on the button Add Channel
- This will open the Add Channeldialog box. Here enter the following:
- Channel Name - Any name you want to give to this channel
- Choose Channel Type - Here you will see two different channel types:
Public: This is an open channel visible to any user who has Scalefusion and Eva app installed on their device. Users can subscribe to this channel if they want to.
Close: These channel types are created by Admin. While creating a closed channel, Admin needs to add the users. Hence, this channel is accessible only to the users added in this channel by admin. A user can neither join nor leave this channel at his own will.
Add a Public Channel
- In Add Channel dialog box, give any name to the channel
- Select Public in Type and Submit
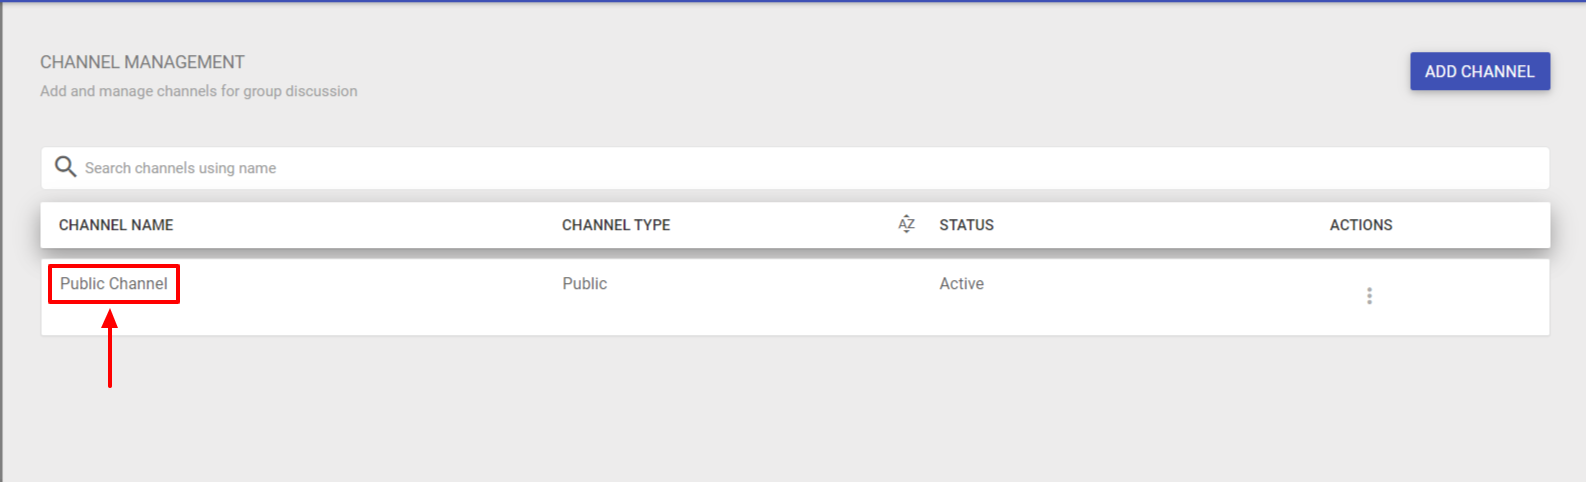
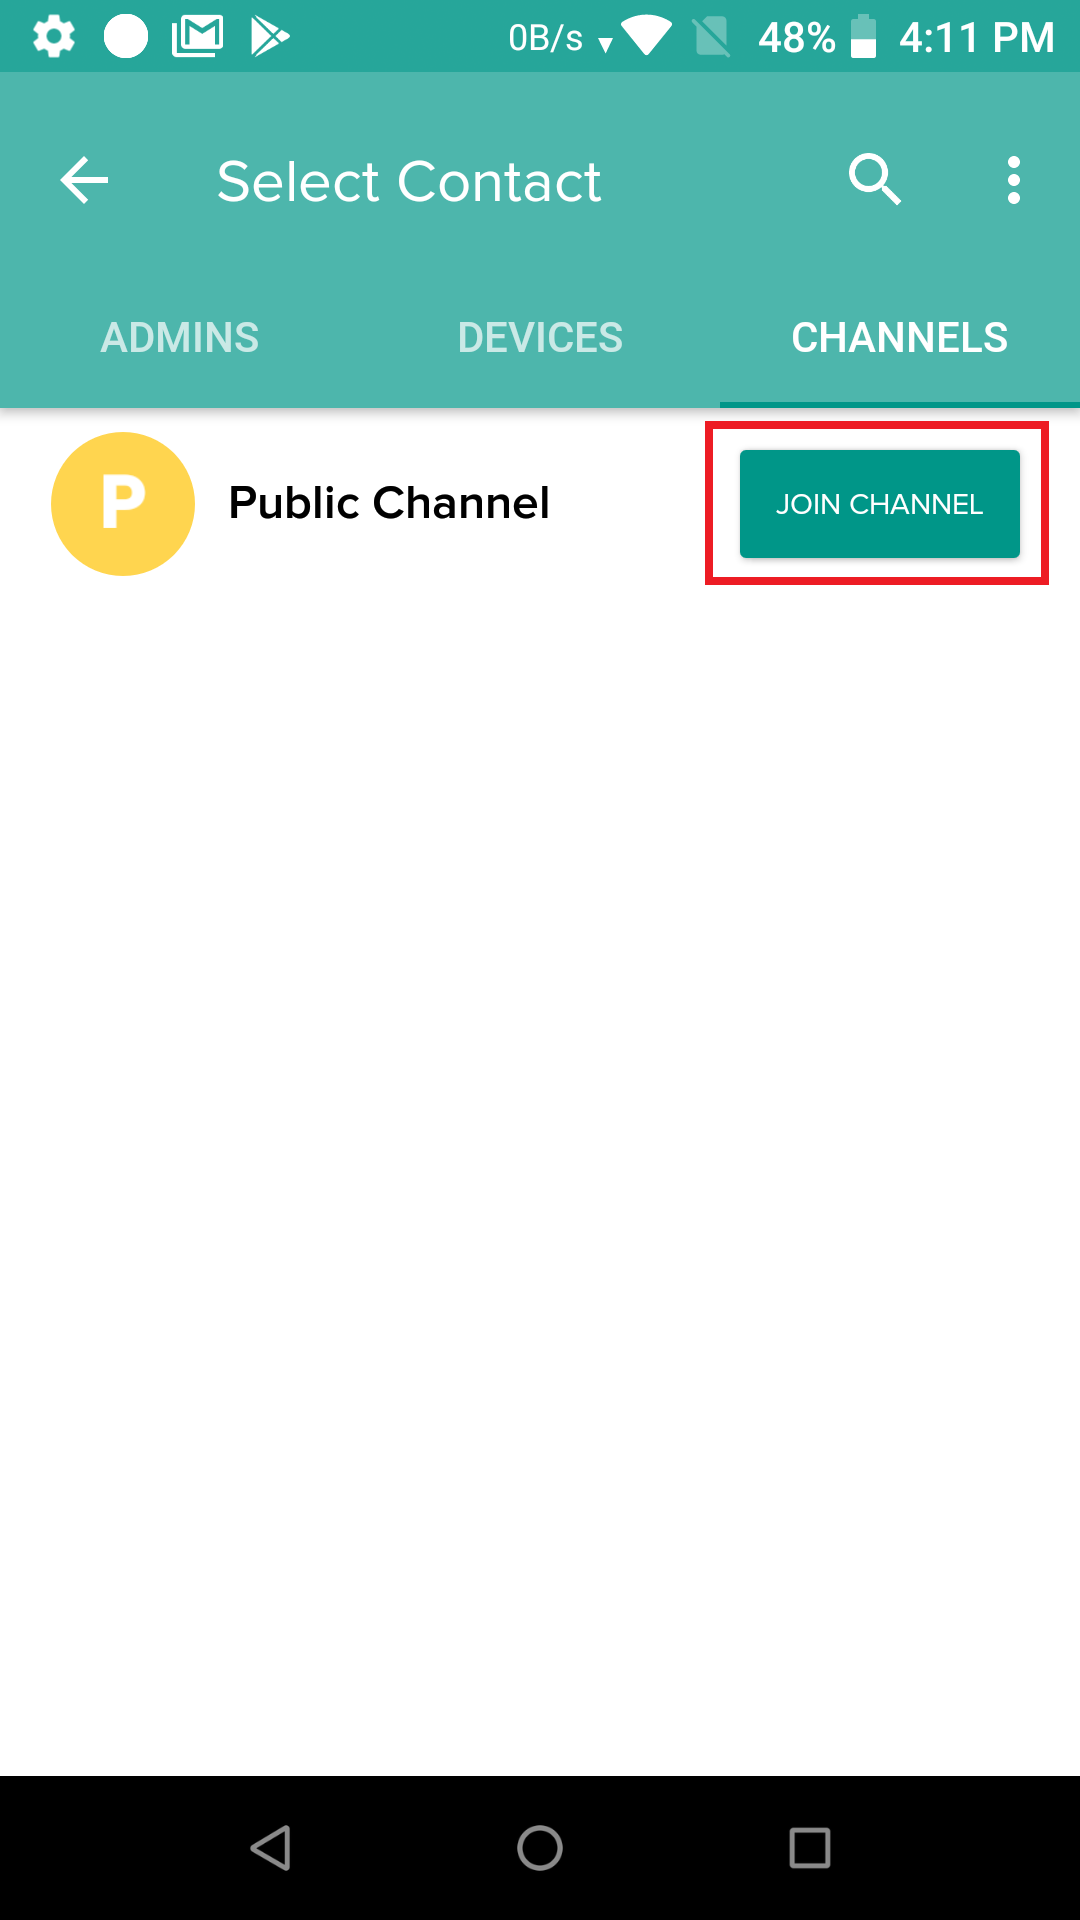
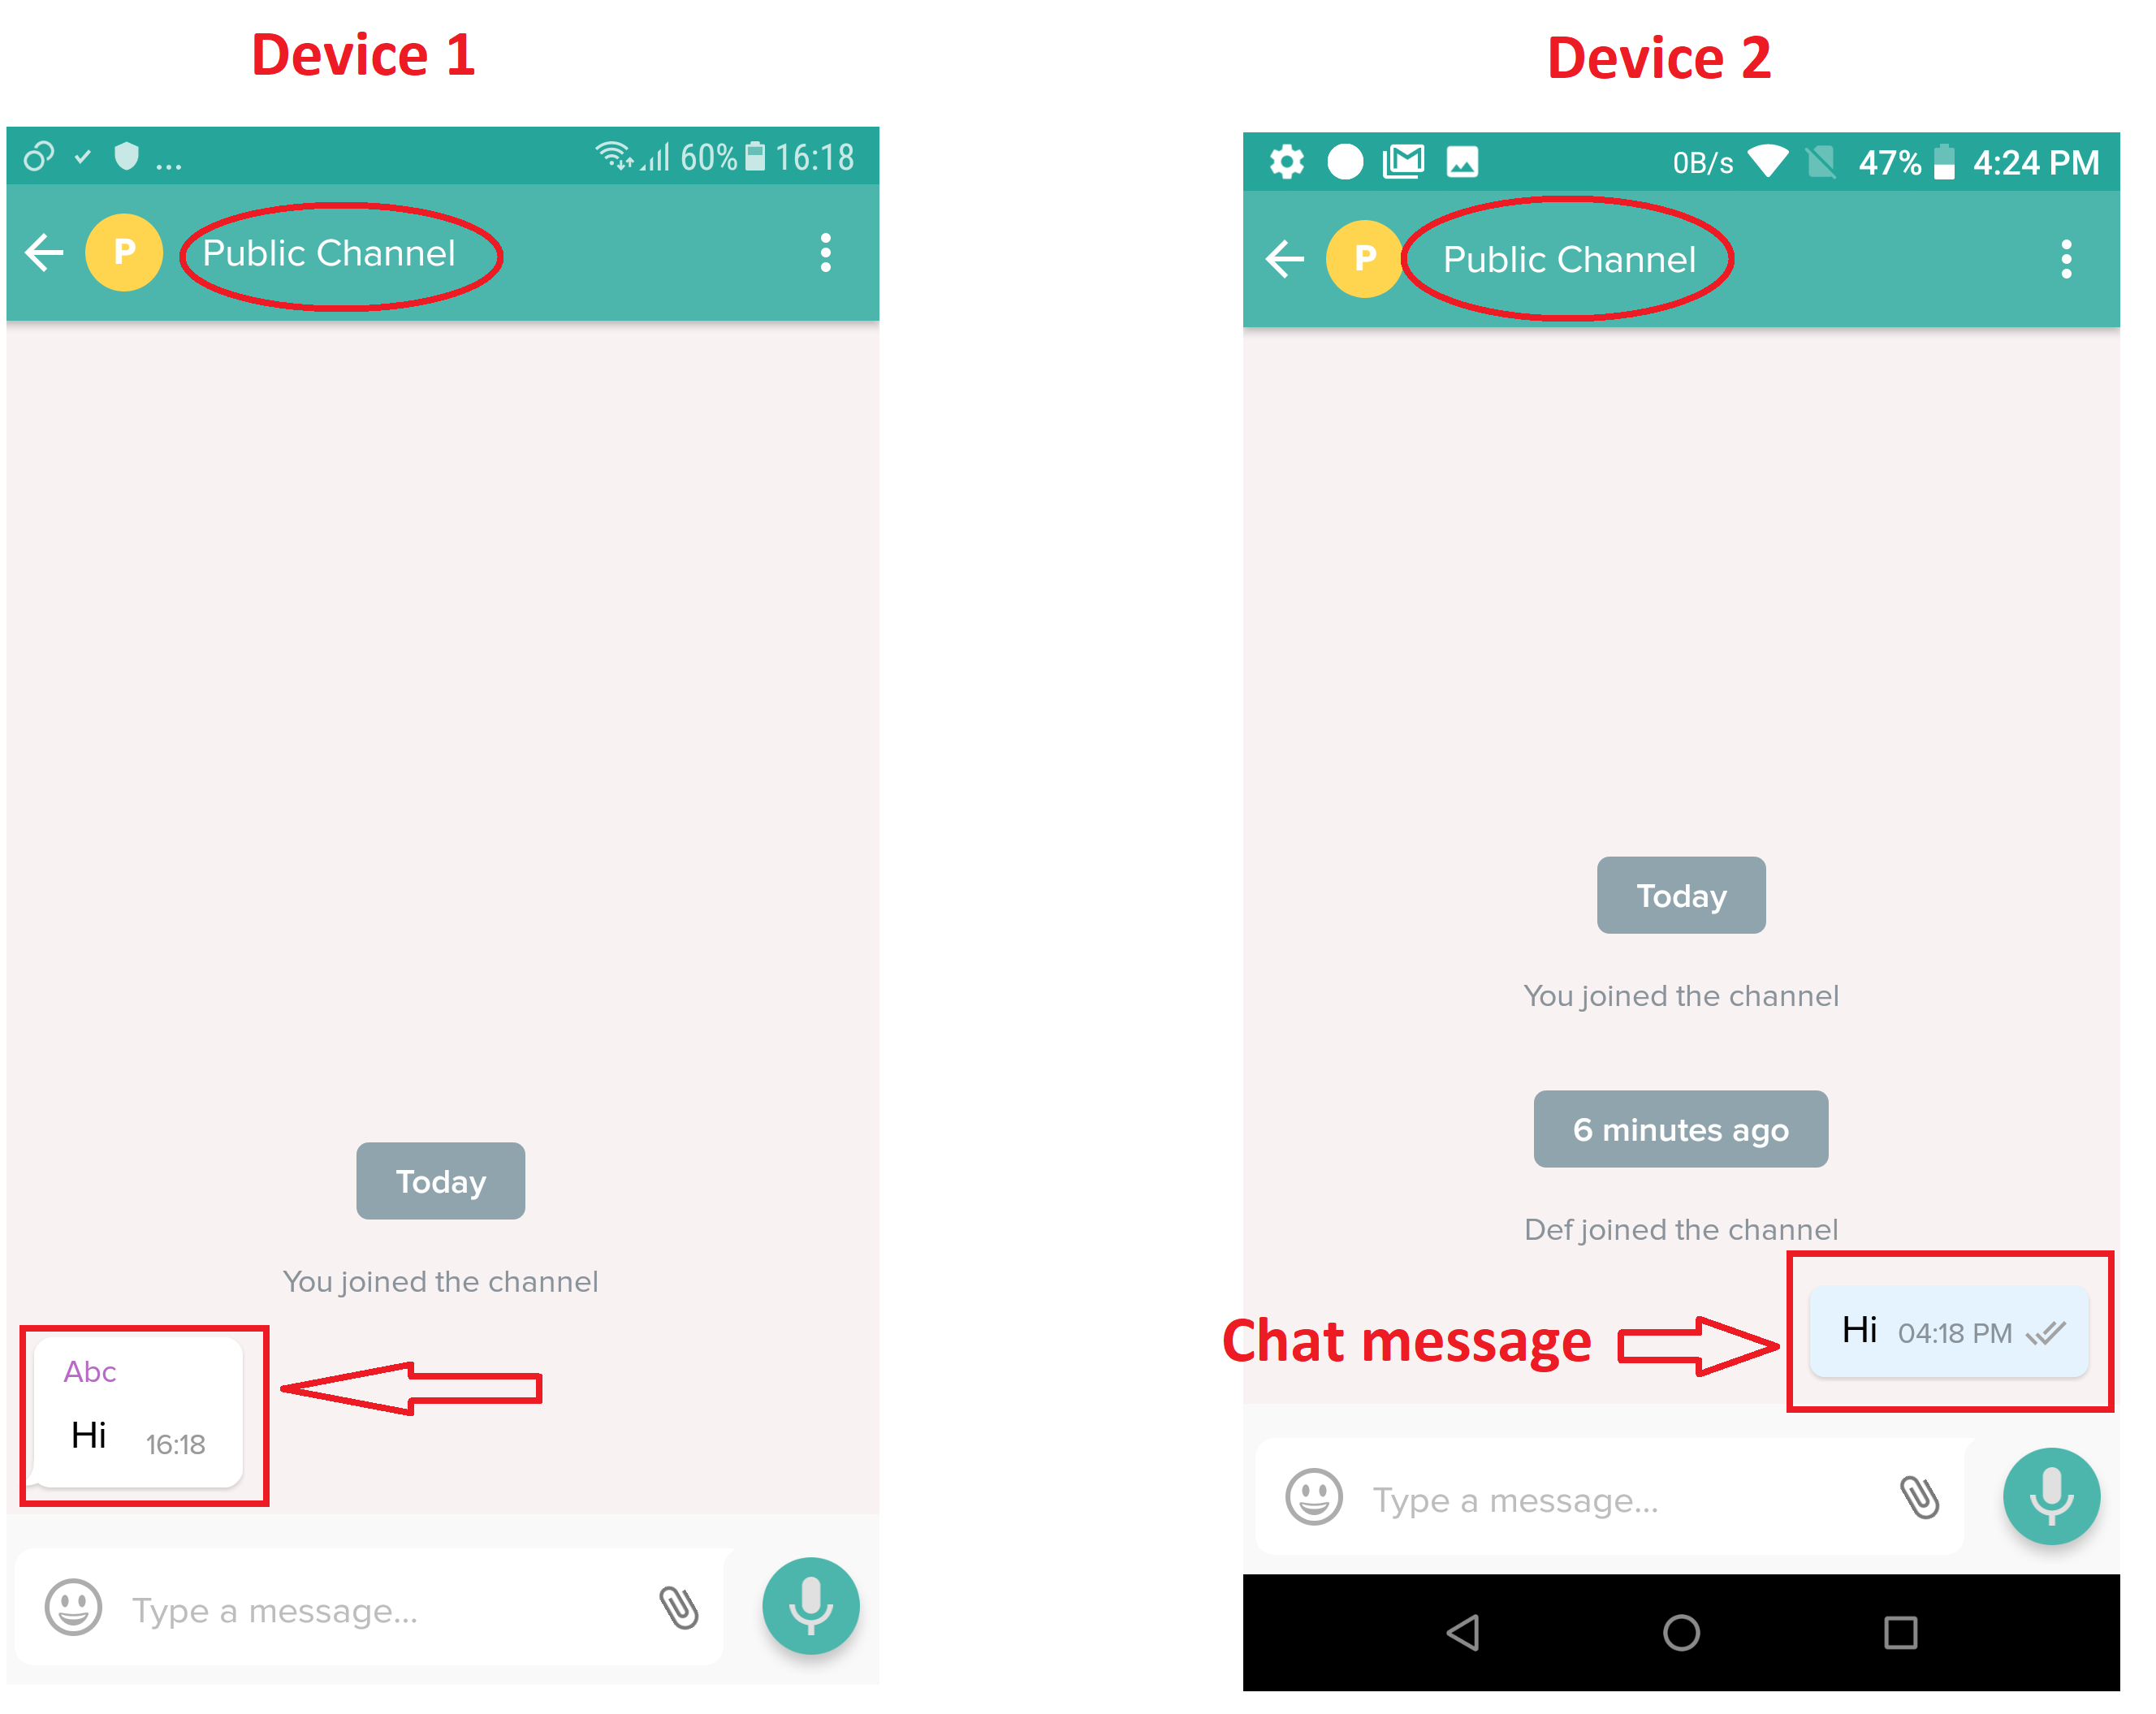
- The Channel gets created and is visible on the device. To join the public channel, tap Join Channel
- Users (who have joined the channel) can now start chatting, sending images and other files, voice messages, etc. to all the people who have joined the public channel.
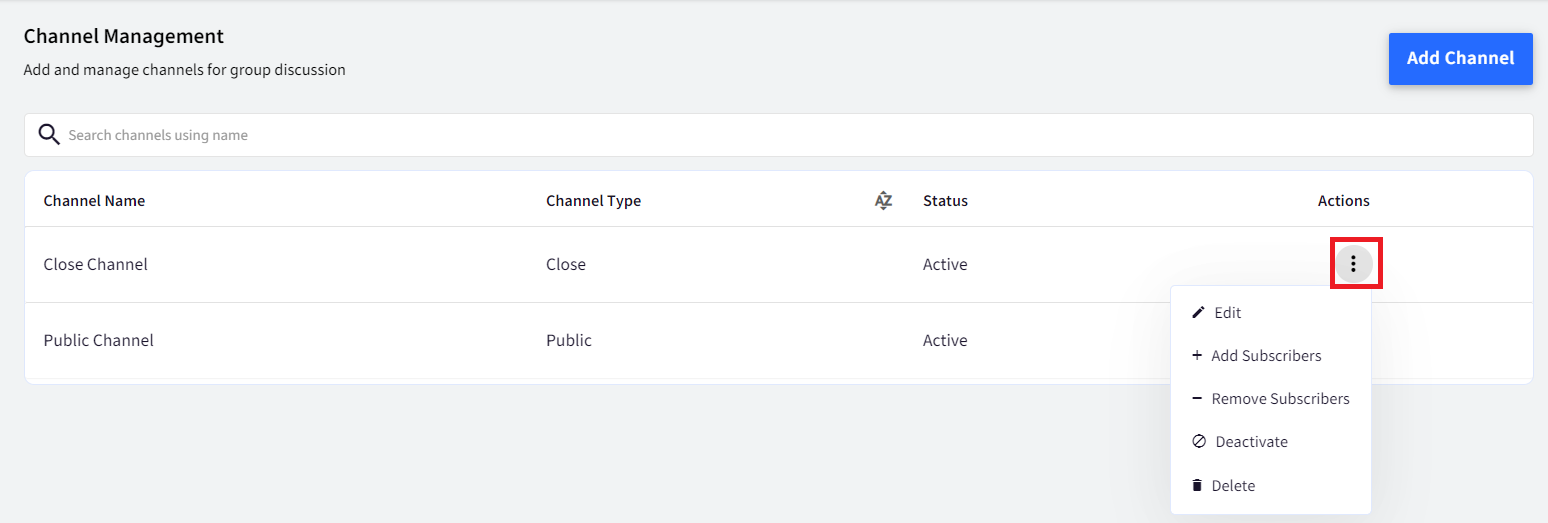
Additional Actions on a Public Channel
From the dashboard, you can perform following actions on a Public channel:
- Edit: You can edit the name of channel
- Deactivate: When you deactivate a channel, it goes in read-only mode for everyone (admin, participants). A channel once deactivated can always be activated again.
- Delete: The channel can be deleted. Once deleted, it gets removed from the devices as well as dashboard.
Add a Close Channel
- In Add Channel dialog box, give any name to the channel
- Select Close in Type and Submit
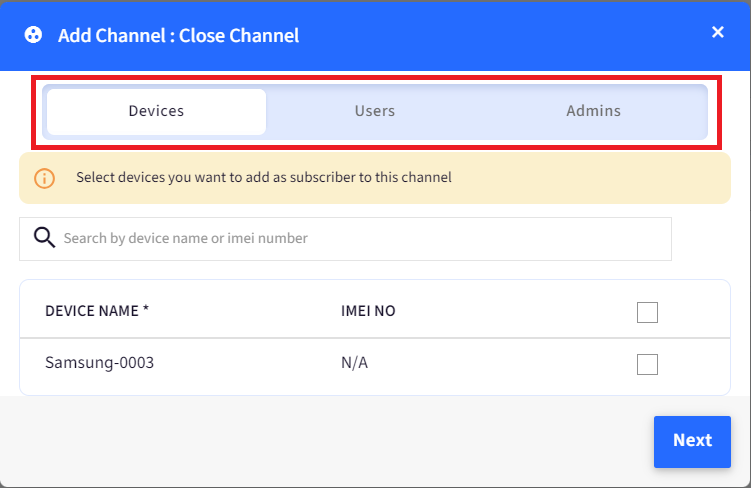
- A new dialog box comes. Here, select Devices, Users, and Admins who the admin wants to add as subscribers to the channel. The Devices which are enrolled will be visible here. Select devices and click Next. All admins (Group Admin, Device Admin, Co-owner or any custom role), will be listed here. Select the Admins and click Save.
- The channel gets created.
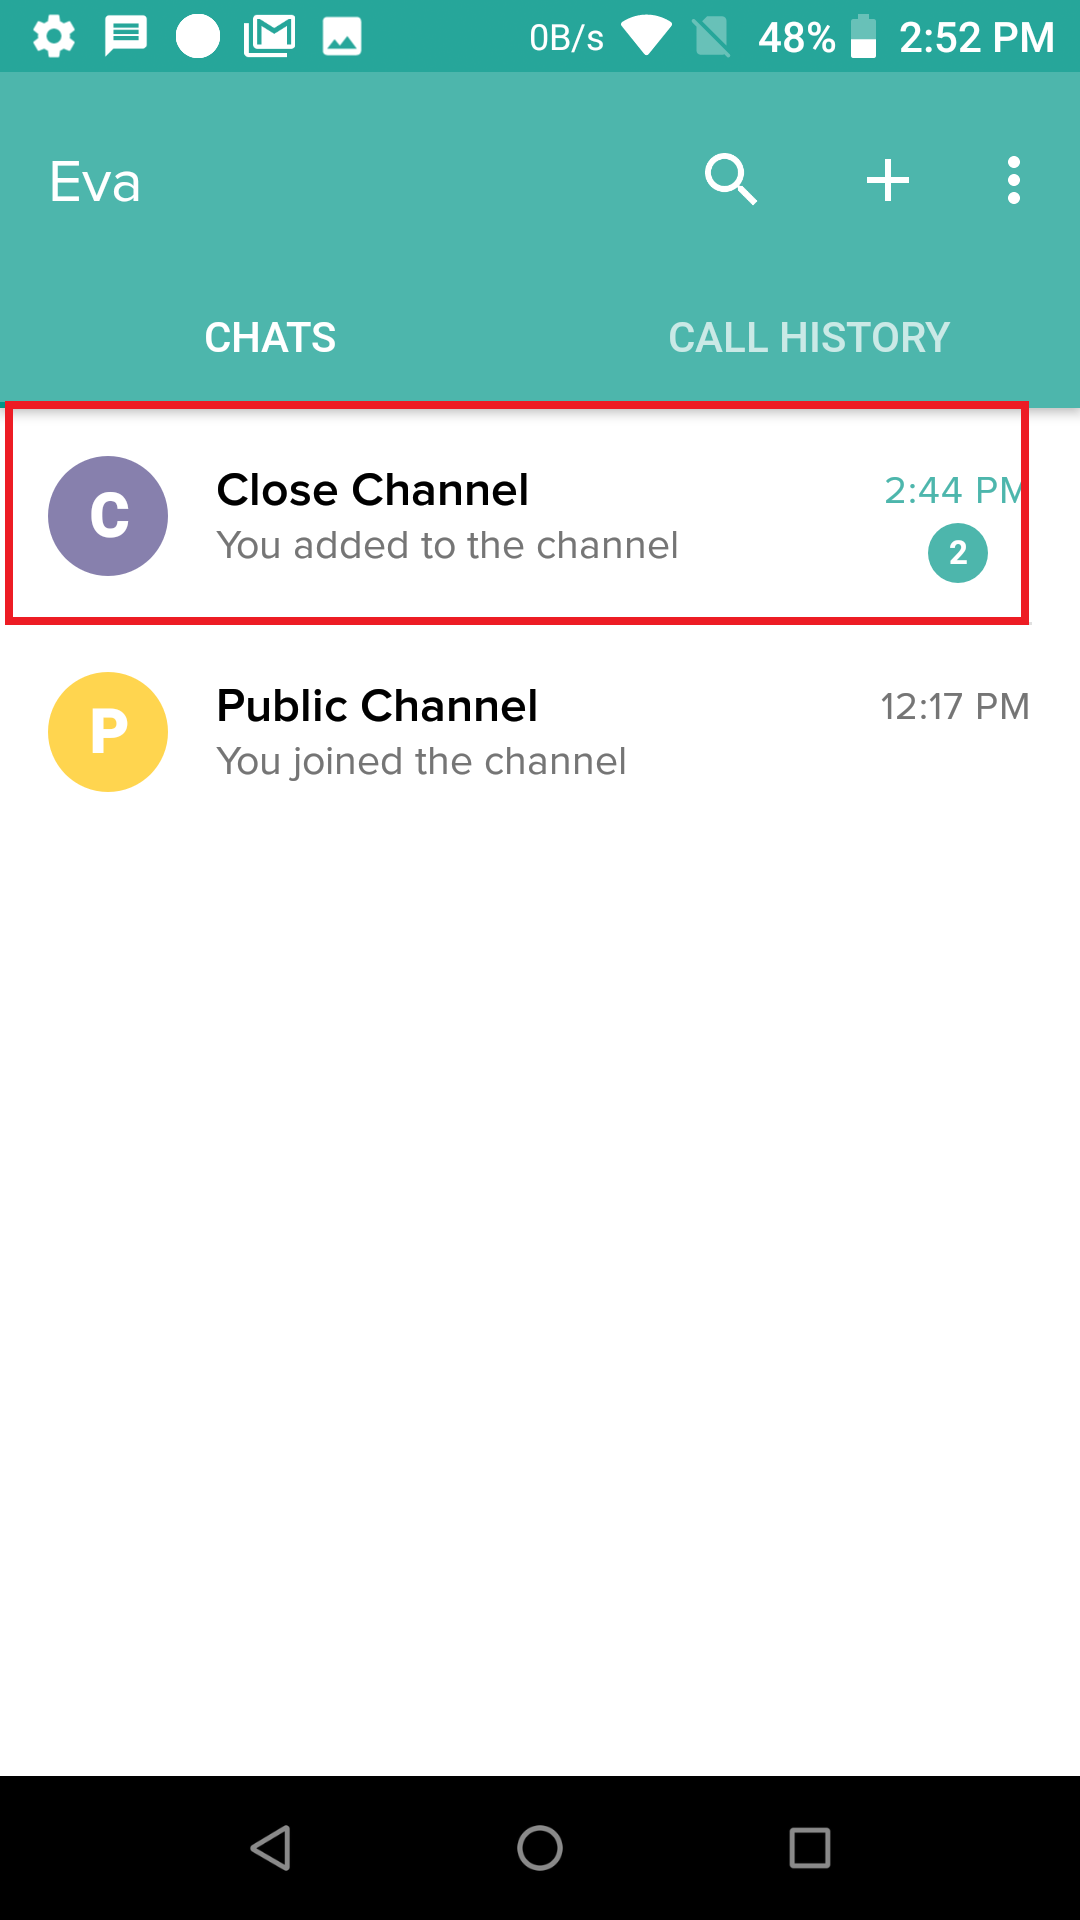
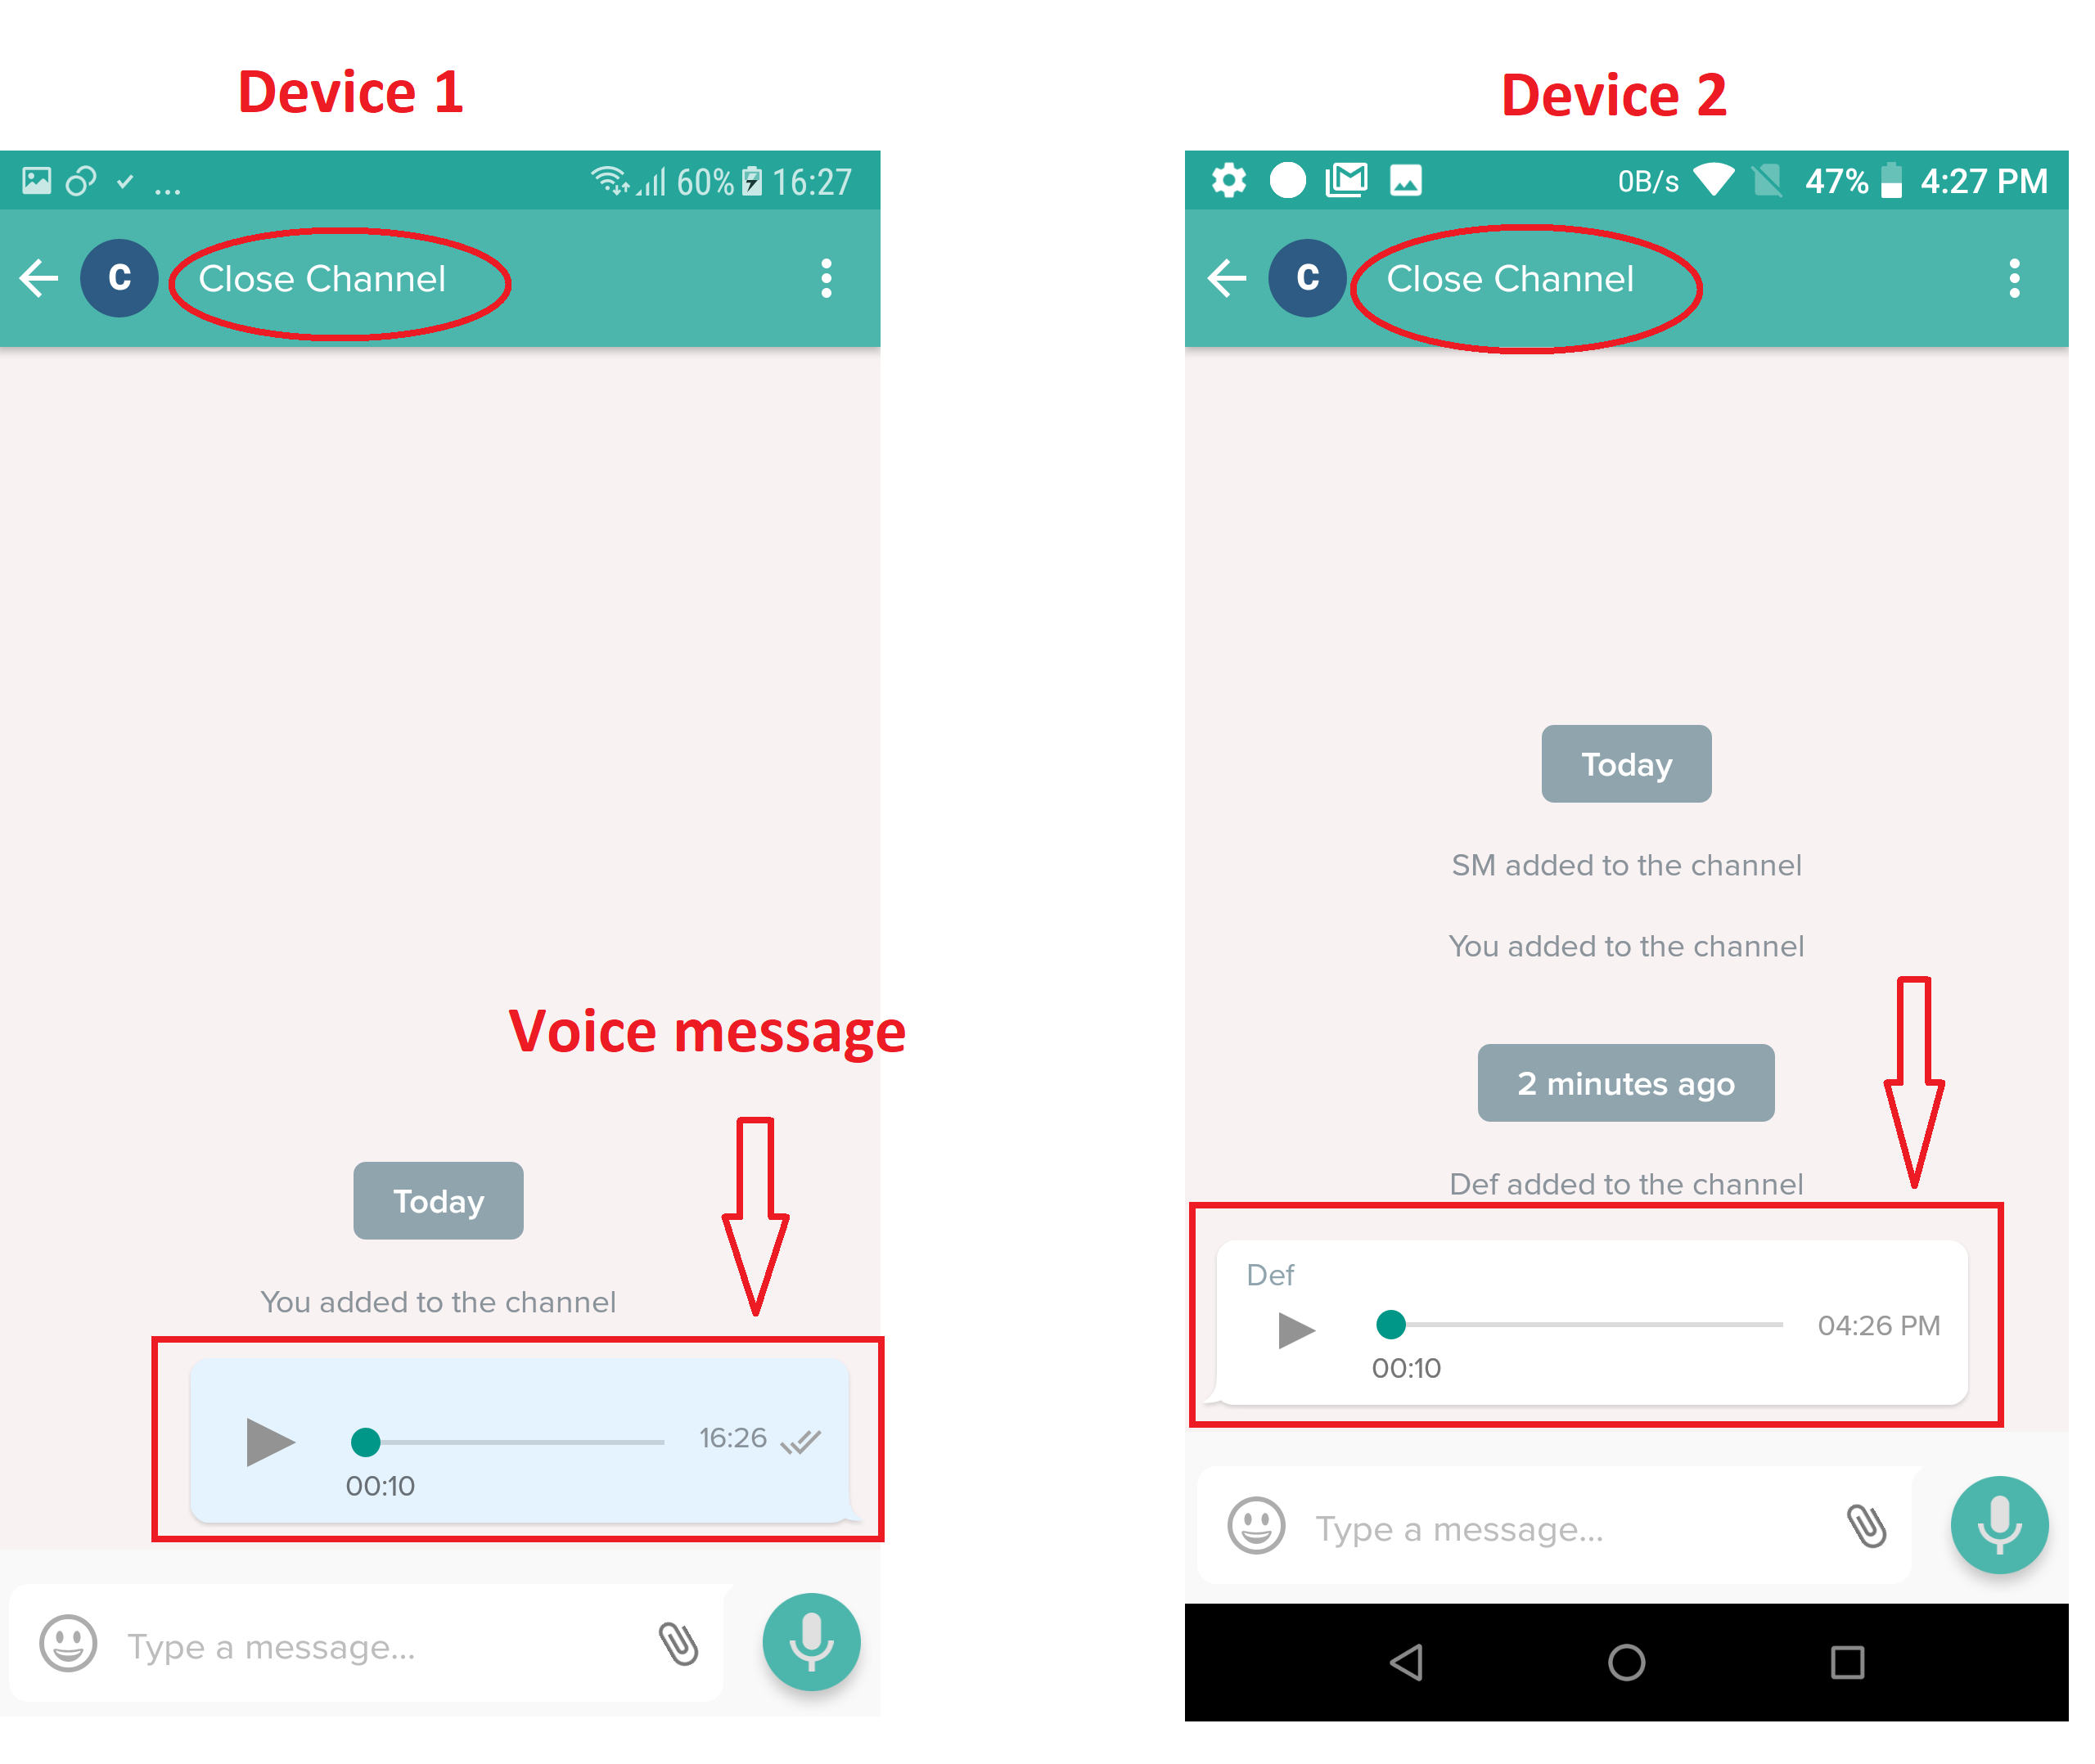
- All the device owners/admins who have been invited by the admin are part of this channel. They can start chatting, sending images and other files, and voice message each other within this channel.
Additional Actions on a Close Channel
From the dashboard, you can perform following actions on a Close channel:
- Edit: The name of the channel can be edited
- Add Subscribers: Add more subscribers to this channel. Clicking on this opens the same dialog box where admin can select more devices and admins to be included in this channel.
- Remove Subscribers: All those who have already subscribed to the channel will be listed and admin can remove the subscribers. Click on Remove Subscribers, the dialog box will open, select devices/admins which have to be removed and click Remove Subscribers.
- Deactivate: A close channel can be deactivated with this option. When you deactivate a channel, it goes in read-only mode for everyone (admin, participants). A channel once deactivated can always be activated again.
- Delete: The channel can be deleted. Once deleted, it gets removed from the devices of all the subscribers as well as from the dashboard.
Channels based on Device Groups
In addition to Public and Close channels, there are also channels that are automatically created based on the device groups available in a user's account. For Example, if an account has a device group as “Sales”, then one Channel will get auto-created in that account with the same name (i.e. Sales). These Channels will be auto- published on the devices which are part of this device group.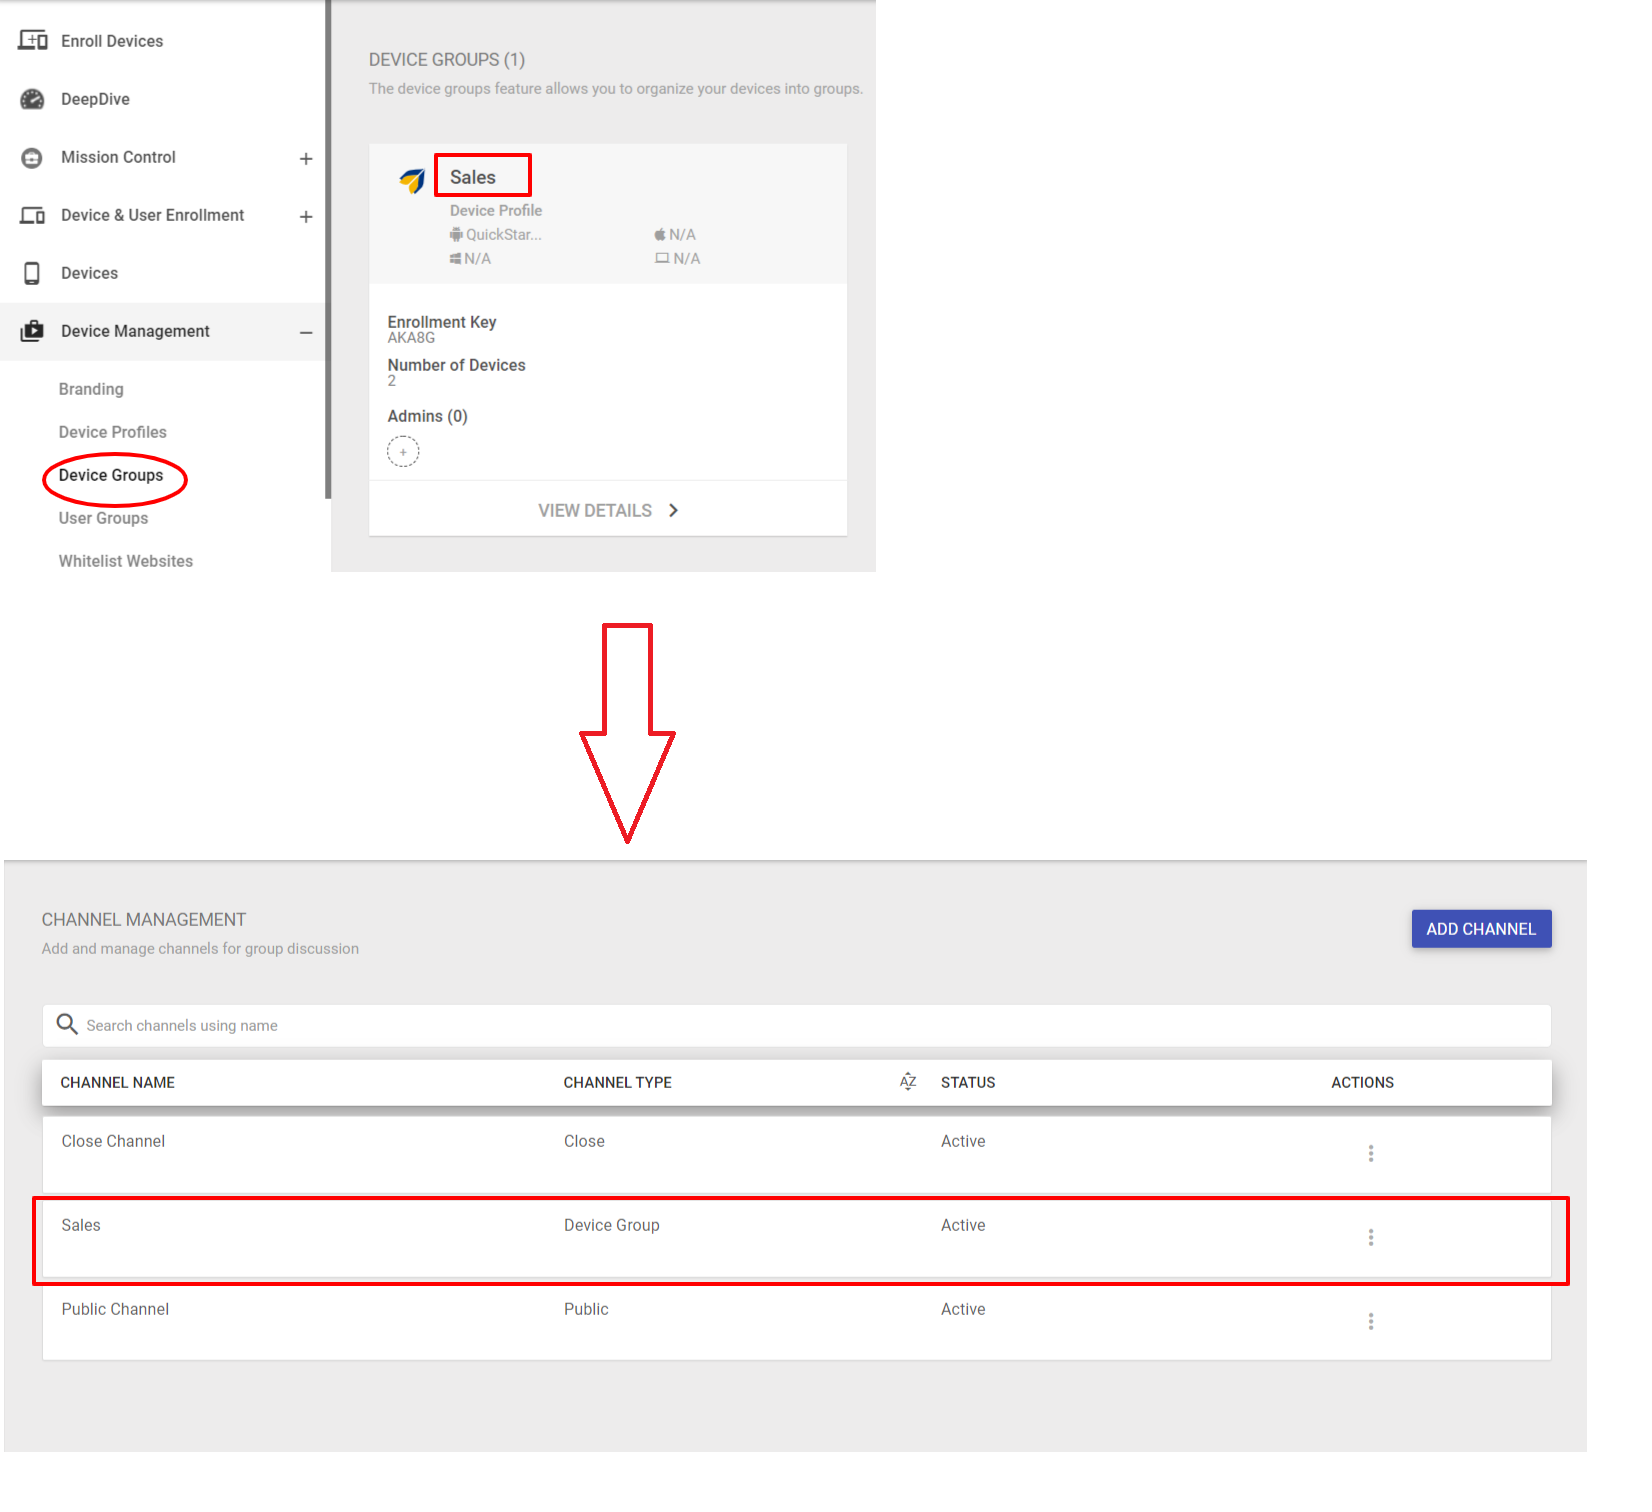
It is up to the users from that particular group whether they want to subscribe to it or not. To subscribe, just tap on Join Channel
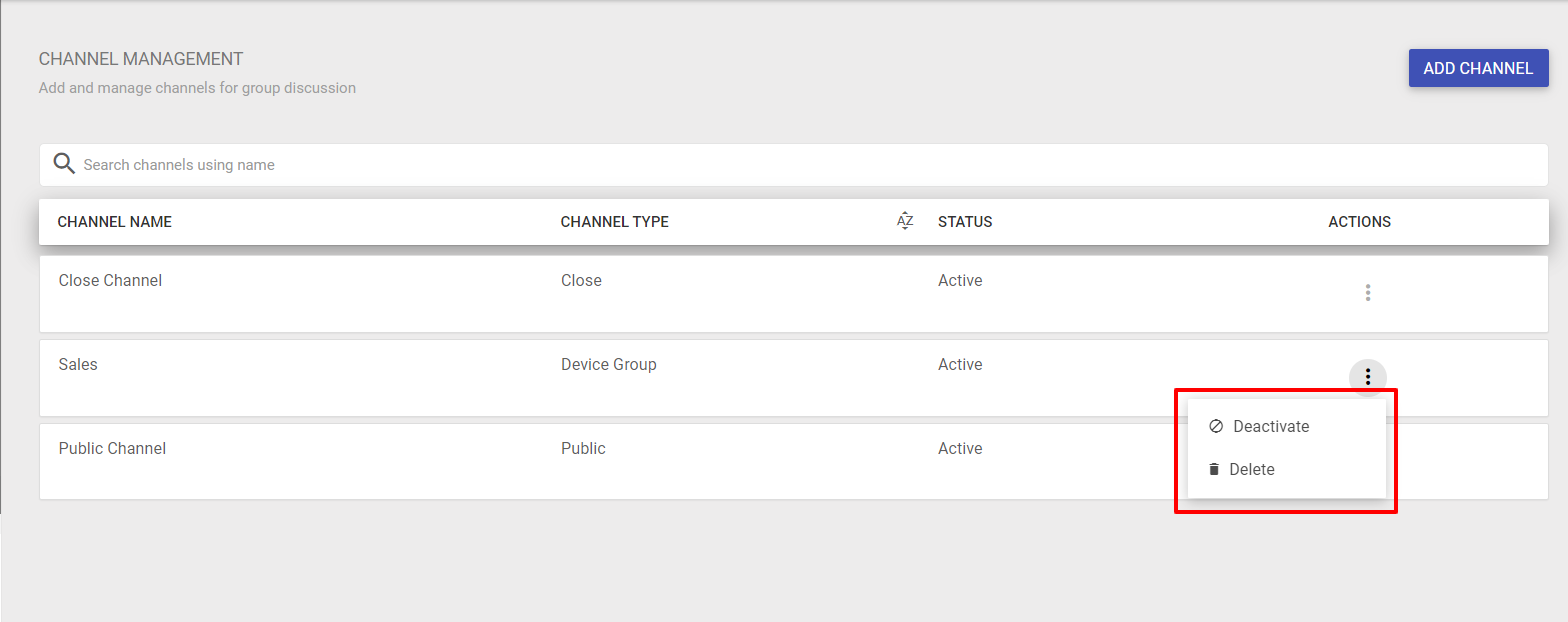
Additional Actions on Device Group Channel
- Deactivate: A Device Group channel can be deactivated with this option. When you deactivate a channel, it goes in read-only mode for everyone (admin, participants). A channel once deactivated can always be activated again.
- Delete: The channel can be deleted. Once deleted, it gets removed from the devices of all the subscribers as well as from the dashboard.
The admin can send and receive messages on devices through Dashboard. Navigate to Eva Communication Suite > Messenger. This opens a new window with a separate Channels section that displays all the channels.
Admin can select the channel by clicking on it and sending messages from the right-side chat area.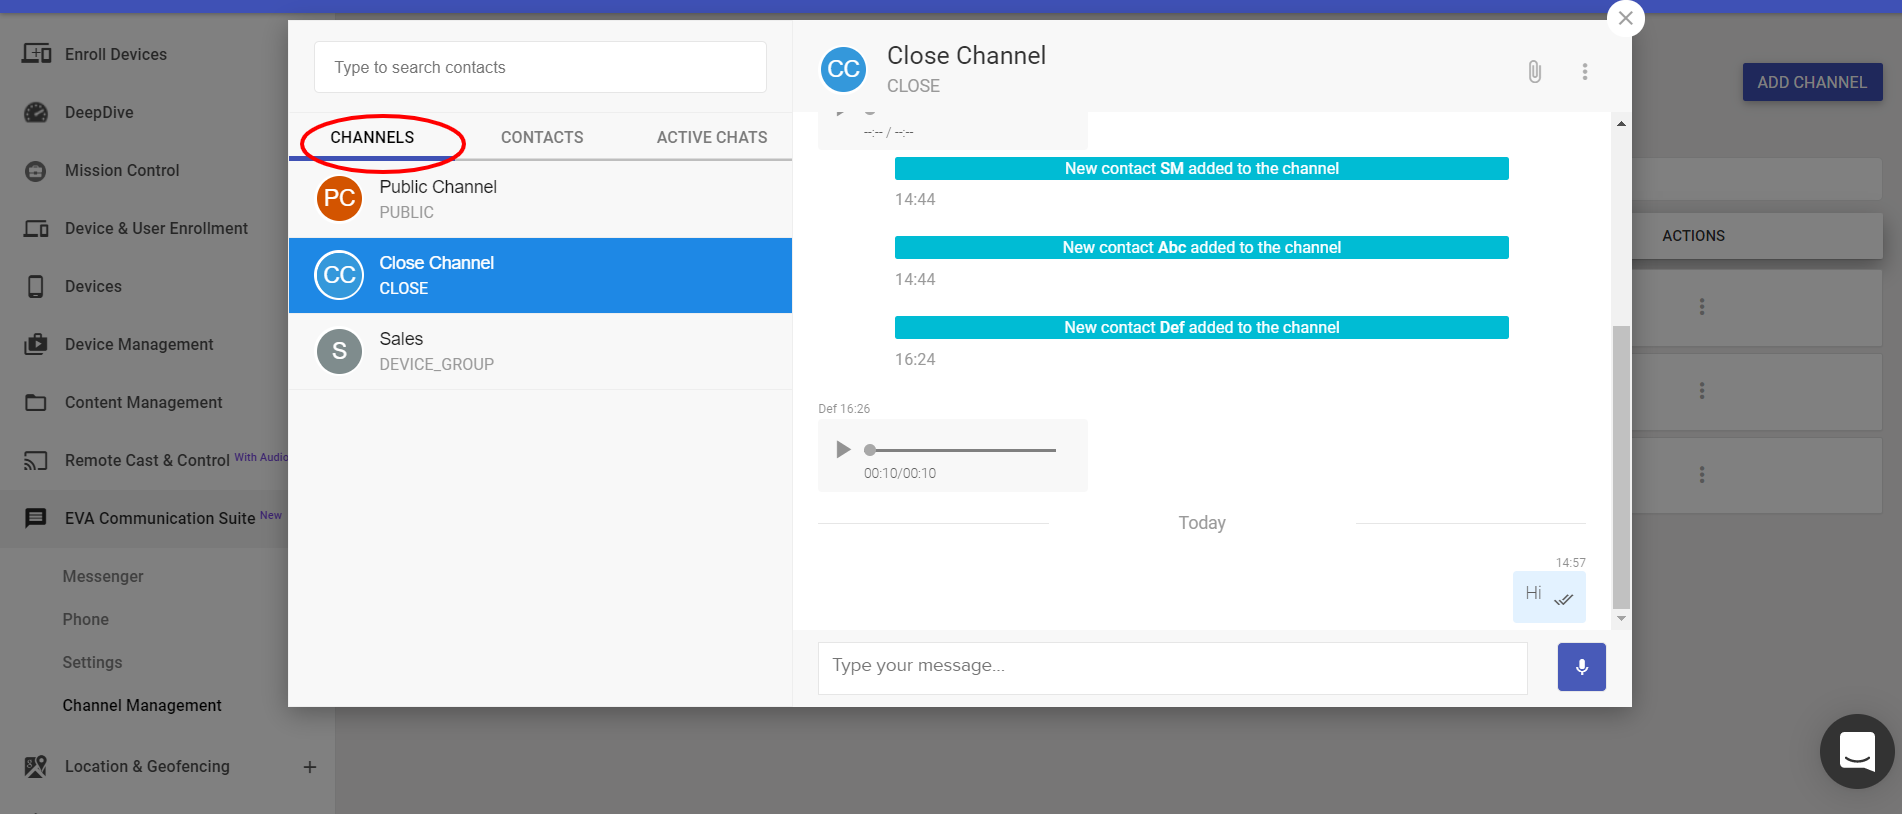
Flag Messages
There might be cases where some messages which you have sent or received, on public or close channels, are important and you want to refer back to them at a later point of time. The Eva messenger provides a feature to bookmark such messages on your devices for a quick reference later, so that you don't have to keep scrolling through the chats and search the messages.
This is achieved through 'Flag Messages' feature. Once message is flagged, it will be shown on a separate screen under the head Flagged messages. This functionality works across all active chats.
To know more about how to flag messages, click here