Eva Communication Suite is deprecated
Scalefusion's Eva Communication Suite has been deprecated and is no longer supported.
Eva Messenger component provides Chat & Voice Call (VoIP) functionality between administrators and devices on field. The feature is available both on Android and iOS devices. The document will describe how voice messaging can be done with Eva Messenger, on both Android and iOS.
Before You Begin
- Eva Communication Suite should be enabled for your account.
- All the devices should be updated to the latest Eva Client Android & iOS
- Eva Client is setup on Devices
How to Send a Voice Message:
From Dashboard to device
- Sign In to Scalefusion Dashboard.
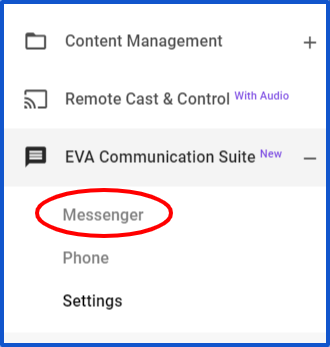
- Navigate to Eva Communication Suite -> Messenger OR click on the EVA button at the top of the dashboard
- A pop-up window will appear containing two tabs All Contacts and Active Chats. Click on All Contacts tab.

- All contacts/devices are listed on the left. Select the contact/device to which you want to send voice message. On selecting device, the right side of the window will display its chat view. At bottom right side of chat view, you will see a Mic icon.
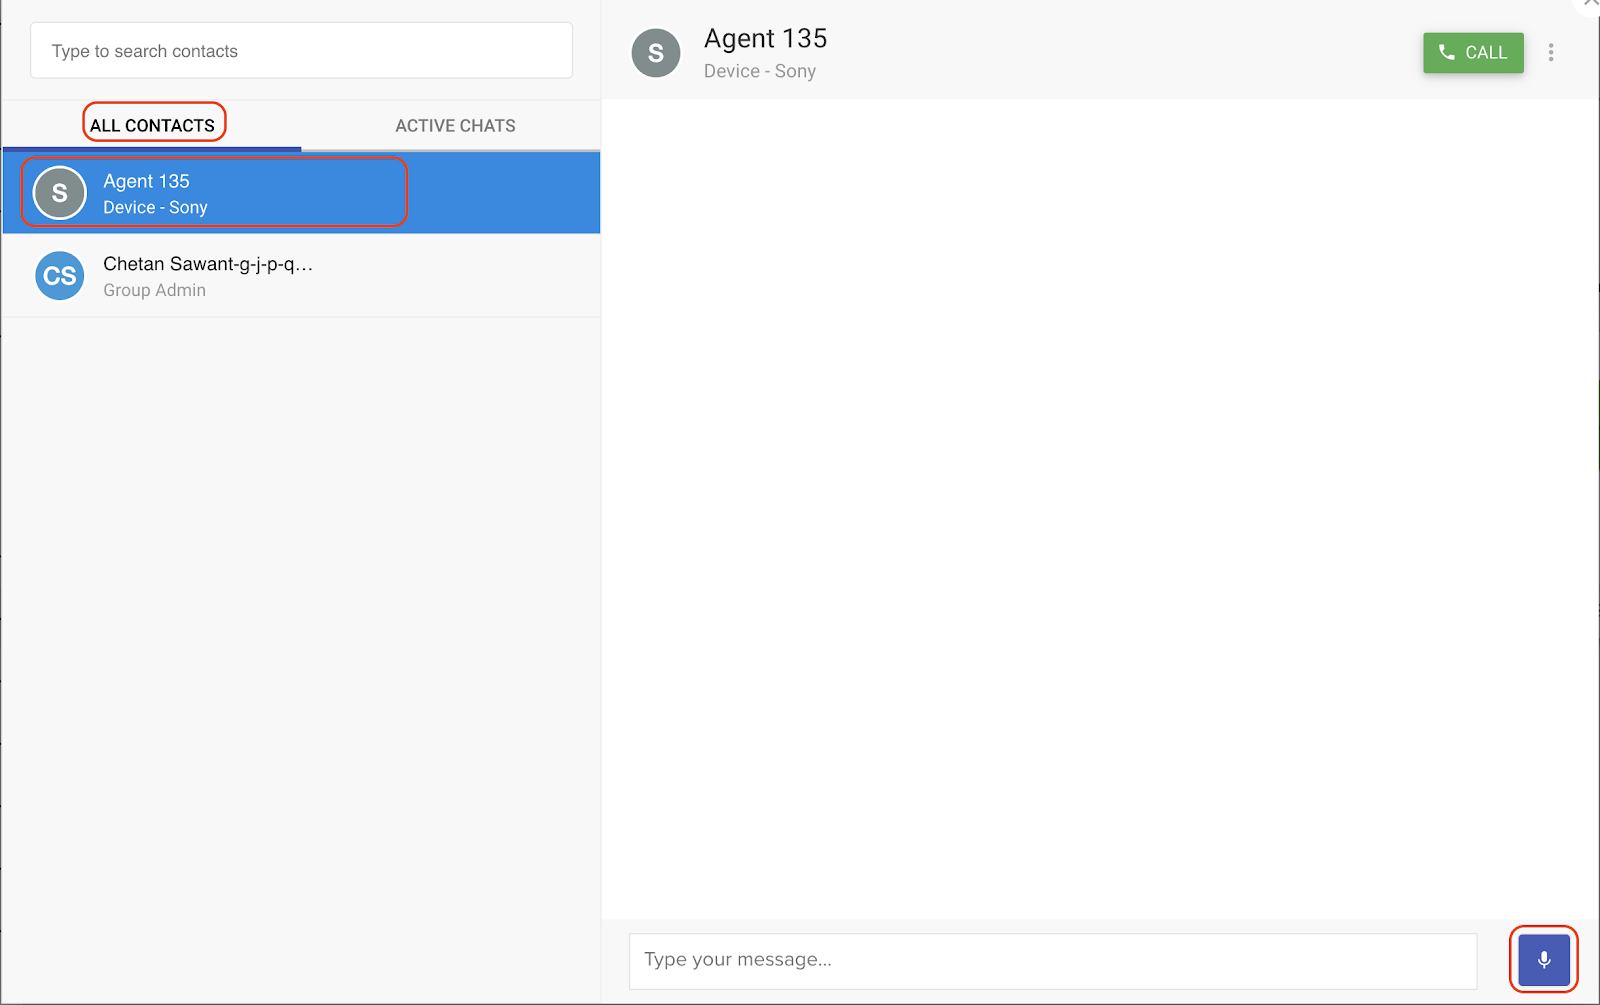
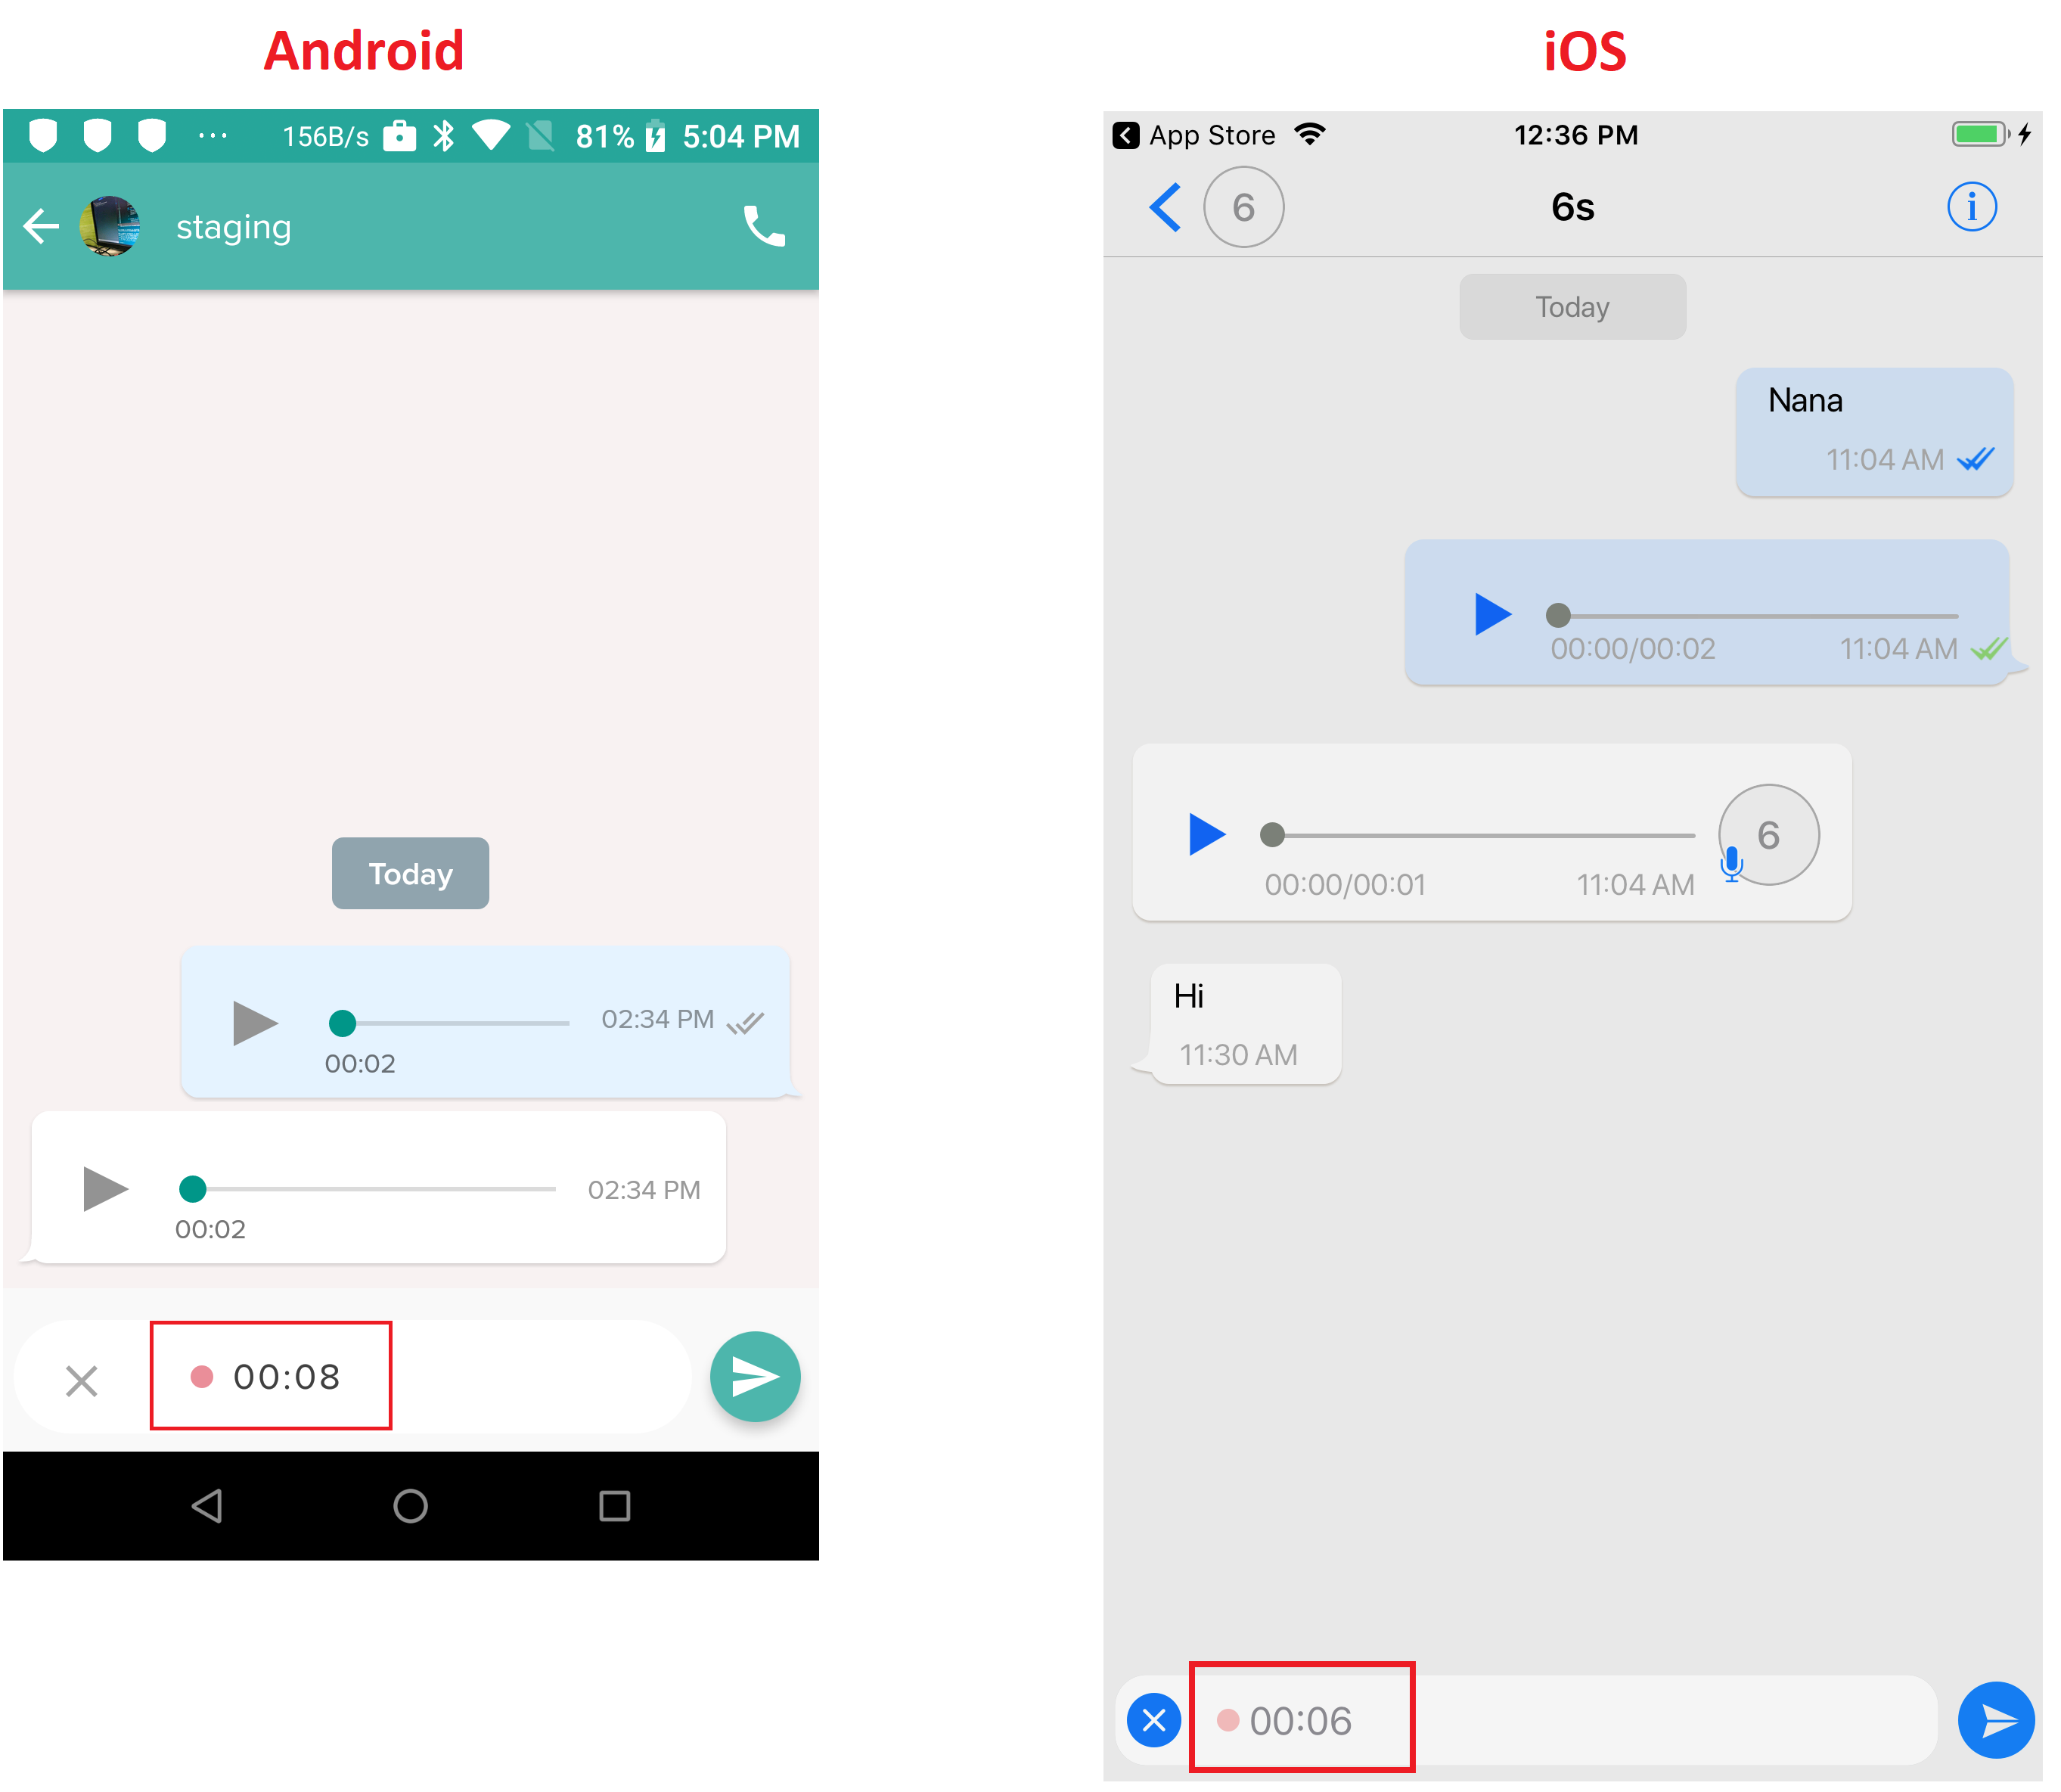
- To record Voice Message, just click on the mic icon and start recording. The progress will be shown in the form of recording duration.

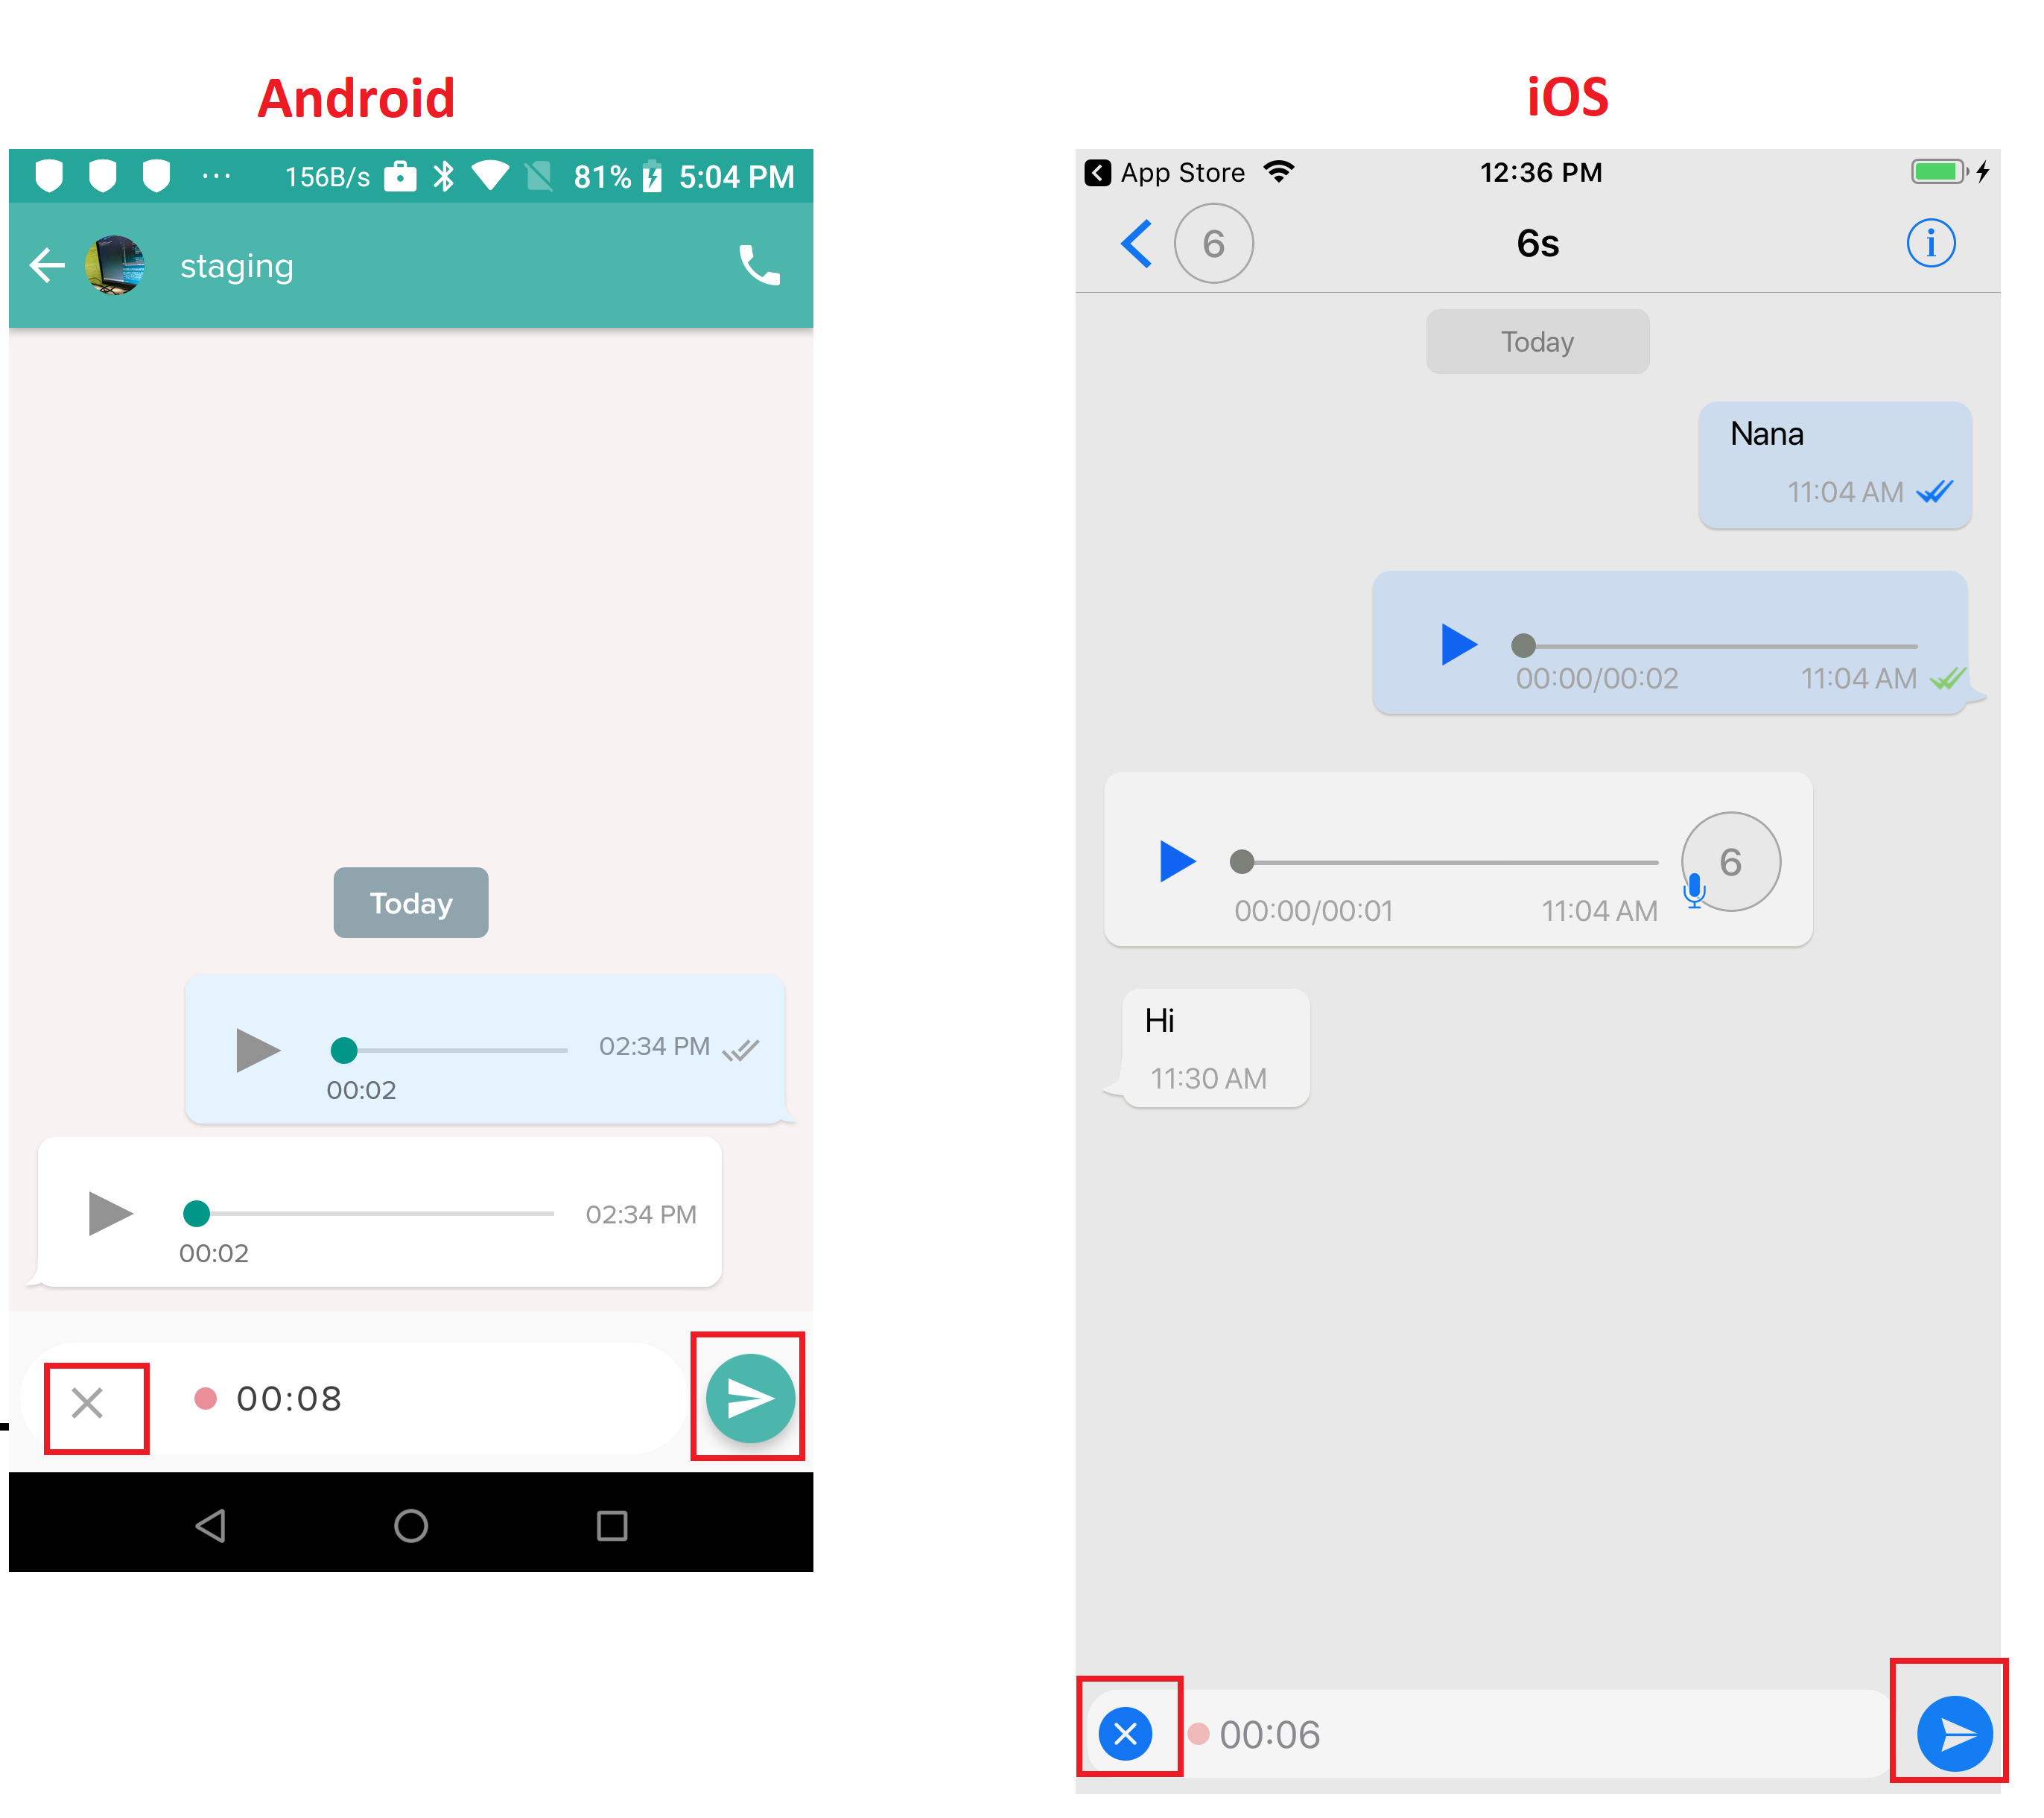
- Once voice message is recorded, click on the send icon on the right to send it. To cancel the ongoing voice message, click on the cancel button (cross icon on the left).

- The message will get sent to the device.
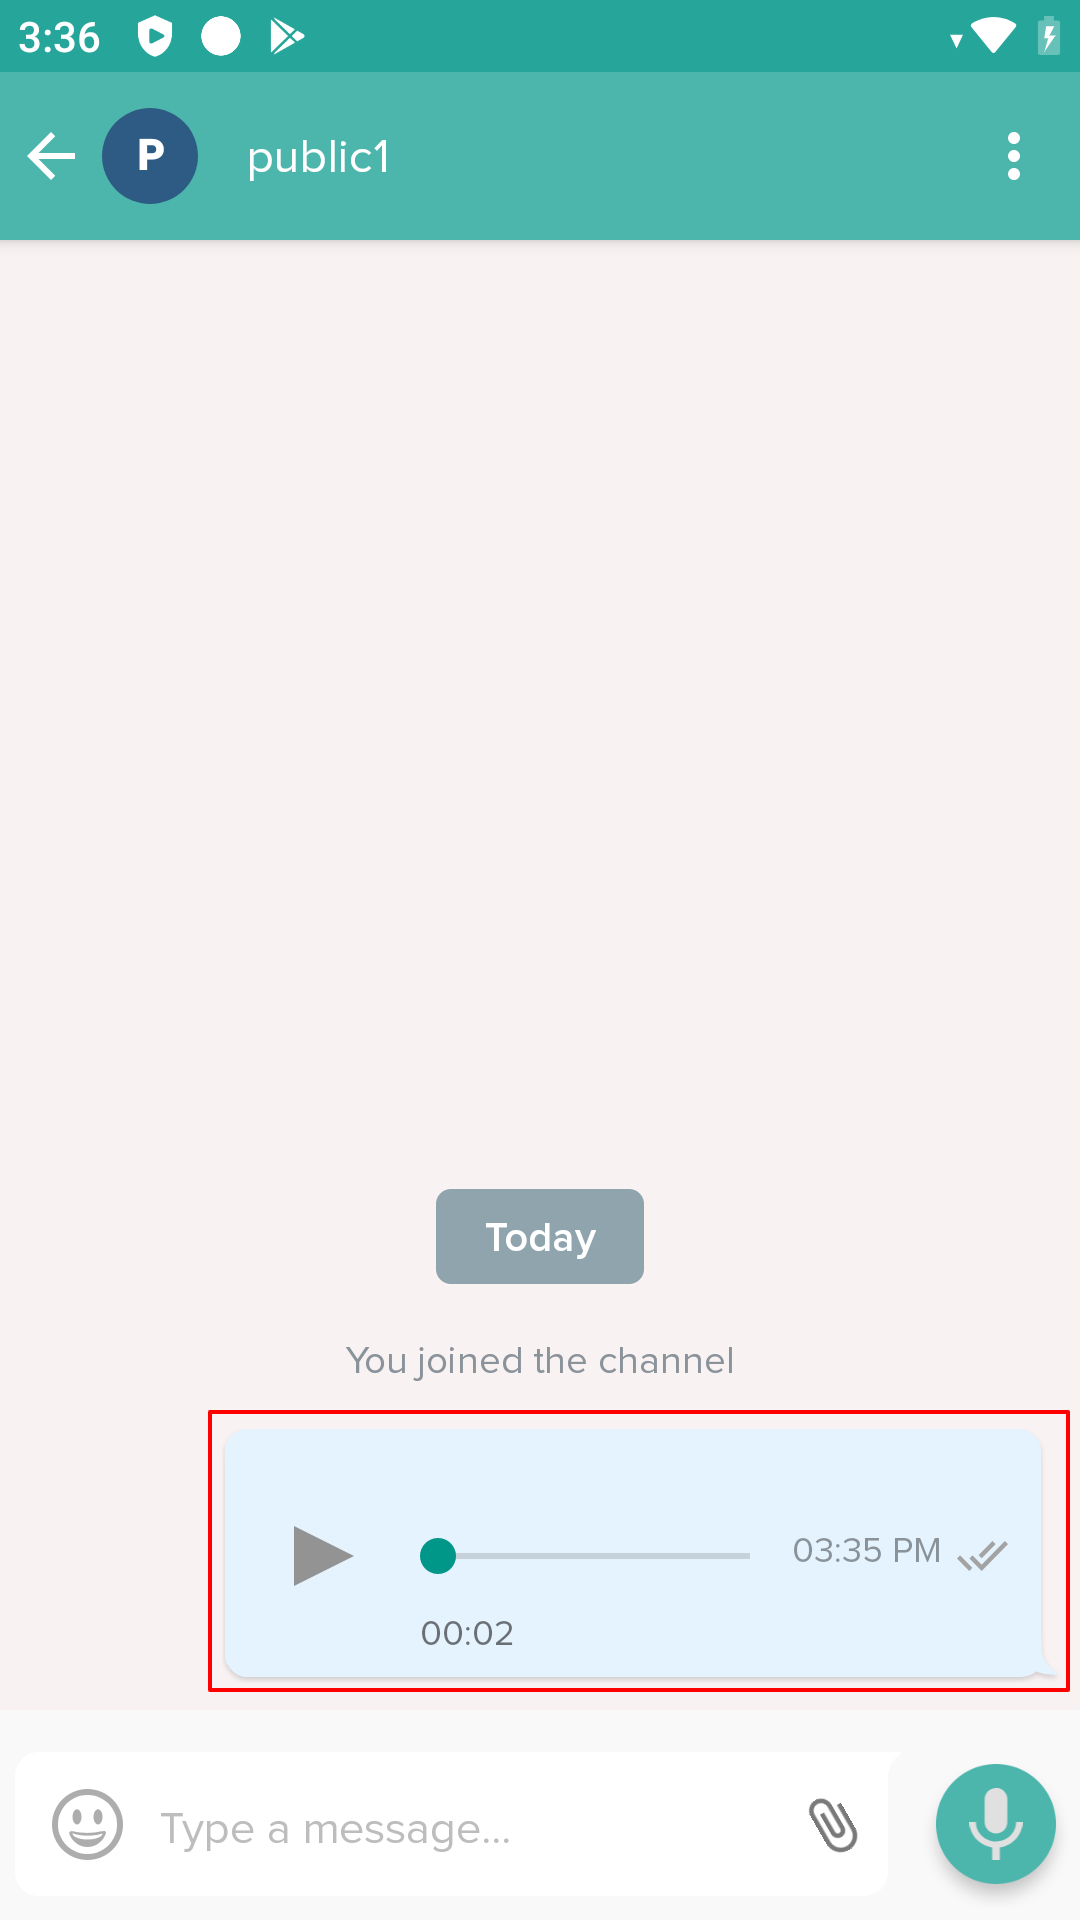
The sent and received Voice Messages will be displayed as below: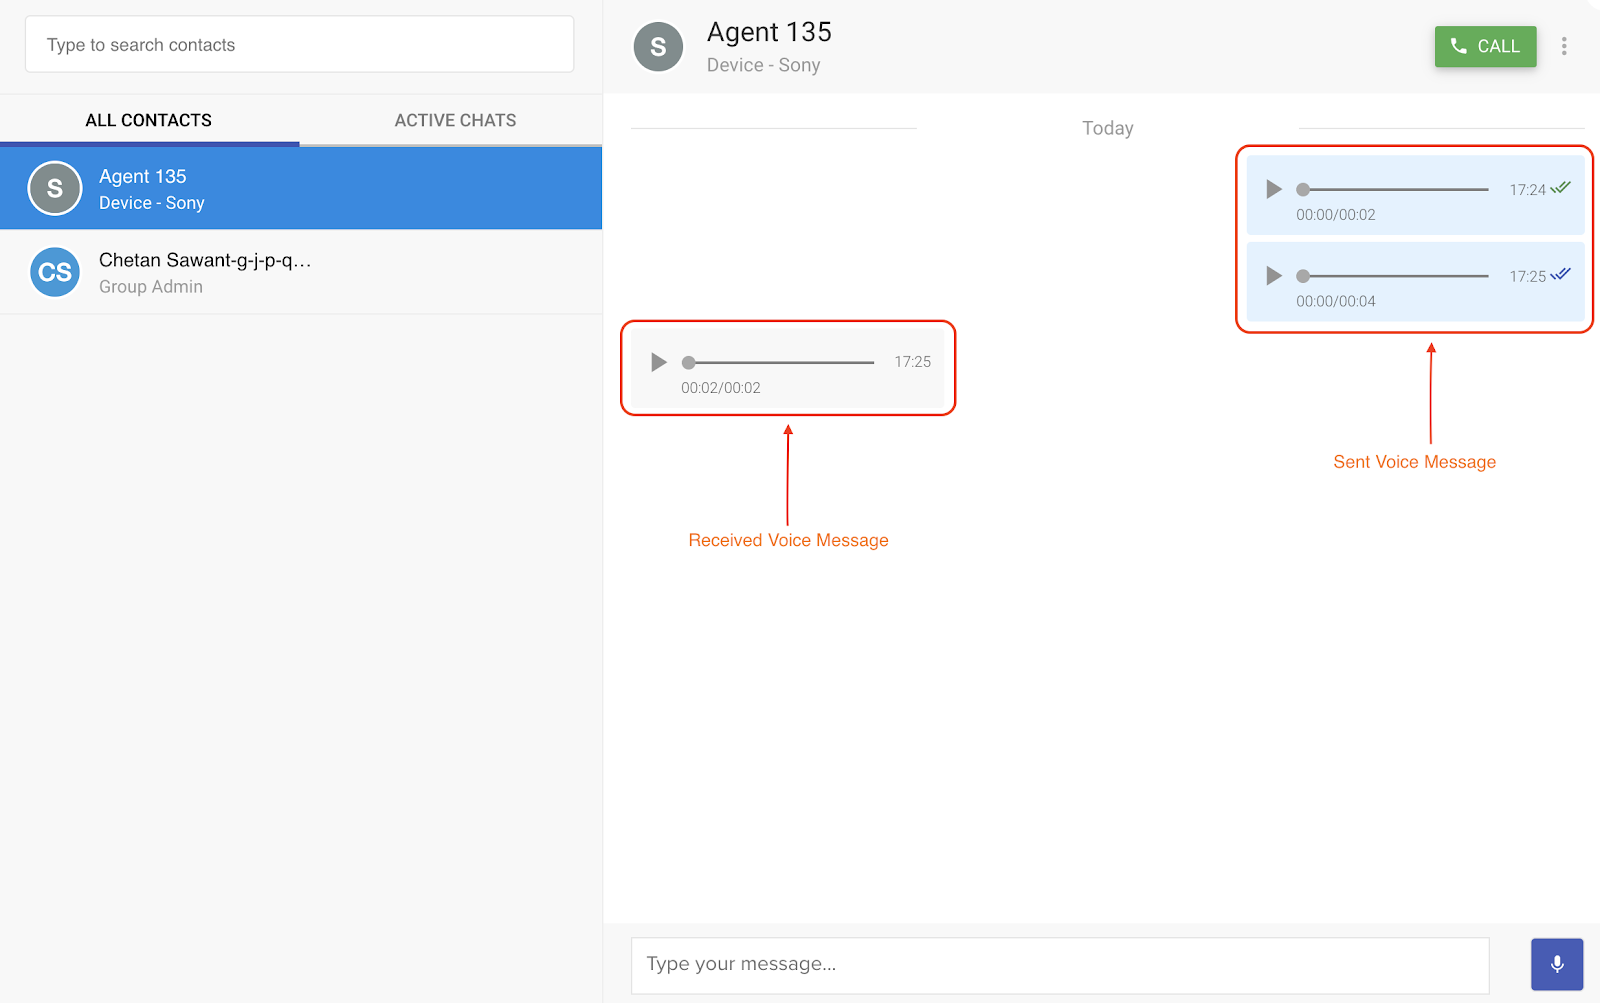
The status of the message sent is indicated by a Double tick mark on the filename where:
- Grey color - indicates that the message is delivered
- Blue color - indicates that message is seen by the recipient.
- Green color - indicates that the voice message is heard by the recipient
Send Files from device to Dashboard
- On your device, open Eva App by clicking on it.
- In the Chats list, choose the contact to which you want to send the message and tap on it
- This will open the chat view. Tap on the Mic icon at the bottom right, next to the attachment icon and start recording.
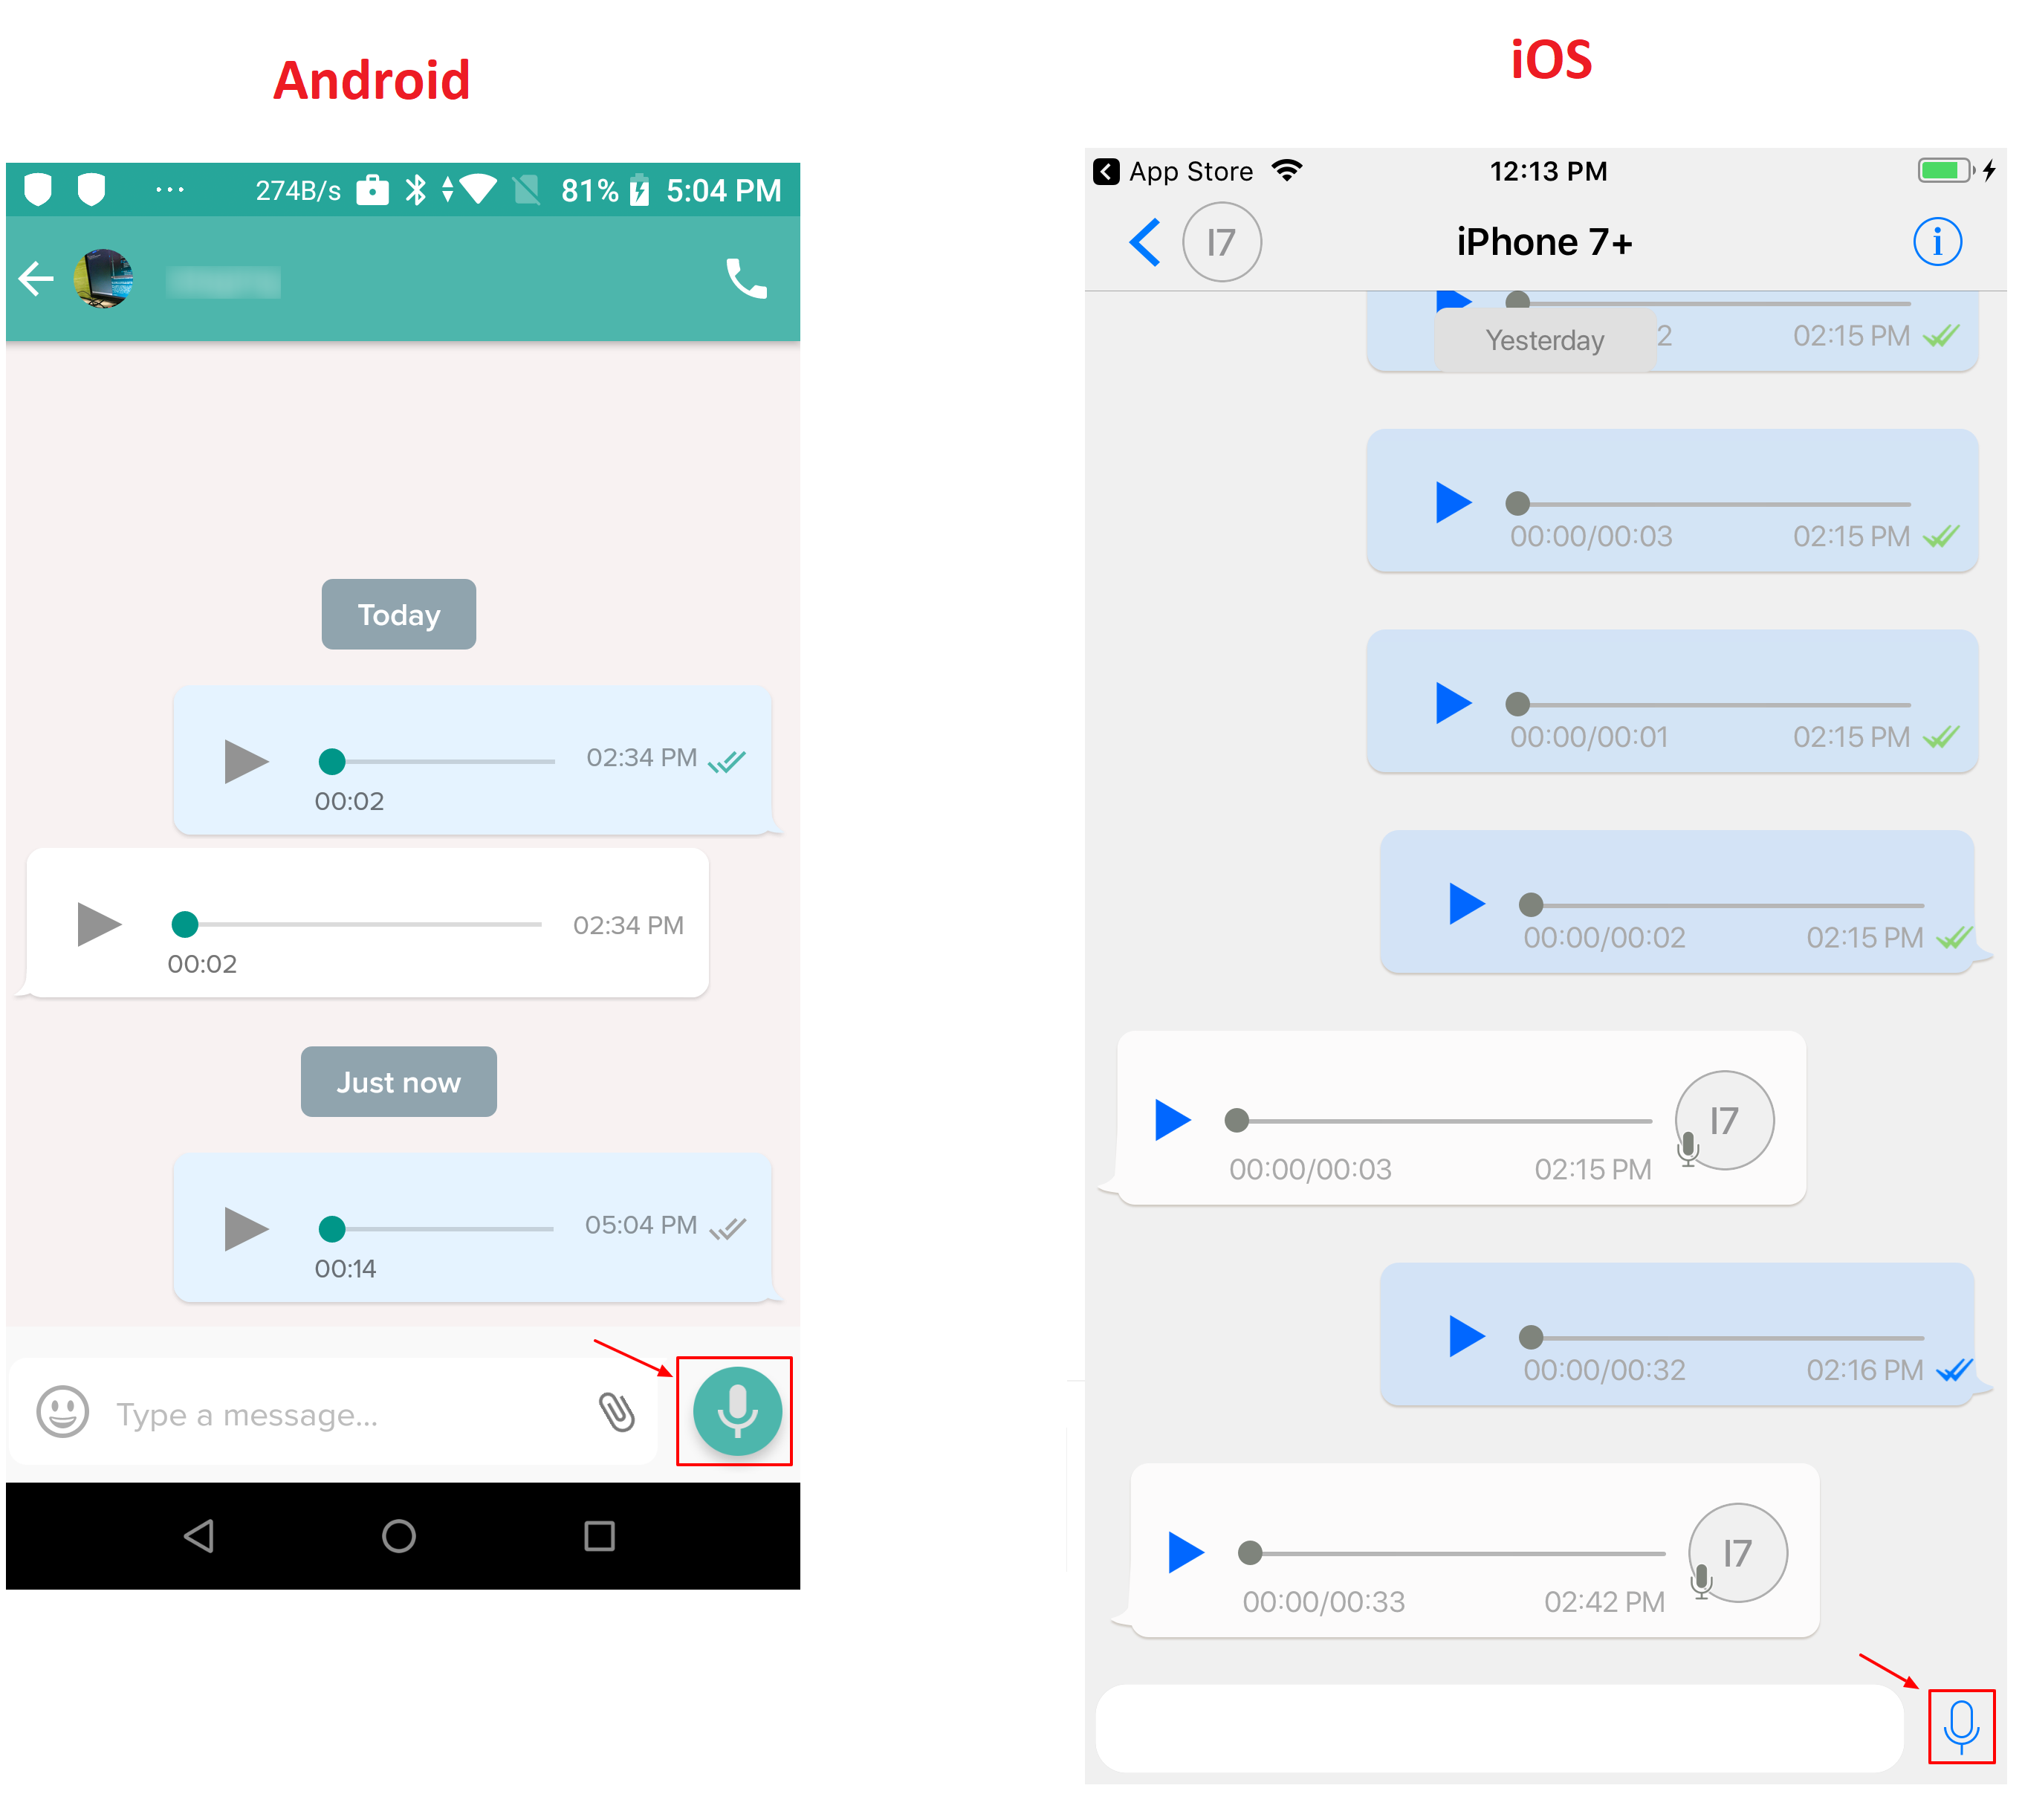
- The progress will be shown in the form of recording duration.
- Once voice message is recorded, click on the send icon on the right to send it. To cancel the ongoing voice message, tap on the cancel button (cross icon on the left).
- The message will be sent to the dashboard under Eva Messenger.The status of the file sent is indicated by a Double tick mark on your device
Message forwarding
Any voice message can be forwarded to other users using Message forwarding feature.
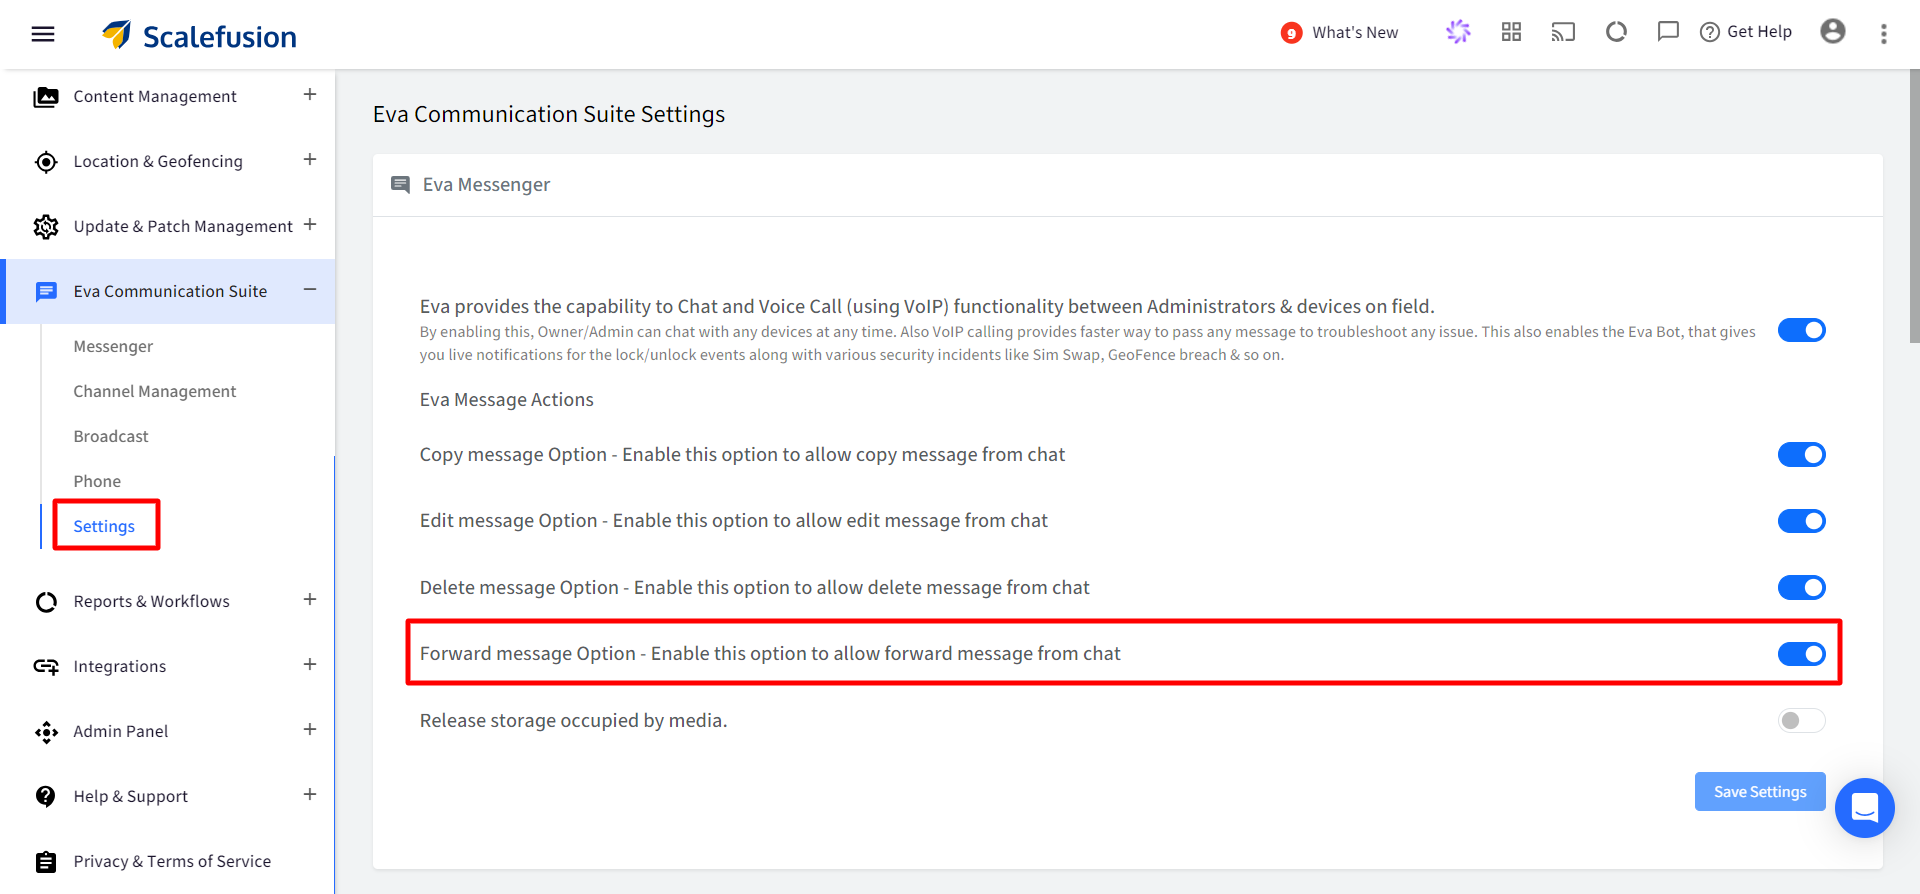
This feature would be available only when admin enables the forwarding feature on Dashboard. To enable:
- Navigate to Eva Communication Suite -> Settings
- Under Eva Messenger, toggle On the Forward Message option
To forward a message, follow these steps:
- On your device, open Eva App by clicking on it.
- Select and tap on the chat from which you need to forward message.
- Long press on the message you wish to forward. This highlights the message.
- There will be a forward icon on the top. Tap on it.
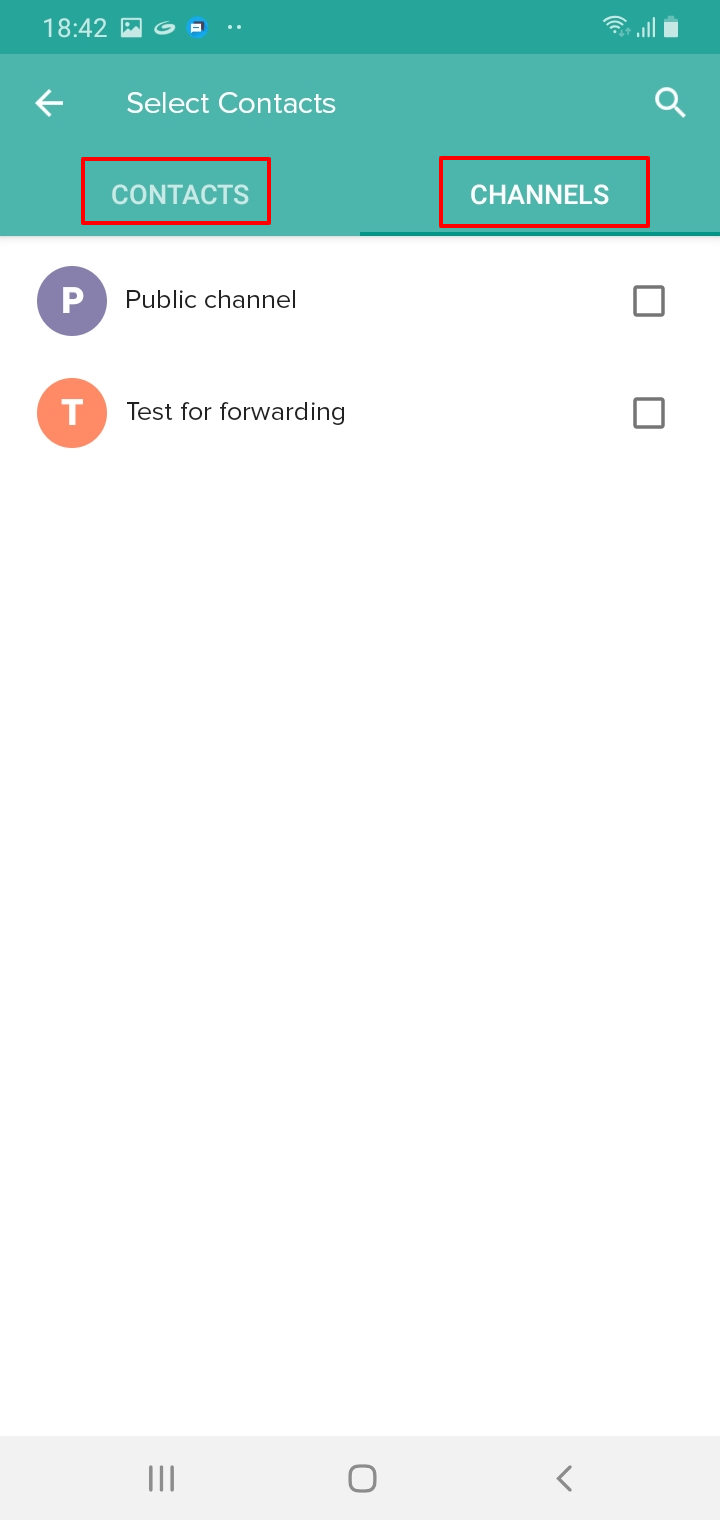
- A contact list screen would appear. Select the recipients. You can forward message to contacts as well as Channels
- Once you select recipients, the forward icon will appear. Tap the forward icon to send message.A message can be forwarded to maximum 5 recipients
Message forwarding cannot be done from Scalefusion dashboard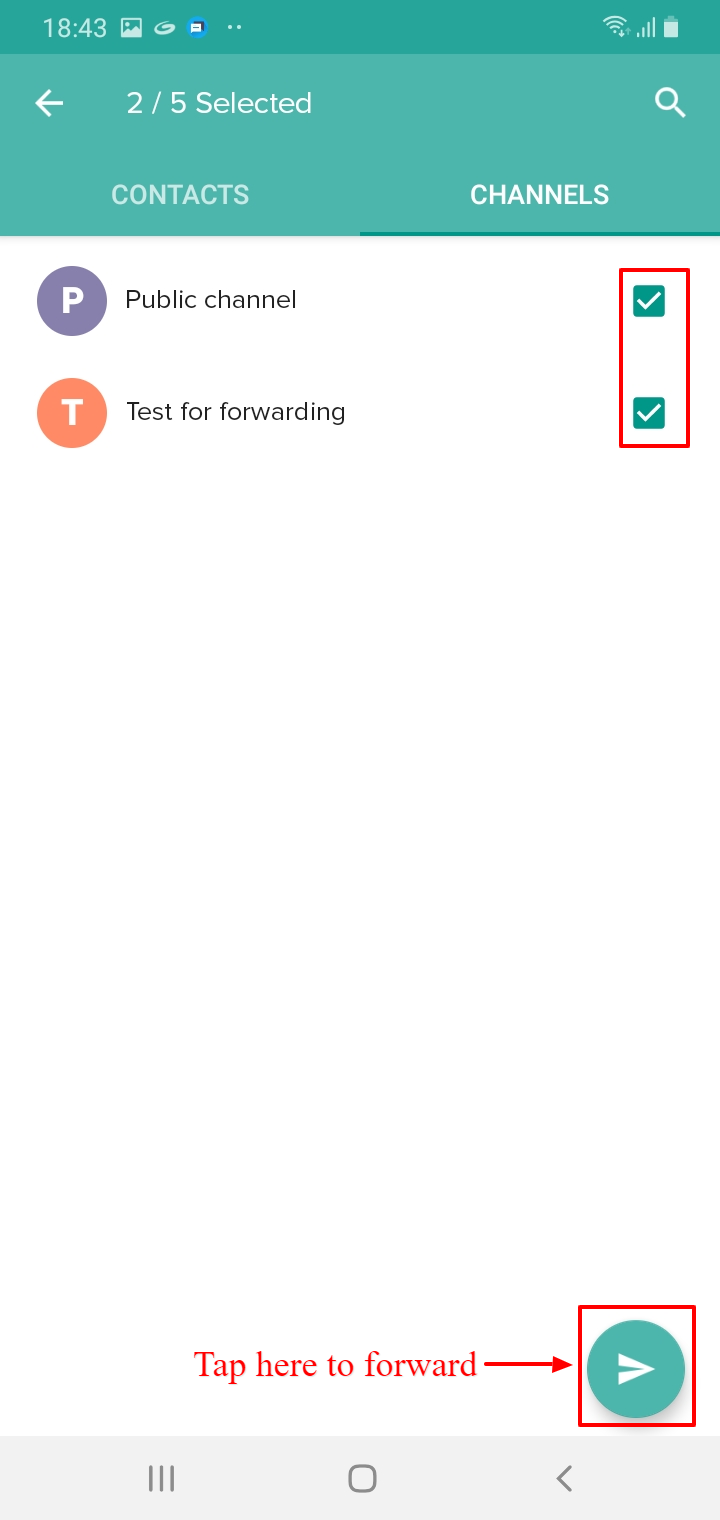
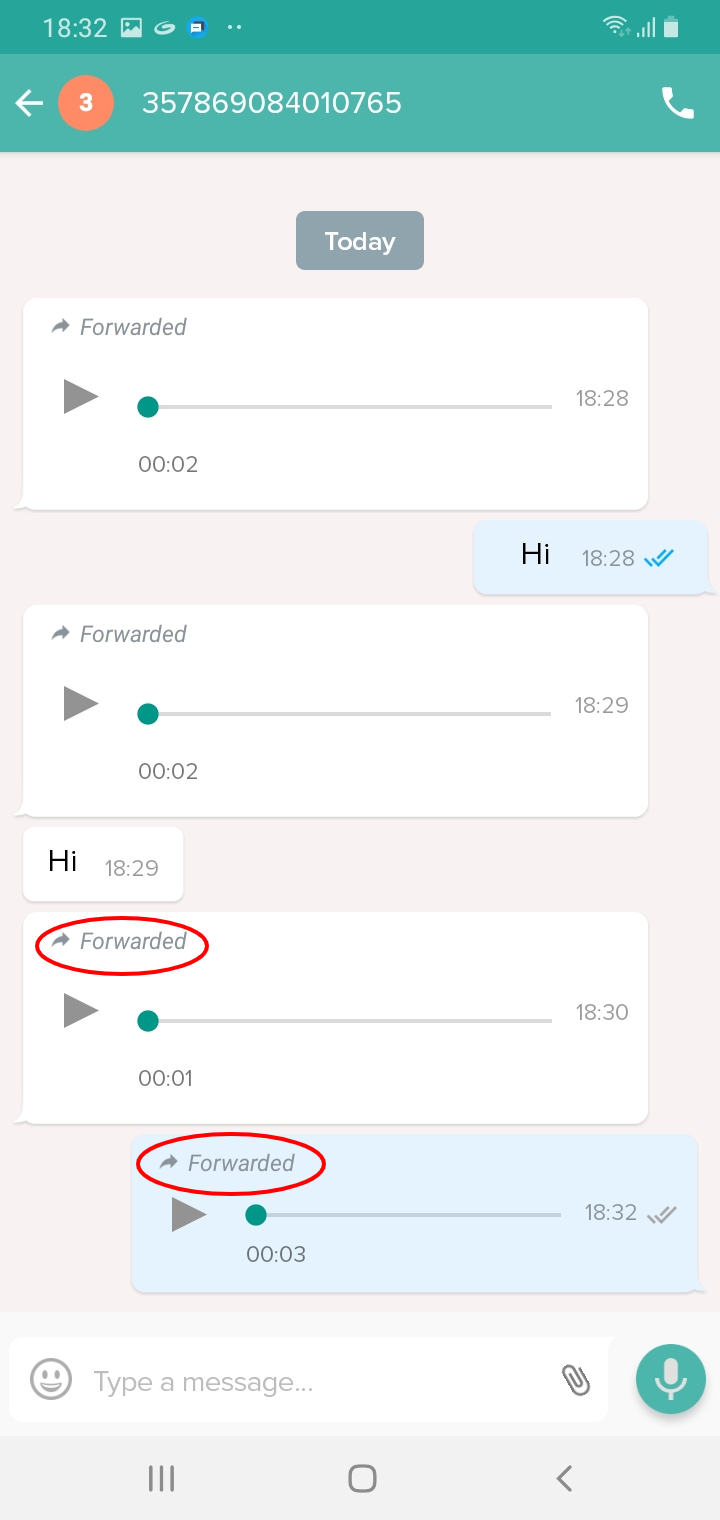
- The recipient will get the text "Forwarded" written over the message which denotes that it's a forwarded message.
The message forwarding functionality is supported on:
- Android app version 4.2.0.2220 and above
- iOS app version 2.1.25 and above