Eva Messenger component provides Chat & Voice Call (VoIP) functionality between administrators and devices on field. In this document we will see how to initiate a chat & send a Image file from dashboard.
Before You Begin
- Make sure you have the Eva Communication Suite enabled for your account.
- All the android devices have been updated to Eva Android Client v3.4.0.2116
- All the iOS devices have been updated to Eva iOS Client v1.4.31.
- Eva Client has been setup on Devices
How to Send a Image file from Dashboard:
- Sign In to Scalefusion Dashboard.
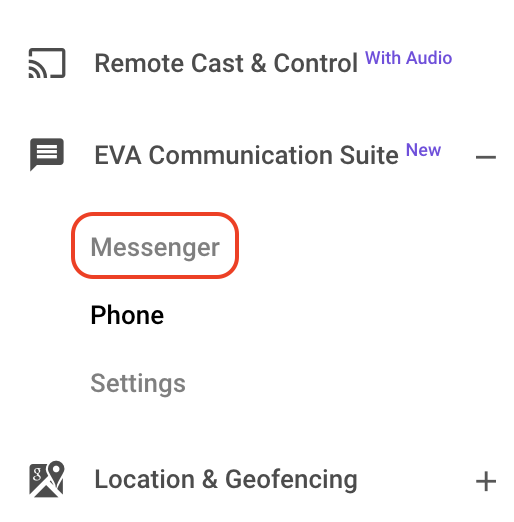
- Navigate to Eva Communication Suite > Messenger OR click on the EVA button at the top of the dashboard, as shown below:
- You would see a pop-up window on the screen with 2 tabs as All Contacts and Active Chats. Click on the All Contacts tab.
- Select the contact/device that you want to chat with. On the right side of the window, you will see a chat view. At top-right of chat view, there is a Attachment icon.
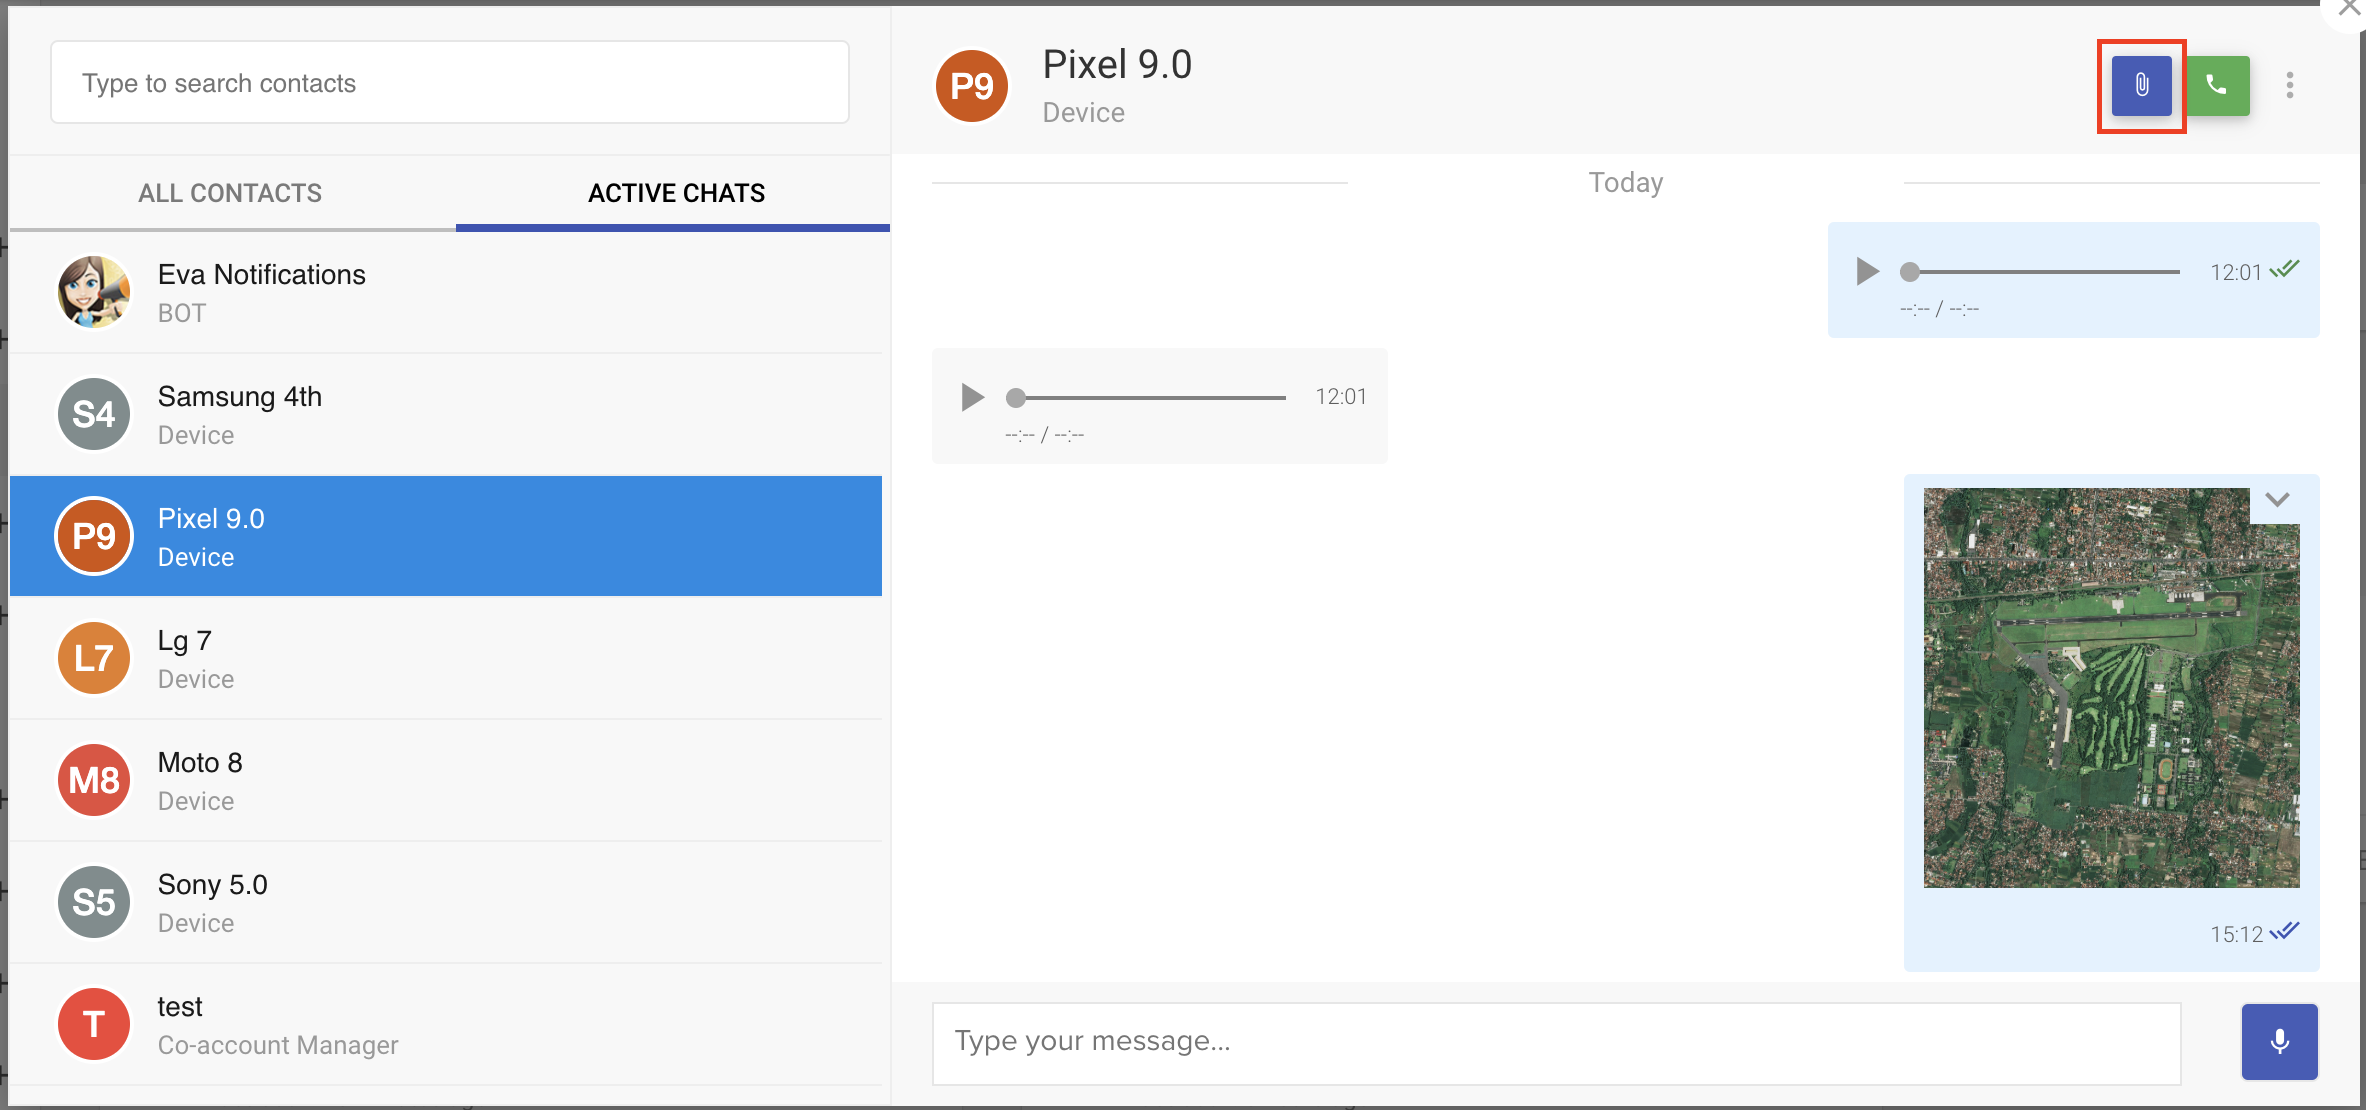
- Click on Attachment icon & it will show a image file chooser window as shown below
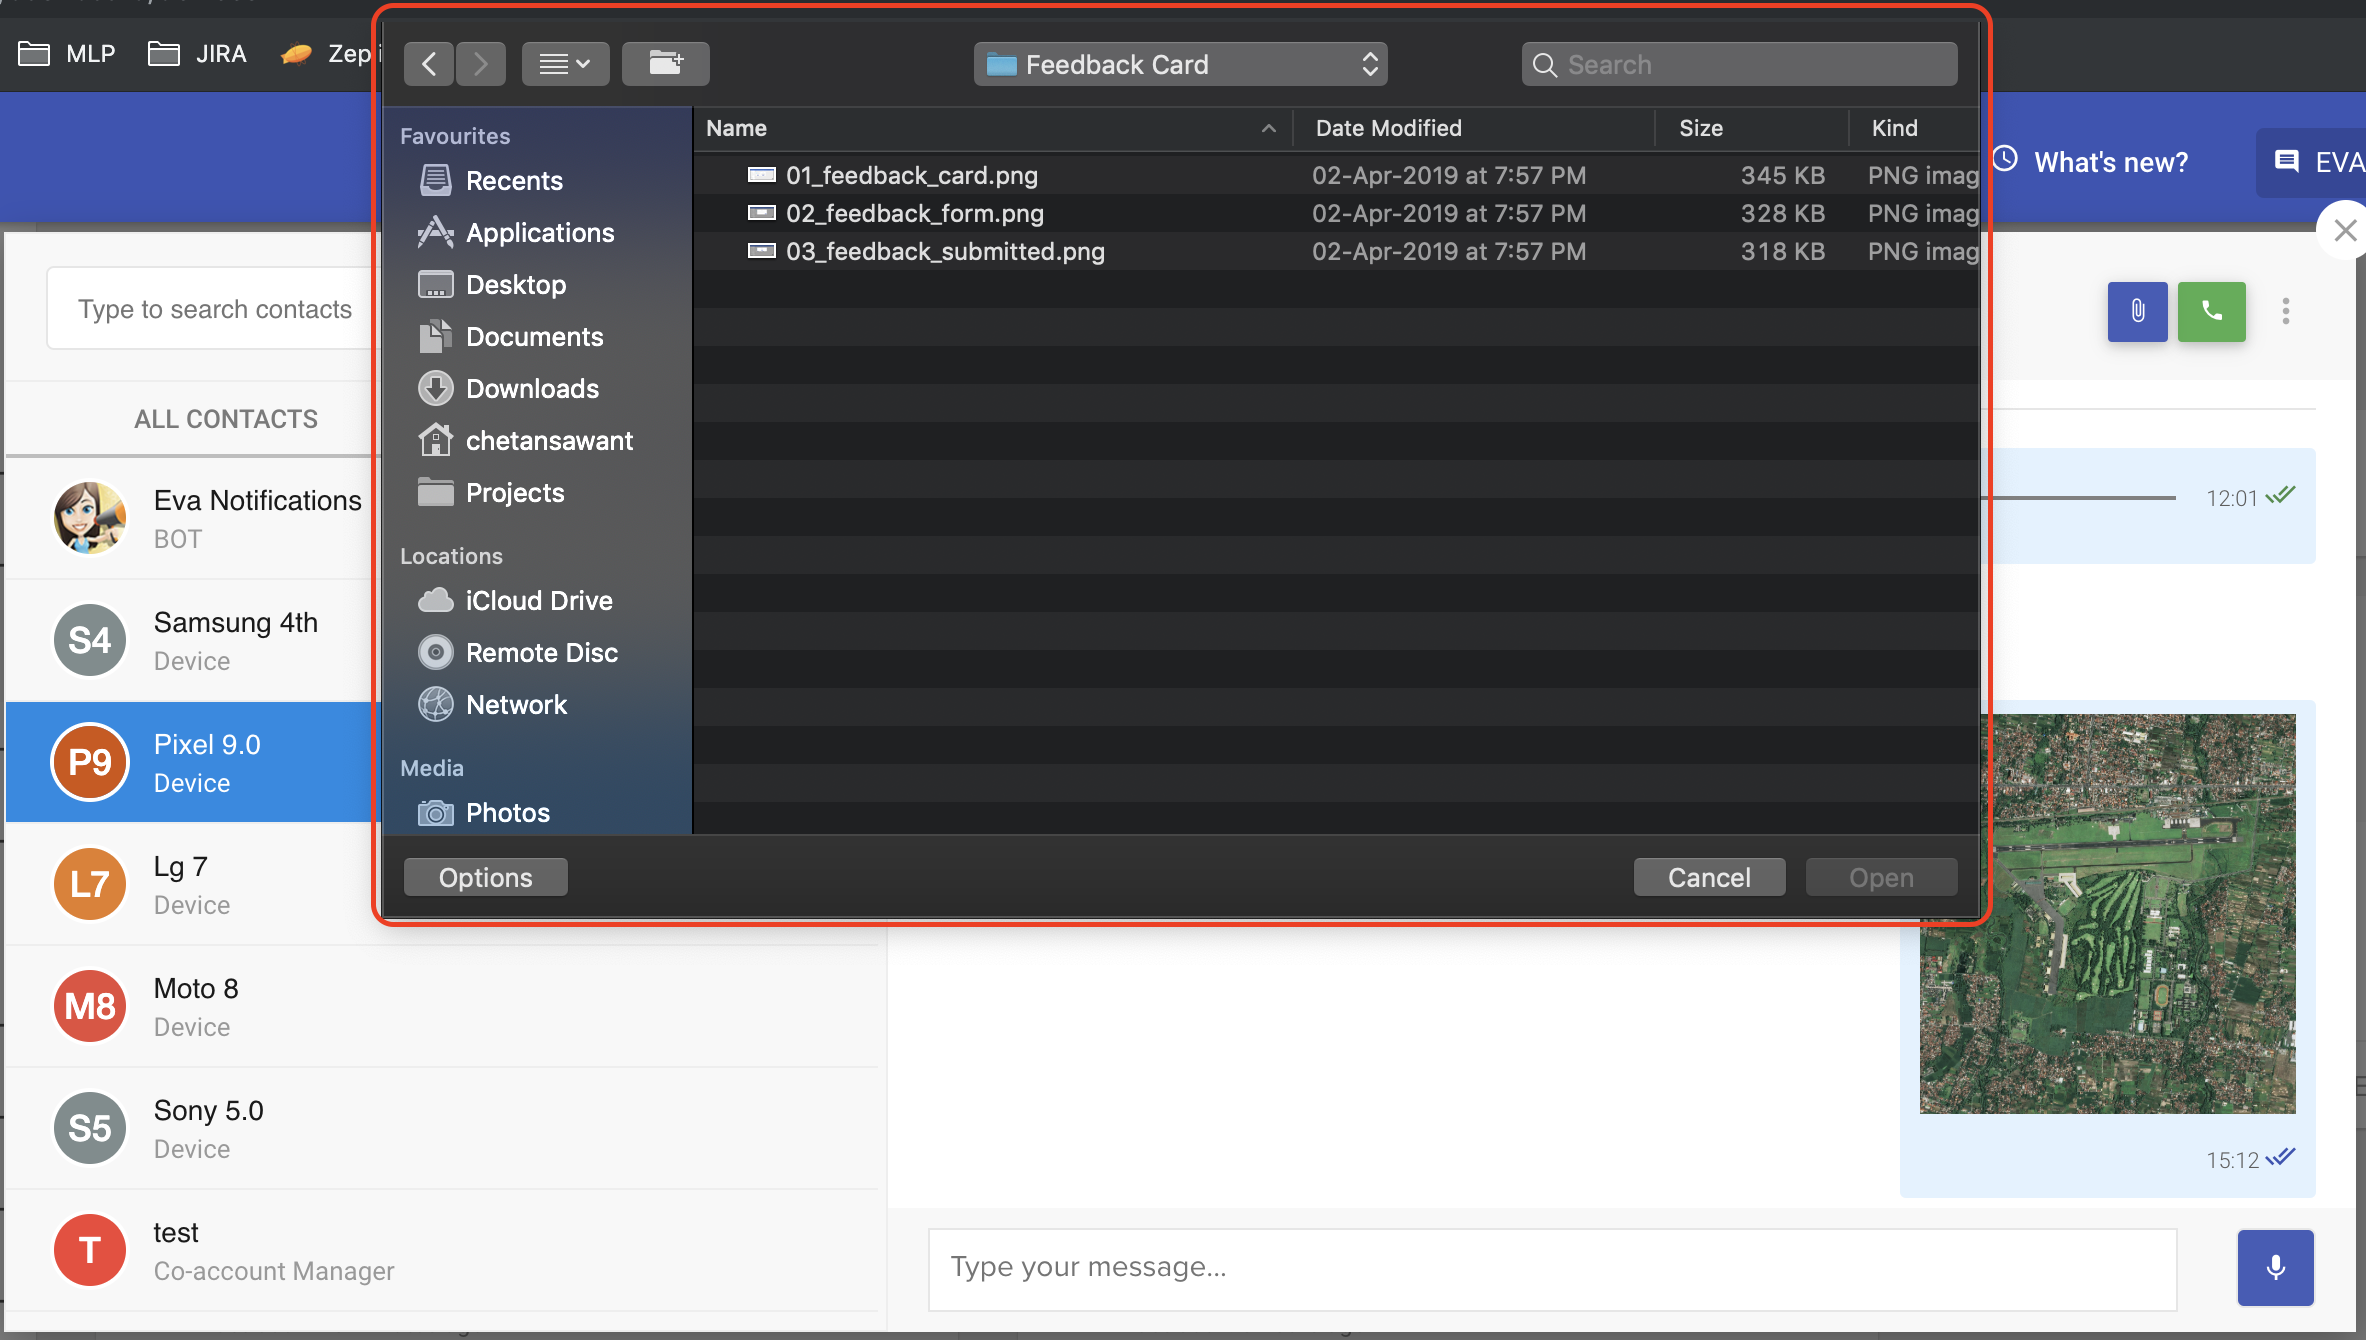
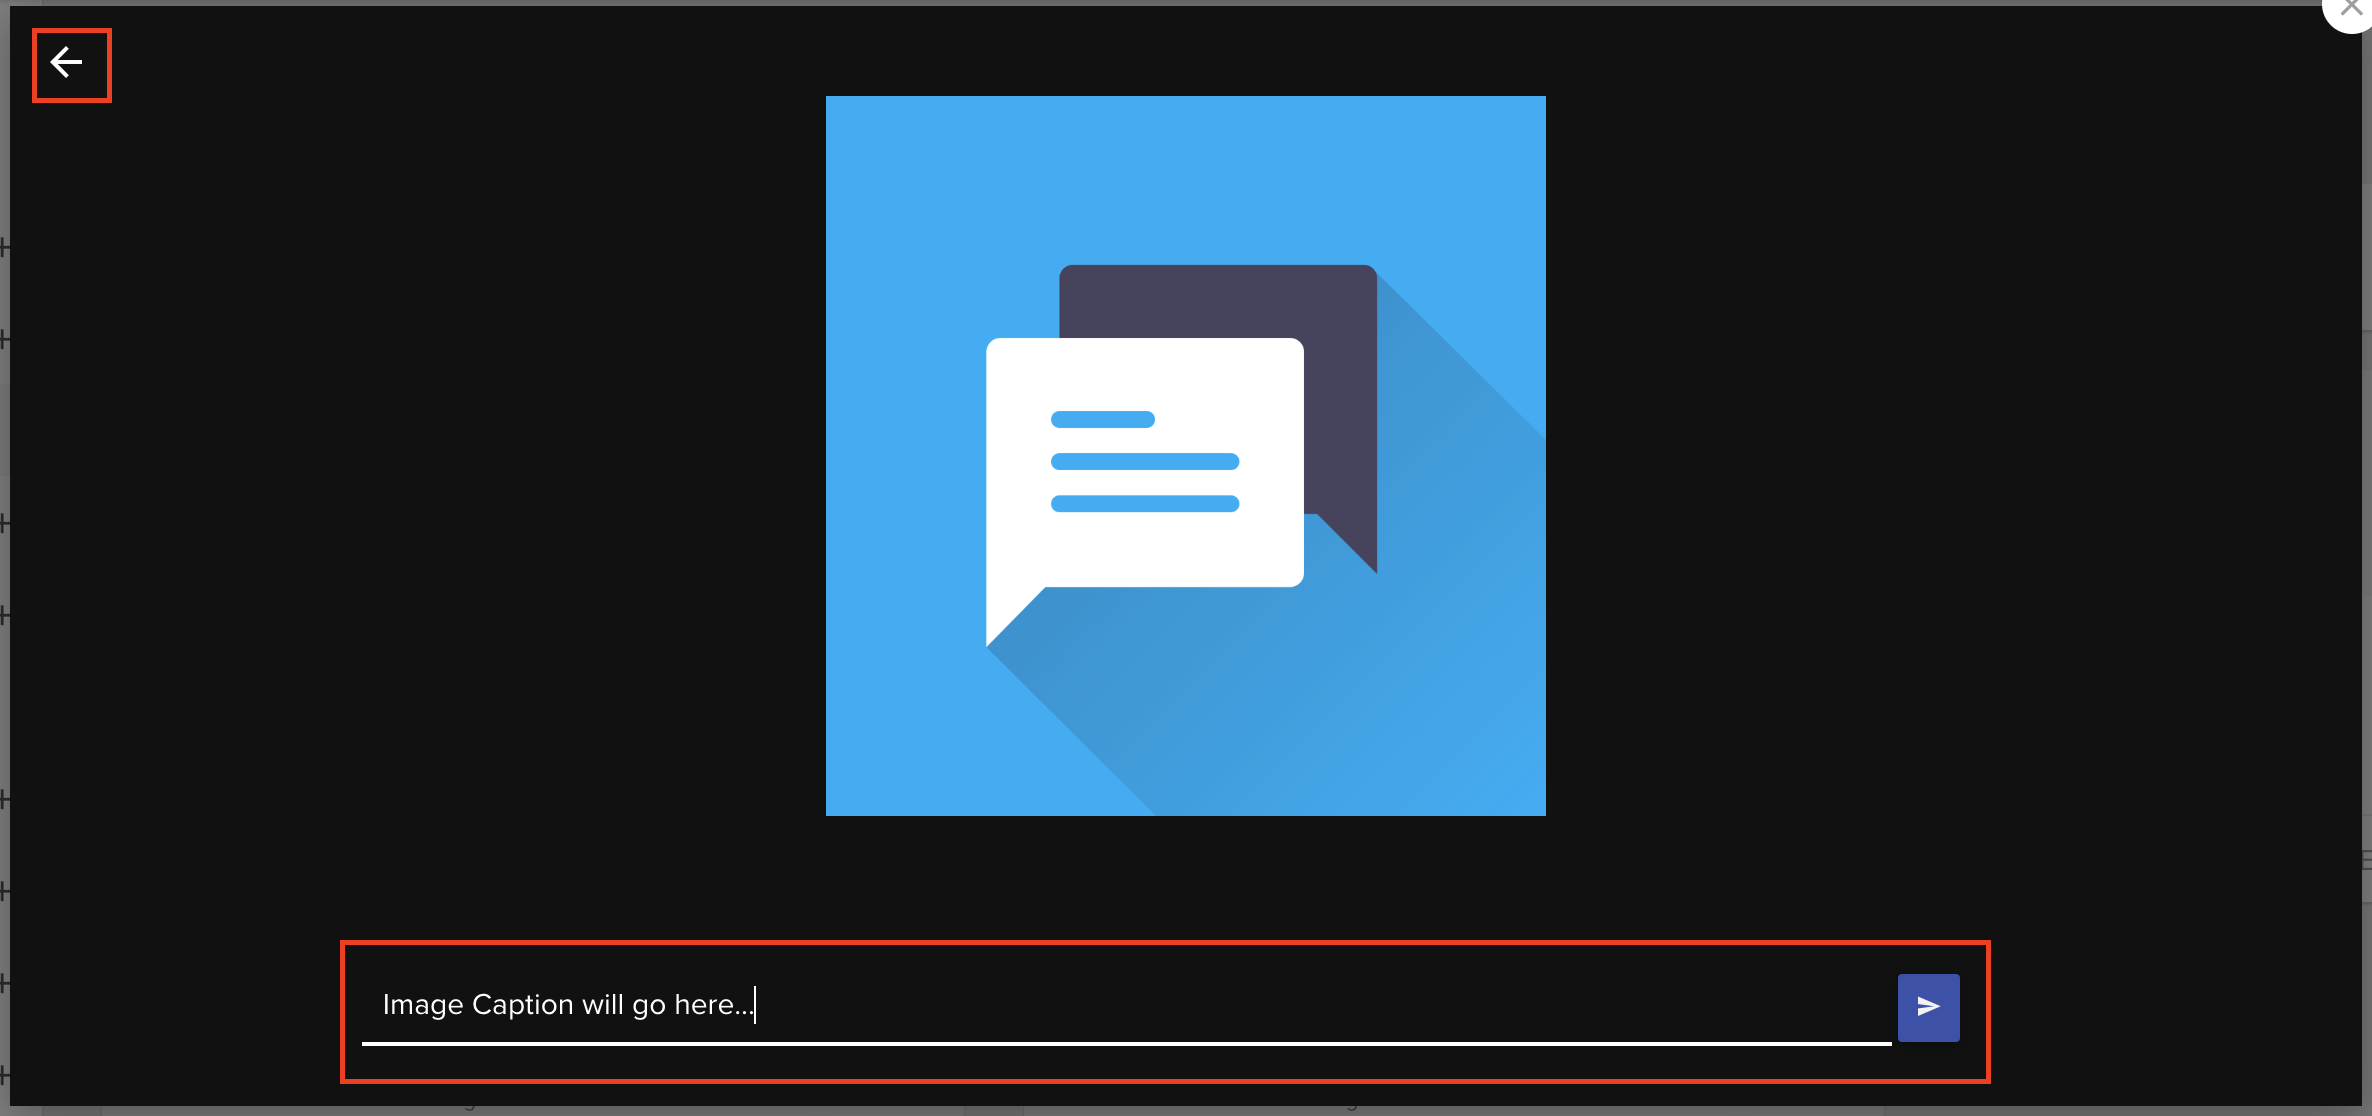
- Select the image & click on the 'Open' button. It will show an image preview screen as shown below. This screen is used to see a preview of the selected image. Here Admin can set the image caption. Note, image caption is an optional part. Click on the Send button to send the selected image to the recipient. The back button (Back arrow) shown on the top-left corner is used to discard the selected image and go back to the image selection window.
- The sent image will be displayed as below:
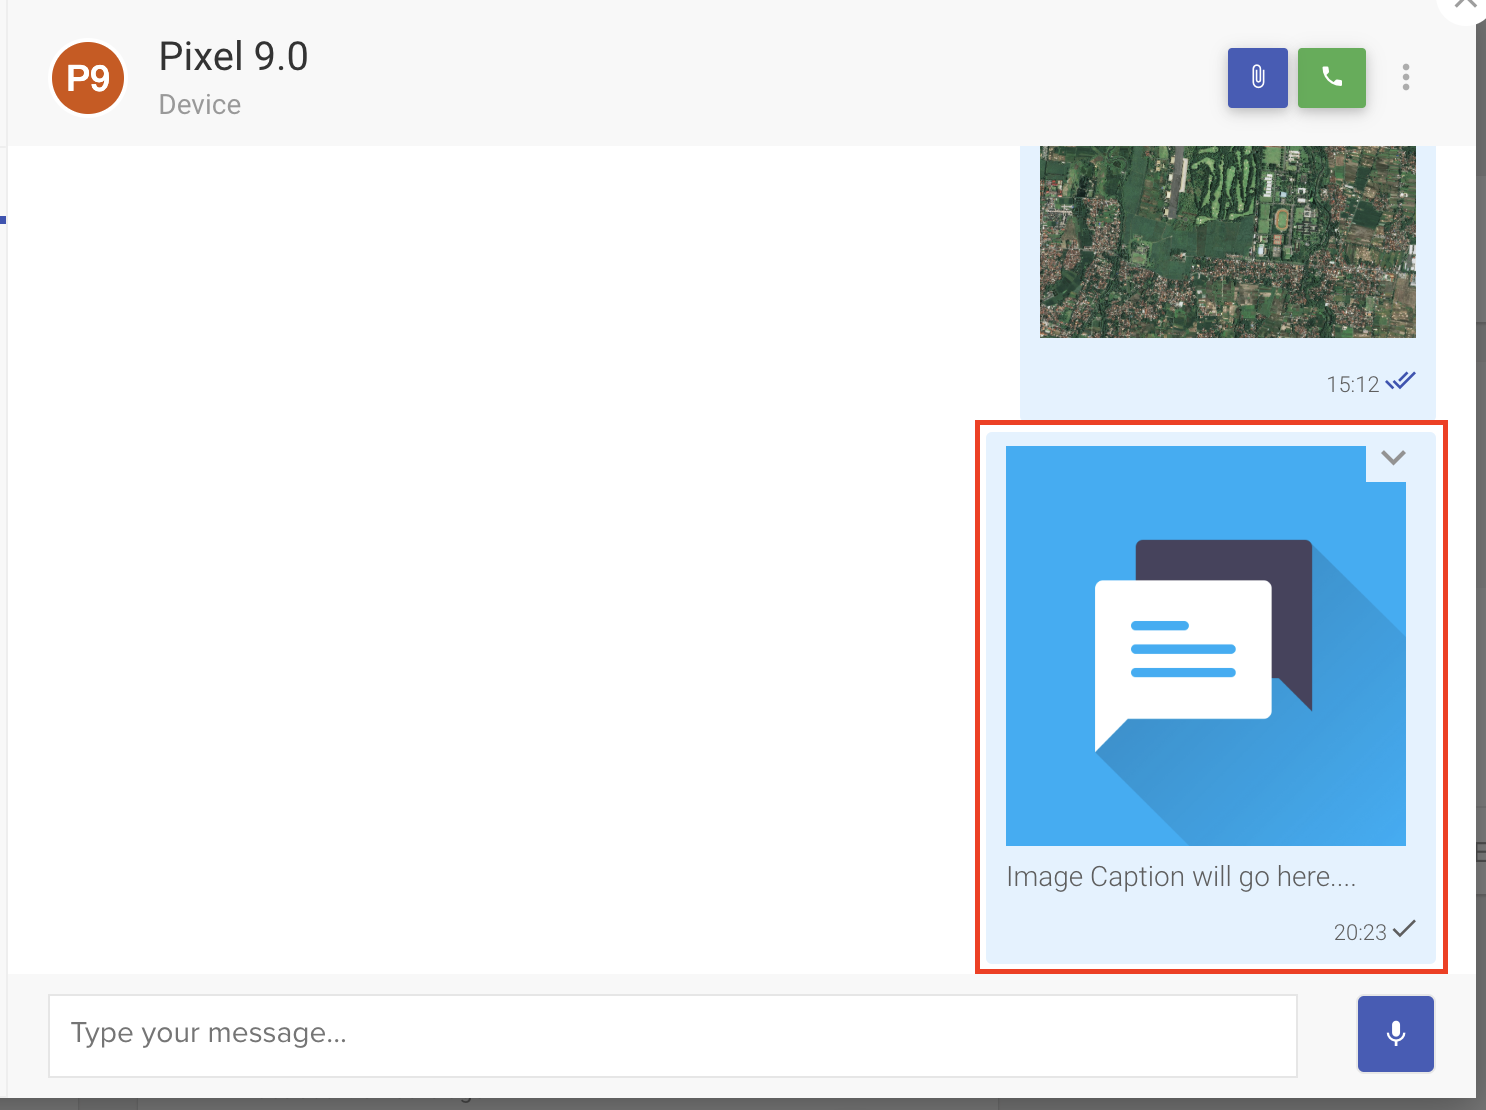
- For the sent image file, the status will be indicated as below:
- Single tick indicates that Image file is delivered to server.
- Double tick (grey color) indicates that Image file is delivered to recipient side.
- Double tick (blue color) indicates that Image file is seen by the recipient.
How to Send a Image file from Android App:
- Eva Android app offers the image selection from the device's camera as well as from the device's gallery.
- Click on the attachment icon. It will show a menu with options Camera & Gallery.
- User can launch Camera through Camera menu option, capture the image, confirm in preview & add the caption for the image in preview screen (it is optional) & send the image.
- User can open the Gallery through Gallery menu option, select the image, confirm in preview & add the caption for the image in preview screen (it is optional) & send the image.
How to Send a Image file from iOS App:
- Eva iOS app offers the image selection from the device's camera as well as from the device's photo library.
- Click on the plus icon. It will show a menu with options Camera & Photo Library.
- User can launch Camera through Camera menu option, capture the image, confirm in preview & add the caption for the image in preview screen (it is optional) & send the image.
- User can open the photo library through Photo Library menu option, select the image, confirm in preview & add the caption for the image in preview screen (it is optional) & send the image.
Notes:
- For the sent image file, the status will be indicated as below:
- Single tick indicates that Image file is delivered to server.
- Double tick (grey color) indicates that Image file is delivered to recipient side.
- Double tick (blue color) indicates that Image file is seen by the recipient.
- Eva Android & iOS app offers a setting for the auto-download of images from the server. Users can choose to auto-download the received images only if the device is connected to WiFi or choose to auto-download the received images on any network. Default is WiFi only.
Message forwarding
Along with transferring image files you can also forward them to other users. This can be done using message forwarding.
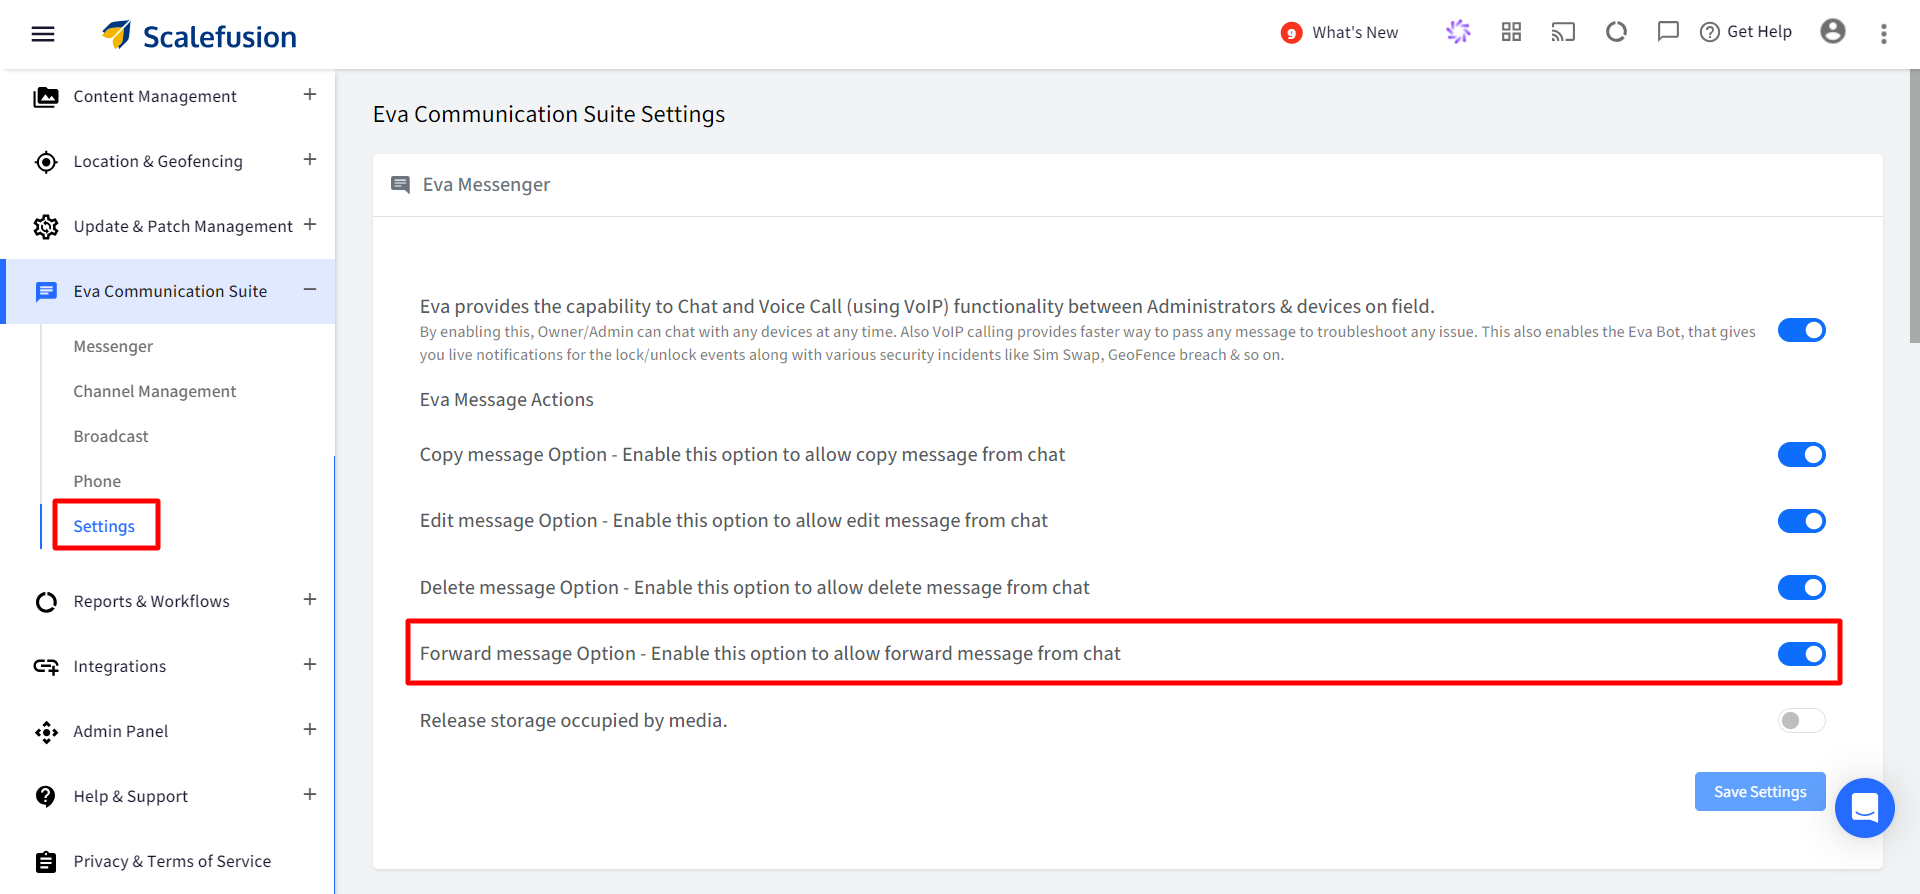
This feature would be available only when admin enables the forwarding feature on Dashboard. To enable:
- Navigate to Eva Communication Suite -> Settings
- Under Eva Messenger, toggle On the Forward Message option
 To forward a message, follow these steps:
 - On your device, open Eva App by clicking on it.
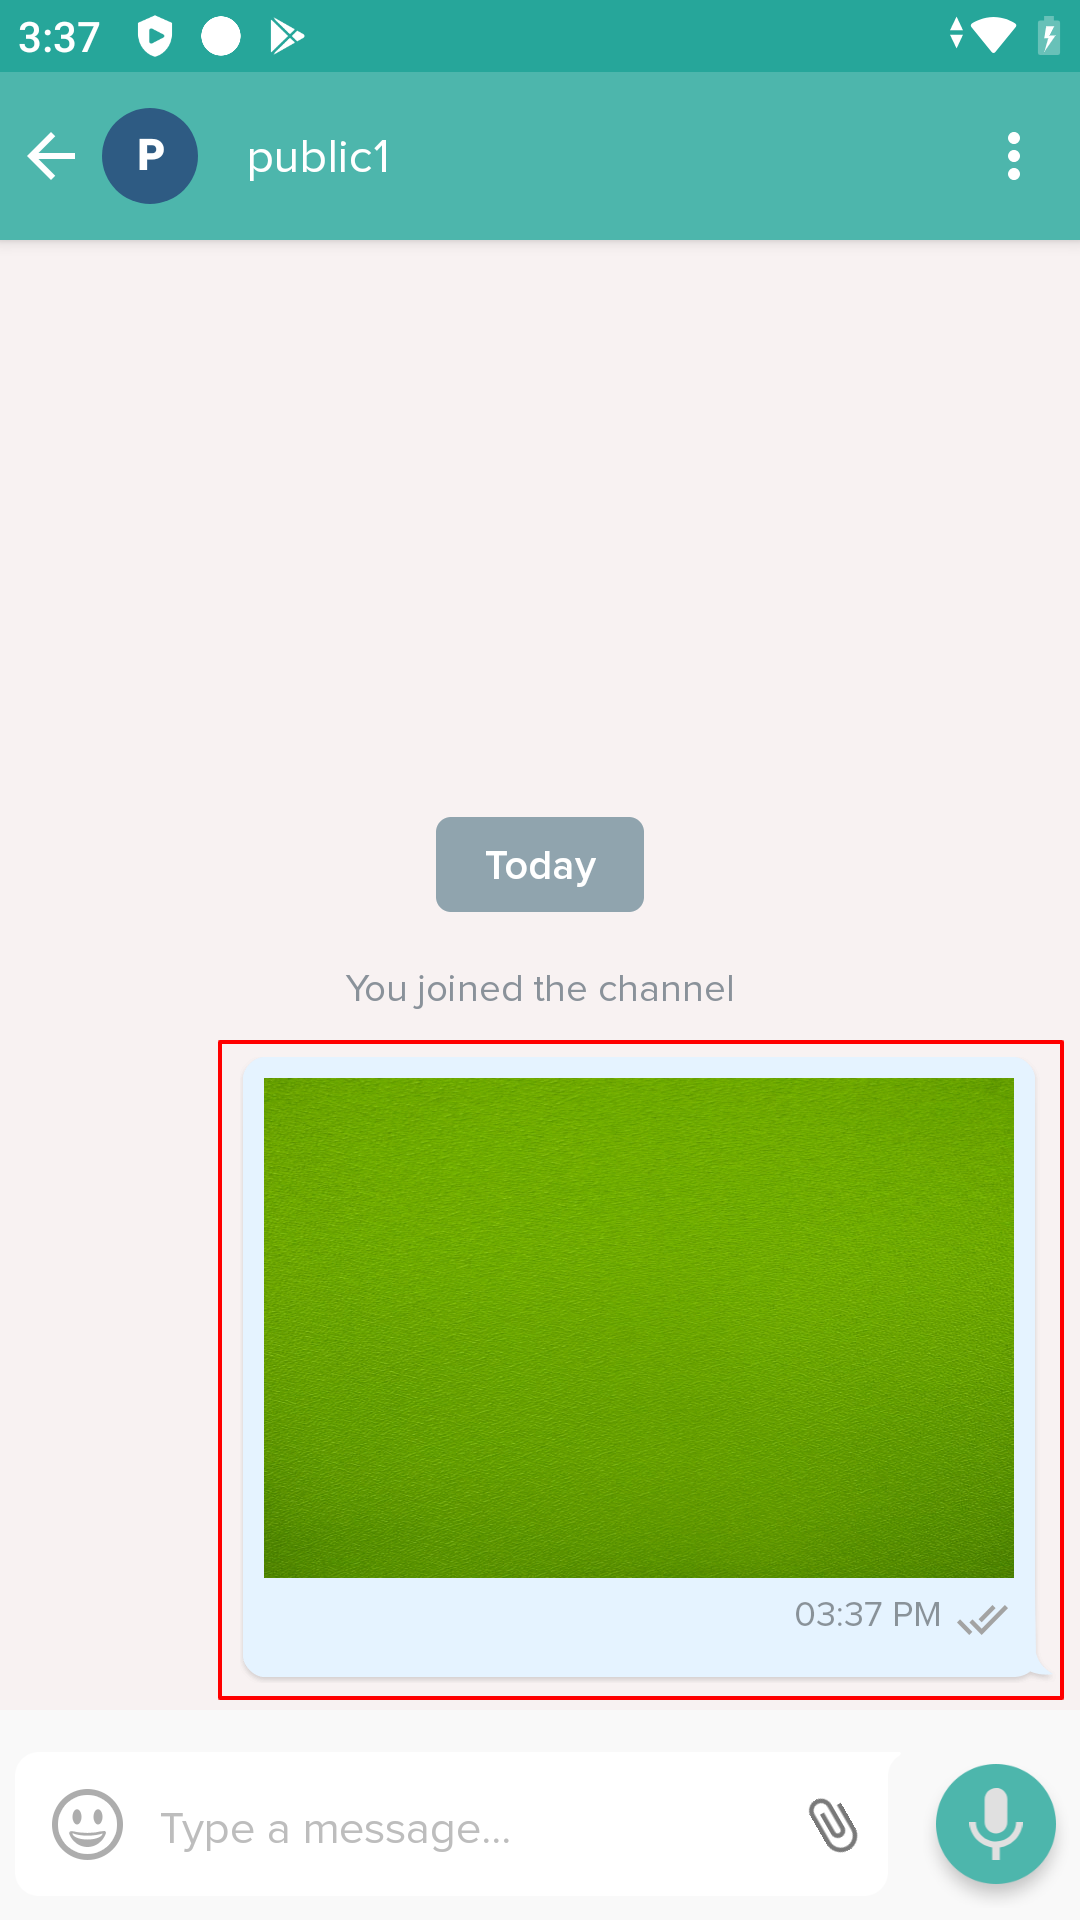
- Select and tap on the chat from which you need to forward message.
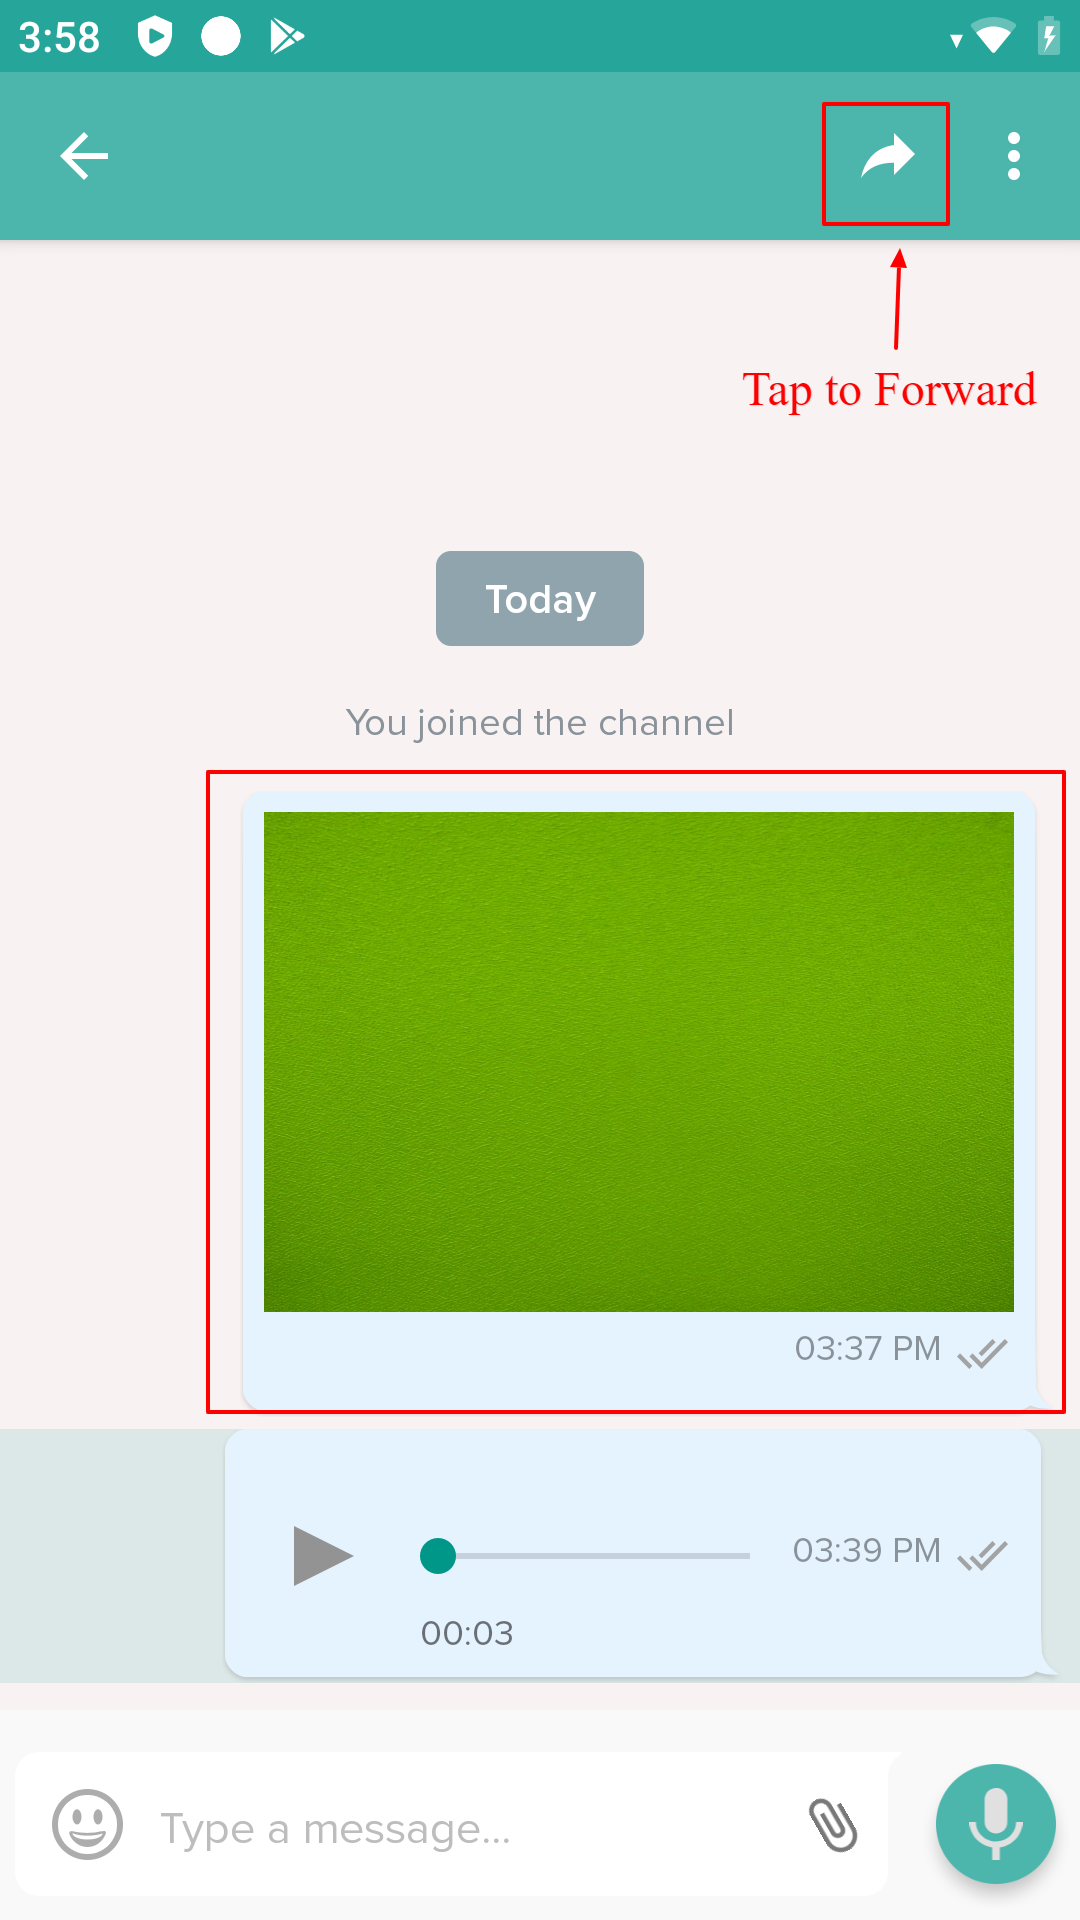
- Long press on the message you wish to forward. This highlights the message.
- There will be a forward icon on the top. Tap on it.
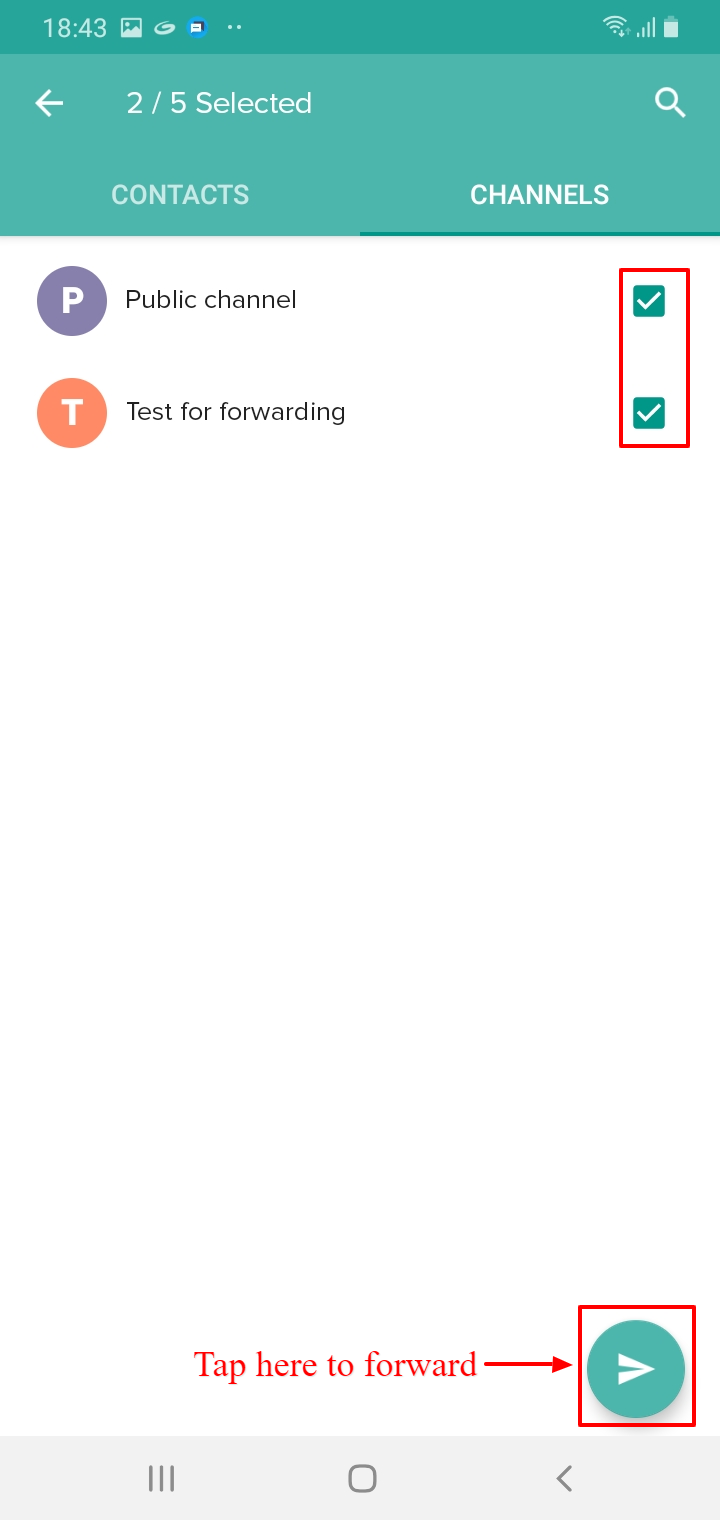
- A contact list screen would appear. Select the recipients. You can forward message to contacts as well as Channels
- Once you select recipients, the forward icon will appear. Tap the forward icon to send message.A message can be forwarded to maximum 5 recipients
 Message forwarding cannot be done from Scalefusion dashboard
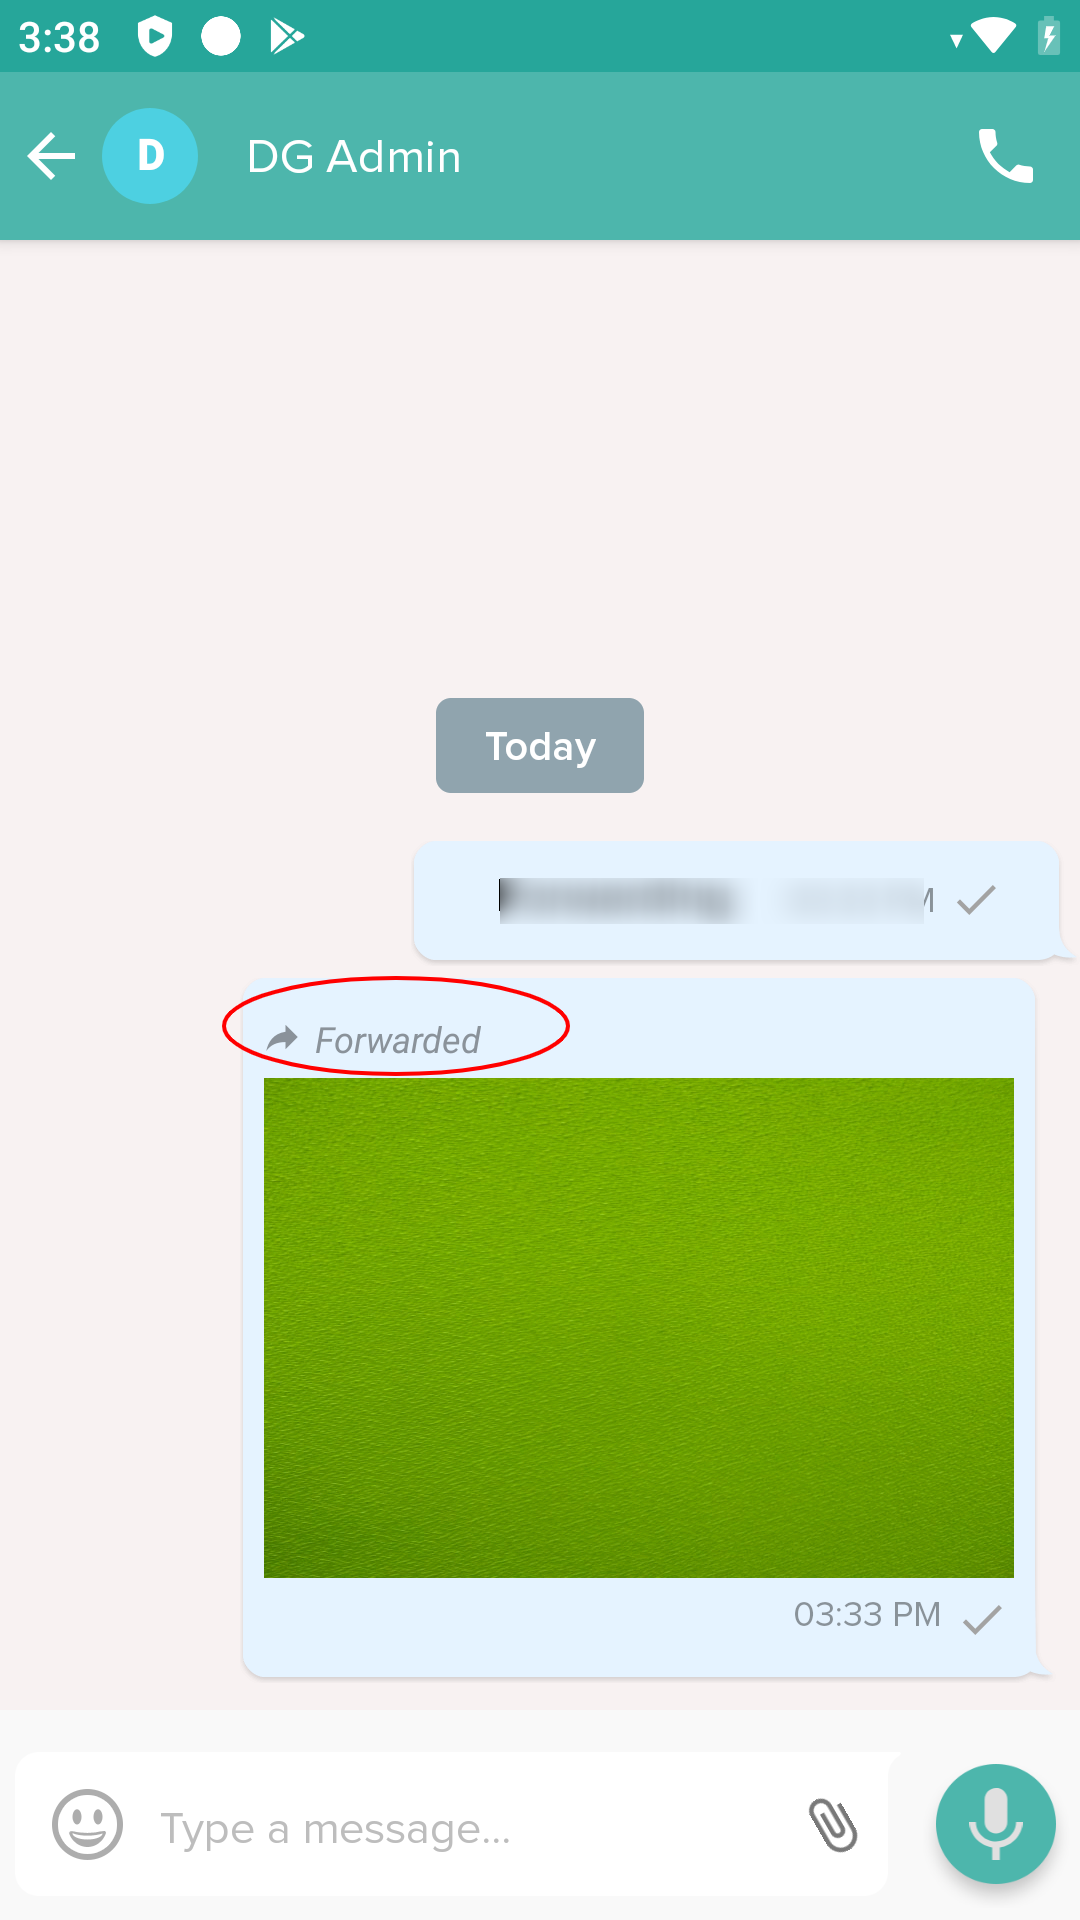
 - The recipient will get the text "Forwarded" written over the message which denotes that it's a forwarded message.
The message forwarding functionality is supported on:
- Android app version 4.2.0.2220 and above
- iOS app version 2.1.25 and above
Flag Messages
There might be cases where some images which you have sent or received are important and you want to refer back to them at a later point of time. The Eva messenger provides a feature to bookmark such images on your devices for a quick reference later, so that you don't have to keep scrolling through the chats and search the messages.
This is achieved through 'Flag Messages' feature. Once message is flagged, it will be shown on a separate screen under the head Flagged messages. This functionality works across all active chats.
Flagging Message/Image
To flag a message, follow these steps:
- On your device, open Eva App by clicking on it.
- From the list of chats, select and tap on the chat in which you need to flag message.
- Long press on the image that has to be flagged. This highlights the image. There will be a flag icon on the top. Tap on it.
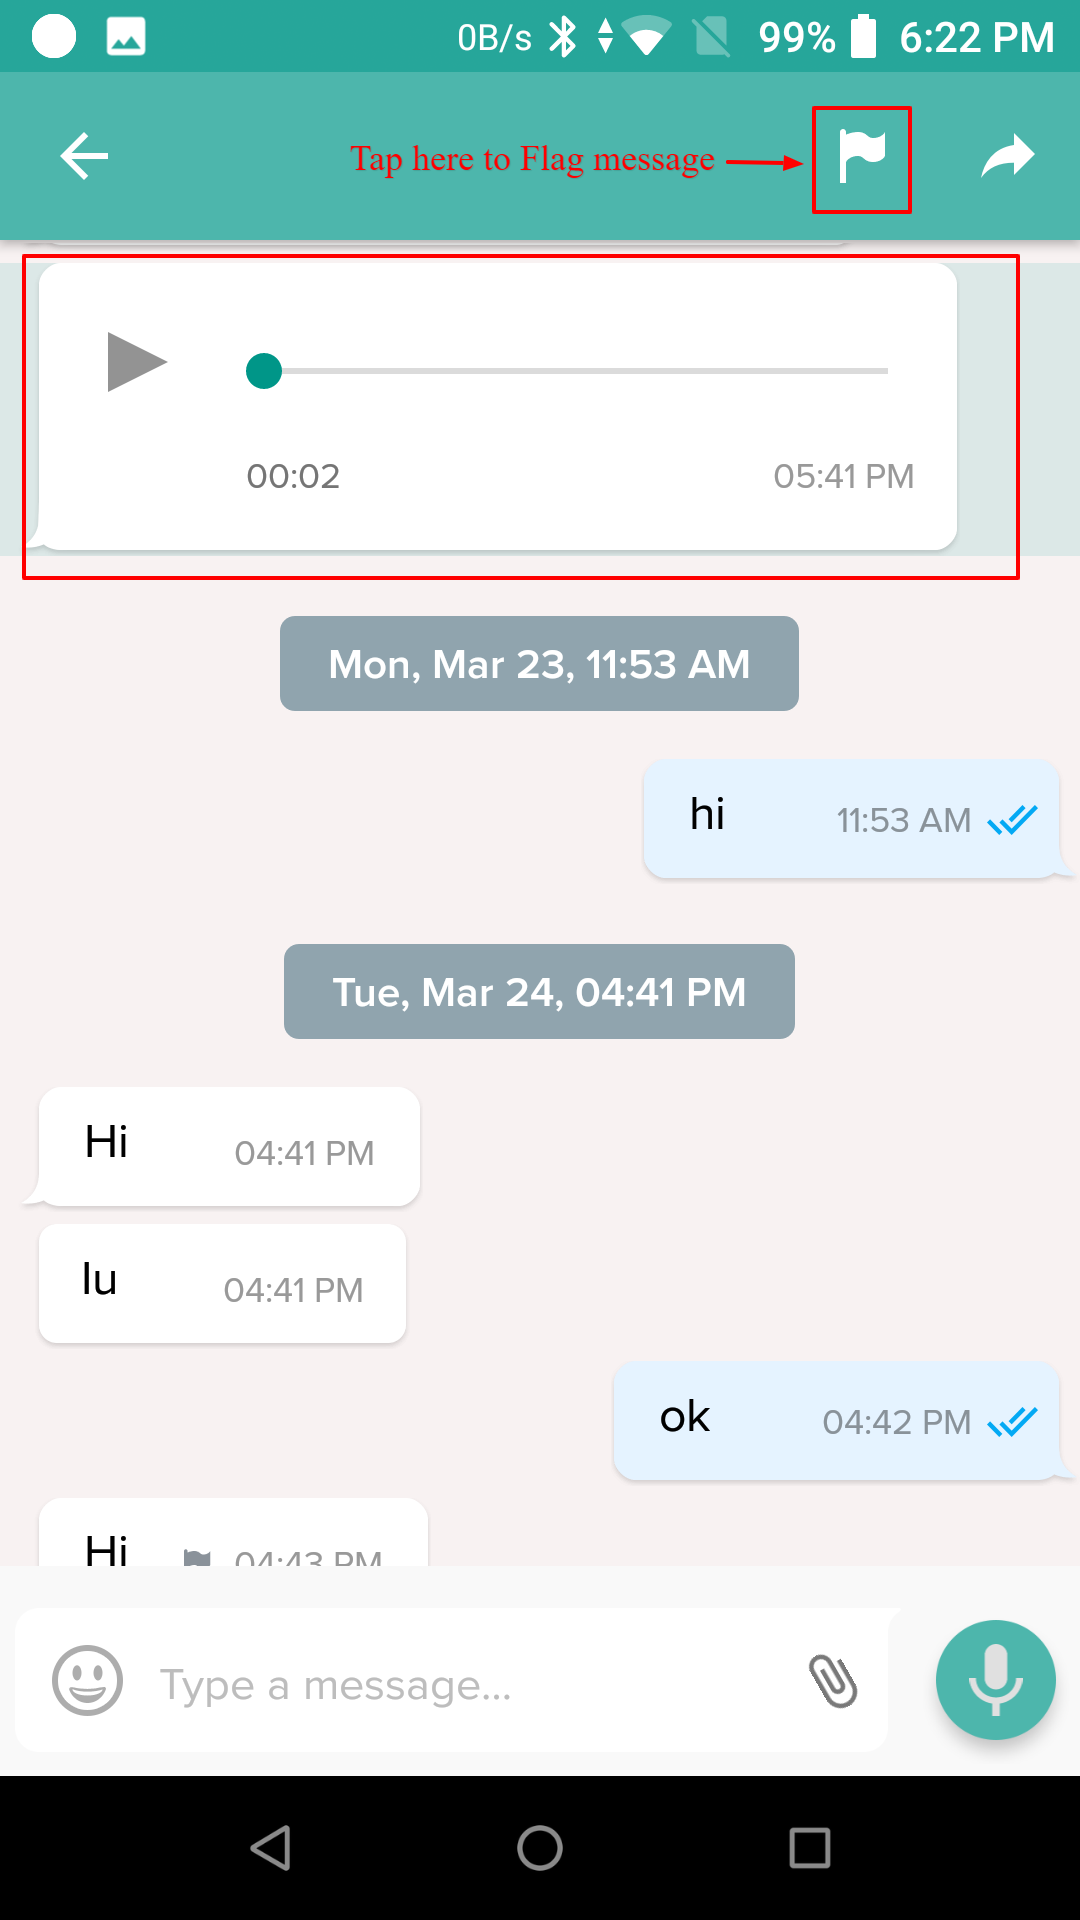
- Once you tap on Flag, a small flag icon will appear over the image. This indicates that the image is flagged.
Viewing Flagged messages
- Tap the back arrow to come to the screen listing all chats.
- Here, tap on the three vertical dots on the top right. You will find the option Flagged messages. Tap on it
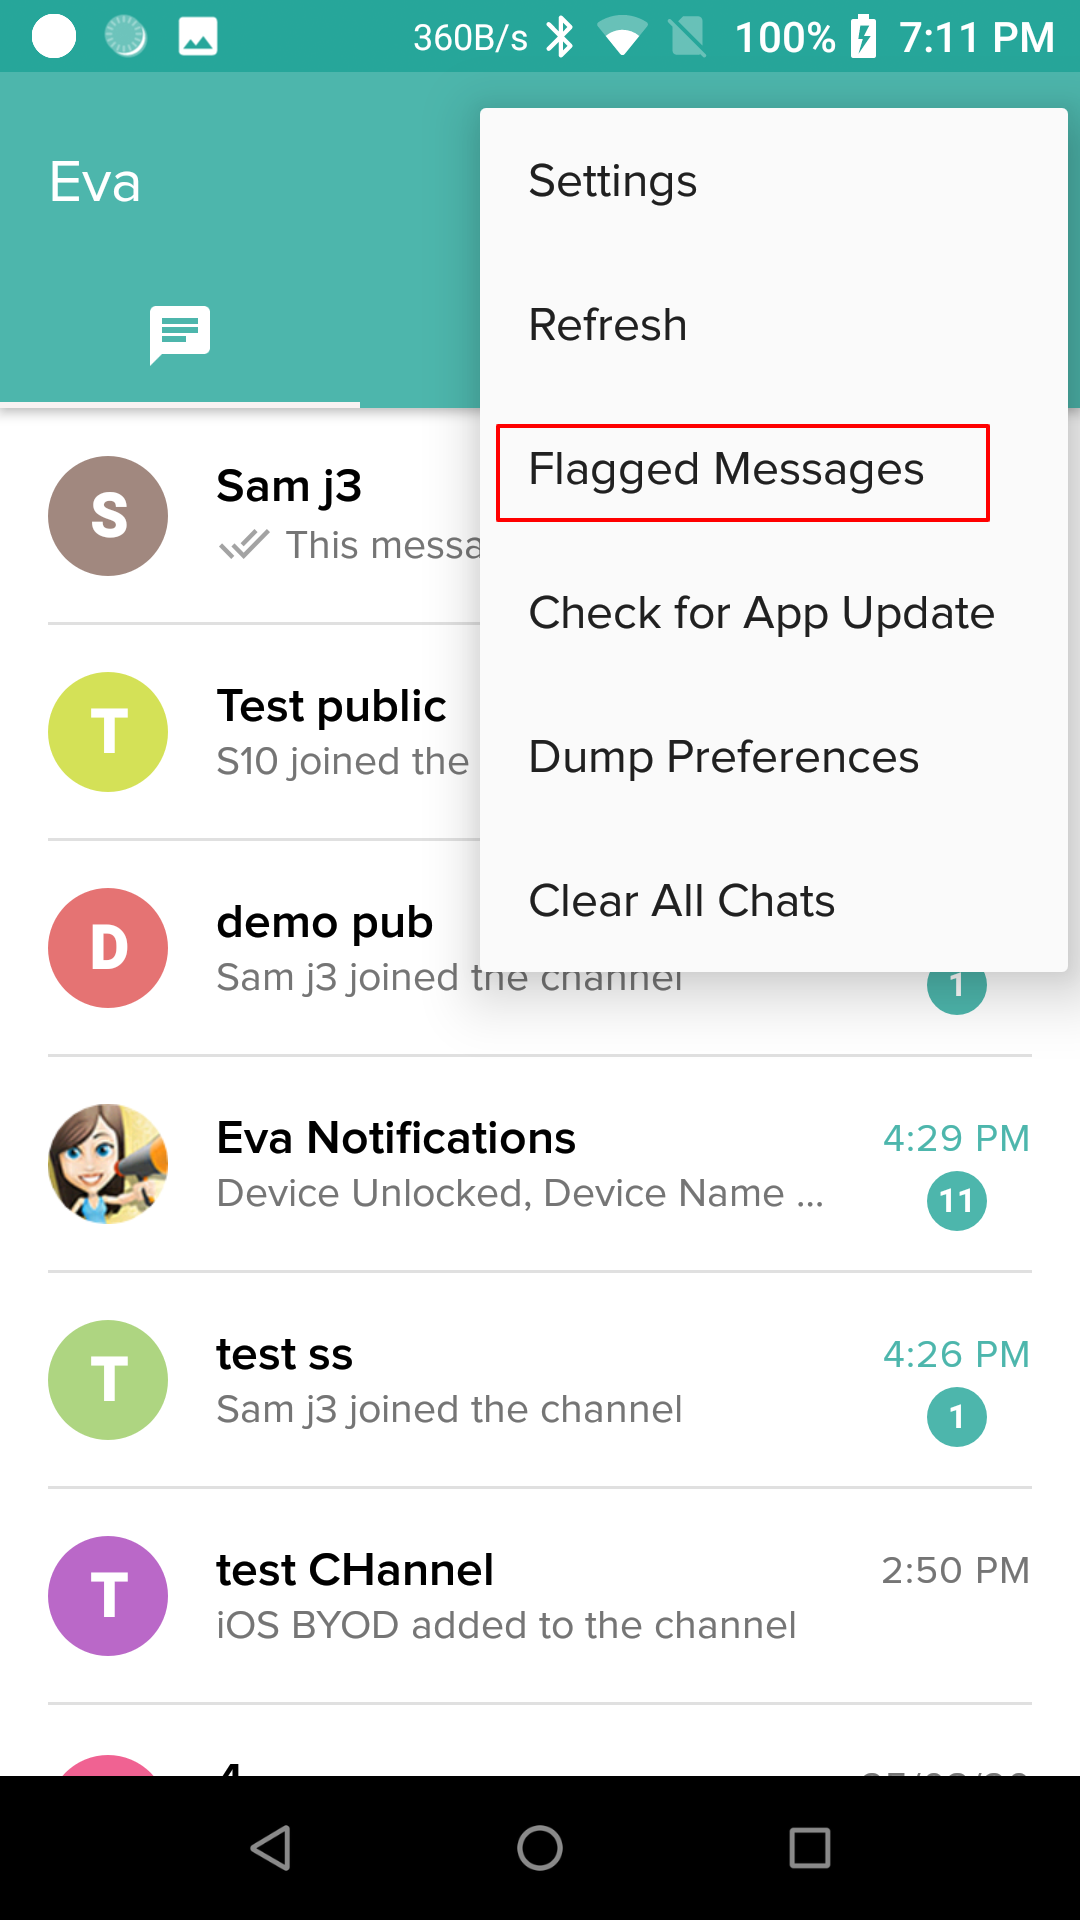
- A new screen Flagged Messages will come up. All the images/messages you flagged will appear here.
Release Storage occupied by media
To free up the space occupied by media, admin has the option to remove old media files from their account and reclaim storage. This can be done by enabling the flag Release storage occupied by media available under Eva Communication Suite settings on Scalefusion dashboard. To access,
- On Scalefusion dashboard, navigate to Eva Communication Suite > Settings
- Under Eva Messenger section toggle on the flag Release storage occupied by media
- Once enabled, following underlying values need to be set
| Setting | Description |
| Trigger release of storage on exceeding ' XX ' % of usage | Used to set the trigger when the space consumption crosses the set value. |
| Release media older than ' XX ' number of days | Deletes the files older than the no. of days you mention in this field. |
As for example, if the storage consumption value is set to 85% and number of days to release media is set to 45 days, then when the storage consumption crosses the 85% mark, then all the media messages which are older than 45 days will get deleted from the server.
Frequently Asked Questions
Question: Does this feature require the devices to be connected to the internet?
Answer: The internet is required on the dashboard side. On the device side, the message can be recorded without the internet. But the internet connection will be required to send the recorded message to the server.
Question: How do I know whether the Image file is delivered to recipient device.
Answer: This can be identified using the sent message status indicator. For more details about status indicator, please refer to the point 1 from the Notes section.