This guide walks you through the process of enrolling an Android device into Scalefusion using email-based authentication. The email enrollment method offers a simple and secure way for users to sign in with their existing credentials, select the appropriate device type and Scalefusion instance, and complete the setup with guided permissions.
Once enrolled, the device is automatically configured based on your organization’s policies and is ready for use.
Before You Begin
Ensure the following:
Valid dashboard sign-in credentials
Android device running 5.0 or above
Scalefusion app installed
Steps to Enroll
Install the Scalefusion client from Google Play Store or install the Scalefusion apk directly.
Open the Scalefusion app on your device.
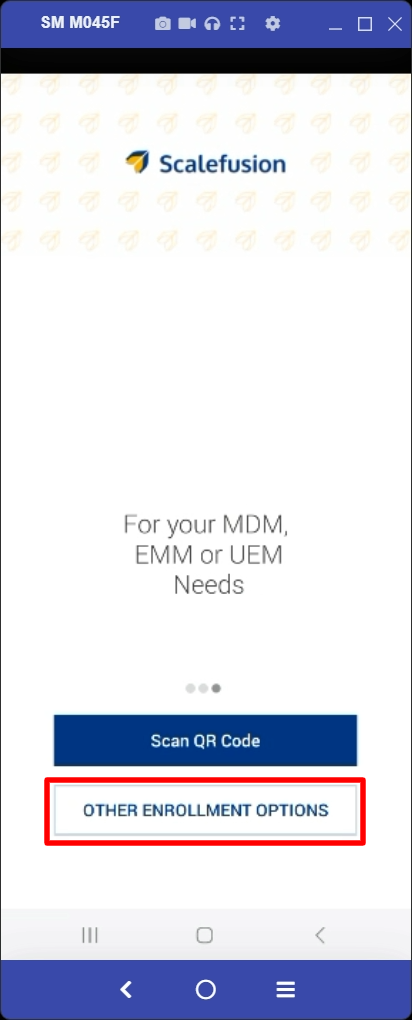
Tap Other Enrollment Options on the welcome screen.
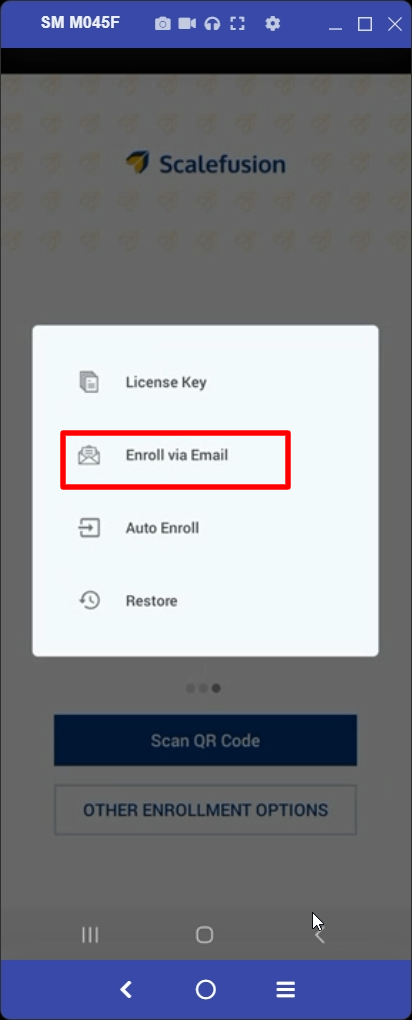
From the options menu, tap Enroll via Email.
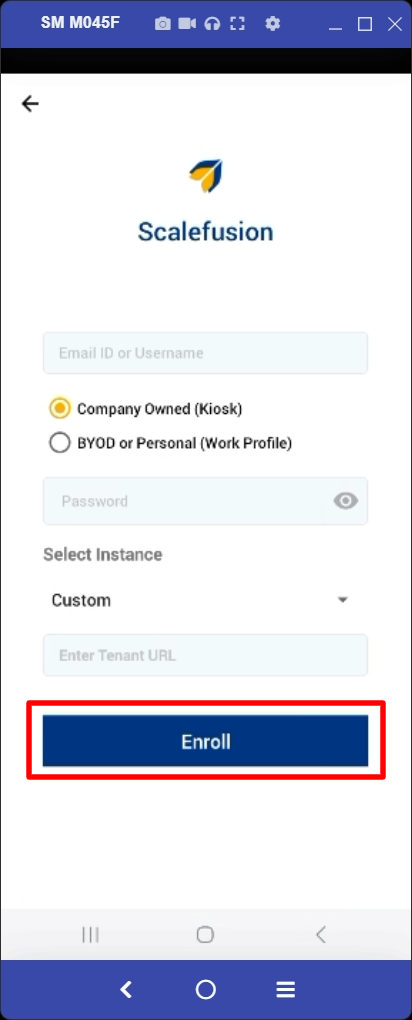
Enter Credentials and Select Instance
Enter your Email ID/Username and Password
Choose:
Company Owned (Kiosk) or
BYOD / Personal (Work Profile)
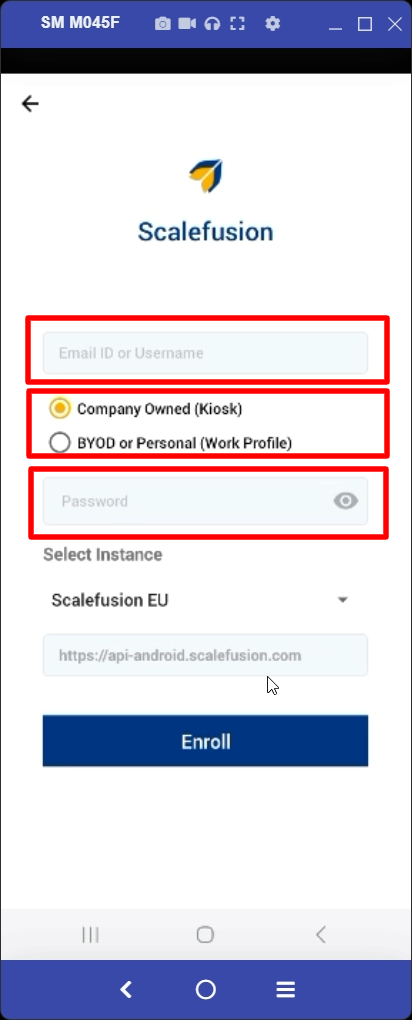
Select your Scalefusion Instance from the dropdown
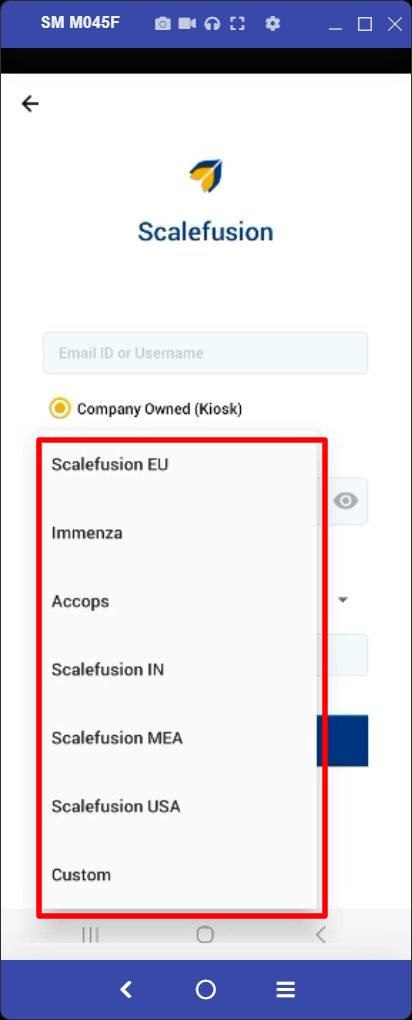
Based on the instance that you select, the text field below it will be pre-filled with the Instance URL
If you choose “Custom” in the Select Instance dropdown, you can manually enter the Instance URL in the text field.
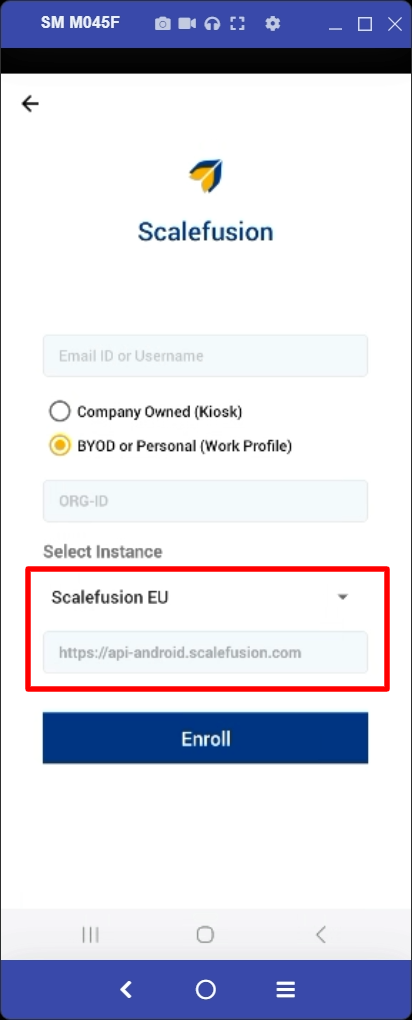
Tap Enroll
Accept Terms & Permissions
You may see the Data Collection Information screen. Click Agree
You will be asked to give Scalefusion permission to make and manage Phone calls. Click on Allow.
Configure Device
Enter a Device Name and tap Submit
If you have created a Device Group or Device Profile on the Scalefusion dashboard, then you can enter the group key or select the profile.
If you don't want this device to be a part of any group or profile, you can select Skip.
Complete Setup
Grant all required permissions. The permissions are divided into 3 sections,
Mandatory Permissions: Clicking on the toggle button next to each of the permissions will take you to a system screen, where among other applications, you would see Scalefusion. Enable Scalefusion for each permission and hit the back key to come back to the permission screen. Click Next once you have given all permissions and see green ticks next to each one.
Runtime Permissions: These are the run-time permissions and are required for an optimal Kiosk/Agent experience.
Set Scalefusion as Launcher: This option is shown if Scalefusion is set to run as Kiosk, which is the default (and only) option as of today. Click on the Setup Scalefusion button, and from the list of options, select Scalefusion as the launcher and select Always.
If you have a GSuite ID, on the permissions page, there will be a toggle button to Sign In To GSuite with your GSuite account ID. You need to enable this and follow further steps. Once completed, click the Complete Setup button. Please see details in the below section, Enrollment with GSuite. In this case, the device should be made as Device Owner
Once completed, the device will be enrolled and display the Scalefusion home screen with configured apps.