In a Windows environment, Internet Information Services (IIS) can be configured to act as a reverse proxy. This allows IIS to handle incoming requests from clients and forward them to backend servers. Essentially, IIS acts as a gateway, hiding the internal server structure and improving security and performance.
This guide outlines the steps to configure Internet Information Services (IIS) on a Windows Server to act as an HTTPS reverse proxy for your OPC (On-Premise Connector) server. This setup enables secure, encrypted communication between clients and the OPC server, which is crucial for protecting sensitive industrial data.
Pre-requisites
A Windows Server with IIS installed.
URL Rewrite module for IIS.
Application Request Routing (ARR) module for IIS.
An SSL certificate in .pfx format (without a password).
The Fully Qualified Domain Name (FQDN) that will be used for OPC in your MDM dashboard (e.g., opc.yourdomain.com).
Step 1: Install Required IIS Modules
Install URL Rewrite:
Download the URL Rewrite module from: https://download.microsoft.com/download/1/2/8/128E2E22-C1B9-44A4-BE2A-5859ED1D4592/rewrite_amd64_en-US.msi
Run the downloaded MSI installer.
Install Application Request Routing (ARR):
Download the Application Request Routing module from: https://download.microsoft.com/download/e/9/8/e9849d6a-020e-47e4-9fd0-a023e99b54eb/requestRouter_amd64.msi
Run the downloaded MSI installer.
Step 2: Open IIS Manager
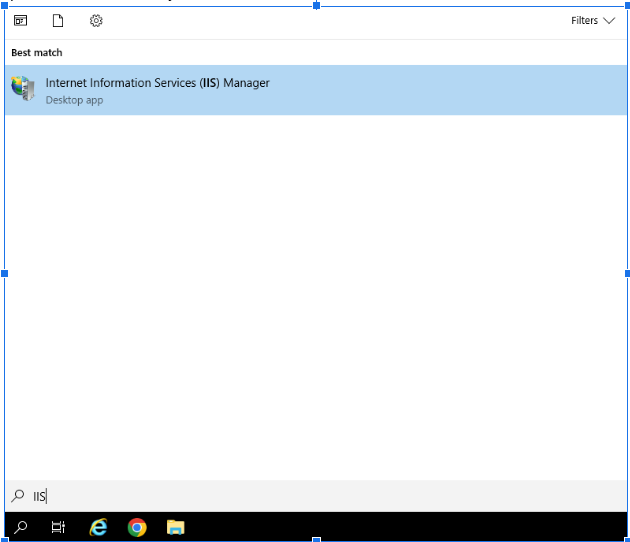
Click on the Windows search bar.
Type IIS.
Double-click on Internet Information Services (IIS) Manager to open it.
Step 3: Import the SSL Certificate
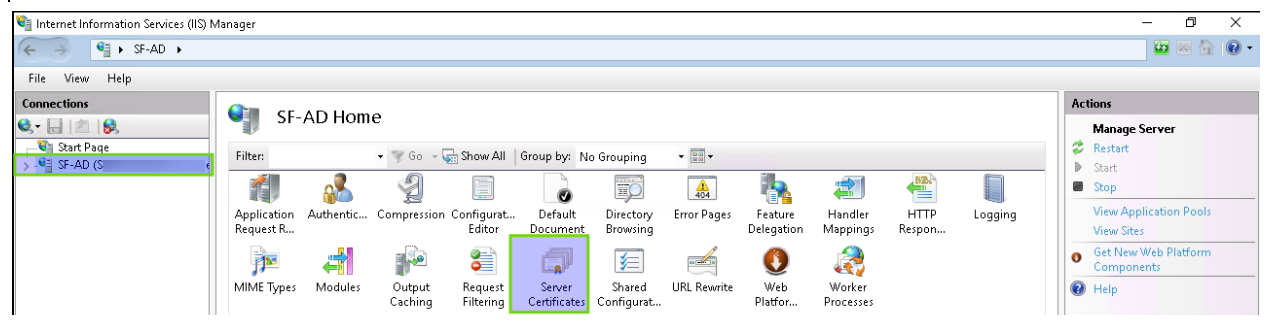
In IIS Manager, in the Connections pane on the left, select the server name.
Double-click on Server Certificates in the center pane.
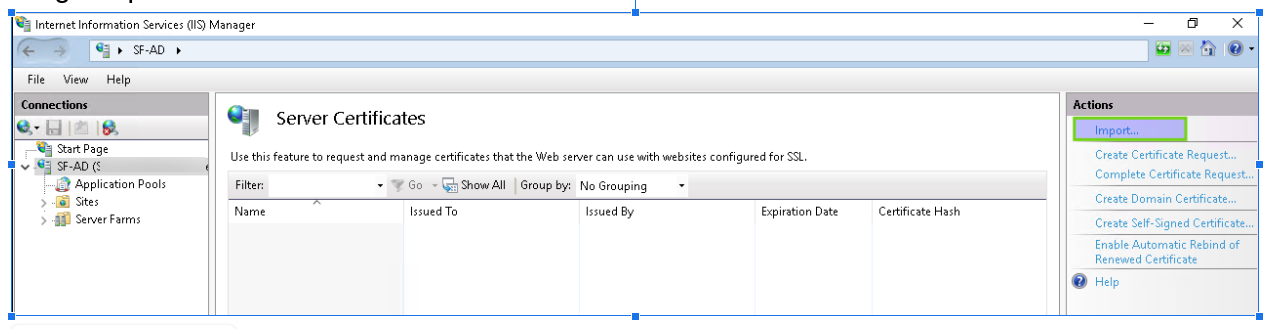
In the Actions pane on the right, click on Import....
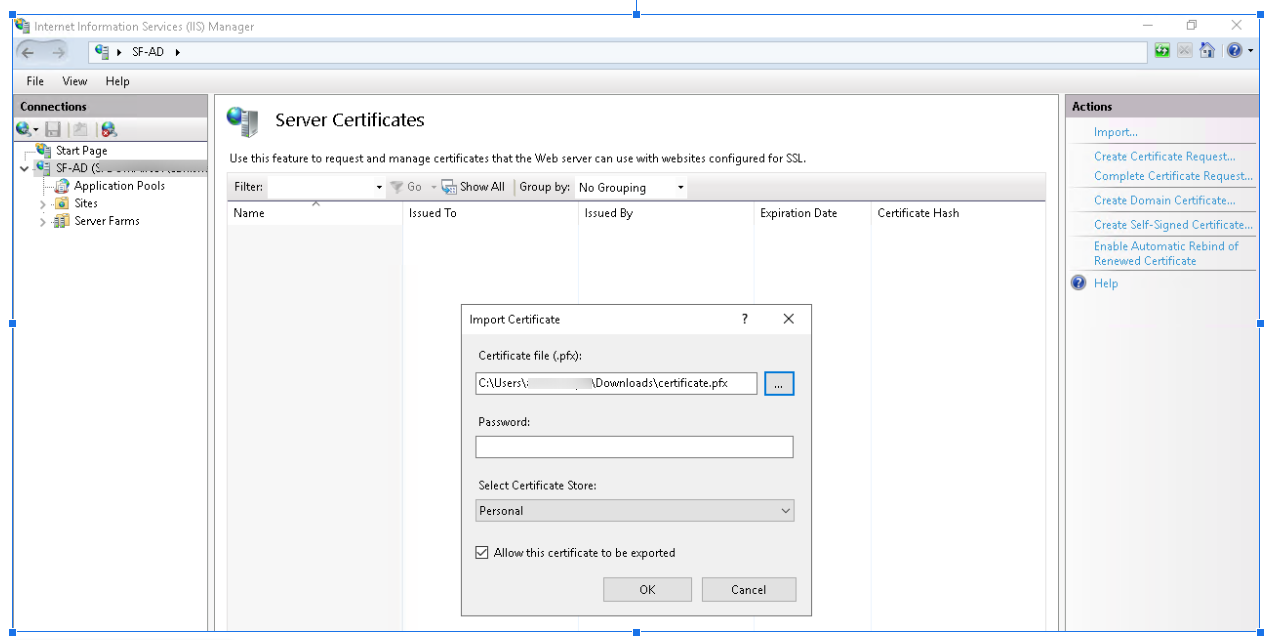
In the Import Certificate dialog box:
Browse to the location of your .pfx certificate file.
Enter the certificate password (if you set one).
Important: It is strongly recommended to use a password for your SSL certificate. If you followed best practices, you will have a password.Check Allow this certificate to be exported if needed.
Click OK.
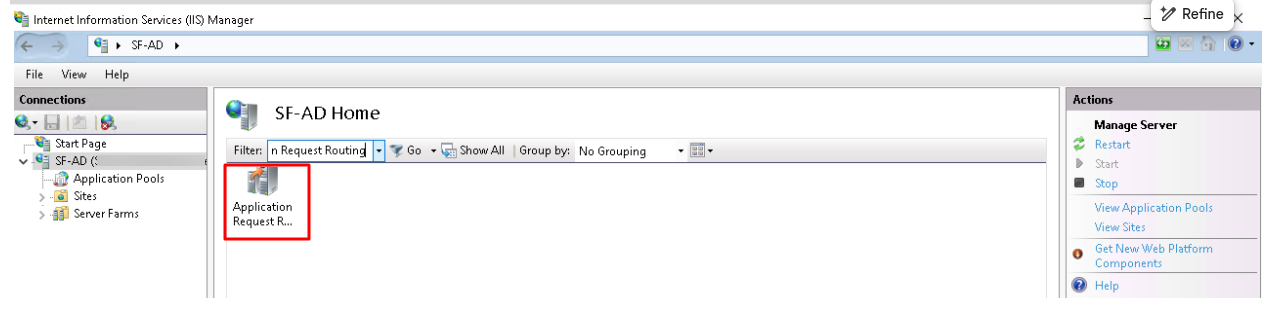
Step 4: Configure Application Request Routing (ARR)
In IIS Manager, in the Connections pane, select the server name.
Double-click on Application Request Routing Cache in the center pane.
In the Actions pane on the right, click on Server Proxy Settings....
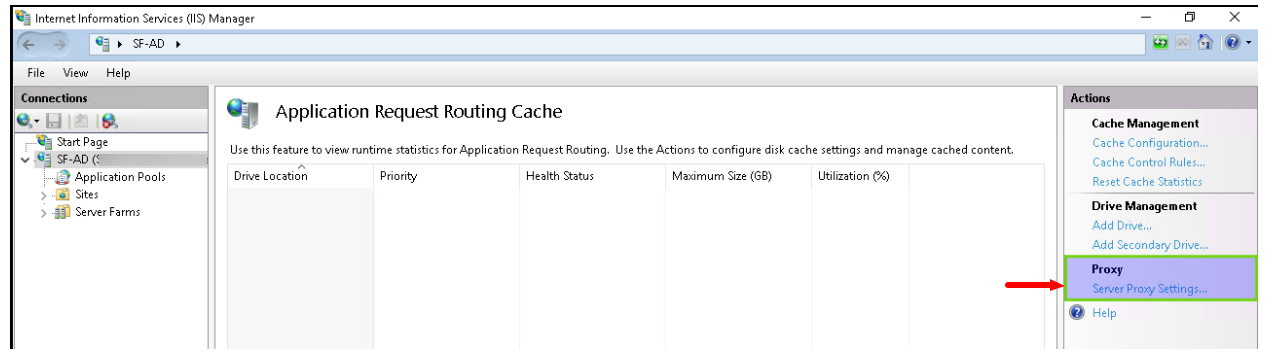
In the Server Proxy Settings dialog box:
Check the Enable Proxy checkbox.
Click Apply in the Actions pane

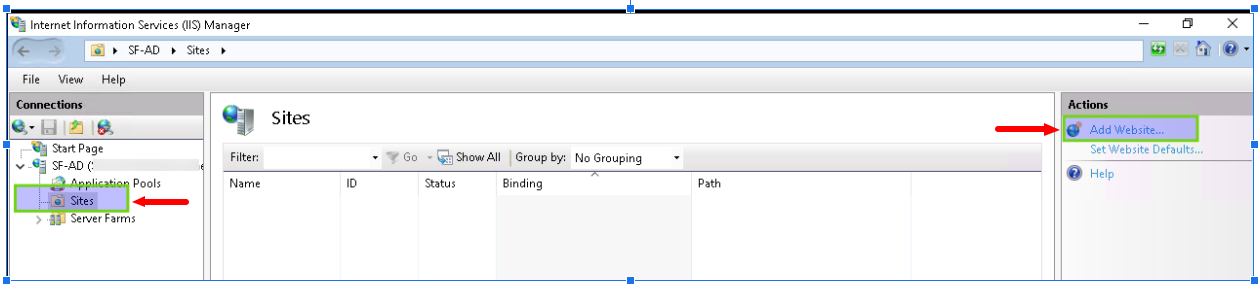
Step 5: Add a Website for the Reverse Proxy
In IIS Manager, in the Connections pane, expand the server name and click on Sites.
Click on Add Website... under Actions.
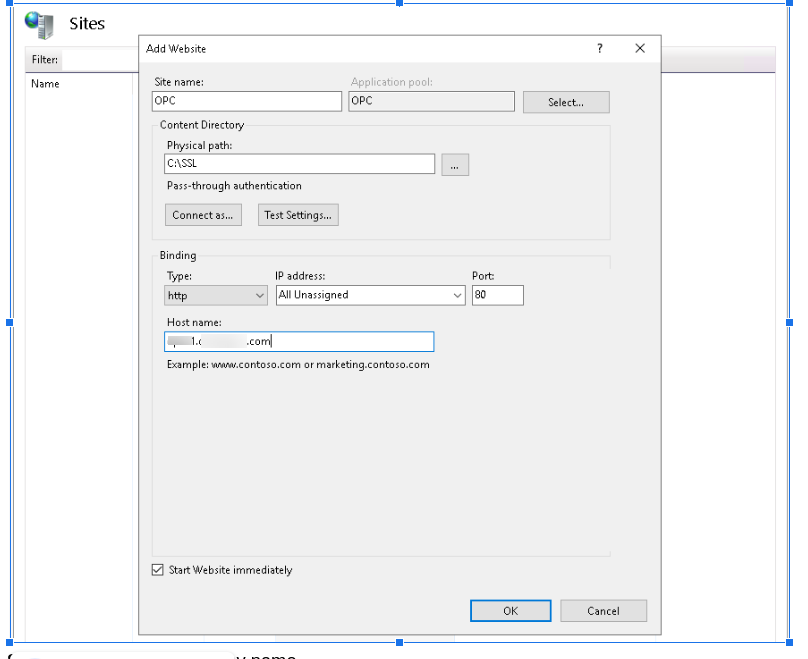
In the Add Website dialog box:
Site name: Enter a descriptive name for the website (e.g., OPC Reverse Proxy).
Physical path: Create a new, empty folder (e.g., C:\OPCProxy) and enter its path. This folder will not contain your actual web content, but IIS requires a path.
Hostname: Enter the FQDN that you will use for OPC in your MDM dashboard (e.g., opc.yourdomain.com).
Click OK.
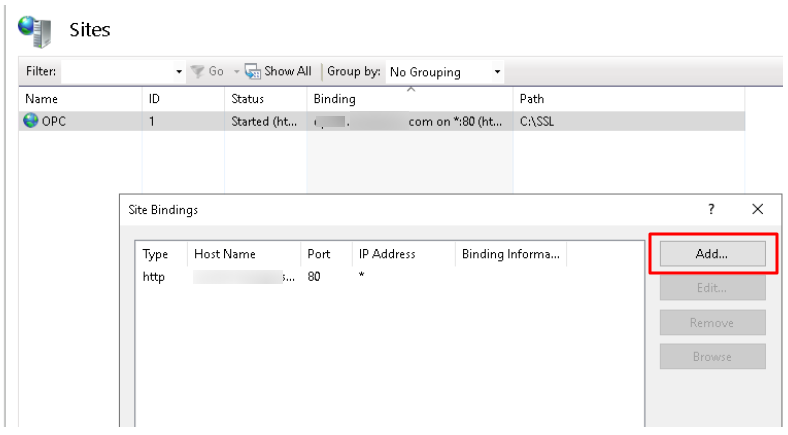
Step 6: Configure Website Bindings
In IIS Manager, in the Connections pane, expand Sites and select the website you just created.
In the Actions pane on the right, click on Bindings....

In the Site Bindings dialog box, click on Add....
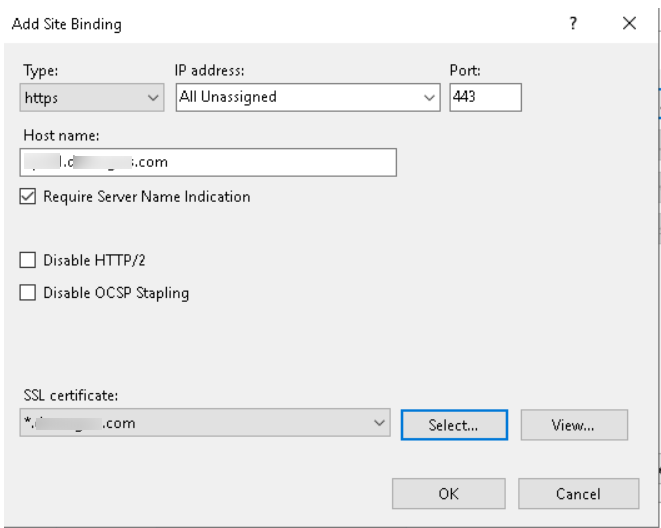
In the Add Site Binding dialog box:
Type: Select https.
Hostname: Enter the FQDN you will use for OPC (e.g., opc.yourdomain.com).
SSL certificate: Click on the Select... button and choose the SSL certificate you imported in Step 3.
Click OK in the Add Site Binding dialog box.
Click Close in the Site Bindings dialog box.
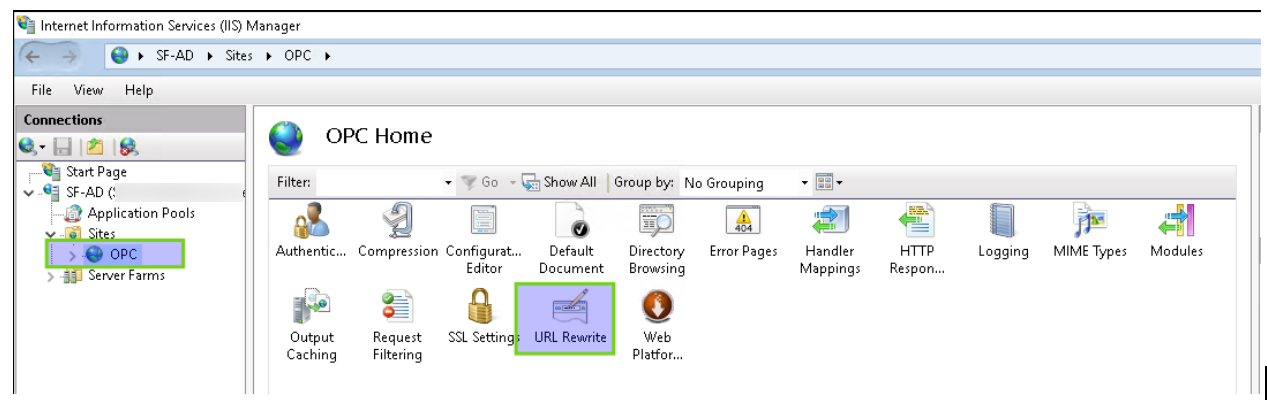
Step 7: Configure URL Rewrite Rules
In IIS Manager, in the Connections pane, expand Sites and select the website you created.
Double-click on URL Rewrite in the center pane.
If there are any existing rules in the Inbound Rules or Outbound Rules sections, you may need to remove or modify them depending on your specific requirements.
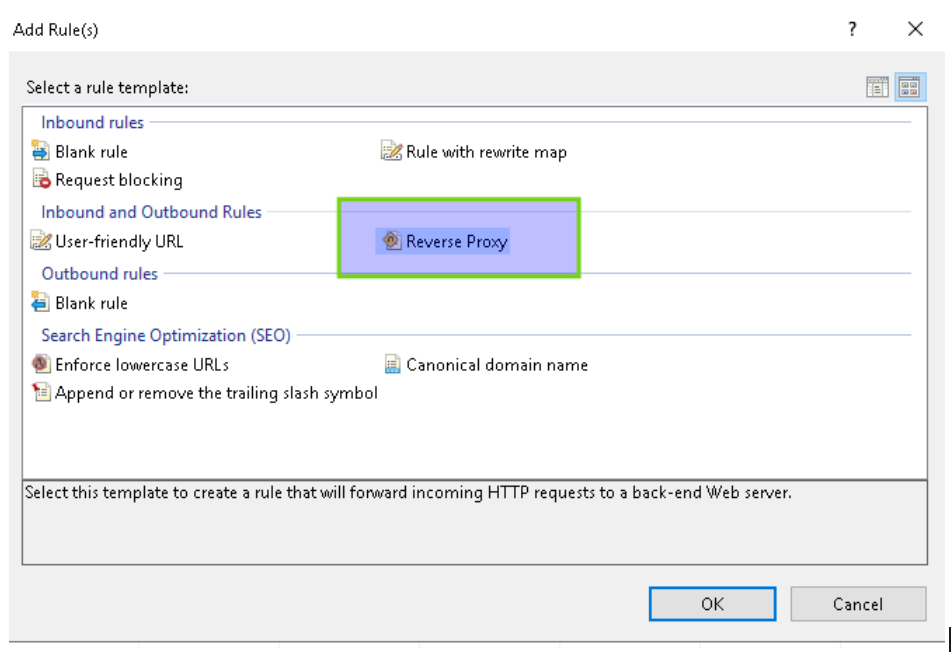
In the Actions pane on the right, click on Add Rule(s)....
In the Add Rules dialog box, double-click on Reverse Proxy.
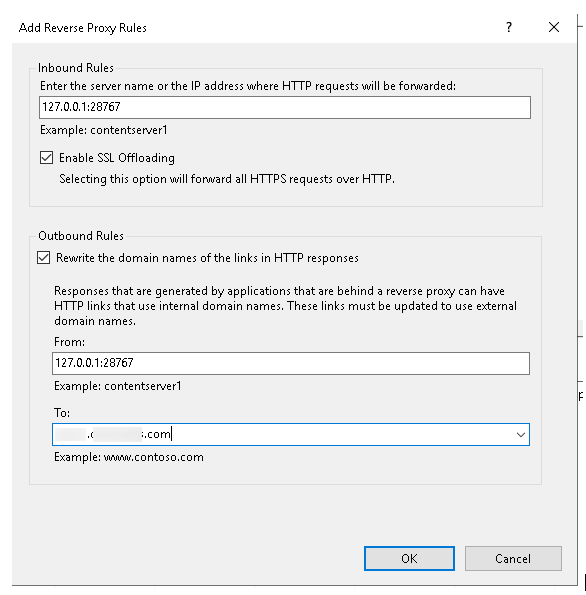
In the Add Rewrite Rules dialog box:
Enter the server name or IP address and port of your OPC server (e.g., http://127.0.0.1:28767).
Ensure that the Enable SSL Offloading checkbox is checked if your OPC server is on the same machine and does not require HTTPS. If your OPC server does require HTTPS, leave this unchecked and ensure your OPC server is configured correctly.
Click OK.
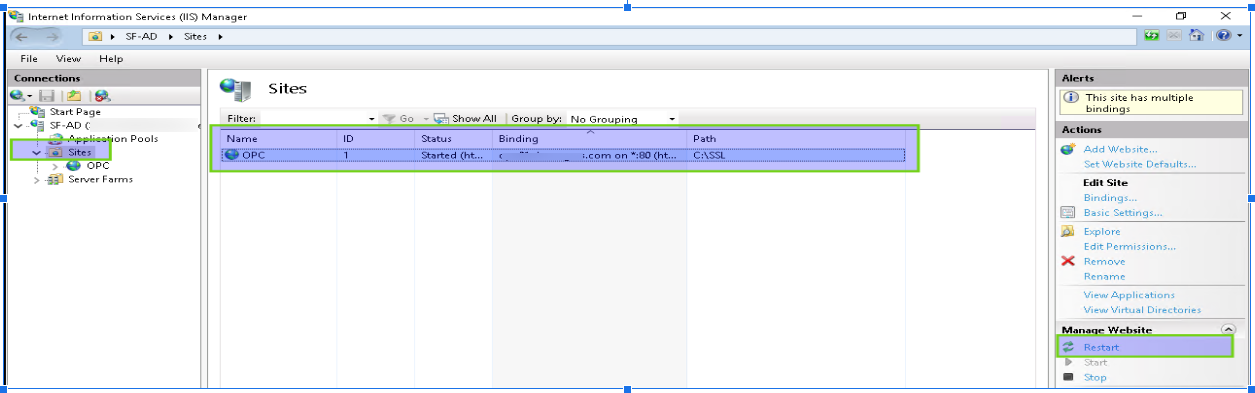
Step 8: Restart the Website
In IIS Manager, in the Connections pane, select the website you configured.
In the Actions pane on the right, click on Restart.
Step 9: Verify the Configuration
Open a web browser and navigate to a URL that should be routed to your OPC server (e.g., https://opc.yourdomain.com/opc/heart-beat/pass). Replace opc.yourdomain.com with your actual FQDN.
If the configuration is correct, you should see the expected output from your OPC server. For example, you might see a response like:

If you see the correct output, you have successfully configured IIS as an HTTPS reverse proxy for your OPC server.