SSO with Microsoft 365/ Entra using OIDC
- 25 Sep 2025
- 9 Minutes to read
- Print
- PDF
SSO with Microsoft 365/ Entra using OIDC
- Updated on 25 Sep 2025
- 9 Minutes to read
- Print
- PDF
Article summary
Did you find this summary helpful?
Thank you for your feedback!
Introduction
Microsoft 365 and Entra ID (formerly Azure Active Directory) are core components of Microsoft’s cloud ecosystem, providing productivity tools and robust identity and access management capabilities for organizations of all sizes. Together, they enable secure collaboration, access control, and centralized management of users and devices.
With Scalefusion's SSO configuration, you can seamlessly integrate Microsoft 365 and Entra ID using industry-standard OIDC/OAuth 2.0 protocols. This integration enables secure, centralized authentication for users, allowing IT admins to manage access across platforms more efficiently. It simplifies identity management, enhances security posture, and supports the scalable deployment of services and devices across the enterprise.
Prerequisite
The devices should be enrolled with Scalefusion as BYOD or UAE, or Shared COD.
The Custom Domain for which you are authorizing should be verified through OneIdP.
Users belonging to a custom domain should be imported/added to the Scalefusion Dashboard and migrated to OneIdP.
IT Admins should have access to the Microsoft 365 and Entra ID Admin Console.
For iOS device →If Microsoft Authenticator or Intune Company Portal is installed on the device, please ensure these applications are marked as Managed Applications.
Create SSO Configuration for Microsoft 365 and Entra ID
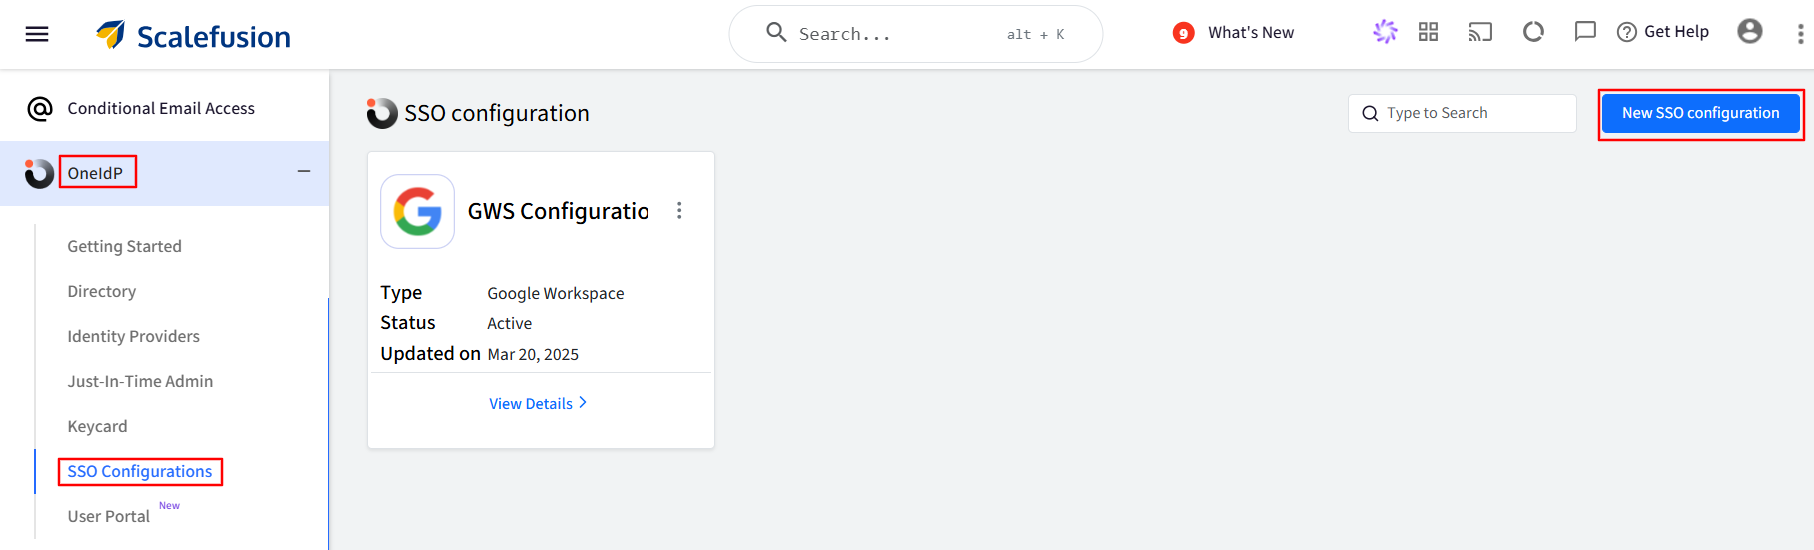
Navigate to OneIdP > SSO Configurations on the Scalefusion dashboard.
Click on the New SSO configuration button.
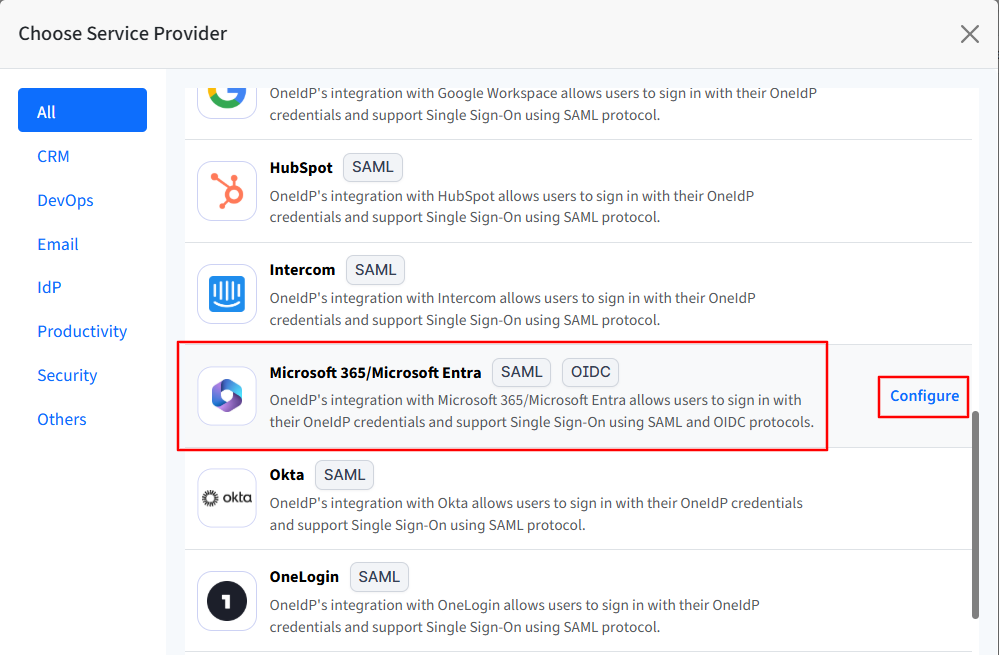
From the shown list, search and click on Configure for Microsoft 365/Microsoft Entra to open the configuration wizard.
Navigate to each tab and enter the required details. You can navigate to the next tab only after you have entered complete details in the current section.
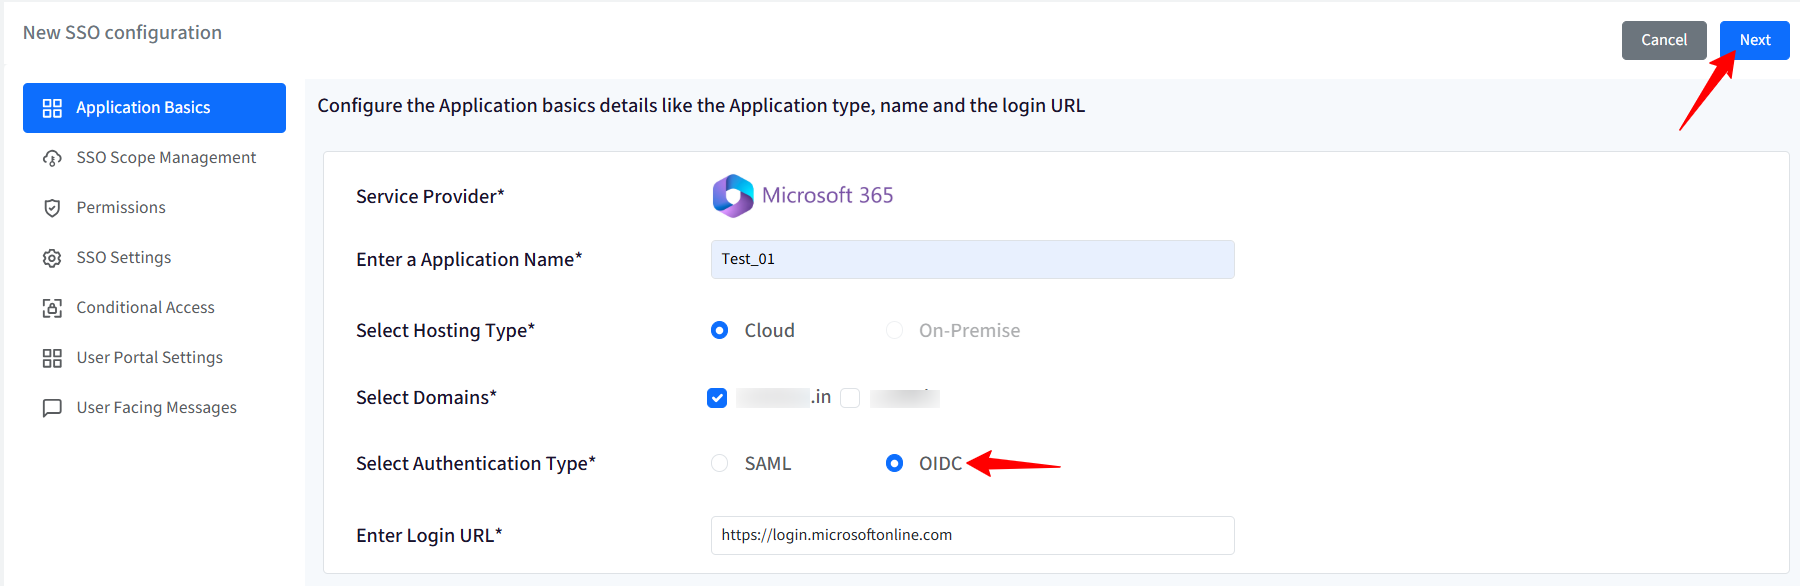
Application Basics
Enter Application Name: Enter a name for your App, which will be an identifier for your configuration. The name must be at least 5 characters long. The maximum allowed length is 128 characters.
Select Hosting Type: This will be pre-selected as Cloud.
Select Domains: All the custom domains you have configured and verified using OneIdP will be listed here. Select the domain(s) on which you want SSO to be enabled. You can select more than one domain.
Select Authentication Type: Please select OIDC.
Enter Login URL: This will be pre-filled.
Once you have entered all details, click Next.
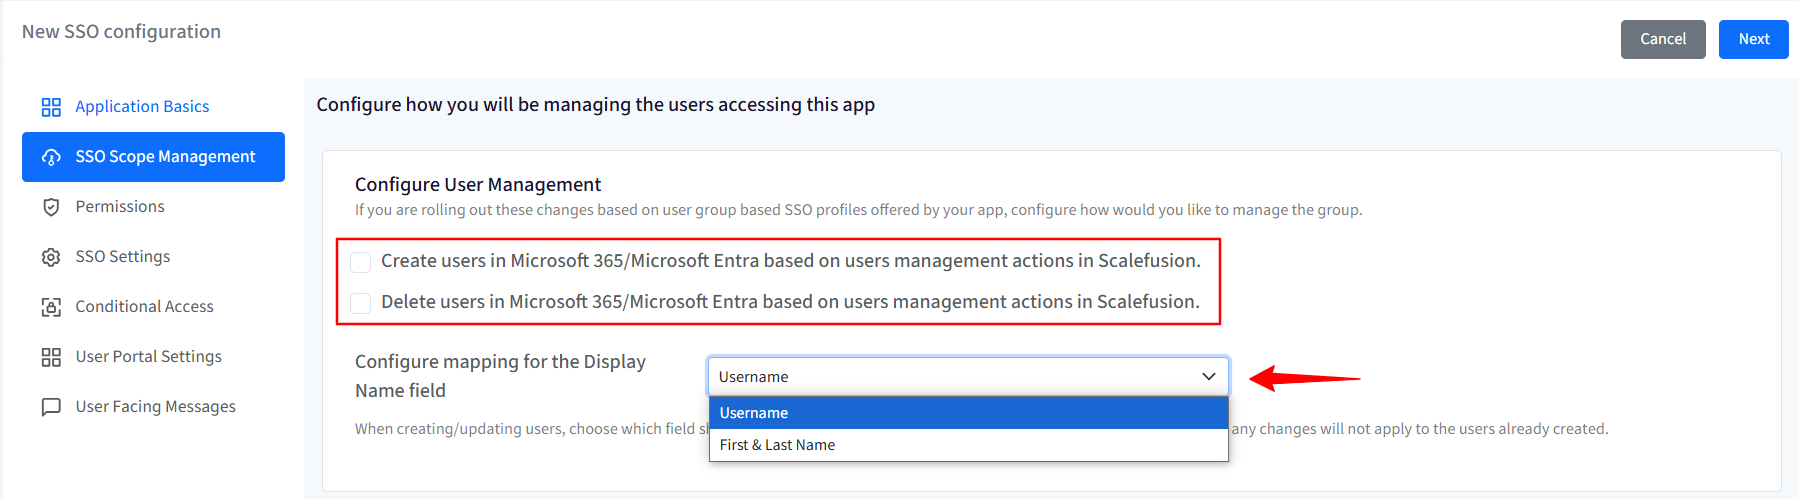
SSO Scope Management
With SSO scope management, you can configure the procedure for managing the users who will be accessing this application.
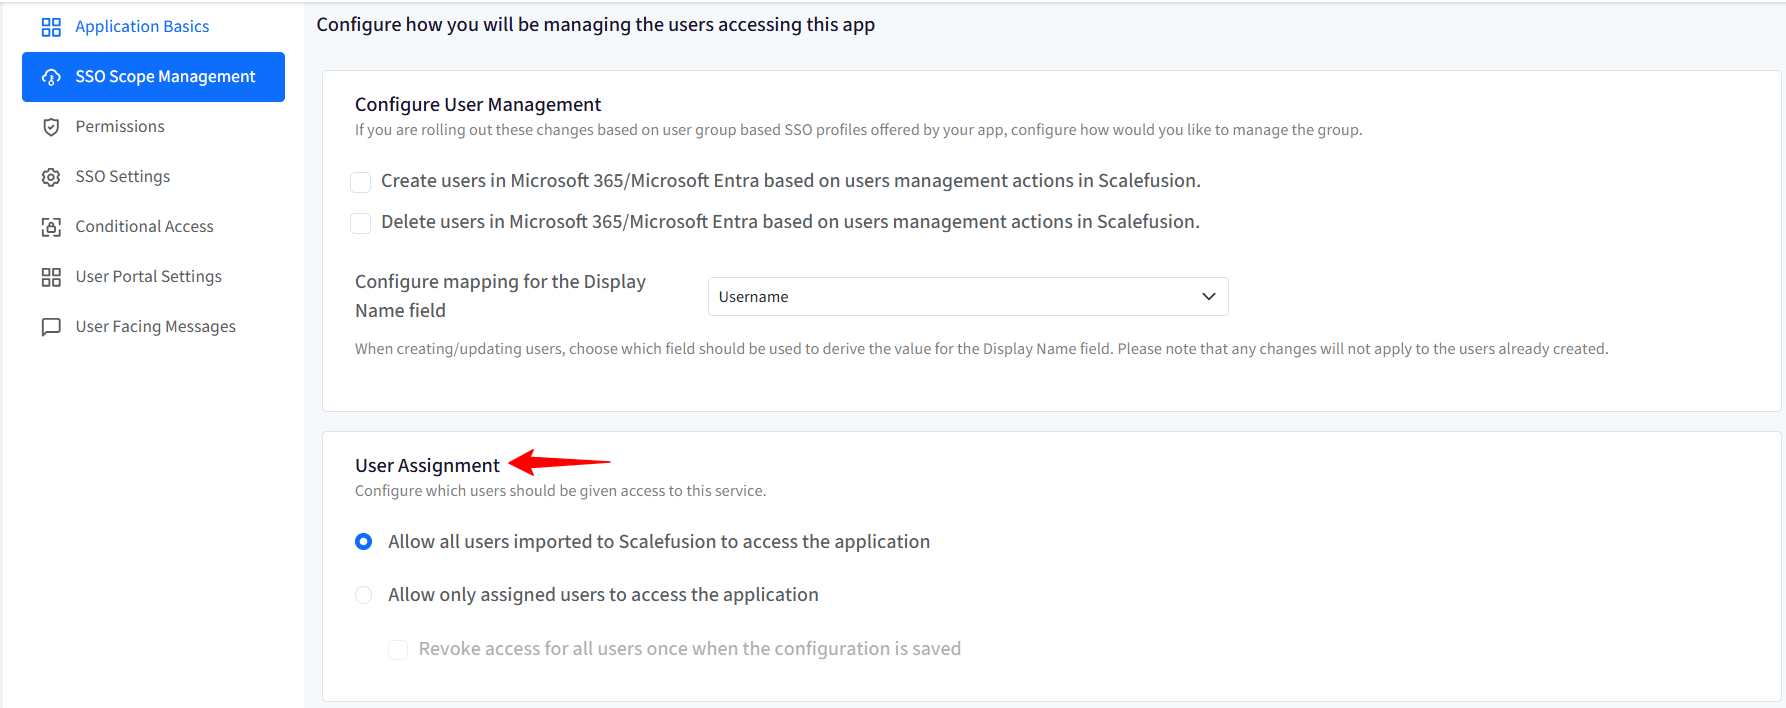
Configure User Management
Set up how you intend to manage users accessing this app. If you're deploying these changes using group-based SSO profiles provided by your app, specify how you would like to manage those groups. You can choose to:
Create users in Microsoft 365/Microsoft Entra based on users management actions in Scalefusion.
Delete users in Microsoft 365/Microsoft Entra based on users management actions in Scalefusion.
Configure mapping for the Display Name field: When creating/updating users, choose which field should be used to derive the value for the Display Name field. Please note that any changes will not apply to the users already created.
User assignment
SSO Configuration would allow only assigned users to access the app. Choose one from the following options:
Allow all users imported to Scalefusion to access the application: All users (belonging to the domain) imported to Scalefusion and migrated to OneIdP will be allowed to access the application.
Allow only assigned users to access the application: Only the user(s) whom you have assigned the SSO configuration will be allowed to access the application. With this option, after the SSO configuration is created, you need to manually select and assign the users.
Revoke access for all users once when the configuration is saved: If this is checked, the access is revoked from the users who are currently assigned the configuration. As a result, it will invalidate all user sessions and log out users from their current running session.
Permissions
Here, you need to grant permissions by signing in with an admin account on the Entra portal.
Click on the Grant Permissions button at the bottom.
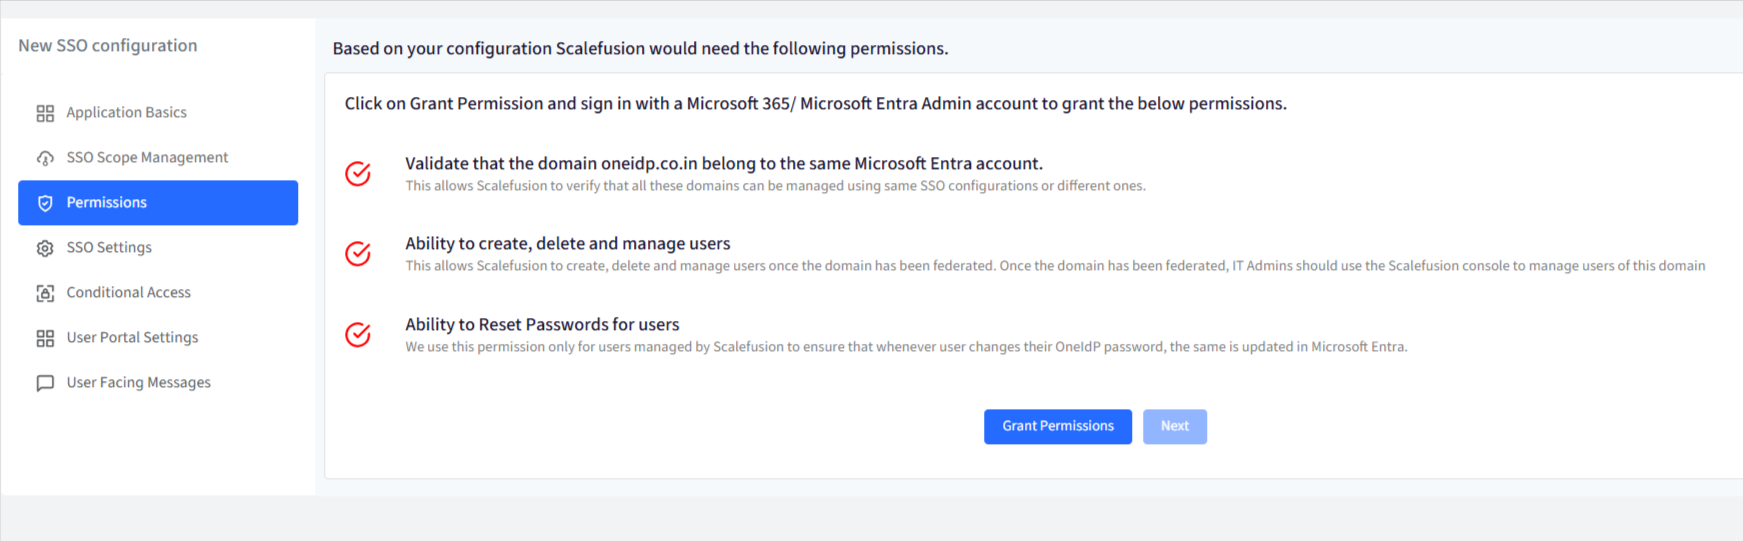
This will redirect you to the Entra login portal (https://login.microsoftonline.com). Sign in with your Entra admin credentials.
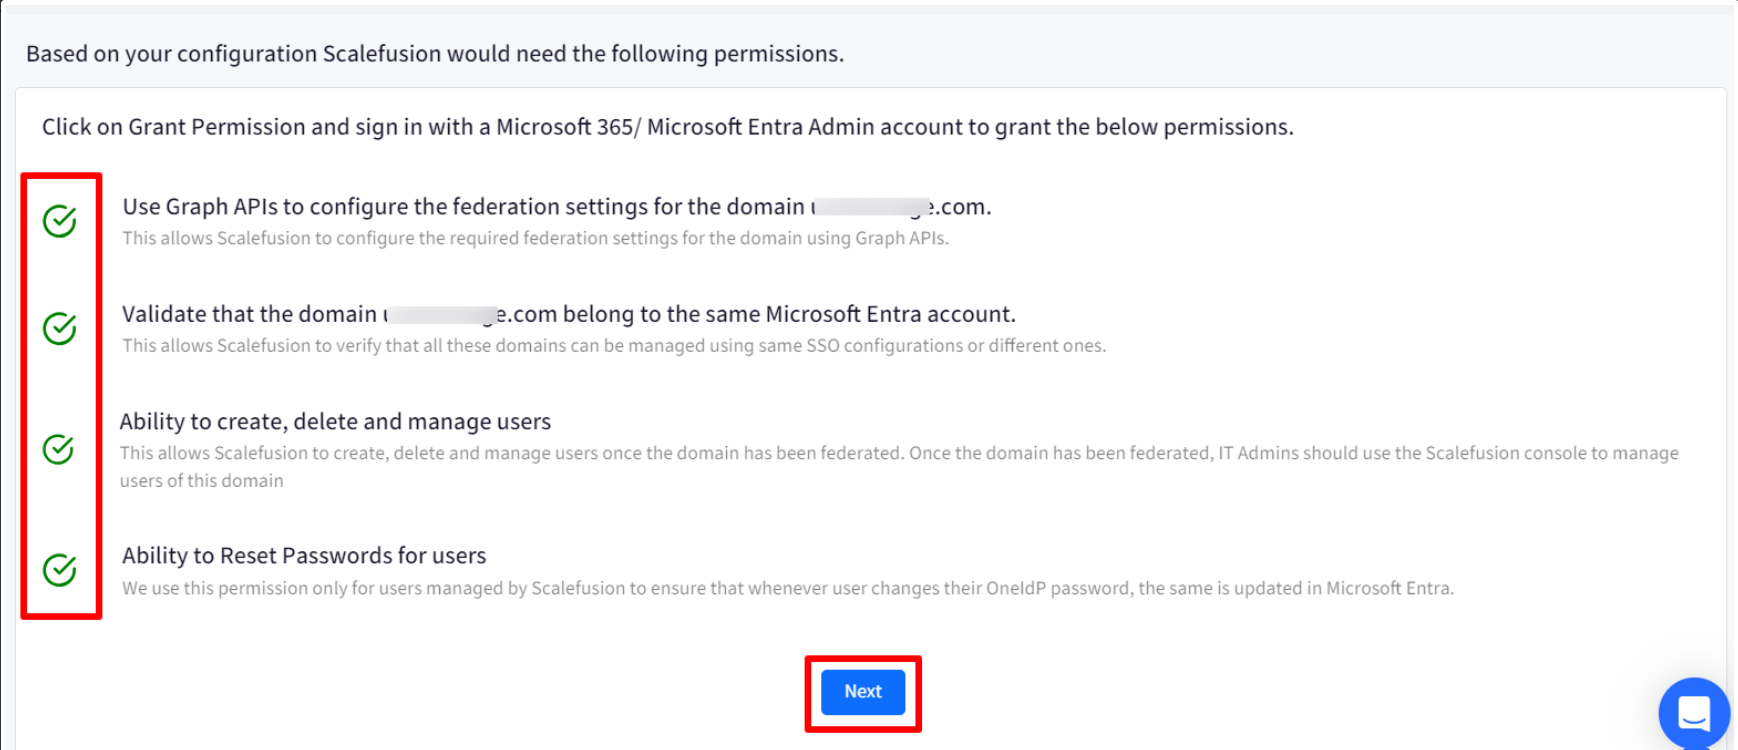
After signing in to the Entra portal, you will be redirected back to the Scalefusion Dashboard with permissions granted.
Note that the check mark in front of each permission turns green. This indicates that the permissions have been granted. Click Next to go to the next step.
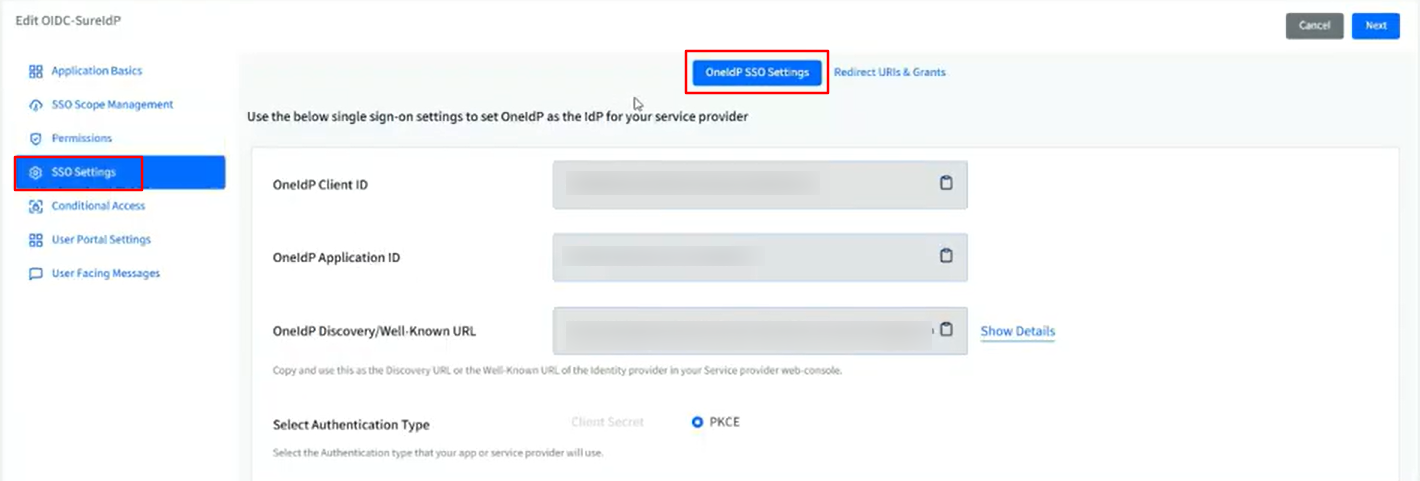
SSO Settings
This section provides the SSO settings to set OneIdP as the Identity Provider for the Microsoft Entra//Microsoft 365 admin center. You will have to add these there.
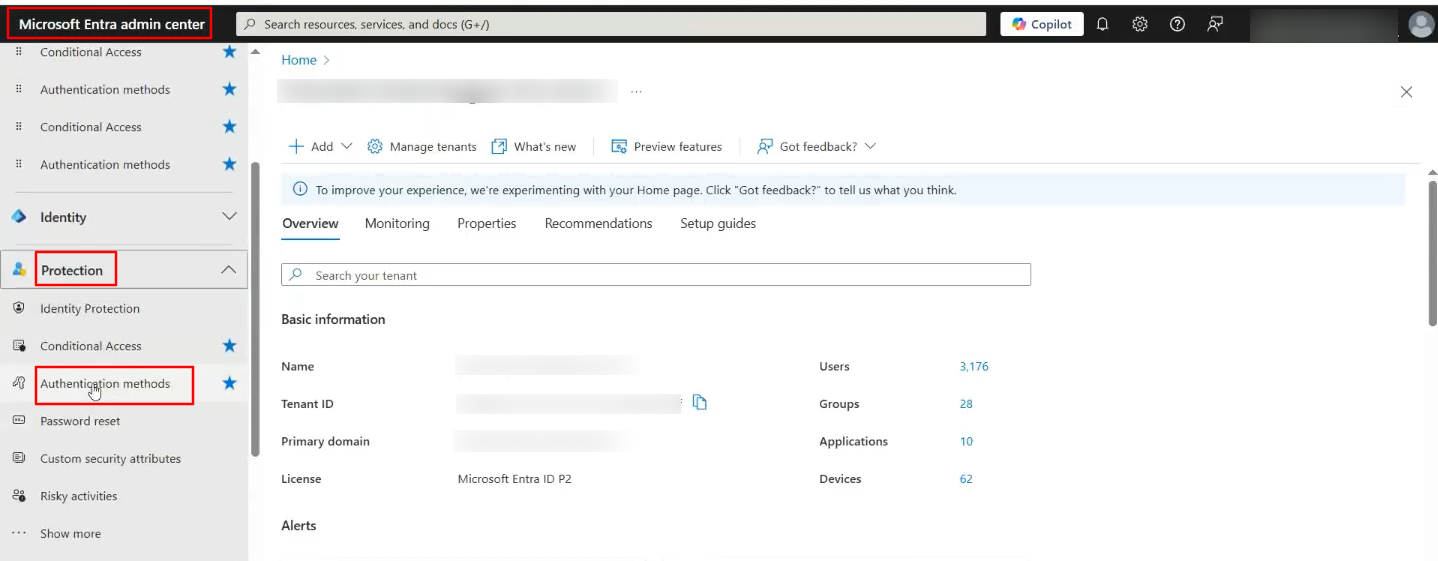
Navigate to your Microsoft Entra/Microsoft 365 admin center and log in.
Go to Protection and click Authentication methods.
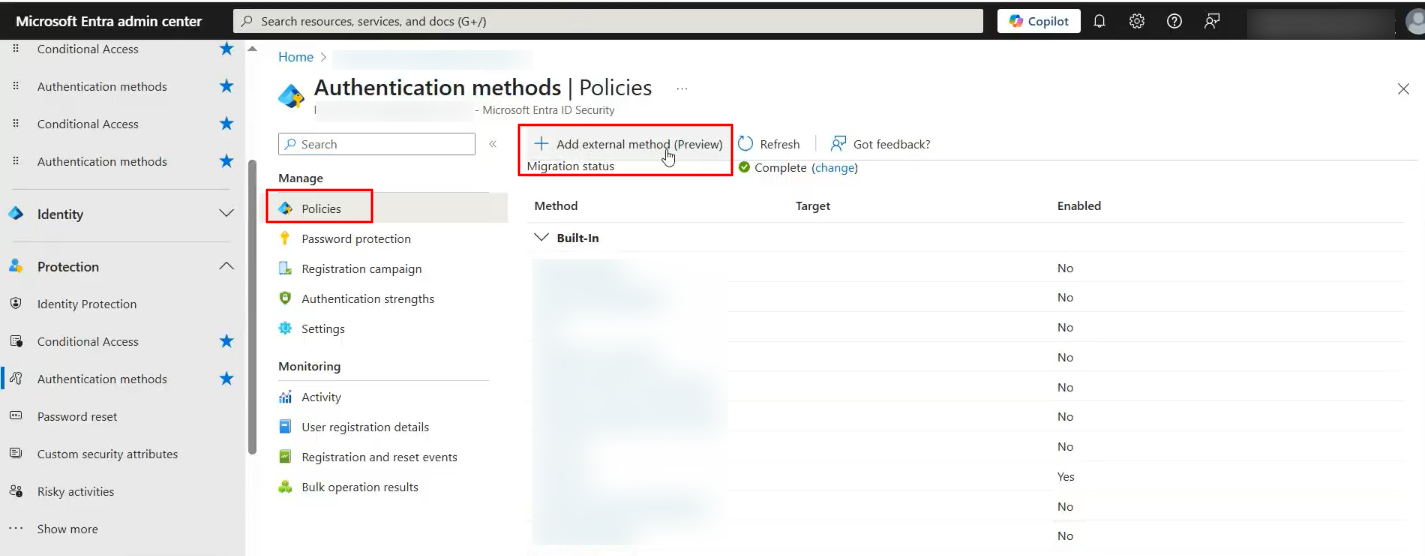
Click Add external method (Preview).
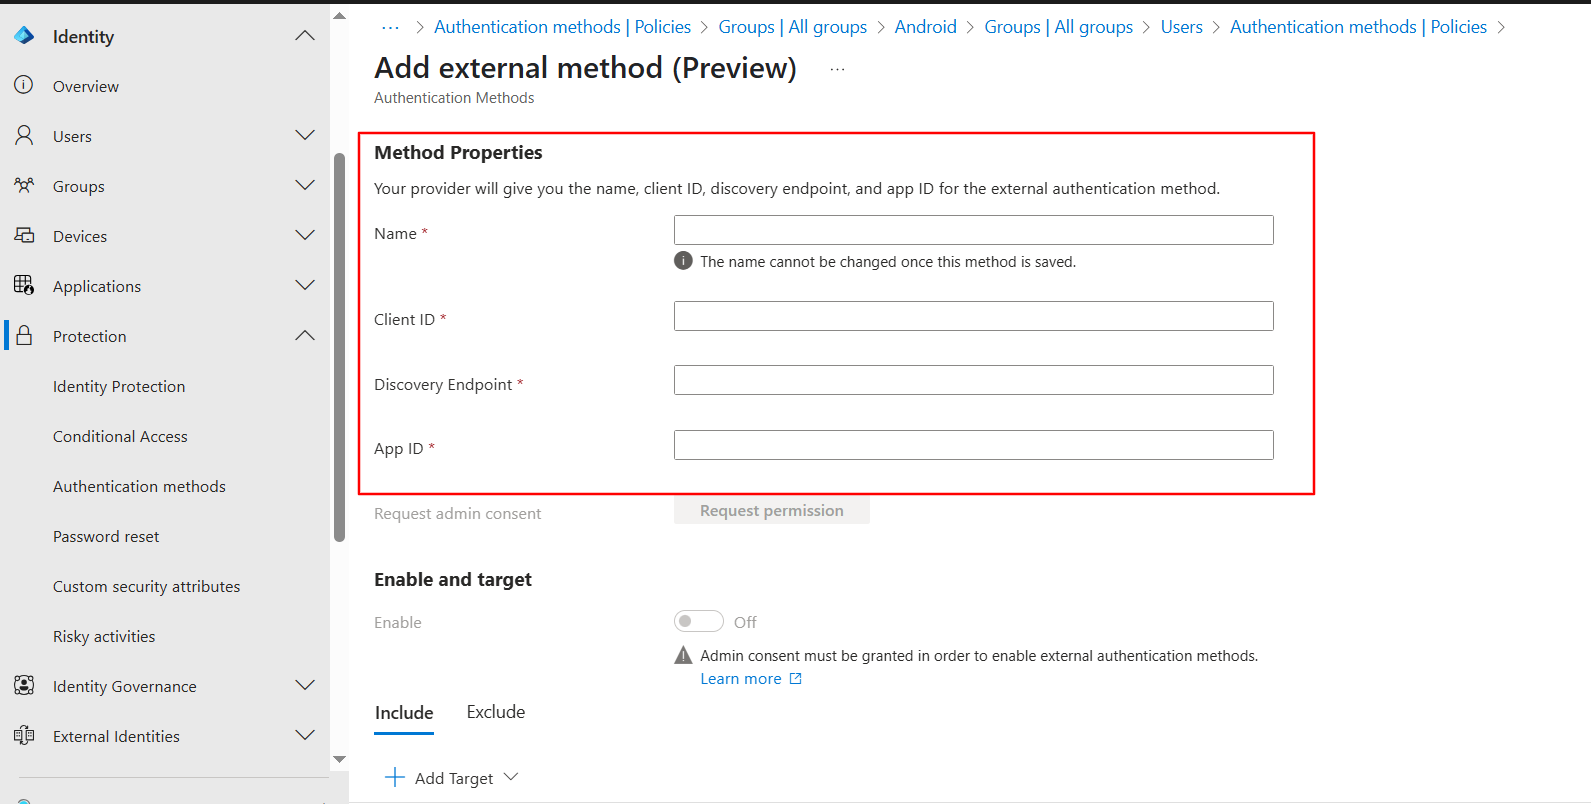
In the Method Properties tab, you will have to enter the OneIdP details in the respective fields by copying them from the Scalefusion dashboard > OneIdP SSO Settings section. Once done, click Save.
Select Authentication Type: On the Scalefusion dashboard, it will be pre-selected as PKCE.
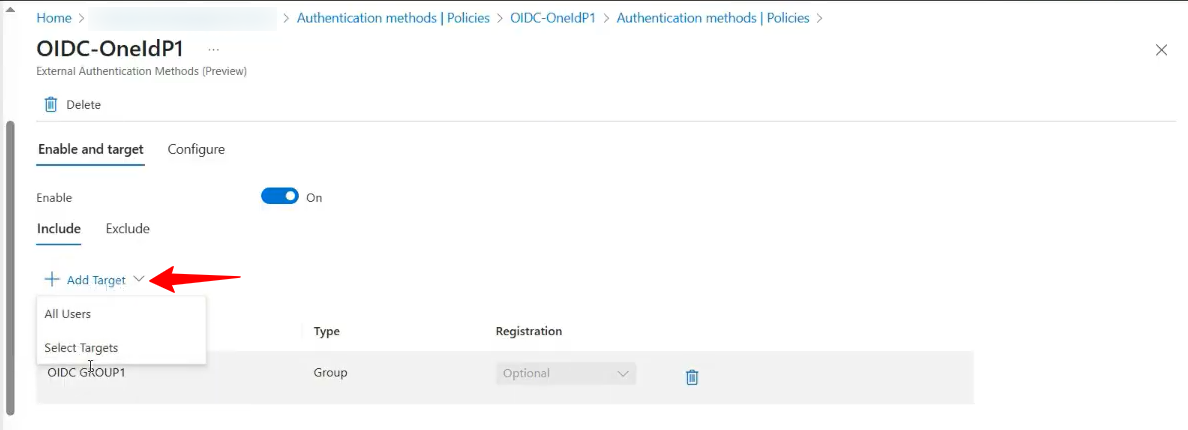
Next, go to the Enable and target tab on the Microsoft Entra Admin Center to enable this authentication method.
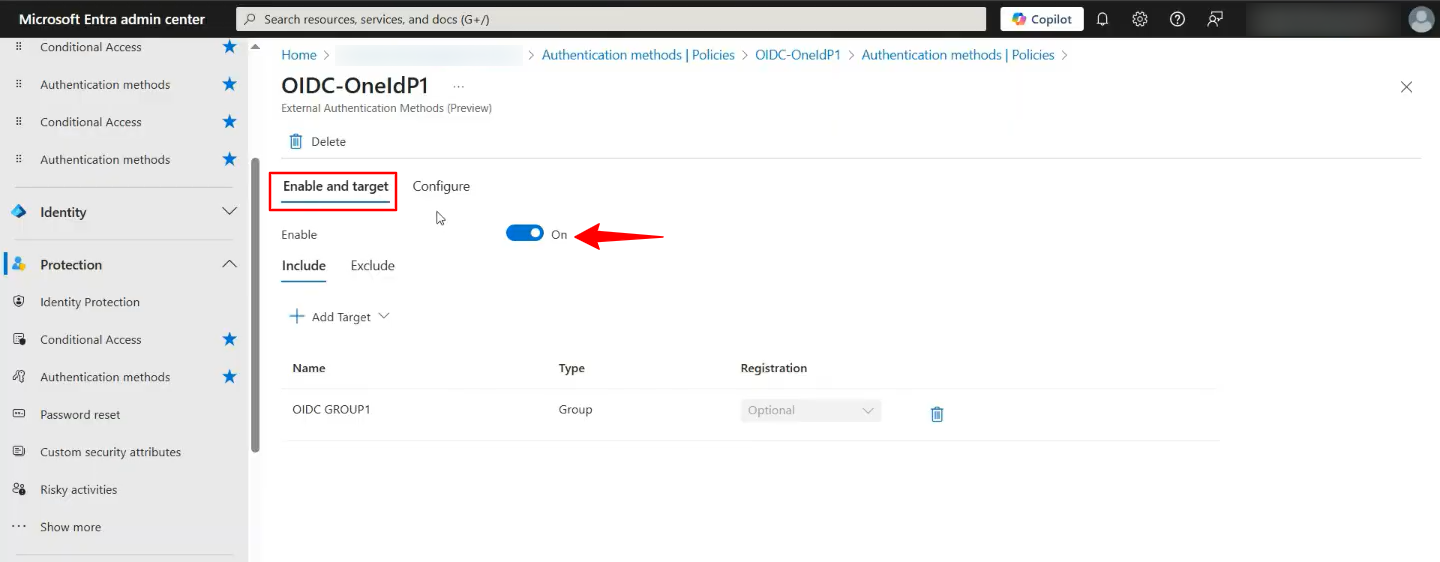
Next, select the target where you would like this authentication method to apply.
Next, navigate to the Conditional Access section on the Microsoft Entra/Microsoft 365 admin center and create a new Policy.
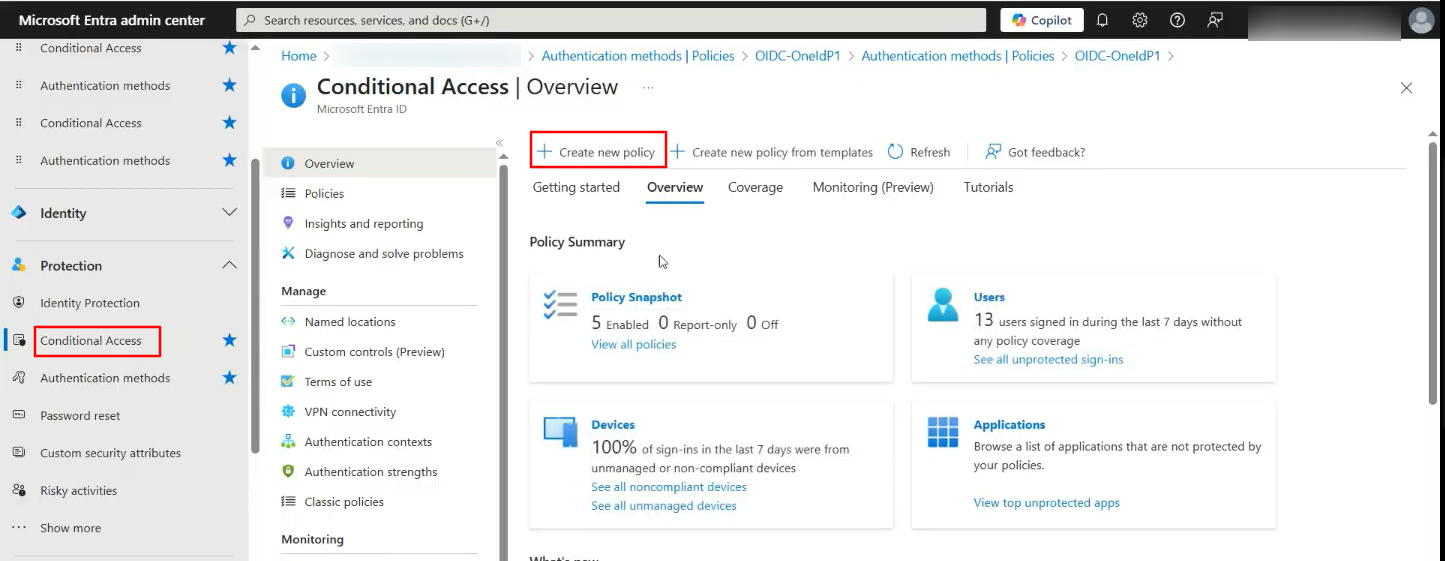
Provide a name for this Policy.

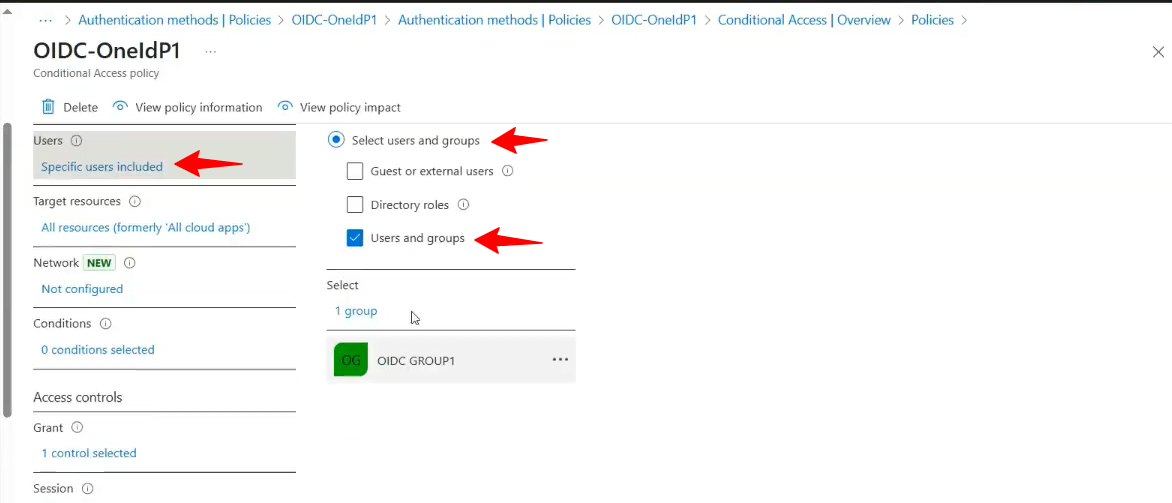
Select the Users and Groups where this policy will be applied.
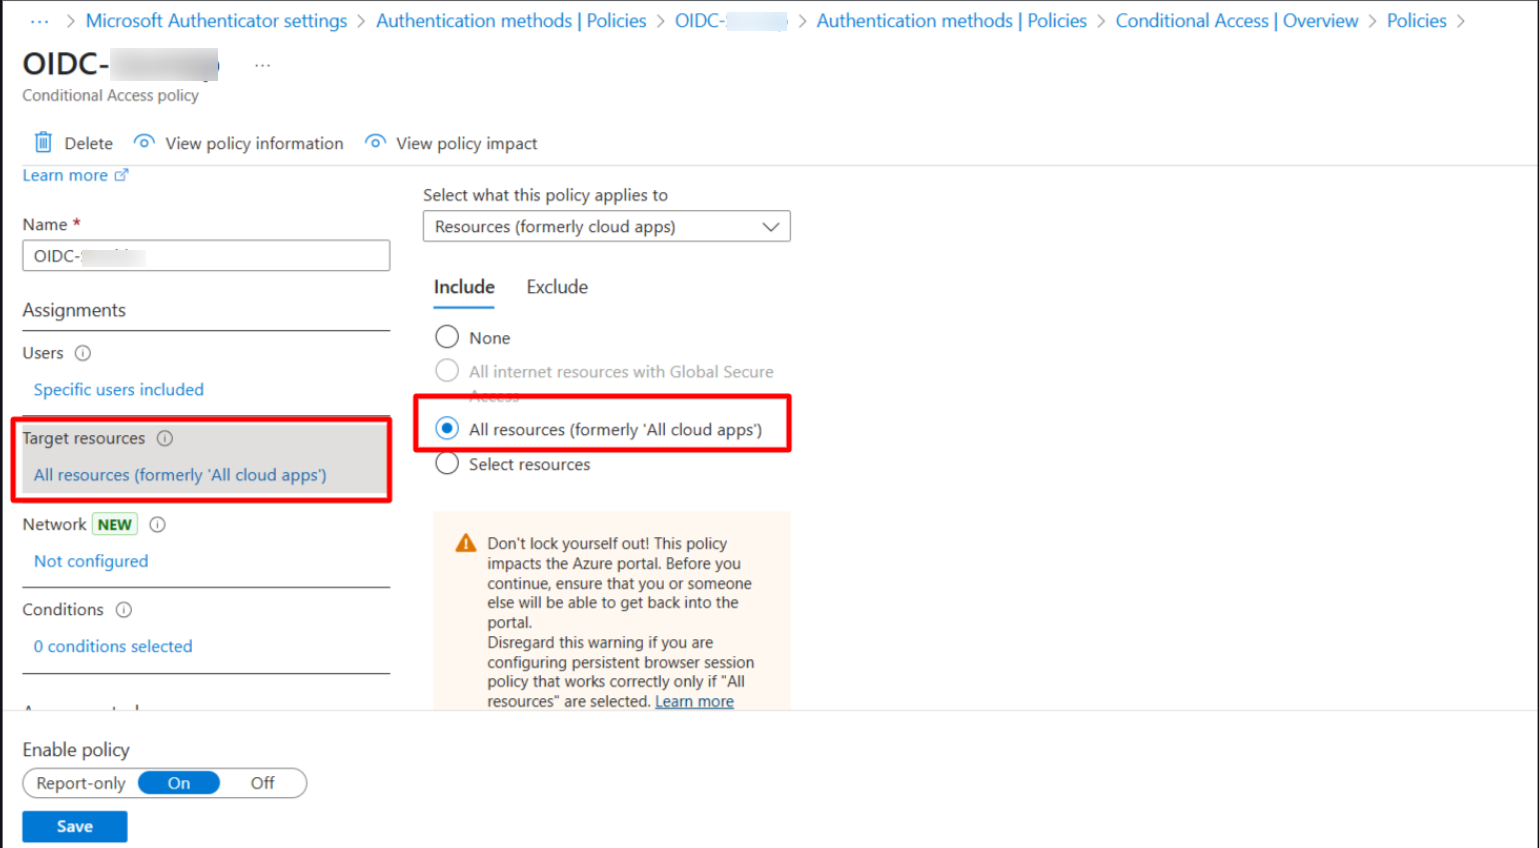
Select Target resources to “All resources (formally ‘All Clouds apps’)”.
Select Require multifactor authentication in Grant Access.
Enable the Policy (ON) and Save this policy.

This completes the Identity provider setup on the Microsoft Entra/Microsoft 365 admin center.
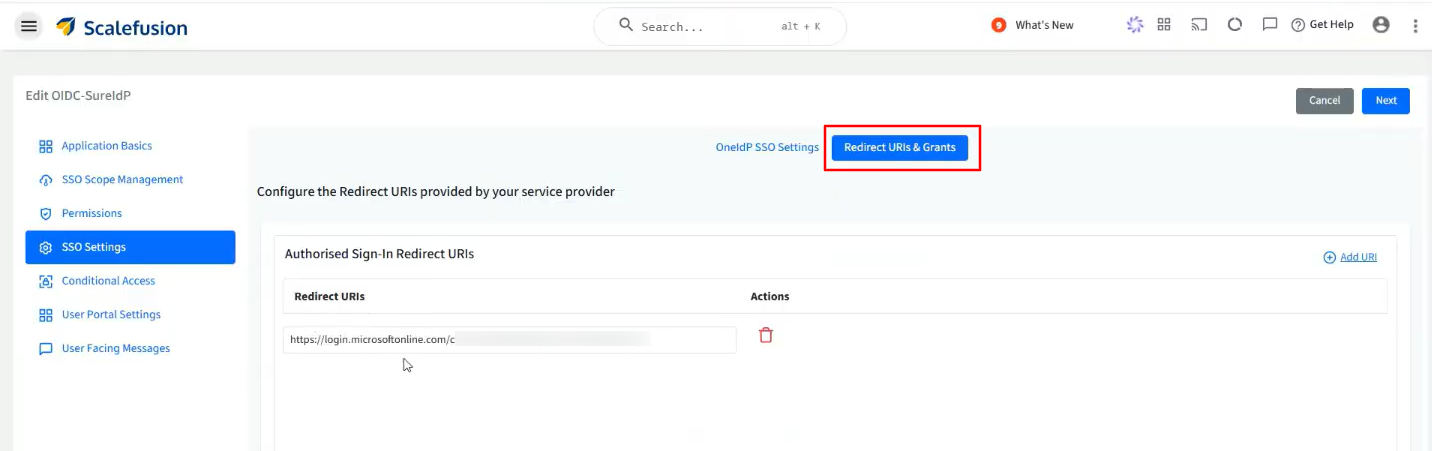
On the Scalefusion dashboard, navigate to the Redirect URIs & Grants section.
The Redirect URIs field will be pre-filled.
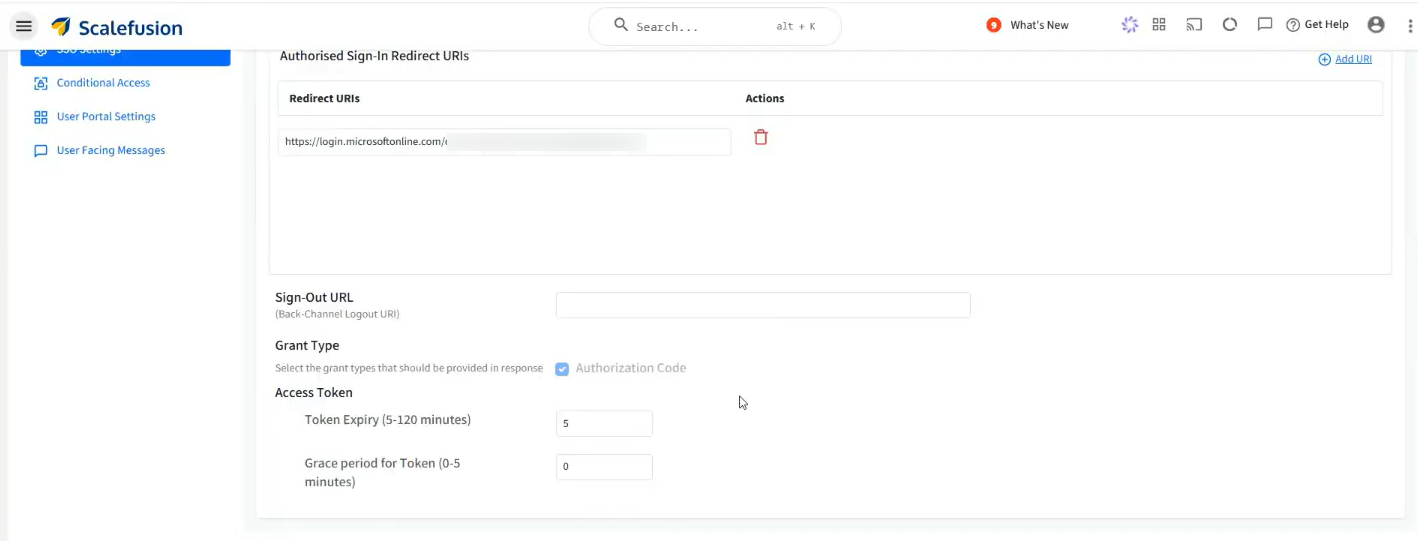
Sign-Out URL: You can add the back channel log-out URL here, if it is supported.
Grant type: Select the grant types that should be provided in response. By default, the Authorization Code is selected.
Access Token: You can set the Token expiry from 5 to 120 minutes and the Grace Period for Token from 0 to 5 minutes.
This also completes the SSO Settings on the Scalefusion dashboard. Click on Next to save the settings on the Scalefusion dashboard and move on to the next section.
Conditional Access
From this section, you can define the additional conditions on the basis of which users will be allowed/disallowed from accessing the application on the device.
Conditional Access Settings
Device Policy
For Android, iOS/iPad OS, Windows & macOS, Linux: Choose one from the following two conditions:
Only if the device is managed by Scalefusion: The application will be accessible only on devices managed (enrolled) by Scalefusion.
If the device is managed by Scalefusion or an OTP using the Scalefusion Authenticator app from a managed device: The application is accessible if any of the following conditions is met:
Device is managed by Scalefusion: If device is managed you will not be asked to enter OTP for authentication, or
If device is unmanaged, OTP is required for authentication: OTP can be taken from the Scalefusion Authenticator app installed on a Scalefusion-managed device.
Allow users to access by setting up MFA using third-party authenticator app or OTP sent on email:
Device is managed by Scalefusion: If device is managed user will not be asked to enter OTP for authentication.
If device is unmanaged, OTP is required for authentication. OTP can be taken from any 3rd party authenticator app or an OTP received via email, based on the MFA settings in Directory Settings.
Note: The left side panel is for configuring Device Policy on Android & iOS/iPad OS and right side is for Windows & macOS and Linux below them. Hence, you can configure separate device policies based on platform.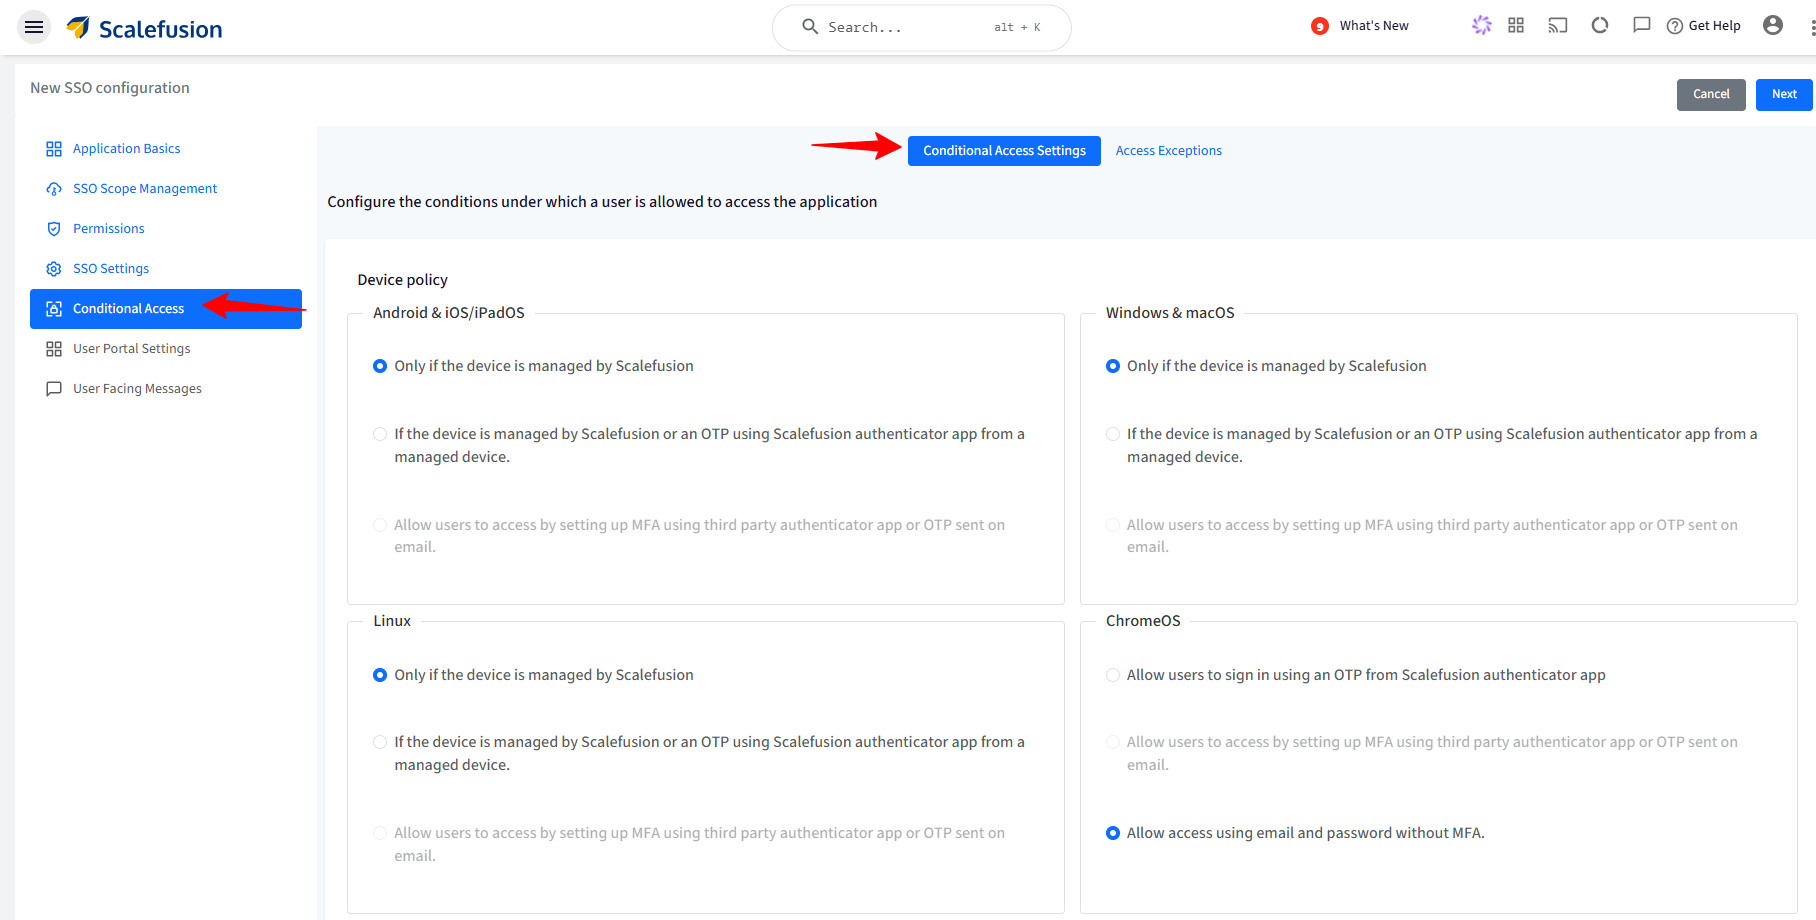
For ChromeOS: Choose one from the following two conditions:
Allow users to sign in using an OTP from Scalefusion authenticator app: OTP can be taken from Authenticator app installed on a Scalefusion managed device.
Allow users to access by setting up MFA using third party authenticator app or OTP sent on email: OTP is required for authentication. OTP can be taken from any 3rd party authenticator app or an OTP received via email, based on the MFA settings in Directory Settings.
Note:
This option will be enabled if MFA is enabled in Directory Settings.
Allow access using email and password without MFA: Authorization check will not happen, and users can login directly with their email and password.
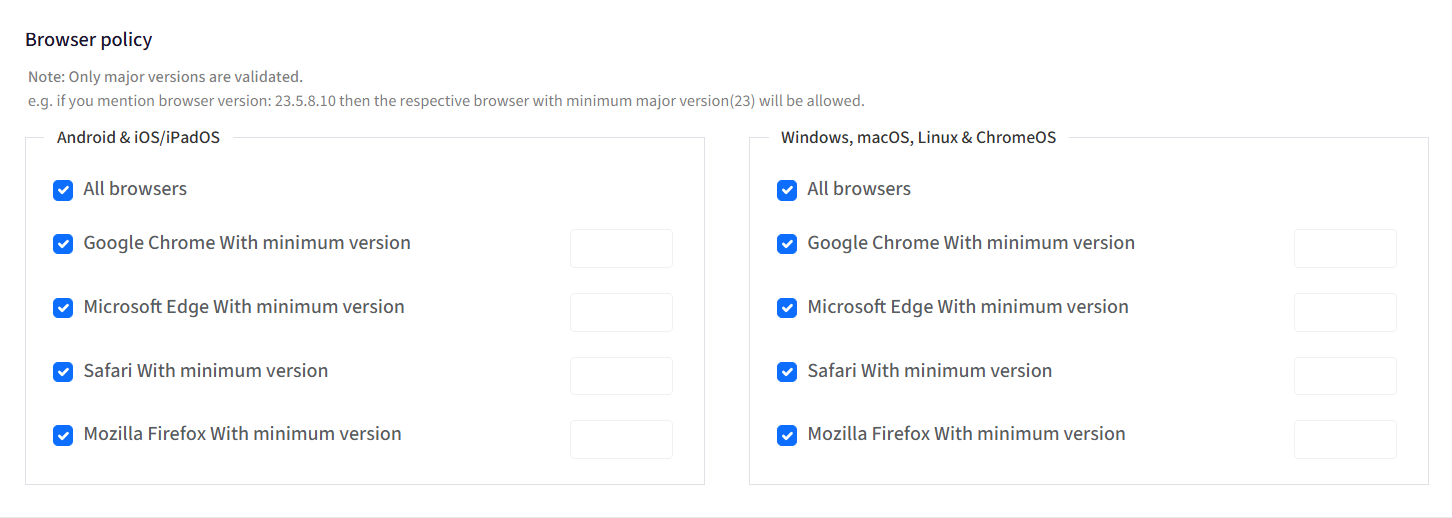
Browser Policy
From here, you can select one or more browsers and specify minimum versions on which you want to allow the access to the application.
The following are the options:
All Browsers
Google Chrome with minimum version
Microsoft Edge with minimum version
Safari with minimum version
Mozilla Firefox with minimum version
By default, all browsers are allowed.
Only major versions are validated. E.g., if you mention browser version: 23.5.8.10, then the respective browser with minimum major version (23) will be allowed.
Access Exceptions
From this section, you can configure the exceptions where the users are allowed to access the applications even if the conditions are not met. The following are the exceptions that can be configured:
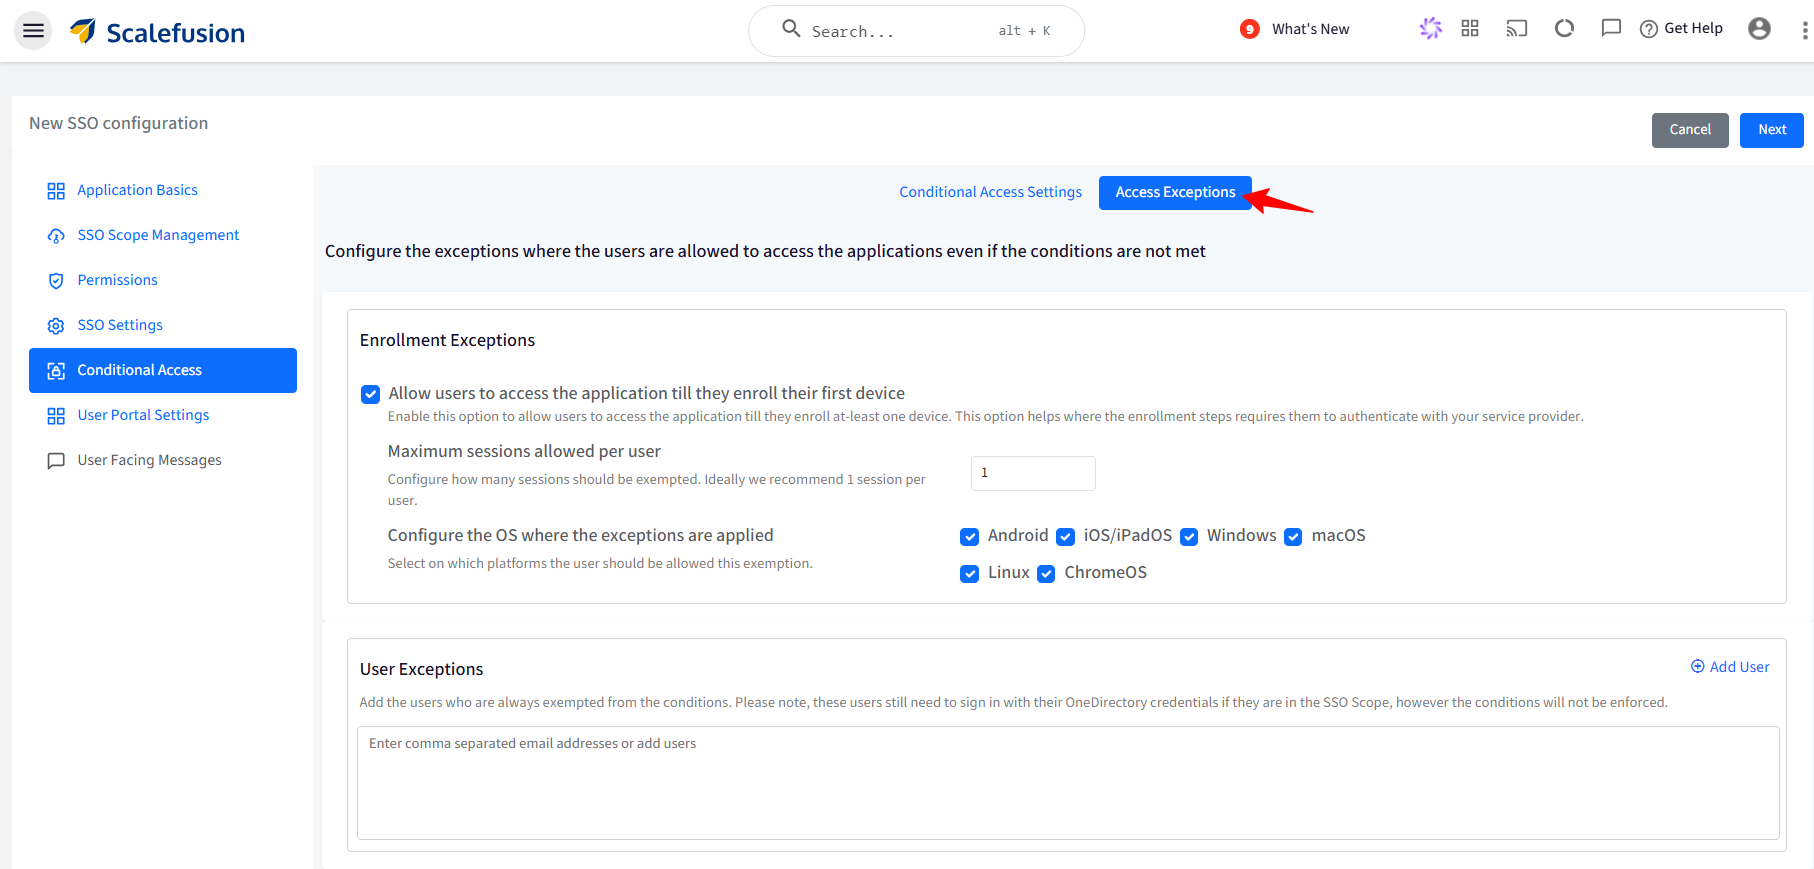
Enrollment Exceptions:
Allow users to access the application till they enroll their first device: Allows users to access the application till they enroll at least one device. This option is helpful in conditions where the enrollment steps require them to authenticate with the service provider. With this, you can also configure the following:
Maximum sessions allowed per user: Set the maximum number of simultaneous sessions a user can have when logging into an application across devices. If a user is already logged into the app on one device, they won’t be able to log in to the same app on another device. It can range from 1 to 3. Ideally, 1 session per user is recommended.
Configure the OS where the exceptions are applied: Select the platform(s) on which this exemption would be allowed to users.
User Exceptions: Here, you can add the users who are always exempted from the conditions and will never be asked to manage their devices. Enter comma-separated email addresses of users, or click on Add Users on the right, and in the new window, select the users who should be exempted.
Note:
These users still need to sign in with their OneDirectory credentials if they fall under the SSO Scope, however the conditions will not be enforced.
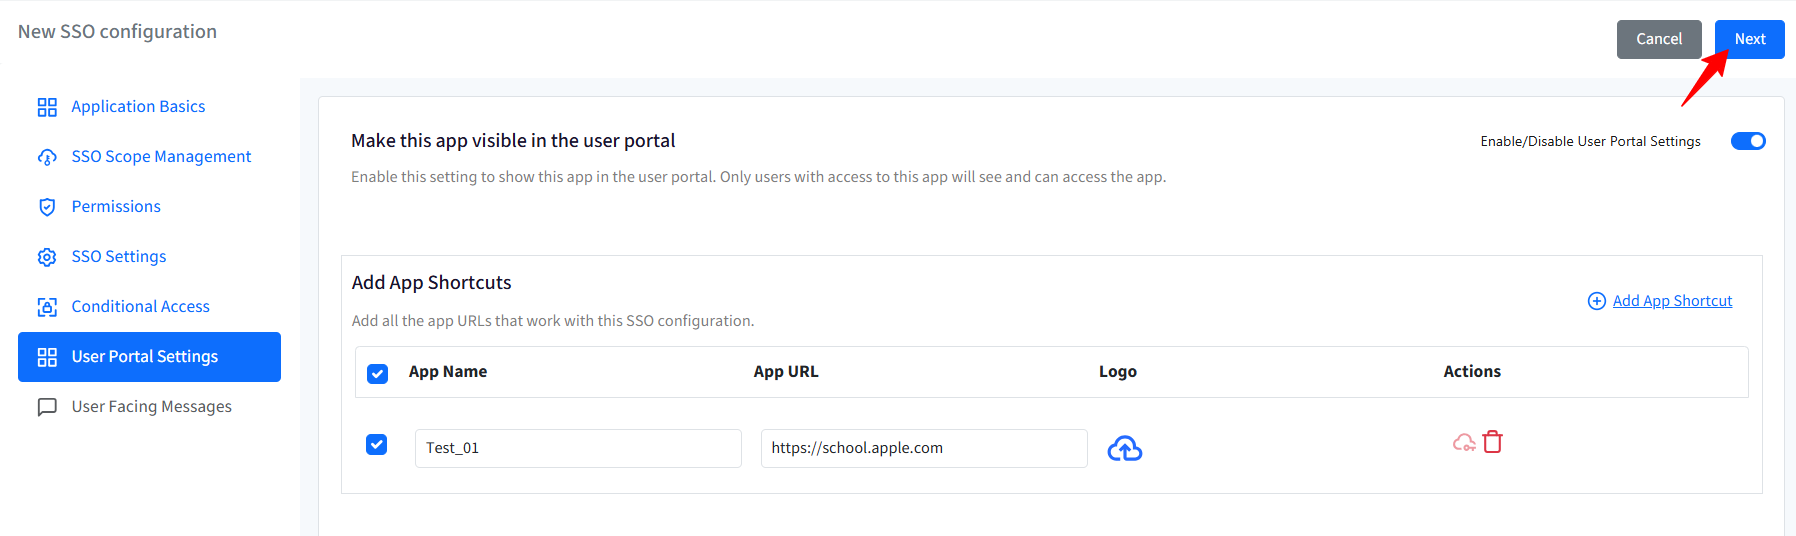
User Portal Settings
IdP-initiated SSO is particularly useful in scenarios where users access applications through a unified dashboard or portal displaying all available apps. Since OAuth (and OIDC) does not natively support IdP-initiated SSO, we handle this by displaying application shortcuts based on the configured SSO settings. When a user clicks on an app, they are redirected to the appropriate login URL to initiate the standard authentication flow.
To know more about the User Portal, please refer to our guide here.
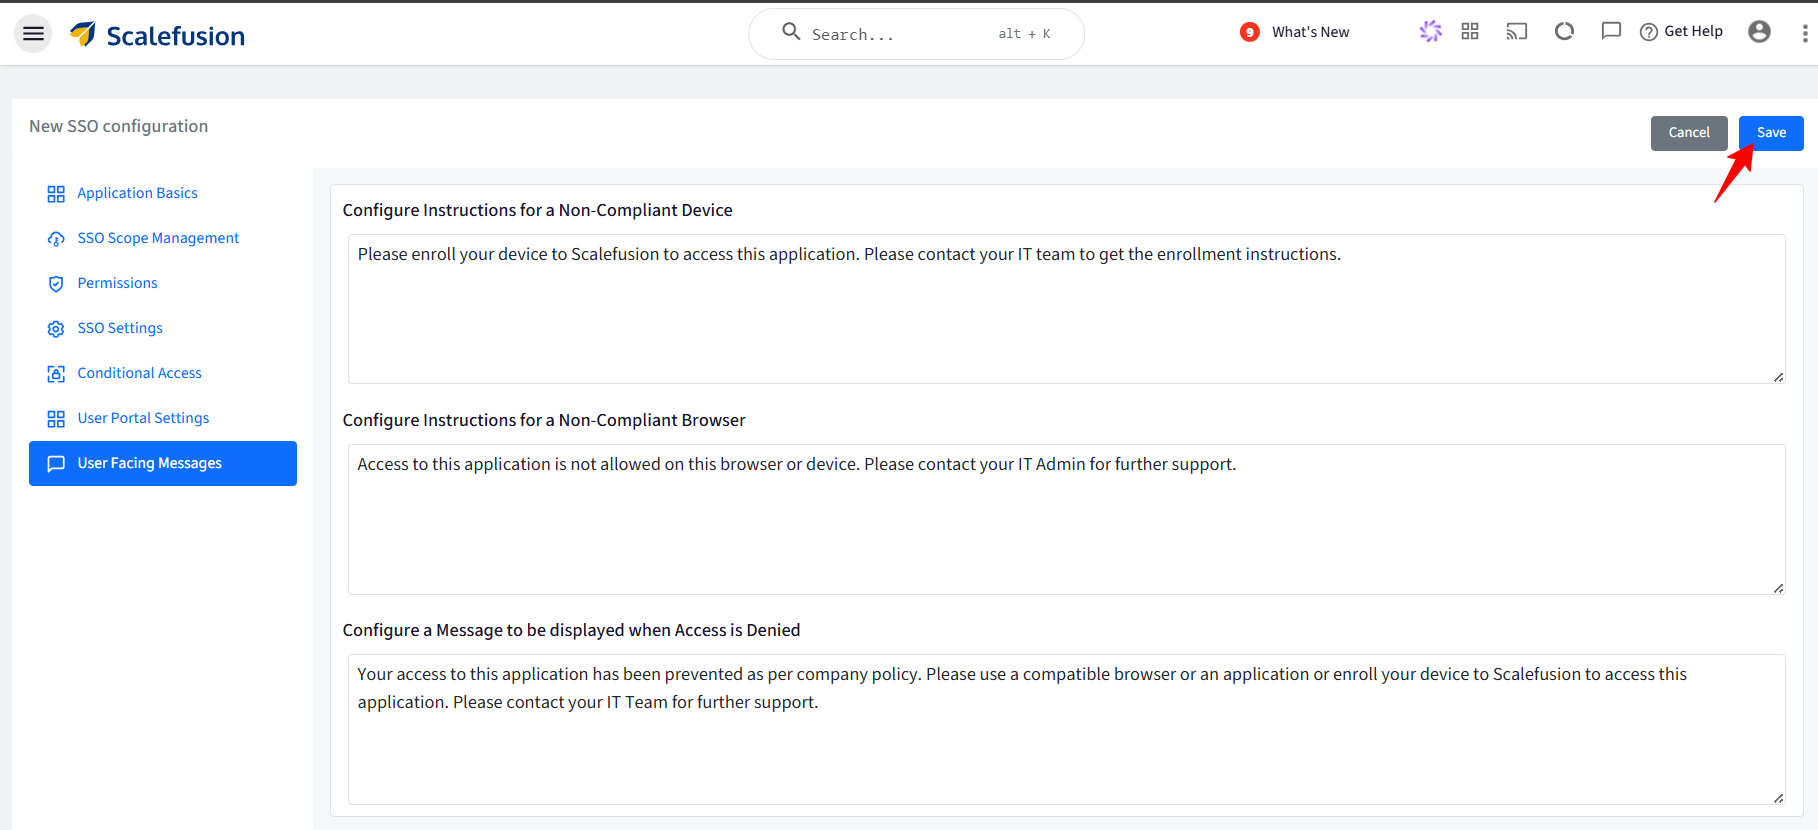
User Facing Messages
User-facing messages help admins configure messages that end users may be shown when they are unable to access the application if any of the compliance conditions are not met. You can configure messages under the following:
Configure Instructions for a Non-Compliant Device: This message is shown when the device is not compliant and needs to be enrolled in Scalefusion.
Configure Instructions for a Non-Compliant Browser: Shown when the browser is not compliant as per the configurations.
Configure a Message to be displayed when Access is Denied: Any other cases where access to the application is denied.
There are some pre-configured messages displayed on the Dashboard which you can edit as per your requirement.
After configuring user-facing messages, click on Save.
The SSO configuration is created and listed on the SSO Configuration page as a separate card with the name you have defined. You can create multiple SSO configurations in the same manner.
User Experience
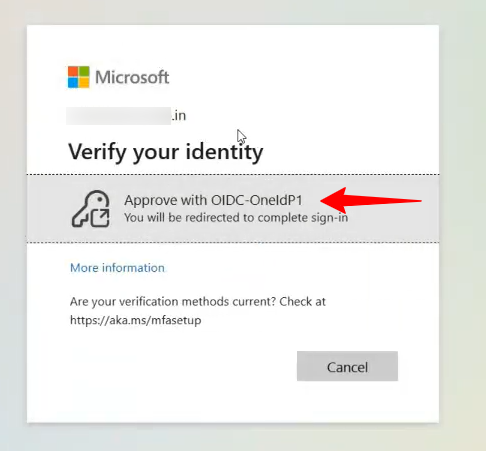
When the user(s) log into any of their Microsoft applications, they will be able to log in using their Entra credentials and will not be redirected to the OneIdP screen.
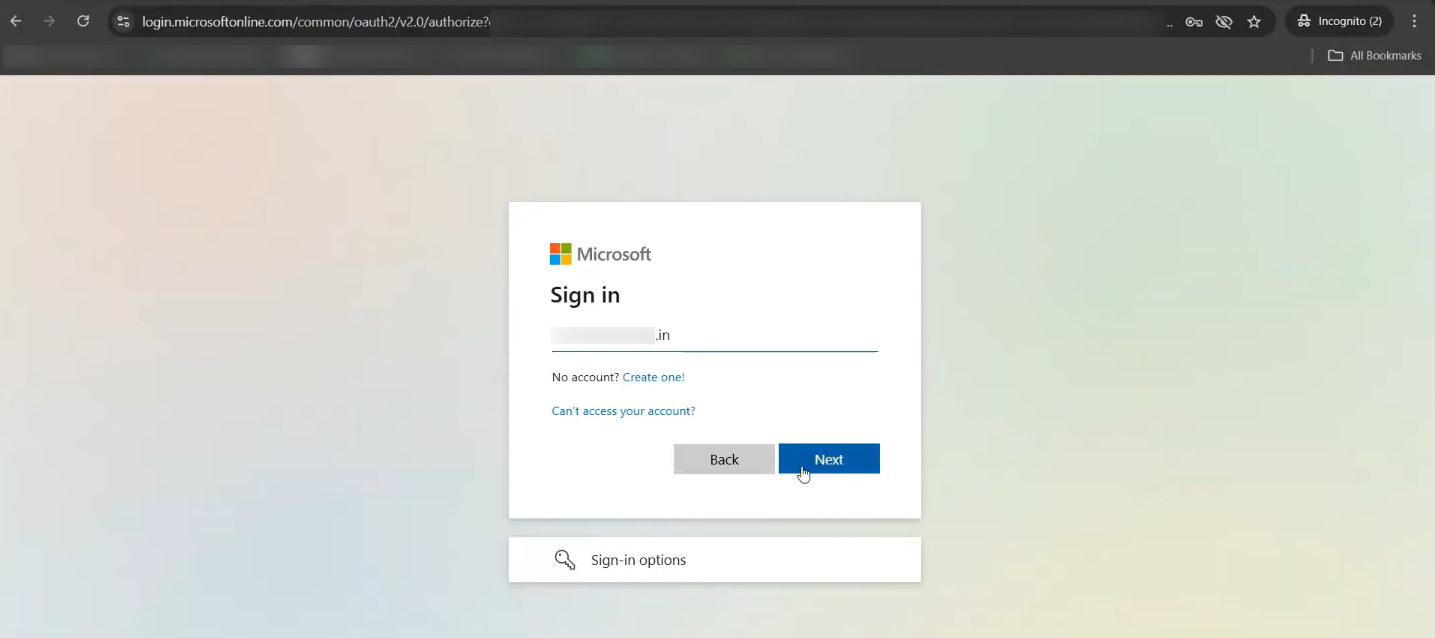
After entering their ID and password, they will see a screen asking them to verify their identity.

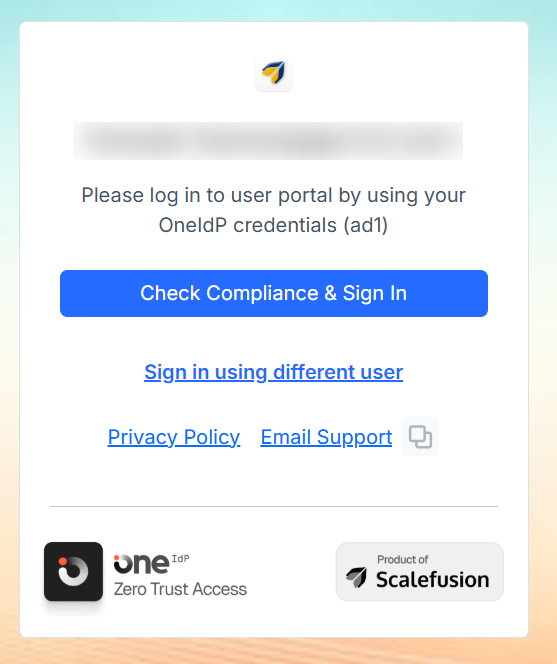
In the next screen, click Check Compliance & Sign in.
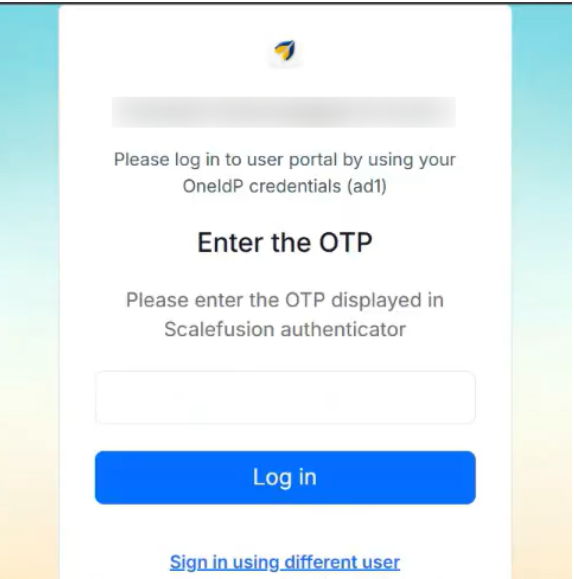
Based on the Conditional Access Settings configured on the Scalefusion dashboard, the user will successfully sign in if the device is a Scalefusion-managed device, or it might ask to enter an OTP from a Scalefusion-managed device.
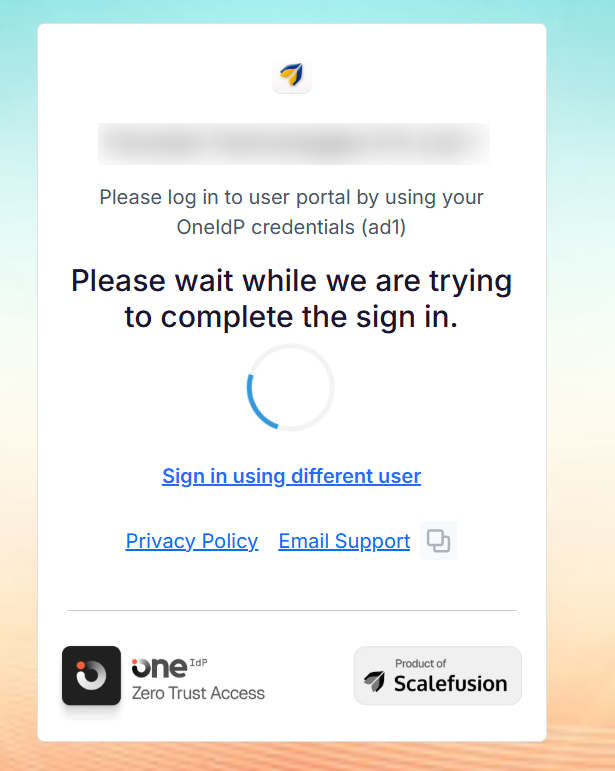
On meeting the conditional access requirements, user(s) will successfully sign into their account.
Note:
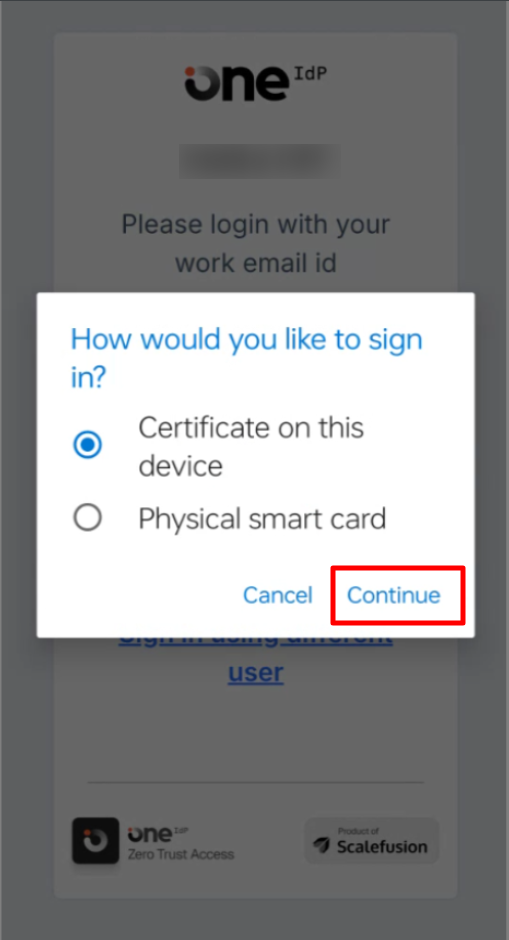
On the Android BYO devices, you will also see the following pop-up message while logging into the Microsoft apps, you will have to click on Continue and log in.
Was this article helpful?