The terminal is an essential tool for Windows administrators, enabling them to perform a wide range of tasks efficiently, such as managing files and directories, installing and maintaining software, monitoring system health, troubleshooting issues, configuring networks, and managing users and groups.
With Scalefusion’s Remote Cast & Control feature, IT administrators can remotely access the live terminal of Windows devices directly from the Scalefusion Dashboard. This allows admins to execute commands, perform maintenance, and provide real-time support without needing physical access to the device. The Remote Terminal session also offers configurable session settings, such as user context, shell type, and consent options, giving administrators greater control over how each remote session is initiated and managed.
The document explains how you can access live terminal window on Windows devices via Scalefusion Dashboard.
Before you Begin
Make sure that you have an Enterprise Plan or Scalefusion 360 subscription
Device should be enrolled in Scalefusion with the latest Scalefusion MDM Agent (agent app for Windows)
Remote Support for Windows v4.12.0.0 or above is installed on the device
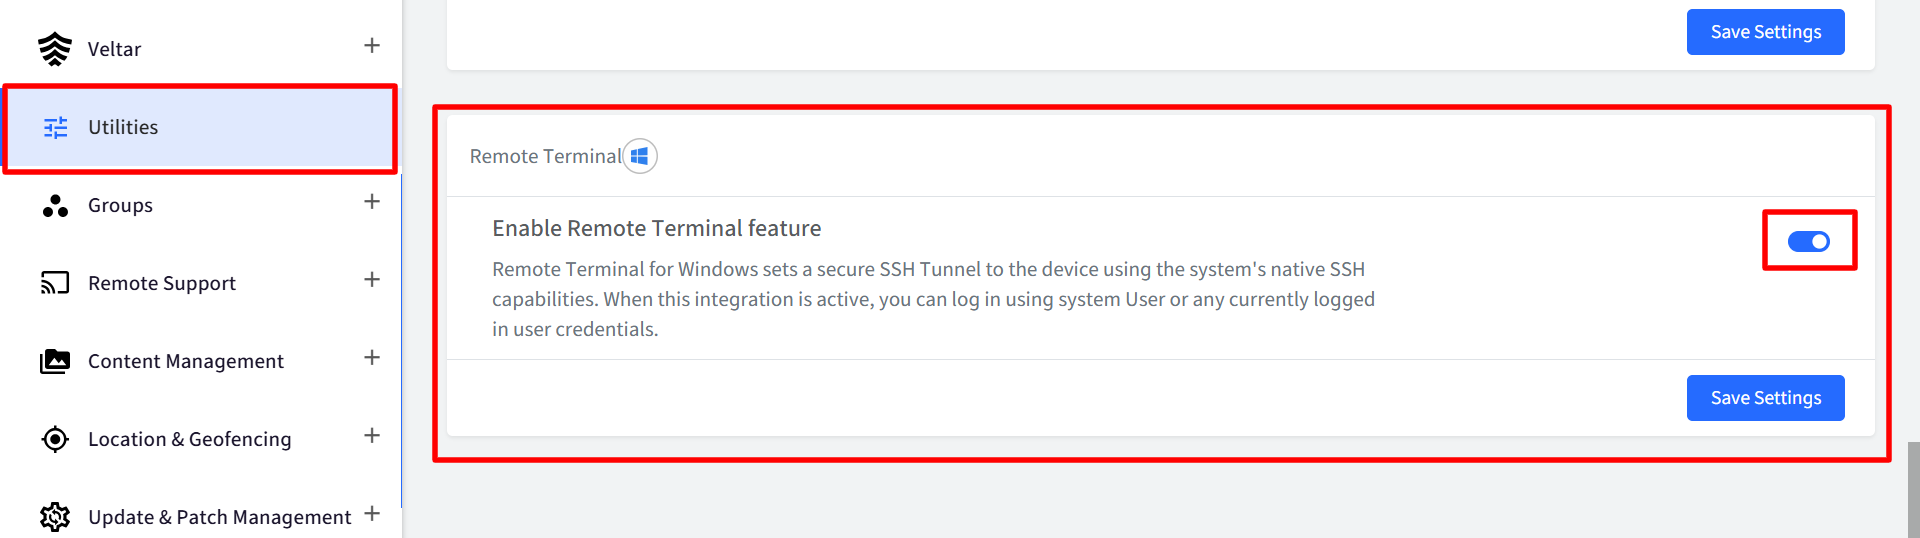
On Scalefusion Dashboard, the setting Enable Remote Terminal feature should be enabled under Utilities > Global Settings > Windows Settings
How it Works
Remote Terminal for Windows establishes a secure SSH tunnel to the device using Windows’ native SSH capabilities.
When enabled, this integration allows authorized users to connect to the device remotely by authenticating with a local system user account or the credentials of any user currently logged in on the device.
Initiating a Remote Cast & Control Session
Follow the steps below to initiate a remote cast session on Windows device from Scalefusion Dashboard:
On Scalefusion Dashboard, navigate to Devices section
From the list of Devices, select the Windows device which you want to access remotely.
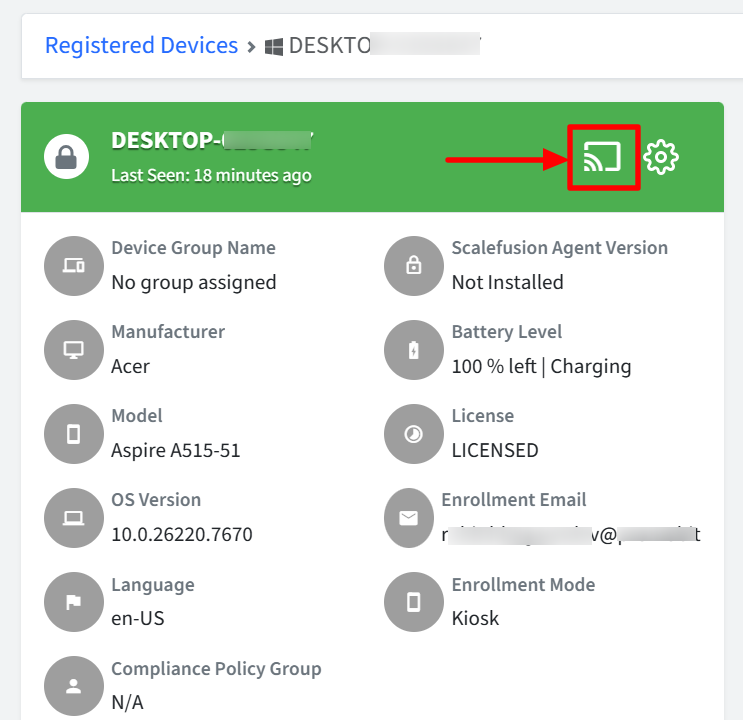
On the device details page, click on the screencast icon on the top bar.
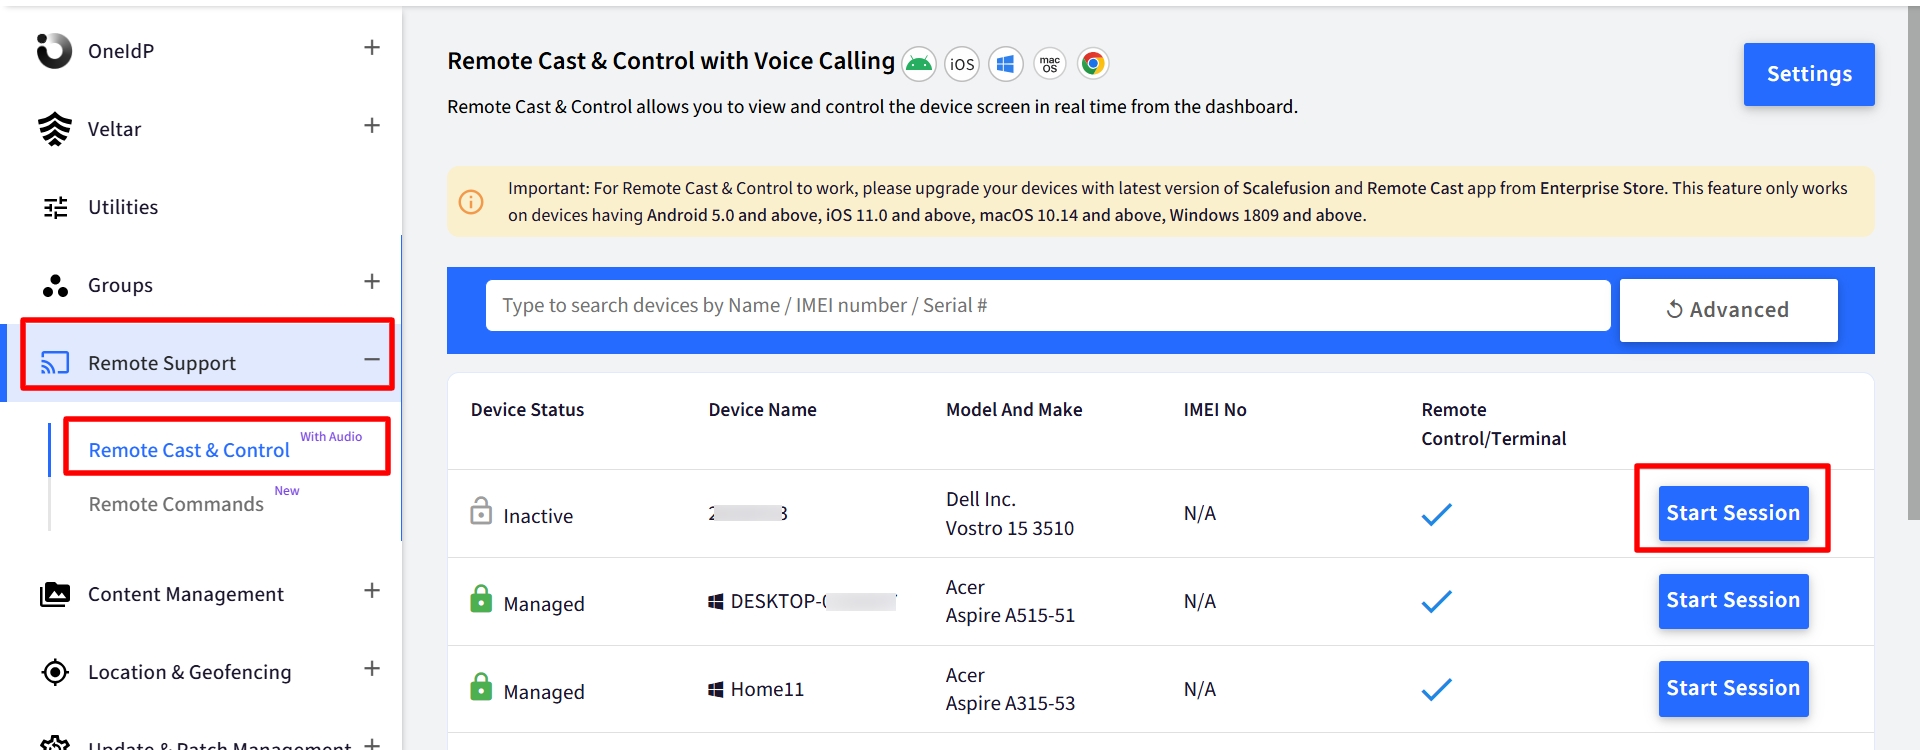
Alternatively, you can navigate to Remote Support > Remote Cast & Control. Here you will see the list of devices.
Click on the Start Session button next to the device you want to start a screen-sharing session with.
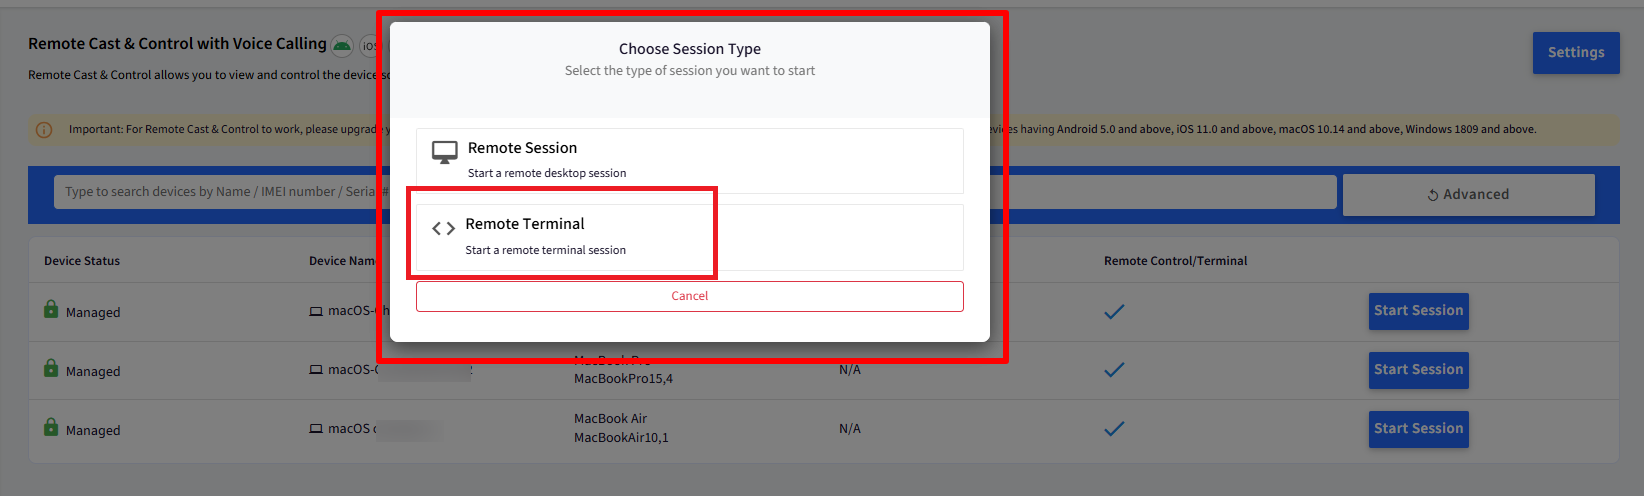
A pop-up will appear to choose the session type. Click on Remote Terminal to start a remote terminal session
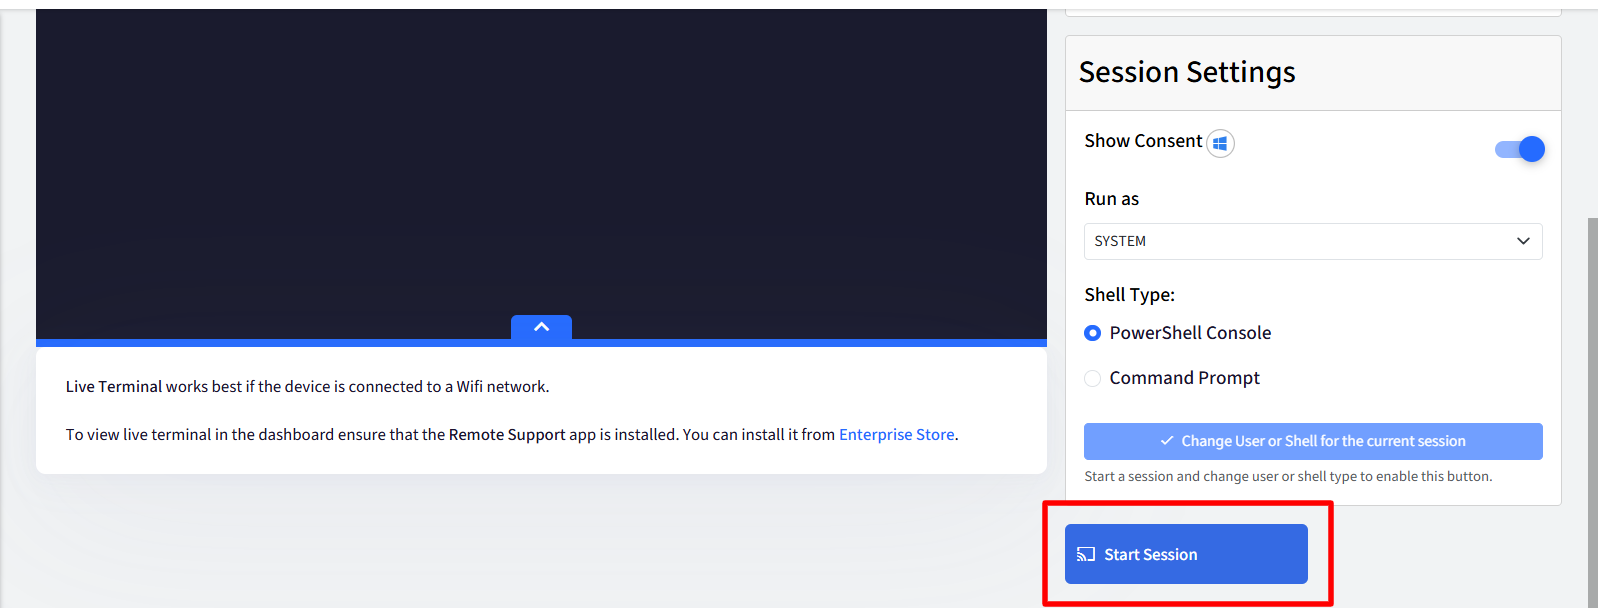
You will be navigated to the screen casting page with few session details on the right side.
Here, click on Start session to initiate the remote terminal session.
Once connection is established, you will see the terminal window of the Windows machine.
Here, you can enter respective commands to perform actions on the Windows device remotely.
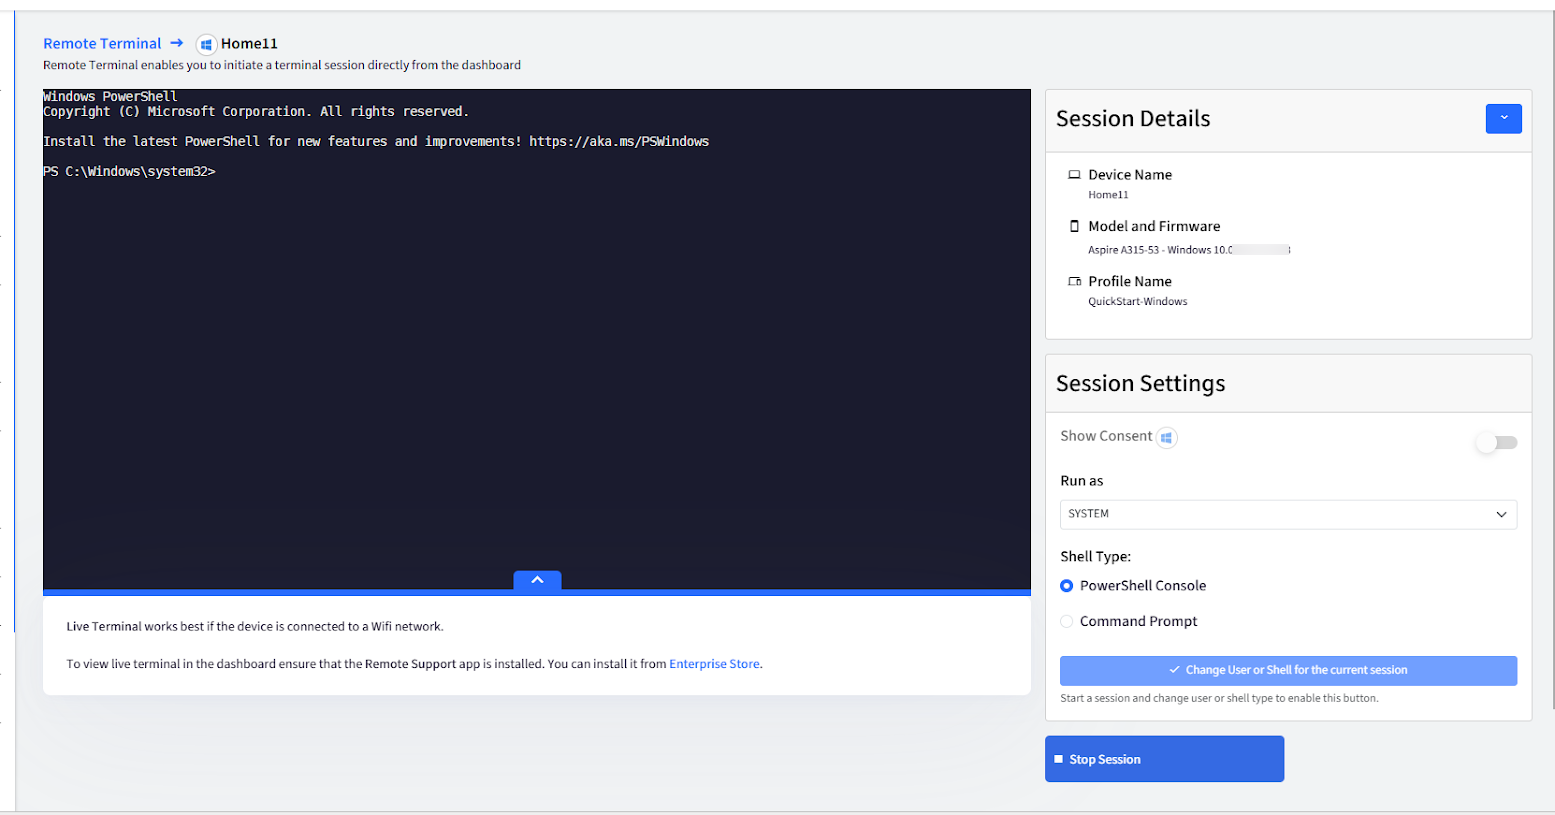
You can stop the session any time by clicking on the Stop Session button.
Session Settings
Show Consent: Enable this option to display a consent prompt on the device before starting the remote terminal session.
Run As: Choose the user context in which the session should run:
System User (default): Runs the remote session under the Windows system account, providing elevated access for device-level tasks without requiring an active user login.
Administrator / Logged-in User: Runs the remote session in the context of an administrator or the currently logged-in user, allowing access to user-specific settings, files, and applications.
Shell Type: Select the command-line interface you want to use during the session:
PowerShell Console (default): Command-line interface used for automation, scripting, and managing system tasks.
Command Prompt: Basic command-line interface for running traditional commands and legacy scripts.
The user context and shell type can only be changed after the session has started.
To switch the user context or shell type during an active session, click Change User or Shell for the current session.
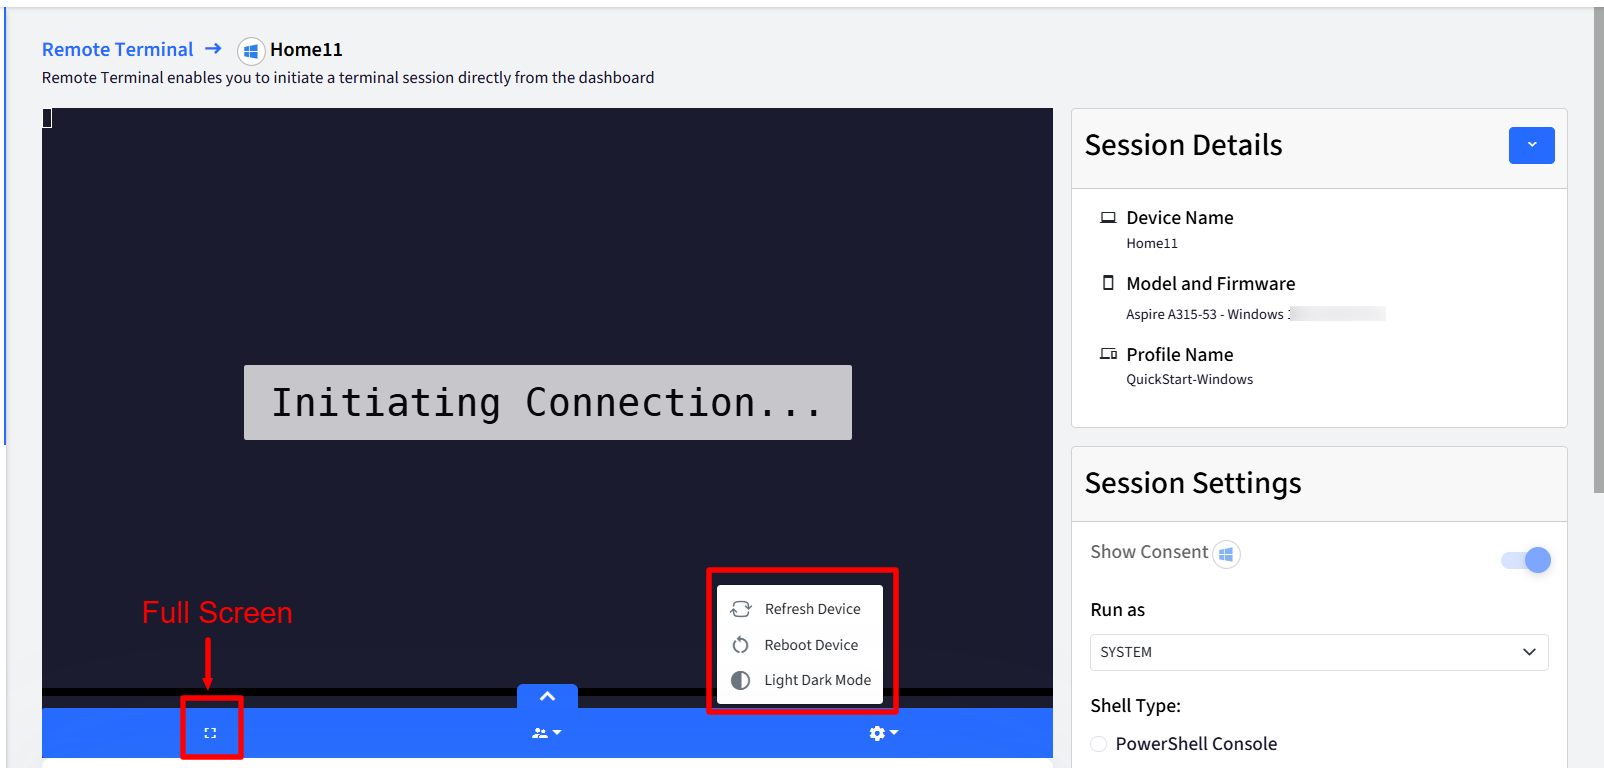
Additional Actions
During a remote session, you can also perform the following actions:
Full Screen: Takes the terminal to full screen. Click on the full screen icon at the bottom of the remote cast window to bring the terminal window to full screen view
Other Actions: By clicking on the settings, you can also perform following actions on the device:
Refresh Device
Reboot Device
Light/Dark Mode
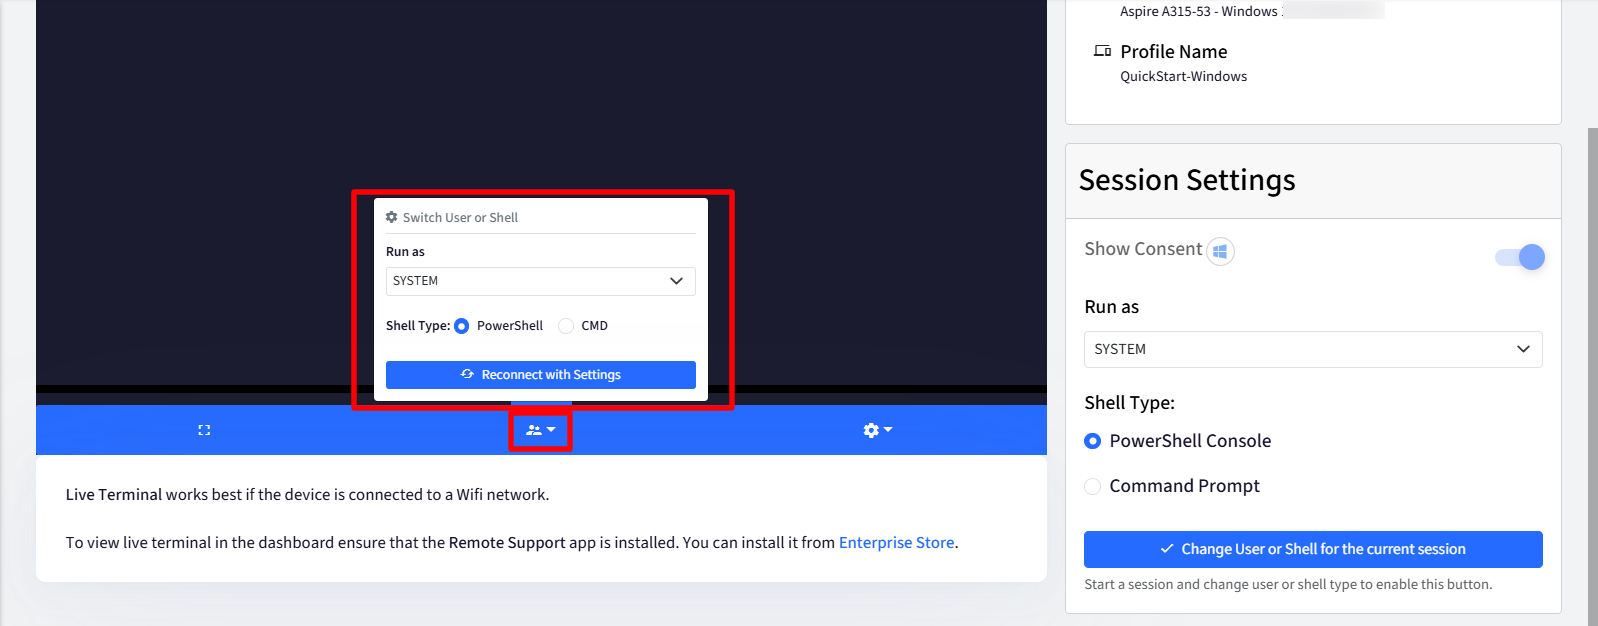
Switch User or Shell: The user context and Shell Type can also be switched from here
FAQ
Why is the "Remote Terminal" option disabled under "Choose Session Type"?
This issue could be due to one of the following reasons:
Remote Terminal is not enabled in Utilities
Solution: Enable the Remote Terminal setting by navigating to Scalefusion Dashboard > Utilities > Global Settings > Windows Settings.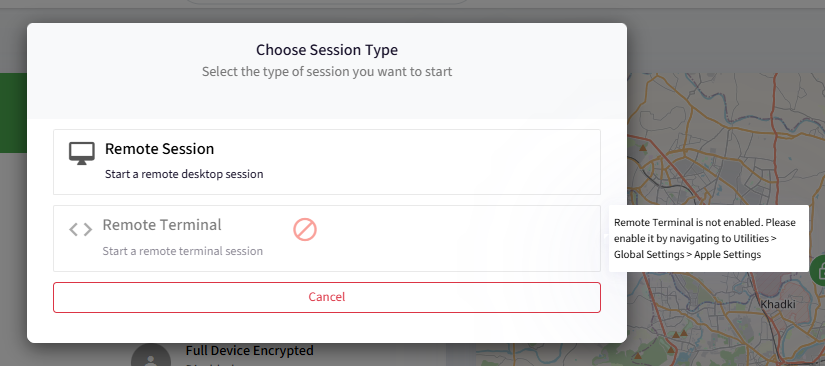
Remote Support app is not updated
Solution: Install the latest version of the Remote Support app on the device to use the Remote Terminal feature.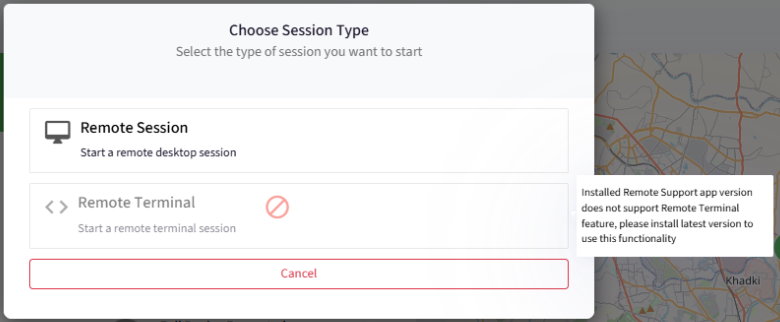
What key combinations should I use to copy and paste in a remote support session when accessing Windows Live Terminal?
To copy text, press Ctrl + Shift + C. To paste text, press Ctrl + Shift + V.