Guide to IdP-Initiated SSO and User Portal
- 24 Apr 2025
- 6 Minutes to read
- Print
- PDF
Guide to IdP-Initiated SSO and User Portal
- Updated on 24 Apr 2025
- 6 Minutes to read
- Print
- PDF
Article summary
Did you find this summary helpful?
Thank you for your feedback!
In today’s world of seamless digital access, Single Sign On (SSO) has become the norm across organizations of all sizes. But not all SSO workflows are created equal, especially when it comes to IdP initiated vs SP initiated SSO.
To put it simply, both methods aim to let users log in once and access multiple services securely. The key difference is, Where the journey begins.
With IdP initiated SSO, the user starts at a centralized identity provider (IdP), logs in, and selects the application they want to use.
With SP initiated SSO, the user starts at the application (service provider), gets redirected to the IdP for authentication, and is then granted access.
Think of IdP initiated SSO as starting at the front door of a secure building and choosing which room (app) to enter. SP initiated SSO is like walking directly to a room and being guided to the front desk to verify your identity before entry.
IdP initiated SSO is especially helpful when users are given a single, Unified Portal. A dashboard where all available apps are listed. Instead of visiting individual app URLs, users simply log in once and click on the app they need, no repeated sign ins required. It’s a cleaner, more controlled experience, perfect for corporate or educational environments with tightly integrated tools.
This is the guide where OneIdP helps you set up your IdP initiated SSO & user portal, making secure access simple, streamlined, and centralized for your organization.
Pre-requisites
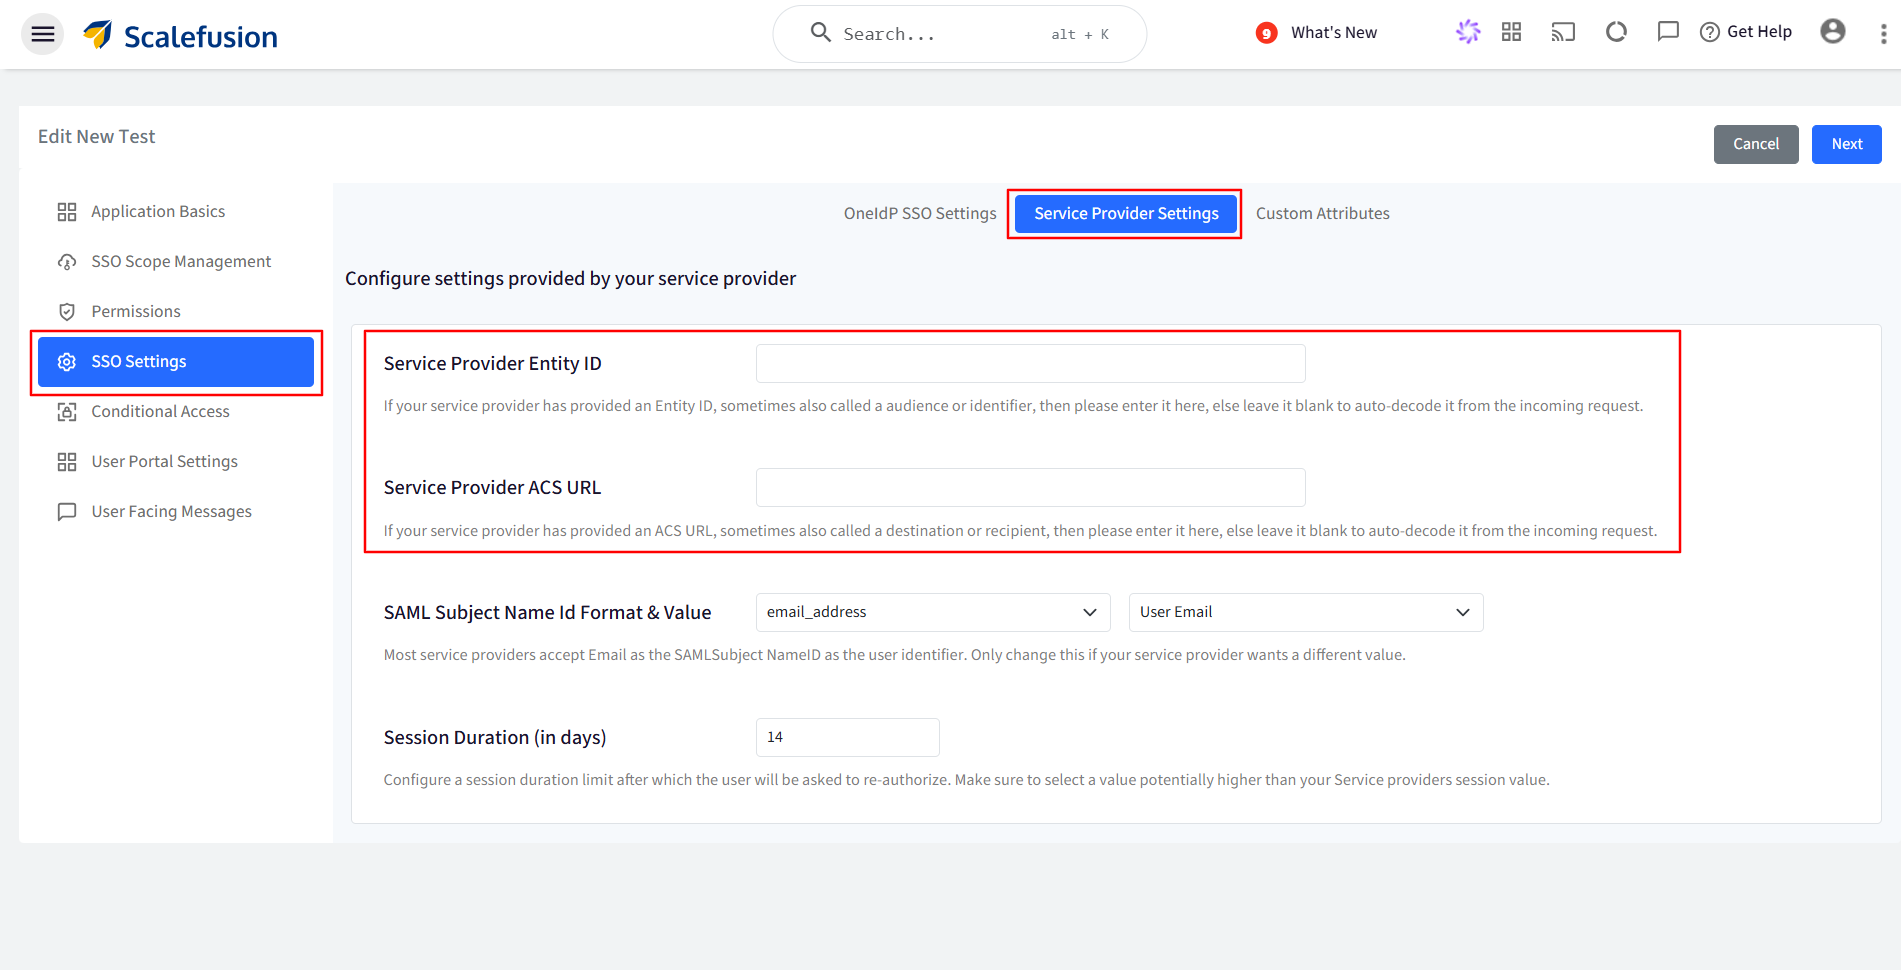
Before setting up the User Portal, go to SSO Configurations, click on the three dots (⋮) next to the desired configuration, select Edit > SSO Settings, navigate to the Service Provider Settings tab, and paste the Service Provider Entity ID and ACS URL for each SSO-configured application you want to make visible in the portal. Click Next to save this.
Service Provider Entity ID & ACS URL can be taken from service providers end.
Next, navigate to User Portal Settings, toggle on ‘Make this app visible in the user portal’, add your App Shortcuts, and then Save the configuration.
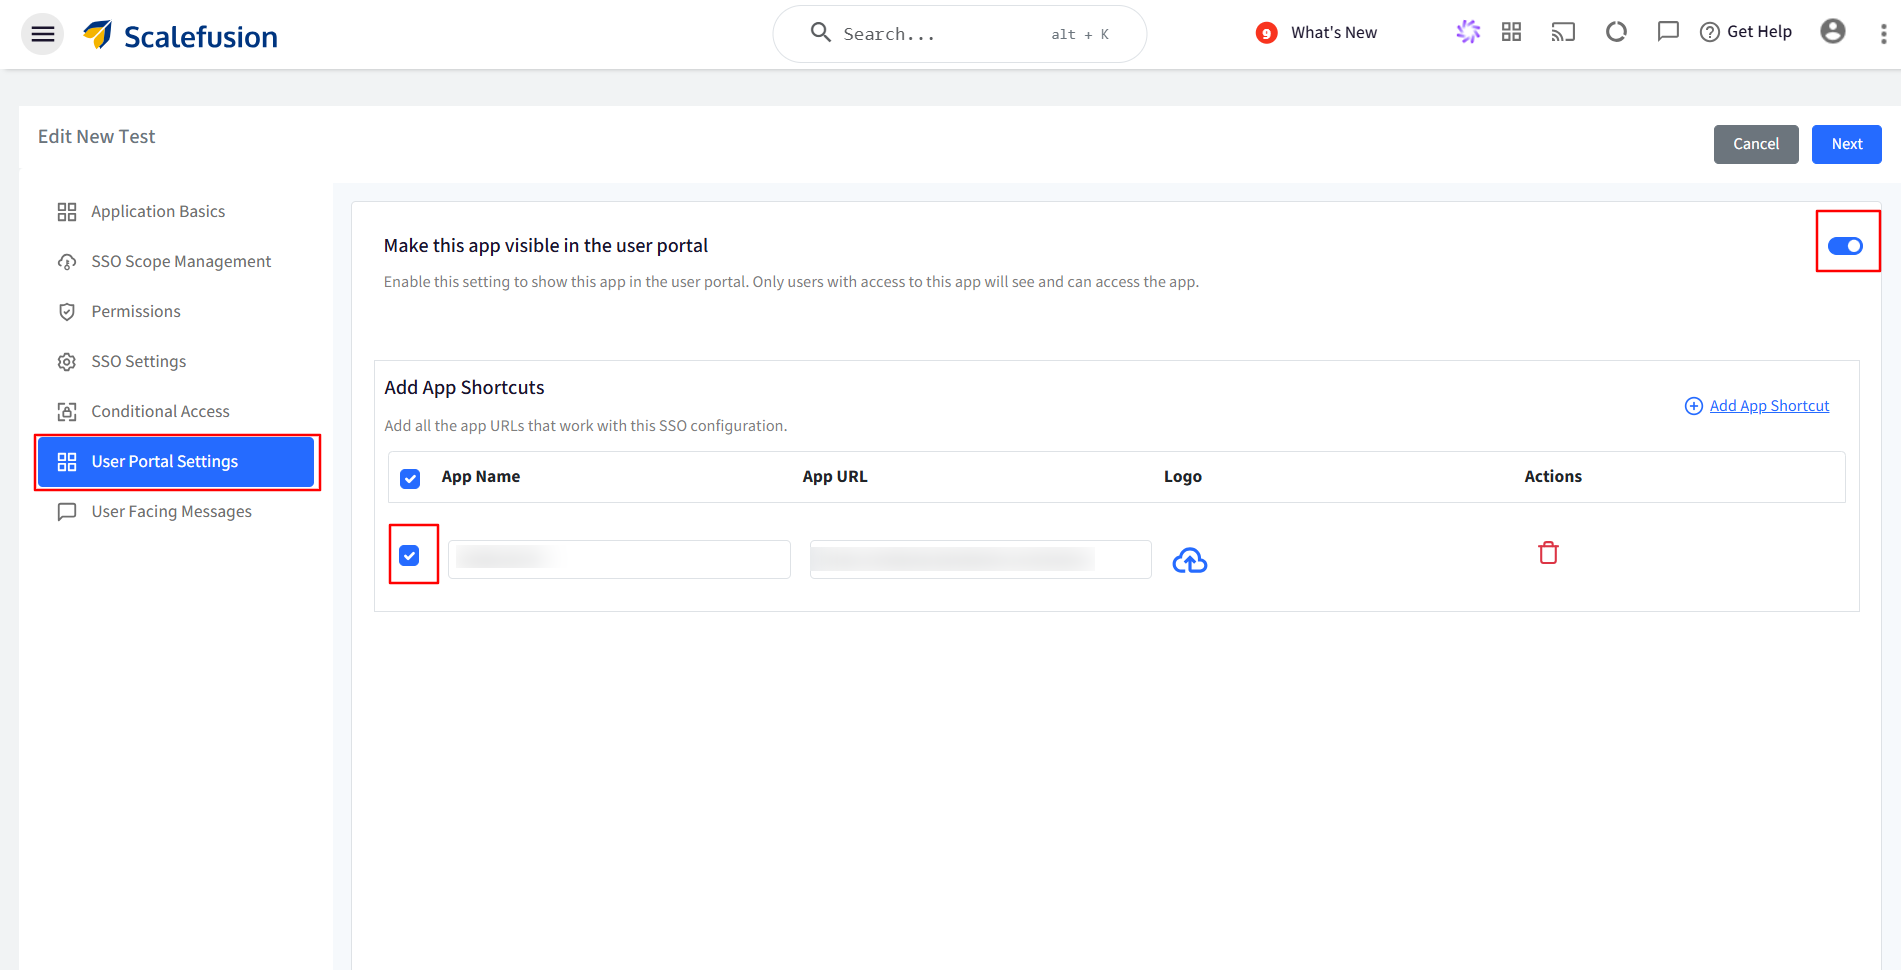
Apps for GWS, Entra & Zoho will already be present here. For other SSO based application, a new app will have to be created with App Name, URL, Logo (Optional).
Getting Started with Configuration:
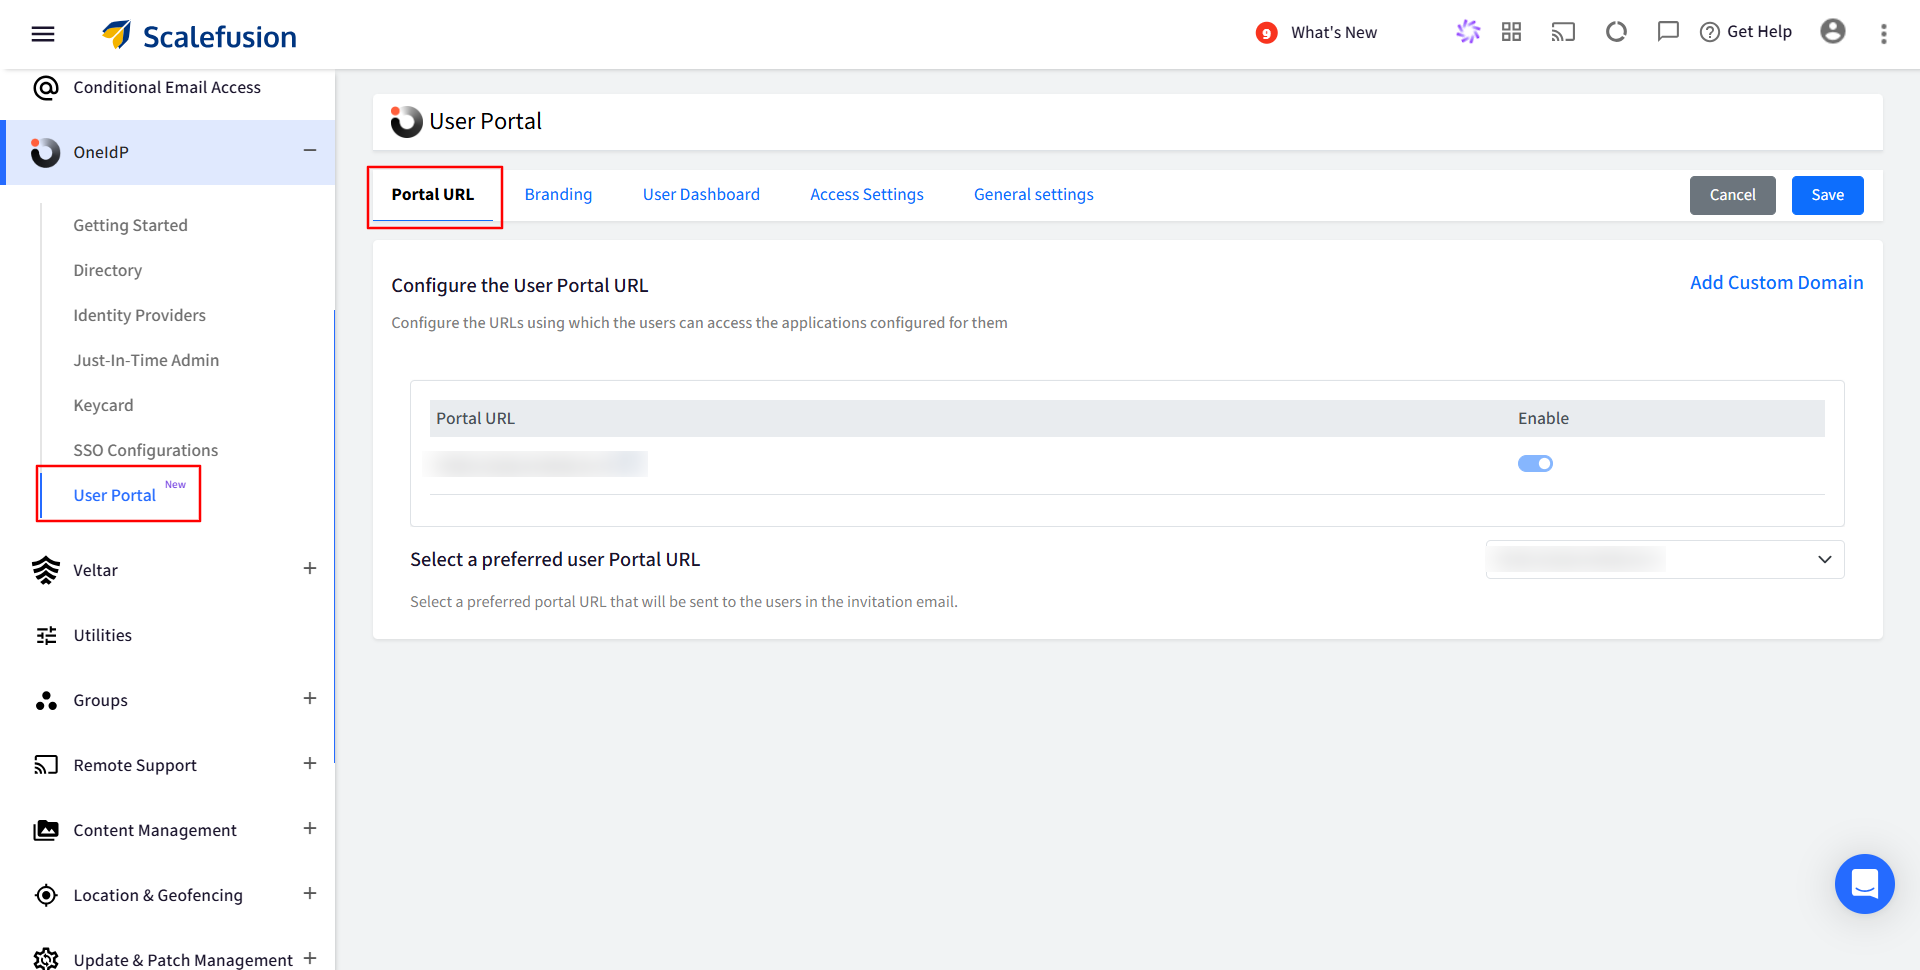
Portal URL
This is your starting point to configure the User Portal for IdP Initiated Login. On your Scalefusion Dashboard, navigate to OneIdP > User Portal. This will enable and give you access to the URL which redirect you to your User Portal.
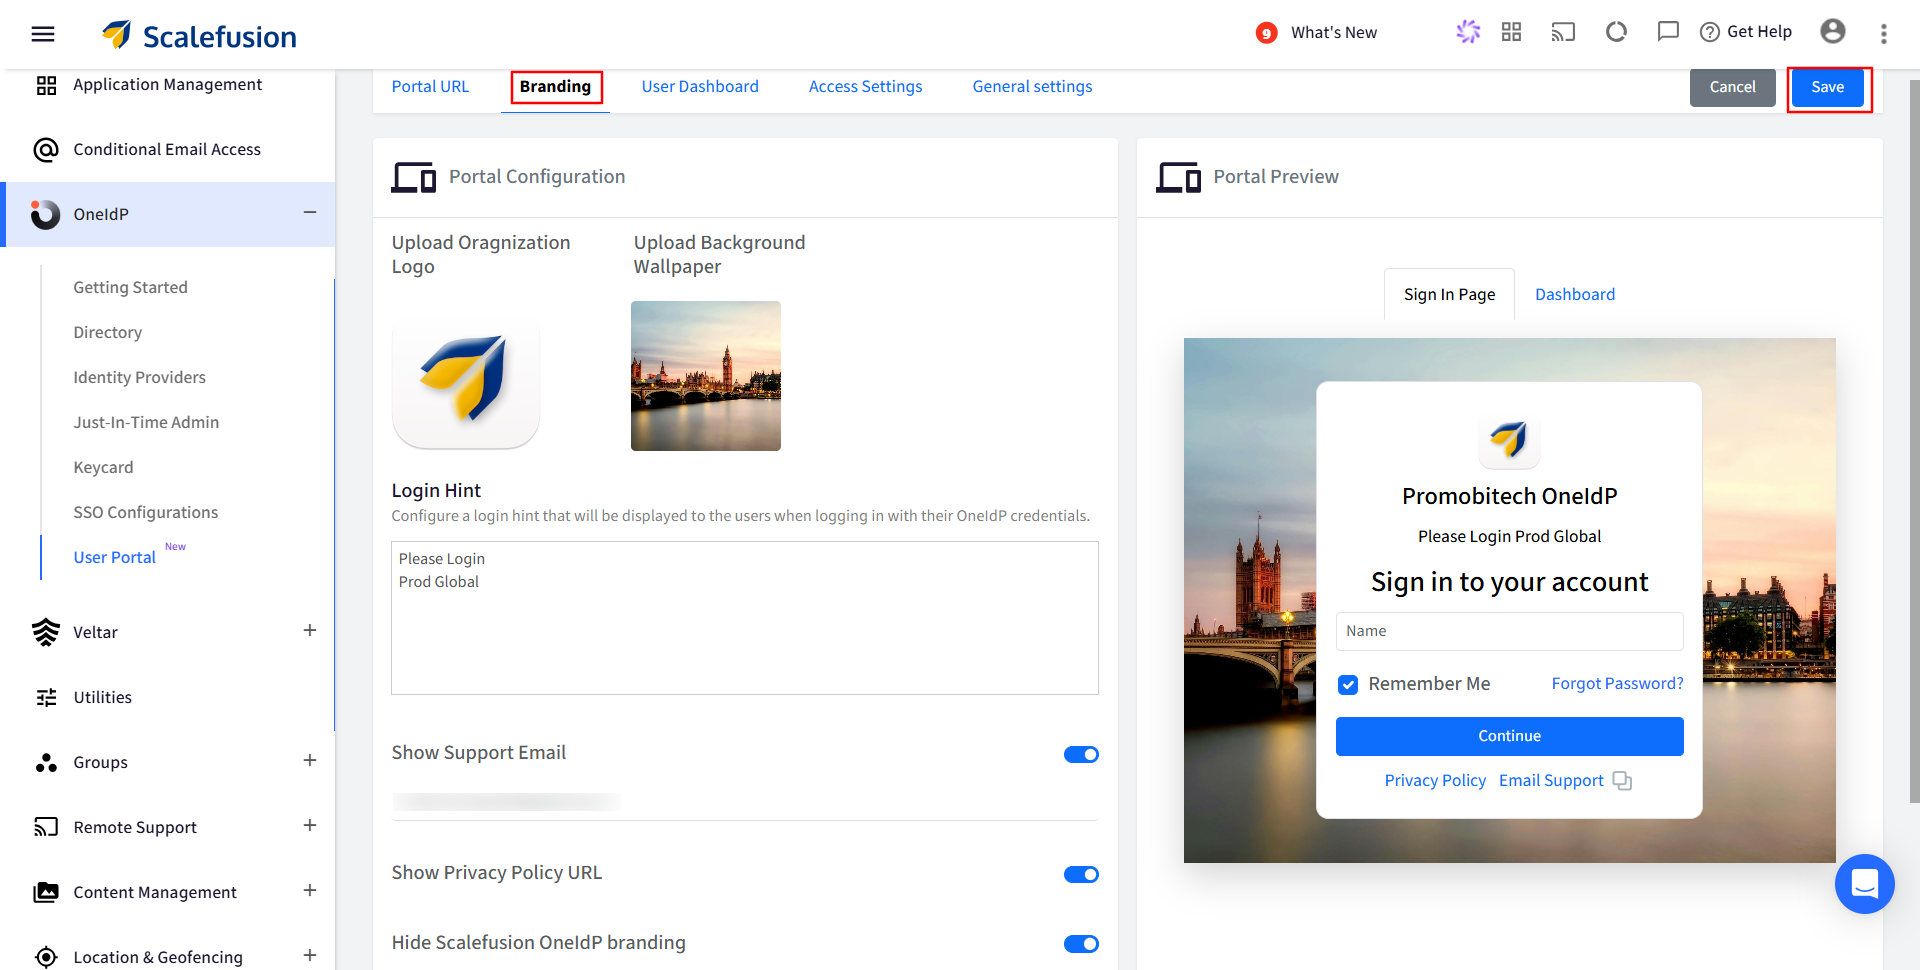
Branding
This section allows you to customize your Sign-In Page and Dashboard. You can personalize the user experience by configuring the organization logo, background wallpaper, login hint, support email, and privacy policy URL.
Portal Configuration
You can configure the following Options:
- Upload Organization Logo (Pixel Limit 192×192)
- Upload Background Wallpaper (Pixel Limit 2500×2500)
Login Hint
Configure a login hint to guide users during sign-in, it will be displayed on the login screen when they enter their OneIdP credentials.
Show Support Email
Lets you add a support email for user convenience, enabling them to reach out for assistance or further support directly from the login or dashboard page.
Show Privacy Policy URL
If configured (Updating Privacy Policy in Organization Info) allows admins to display a clickable link to the organization's privacy policy on the User Portal login screen. Enabling this ensures transparency by informing users how their data is handled.
Hide Scalefusion OneIdP branding
Allows admins to remove Scalefusion’s default branding from the User Portal login screen. Enabling this option helps create a more customized, white-labeled experience.
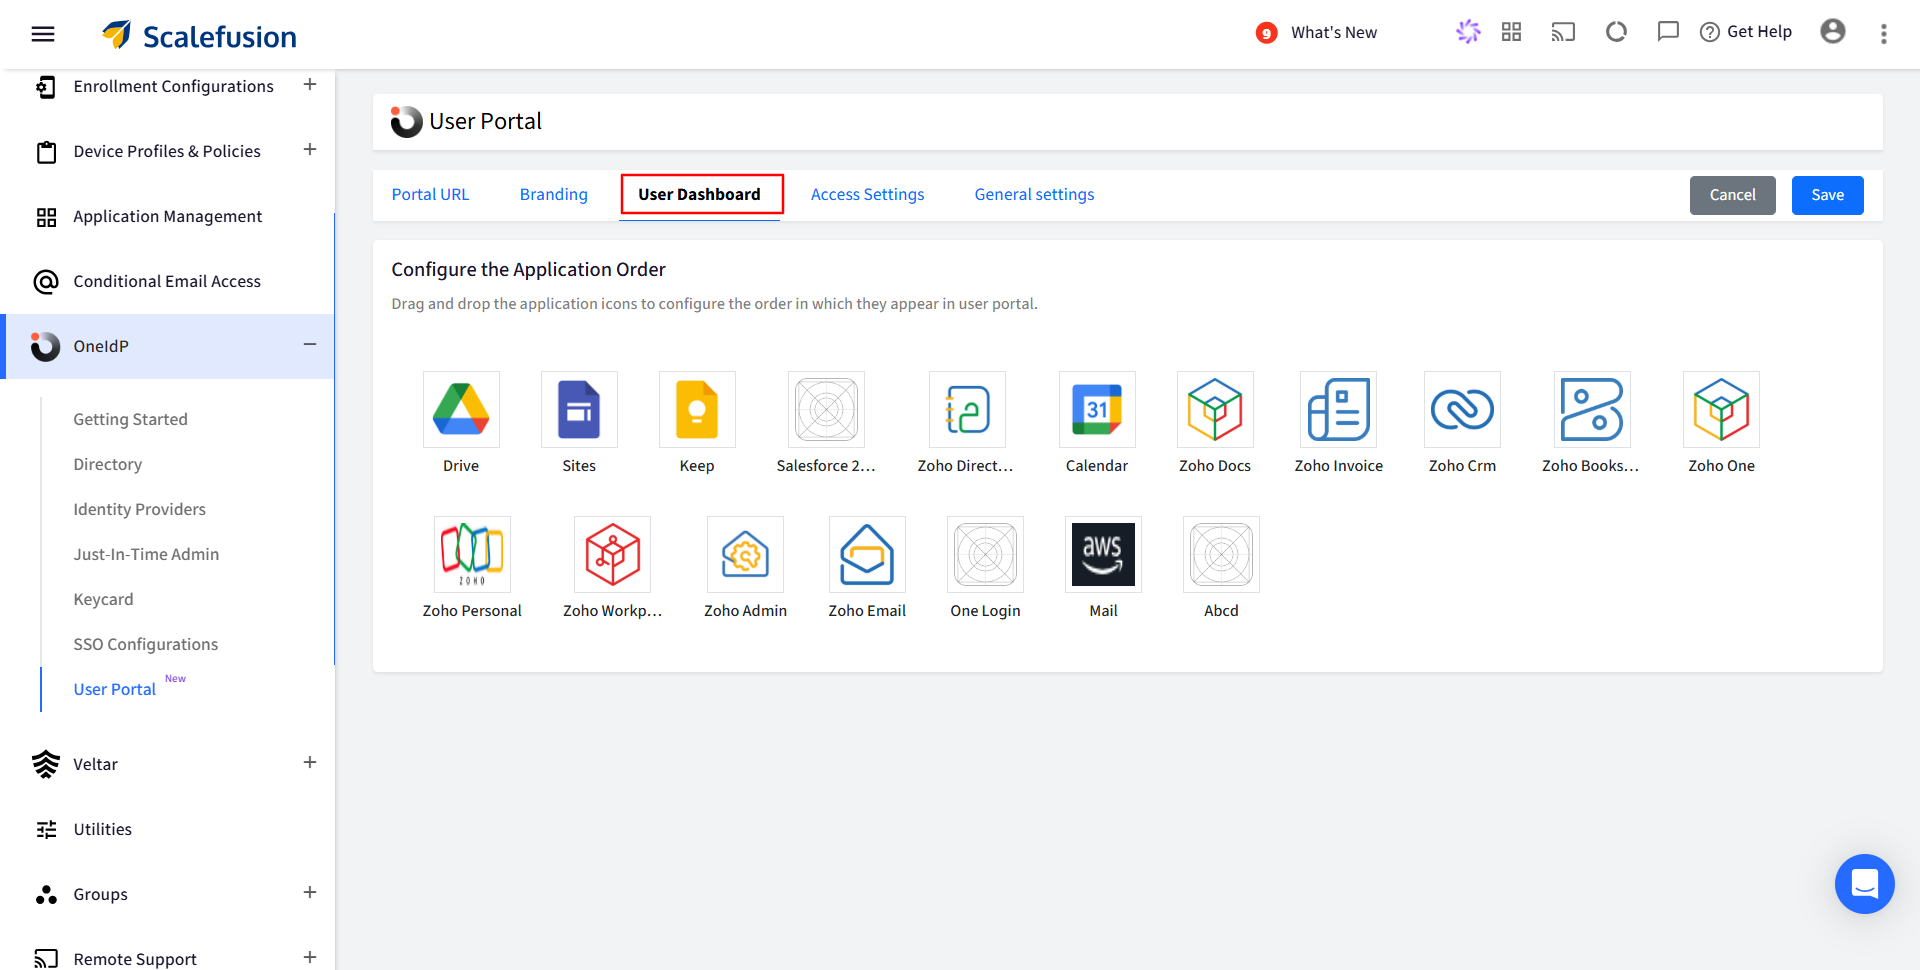
User Dashboard
The apps that have the ‘Make this app visible in the user portal’ toggle enabled in the SSO Configuration will appear on the User Dashboard.
Admin can use drag-and-drop to arrange the application icons in the desired sequence. This will define the order in which they appear on the User Portal.
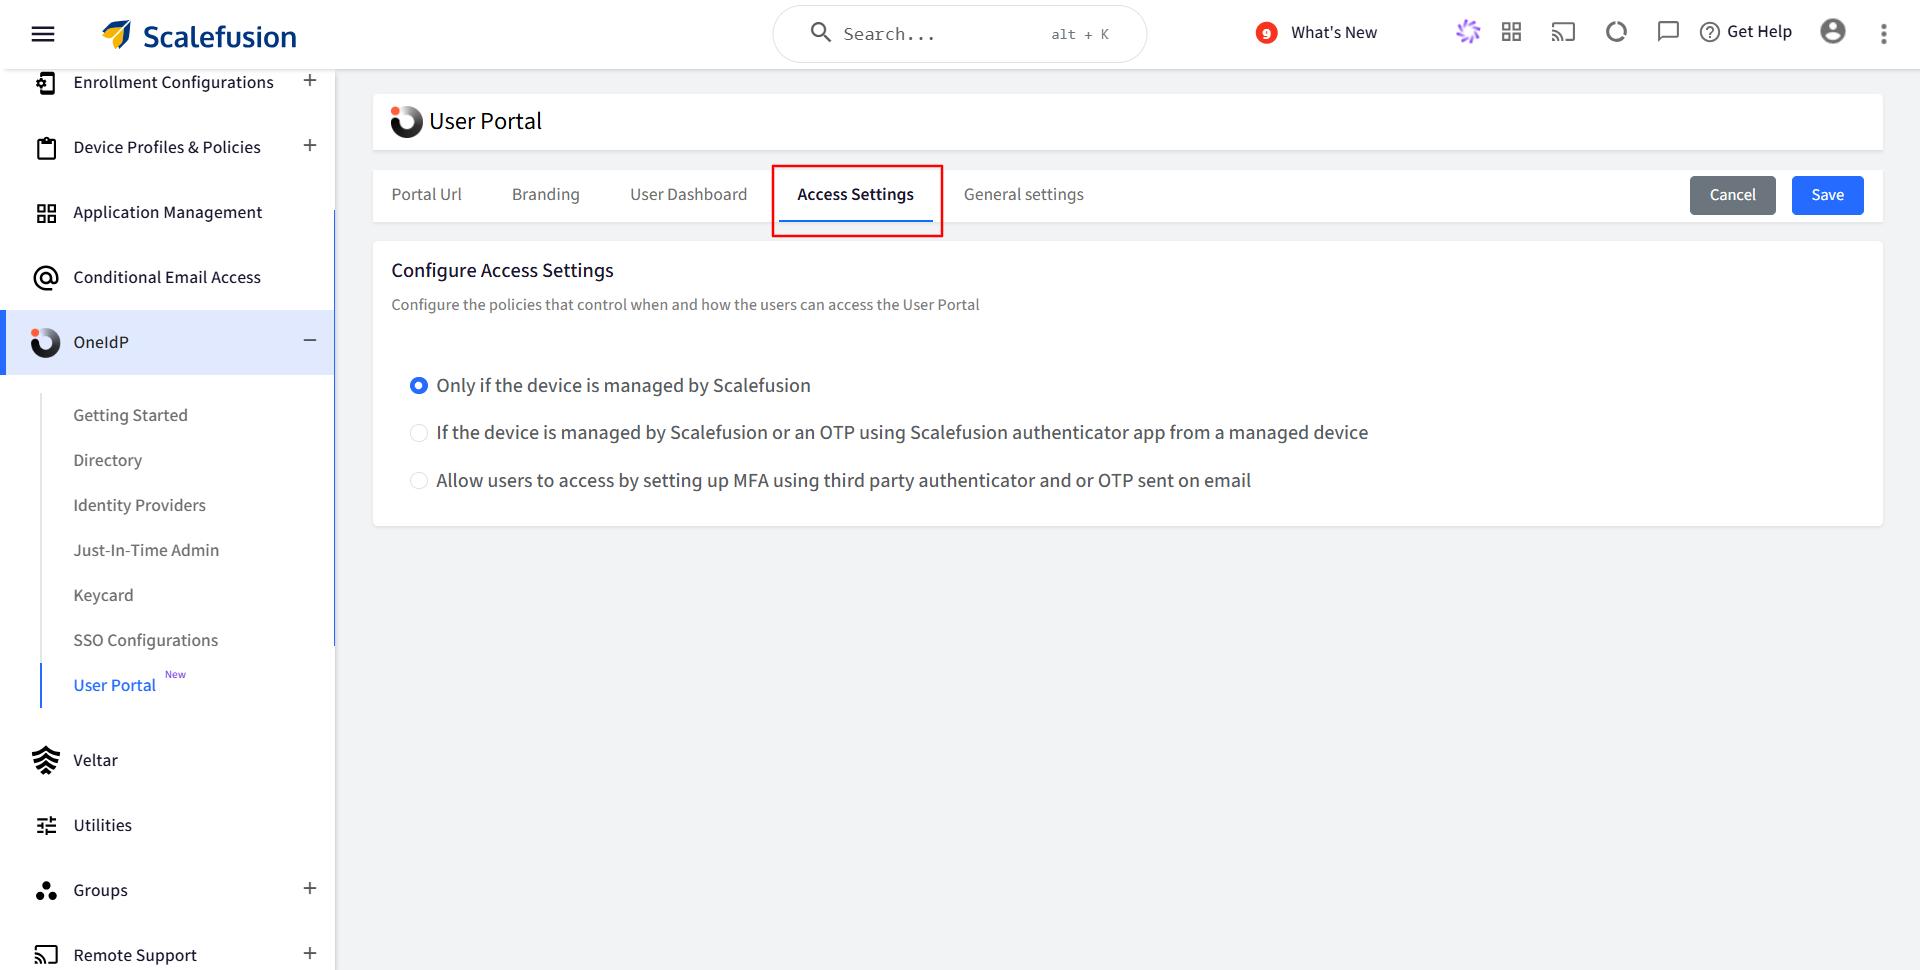
Access Settings
Set up policies that define how users can access the User Portal. You can choose from the following access methods:
Only if the device is managed by Scalefusion: The User Portal will be accessible only on devices managed (enrolled) by Scalefusion.
If the device is managed by Scalefusion or an OTP using Scalefusion Authenticator app from a managed device: The User Portal is accessible if any of the following conditions are met:
a. Device is managed by Scalefusion: If the device is managed you will not be asked to enter OTP for authentication, or
b. If the device is unmanaged, OTP is required for authentication. OTP can be taken from the Authenticator app installed on a Scalefusion-managed device.
Allow users to access by setting up MFA using a third-party authenticator app or OTP sent by email: The User Portal is accessible if any of the following conditions are met:
a. Device is managed by Scalefusion: If the device is managed you will not be asked to enter OTP for authentication, orb. If the device is unmanaged, OTP is required for authentication. End User set any Third Party Authenticator app and OTP can be take from that Authenticator app.
General settings
Session Management: Set the session timeout duration for the User Portal. After the specified time of inactivity, the user will be automatically logged out of the portal.
You can configure the timeout between a minimum of 1 minute and a maximum of 60 minutes.
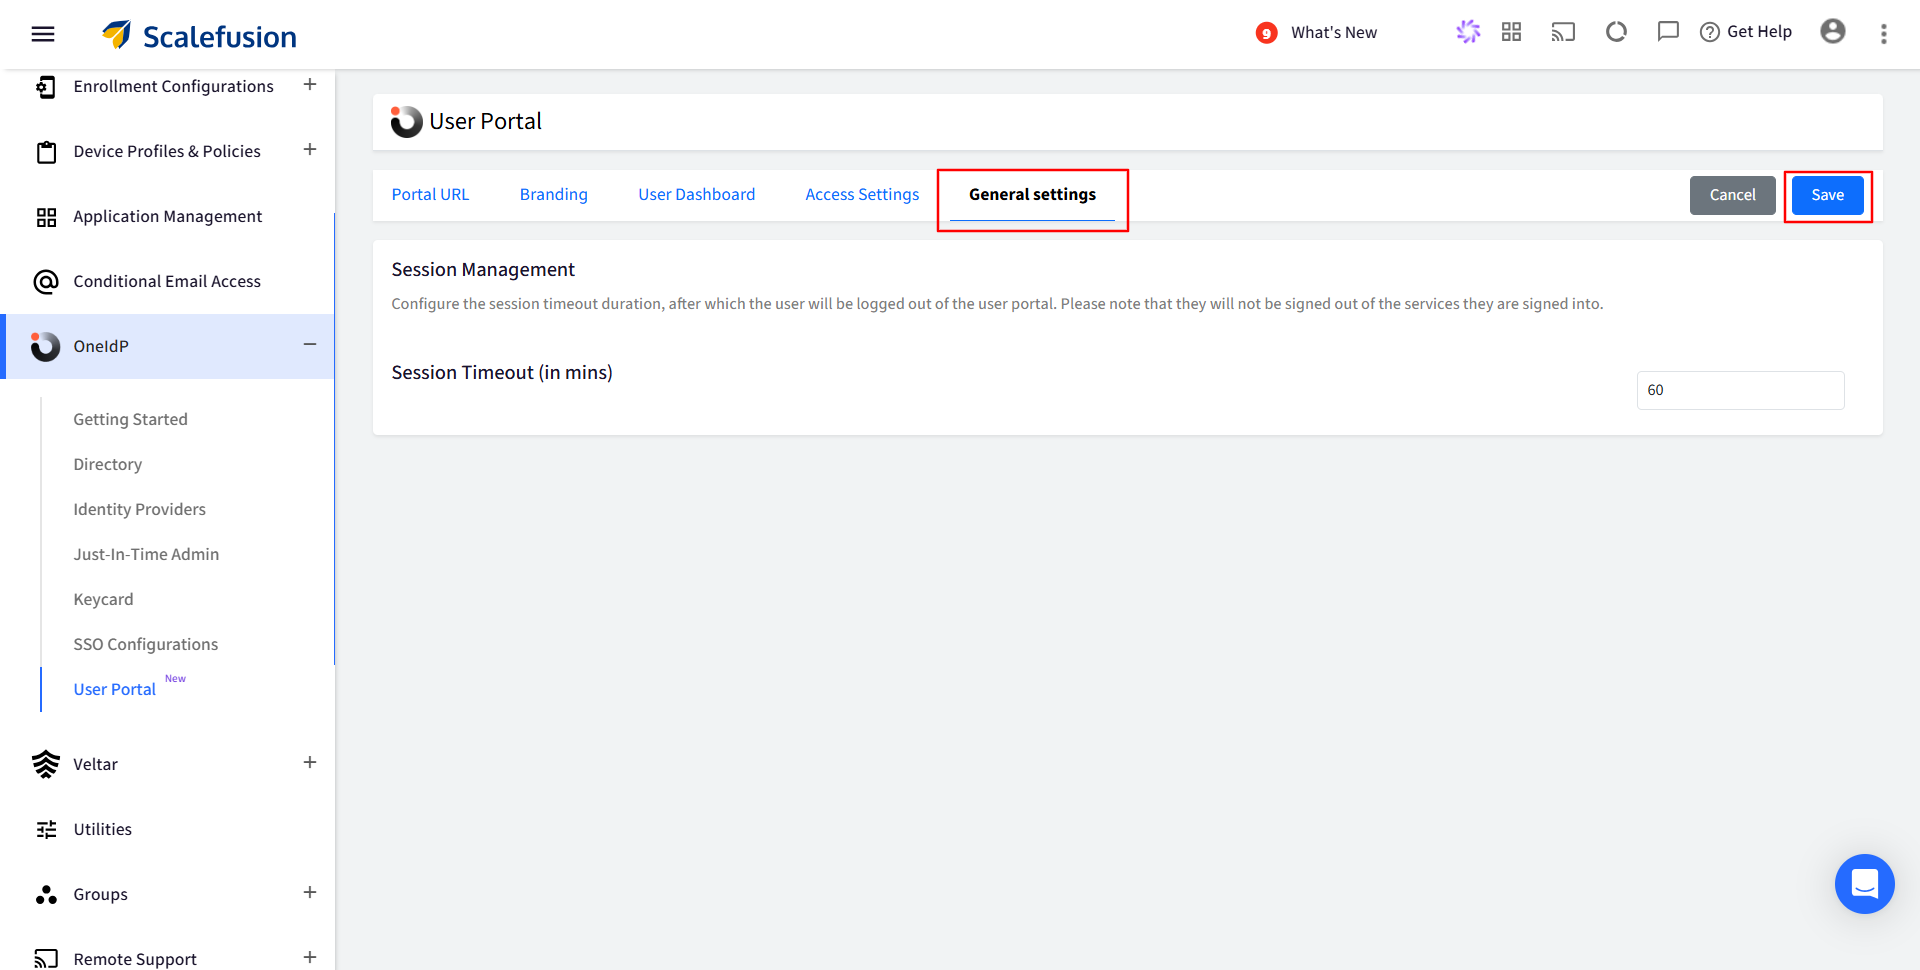
Note: This will not log users out of the individual services they accessed through the portal.
End User Experience
Once you enter the portal URL (provided on the dashboard), you’ll be redirected to User Portal login screen.
Once your enter your OneIdP credentials, click on Sign in.
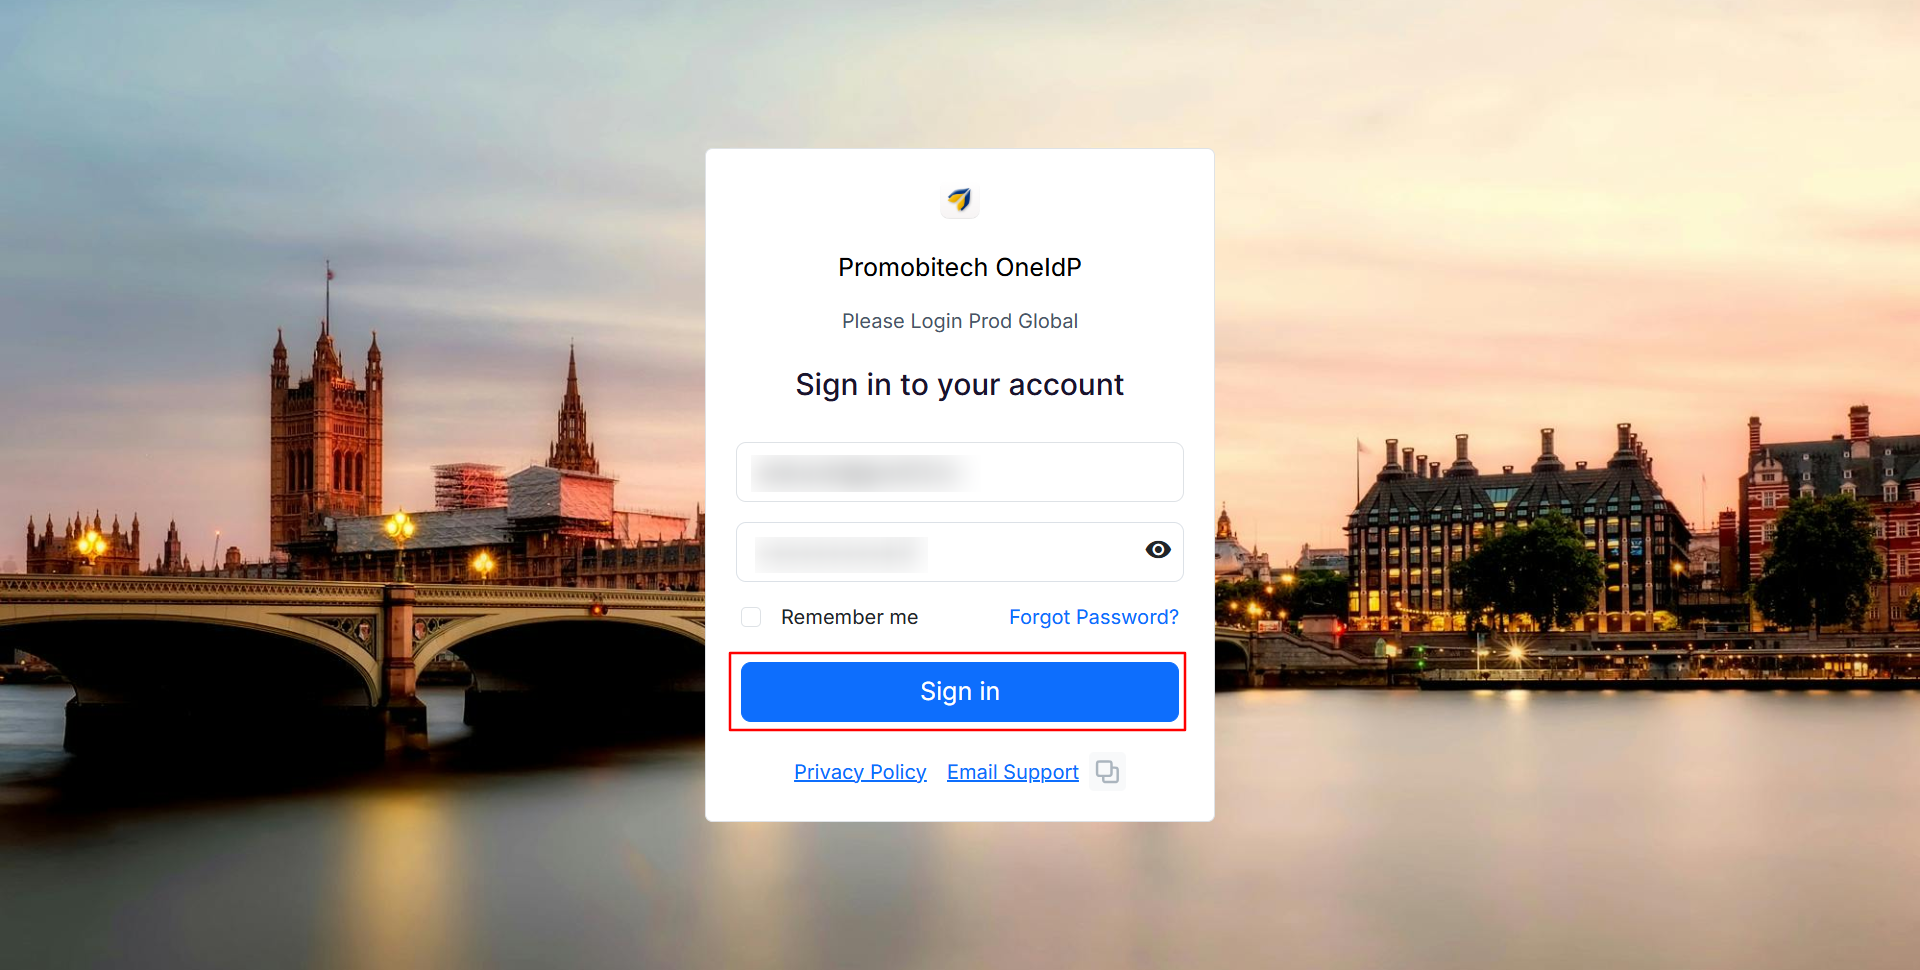
It will direct you to Check Compliance & Sign In based on the conditions configured. If the conditions are met, you’ll be granted access to your personalized dashboard.
(1).png)
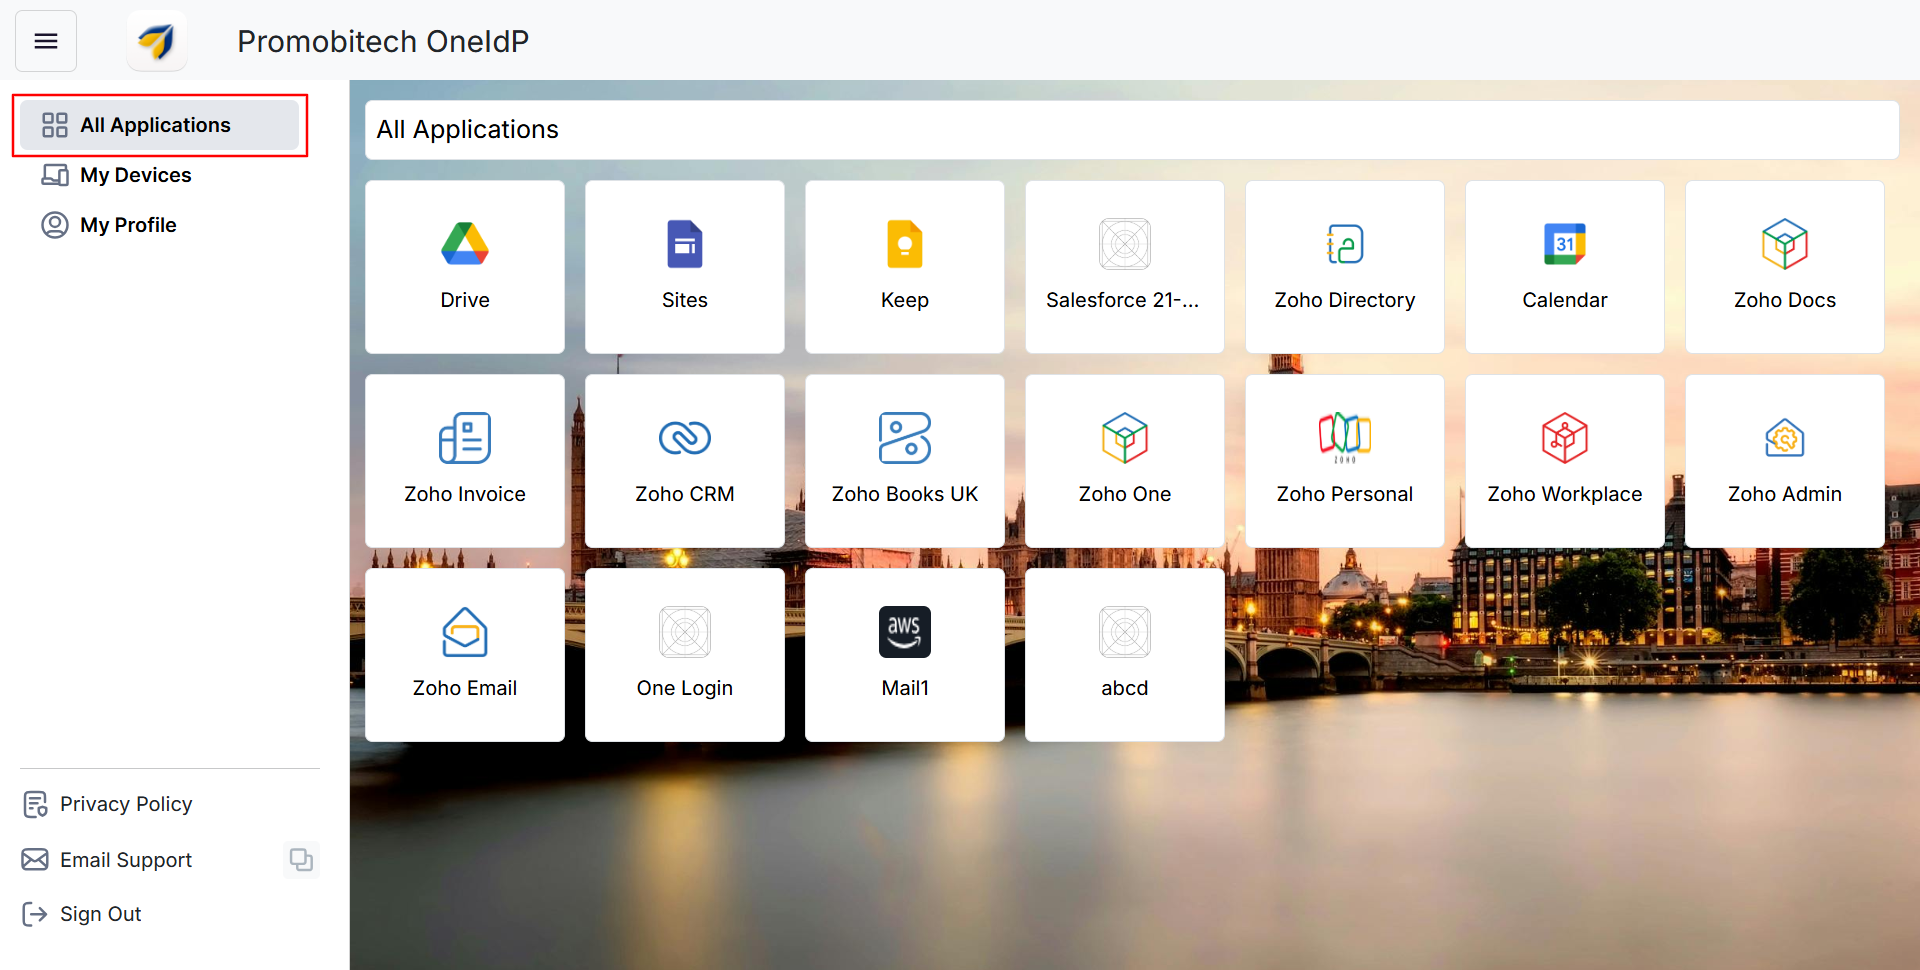
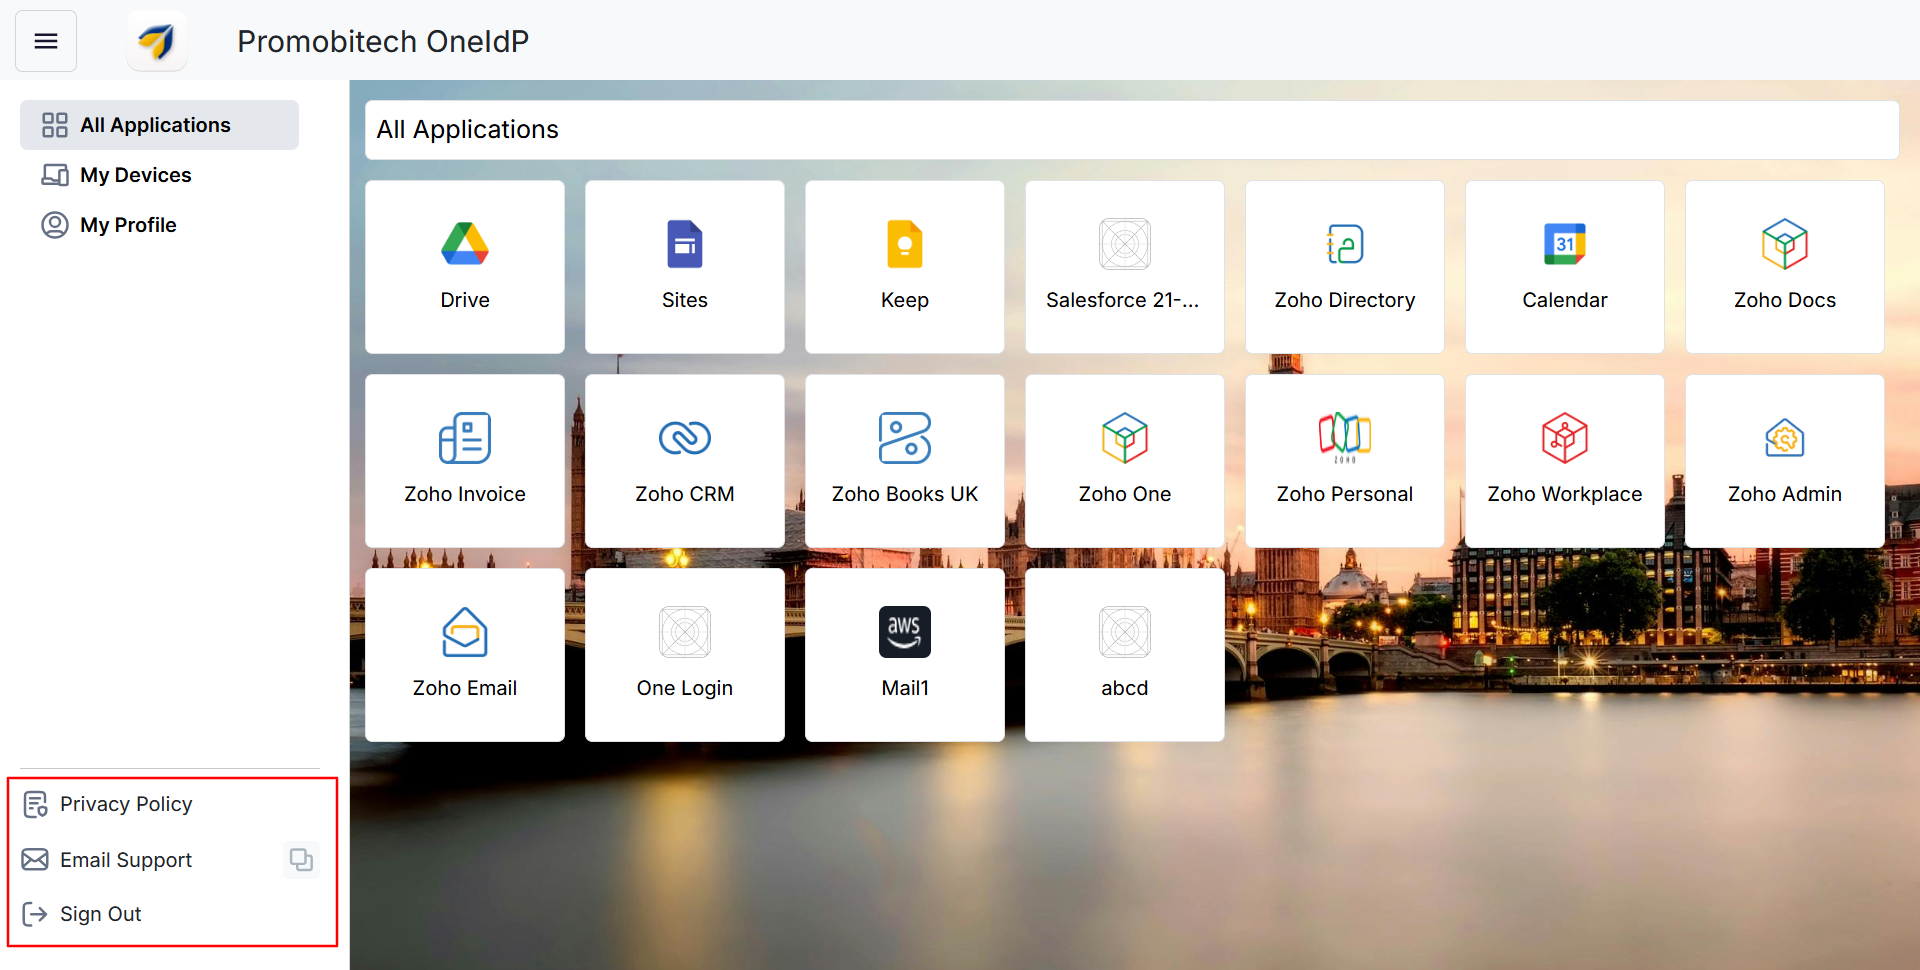
All Applications
This section is a centralized dashboard where you can securely access all your authorized applications with a single click. Each app displayed here is configured via your organization's SSO settings and personalized based on your access permissions.
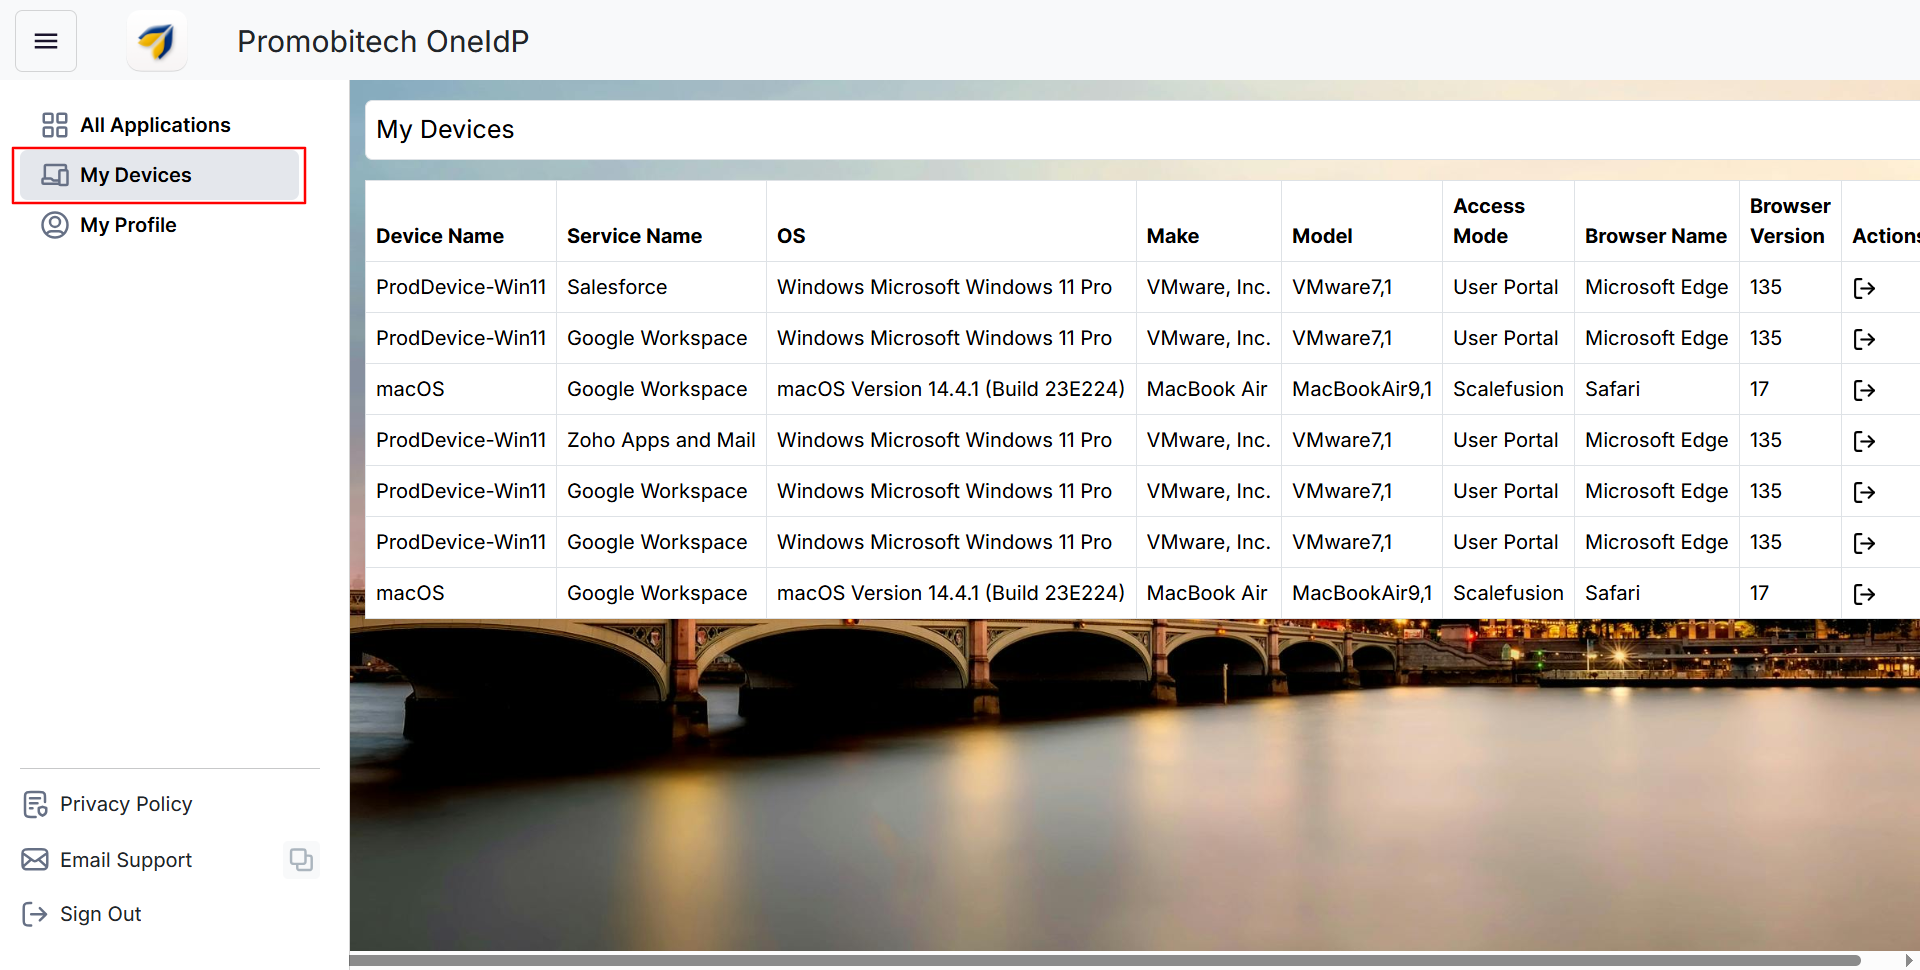
My Devices
This section provides an overview of all devices currently logged into services, along with key details such as Service Name, OS, Device Make and Model, Access Method (User Portal or SP-initiated login), Browser used, and its version.
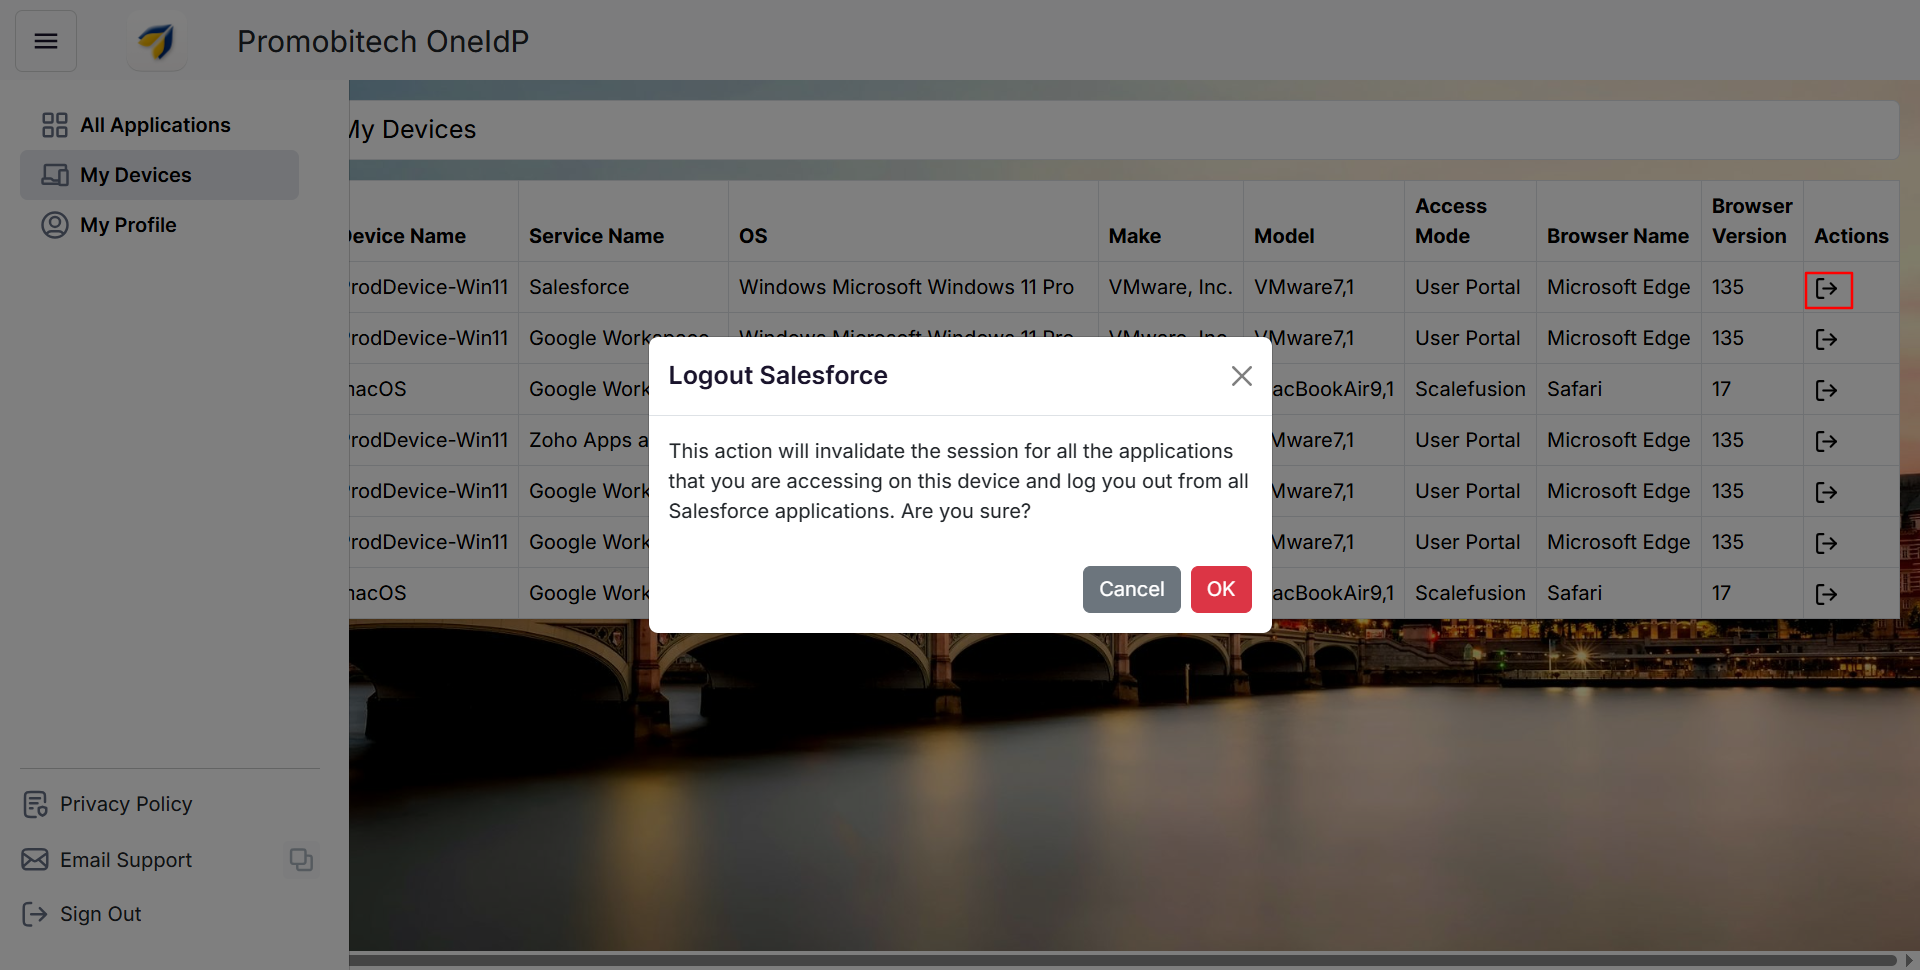
In the Actions tab, clicking on Logout will prompt a confirmation message. Proceeding with this action will invalidate the current session and log the user out of all service applications accessed from that Browser.
My Profile
This section provides an overview of your account details, including First Name, Last Name, Username, Email, and Organization.
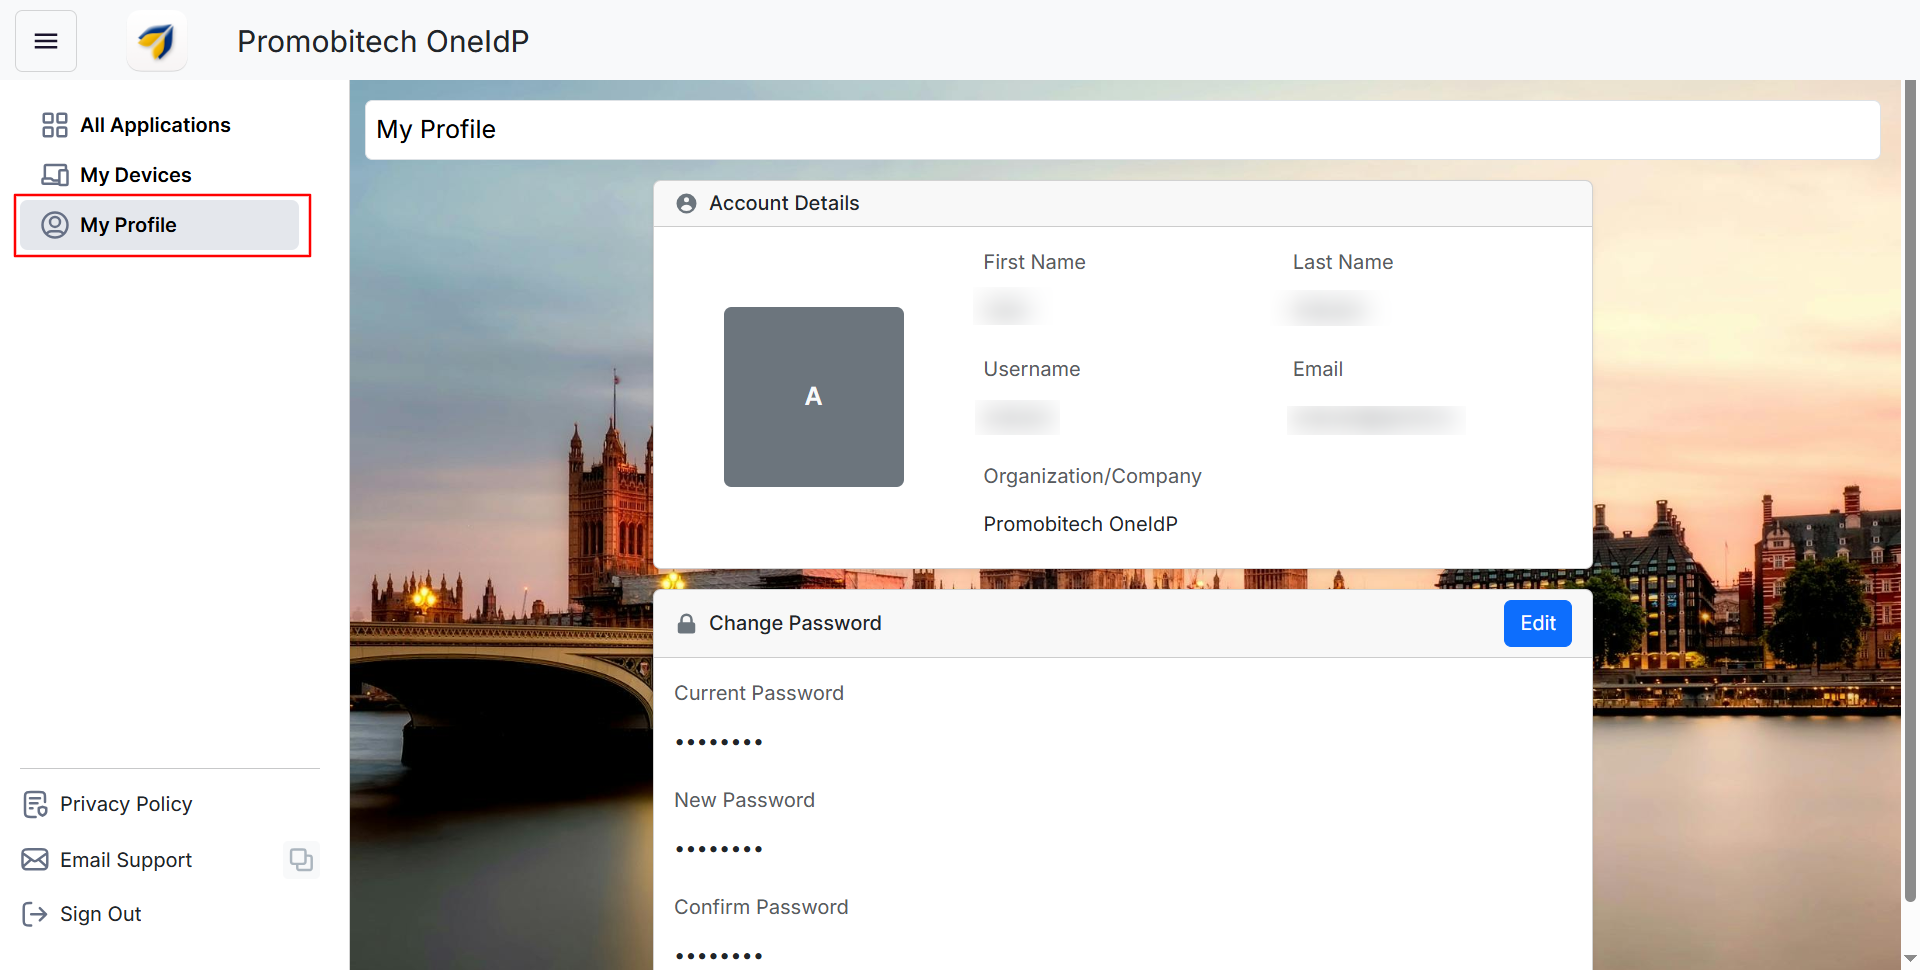
You can set a new password by clicking Edit and updating your current login password.
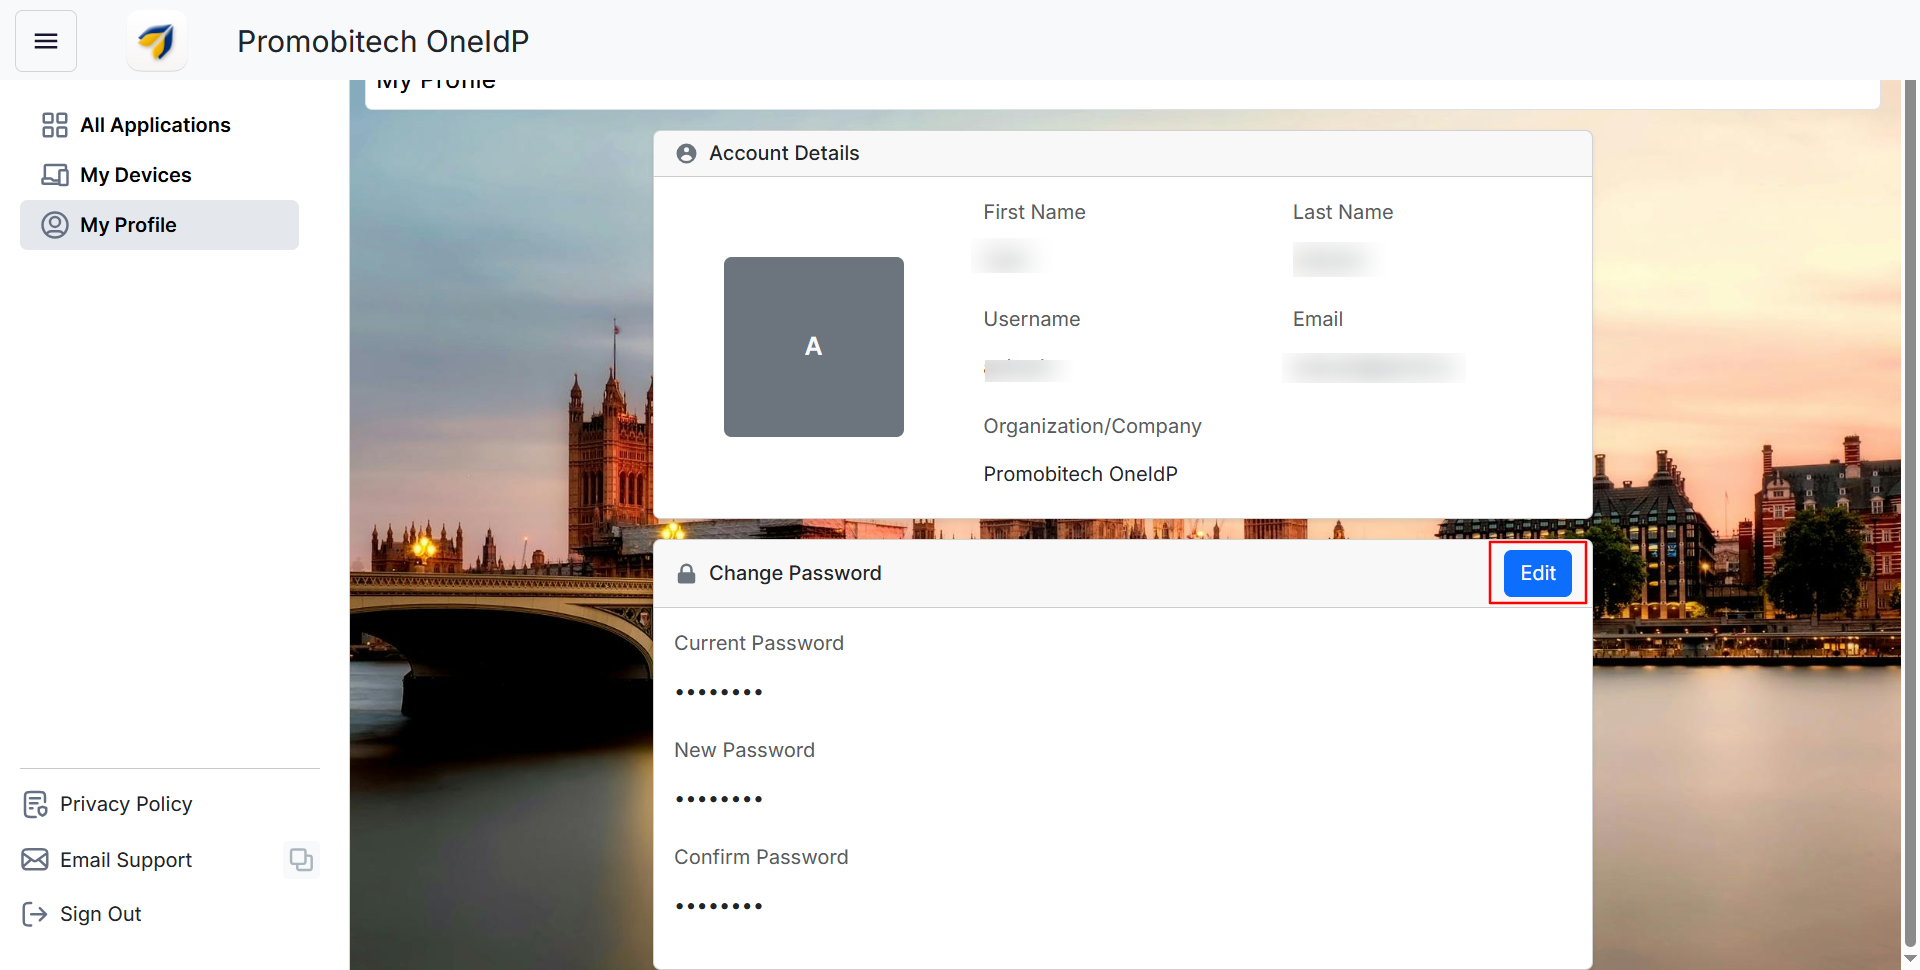
Note: If the Authentication source is set to Third Party Identitiy Provider(Google Secure LDAP,Okta) then change password section will not be disaplyed.
Additional Options
At the bottom left corner of the dashboard, you will see these additional options which will come in handy.
Privacy Policy: If configured, this option allows users to view a clickable link to the organization's privacy policy, ensuring transparency by informing them how their data is collected, used, and protected.
Email Support: This allows users to click on Email Support, redirecting them to their email service, or easily copy the support email ID, enabling them to contact the organization's support or IT team directly if they encounter any issues.
Sign Out: Allows users to securely sign out of the User Portal, ending their current session without affecting active logins to individual service applications.
User Portal simplifies the authentication process by centralizing access to all connected services in a single portal. This not only eliminates the need for users to remember multiple credentials but also enhances security and productivity by providing seamless, one-click access to all applications.
Points to Note
We compare the security level (CAS policy) used during User Portal login with the level required by the SSO app.
If an app's compliance condition is the same as or less stringent than that of the User Portal, no additional compliance check will be triggered.
If an app's compliance condition is more stringent than that of the User Portal, a compliance check will be enforced before granting access.
When compliance levels differ, access to the apps is always governed by the app's own setting. If the portal was accessed using a less strict method (e.g., OTP), but the app requires a more strict one (e.g., managed device), then re-validation will occur.
Hierarchy of Checking Compliance Conditions:
Managed Device
OTP via Authenticator on Managed Device/Third Party Authenticator
IdP-initiated login may not be supported for certain applications such as Amazon Web Services, Keeper, and Cisco Duo.
Was this article helpful?