As described in Android Enterprise Help, Zero-touch enrollment is a streamlined process for Android devices to be provisioned for enterprise management. On first boot, devices check to see if they’ve been assigned an enterprise configuration. If so, the device initiates the fully managed device provisioning method and downloads the Scalefusion MDM agent, which then completes the setup of the managed device.
Android zero-touch enrollment offers a seamless deployment method for corporate-owned Android devices making large-scale rollouts fast, easy and secure for organizations, IT and employees.
This document guides on how to setup the Scalefusion Dashboard to be used in conjunction with Zero-Touch devices. We would highly recommend referring to the original Android Zero-Touch help document here before you start setting up Zero-Touch in Scalefusion Dashboard.
Before You Begin
- Procure a Zero-Touch portal account from a reseller partner. Find the list here.
- Compatible Zero-Touch device from the list on the Android Zero-Touch site.
- A valid Scalefusion account.
- Complete Android for Work setup, Create a Device Profile and QR Code configuration.
Zero-Touch Setup on Scalefusion Dashboard
Zero-Touch streamlines the enrollment process of devices and makes the Scalefusion Android client the device owner right on the first boot. Since it automatically enrolls the device, certain steps in the Dashboard are mandatory before you proceed with the Zero-Touch.
Steps on Scalefusion Dashboard
The steps below refer to other help documents for mandatory steps so that the focus is on the Zero-Touch setup.
- Sign In to Scalefusion Dashboard.
- Set up Android for Work.
- Create a Device Profile for your zero-touch devices.
- Create a Device Enrollment Configuration (a.k.a QR Code) that can be used for zero-touch enrollment as well.
- Navigate to Getting Started > Android Enterprise Setup.
- Click on the Android Zero Touch & Samsung KME Setup tab.
- Click on CREATE CONFIGURATION to start creating a configuration.

- In the configuration creator window, enter a name for your configuration, select a QR Code configuration and click on SAVE.

- Once the configuration is created, it will be shown in the list of configurations; click on it to expand it. This expanded view guides the next 3 steps:
- Copy Configuration: Click on the Copy icon to copy the configuration.
- Learn Next Steps: Links to this help document and video to guide any admin in your dashboard on how to use it.
- Complete Setup: From this point, you would have to navigate to Android's Zero-Touch portal to finish setup.

- Once you have copied the configuration as shown above, click on the Complete Setup step. Click on the Sign In link to navigate to the zero-touch portal. Follow the steps in the section below to complete the setup.
Steps on Zero-Touch Portal
- Once you sign in to the zero-touch portal, click on the Configurations tab on the sidebar. Click on the + symbol to create a new configuration.
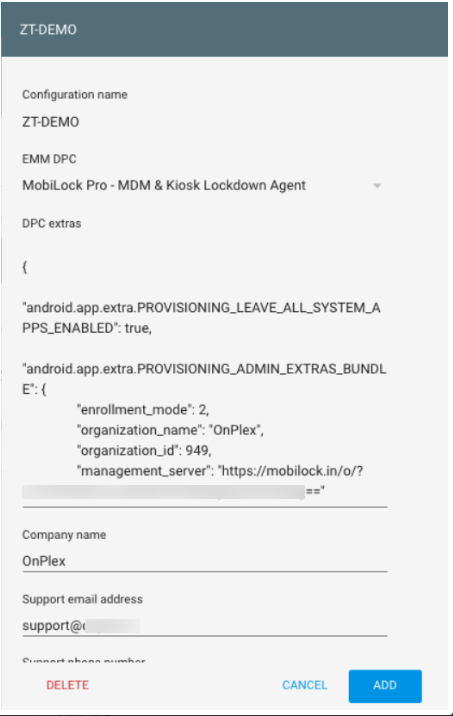
- The configuration creator in the zero-touch portal offers you the settings mentioned below. Once you have filled in all fields, click ADD to add the configuration.
- Configuration Name: Give your configuration a name that describes its purpose. Choose a short, descriptive name that's easy to find in a menu. For example, Sales team or Temporary employees.
- EMM DPC: Select your Scalefusion Pro - MDM & Kiosk Lockdown Agent from this list.
- DPC Extras: Paste the configuration payload that you copied in Step 9.
- Company Name: Set this to the name of your organization. Zero-touch enrollment shows this company name to your device users during device provisioning. Shorter names that are easily recognized by your organization's employees work best.
- Support Email Address: Set this to an email address your device users can contact to get help. This is typically your internal support email address, for example, it-support@xyzcorp.com. Zero-touch enrollment shows this email address to device users before device provisioning. Because device users can see the email address but can't click it to send a message, choose a short email address that users can type on another device.
- Support Phone Number: Set this to a telephone number your device users can call using another device to get help. This is typically the phone number of your IT support team. Zero-touch enrollment shows this number to your device users before device provisioning. Use the plus sign, hyphens, and parentheses to format the telephone number into a pattern that your users will recognize.
- Custom Message: Optionally, add one or two sentences to help your users contact you or give them more details about what’s happening to their device. Zero-touch enrollment shows this message before the device is provisioned. The following image shows a reference configuration:
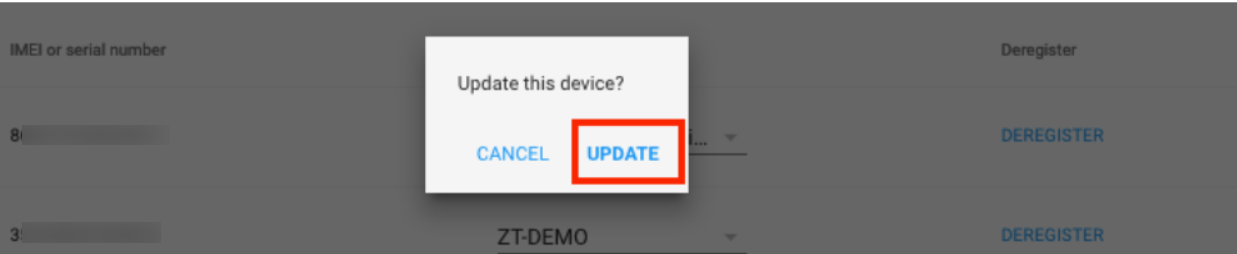
- Click on the Devices tab to see the list of devices and assign the configuration to them.
- Select a Configuration: From the drop-down, select the newly created configuration.

- Confirm the action: Click on UPDATE to confirm the action.
- Select a Configuration: From the drop-down, select the newly created configuration.
- This completes the steps on the Zero Touch portal. Now you can power on the device to complete the steps on the device.
Steps on Zero-Touch Device
- Once you power on the device that has a zero-touch configuration assigned as described above, it will download the Scalefusion android client and enroll into Scalefusion.
- Users will see the Scalefusion permission screen, and once the permissions are given, the device will be locked to the Scalefusion home screen.
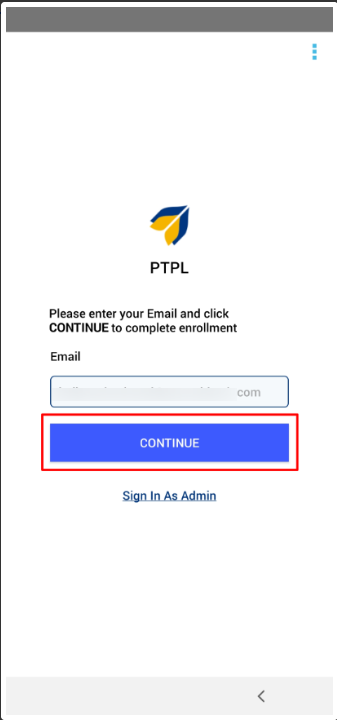
- User Authenticated Enrollment: If you have selected User Authenticated Enrollment in the QR code configuration, you will get the user authentication screen after permission.
- Enter the user's email ID (ID added at the time of adding the user) and tap Continue.
- You will receive OTP on the registered email ID. Enter the OTP on the device and Submit.
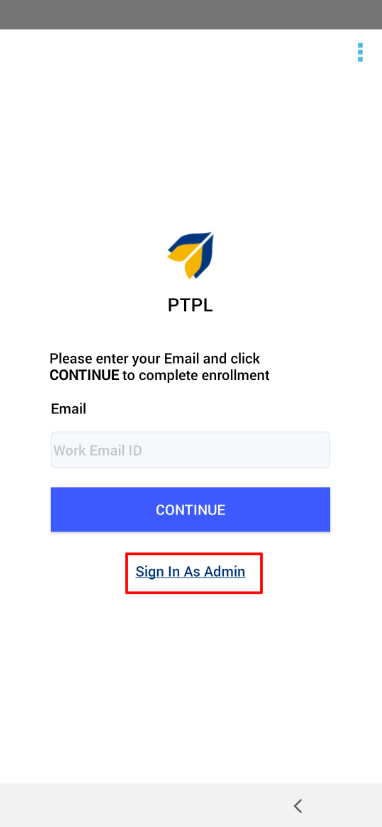
- Sign in as Admin: Tapping on Sign in As Admin will ask for an exit password. Once you enter the password, it will lock you into Scalefusion.
- This option can be used by admins if they are setting up the devices for end users.
- With this, admins will be directly led to the Scalefusion home screen without authentication and check if policies, and published apps are present and working fine or not and then hand over the devices to end users.
- Enter the user's email ID (ID added at the time of adding the user) and tap Continue.
Silent Setup using Wingman
Using Wingman, admins can do a silent setup, which means all the permissions will be auto-granted. Admins get an option in the Dashboard to enable this. In Utilities -> Global Settings, there is a flag Use Wingman to Auto-configure permissions at Setup. This needs to be enabled.
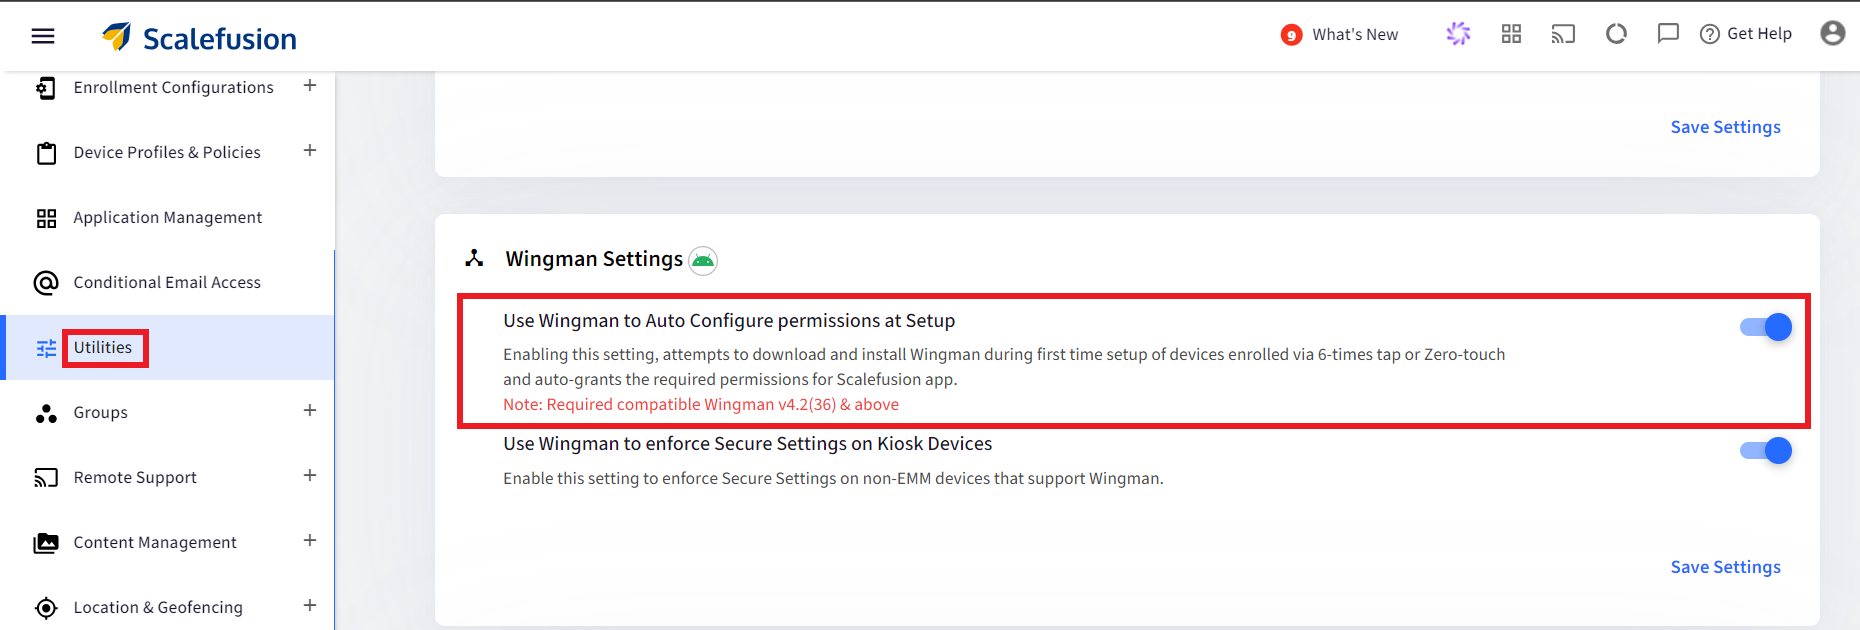
Once enabled and if there is Wingman supported for the device, then it will be downloaded, and all the permissions will be auto-granted.
Frequently Asked Questions
Question: Why are we shown an error when we click on CREATE CONFIGURATION in the Zero Touch Setup tab in Scalefusion?
Answer: There are two cases when you might see an error:
- You have not created a QR Code with an Android Kiosk Device Profile.
- You have already created a zero-touch configuration using all the QR Code configurations that you have created.
Question: How many zero-touch configurations can we create in Scalefusion?
Answer: You can create as many QR Code configs and/or Android Kiosk Device Profiles as you have.
Question: We have created the configuration, but nothing happens on the device.
Answer: Make sure that you have completed the steps on the Android Zero Touch portal and assigned a configuration to the device. Also, make sure that you copied the configuration from Scalefusion properly.
Question: Do we still need to give permission to Scalefusion during setup if we are using Zero Touch?
Answer: Yes. For some of the Scalefusion features that go beyond basic management, these permissions are mandatory. Hence we mandate it during setup. However, we are coming up with changes that would let an IT Admin make these permissions optional if they do not want the associated features.
Question: Do we need to manually assign configurations to each device one by one in the Zero-Touch portal?
Answer: No. You can make one configuration as the default configuration for all your new/subsequent zero-touch devices. The option to make a configuration default is available in the Configuration section of the Android zero-touch portal. For all the existing devices, you can upload a CSV. Refer to the Assigning a Configuration section here.
Question: What happens if we do not provide a SIM/Wi-Fi network when the device is powered on for the first time?
Answer: The device boots as a normal device. However, once the device connects to the network, it prompts the users to set up the device to be used for Android for Work. It gives the users a one-hour grace period before an automatic hard reset is done and the device reboots to download Scalefusion.
References
Some of the documentation in this guide has been verbatim copied from Android Enterprise Help for zero-touch here.