Device Profile is a feature that helps you to group your policies together. Once a profile is created, you can apply it to multiple devices. Any change that you make in the device profile will be automatically applied to all the devices. You can also apply a Device Profile to a Device Group so that you can easily group your devices and manage their settings as well.
In this guide, we will see how to create a Windows Device Profile and the various settings that can be used.
Before You Begin
- Make sure to Sign In to the ScaleFusion Dashboard.
- As per our observation, we have seen that not all the features work on the various versions of Windows 10, and some do not work at all, although, as per the Windows 10 protocol, they are supposed to work. The iconography below indicates the feature compatibility,
Iconography Description 
Indicates that the feature works as expected. 
Indicates that the feature is supported by Windows 10 protocol but DOES NOT work as intended. 
Indicates that the feature does not work.
Creating and Configuring a Profile
- Navigate to Device Profiles & Policies > Device Profiles and click the CREATE NEW PROFILE button.
.png)
- In the Create Profile dialog, select the Windows tab. Enter a name for your profile and click on SUBMIT.
.png)
- The Profile Creator wizard will be launched. The device profile creation is divided into 5 sections,
- Select Apps: Section to configure your application policy.
- Allowed Websites: Section to allow websites to be used with Google Chrome.
- Passcode Settings: Section to configure passcode settings on managed Windows devices.
- Chrome/Edge Configurations: Additional settings for Google Chrome and Microsoft Edge.
- Settings: Section to configure additional settings based on categories.
- Select Apps: The first step is to configure the application policy. Choose an application policy and click NEXT
Feature Description Supported on Multi-App Kiosk Mode Select the list of applications that should be allowed. You can allow both UWP and Win32 apps. For more details, click here.
Multi-App Kiosk mode can be set with Modern Management mode or Scalefusion MDM agent enrollment mode.
- Win 10 Pro

- Win 10 Enterprise

- Win 7
- Win 8.1
App Locker Policy With this option, select the apps and configure to allow or block those apps. For more details, please click here. - Win 10 Pro

- Win 10 Enterprise

Skip Application Policy Select this option if you do not want to define an application policy for your Windows devices. - Win 10 Pro

- Win 10 Enterprise

- Win 7
- Win 8.1
- Win 10 Pro
- Allowed Websites: Configure the URLs that a user is allowed to browse on Google Chrome or Windows Kiosk Browser app by following our guide here.
- Passcode Settings: You can set the passcode policy inside the device profiles. This provides the flexibility for the IT admins to define passcode policies of different complexities to devices in different profiles. To configure, Toggle on the button Override Global Password Policy; only then the passcode settings become configurable.
The policy created here will override the global passcode settings and will be applied to the devices of this Windows profile. - Google Chrome and Microsoft Edge Configurations: Use this section to configure Google Chrome settings. Please refer to our help document here.
- Settings > Kiosk App: Use this option to set an application to run always and set the Windows Device in Kiosk app mode. Please refer to our help document here.
- Other Settings: To configure other profile settings, please visit here.
- Once you have configured the various settings, click on UPDATE PROFILE. Once the profile is saved, it will appear in the list of Device Profiles.
Applying a Device Profile to Windows Devices
Once a device profile is created, you can easily apply it to the devices. You have the following options,
- Applying a Device Profile at Enrollment: If you are looking to apply a device profile right when the device enrolls, then create an Enrollment Configuration and in the Group/Profile section, select the Windows Profile that you want the devices to enroll in. Use the enrollment link to enroll the devices.
- Changing a Device Profile after Enrollment: Follow the steps below to change the device profile,
- Navigate to Device Profiles & Policies > Device Profiles and select Device Profile to which the device belongs.
- Click on the APPLY button on the actions panel on the right side.
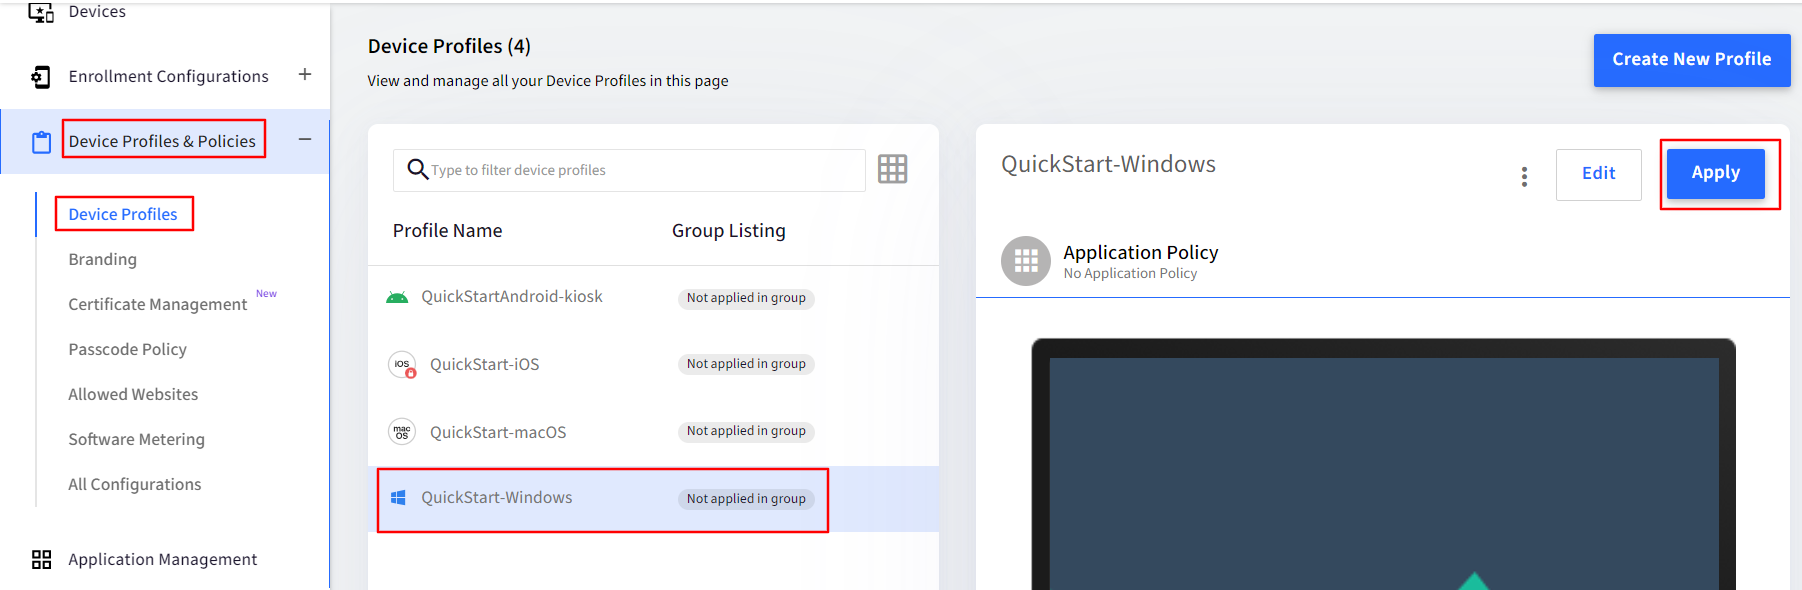
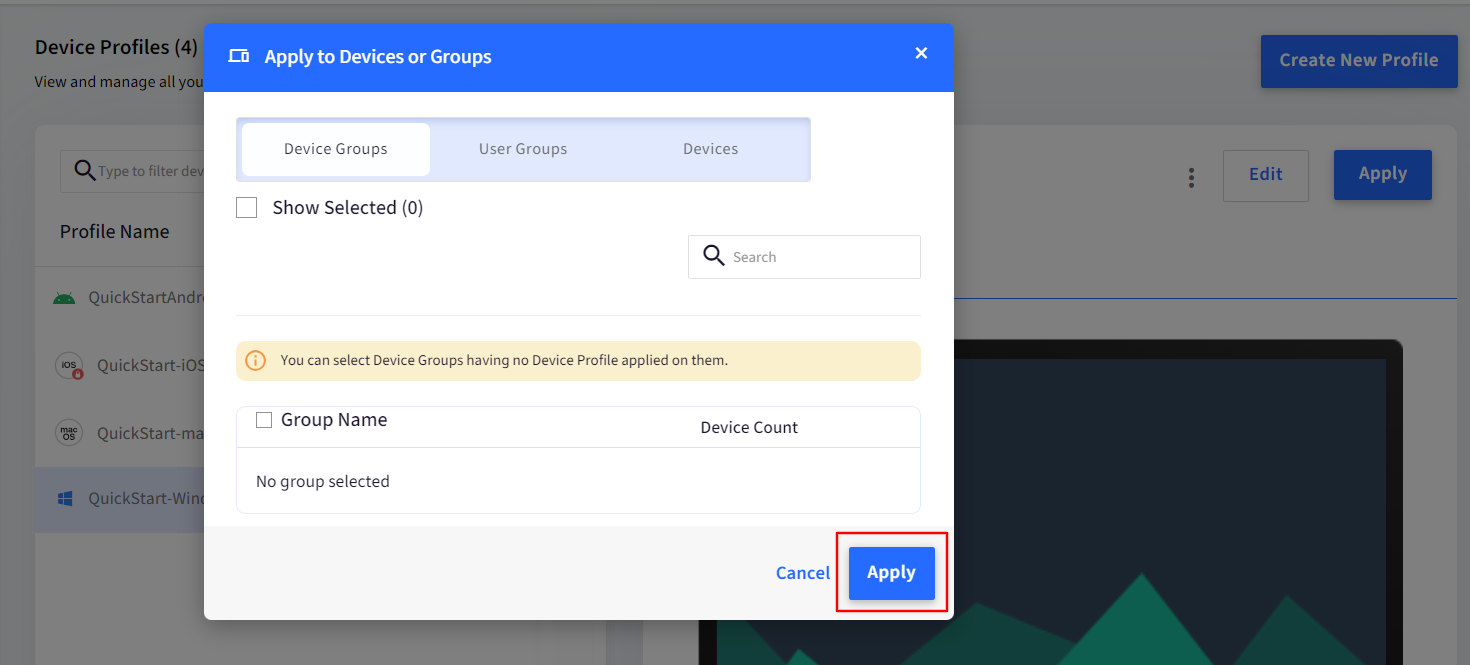
- You will be shown a dialog with all the Device Groups, User Groups & Devices that are not associated with a device profile currently. Select the Device Group(s) / User Group (s) or navigate to the Devices tab, select the devices and click APPLY.
- Applying a Windows Profile via Device Group: If you intend to use Device Groups, then you can add/modify a Windows Profile to a Windows group. The selected Windows Profile will be applied to all the devices in this group.
Removing a Device Profile from Windows Devices
If you want to move the device to a different device profile, then first, you have to remove it from its existing profile. Follow the steps below to do so,
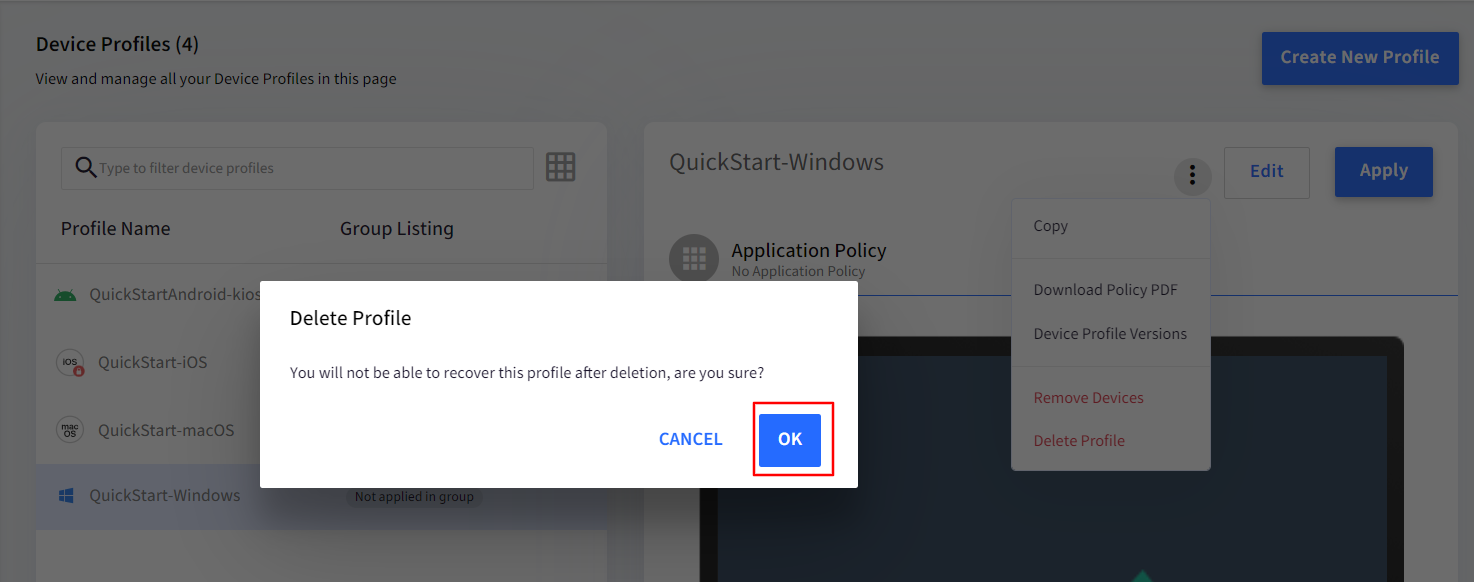
- Navigate to Device Profiles & Policies > Device Profiles and select Device Profile to which the device belongs.
- Click the 3 dots in the actions panel on the right and click on Delete Profile from the menu list.

- You will see a dialog box asking you to confirm. Click on Ok to delete the profile.
Device Profile Provisioning
This feature will assist Admins in reviewing changes made to device profile policies in different versions, allowing them to use the appropriate profile versions to roll back the device profile policies when needed. To access the Device Profile versions:
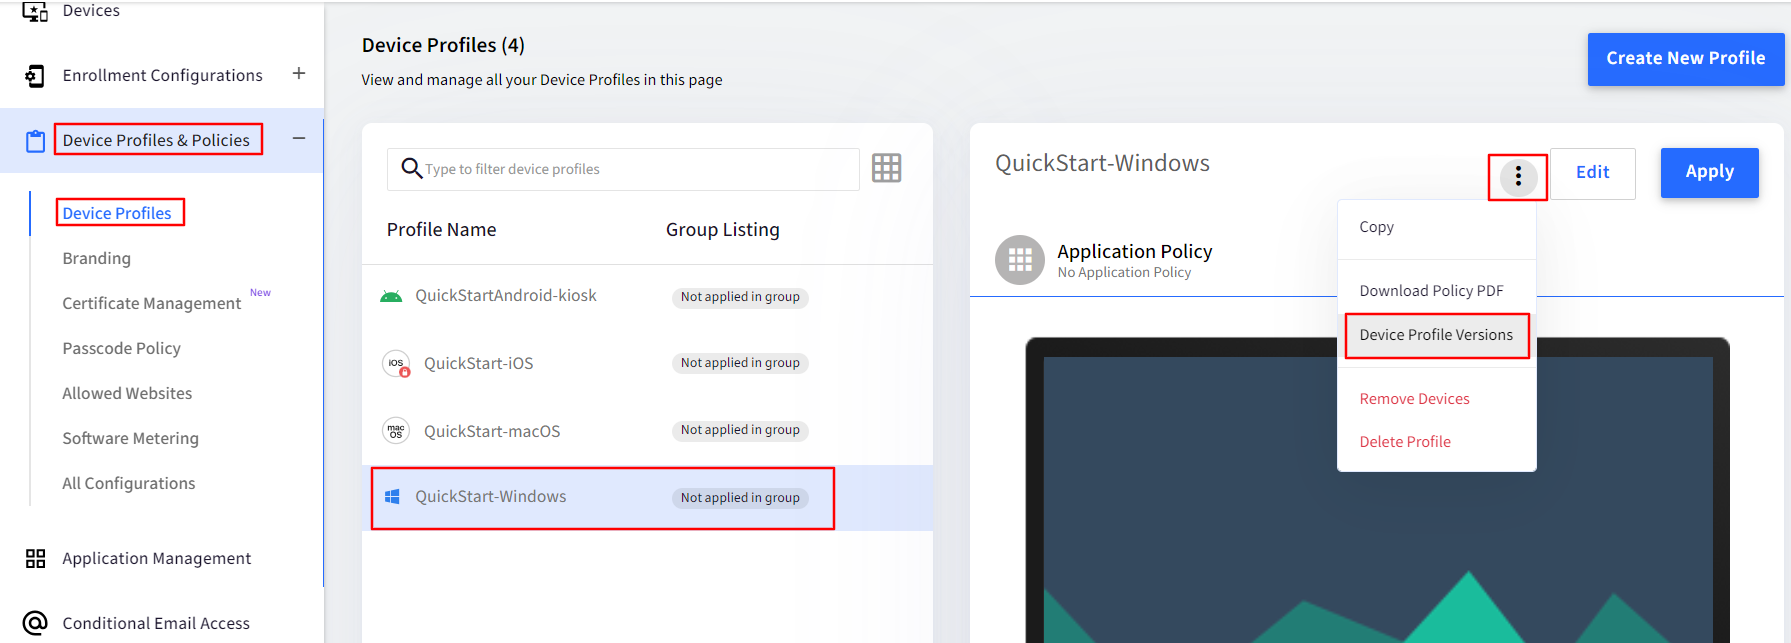
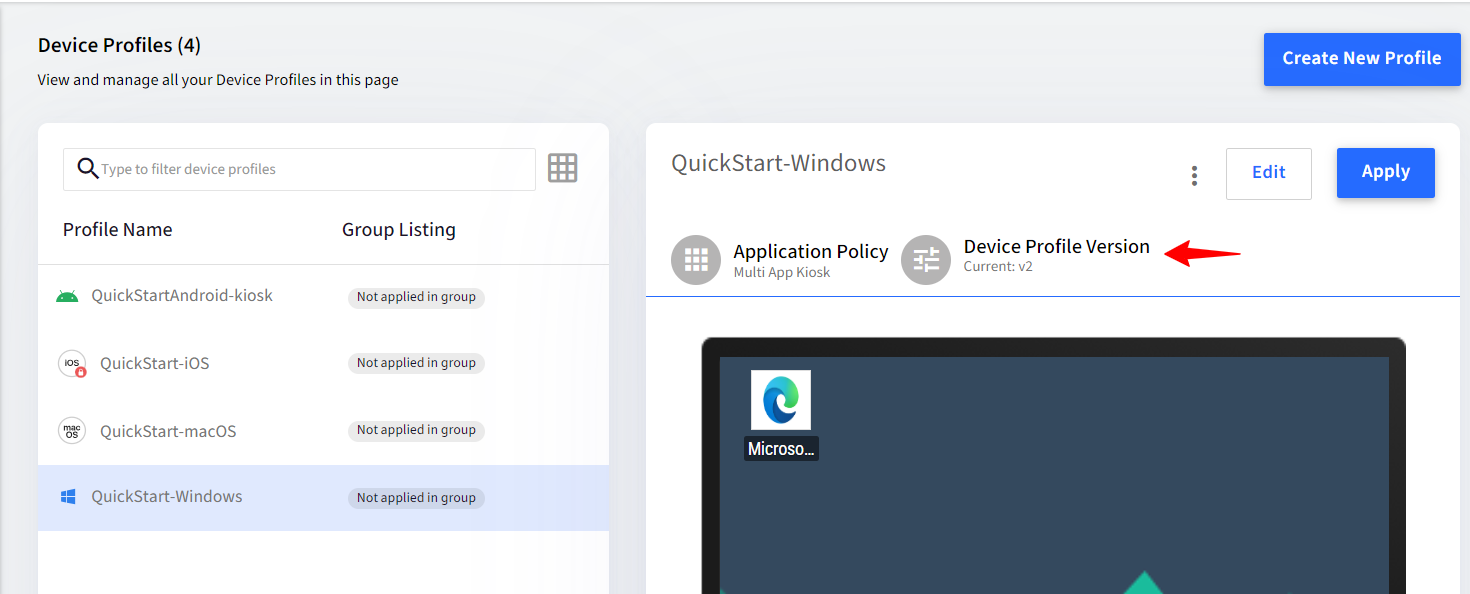
- Navigate to Device Profile & Policies > Device Profiles > click on the concerned Windows Device Profile.
- Click the 3 dots in the actions panel on the right to open the menu list items.
- Here you will see the option Device Profile Version. Click on it to see the details.
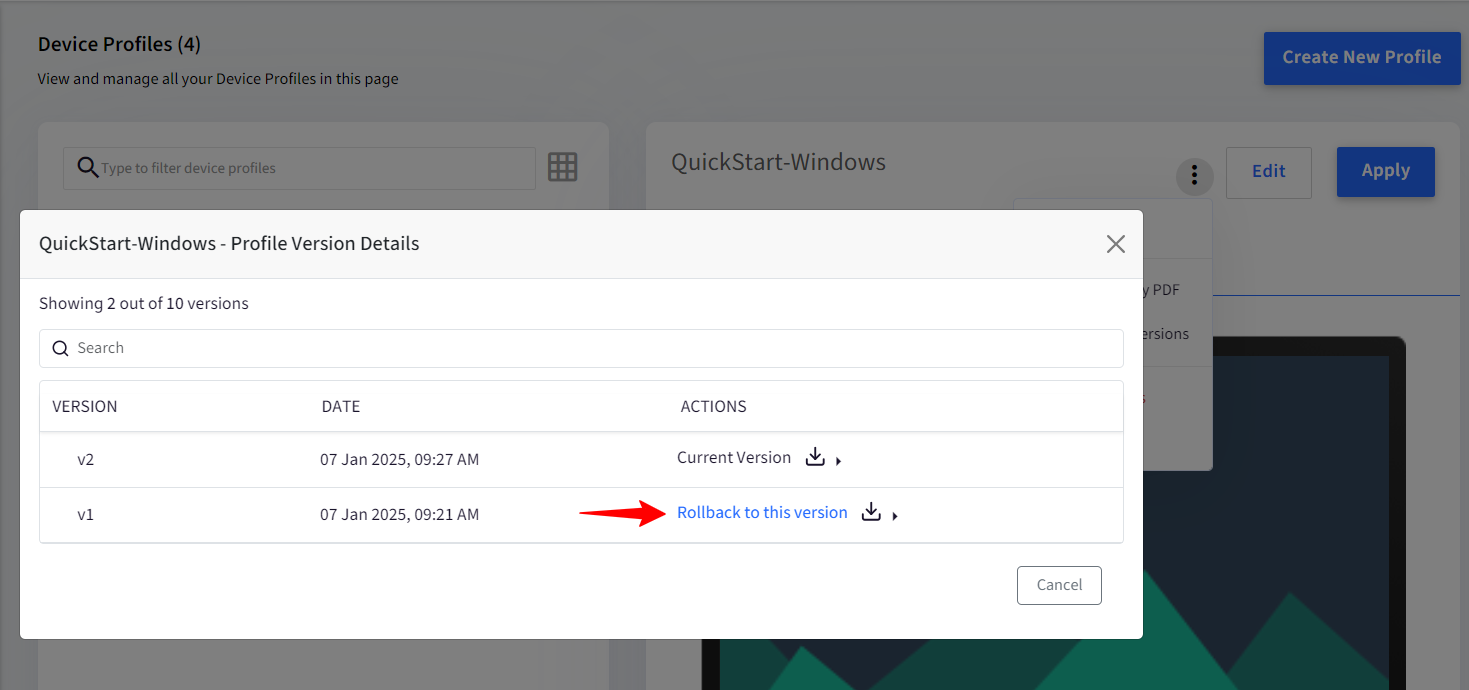
- It will show you the Version, the Date it was created, and an option to download it under Actions.
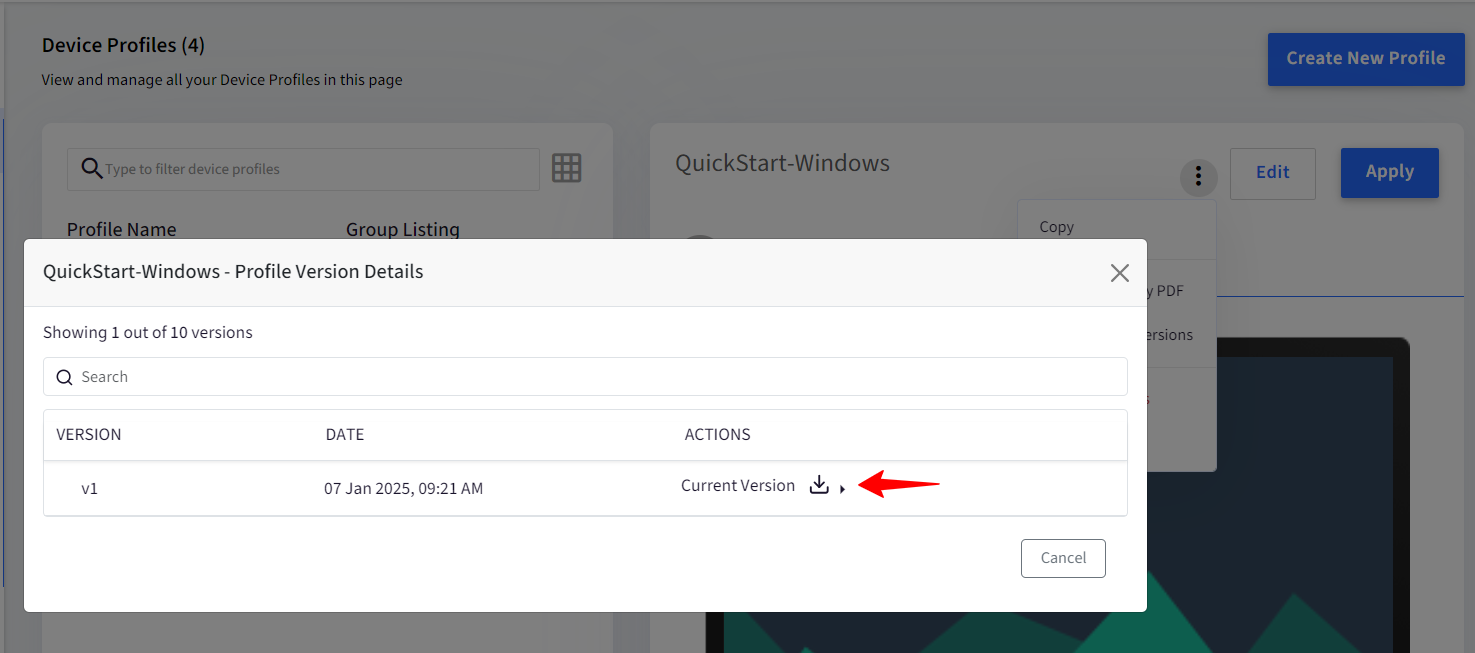
- When you make any changes to the Profile, a new version of the profile is created.
- In the Profile version details, you will see both versions with an option to Rollback to the previous version.
- When you revert to a previous version and update the profile, it will also generate a new version of the profile.
- When you revert to a previous version and update the profile, it will also generate a new version of the profile.
- The minimum number of versions that can be set is 10 and the maximum is 9999.
- If the number versions exceeds the set value then the older versions will be removed from the list.
Frequently Asked Questions
Question: In the Device Profile, under the Select Apps section, I don't see the applications that are installed on the enrolled devices.
Answer: ScaleFusion can collect information only about the UWP applications or the applications installed from the Windows Store. ScaleFusion collects this information when a new device enrolls and every 2 hours after enrollment. If the list is still not updated, then you can do the following,
- Navigate to the Devices section.
- Click on the Device that has the application installed.
- On the bottom panel and next to the Windows frame, click on the Sync Apps option.
Question: We see quite a few settings marked as. Why does ScaleFusion allow control of the settings that are not working?
Answer: We had contemplated not adding these settings. However, these are the ones that the Windows MDM protocol claims to be supported and still not marked deprecated. Hence we have retained them with the assumption that it will work in future versions. Once the Windows documentation marks them deprecated or unsupported, we will remove them.
Question: The Exchange/Email settings are not removed from the device when we remove it from a Device Profile?
Answer: This is the intended behavior. As Exchange/Email is critical business information and is data intensive operation, we have not removed it when the devices are merely removed from the Device Profile. This is based on the assumption that you would move the device to a different profile which will have the same exchange/email configuration.
Question: None of the profile settings are removed from the device when we remove it from a Device Profile.
Answer: Yes. Removing a device retains its last profile/policy settings. We are in the process of adding a feature that lets you apply/remove policies that will allow you to temporarily relax the policies on the device. However, if you want to completely Unenroll the device, please use the Delete Device option.