A catalog is a list or record of items systematically arranged often including some descriptive details. In similar terms, Scalefusion's Windows App Catalog provides a centralized space containing set of apps from where IT admins can securely manage and distribute applications to end-users' Windows devices. It is a platform that allows you to create a customized app store for managed Windows devices. Administrators can not just create catalog of apps but also categorize them as per their organization's requirements.
Earlier Windows App Catalog allowed remotely installing only O365 Apps. Now we have extended it to include range of third party apps' which are synced and made available on Scalefusion Dashboard and from there they can be installed on managed Windows devices, all remotely.
This document describes the configurations required to be done on Scalefusion Dashboard side, apply them on devices that ultimately lead to the apps' installation on devices.
Pre-requisites
- Supported OS: Windows OS 10 and 11.
- Devices should be enrolled with Scalefusion.
- Latest version of Scalefusion MDM agent (for Windows) should be installed on the devices.
- Users should be subscribed to Enterprise 2023 plan.
How it works?
- On Scalefusion Dashboard, select the App(s) to be installed.
- If the app is not there, add it from App Store in Dashboard.
- Create Install Configurations.
- Publish the Configuration on device profiles.
These are explained in detail below.
Steps to install apps from Windows App Catalog
Step 1: Select Apps
- Sign In to Scalefusion Dashboard.
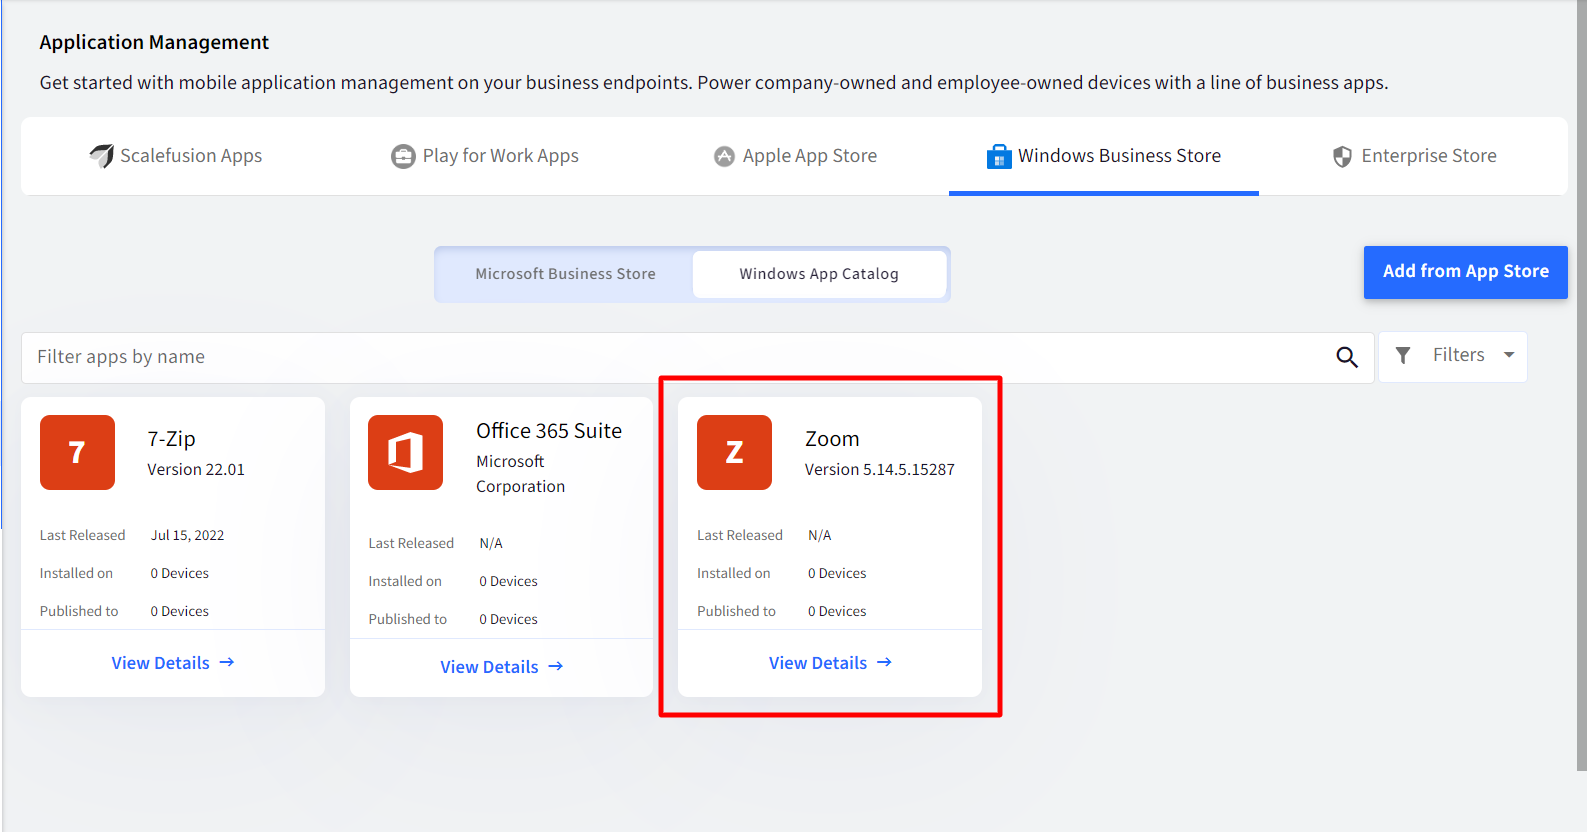
- Navigate to Application Management > Windows App Catalog.
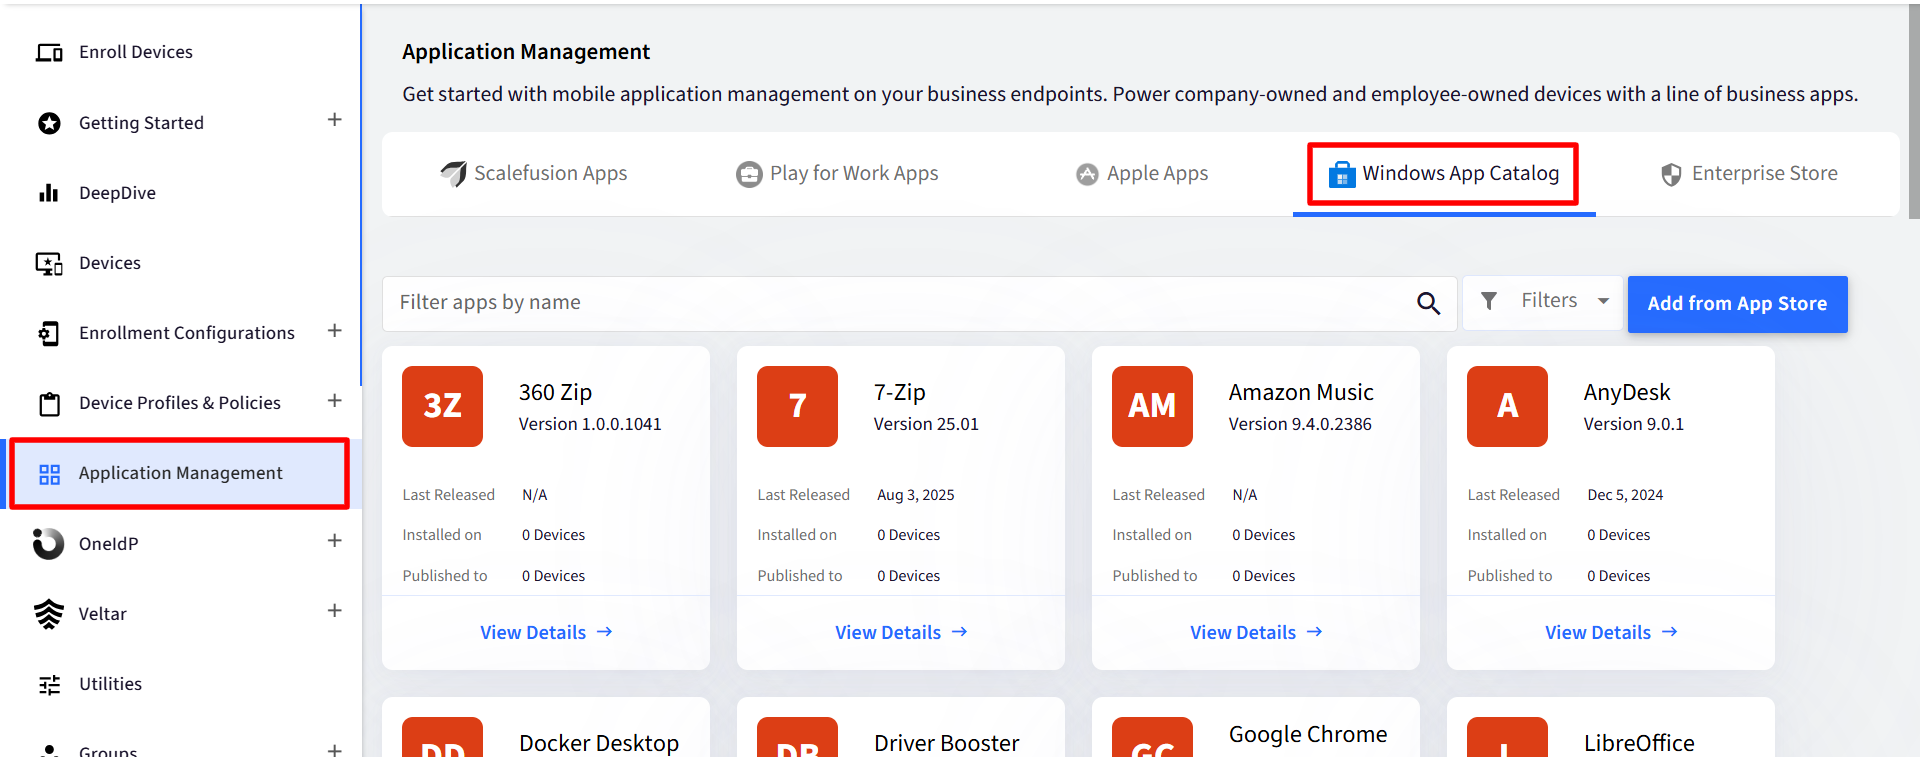
- Some of the recommended apps will be displayed as separate cards. If not, you can add the apps by clicking on Add from App Store on the right side.
Adding apps from App Store
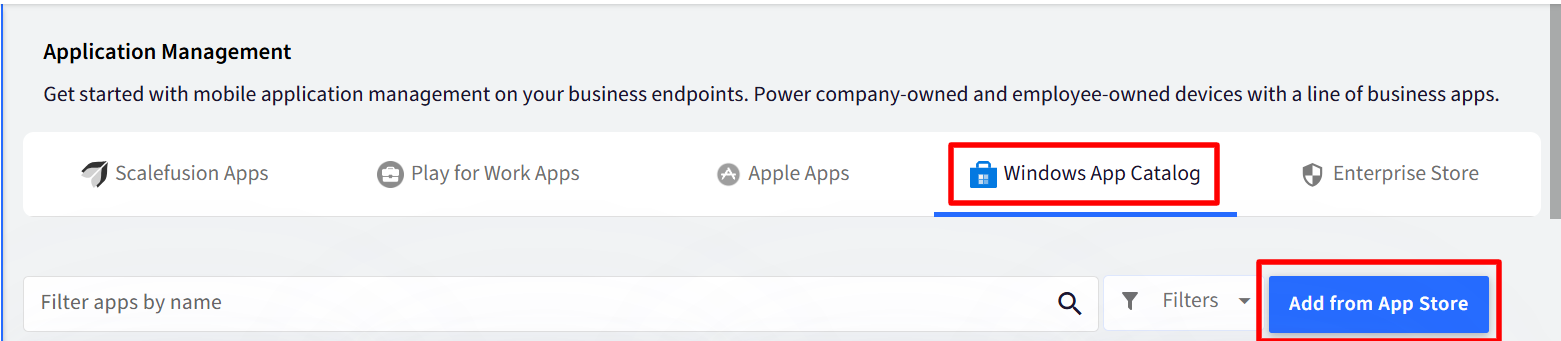
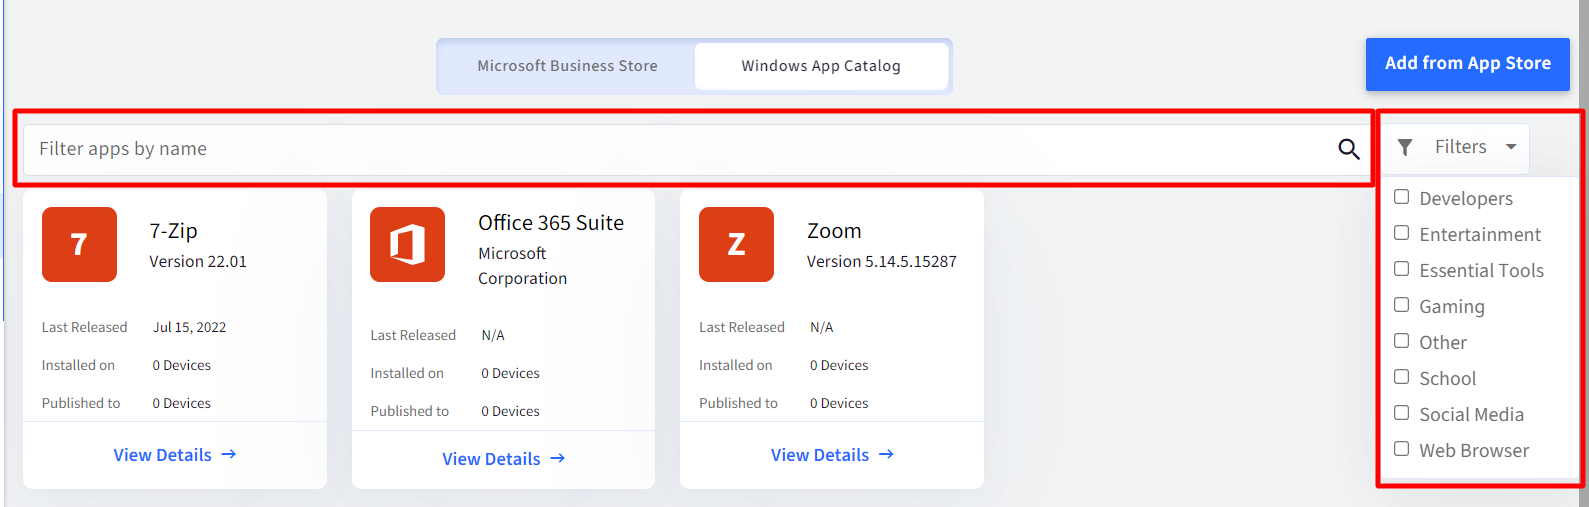
- Under Windows Catalog, click on the button Add from app store on the right.
- On the new page, search for the app you need to add by entering the app name in search box. The screenshots below show adding zoom app as an example.

- Click on View Details link below the app card. This will show the app details on the right side.
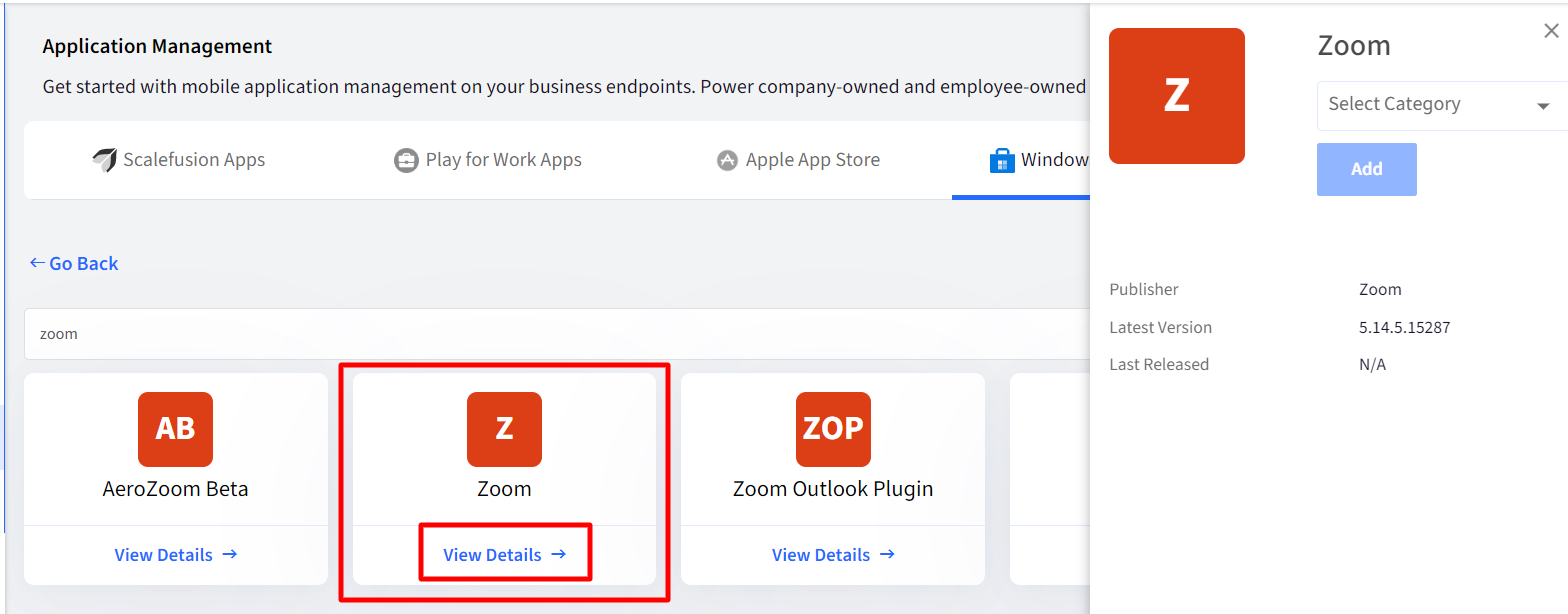
- Choose category for the app by selecting the category from drop-down below app title, on the right panel. The Add button will be enabled on choosing category.

- After selecting category, click on Add button.

- The app will be added and displayed under Windows App Catalog.
Step 2: Create Install Configurations
Now when apps are added under Windows App Catalog, next step is to create install configurations for the app. To do so,
- Click on View Details link below the app card, for which you want to create app configurations. This brings up the app panel on the right.
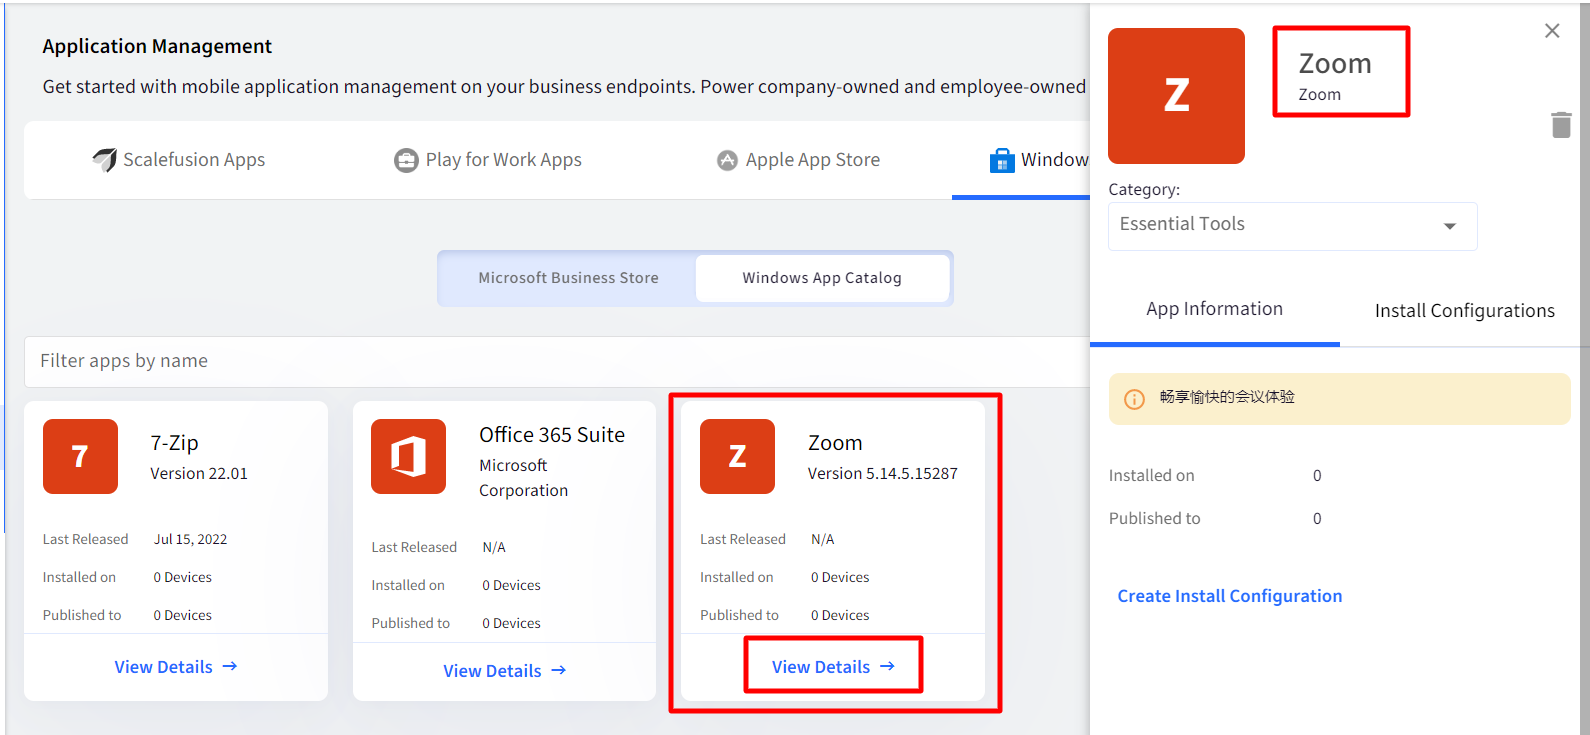
- Here, you will see two tabs, viz.,
- App Information: Contains a brief description of the app and a link to Create Install Configuration

- Install Configurations: If any configurations are created, they are listed here. It also contains CREATE link to create Install Configuration.

You can either click on Create Install Configuration button on App Information or CREATE button under Install Configurations. Both open the Configure app window wherein you specify details to create App Install configurations.
- App Information: Contains a brief description of the app and a link to Create Install Configuration
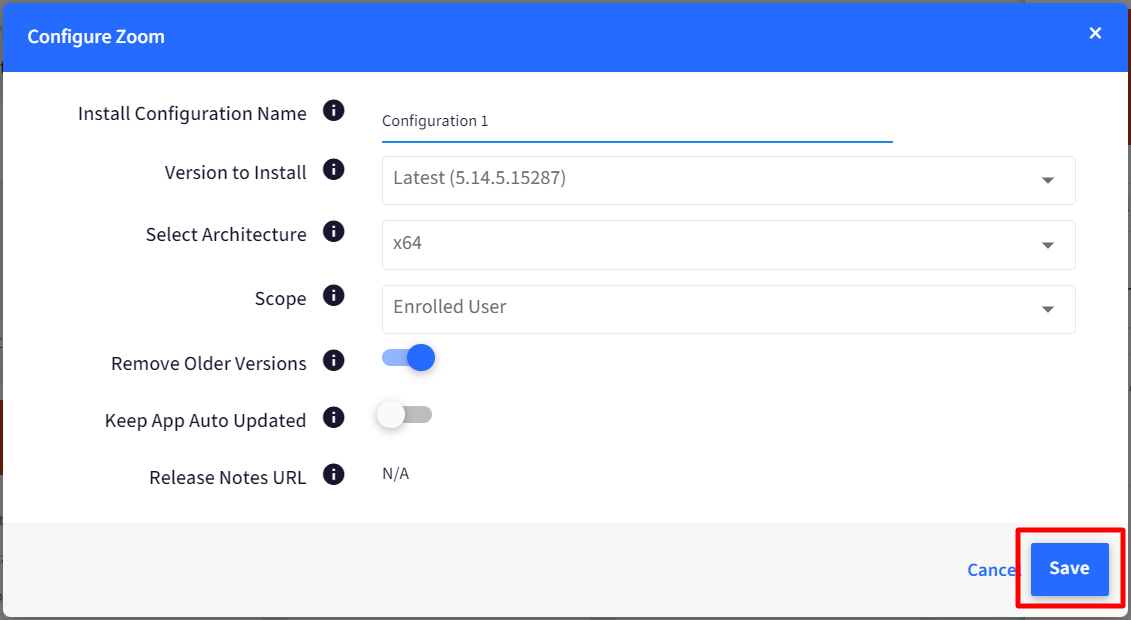
- Configurations: Clicking on create brings up the Configure App window. Following are the configurations you need to configure for the app:
- Install Configuration Name: Provide a name with which this configuration can be identified.
- Version to Install: Lists all available versions of the app. Select the version which has to be installed. If the selected version is deprecated, a message will display regarding the version being deprecated and you will not be allowed to save the configuration.
- Select Architecture: Lists available architectures based on the app version you select in Version to install. Choose whether 32-bit or 64-bit version of app is to be installed.
- Scope: Select the scope by choosing any one from the following:Scope will be populated on the basis of the selected architecture.
- Enrolled user: The app will be installed only for the enrolled user.
- Machine: The app will get installed for all the users existing on the machine.
- Remove Older Versions: Toggling this to On removes earlier installed versions of the app from the device, if present.
- Keep App Auto Updated: Toggling this to On automatically installs updated version of the app keeping it auto-updated. The dashboard will reflect the updated app. If you have installed a lower version of the app with this toggle on, then the app will be auto-updated to the latest version on the device in 24 hours.
- Release Notes URL: Displays URL of Release Notes for the app. If Release Notes' URL is not there, N/A will be displayed.
- After entering all details, click SAVE to save the configuration.
Multiple Install Configurations can be created for a single app.
Step 3: Publish App Configuration
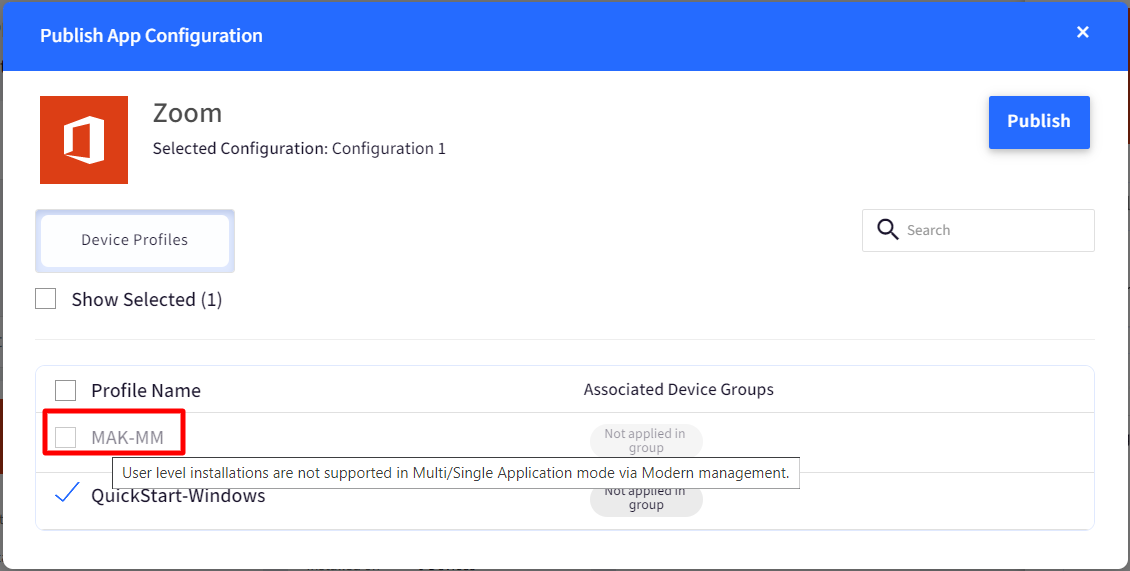
On saving Install Configuration, the Publish App Configuration window will come up. Choose the device profiles on which you want to publish this configuration and click Publish button. If you do not want to publish the configuration at this point of time, close the publish window. You can publish it later from Actions.
Publish on Device Groups
The app can be published to Device groups also if the Setting Enable Apps to be published to group with Profile is enabled in App Management Settings (Utilities > Global Settings > General Settings). In this case, the Publish dialog box will show all Device Groups under Groups tab. Device Profiles will only show profiles that are not associated with any group.
Actions on Configuration
Once configuration is created, it is listed under Install Configurations tab. Following actions can be performed on them. The actions can be accessed by clicking on 3 dots in front of configuration name: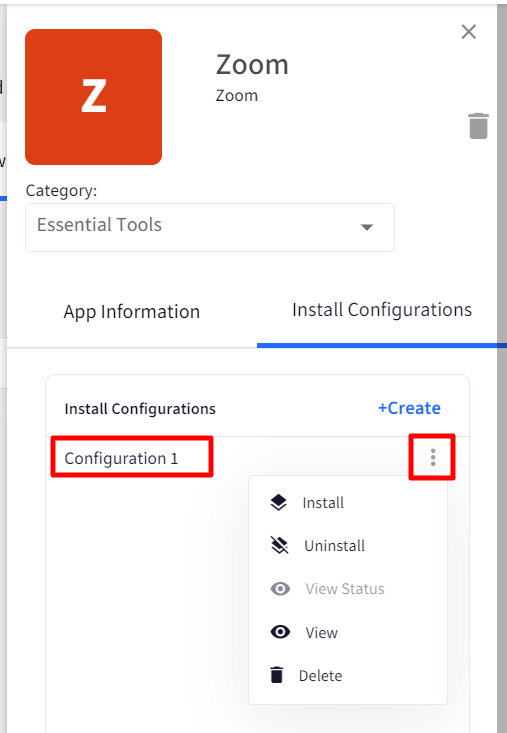
Install: This Installs the configuration to a Device Profile. Clicking on Install brings up the Publish App Configuration dialog box, where you can select the device profiles on which the App Configuration has to be published and click PUBLISH. This will push the configurations on devices and install the app.
Uninstall: It uninstalls the configuration from devices. The Unpublish App Configuration dialog box lists only those device profiles on which configuration has already been published. Select the ones from which the App Configuration has to be unpublished and click UNPUBLISH.
View Status: Shows the current status of installation of configuration across devices where it was applied. Clicking on View opens the Installed App info box where you can check the status and other details. The status is displayed under APP STATUS column. The status shows as Pending or In Progress if it is in process or displays Error if there is any error during installation.
View: View the configuration details. Clicking on View opens the View App Configuration window displaying all configuration settings you have created.
Delete: Deletes the configuration. Once you delete this app configuration, you can no longer access your app configuration settings. If you have already published a configuration on a device profile, and now you delete it, the app will still remain installed on the device with those configurations.
Device View
Once a configuration is successfully published and installed to target devices via device profiles, the app will reflect on your managed Windows devices.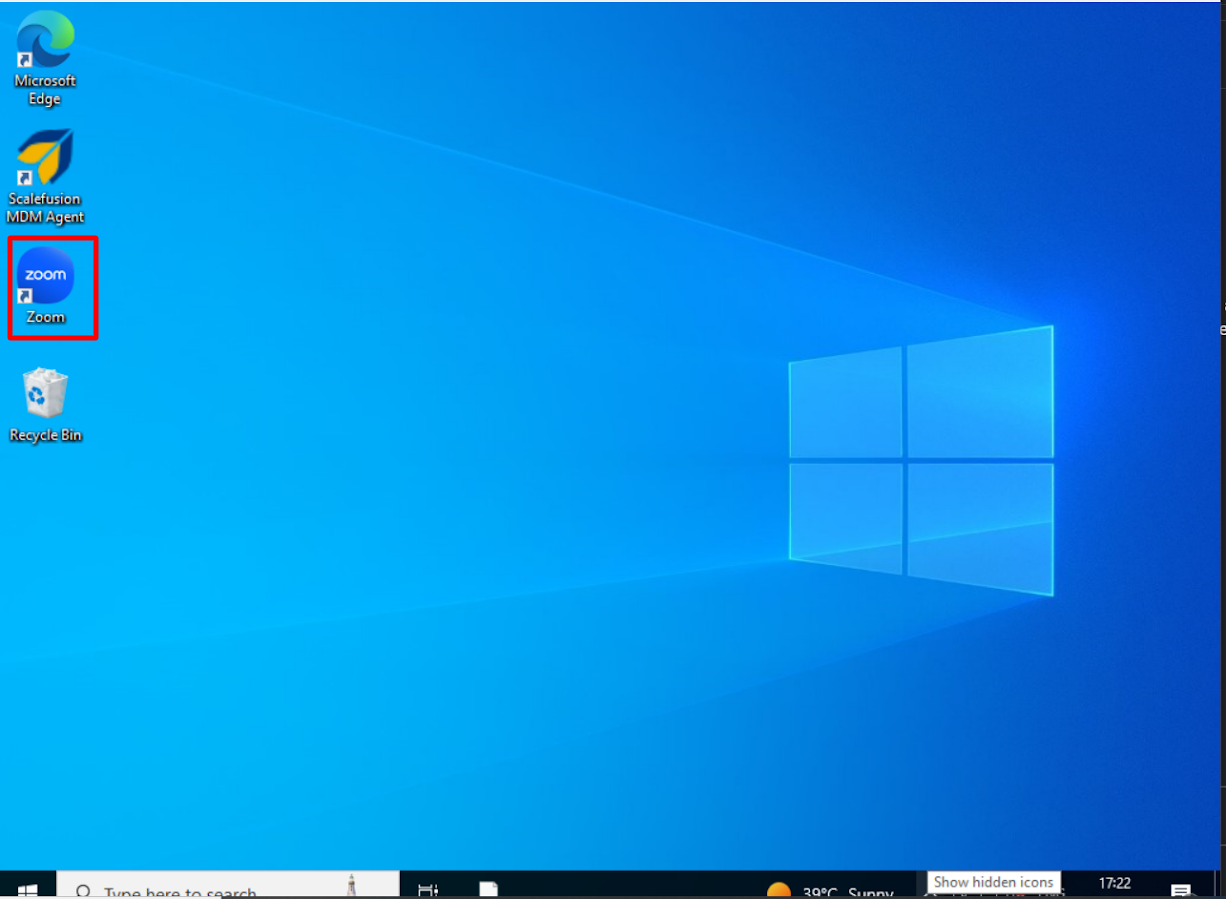
Additional actions on the apps from Dashboard
- Change Category: You can change the category of the app from Category drop-down on the right panel. To change category, select category from the drop-down and click on the right check mark.
.png)
- Search & Filter: On the app catalog page, you can filter the apps based on app name or category.
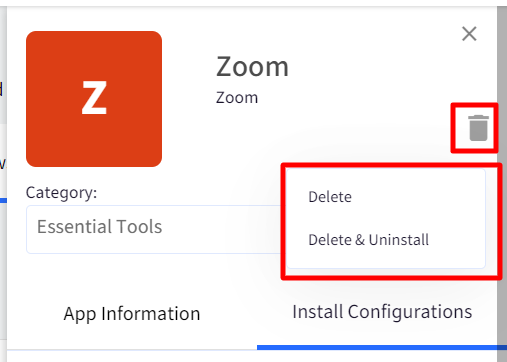
- Delete: The app will be removed from your Windows App Catalog only. It will not be uninstalled from the devices.
- Delete & Uninstall: The app will be removed from Windows App Catalog and will be uninstalled from all devices.
Reporting
The app versions of third party apps installed from Windows App Catalog can be viewed in the App Version Report.
Known Behavior
- Installation / Updation / Uninstallation of some apps may not be successful due to the interactive prompts which may appear during the process thereby impacting successful execution of the action being performed.
- A user level app cannot be installed on devices enrolled under Modern Management with Multi-App Kiosk Mode or Single App Mode. Such device profiles will be grayed out at the time of publishing the app configuration making them deselectable.