Scalefusion's WiFi configuration feature helps you create a Wi-Fi network that can then be pushed to the devices so that the Wi-Fi network is automatically configured on them.
In this guide, we will see how to create a Wi-Fi configuration on Scalefusion Dashboard and then apply it to Android Device Profiles.
Before You Begin
- Android Device Profile should be created
Wifi Configuration
Creating a Wi-Fi Configuration
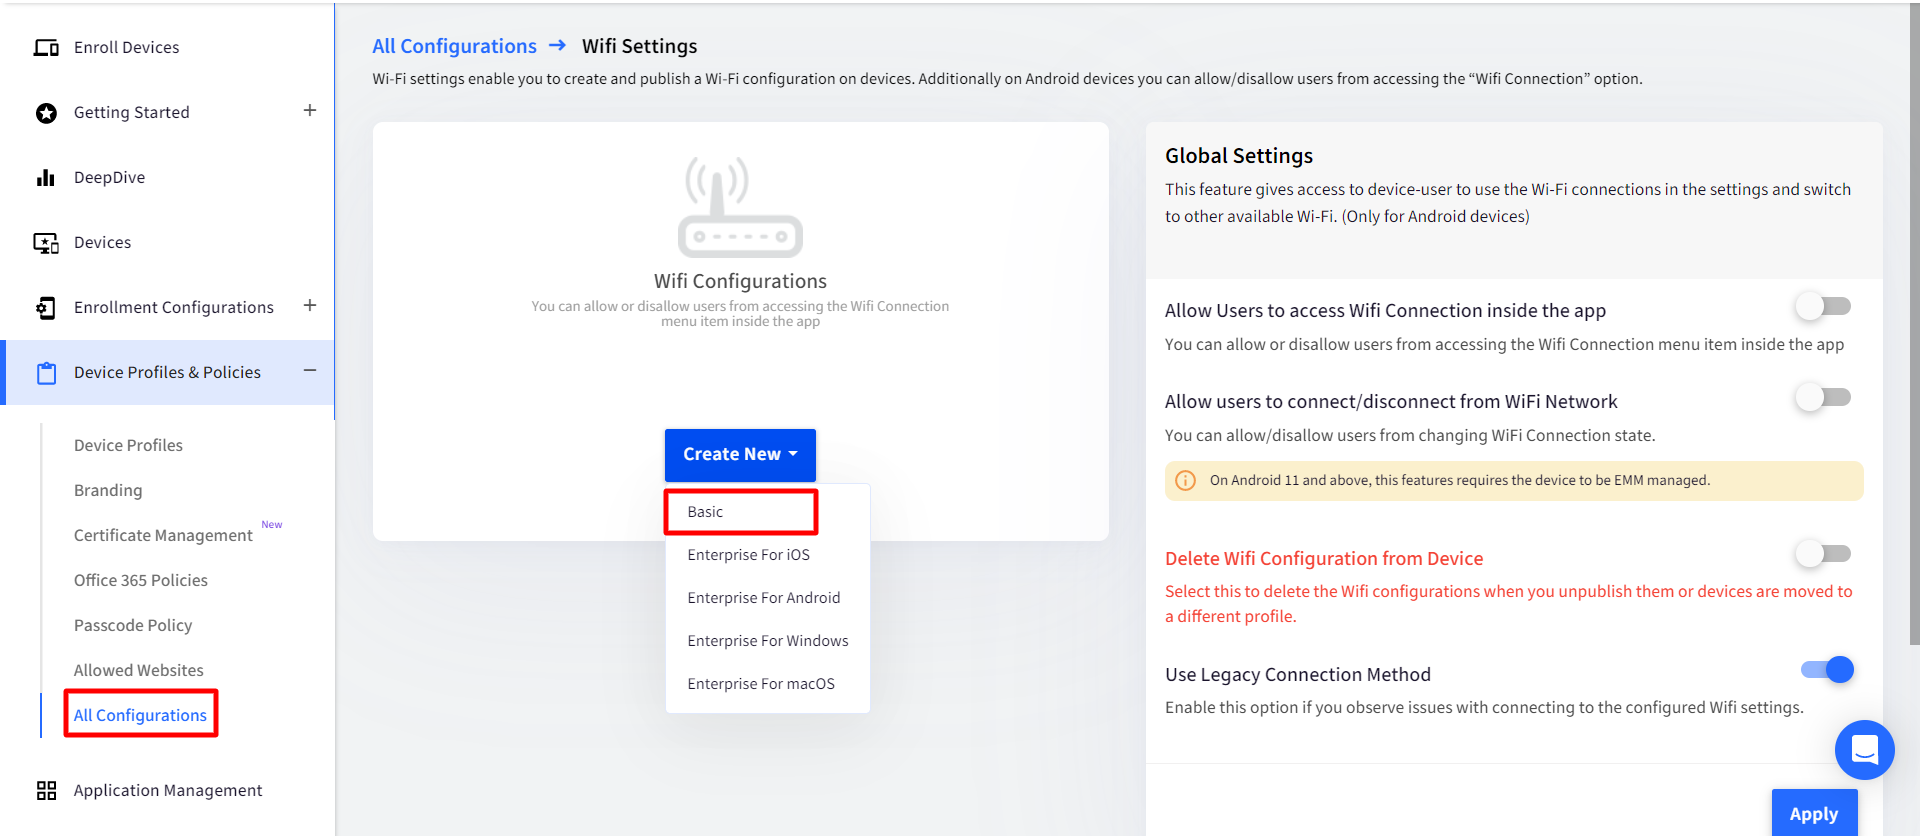
- On the Scalefusion Dashboard, navigate to Device Profiles and Policies> All Configurations> Wifi settings. This screen displays all the Wi-Fi networks that you have created till now. Click on CREATE NEW > Basic to create a new Wi-Fi configuration.
- The Wi-Fi Configuration window is displayed with the following fields,

- Name: Enter a name for this configuration to refer to it across the Dashboard.
- SSID: Enter the SSID broadcast name for the Wifi.
- Hidden Network: Enable this if the network is hidden.
- Security Type: Select a Security Type from None, WEP, WPA/WPA2 PSK, 802.1 x EAP. If you select None, the device won't ask for a password to connect to this Wifi configuration.
- Password: If the security type is WEP OR WPA/WPA2 PSK, the password field will be visible and you can enter the password required to connect to this Wi-Fi here.

- Proxy: A proxy is used to give access to a few websites to the user connected to a Wi-Fi network. There are two types of proxy: Manual and Automatic
- Manual: For manual proxy settings, enter the following values :
- IP address
- Port no
- Bypass proxy for (Optional): The URLs mentioned here will be bypassed even after Proxy settings are applied.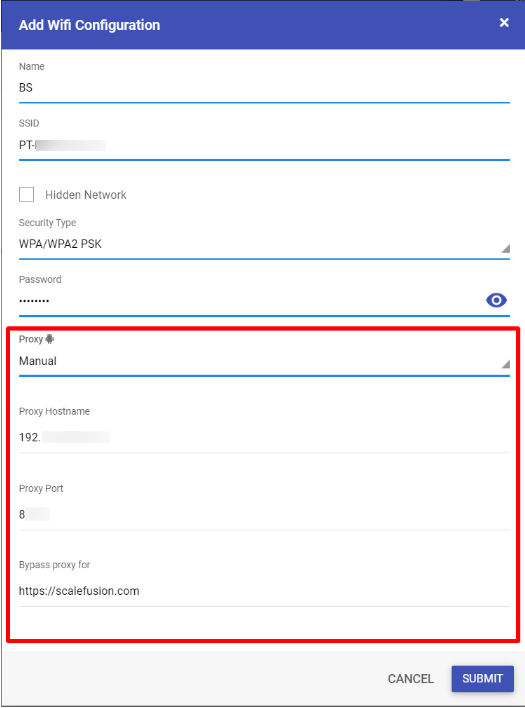
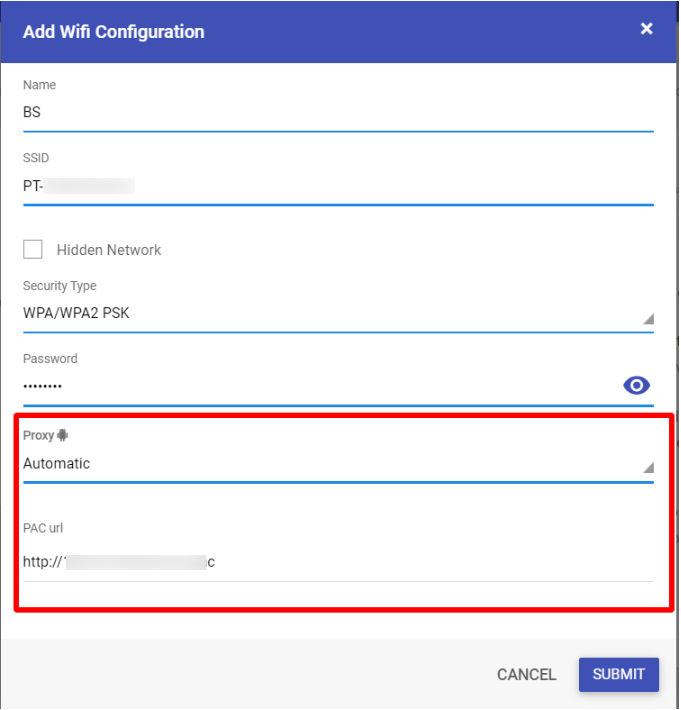
- Automatic: For the Automatic proxy setting, enter the URL where the PAC file is hosted. Pac file has all the proxy settings, which are set by admin.
 These proxy settings are applied to devices connected to the same WiFi configuration.If proxy values are invalid/not working on the device then the system admin needs to fix it. The Proxy setting values that are sent from the dashboard to the device can be checked on the device by going to System Settings > Wifi > Connected Wifi > Proxy settings.Internet will be lost on the device if the invalid proxy is set on it, and the device will receive no further pushes until settings are corrected on both the dashboard as well as the device.
- Manual: For manual proxy settings, enter the following values :
- Disable MAC Randomization: Enable this option to disable MAC randomization when device joins Wi-Fi network.Note:This feature is supported for Android EMM devices running OS version 13 and above.

- Once you have entered the relevant details, click on SUBMIT to save the configuration. The configuration will start appearing in the list of Wifi configurations.
- If Disable MAC Randomization option is enabled, then a new status Randomized is shown as N/A.

- If Disable MAC Randomization option is disabled, then the Randomized address is shown in the Full device information.

- The same statuses will also be shown in the Device Inventory report.

- If there is no Wi-Fi configuration applied, then a default Mac address (02:00:00:00:00:00) is shown, and sometimes it's possible that a correct Mac address will be shown.

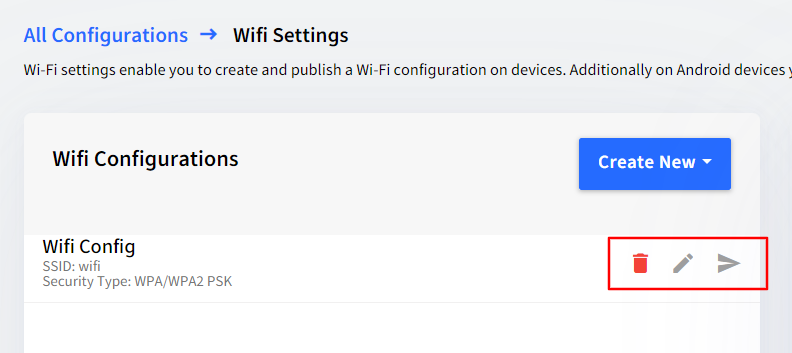
Additional Actions
You can perform the following actions once Wifi Configuration is created:
- Publish: Click on the Publish button and select Android Device Profiles and Devices to directly push the configuration.
- Edit: This opens the 'Update Configuration' window where you can edit the existing Configuration
- Delete: Deletes the Wifi Configuration
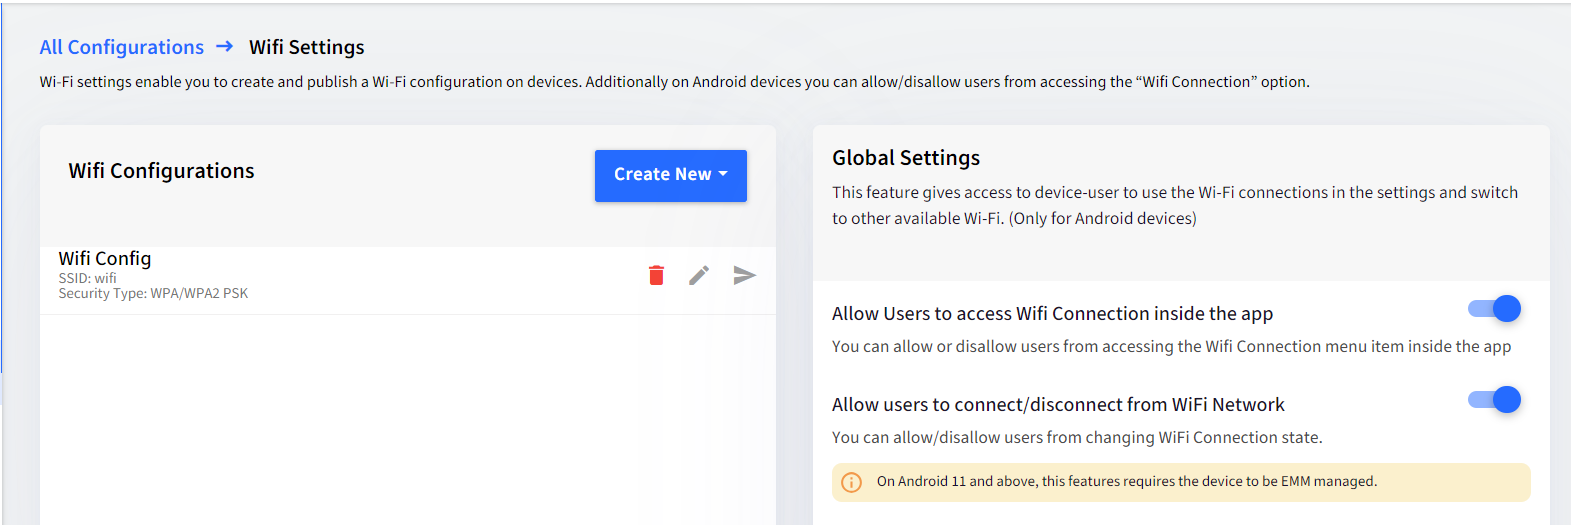
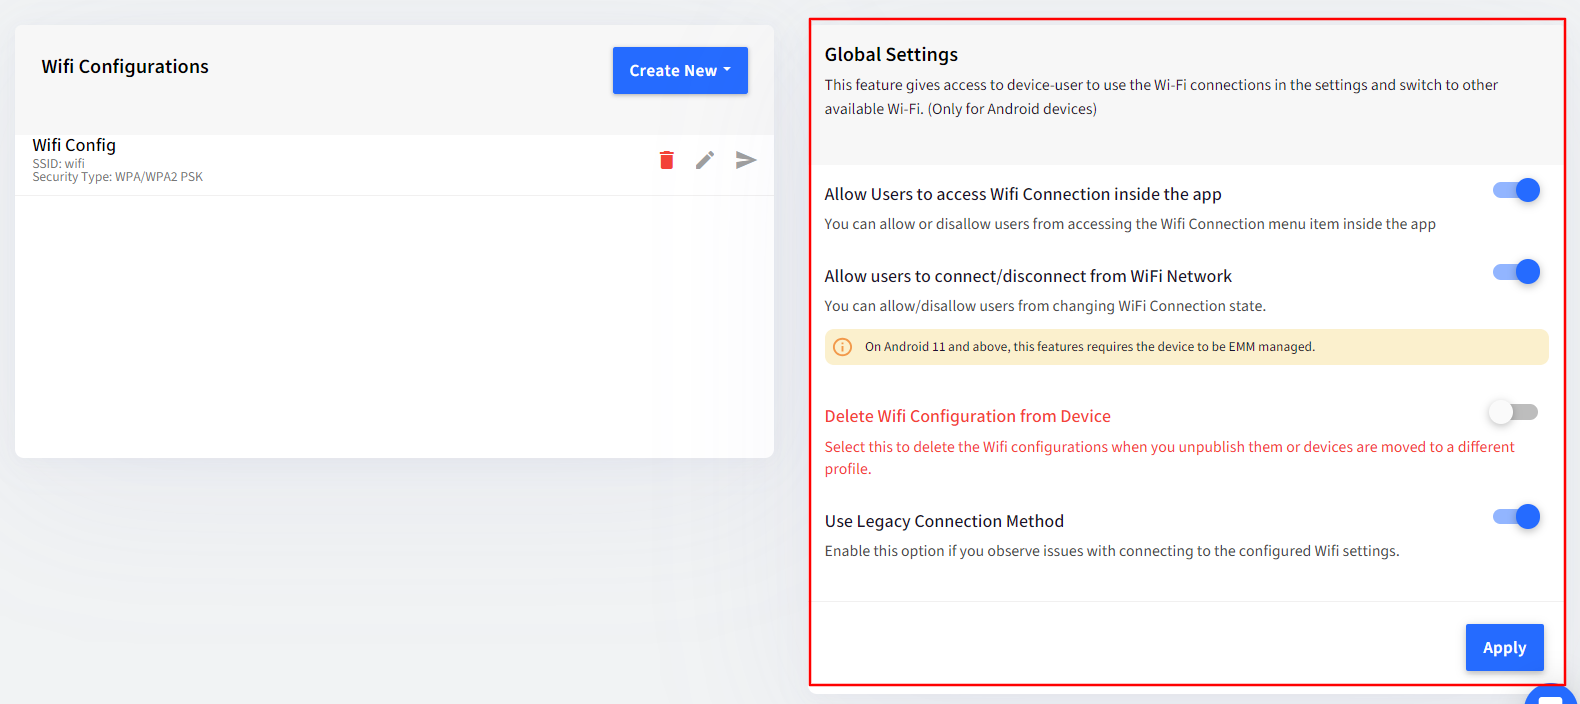
Global Settings
There are also some Global Settings through which you can give access to the device-user to use the Wi-Fi connections and switch to other available Wi-Fi
| Setting | Description |
| Allow Users to access Wi-Fi connection inside the app | If enabled, this setting allows the user to access a Wi-Fi connection from inside the Scalefusion app. |
| Allow users to connect/disconnect from WiFi Network | Once enabled, users are allowed to connect or disconnect from the WiFi network |
| Delete Wifi Configuration from Device | Deletes Wi-Fi configuration from the device. Select this to delete a Wi-Fi configuration when you unpublish it from the device or devices are moved to a different profile. Admins should use this option with caution as it will delete the configured Wi-Fi from the device, and the device may be disconnected |
| Use the Legacy Connection Method | Allows you to use the Wi-Fi connection method from the Settings on your device. Enable this option if you observe issues with connecting to the configured Wi-Fi settings. |
To apply Global settings, click the Apply button after making selections.
Applying WiFi Configuration on Android Device Profile
Now that the Wi-Fi configuration is created, it can be applied to the Android Device Profile(s) and hence get configured on the devices on which the device profile is applied. Follow the steps below,
- Navigate to Device Profiles and Policies section.
- Launch the Device Profile Wizard by clicking on CREATE NEW PROFILE or select an Android Device Profile and Edit it from the action panel.
- Navigate to Restrictions > Network & Location settings > Wifi Settings and select the Wifi configuration that you have created.
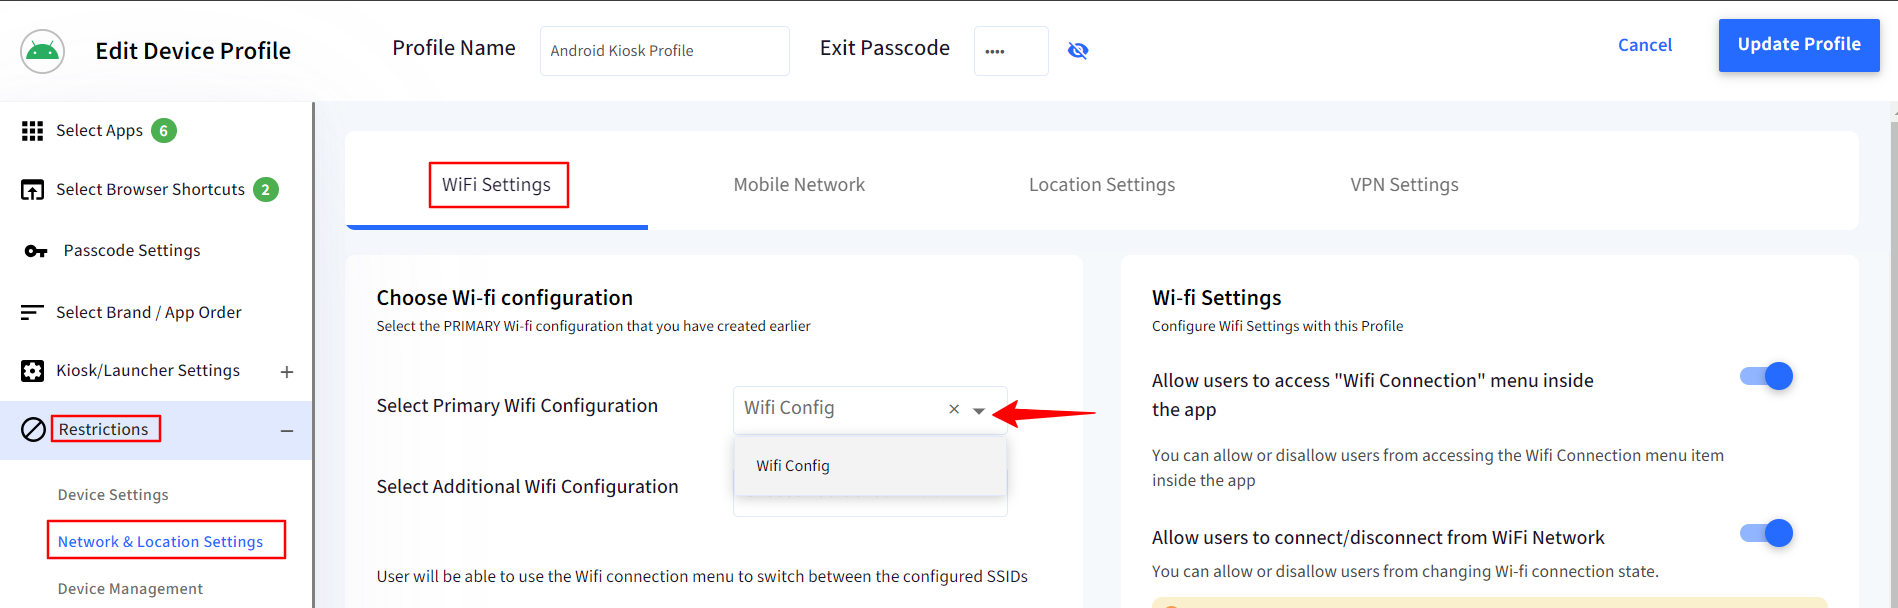
- You can select Primary and additional Wi-Fi configurations on this page so that they are remotely configured on the device. Depending upon the network signal and strength, Android chooses which Wi-Fi to connect automatically.
- Click UPDATE PROFILE to save the changes to the device profile.
The Wi-Fi configurations will be applied to the devices on which this Device Profile is applied.