The usage of OneIdP is widely recognized in the management and generation of user accounts. This document provides a detailed explanation of the user management procedures using OneIdP.
Pre-requisite
- Directory should be set up on Scalefusion Dashboard from Directory.
Add User(s)
Users can be added to OneIdP directory from two places on Scalefusion Dashboard:
- Directory: Click on Add User icon in front of the directory in which you want to add user
- User Enrollment: Add a user from User Enrollment (Enrollment Configurations > User Enrollment)
Add Users from Directory
- Click on Add Users from the three dots in front of the directory name.
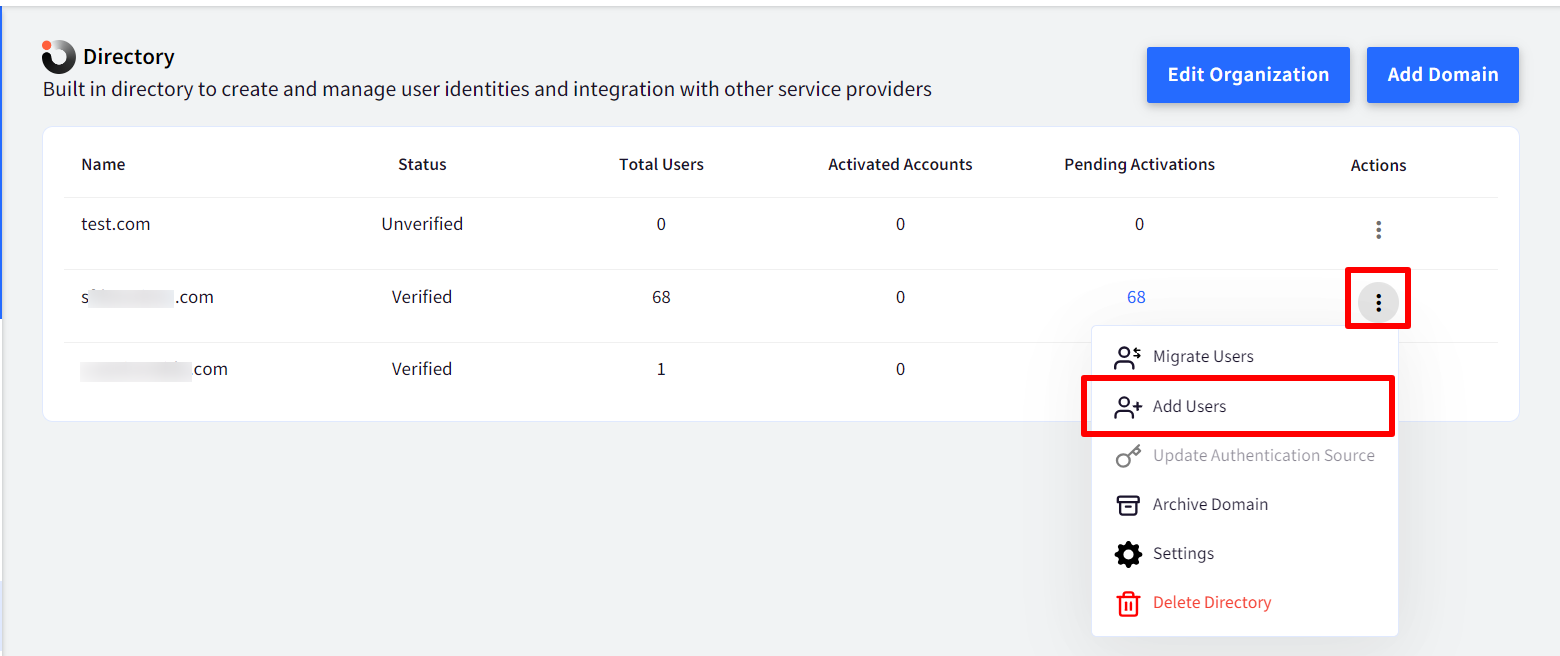
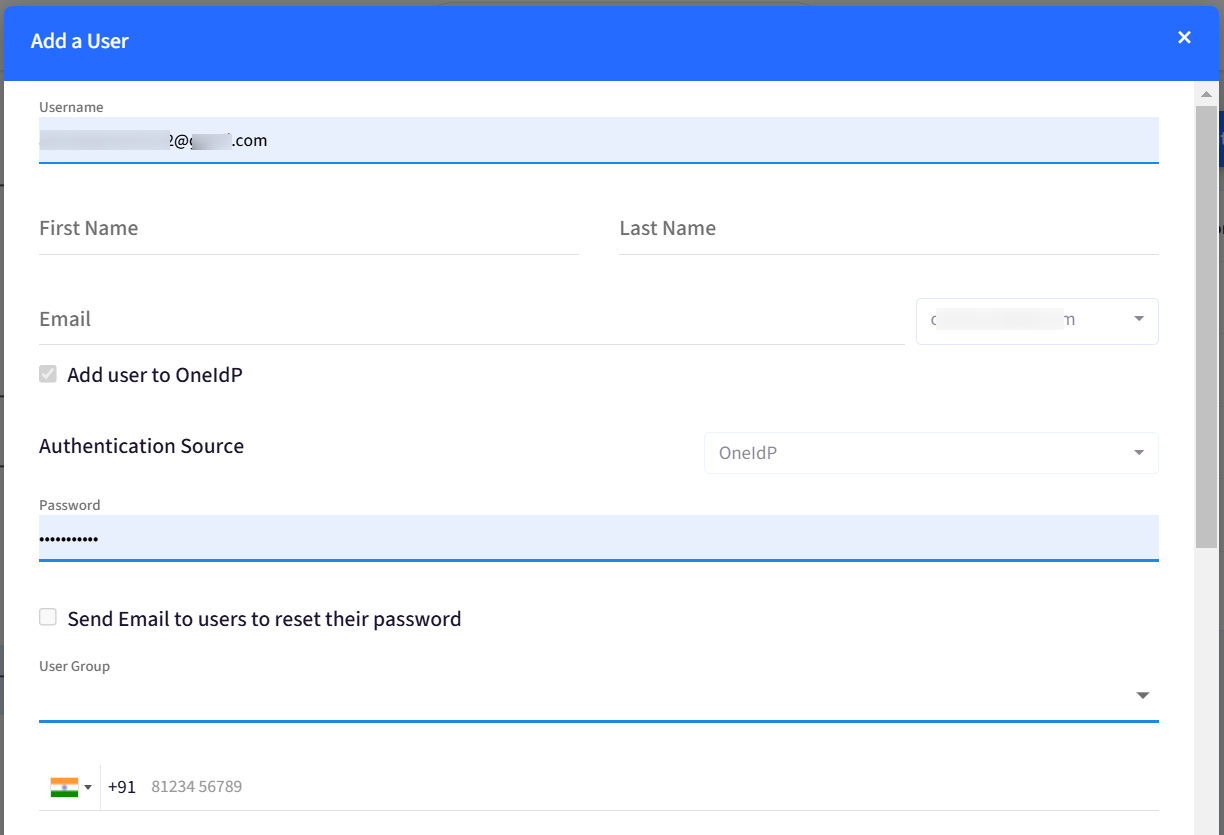
- This will bring up the Add User dialog box. Enter the following:
- Username: This will be pre-filled with the account details with which you sign in on Dashboard. You can change this
- First Name and Last Name: Enter the First Name and Last Name of userIt is mandatory to provide First & Last Name if the following conditions are met:
- The setting Create Users in Google Workspace based on users management actions in Scalefusion, is enabled while creating SSO Configuration for Google Workspace
- Add User to OneIdP is enabled
- Email: Enter the email. The email address will be appended with the directory name you have created. You don't need to enter @ character while adding email.
- Add user to OneIdP: Enabling this will migrate a custom domain user to OneIdP directory. This checkbox will be disabled for a default domain (*.oneidp)
- Authentication Source: Select the authentication source for the user. You can select authentication source if the following condition is met:
- Federated Authentication is enabled in OneIdP Directory Settings for the domain
- Password: Provide a password which will be used to sign in on the device
- Enter other required details and click Add
Add Users from User Enrollment
- On Scalefusion Dashboard, navigate to Enrollment Configurations > User Enrollment
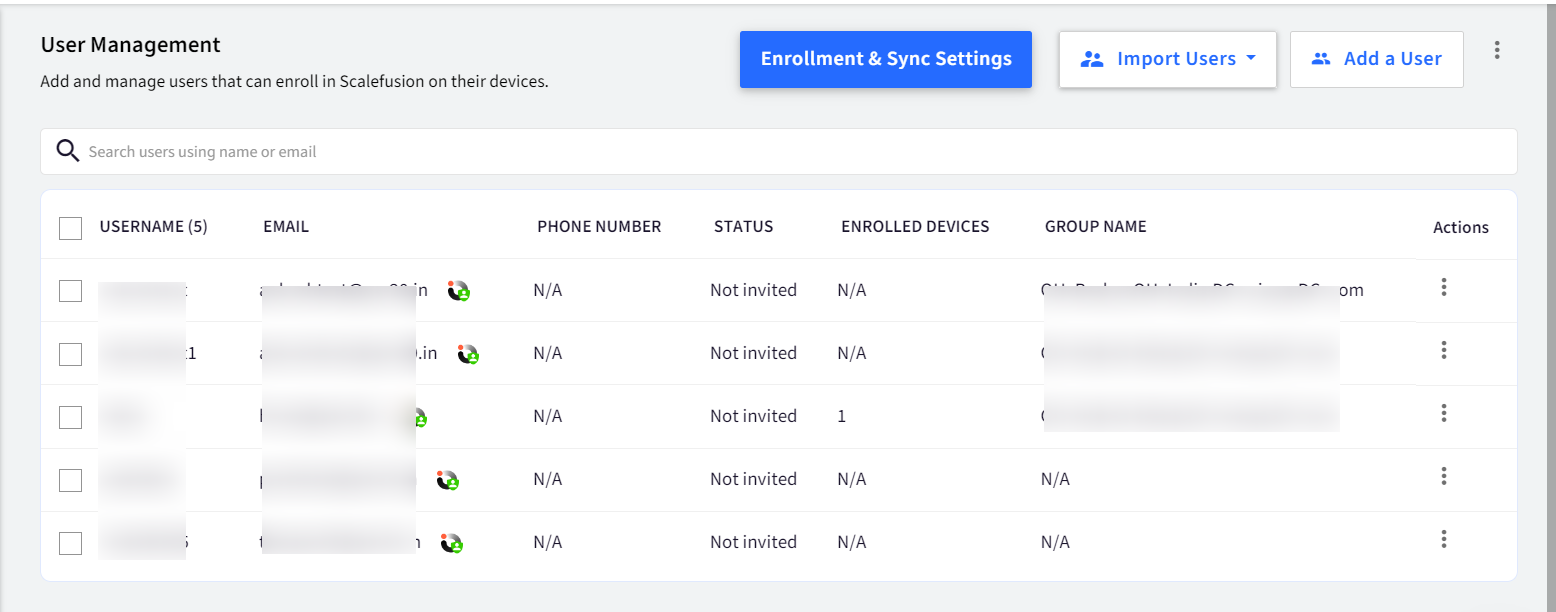
- Click on Add a User button

- This will bring up the Add User dialog box. Enter the following:
- Username: This will be pre-filled with the account details with which you sign in on Dashboard. You can change this
- First Name and Last Name: Enter the First Name and Last Name of userIt is mandatory to provide First & Last Name if the following conditions are met:
- The setting Create Users in Google Workspace based on users management actions in Scalefusion, is enabled while creating SSO Configuration for Google Workspace
- Add User to OneIdP is enabled
- Email: Enter the email. In the drop-down next to email, choose oneidp / custom domain you have configured in Directory. The email address will be appended with the directory name you have created.
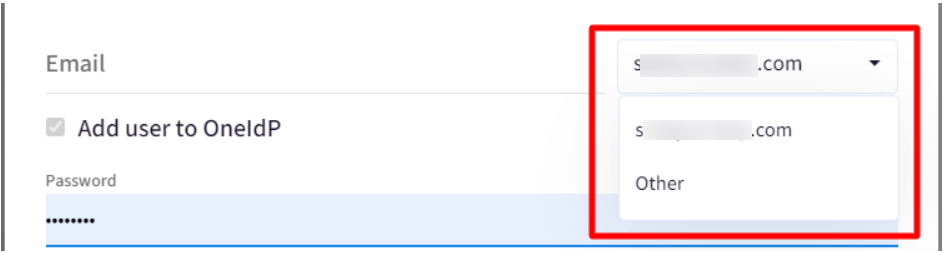 For directory domain, you don't need to enter @ character while adding email. It will get automatically added.
- Add user to OneIdP: Enabling this will migrate a custom domain user to OneIdP directory. This checkbox will be disabled for a default domain (*.oneidp) and Other user.
- Authentication Source: Select the authentication source for the user. You can select authentication source if following conditions are met:
- Add user to OneIdP (above) is enabled
- Federated Authentication is enabled in OneIdP Directory Settings for the custom domain
- Password: Provide a password which will be used to sign in on the device. If it's a user belonging to custom domain, password is not required as it is set from respective domain.
- Enter other required details and click Add
- The user will be created and displayed in list of users.Users created with OneIdP (default domain) will be indicated with a oneidp logo next to email.
Actions on OneIdP users
Following actions can be performed on OneIdP users: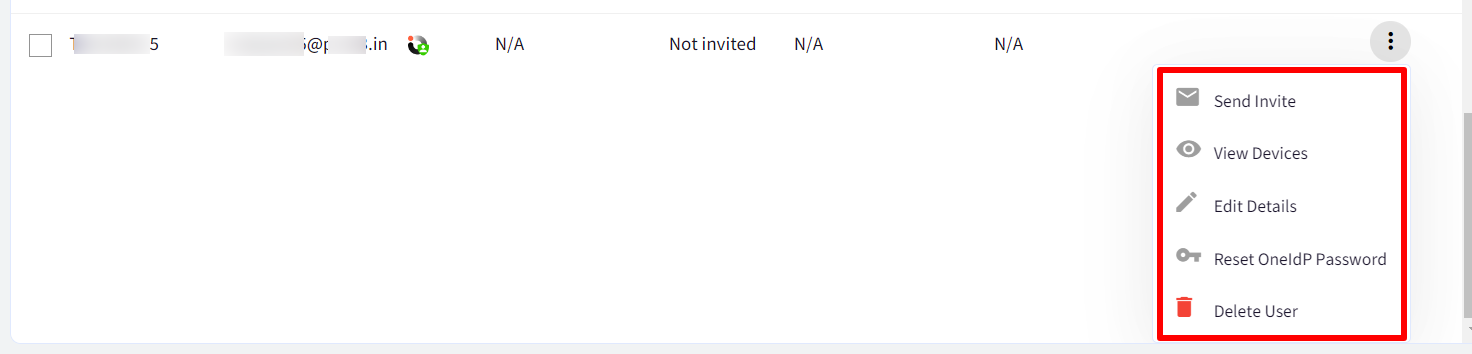
- Delete User: Deletes the user from User Management
- View Devices: View the devices enrolled with the user
- Edit Details: Edit user details. Email and password cannot be edited from here.
- Reset Password: Resets the password of a OneIdP user. On resetting the password, the users will not be logged out from their managed devices. When they login next, they will be required to enter the new password. Clicking on the Reset Password brings up Reset password dialog box. Enter the new password and click Reset password button.If a user has been configured to authenticate with a domain which is on OnPremise connector, you need to reset the password using OnPremise Active directory
The next documents explain the enrollment of devices and how users (created via OneidP) are authenticated in the process.