Do you want to perform the following actions on your Windows devices using one single tool?
- Allow the execution of multiple files in one go.
- Specify the order in which the files should be executed.
- Check the file, folder, registry, or service before and after execution.
- Pass command line arguments for each file.
- Configure post-execution actions such as logging off or restarting the device.
All of these features are now available with the advanced Scalefusion Windows Deployer. The deployer does not need to be installed on the end user's machine. The IT admins can simply add files, configure properties, bundle them all together, compile and push onto the user's devices in one go, remotely.
This document explains the steps to be followed to have the files executed on end users' devices using Scalefusion Windows Deployer.
Supported files using Scalefusion Windows Deployer
- Executables like .msi, .exe, .ps1, .bat, .cmd can be added to the tool.
- Non-executable files like png, doc, pdf can also be added to the tool.
Overview
Following are the steps to be followed to execute the files:
Step 1: Install and add the files to the Scalefusion Windows Deployer
Step 2: Define the order of files
Step 3: Define Properties: Pre/post execution checks, actions post failure, Provide Command Line Arguments etc.
Step 4: Generate self extractable exe by compiling all the files into one exe.
Step 5: Upload the exe on Scalefusion Dashboard through Enterprise Store and publish on Device Profiles
All the steps are explained in detail below.
Pre-requisites
- Scalefusion Windows deployer's latest version should be installed
- Latest version of Scalefusion MDM agent (agent app for Windows) should be installed on the end user's device.
- File paths and command line arguments should be known to the IT admin.
- You should be subscribed to Scalefusion Enterprise Plan
Steps to execute
Step 1: Install and add files to Scalefusion Windows Deployer
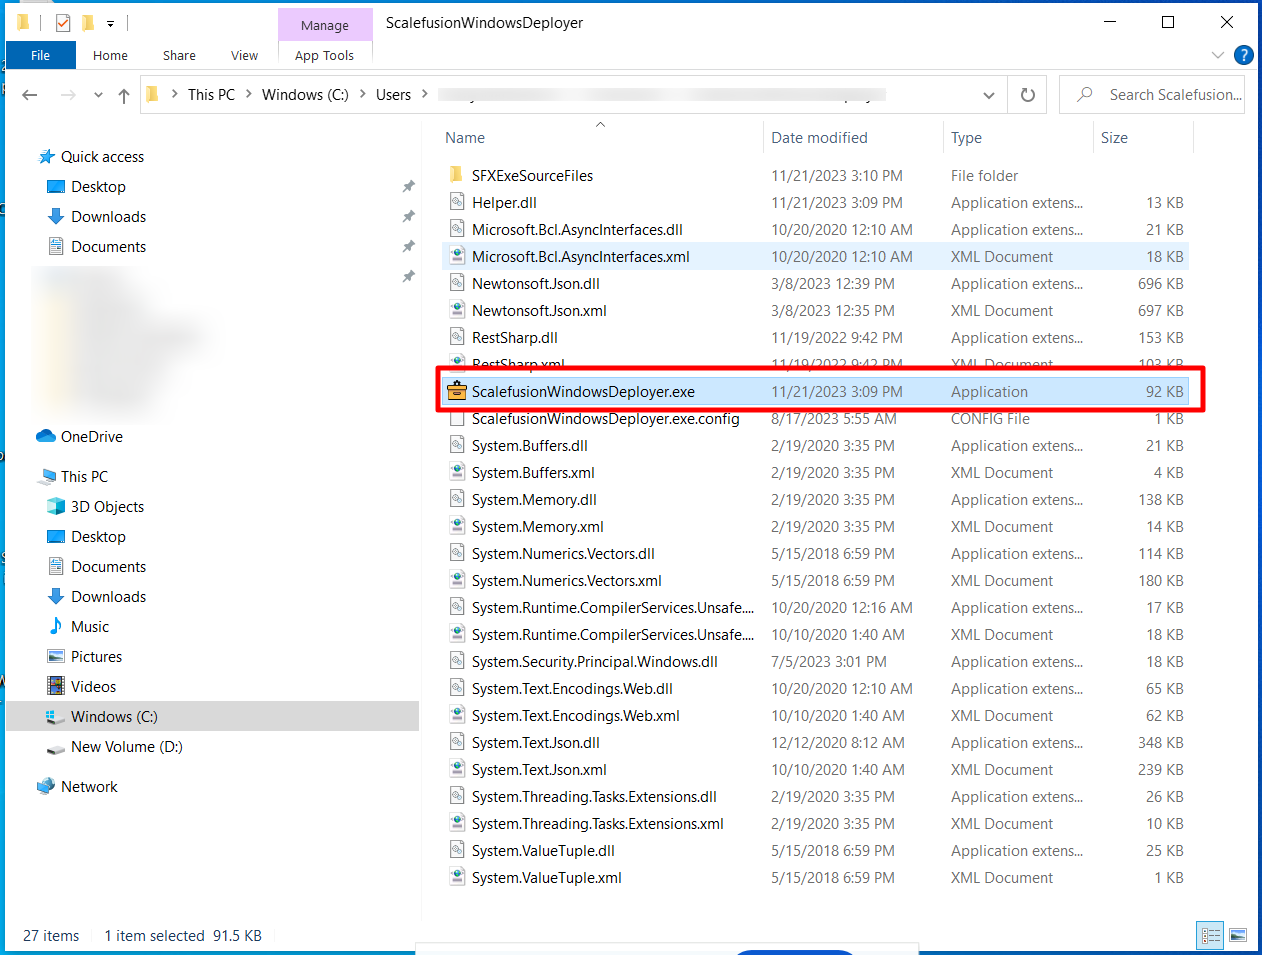
- Double-click on the Scalefusion Windows Deployer exe to open it on your machine.
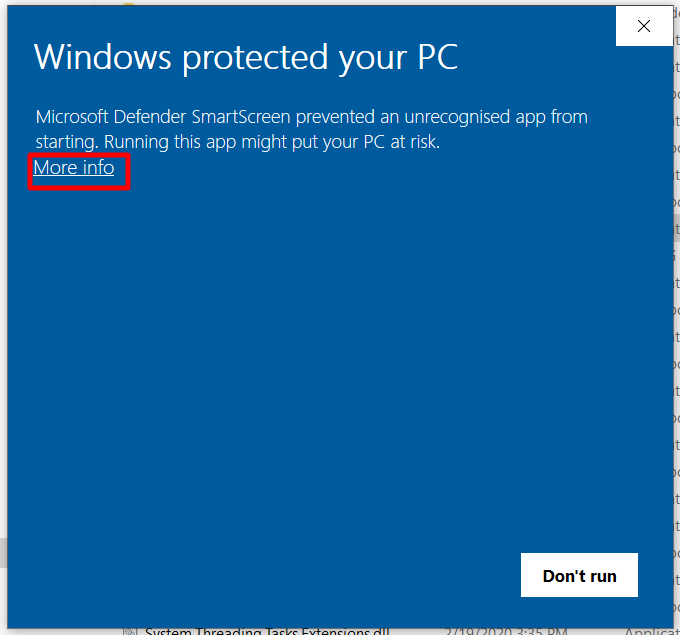
- You will get the following window. Click on More Info
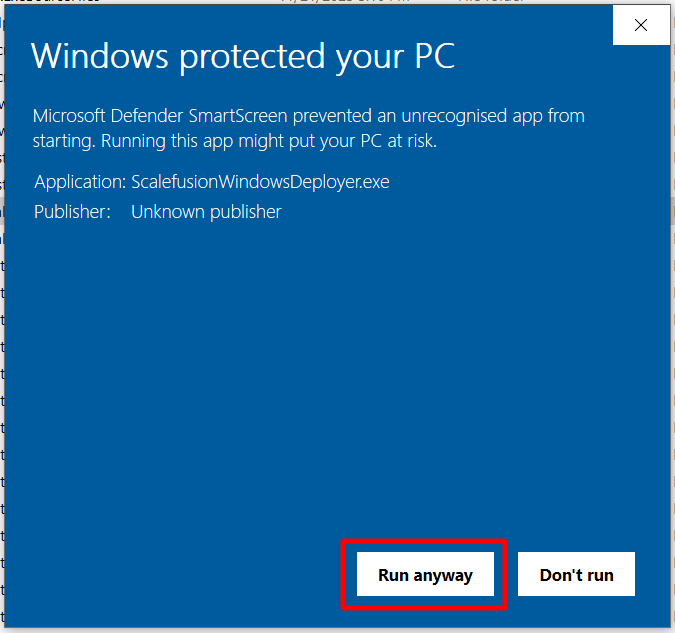
- Now, click on Run anyway
- Open the Scalefusion Windows Deployer application. You will get the login window.
- At the login screen enter the following details and click Login,
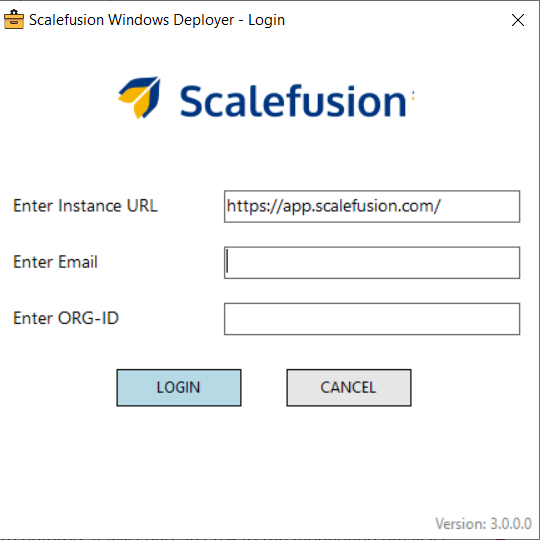
- Instance URL: https://app.scalefusion.comNote:If you are using Scalefusion's India Instance, Server URL will be https://in.scalefusion.com
- Email: The email that you use to sign in to Scalefusion Dashboard.
- Org-Id: The organization Id. This can be taken from Getting Started > Organization Info on Scalefusion Dashboard.
- Instance URL: https://app.scalefusion.com
- After entering all the details and clicking Login, you will receive an OTP (One Time Password) on the email id you mentioned above.
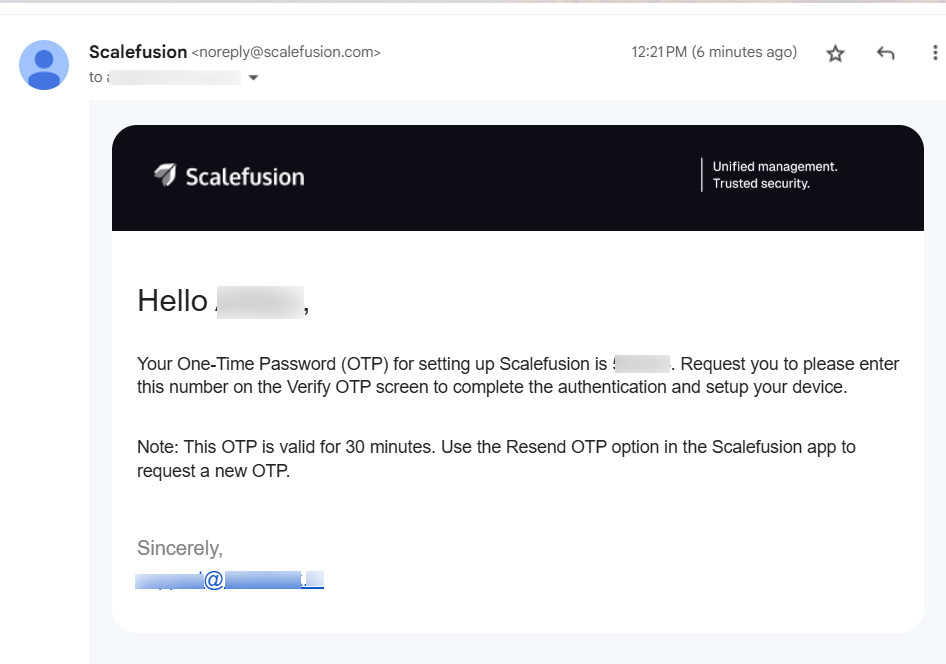
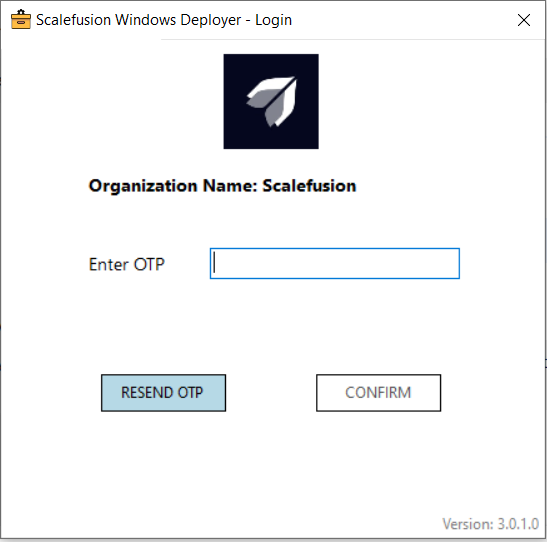
- Enter the OTP on the following screen and click on Confirm to complete the authentication.
- The Deployer wizard window will open

- The Deployer wizard mainly has following sections:
- Section listing files to be executed
- Actions:
- Select Files: Select the files to be added
- Properties: Define properties (pre/post execution etc.) for each executable
- Clear List: Clears the list of files
- Delete: Deletes the selected file from the list of executables
- Move Up/Down: Lets you define the order of execution on the device
- Exe settings: Here you can provide the extraction folder path where the compiled exe will reside, an icon for the self extracted file, global admin credentials, define the action post execution
- Compile SFX Exe: Compiles and generates a self executable file, once you have added the files and defined properties.
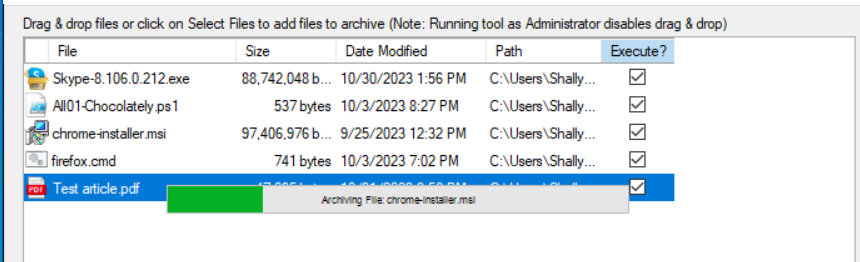
- To add files, click on Select Files button on the right in Scalefusion Windows Deployer window.

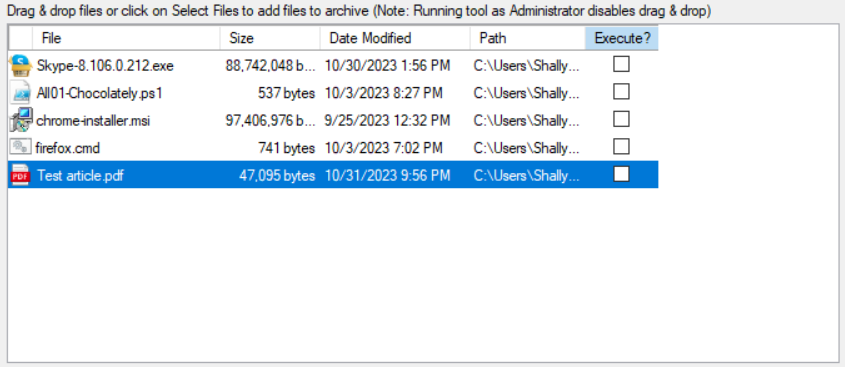
- Select the executable file(s) one by one from the location where it is stored on your machine, and click Open.
- The file(s) will be listed inside Scalefusion Windows deployer wizard. You can also drag & drop the files.
Step 2: Define the order of files
Define the order in which you want the files to be executed on the end user's device. This can be done using Move Up / Move Down button which moves the selected file up or down. The order in which the files are listed in Scalefusion Windows deployer wizard, will be the sequence in which they will get executed where the file on the top will be executed first.
Step 3: Define Properties for the files
To define properties for any file to be executed,
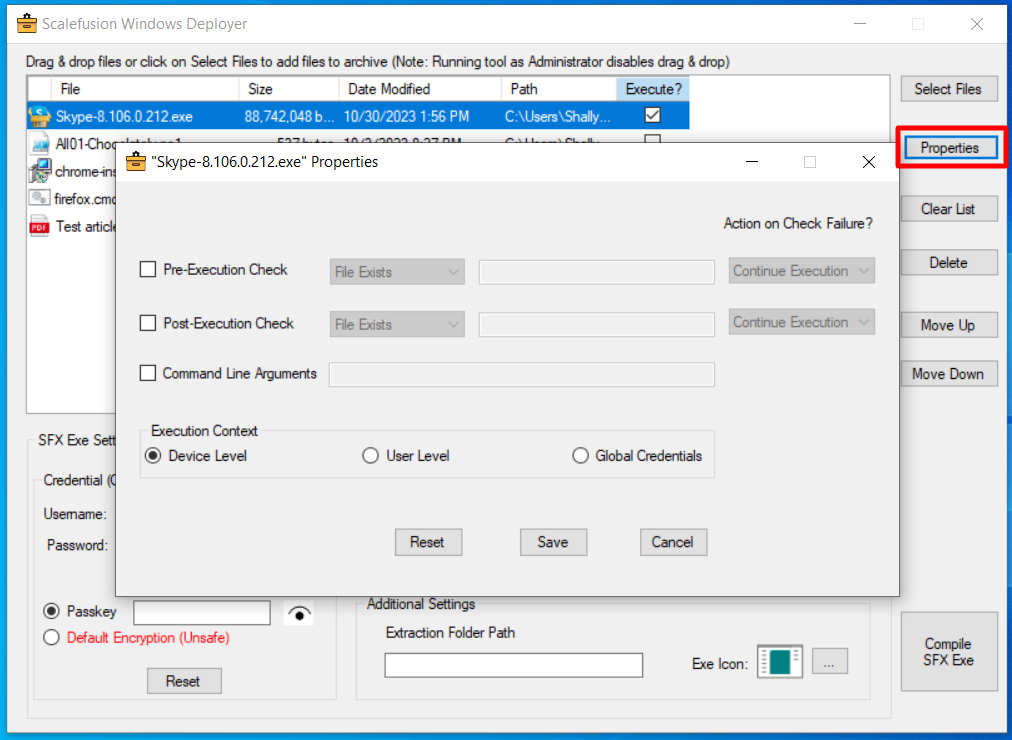
- In the Scalefusion Windows Deployer, check the Execute button in front of any file to enable Properties button on the right.

- Click on Properties. This will launch the Properties dialog.
 Important Points:
- Double-clicking on the file also opens Properties dialog
- The Properties dialog will launch only when you put a check on Execute indicating that the file has to be executed.
- Properties can be defined for exe, ps, msi, cmd, batch type of files, not for doc or pdf files.
- In the Properties dialog, define the following:
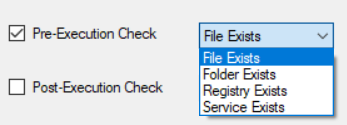
- Pre-execution check: Configure one of these validations to check if File/Folder/Registry/Service exists. To configure, put a check in front of Pre-execution check. This will enable the drop-down where you can select the validation you want to perform. In the text field next to it, provide the path of file/folder/registry/service.
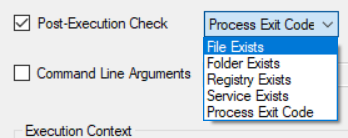
- Post-execution check: Similar to pre-execution, same validations can be configured post execution.
Validations Description File Checks whether the file exists. Provide the path of file 
Folder Checks whether the folder exists. Provide the path of folder 
Registry Checks whether the registry exists. Provide the Registry key, Value name and Data 
Service Checks whether the service exists. 
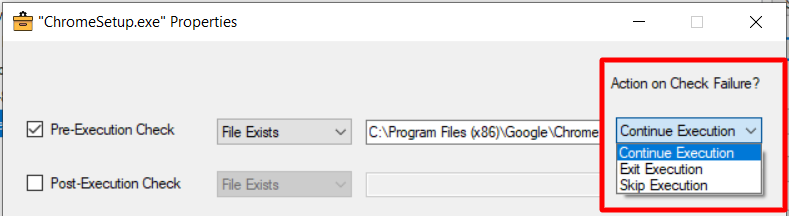
Process Exit Code (Post execution) The default value for process exit code is 0 which is treated as success, for any other value it is treated as failure. - Select Action on Check Failure: Select the action to be performed if the validation (configured above for pre or post execution) fails. The options are:
- Continue execution: It will continue the execution of next set of files.
- Exit execution: It will break the execution and will not continue the execution of any of the further files.
- Skip execution: It will skip the execution of currently selected file and move to next file. Skip execution can be selected only during Pre-execution.
- Command Line Arguments: Specify valid command line arguments for any file by enabling this option.
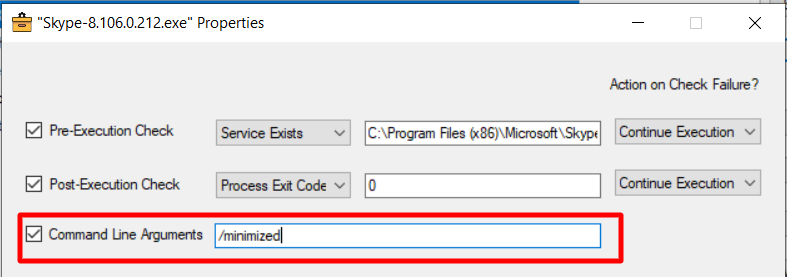 For running an msi file, the command line argument should include one of the following:
- contain /q or /qn
- Enrollment URL or Enrollment code in case of agent enrollment
- If the above two are not there, then provide the entire command like /i "FileName.msi" <cmdlineargs>
- Execution Context: Lets you choose the level at which the file has to be executed. Select one from the following:
- Device Level: The file is executed in the context of system user.
- User Level: The file is executed in the context of the logged in user.
- Global Credentials: If you want to run the file with some other credentials which are different from the logged in credentials. Normally, global credentials are admin's credentials. If you select this, you will need to provide admin credentials in the main deployer window.User at device level cannot perform things at user level or vice versa. Hence, it is recommended to opt for Global credentials and provide admin credentials where you can perform operations both at system and user level.

- Pre-execution check: Configure one of these validations to check if File/Folder/Registry/Service exists. To configure, put a check in front of Pre-execution check. This will enable the drop-down where you can select the validation you want to perform. In the text field next to it, provide the path of file/folder/registry/service.
- Click Save after configuring all properties. This will bring you back to Scalefusion Windows Deployer. Click on Reset if you want to clear the properties defined earlier and provide them again. Clicking on Cancel closes the Properties window without saving them.
- In similar manner you can define properties for other files to be executed.
Step 4: Generate self extractable exe
- On the Scalefusion Windows Deployer wizard, enter the following as per requirement:
- Extraction folder Path: The path of the folder on the target machine where the compiled exe will be uploaded. By default the path is C:\ProgramData\sfdeployer\ This is an optional field.
- Credentials: Enter the admin credentials of target device that is, admin credentials of a user that has admin privileges and is present/created on the target device.
- Passkey: Enter a personal encryption key to encrypt the admin password, for added control and security.
- Default Encryption (Unsafe): Employs a system-generated default key for convenience.Passkey and Default Encryption key will be enabled when you provide global credentials
- Post Execution: Select an action post execution of files, from the following:
- Do Nothing
- LogOff Device
- Restart DeviceNote: In case of Logoff and Restart, you can also select the duration after which these actions should happen. Select one from the Duration drop-down.
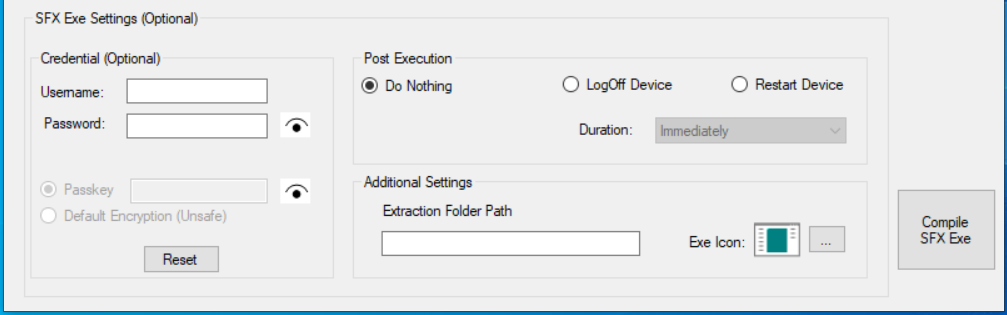
- Once you have filled in the details, click on Compile SFX Exe
 The total size of the extractable exe should not exceed 4GB.
 - Select a path on your local machine where you want to save and give a name for the exe file and click Save
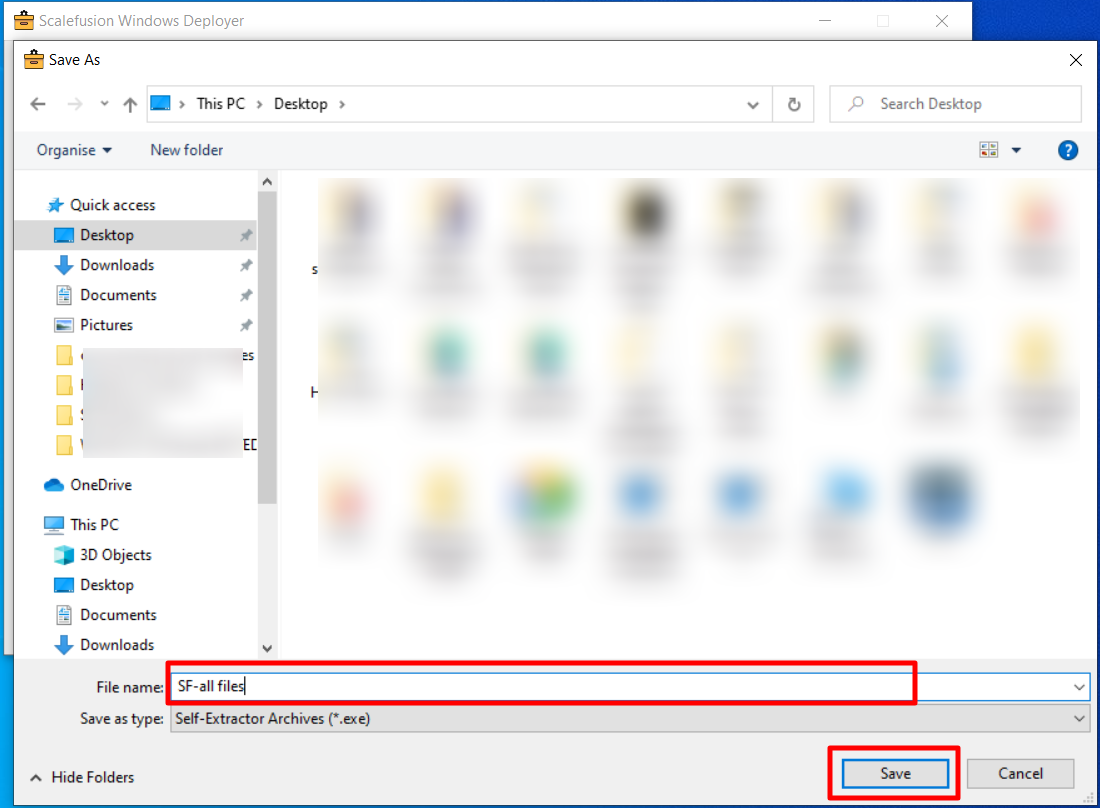
- It will take few seconds to compile the file. A progress bar will be shown during the process.
- When successfully completed, a confirmation message will appear. Click on Ok.
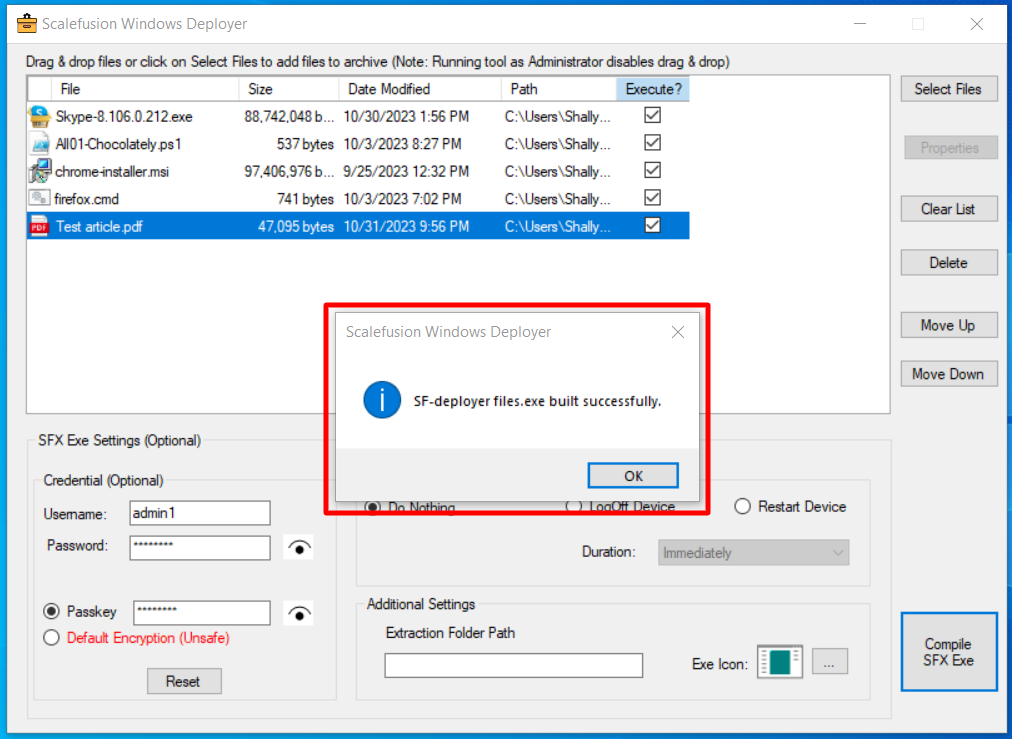
- The compiled file is ready to be deployed on end user devices.
Step 5: Upload the compiled exe via Enterprise Store and publish on devices
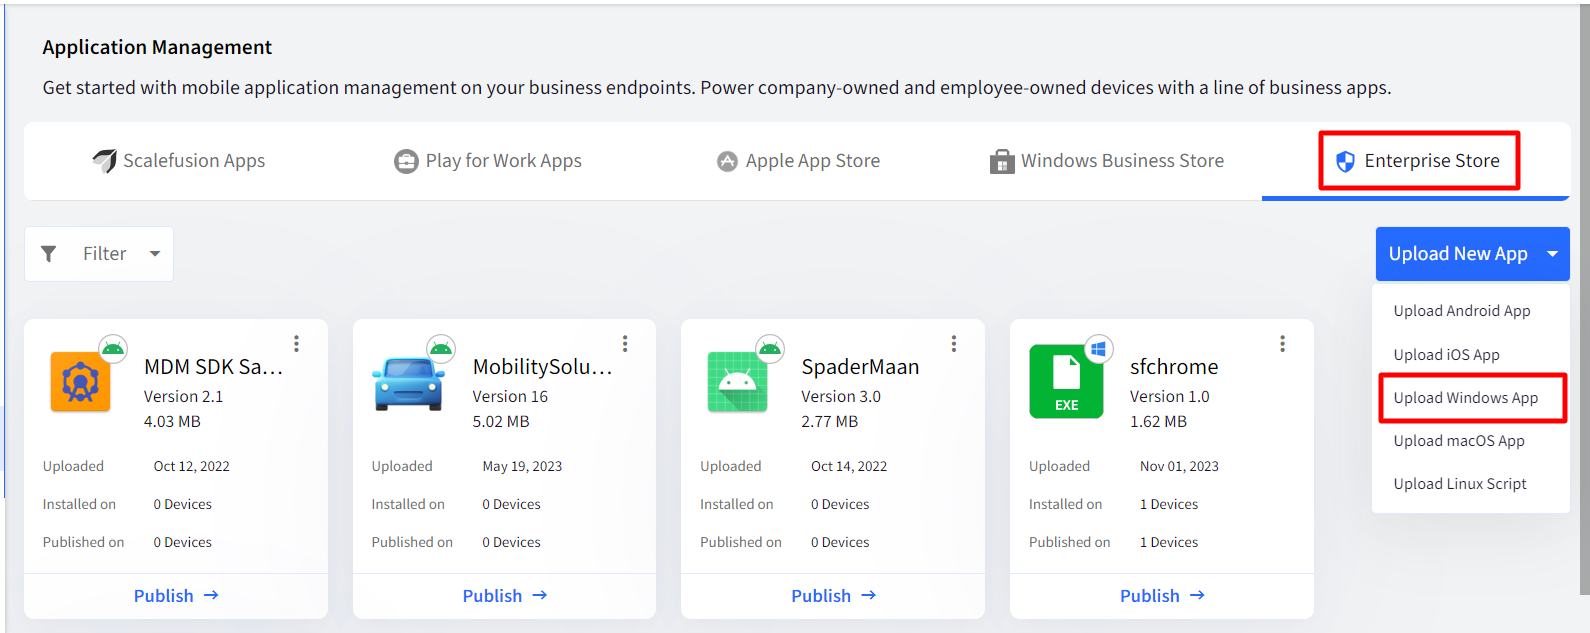
- On Scalefusion Dashboard, navigate to Application Management > Enterprise Store
- Click on Upload New App > Upload Windows app
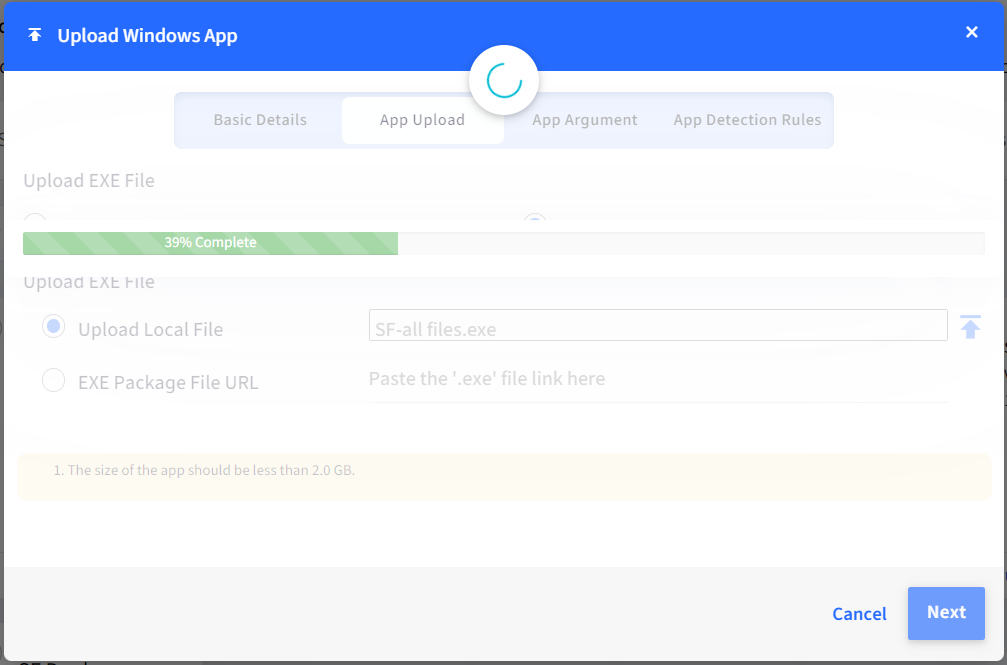
- In the Upload Windows app dialog, click on Exe to upload the exe file

- Provide the required details and parameters. Under App Upload tab, upload the self extractable exe generated in Step #4 above. For more details on how to upload exe, please visit here
- After providing all parameters, click Save. It may take few minutes for exe to upload. A progress bar will appear to show the progress of upload.
- Once done, the Publish dialog box will appear. Select the Device Profile(s) on which you want to publish the compiled exe and click Publish.
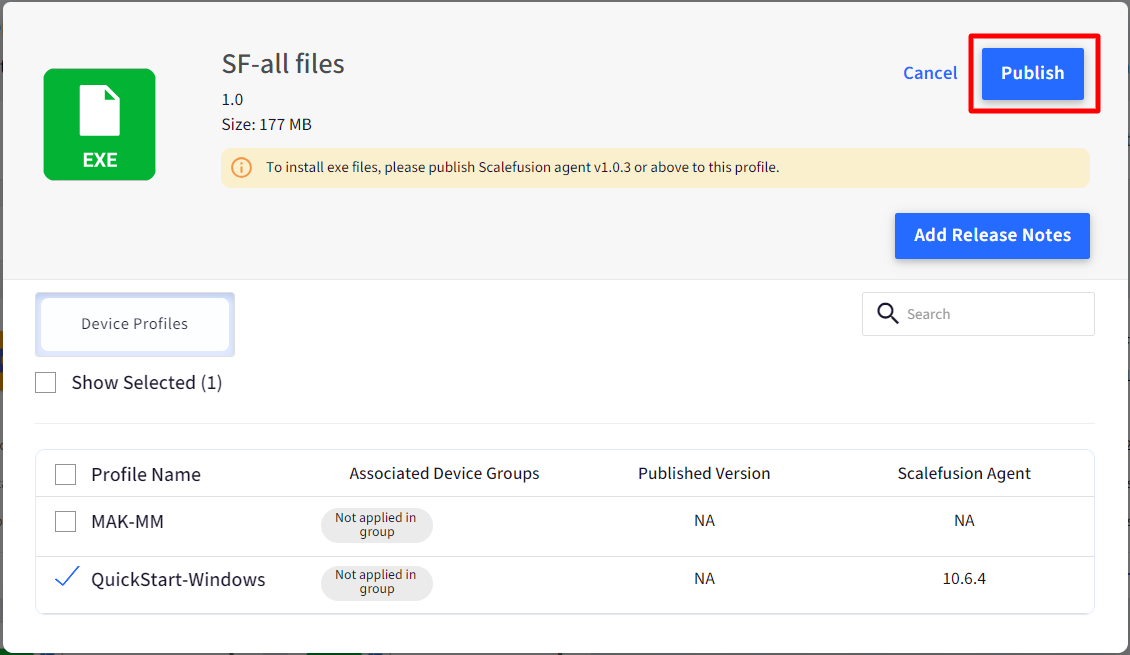
- The exe will be published to selected device profile(s) and the files will be executed on the device as per defined properties.
On Device
- On the end user's device, the extracted files should be present at C:\ProgramData\sfdeployer (or at the location you have specified before compiling)
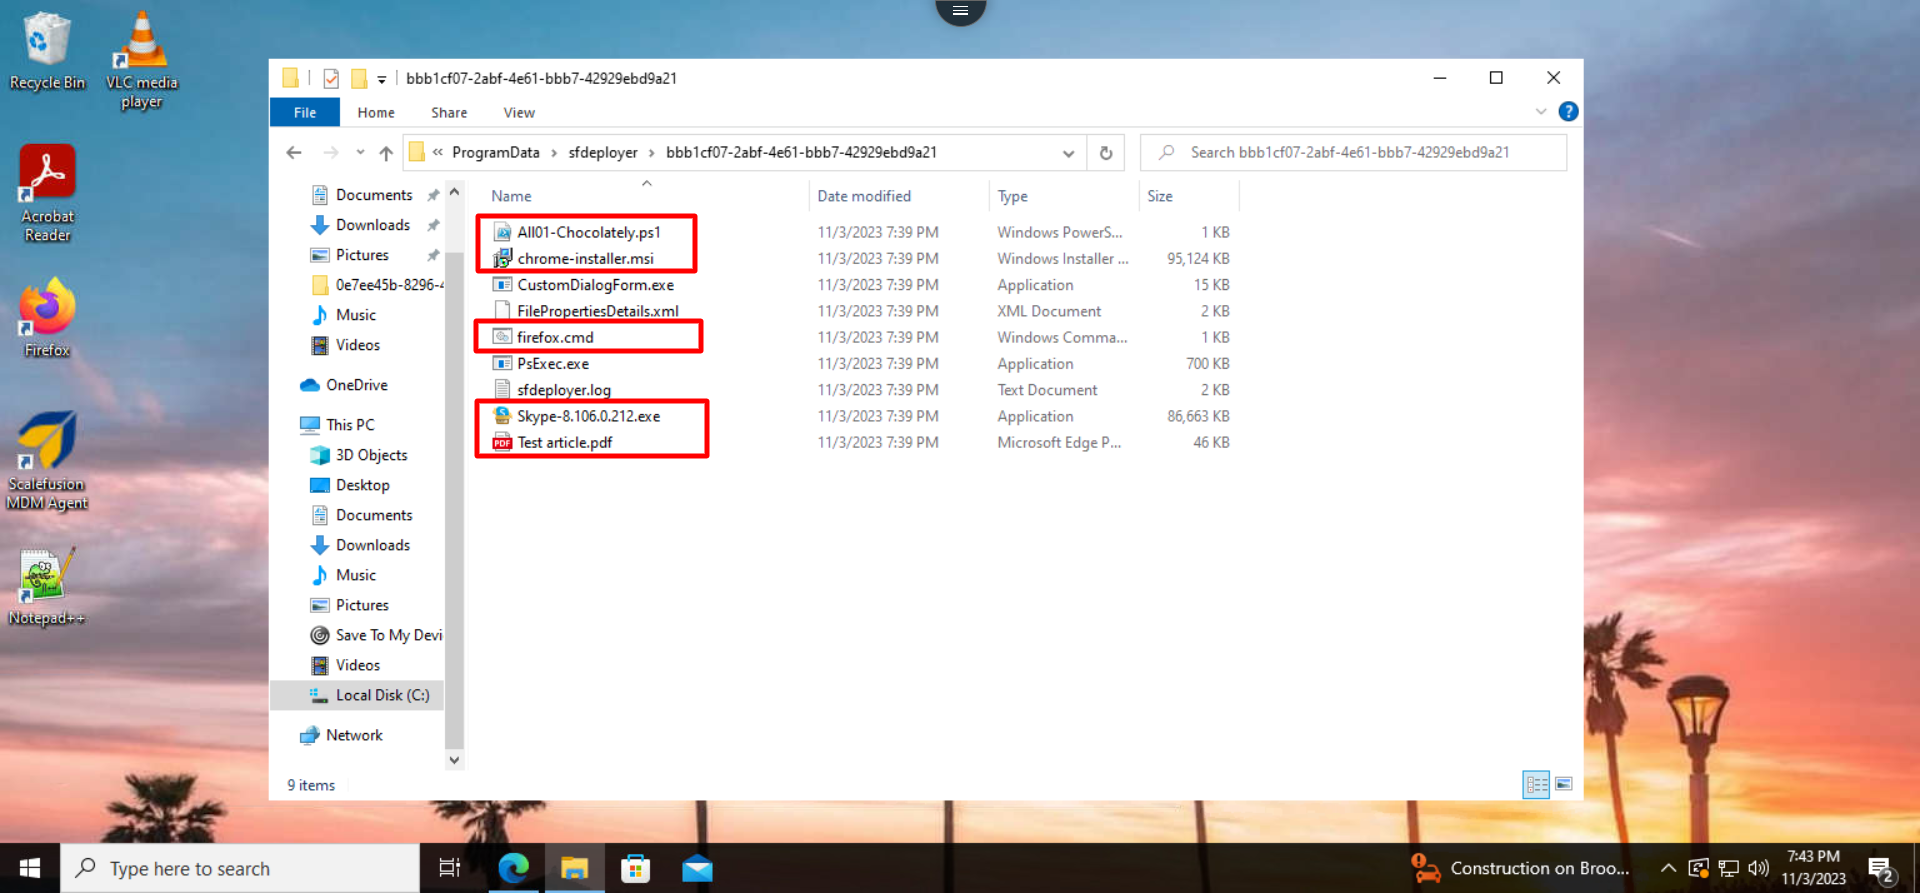
- Once extraction of files is completed, the files for which execution checkbox is checked, they will start executing according to their pre-execution check.
Frequently Asked Questions
Question: On devices enrolled via Agent in Multi-app kiosk mode, Scalefusion Windows deployer is not starting. What can be done to resolve this?
Answer: Command Prompt is restricted to run in Multi-app kiosk mode as it is a secured environment. Under multi-app kiosk agent mode, you need to enable cmd.exe manually in Allowed Apps section.
Question: On devices enrolled via agent or Modern Management in multi-app kiosk mode, some executables are not running properly. What can be the reason?
Answer: In multi-app kiosk mode (enrolled via agent or Modern Management), Explorer is blocked. Some executables generate dynamic exe in other folders (for eg. temp) which are not allowed in multi-app kiosk mode. Admin has to allow these paths to continue execution.
Question: How is passkey implemented and used when it is provided in Scalefusion Deployer?
Answer: There are two methods by which passkey can be used:
a. By providing the key via command line (-passkey key) when invoking the Scalefusion Deployer's exe from Enterprise Store. This command line is passed while deploying the Scalefusion Deployer exe from dashboard.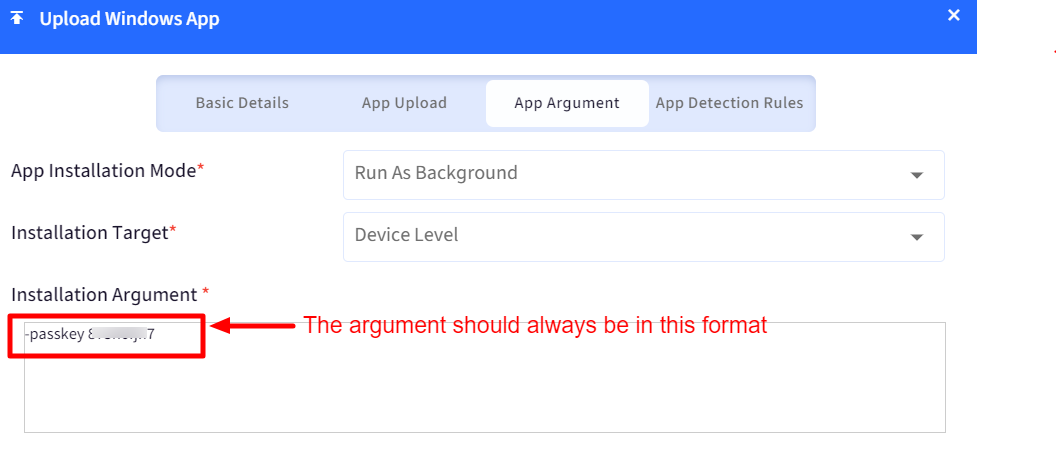
b. If command line argument is not provided, user will get a prompt to enter the passkey whenever the Scalefusion Deployer exe is launched/invoked on the device.