Configure Directory (OneIdP)
- 23 Jul 2024
- 3 Minutes to read
- Print
- PDF
Configure Directory (OneIdP)
- Updated on 23 Jul 2024
- 3 Minutes to read
- Print
- PDF
Article summary
Did you find this summary helpful?
Thank you for your feedback
To create a directory of users, the first step is to configure OneIdP in Scalefusion. To do so,
- On Scalefusion Dashboard, navigate to OneIDP > Directory
- Click on Get Started
- This will bring up the configuration page. Configuration is a four-step process

- The steps are explained in detail below

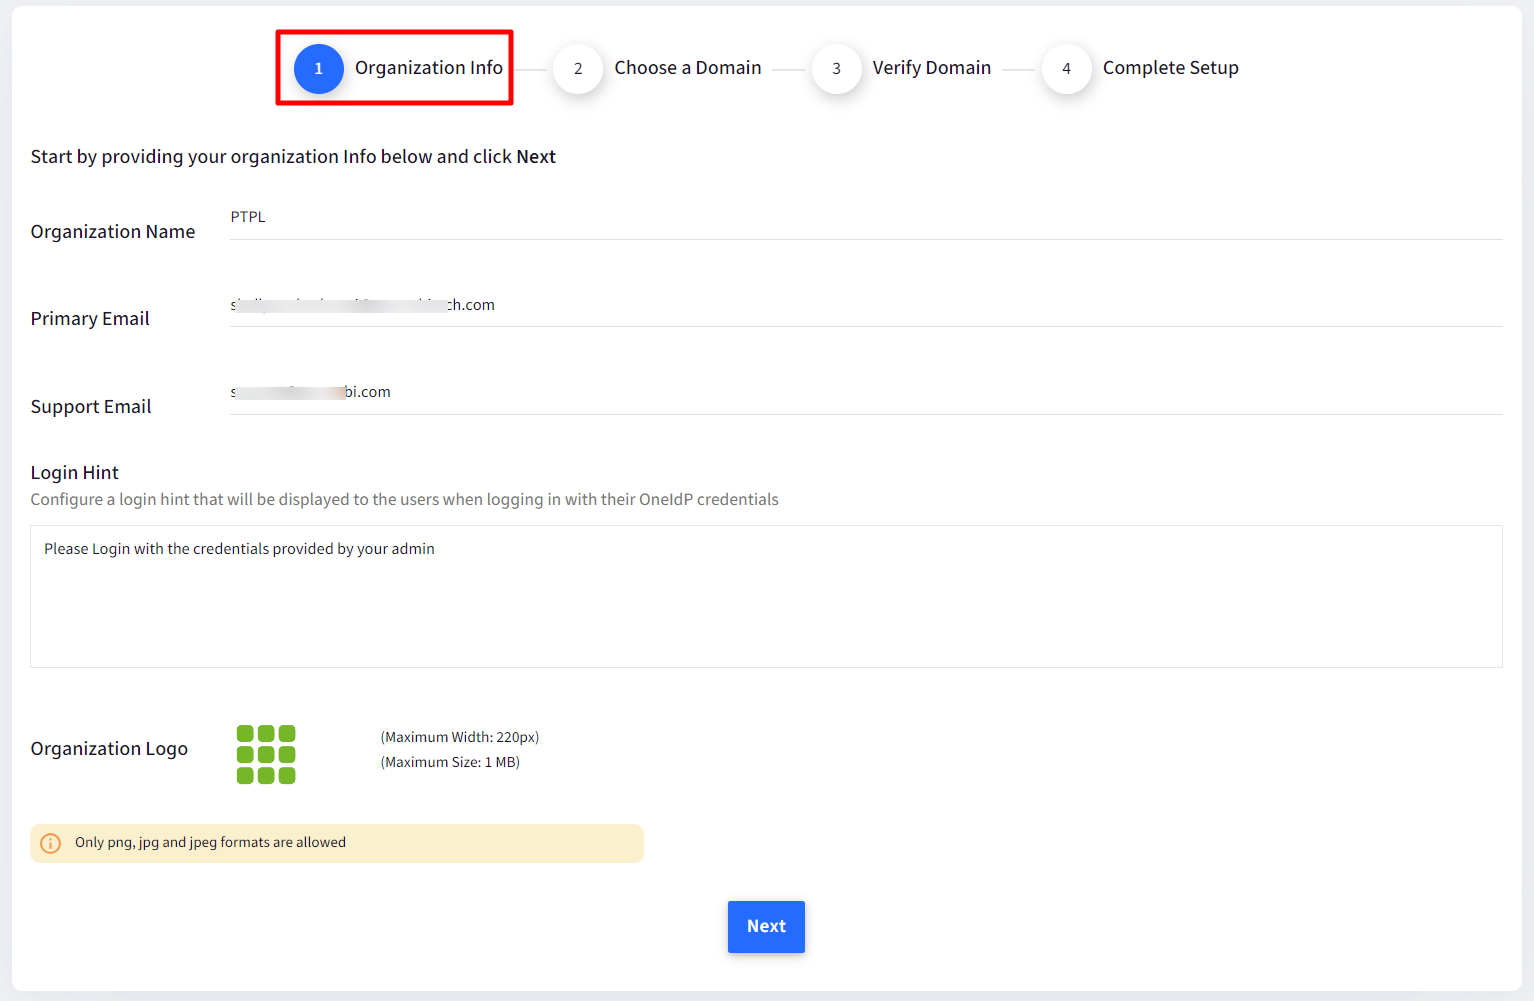
Step 1: Organization Info
Provide your Organization Info with following details:
- Organization Name: Enter the Organization name
- Support Email: Enter support email id
- Login Hint: Configure a login hint. This will be displayed to the users when logging in with their OneIdP credentials
- Organization Logo: Upload Organization logo. The maximum dimensions should be 300*300. Only .png, .jpg, .jpeg images are allowedBy default The Organization Name, Support Email and Organization Logo are taken from Organization Info on Dashboard. You can replace them.
- Click Next

Step 2: Choose a Domain
- Choose a domain for the directory. There are two types of domains to choose from:
- Default domain: This is the default domain provided by Scalefusion. The users will be identified with .oneidp.com as the extension. The domain should be unique and of 4 or more characters.
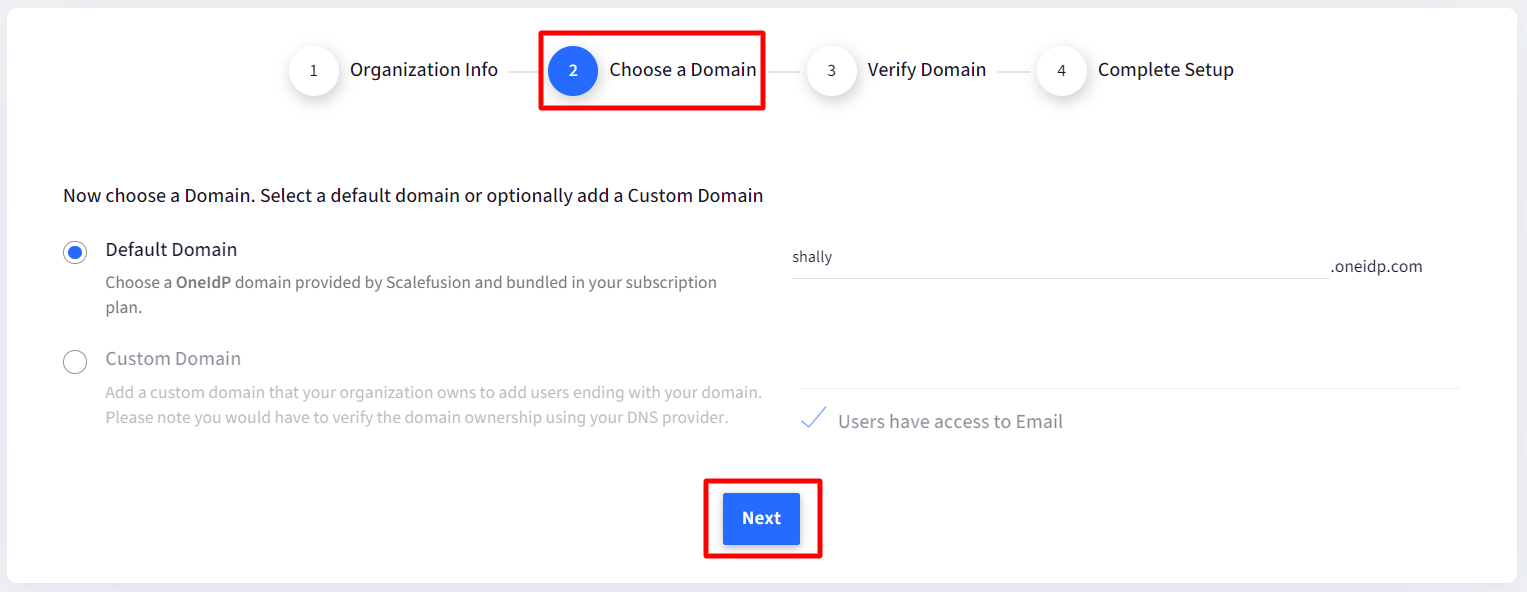
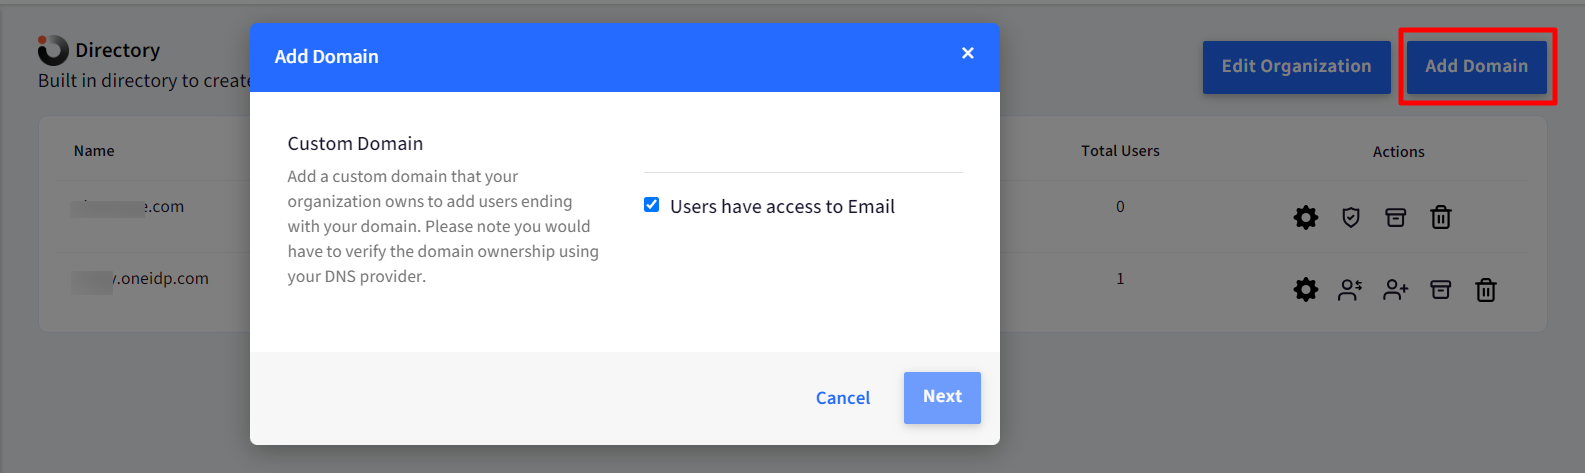
- Custom Domain: You can optionally add a custom domain that your organization owns to add users ending with your domain. You would have to verify the domain at the next step using your Domain provider. This is optional, and can be verified later as well.
- Users have access to Email: Enable this if the users to be added under custom domain, will have access to their email for authentication
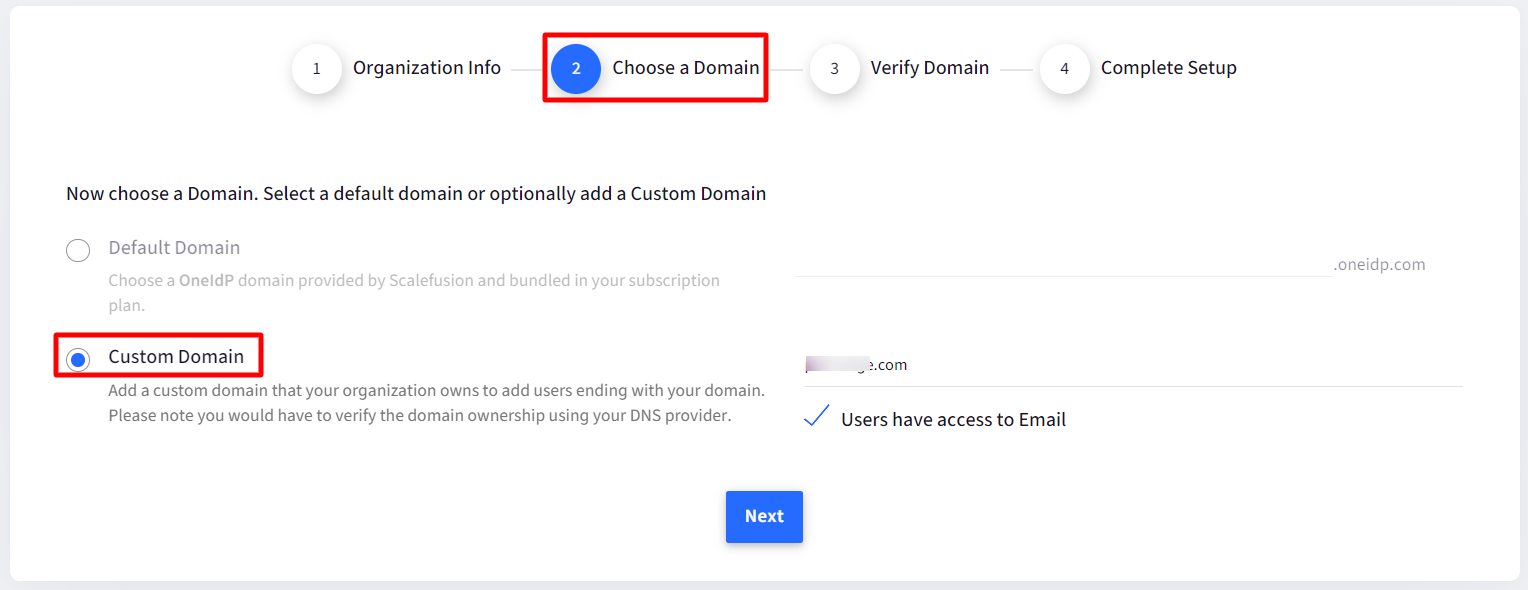
- Users have access to Email: Enable this if the users to be added under custom domain, will have access to their email for authentication
- Default domain or custom domain can also be added later.
- Default domain: This is the default domain provided by Scalefusion. The users will be identified with .oneidp.com as the extension. The domain should be unique and of 4 or more characters.
- Click Next


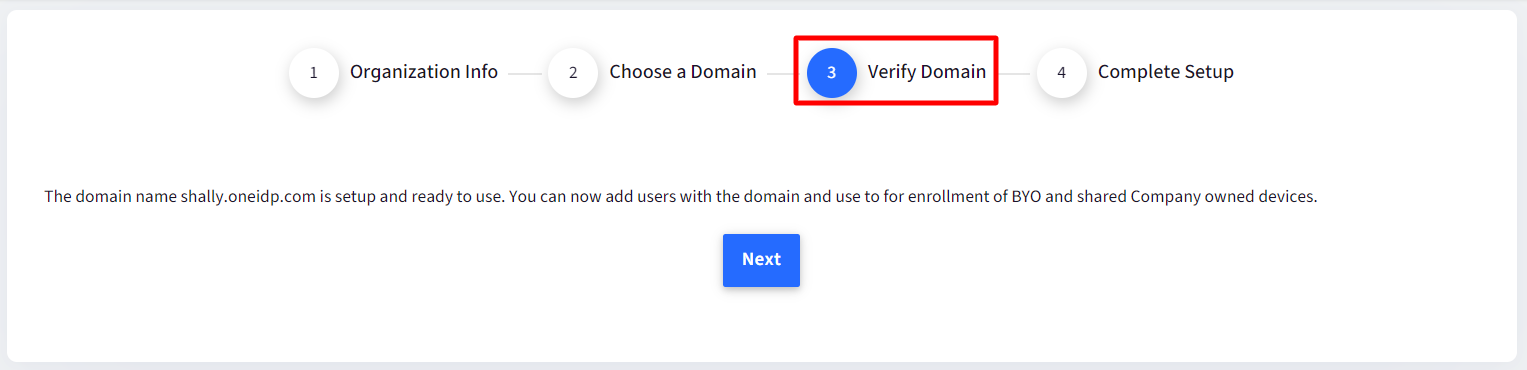
Step 3: Verify Domain
This step is based on your selection at Step #2.
Default domain
- If Default domain is selected, then it will be verified as per basic validations and you will get a confirmation screen of domain being setup. Click Next

Custom Domain
If you have selected custom domain in Step #2, you would have to verify the domain ownership using your DNS provider. Hence, you will get a different screen to Verify Domain. The details have to be added to record with your domain name registrar for verification. After adding click on Verify Now to verify:
You can choose to Verify Later also. With this selection, on OneIdP main page there will be an icon displayed over domain name indicating that it is unverified. You can then verify it later.


Step 4: Complete Setup
On successful verification of domain, you will get the Complete Setup screen. This completes the setup and configuration of OneIdP in your Scalefusion account. Click on Finish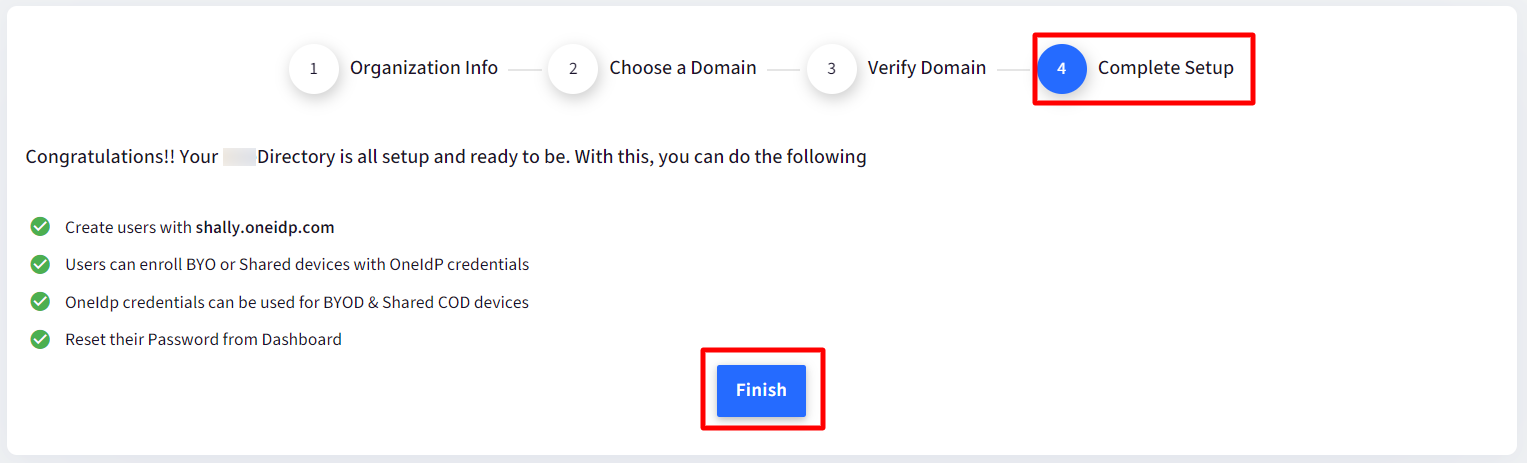
Points to Note:
- One default domain can be created under a directory
- There can be multiple custom domains
On clicking Finish, the domains in the directory will be displayed on the Directory main page. Here,
- Activated Accounts: Displays count of users who have activated (either reset their password from invitation email or enrolled atleast one device) their accounts.
- Pending Activations: Displays count of users who have not yet activated their accounts. You can view the list of such users and also send reminders from here. Click on Pending Activation user count which will bring up a small window with list of users. Click on Send Reminder to send reminder for activating the account(s).
This helps to plan a migration for users to SSO powered by OneIdP.
Actions on Directory
Following actions can be performed once a directory is created:
- Add Users: Adds users in the directory
- Archive domain: Archiving the domain will not delete the users that have been already added with the domain name, however you won't be able to add new users with this domain.
- Delete domain: Deletes the domain. If any users have been added with this domain, first they have to be deleted from User Enrollment section. After that, you will be allowed to delete the domain.
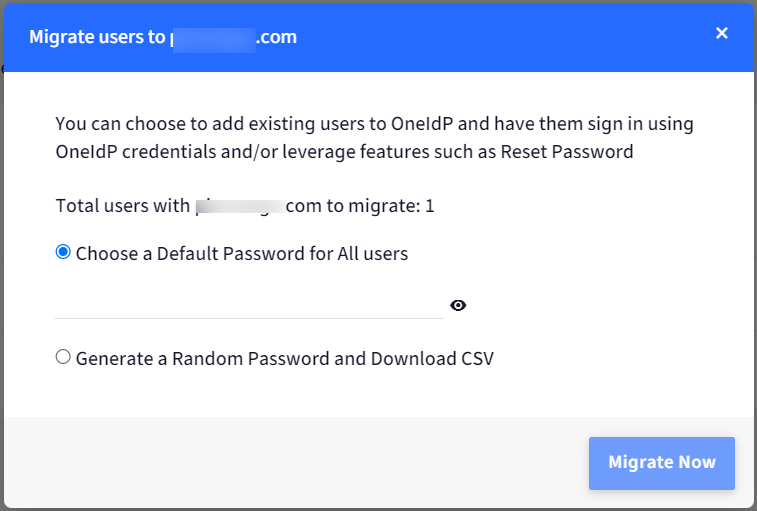
- Migrate users: Users belonging to custom domain can be migrated to OneIdP. This way they don't need to access their email id for authentication while enrolling devices. The authentication will be taken care of by Directory. On clicking the icon, a dialog box will come up to migrate users. Enter the default password with which users can sign in. Alternatively you can choose to generate a random password.

Other Actions
Following actions can be performed from Directory page:
- Edit Organization: The Organization Info can be edited.
- Add Domain: With this, you can add a new default and/or custom domain.

Was this article helpful?