The first step towards managing your Printer devices is to complete the Printer setup on the Scalefusion dashboard by configuring the Device Connector.
Configuring the Printer Setup
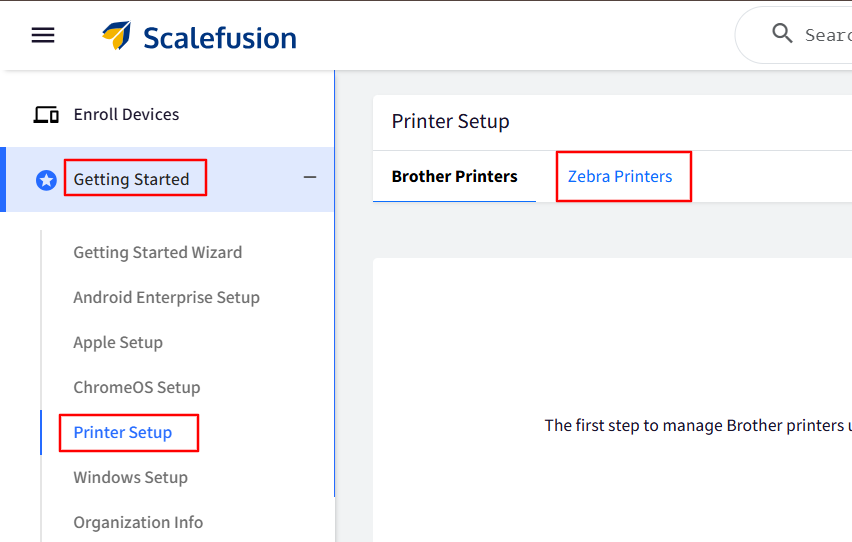
Navigate to Getting Started > Printer Setup > Zebra Printer.
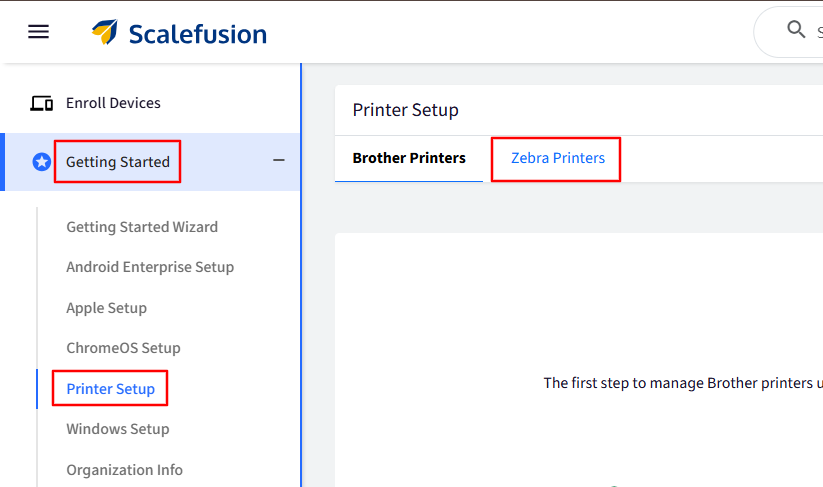
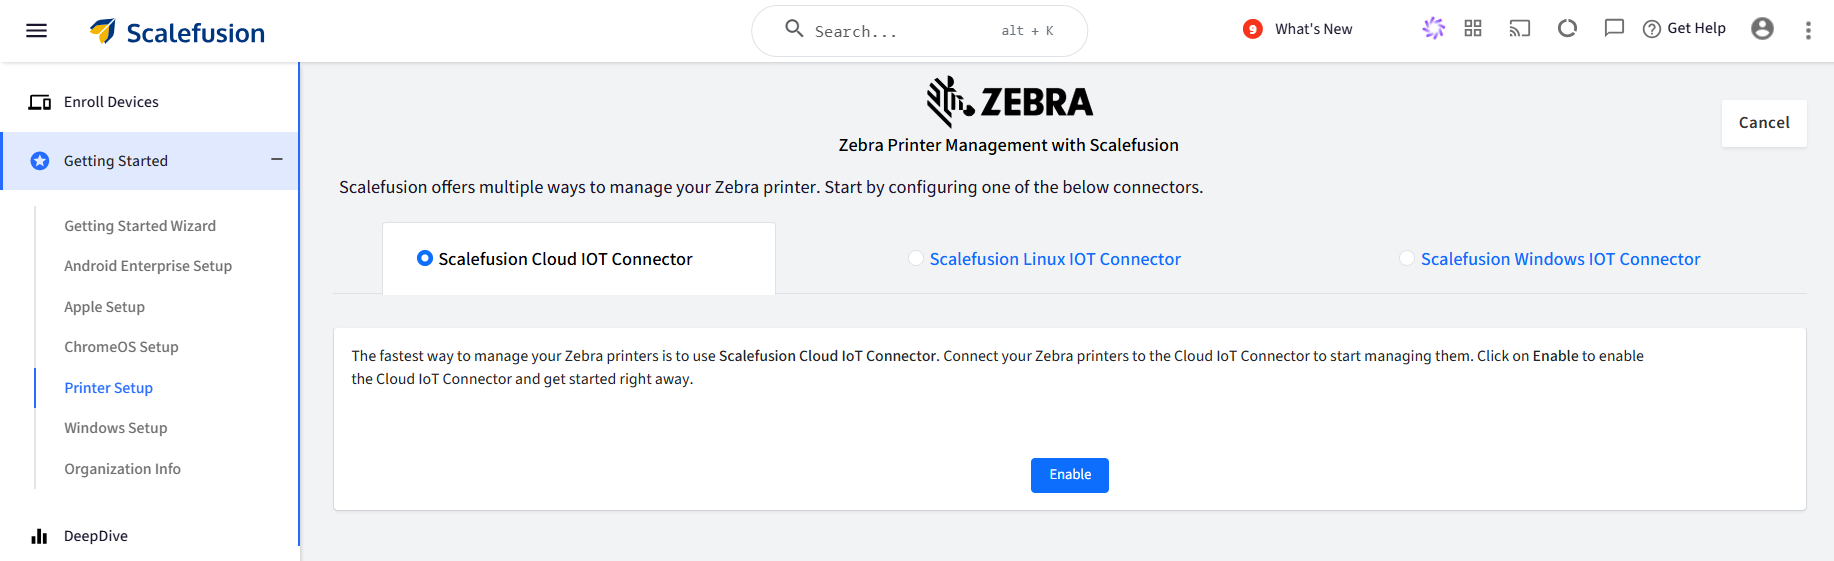
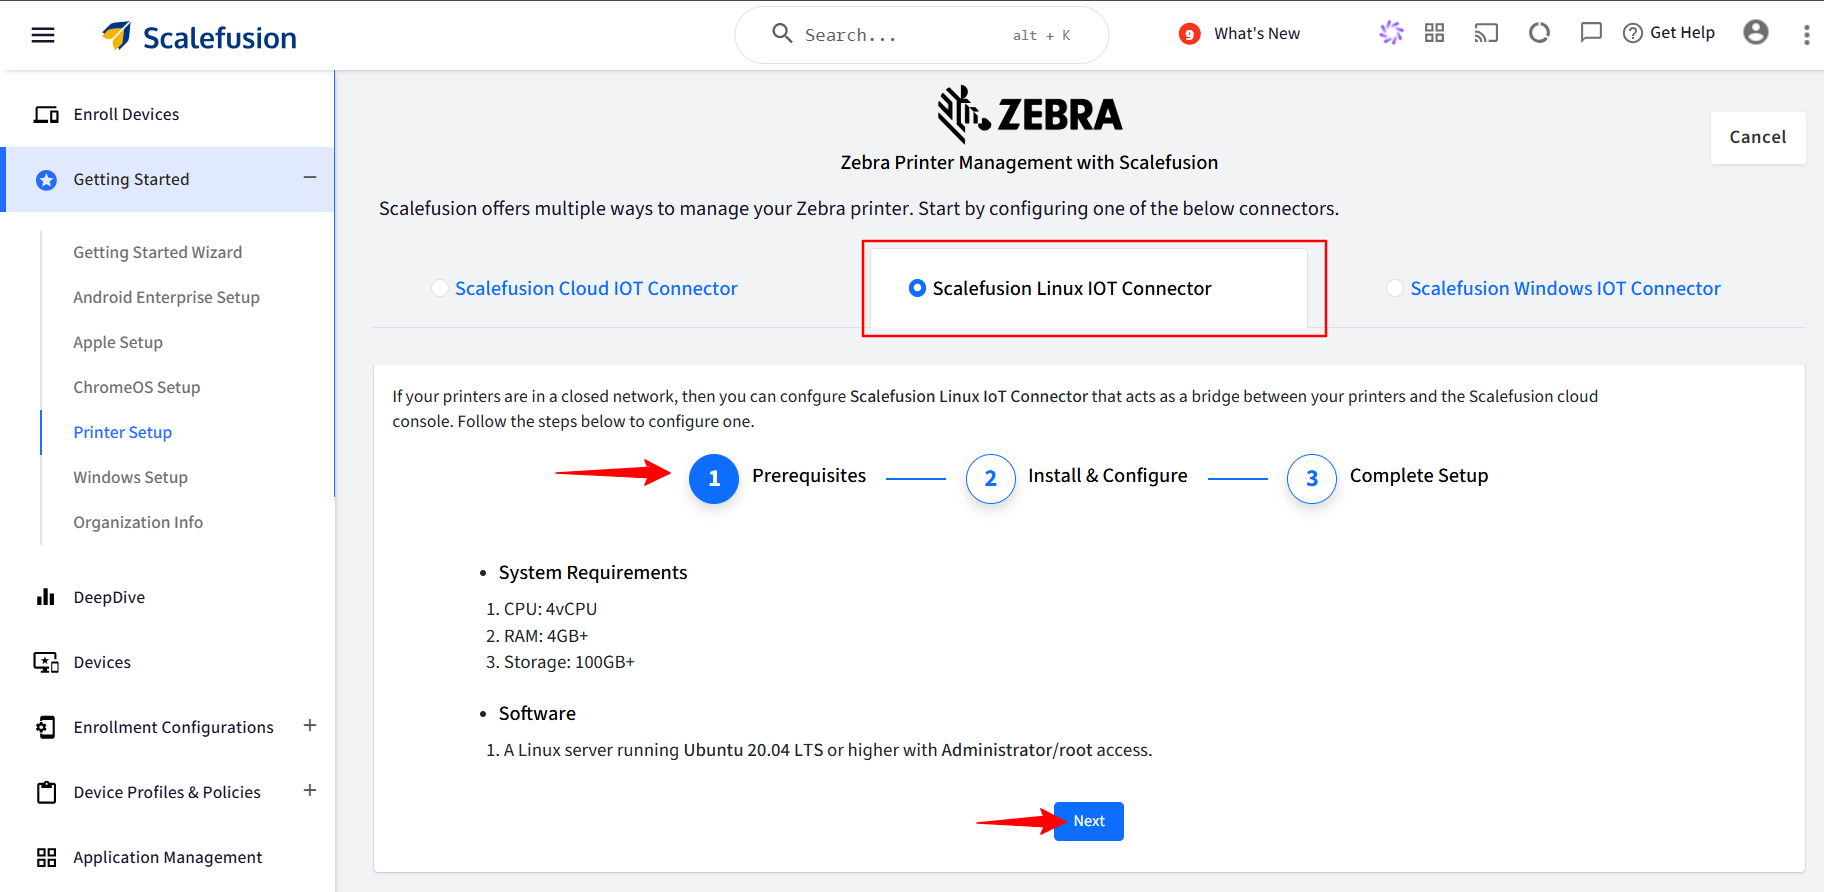
You will see the following screen, where you can select how you can set up the IoT connector.
Scalefusion Cloud IoT Connector: Hosted in EU, US, and India instances, these can be used where Printers can connect to an open network.
Linux IoT Connector: Install Scalefusion’s IoT connector on your Linux machine. The machine where the connector is installed will register itself to the Scalefusion cloud and act as a bridge between the printers in the network and the Scalefusion Cloud.
Windows IoT Connector: Install Scalefusion’s IoT connector on your Windows machine. The machine where the connector is installed will register itself to the Scalefusion cloud and act as a bridge between the printers in the network and the Scalefusion Cloud.
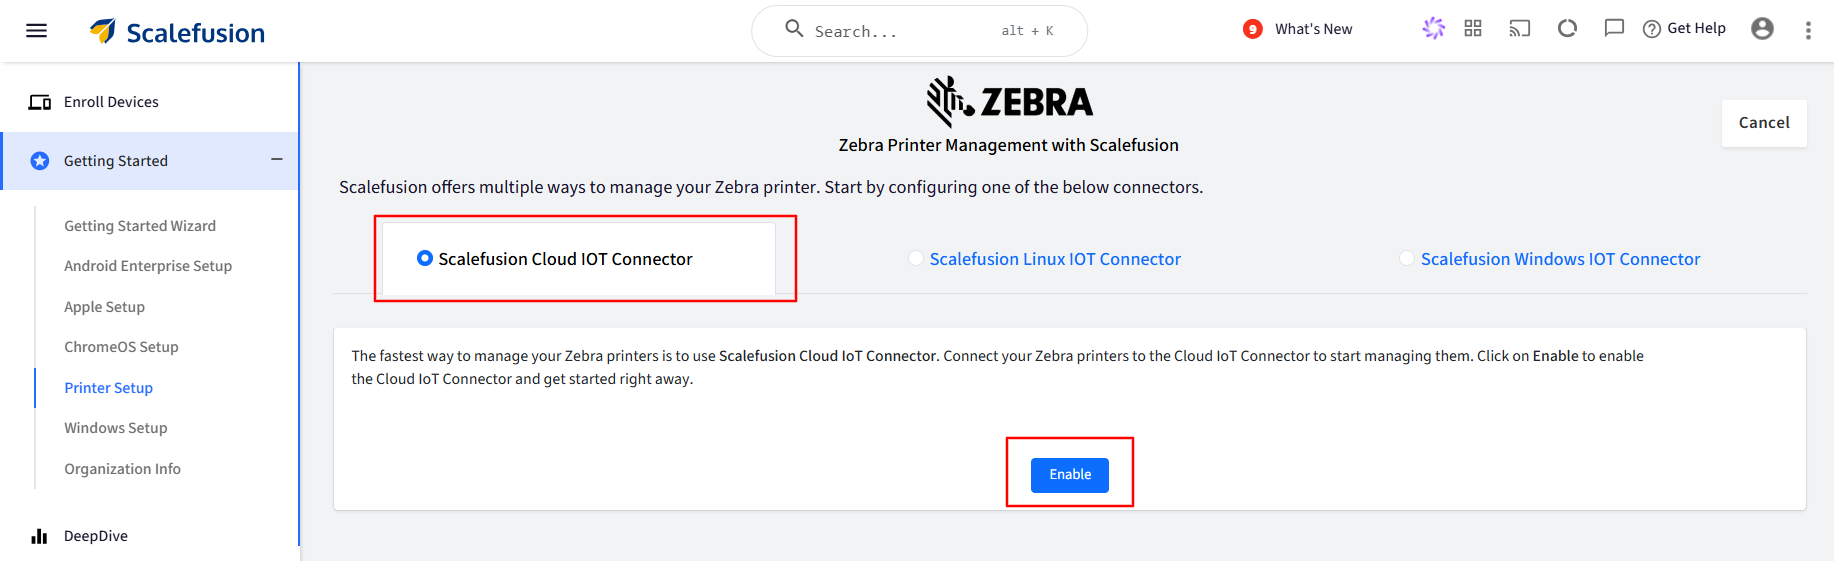
A. Scalefusion Cloud IoT Connector
Select Scalefusion Cloud IoT Connector and click on the Enable button.
That's it! The configuration is complete on the Scalefusion dashboard with one simple click.
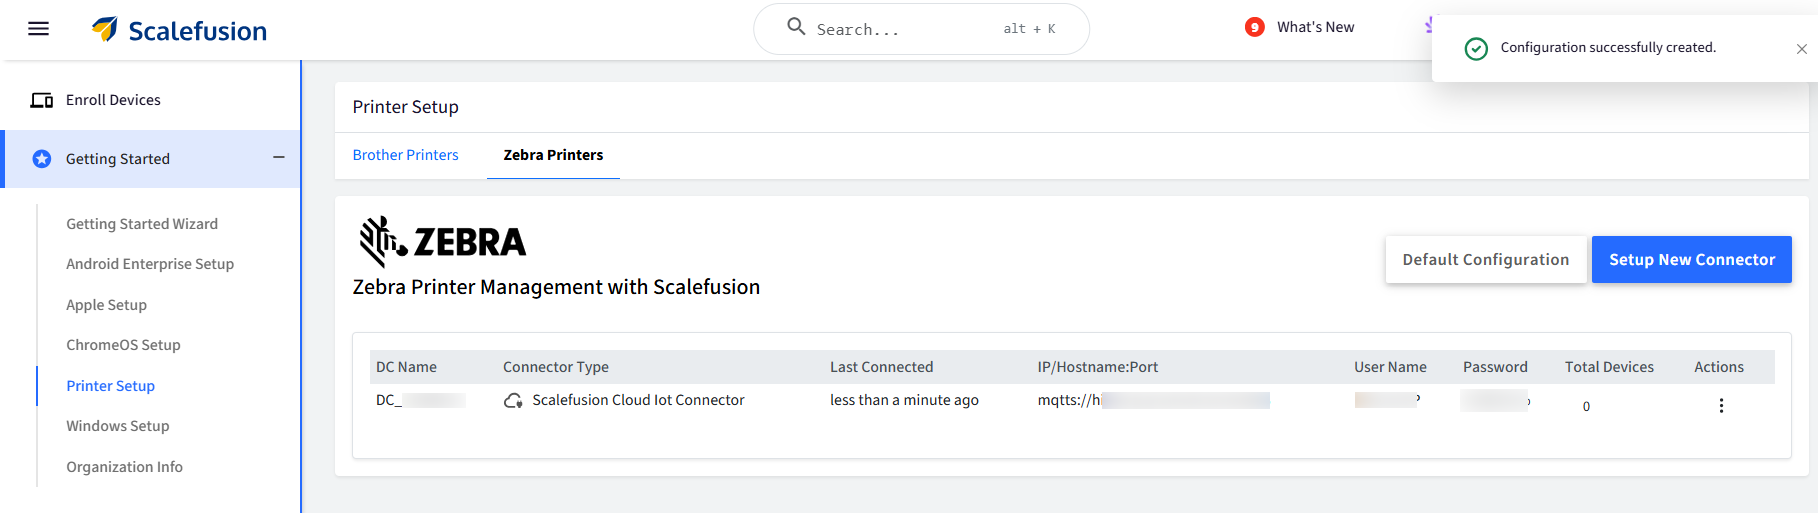
The next step is to set up the Zebra Setup Utility Tool on a Windows machine and enroll the printer.
a. Downloading and Installing Zebra Windows Setup Utility Tool
Navigate to the Zebra Setup Utility Tools page and download the .exe file on the Windows machine.
Once the Utility tool is installed, click Install Printer to install the driver for the printer.
Select the Driver as per the printer model and click the Next Button. For Example: Select ZDesigner ZQ 630 Plus CPCL for ZQ 630 Plus printer.
Once the printer driver is installed, it will appear like this in the utility tool.
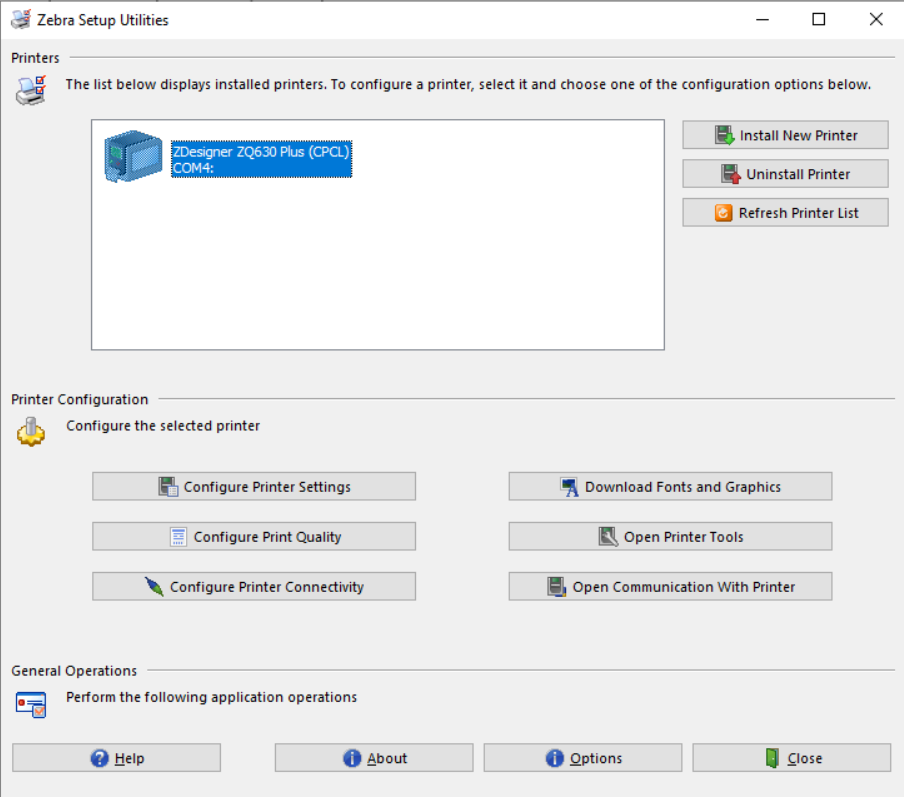
You can connect your printer to Utility Tool via Bluetooth or via USB.
b. Enroll the Printer
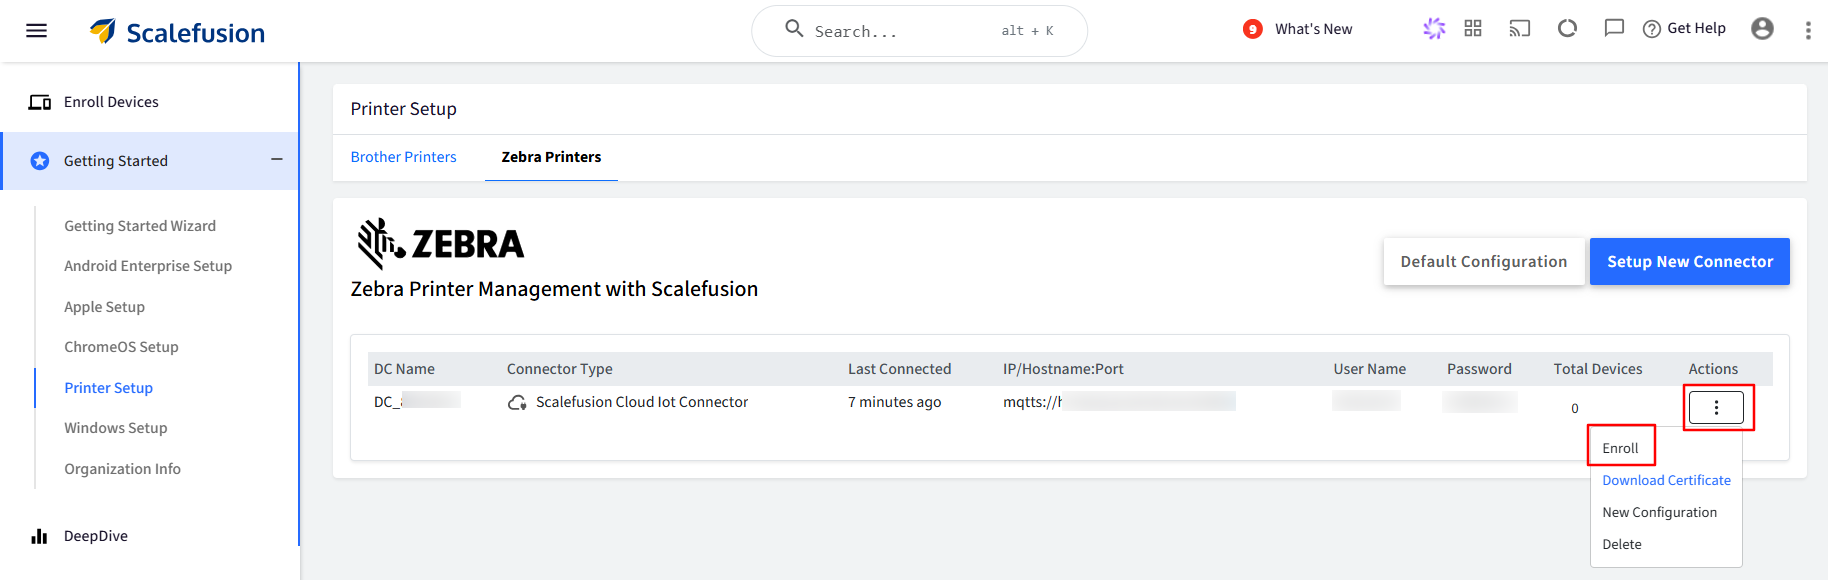
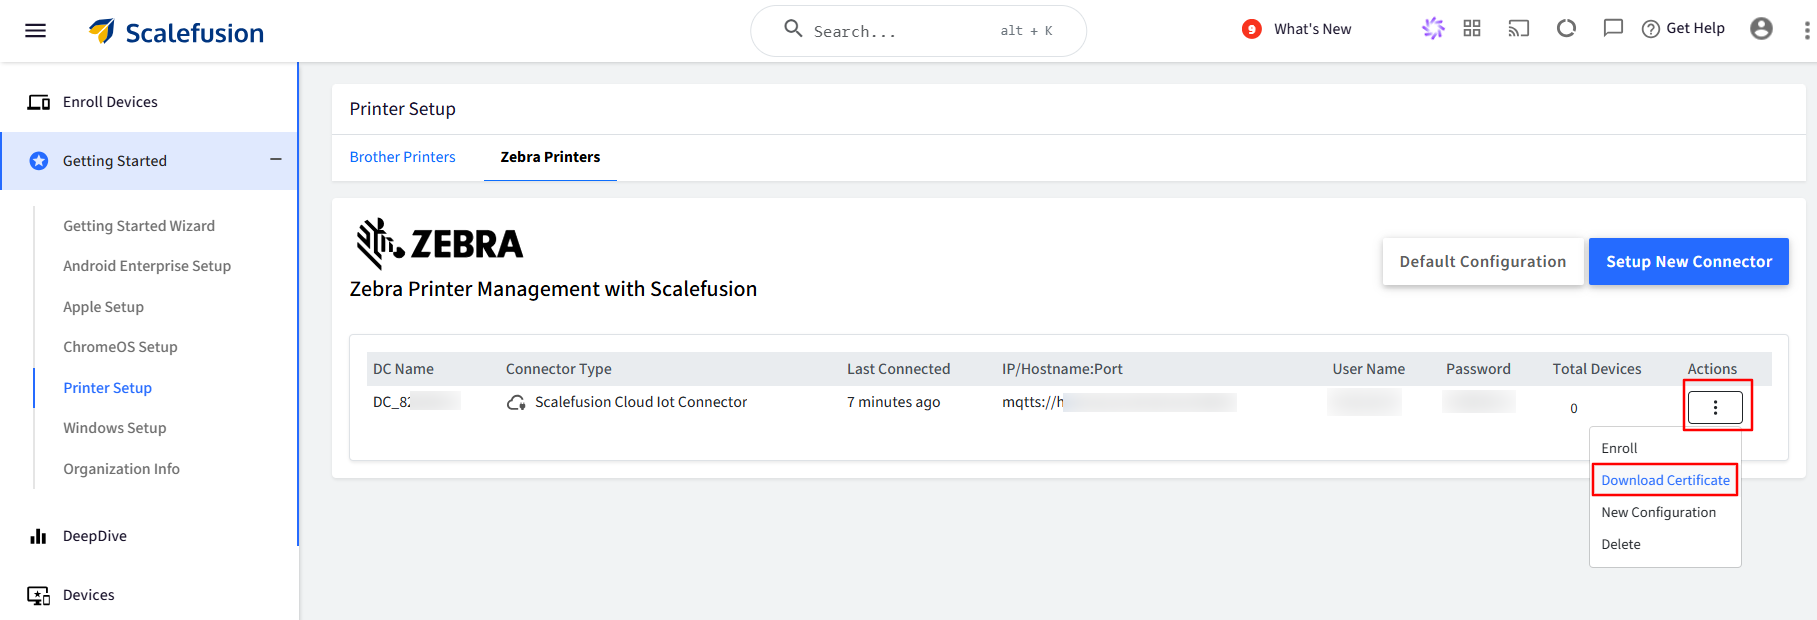
To begin enrolling your Zebra Printers, go to the Scalefusion dashboard to the Scalefusion Cloud IoT Connector configuration. Click the three-dot menu and select 'Enroll'. A step-by-step guide will then appear to walk you through the enrollment process.
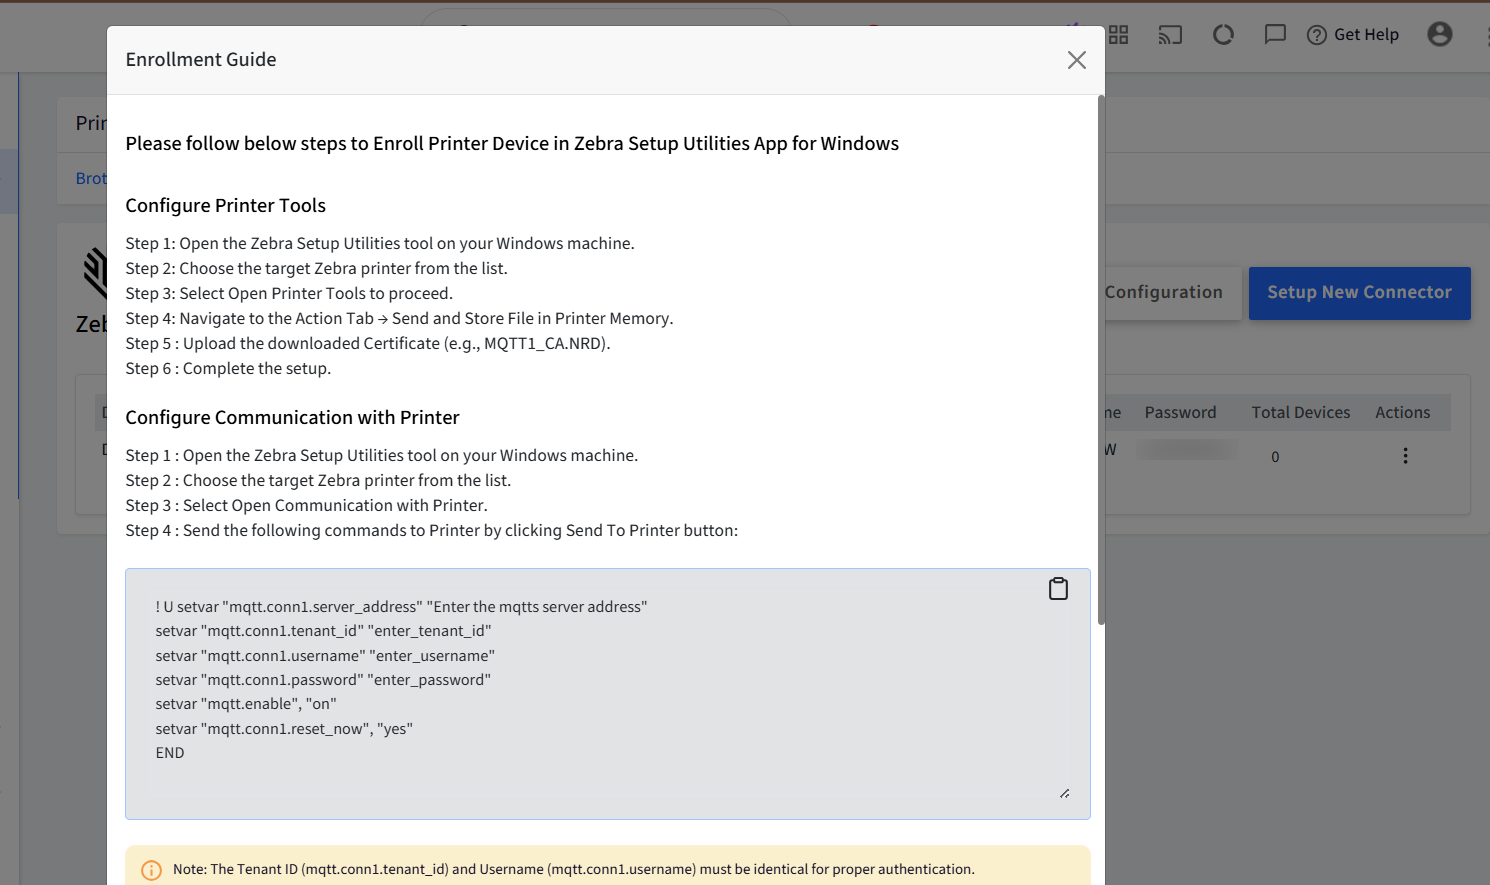
Configure Printer Tools:
Open the Zebra Setup Utilities tool on your Windows machine.
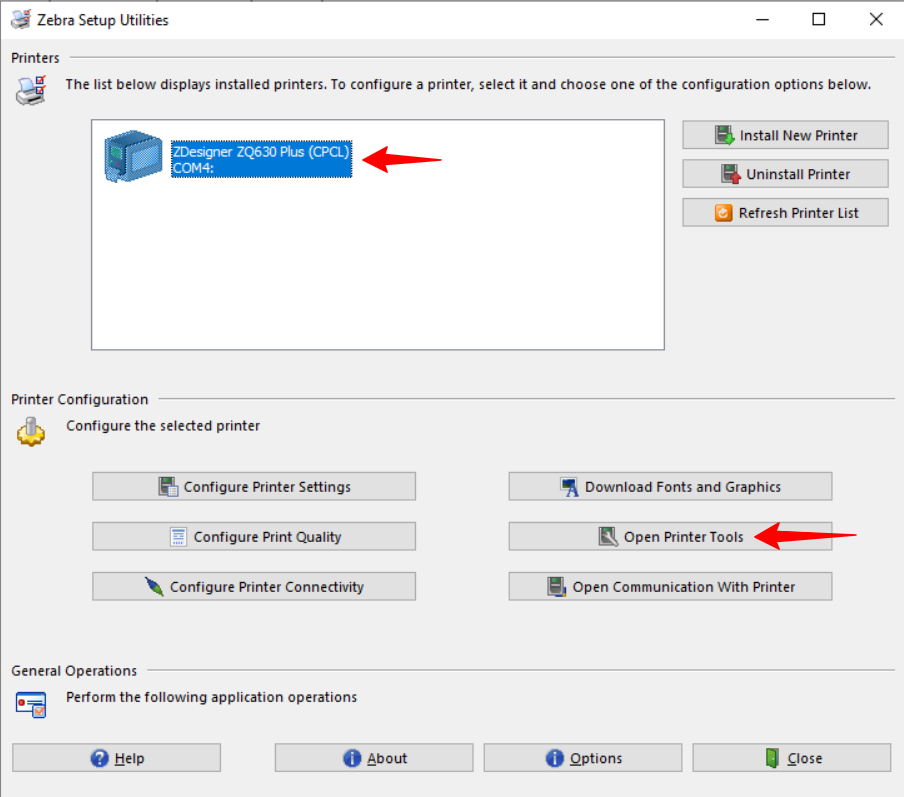
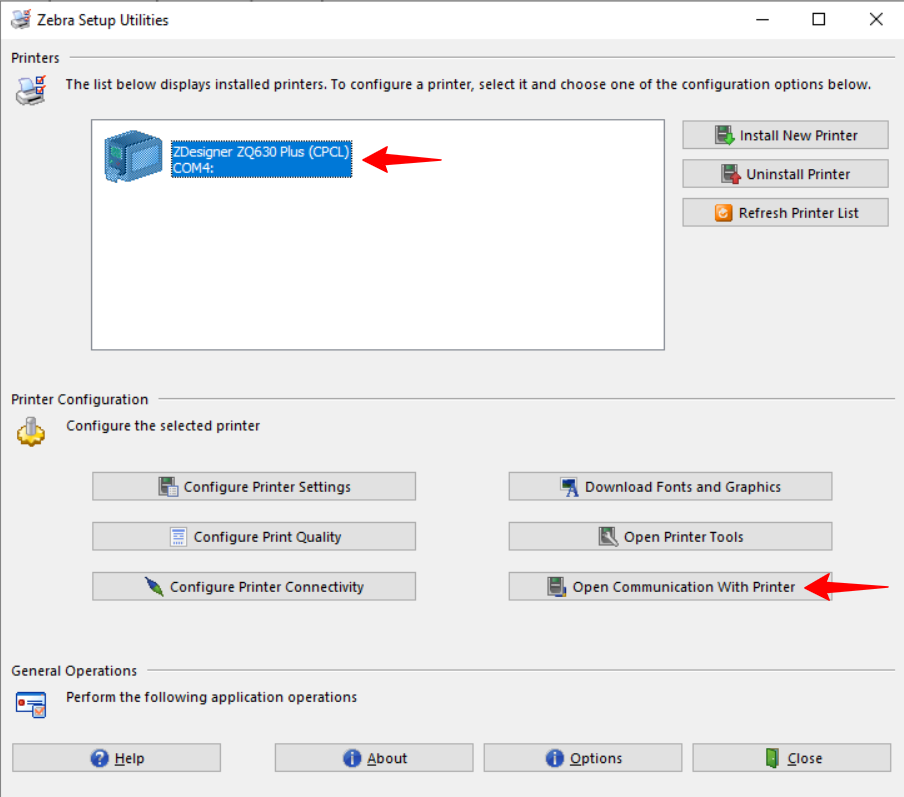
Choose the target Zebra printer from the list.
Select Open Printer Tools to proceed.
Navigate to the Action Tab → Send and Store File in Printer Memory.

Upload the downloaded Certificate (e.g., MQTT1_CA.NRD).
You can download the certificate from the Sclaefusion dashboard.
Complete the setup.
Configure Communication with Printer:
Open the Zebra Setup Utilities tool on your Windows machine.
Choose the target Zebra printer from the list.
Select Open Communication with Printer.
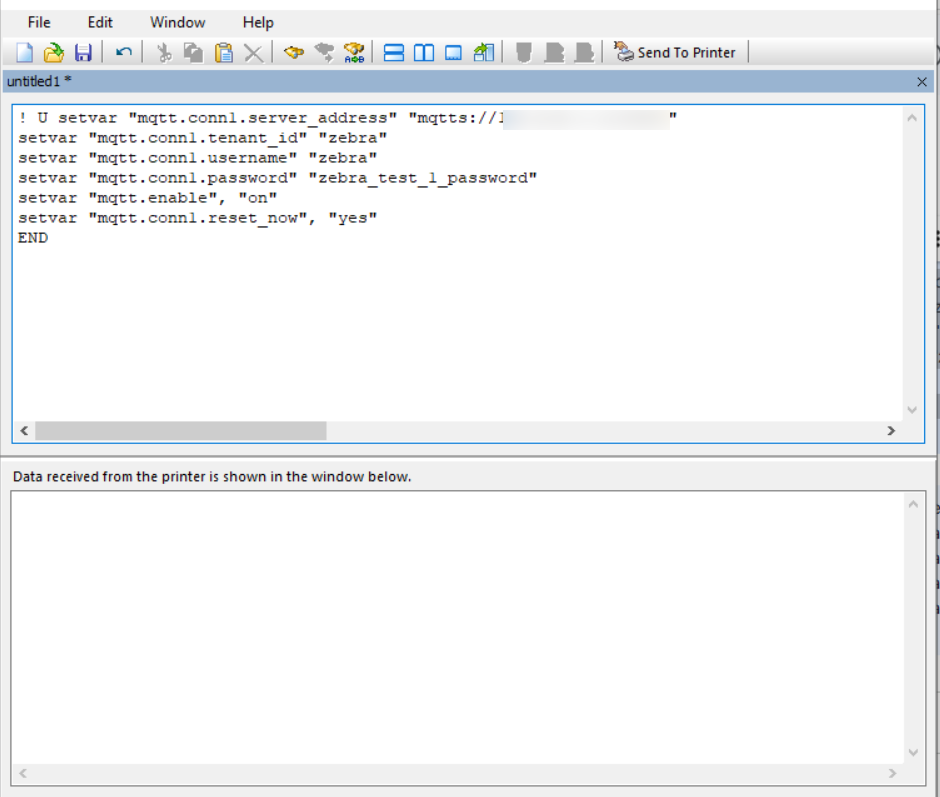
Send the following commands to Printer by clicking Send To Printer button:
! U setvar "mqtt.conn1.server_address" "Enter the mqtts server address"
setvar "mqtt.conn1.tenant_id" "enter_tenant_id"
setvar "mqtt.conn1.username" "enter_username"
setvar "mqtt.conn1.password" "enter_password"
setvar "mqtt.enable", "on"
setvar "mqtt.conn1.reset_now", "yes"
END
In the above command, enter the details for "Enter the mqtts server address", "enter_tenant_id", "enter_username", and "enter_password" as shown in the Scalefusion dashboard.
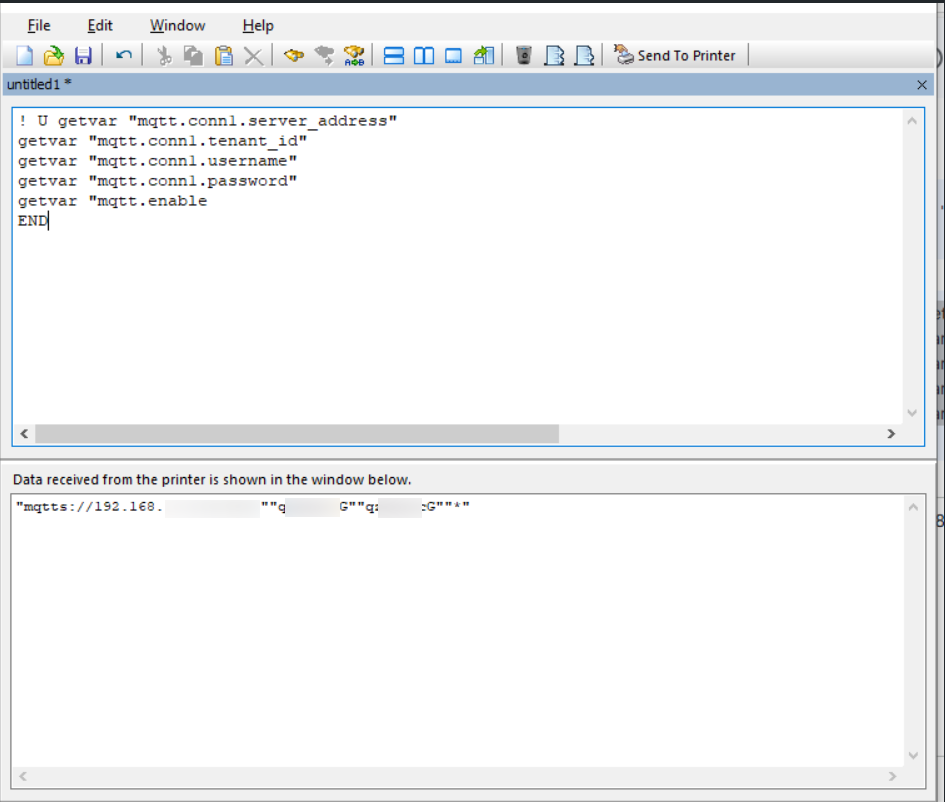
To verify whether the command is received correctly by the printer, send the following commands:
! U1 getvar "mqtt.conn1.server_address"
! U1 getvar "mqtt.conn1.tenant_id"
! U1 getvar "mqtt.conn1.username"
! U1 getvar "mqtt.conn1.password"
! U1 getvar "mqtt.enable"
It should give the response as below:
"mqtts://192.168.1.12.XXXX""tenant_id"username""on"
Once the above setup is complete, the printer will be visible on the Scalefusion dashboard in the Devices section.
B. Scalefusion Linux IoT Connector
Navigate to Getting Started > Printer Setup > Zebra Printers.
Select Scalefusion Linux IoT Connector, where you will find the first step, which shows the prerequisites for the System and Software. Click Next.
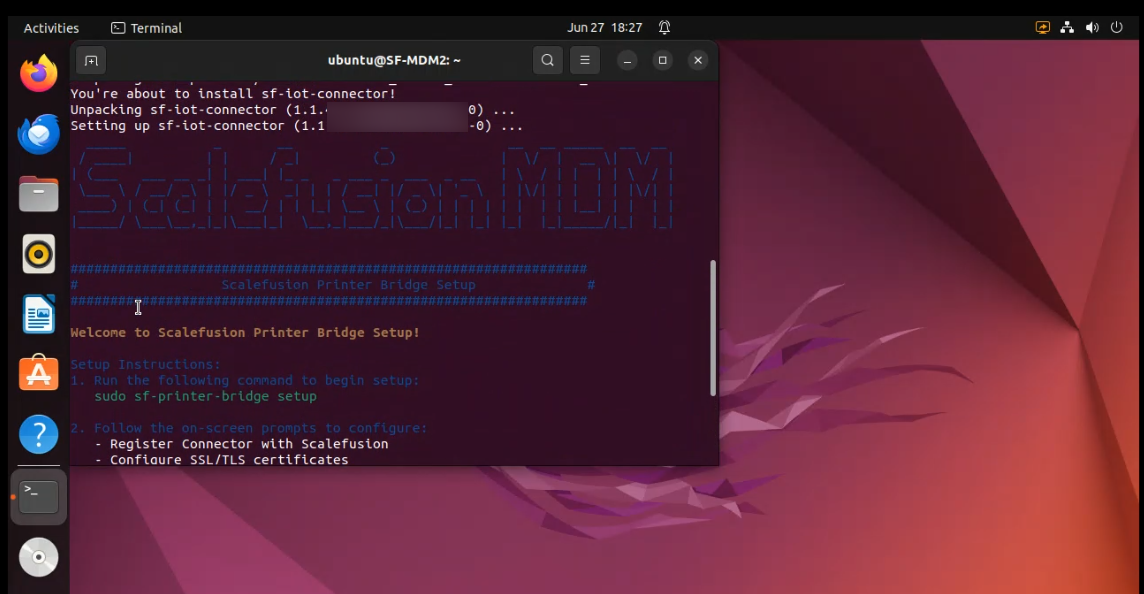
In Step 2, you’ll find the instructions to follow on your Linux machine to set up the connector.
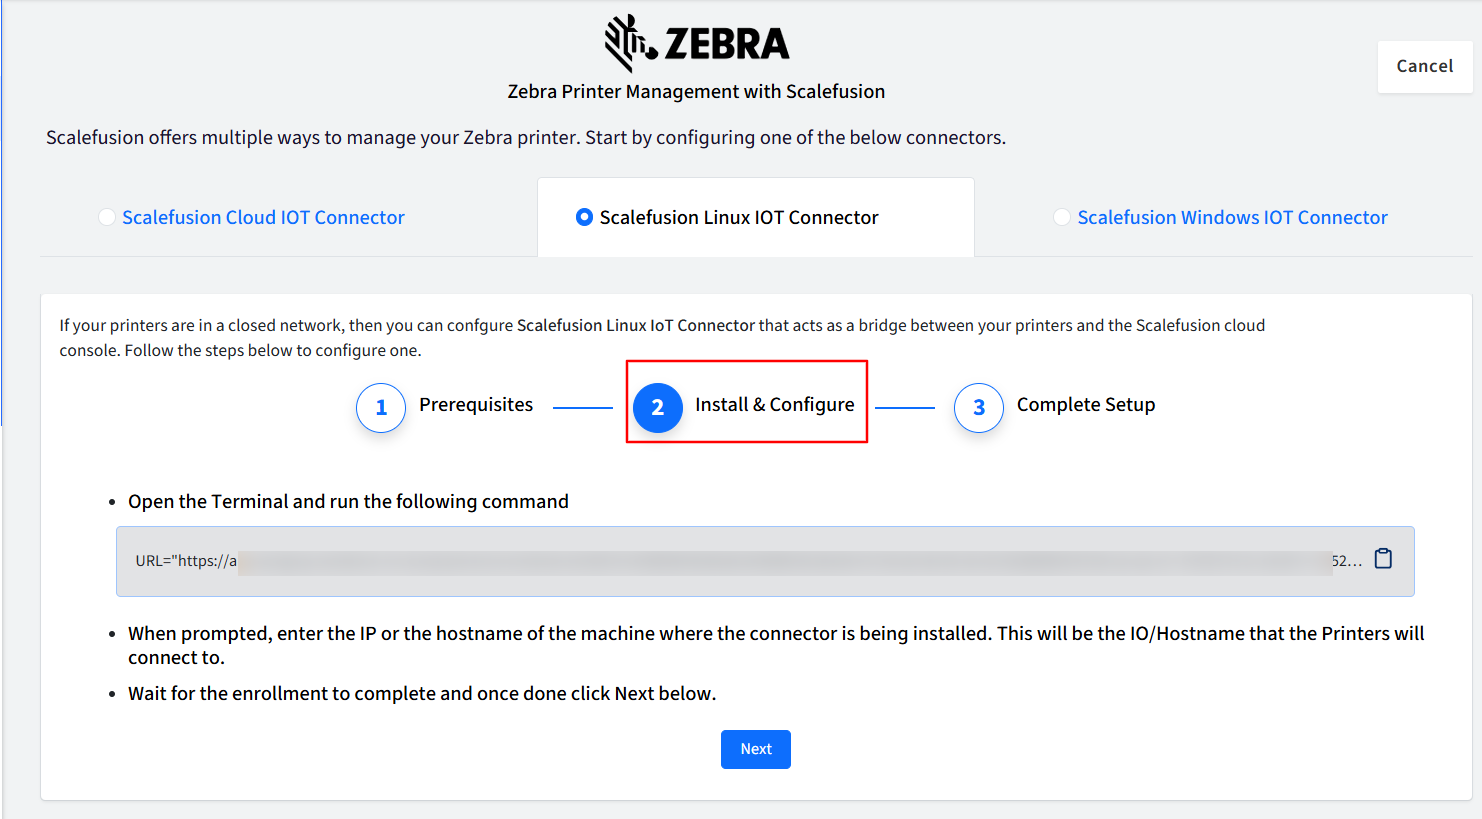
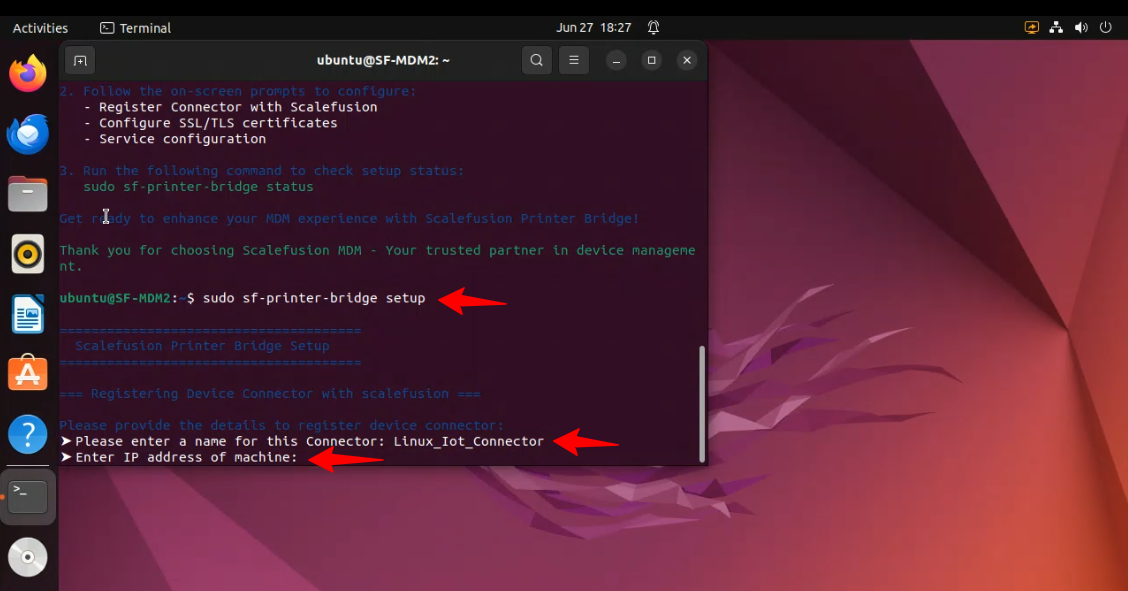
On your Linux machine, open Terminal and run the command that is provided.
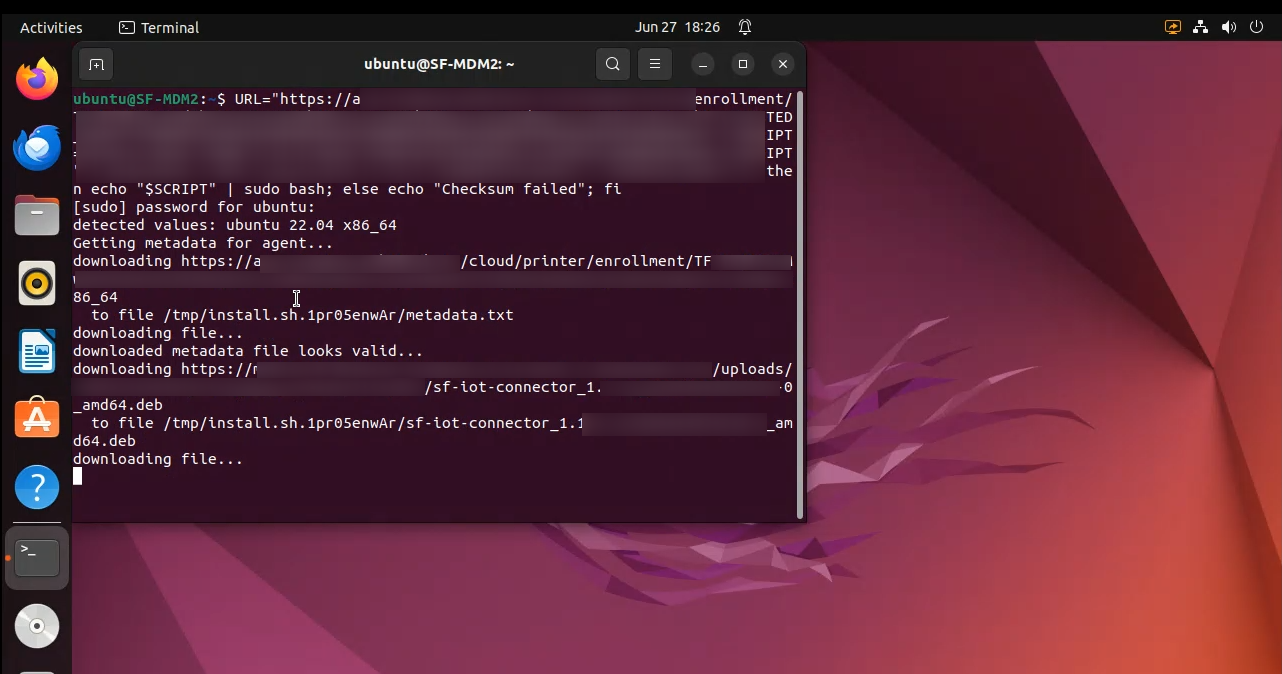
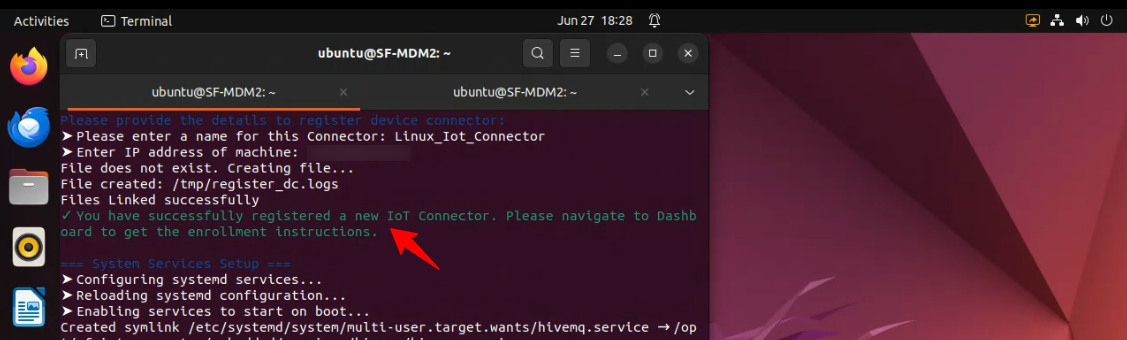
Provide a name to the connector for easy identification. When prompted, enter the IP of the machine where the connector is being installed. This will be the IP that the Printers will connect to.
Wait for the enrollment to complete, and once done, click Next on the scalefusion dashboard.
In Step 3, run the command as provided to check the status of the connection.
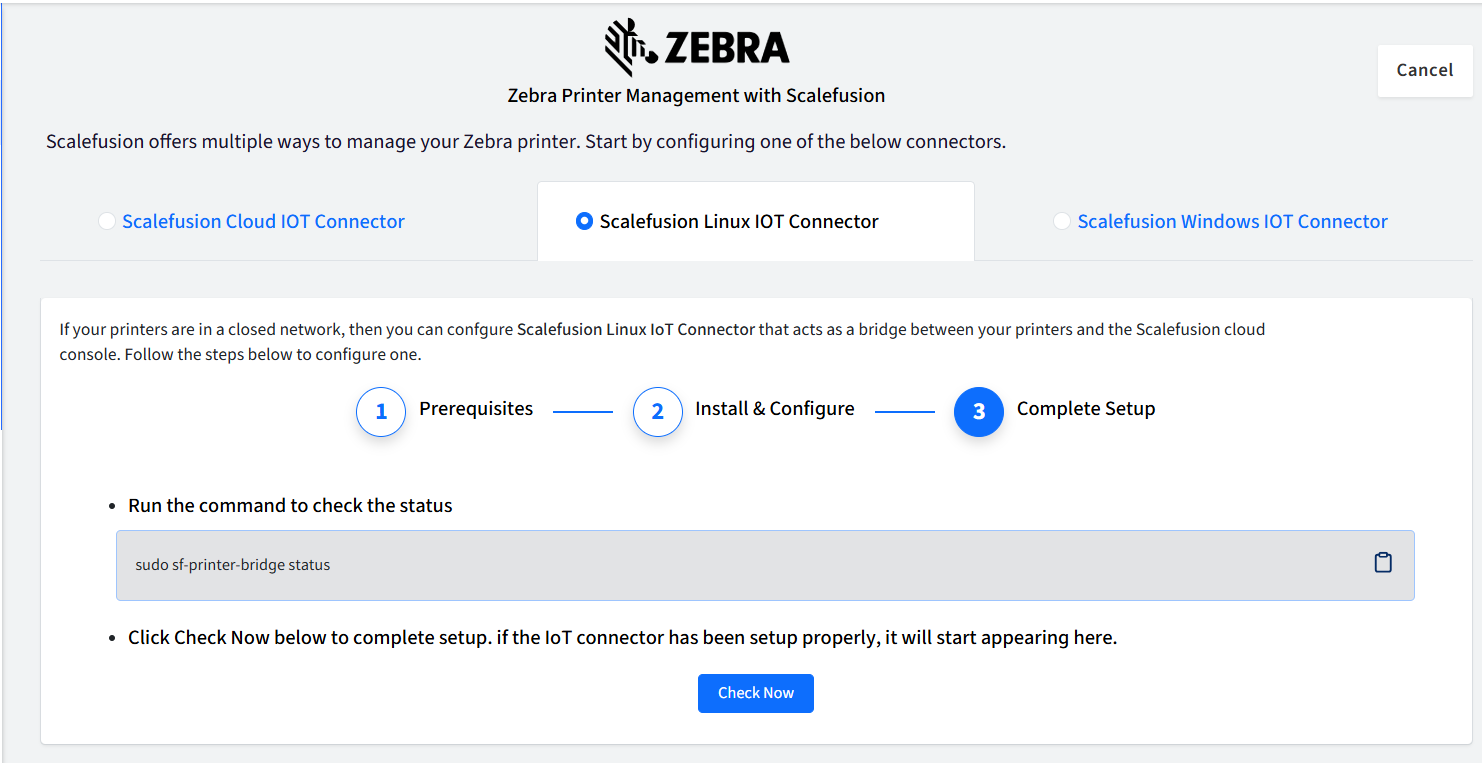
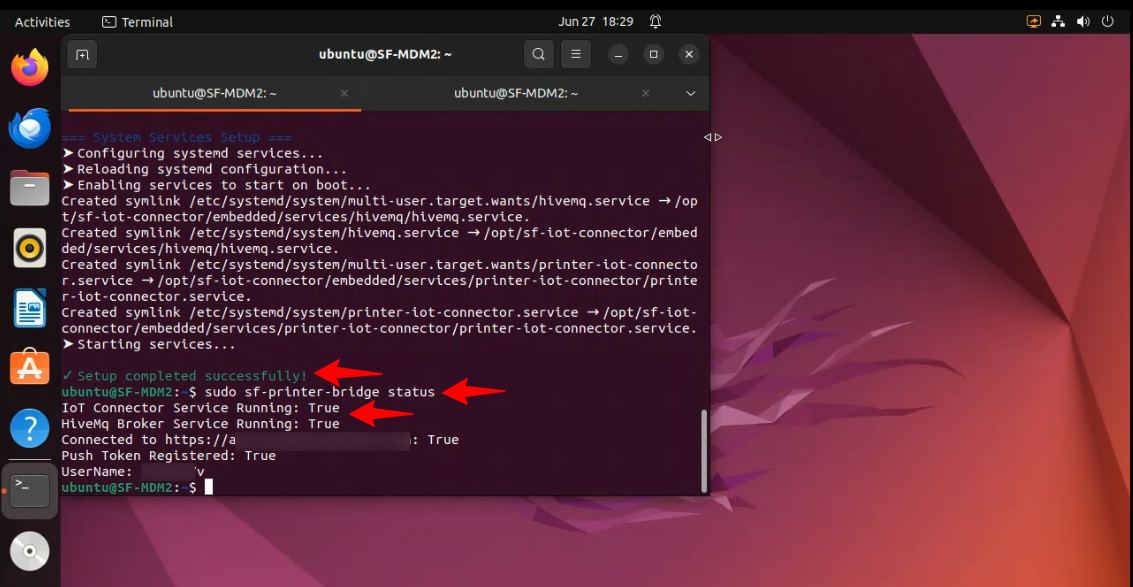
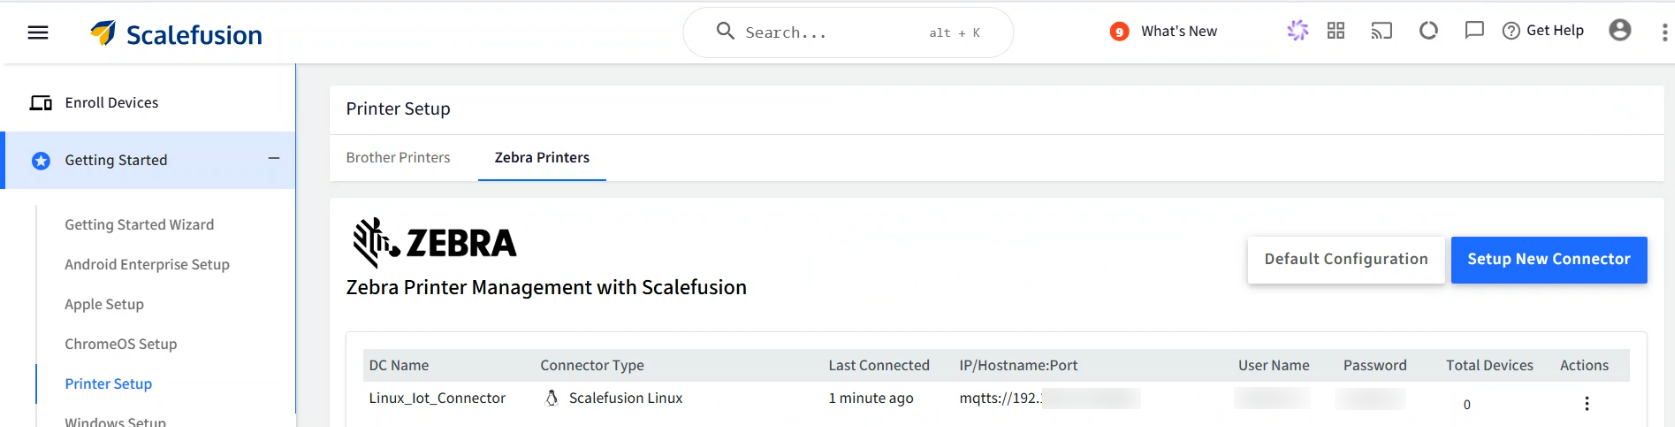
Click Check Now to check if the connector has been set up properly or not. If the IoT connector has been set up properly, it will start appearing on the dashboard.
Enroll the Printer
To begin enrolling your Zebra printers, first download and install the Zebra Setup Utilities tool on a Windows device. Once installed, you can proceed with printer enrollment by following the steps outlined in Step b: Enroll the Printer above.
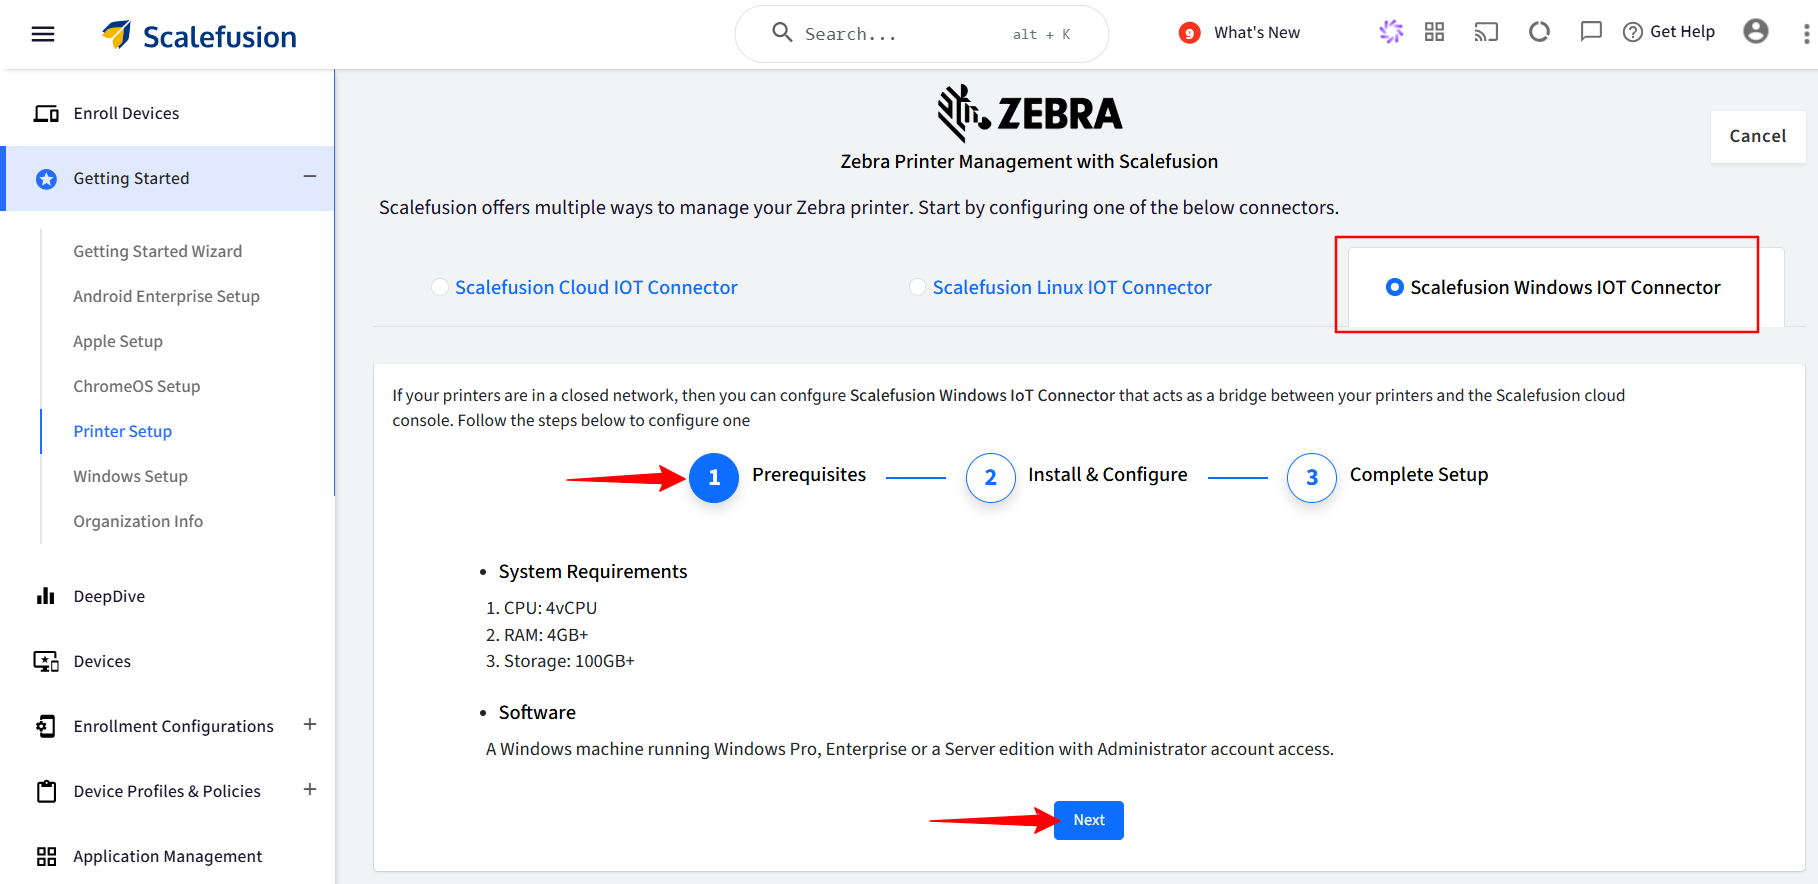
C. Scalefusion Windows IoT Connector
Navigate to Getting Started > Printer Setup > Zebra Printers.

Select Scalefusion Windows IoT Connector, where you will find the first step, which shows the prerequisites for the System and Software. Click Next.
In Step 2, you’ll find the instructions to follow on your Windows machine to set up the connector.
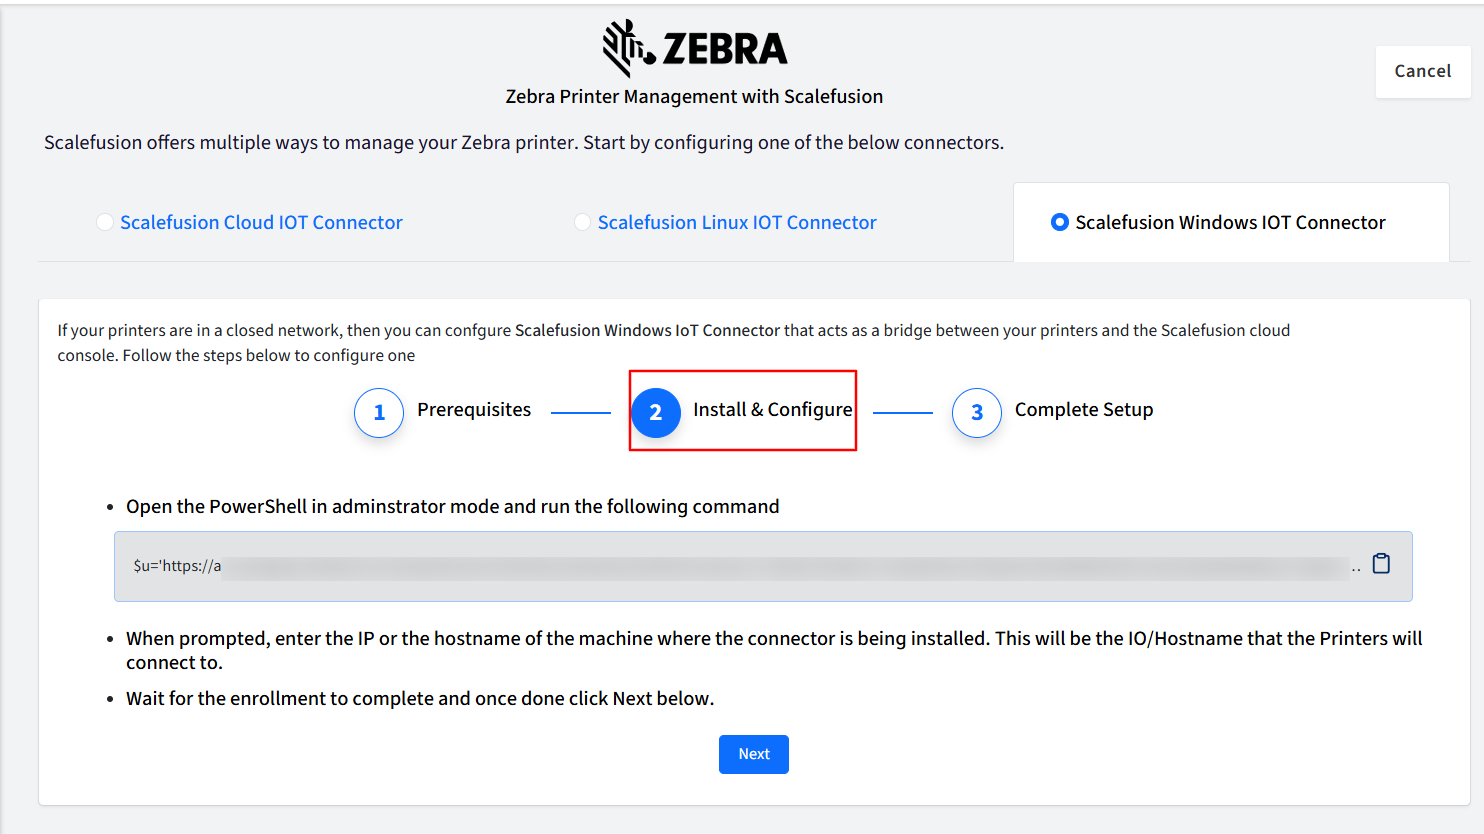
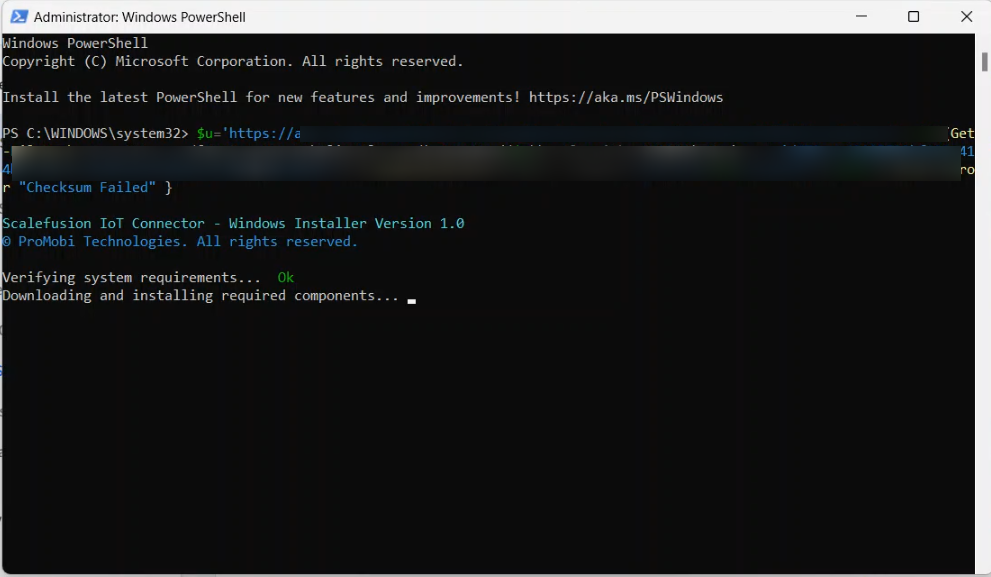
On your Windows machine, open PowerShell as an administrator and run the command that is provided.
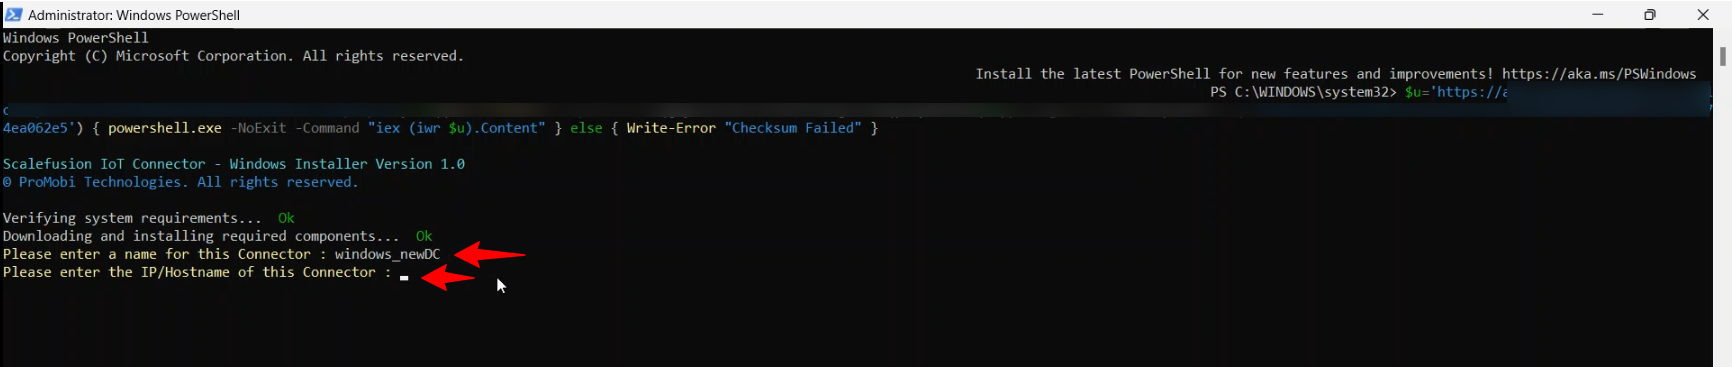
Provide a name to the connector for easy identification. When prompted, enter the IP of the machine where the connector is being installed. This will be the IP that the Printers will connect to.

Wait for the enrollment to complete, and once done, click Next on the Scalefusion dashboard.
In Step 3, launch "scalefusion iot connector" exe from the start menu on the Windows machine to check the status.
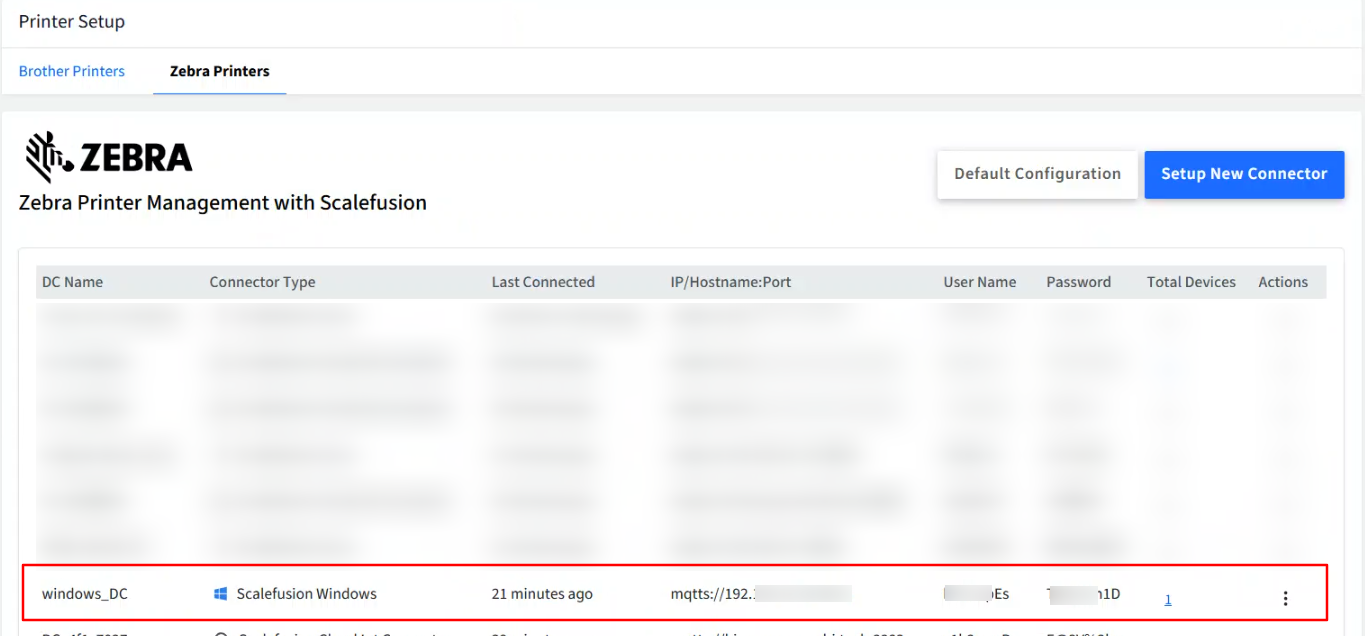
Click Check Now on the scalefusion dashboard to complete the setup. If the IoT connector has been set up properly, it will start appearing on the dashboard.
Enroll the Printer
To begin enrolling your Zebra printers, first download and install the Zebra Setup Utilities tool on your Windows device. Once installed, you can proceed with printer enrollment by following the steps outlined in Step b: Enroll the Printer above.