Okta SCIM Integration Guide for Scalefusion
- 16 Oct 2025
- 2 Minutes to read
- Print
- PDF
Okta SCIM Integration Guide for Scalefusion
- Updated on 16 Oct 2025
- 2 Minutes to read
- Print
- PDF
Article summary
Did you find this summary helpful?
Thank you for your feedback!
This guide provides step-by-step instructions for setting up SCIM integration with Scalefusion and provisioning users and groups using Okta.
Pre-requisite
SCIM Connector should be configured on Scalefusion Dashboard.
1. Set Up the SCIM Application in Okta
Step 1: Browse the App Catalog
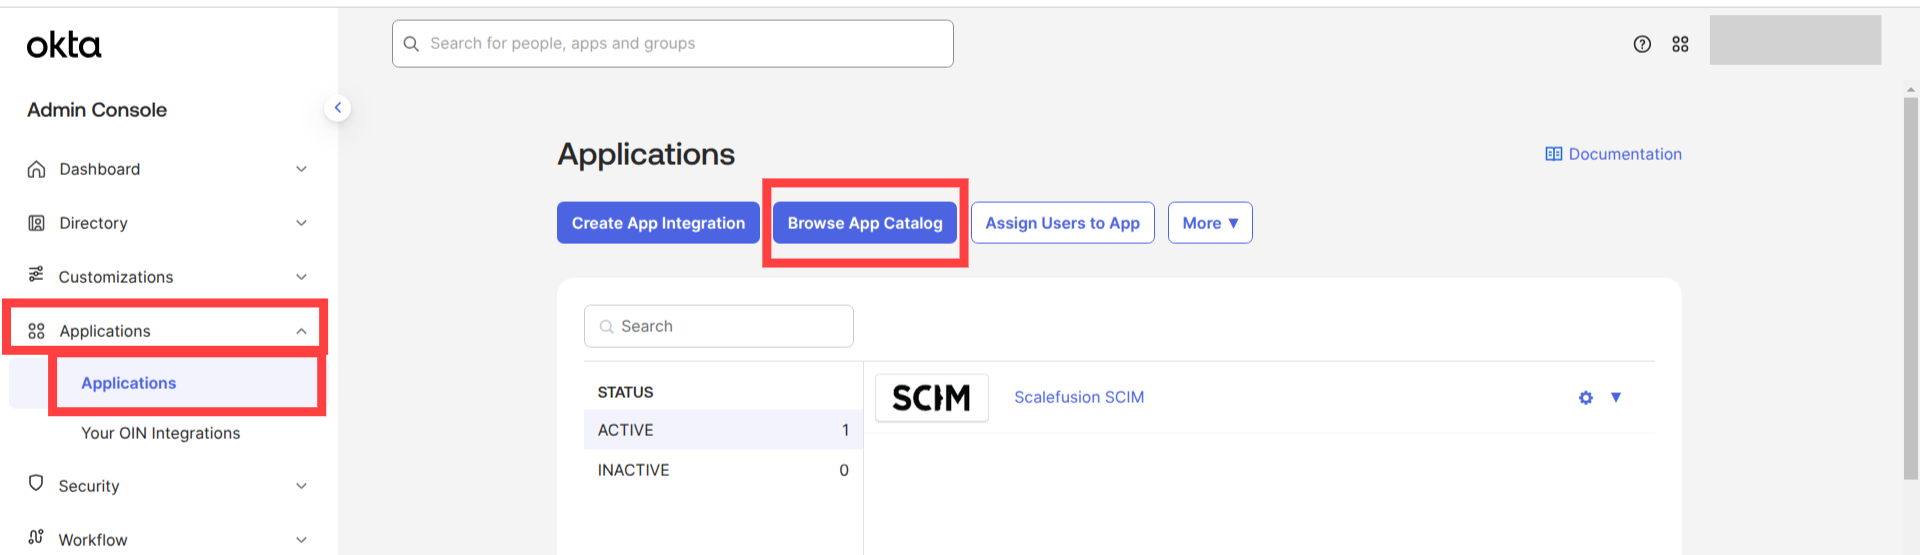
Navigate to Applications > Applications in the Okta admin console.
Click Browse App Catalog.
Search for SCIM in the search bar and click See All Results.
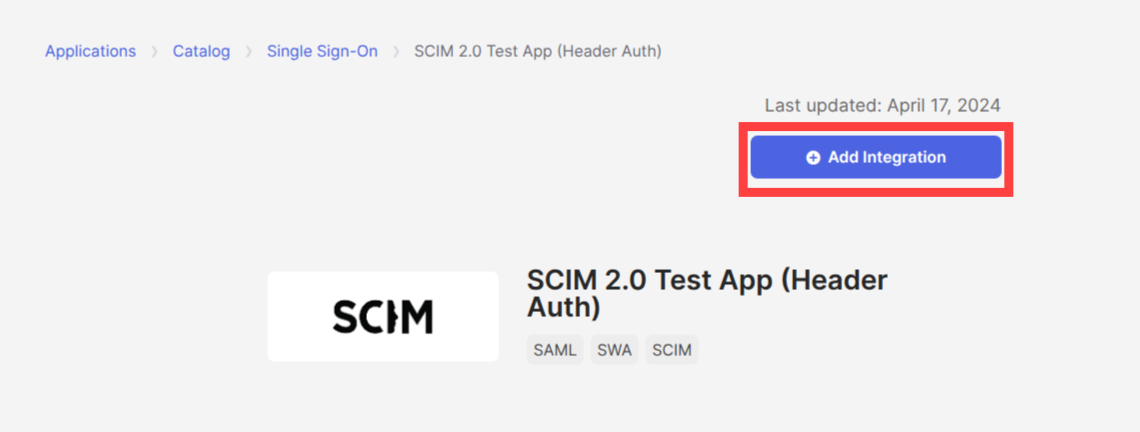
Select SCIM 2.0 Test App (Header Auth).

Step 2: Add and Configure the App
Click Add Integration.
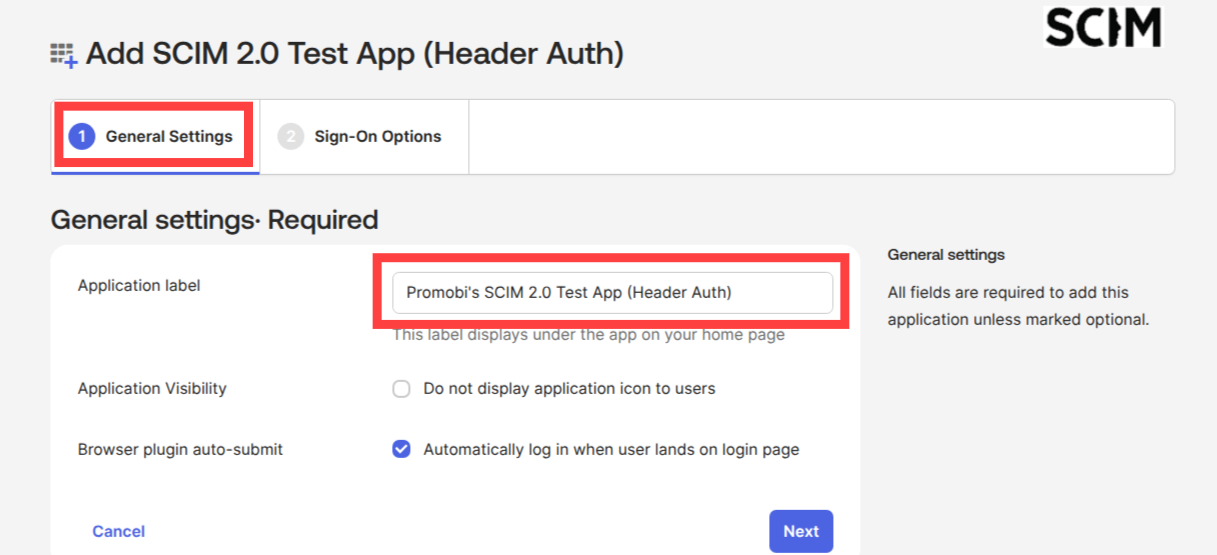
Under General Settings, provide an application label and click Next.
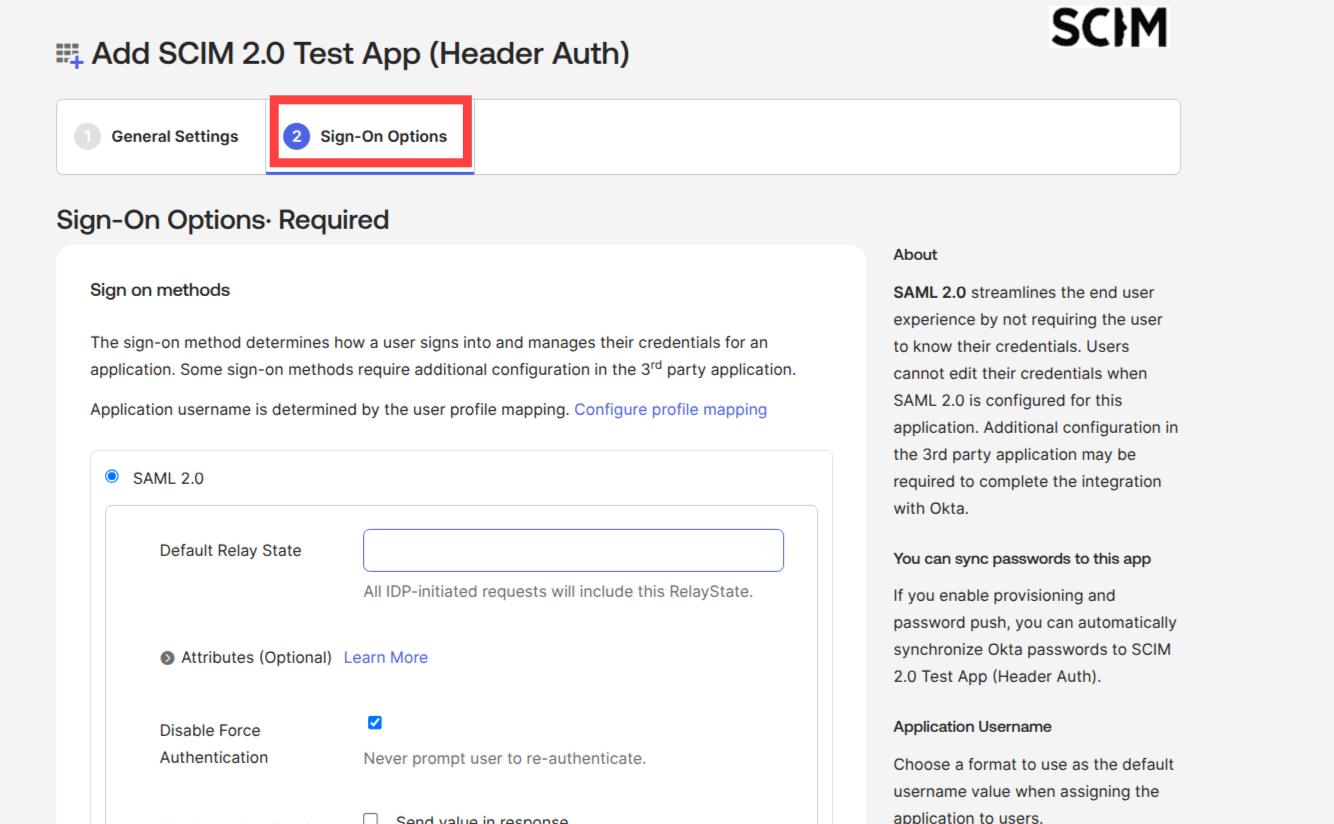
Under Sign-On Options, leave default settings and click Done.
2. Configure API Integration
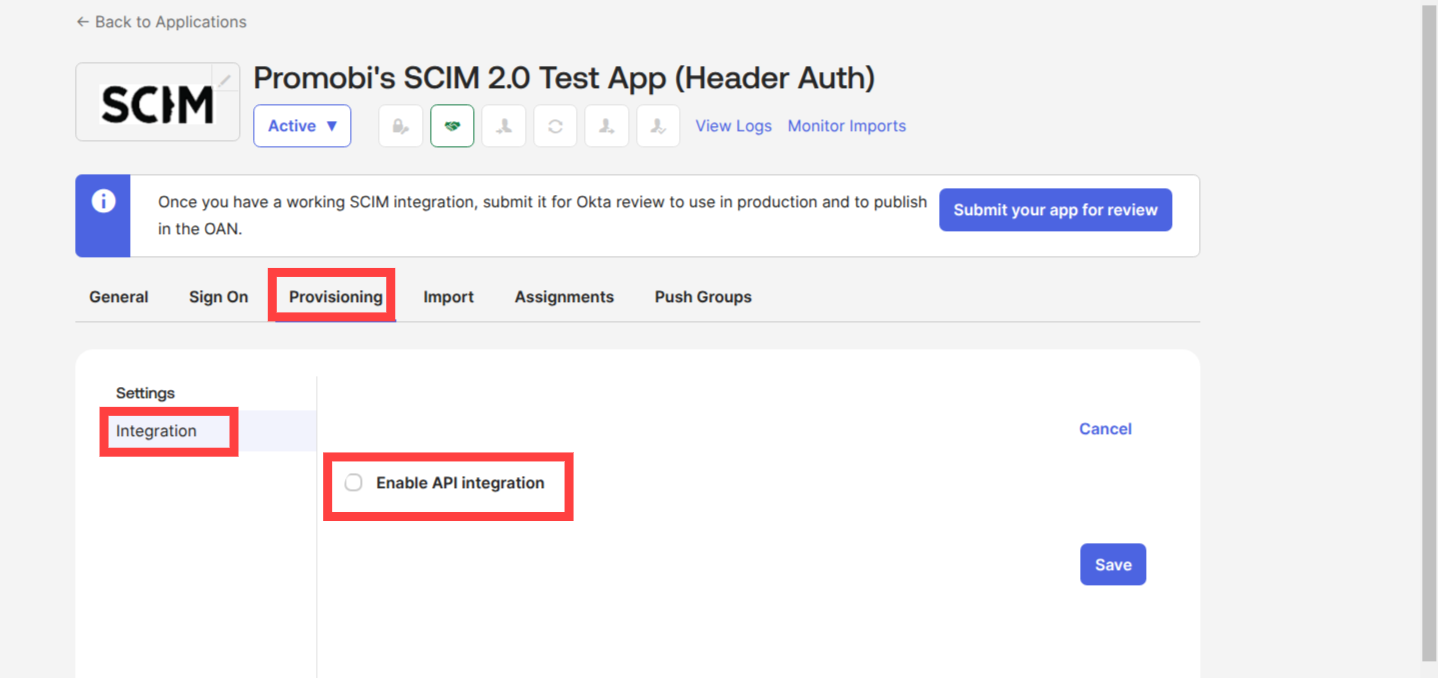
Go to the Provisioning tab of the SCIM application.
Select Integration and check Enable API Integration.
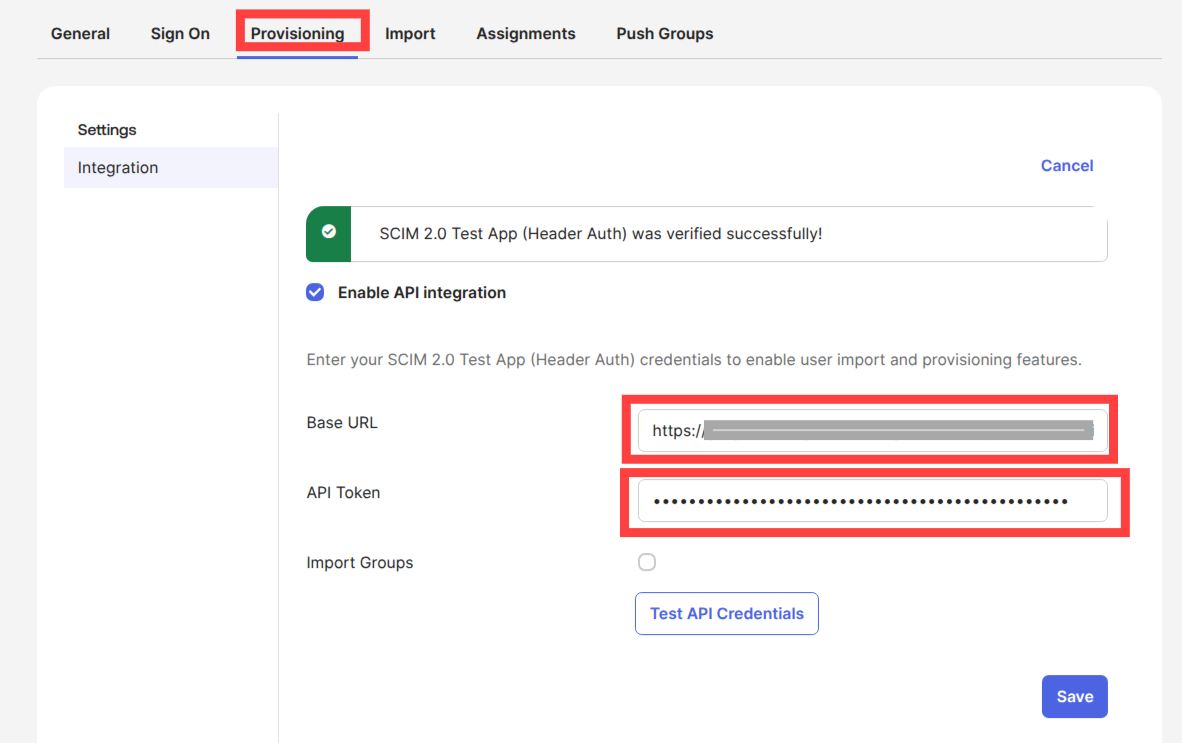
Paste the Base URL and API Token from your Scalefusion dashboard.
Base URL: Copy the SCIM API Endpoint from Scalefusion Dashboard (from Configure SCIM dialog) and paste here
API token format: Copy the Bearer Token (from Configure SCIM dialog) and paste here
Bearer <Your_Token_Here>
Click Test API Credentials to validate the connection.
Once successful, click Save.
Step 3: Configure Provisioning Actions
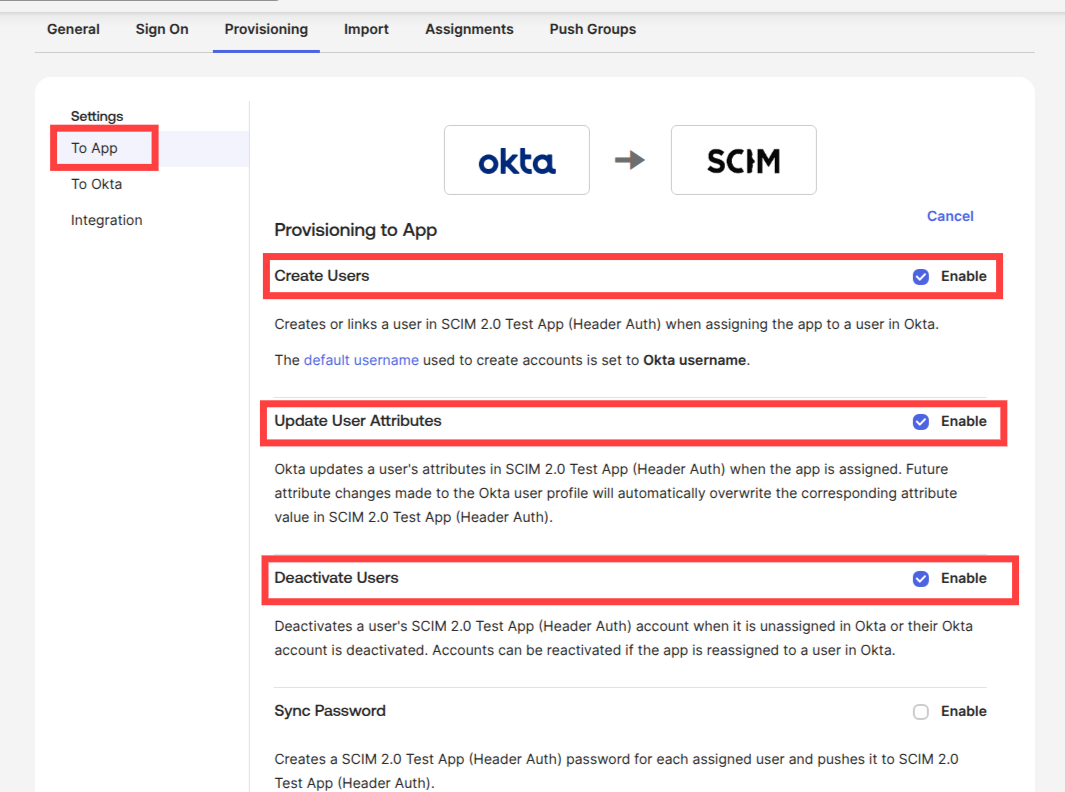
Click on To App > Edit.
Enable the following options:
Create Users
Update User Attributes
Deactivate Users
Click Save.
3. Assign Users to the SCIM Application
You can assign users either individually or by group.
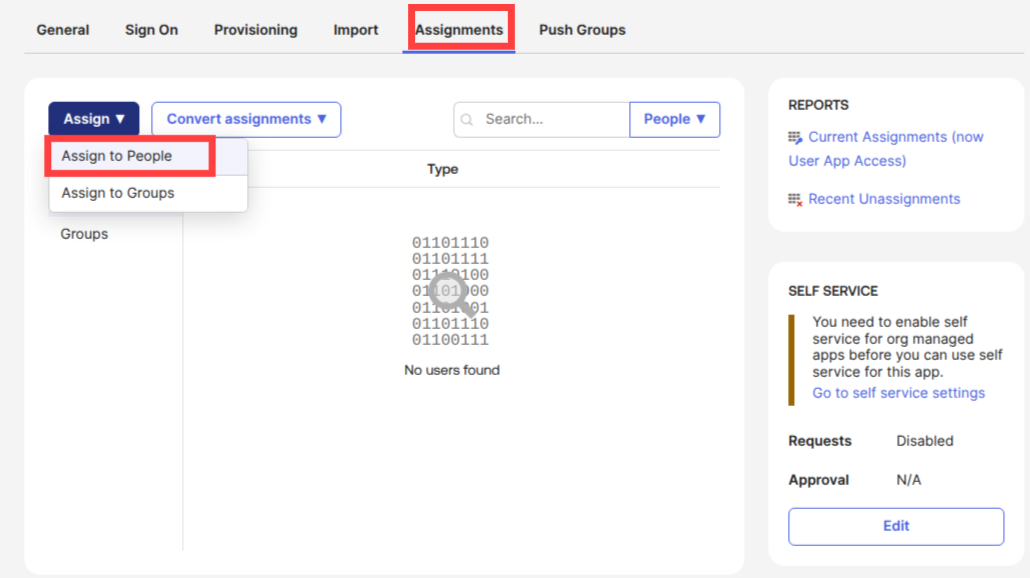
A. Assign to Individual Users (People)
Go to the Assignments tab and click Assign > Assign to People.
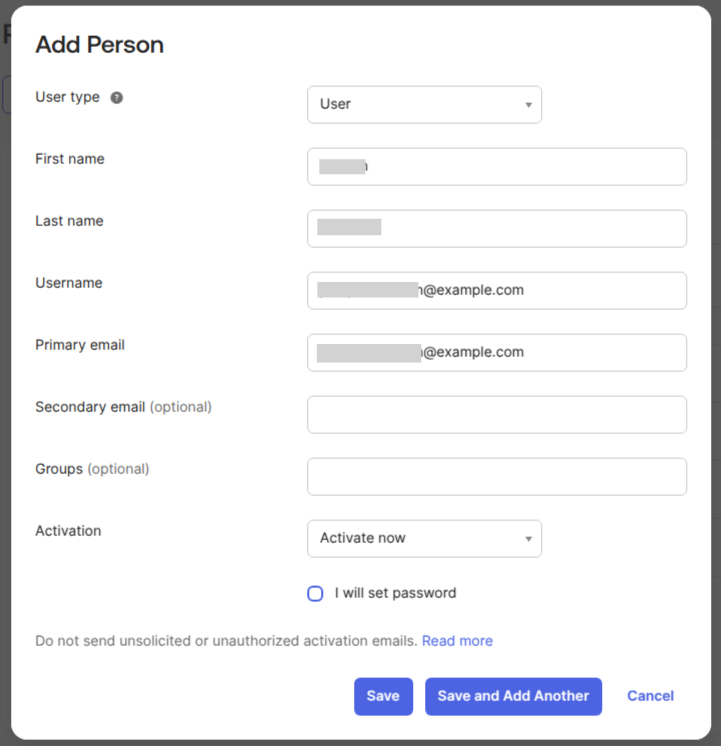
If no users exist yet, click Add Person.

In the Add Person dialog, fill in the required user details and click Save:
User Type
First Name
Last Name
Username
Primary Email
Secondary Email (optional)
Groups (optional)
Activation status
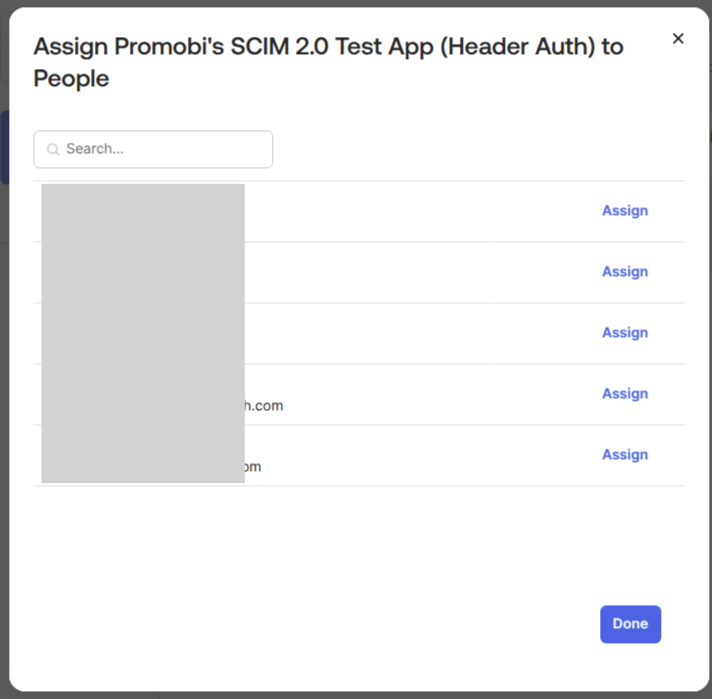
From the list of users, click Assign next to the desired user to assign the SCIM app.
B. Assign to Groups
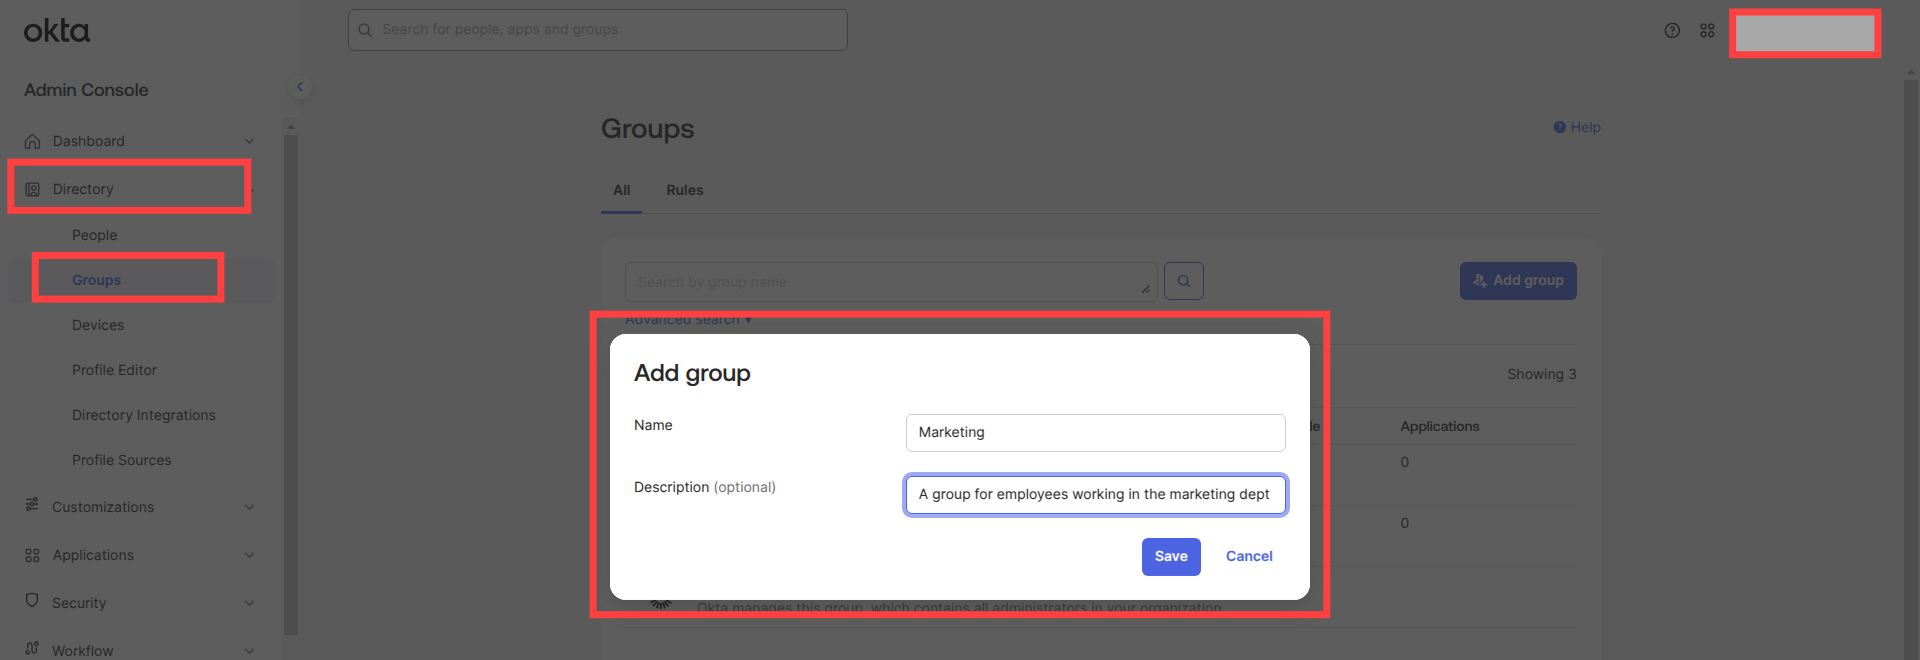
Step 1: Create a Group
Go to Directory > Groups > Add Group.
Enter a Name and optional Description.
Click Save.
Step 2: Add Users to the Group
Click Assign People for the group.
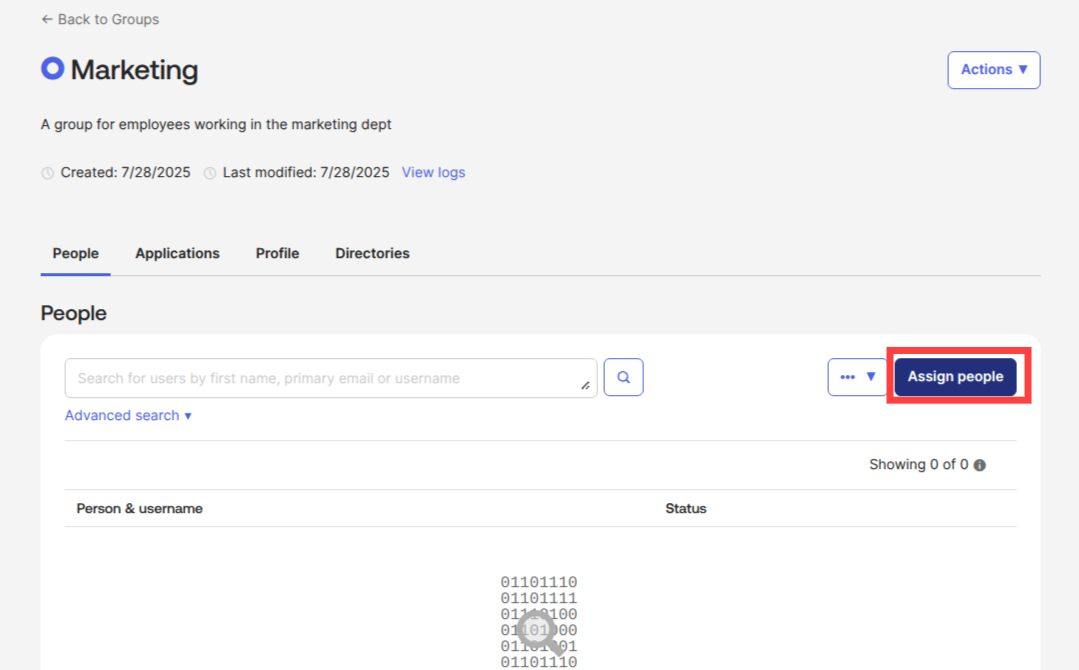
If users are not yet created, click More Actions > Add People and follow the same process as in the Add Person section.
Click the
+icon next to each user to assign them to the group.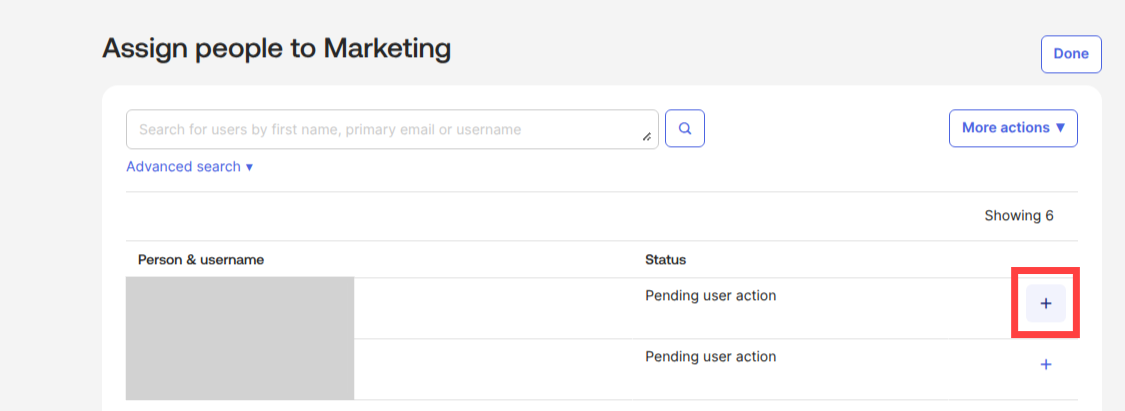
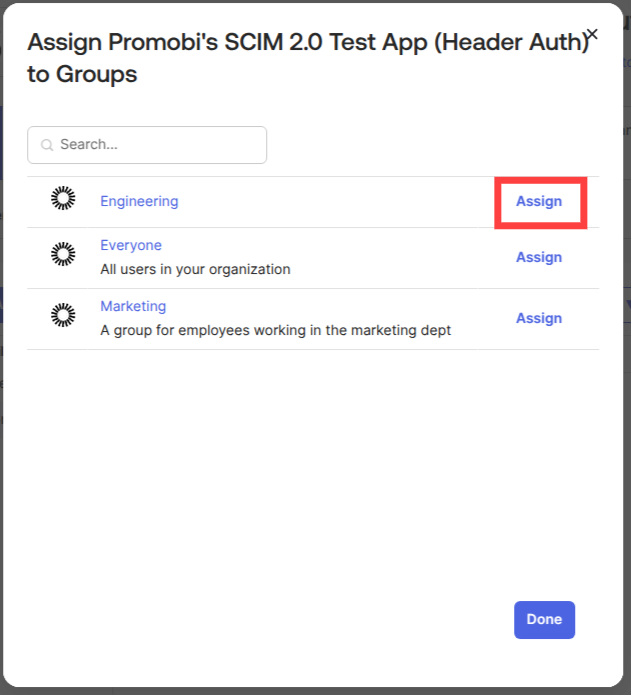
Step 3: Assign the SCIM App to Groups
Go to the Assignments tab > Assign > Assign to Groups.
Select the desired group from the list and click Assign.
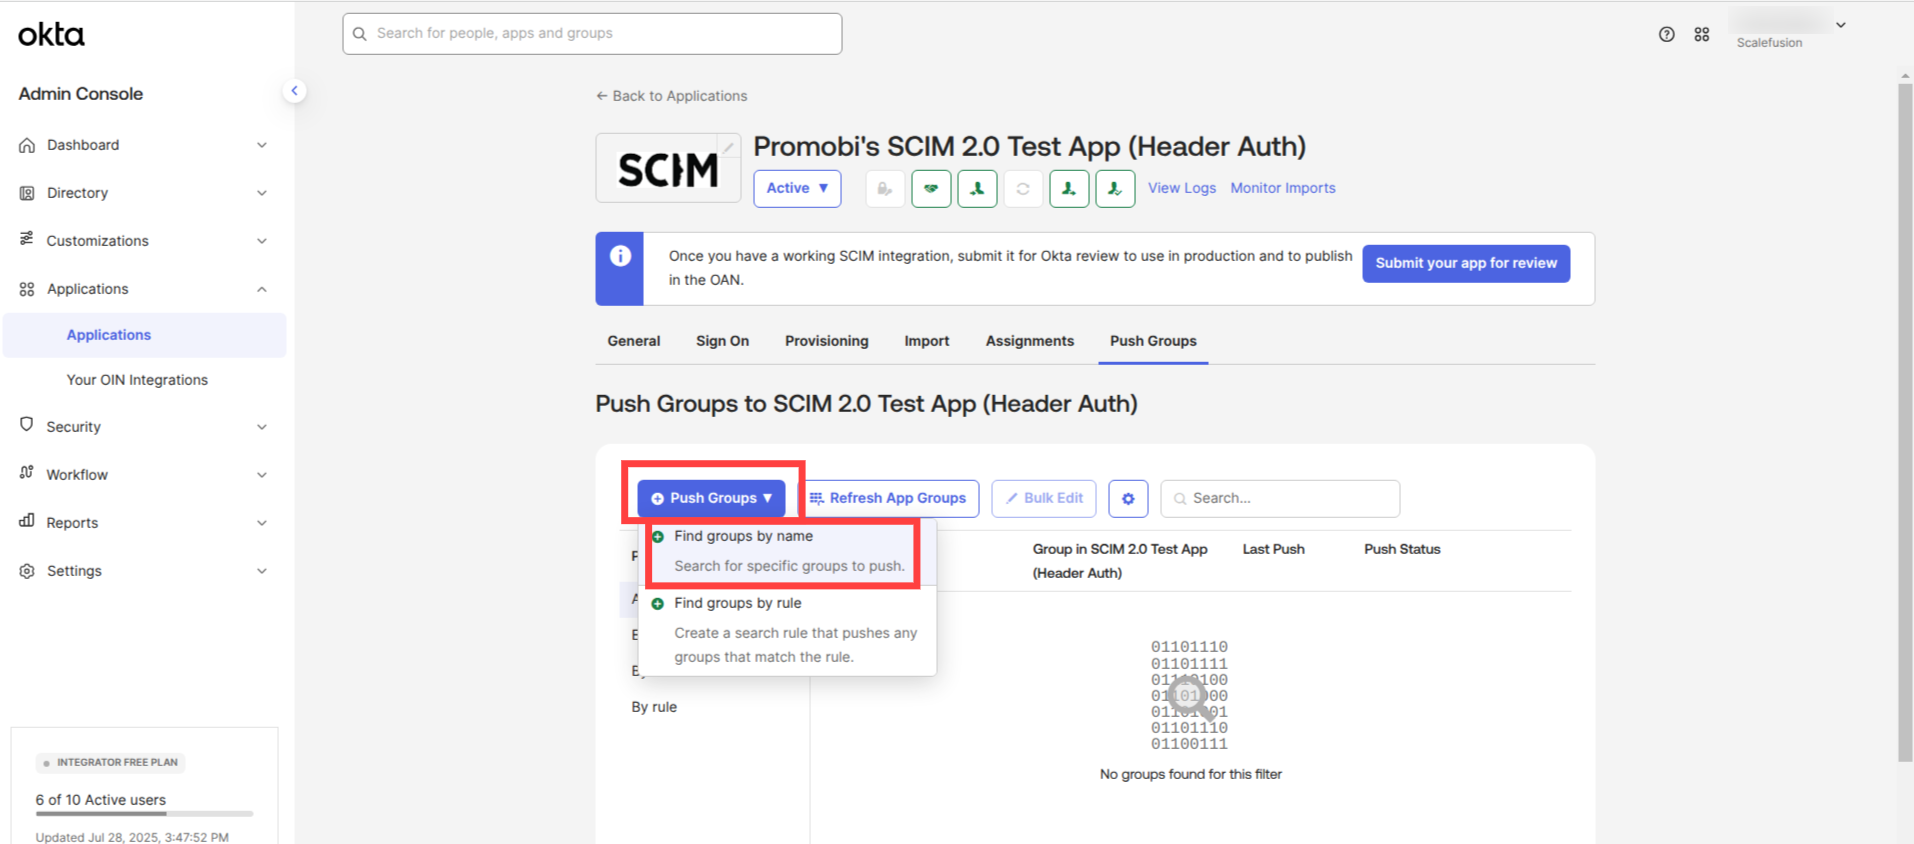
4. Push Groups to Scalefusion
Once groups and users are created and assigned, push them to Scalefusion.
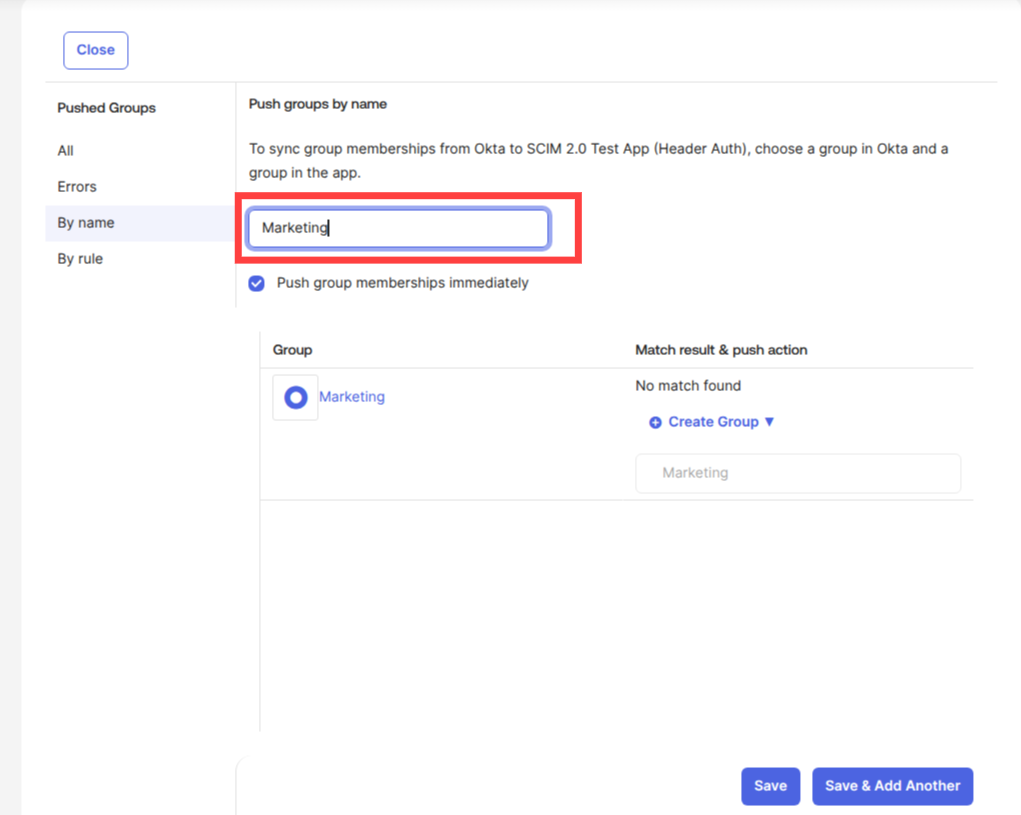
In the SCIM application, go to Push Groups > Push Groups > Find groups by name.
Search for the group you created.
Select it and click Save.
If you push groups to Scalefusion without assigning them in the Assignment section, only the group names will be synced—users will not be included. To sync groups along with their users, make sure to both assign the SCIM app to the groups and push the groups to Scalefusion.
The group and its users will now sync to the Scalefusion dashboard. Once synced, the group and its users will appear in the Scalefusion dashboard.
If individual users are provisioned, they will be listed under the User Enrollment section.
When a group is provisioned, both the group and its associated users will appear under the User Groups section. The associated users will also be listed under the User Enrollment section.
Was this article helpful?