Scalefusion's Presentation mode is an Android, Windows and iOS device-specific feature on top of the Scalefusion Content Management add-on that lets you easily turn your Scalefusion-managed devices into Digital Signage Kiosks or use your content as screensavers.
Digital Signage Kiosks are a great way to engage visitors in malls, airports and various public places. Android tablets are frequently used devices to set up Digital Signage Kiosks because of their low cost and durability. However, setting them up, locking them in a Kiosk mode, and controlling the content for signage is easier said than done.
Scalefusion Presentation mode helps you precisely solve this problem on your Scalefusion-managed devices. While Scalefusion helps you set up the devices as a single-purpose Kiosk, by using its Presentation mode feature, you can easily publish and update the content of digital signage.
In this document, we will see how to create a presentation and use it for Digital signage or as a screensaver.
Before You Begin
✅ You must have a valid Scalefusion dashboard account.
✅ You must have an active subscription to Scalefusion Content Management.
✅ Your devices must be enrolled in the dashboard.
✅ You must have created a Device profile.
✅ For Android and Windows devices, FileDock and Scalefusion clients must be updated to the latest version.
✅ For iPhone devices, Scalefusion must be updated to the latest version.
✅ For macOS users, Scalefusion - MDM client app should be installed on devices
Video Tutorial
Watch this video tutorial to learn more on how to use Scalefusion Presentations. For the purpose of the demo, we have uploaded a few image files and a video file.
Creating a Presentation
- From your dashboard, go to Content Management ➔ Content section to make sure that you have some content uploaded. For this demo, you can upload some images (jpg, gif) and a video (mp4).
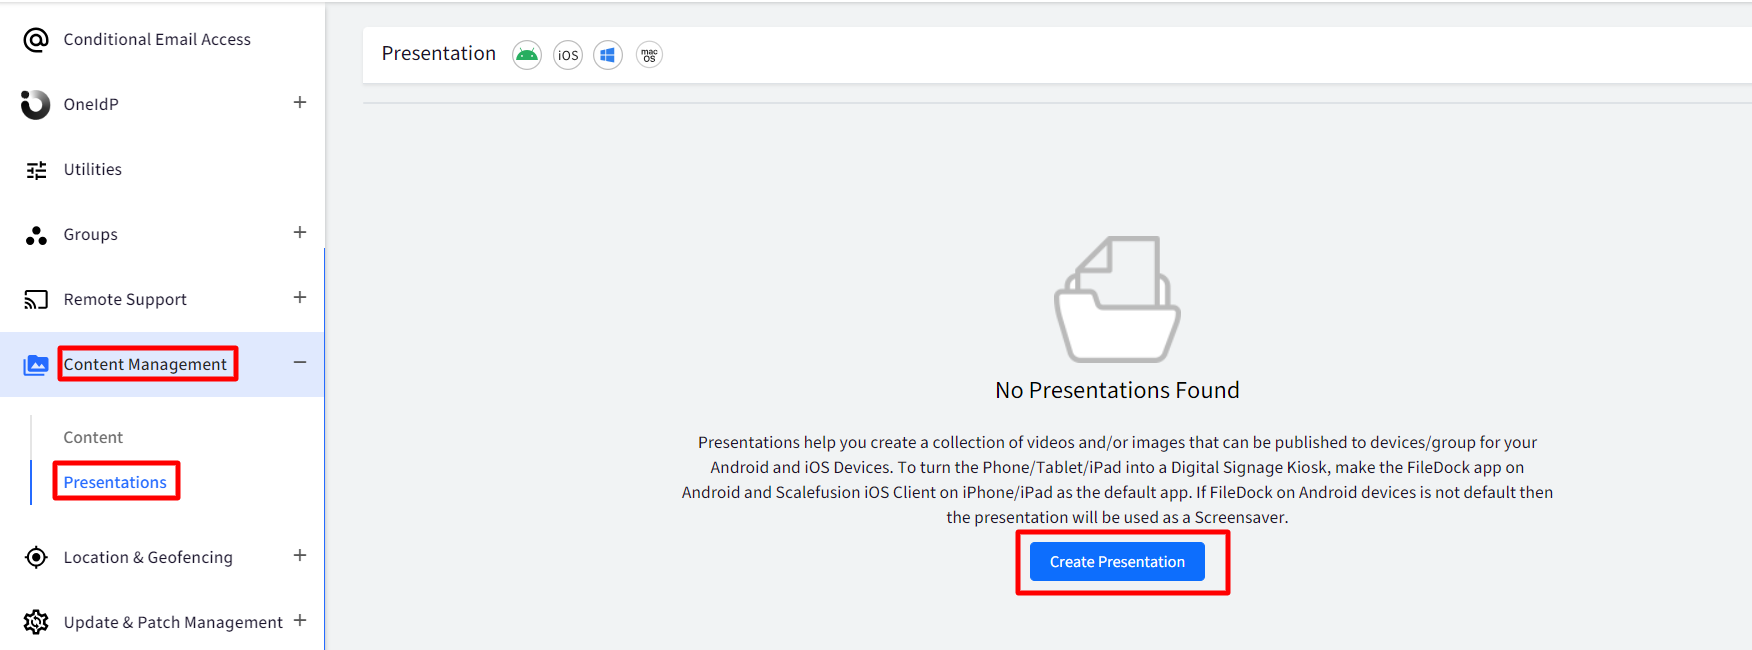
- Navigate to Content Management ➔ Presentations section. This section displays all your current presentations and the published information.
- Click on Create Presentation.
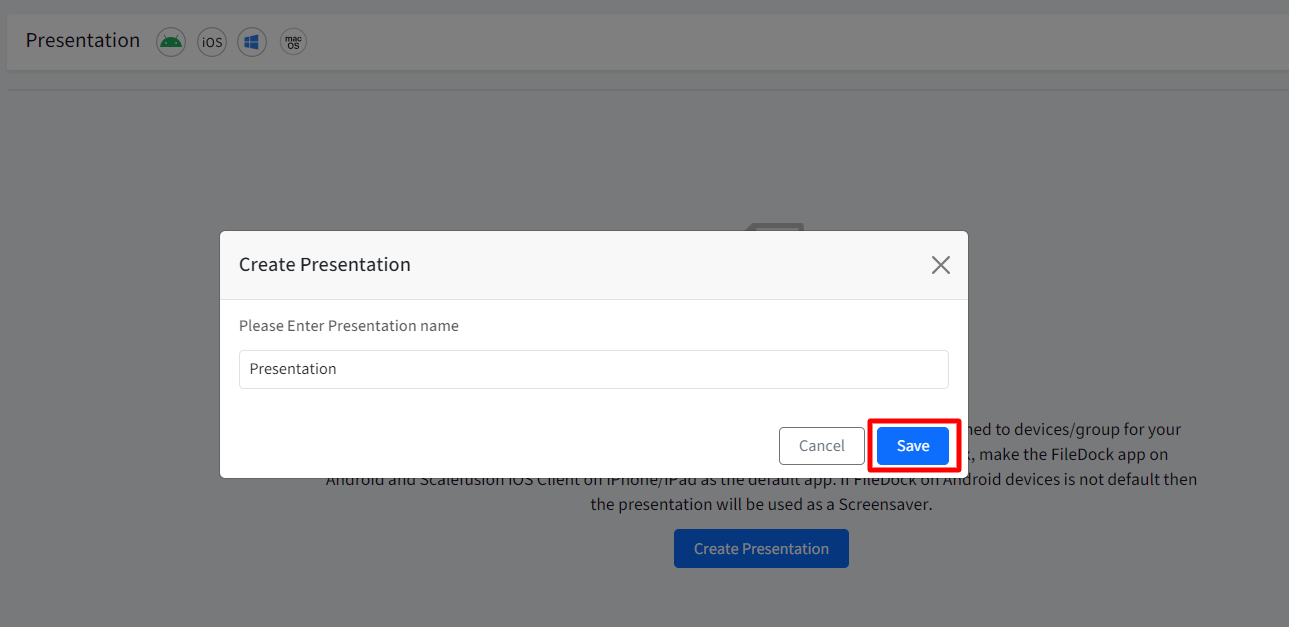
- Give a name for your presentation and click on Save.
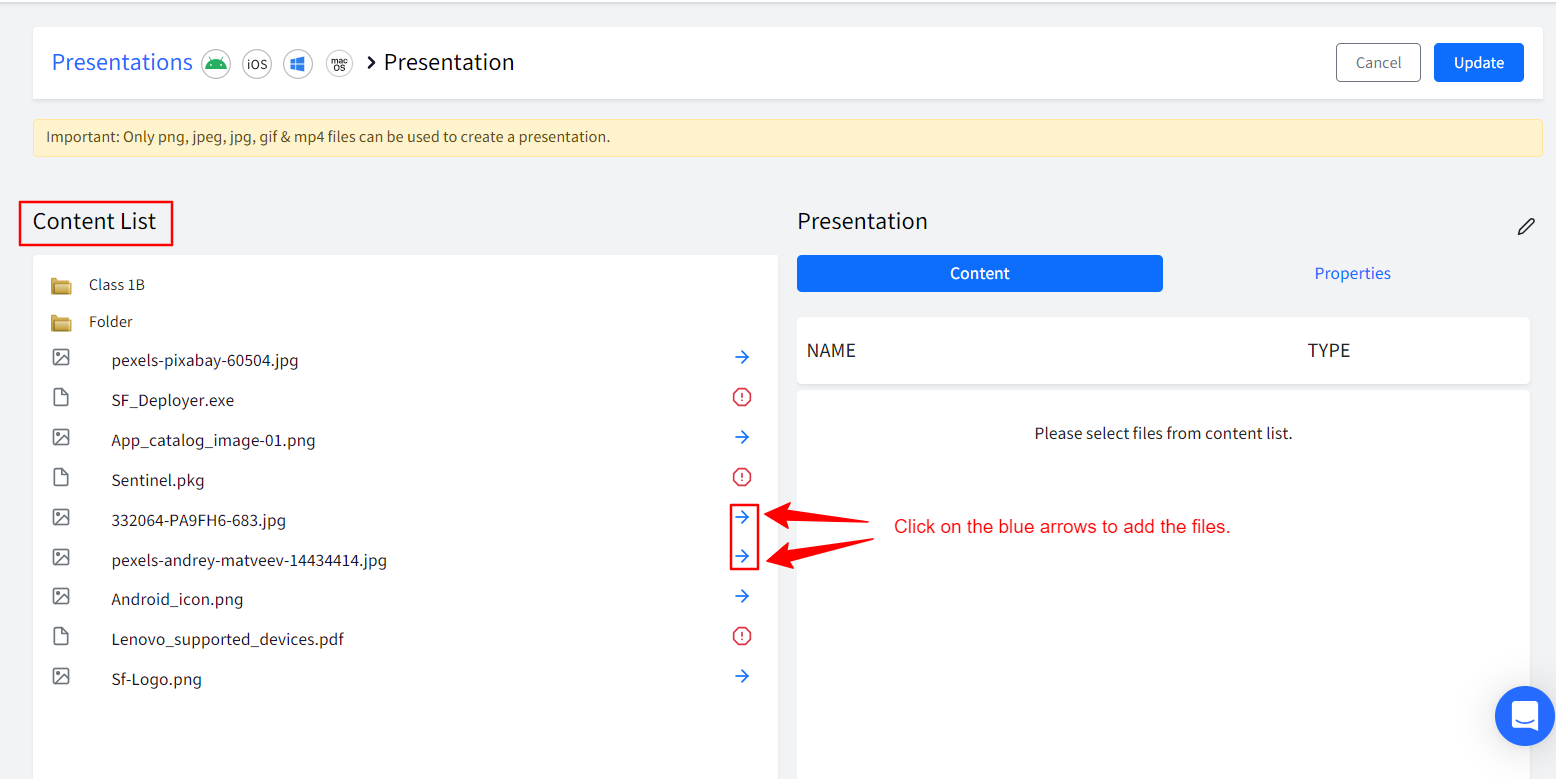
- You will see a Presentation Creator window which has two panels,
- Content Panel - This panel displays all the content that you have uploaded in a tree format so that you can choose the files and move to the Presentation Panel.
- Presentation Panel - This panel displays all the current files that are part of the presentation and some additional properties that can be set for the presentation.
- Currently, we support jpg, jpeg, png, gif and mp4 file formats only to be a part of the presentation.
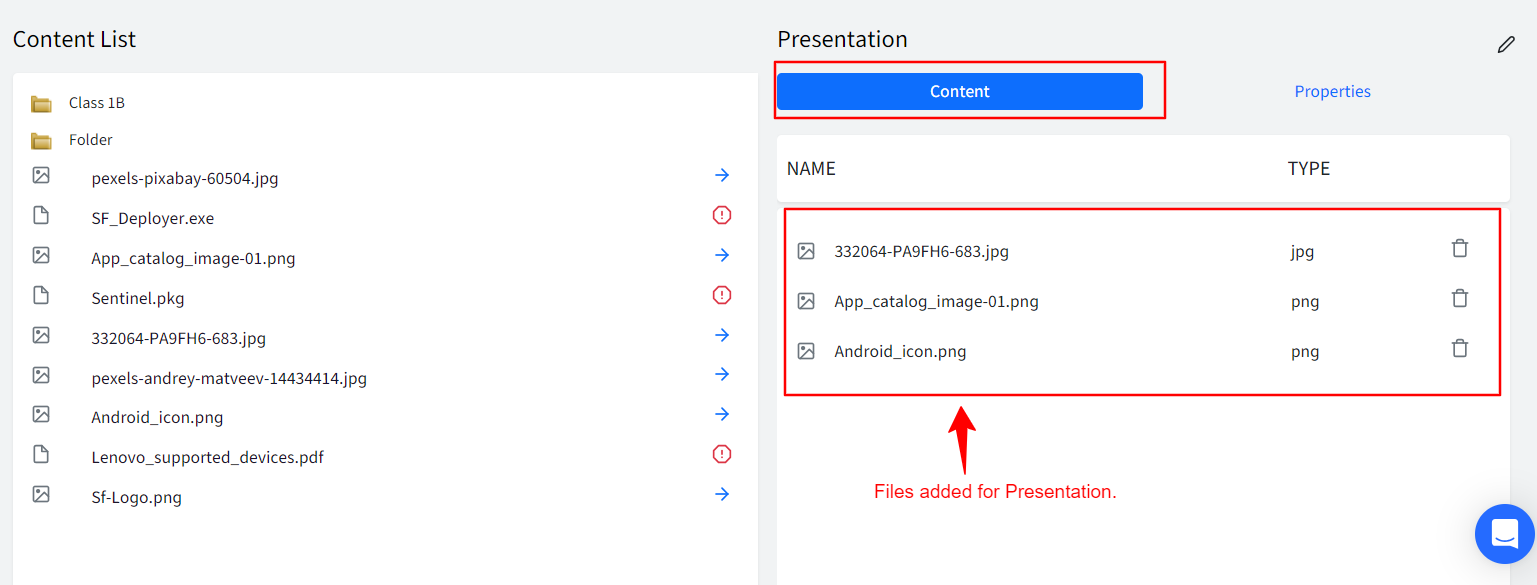
- Start moving the files from the Content panel to the Presentation panel. You can use the arrows next to the file to move. For files that are not supported, you will see a red exclamation mark.
- Once the files are moved to the Presentation panel, you can set the reorder by dragging the files to the appropriate position.
- You can set the properties of your presentation from the Properties tab. The following table explains different property attributes.
Property Description Enforce landscape mode Gives you an option to keep your presentation orientation in Landscape mode. Use as a Screensaver Allows you to use this presentation as a screensaver.
⚠ This feature is not available for iOS devices.
Loop Continuously in Presentation mode Allows you to play your presentation in a continuous loop. This feature is applicable when the presentation is used for digital signage. Choose an Interval Time Allows you to set a time duration to delay between two files. The minimum value is five seconds, and the maximum value is one minute. Display a Shortcut to play on-demand Allows Admins to place a shortcut for Presentation on the device to start it on-demand For presentations to handle touch behavior, you can choose the option Touching/Clicking the screen to move to the next tile(till the last file) in both Screensaver and Presentation mode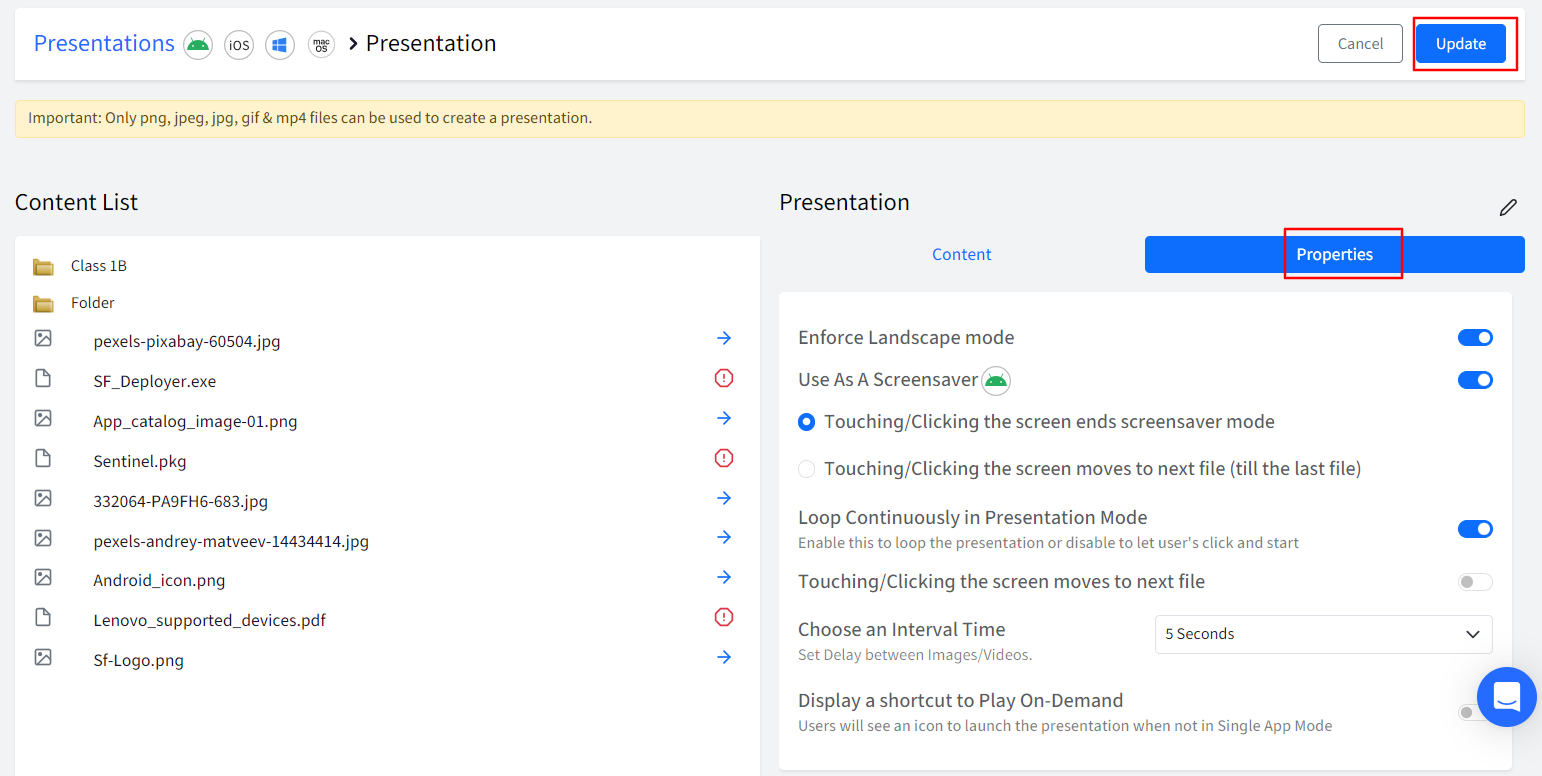
- Once you have made all the required changes, click on Update to save the presentation.
Publishing a Presentation
- Sign in to Dashboard.
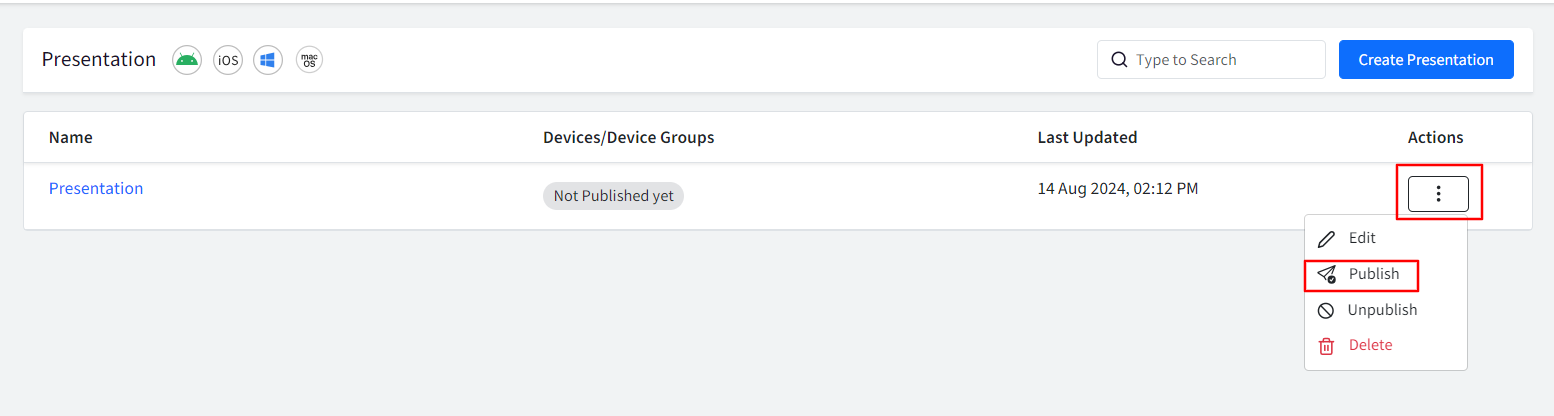
- Go to Content ➔ Presentations and click on the 3 dots action menu. You will see the following options to manage your presentation.
- Edit - Use this option to edit this presentation.
- Publish - Use this option to publish this presentation to devices or device groups.
- Unpublish - Use this option to un-publish this presentation to devices or device groups.
- Delete - Use this option to delete the presentation.
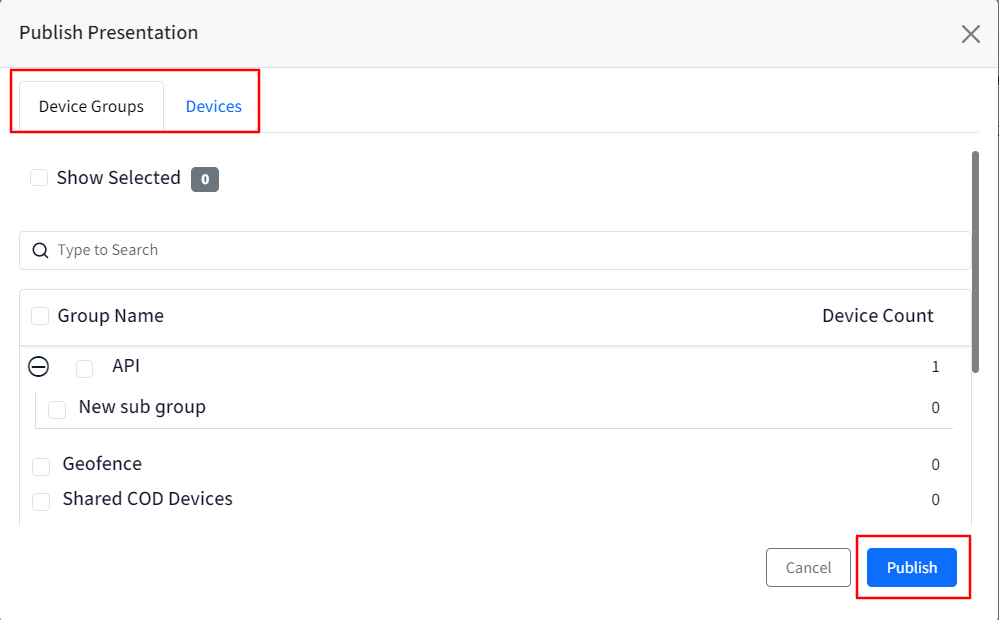
- To publish the presentation, click on the Publish option and select the Device Groups or Devices where you want to publish.
Additional actions
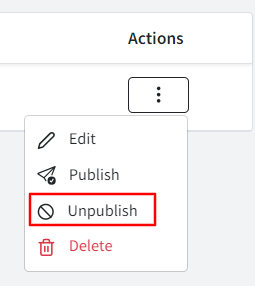
Unpublish - Once a presentation is published on a device, it can be removed using Unpublish
Edit - You can always add or remove images/videos from a presentation using Edit
Delete - The presentation can be deleted using Delete
Using Presentation for Digital Signage
For Android devices
- From your dashboard, go to Device Management ➔ Device Profiles.
- Create or Edit an existing device profile.
- In the Select Apps section, enable the FileDock application.
- Navigate to the Optional Settings sectionand make the following changes.
- Single App Mode - In this section, set FileDock to be the application that runs always.
- Display Settings - In this section, set the screen timeout settings to Keep Screen Always On.
- Click on Create Profile / Update Profile to save the device profile.
- Now you can add this edited/profile to a Device Group to which the presentation is published as described in the Publishing a Presentation section.
- Once you publish a presentation on all the devices where FileDock is running as the default application, it will start downloading the files in the background and while the files are being downloaded, the presentation starts live-streaming.
For Windows devices
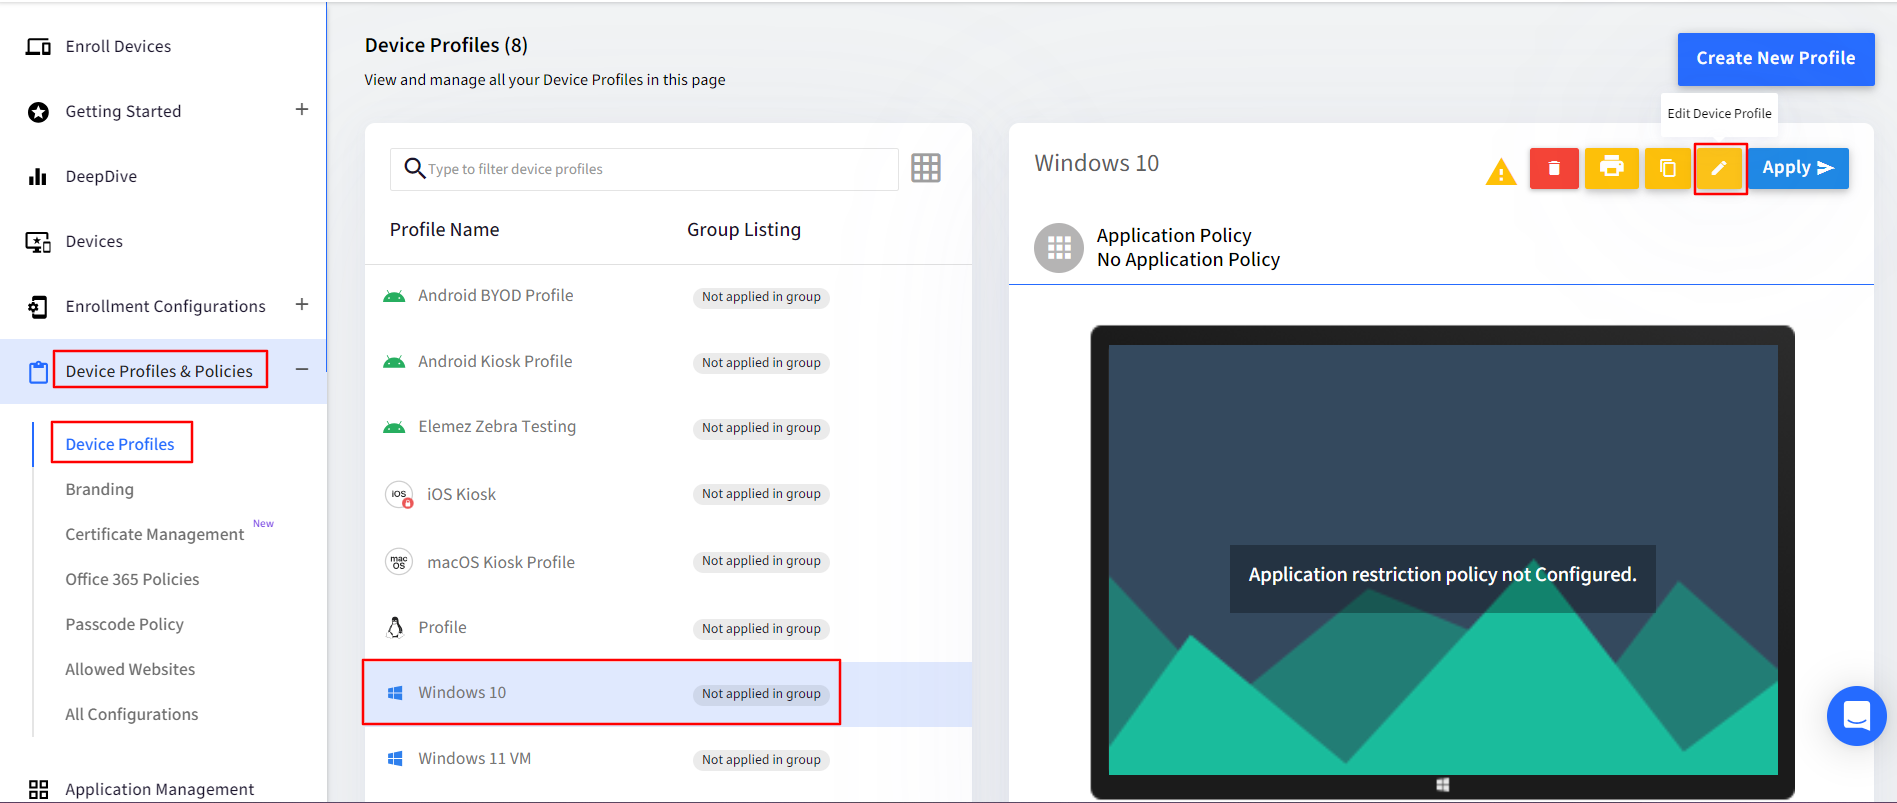
- On Scalefusion Dashboard, navigate to Device Profiles & Policies -> Device Profile
- Select the Windows Device Profile on which you have to set FileDock in Single App. Click on the Edit device profile.
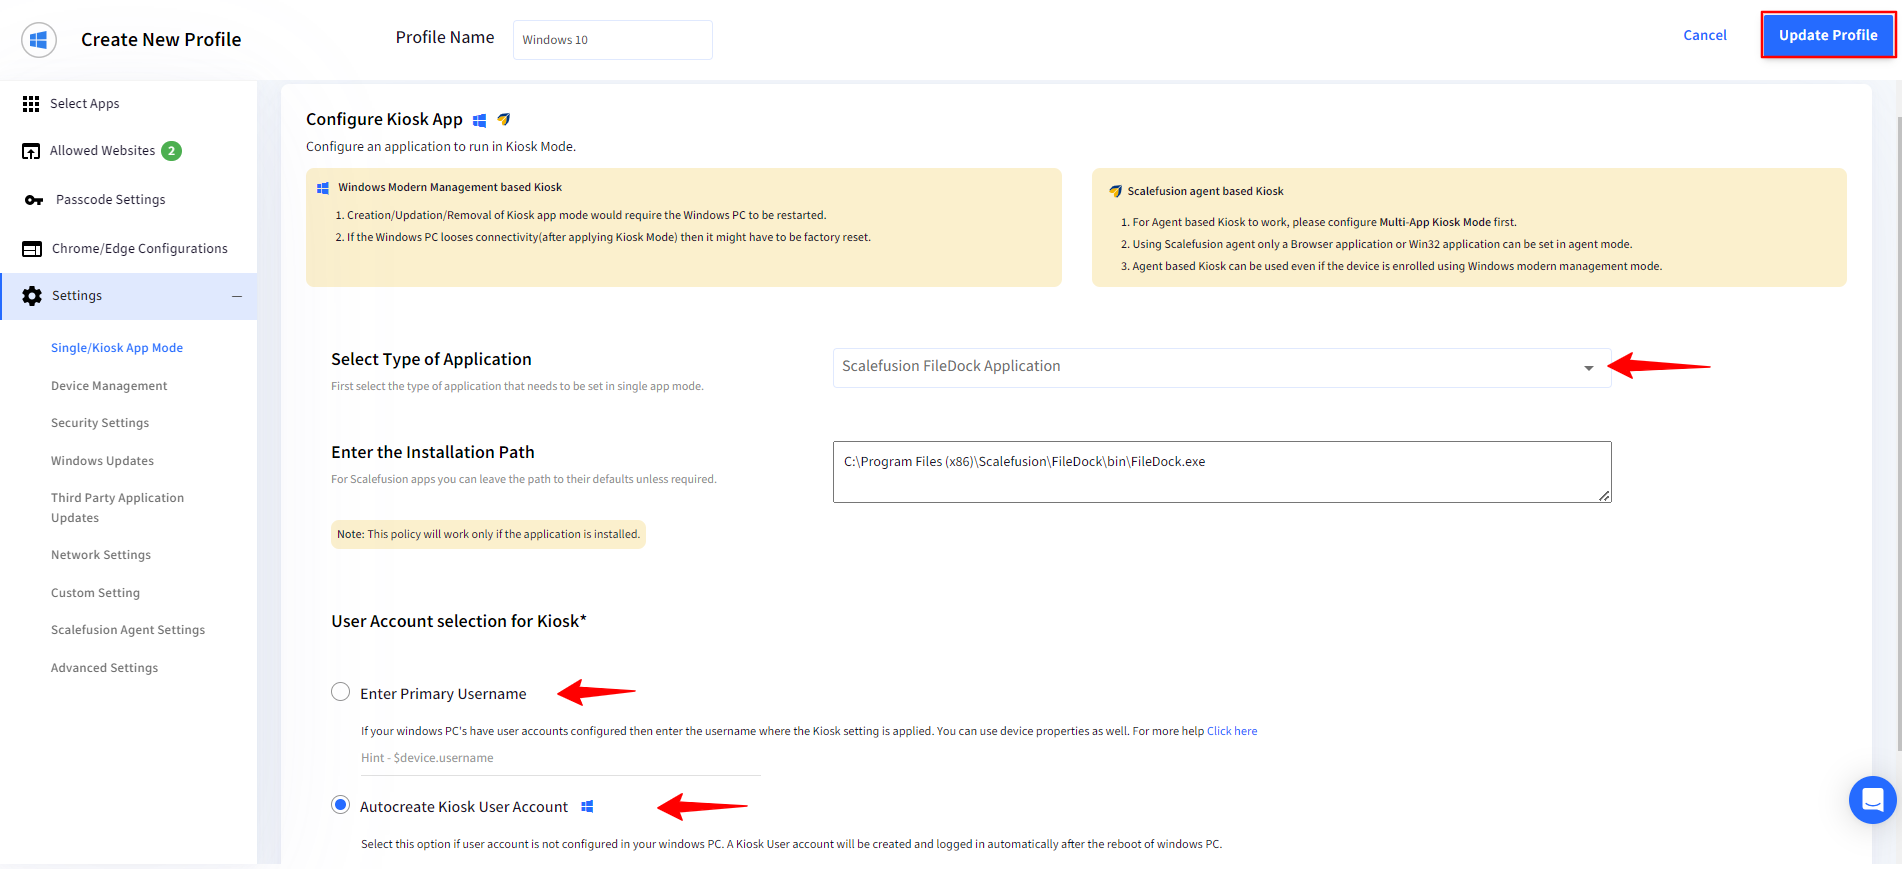
- Go to Settings -> Single/Kiosk app Mode.
- Here, from the drop-down menu select Scalefusion FileDock Application.
- You can choose a Primary Username or select the option Auto create Kiosk User Account.
 You can also create a new Device Profile and set FileDock as a Kiosk app in it.
- You can choose a Primary Username or select the option Auto create Kiosk User Account.
- Apply this profile on the Windows Device / Device Group on which you have to run the Presentation.
Once FileDock has been set as a Kiosk App, Presentation can be run on a Windows device, as described in the Publish Presentation section above.
For iOS devices
- From your dashboard, go to Device Profile & Policies ➔ Device Profiles.
- Edit an existing device profile.
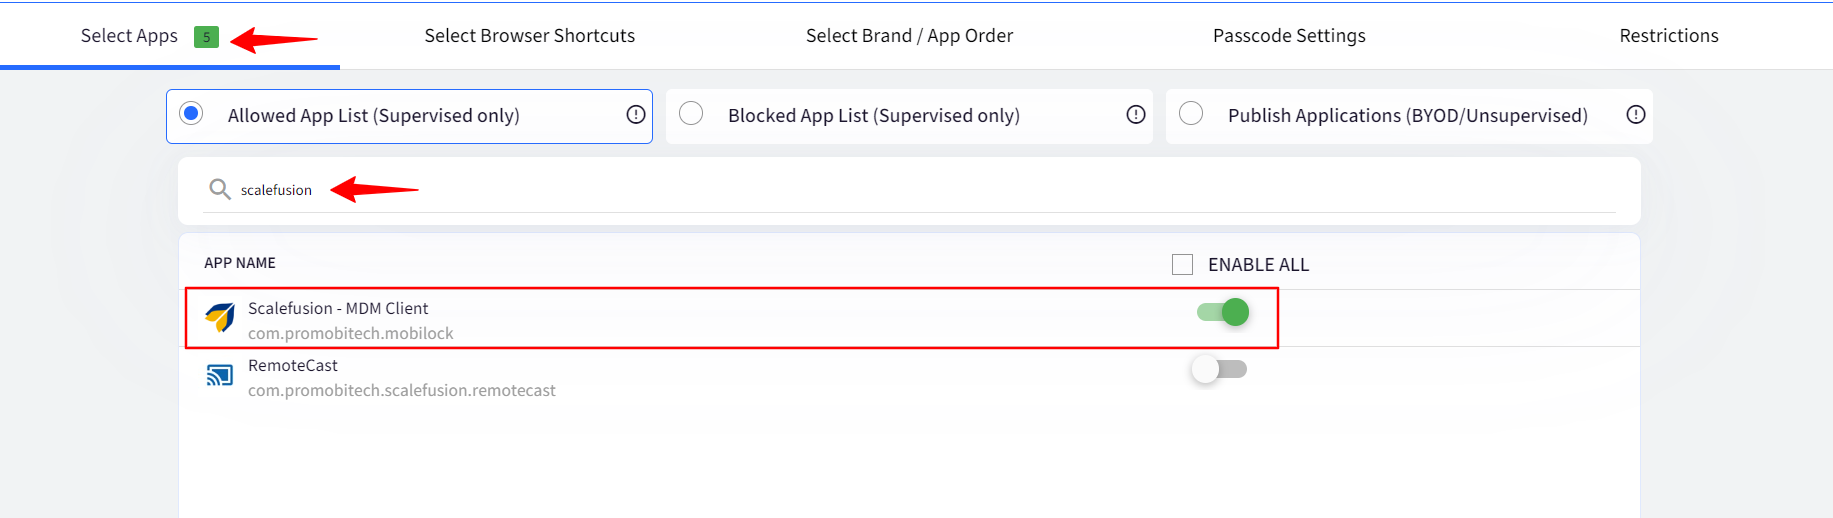
- Enable the Scalefusion-MDM client from the Select Apps tab.
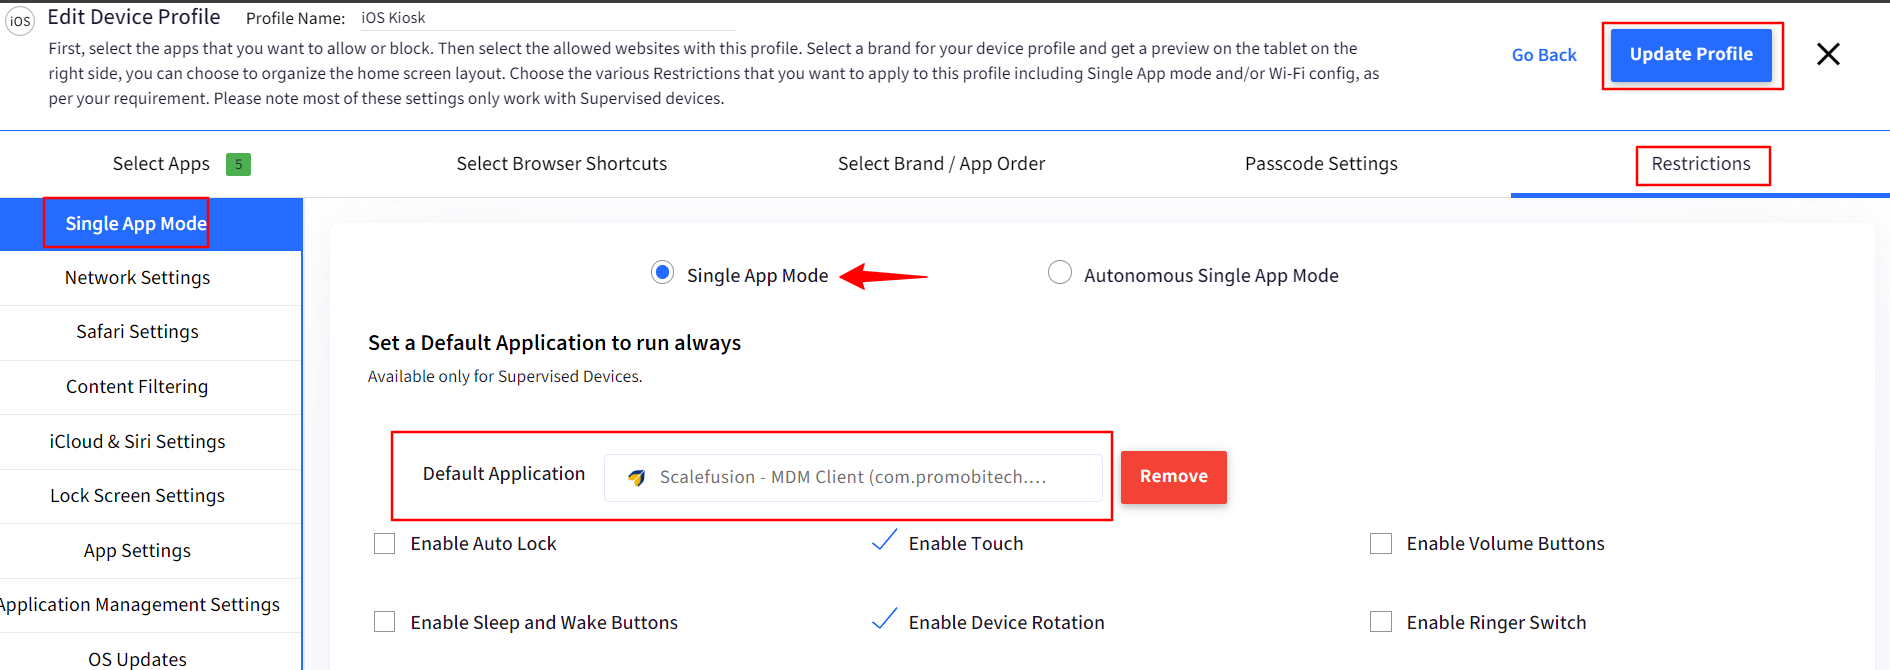
- Click on the Restrictions tab.
- Under the Single App Mode section, click on the Single App Mode radio button.
- Select Scalefusion-MDM Client as the default application from the dropdown menu.
- After you set Scalefusion-MDM Client as the default app, you will see different properties to customize your device for Single App mode. The following table explains these properties.
- From the dropdown menu, set a poll time if needed.On iOS 11.x devices, there is an OS-level issue where the app that is set in single-app mode does not receive remote pushes. Hence if you make any changes in your presentation, they will not reflect immediately on the device. The Poll time helps the devices ping the server after the set period of time so that it can get new settings. This issue has been fixed in iOS 12.x and is not required.
- Click on Update Profile.
For macOS Devices
To run presentations on Mac devices, the setting Display a shortcut to play On-Demand should be enabled on Scalefusion Dashboard for the presentation. The setting is present under Content Management > Presentations > Properties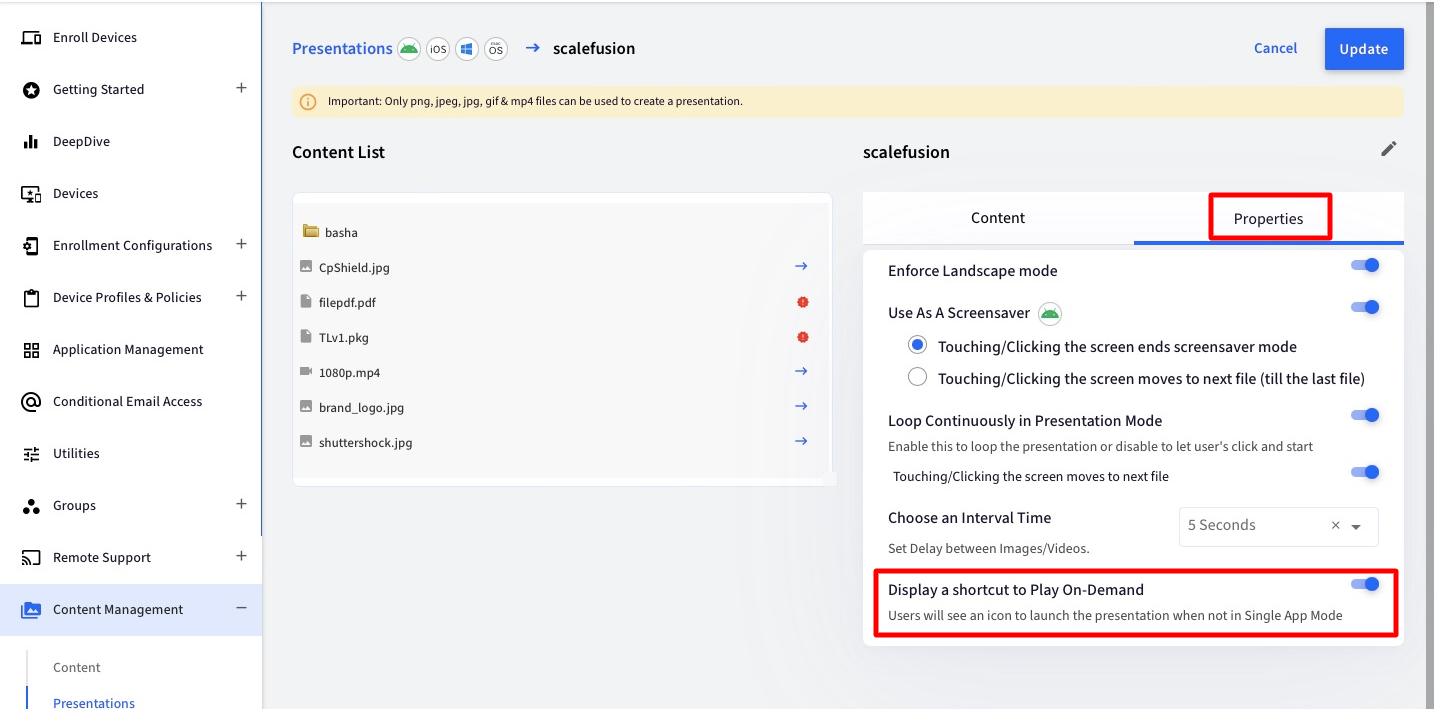
Using Presentation as Screensavers
- From your dashboard, go to Device Management ➔ Device Profiles.
- Create or Edit an existing Device Profile.
- In the Select Apps section, enable the FileDock application.
- Navigate to Optional Settings ➔ Display Settings section and choose a suitable screen timeout value after which you want the device to start showing the presentation.
- Click on Update Profile to save the device profile.
- Now you can add this edited/profile to a Device Group to which the presentation is published as described in the Publishing a Presentation section.
- Once you publish a presentation on all the devices where FileDock is enabled, after the selected idle time, the files as a part of the presentation will start displaying.
Points to Remember
- When the Presentation is set as a screensaver, FileDock does not use the system screen saver feature as Android does not have a straightforward feature to do so. Instead, it is the FileDock app that wakes up the screen and displays images.
- Both Digital Signage and Screensaver consume considerable battery power and internet bandwidth.
- Although these features can be used on Android devices, it is suggested to use them on devices with good screen resolution and screens optimized for digital signage kiosks.
Frequently Asked Questions
Question: Sometimes, the videos in my presentation are skipped or receive an error while playing.
Answer: We use Android Exoplayer API to render the videos and images. Sometimes if the devices do not have the required codecs, then this might be the issue. FileDock automatically skips a file that it cannot render or if it receives an error for a file.
Question: Although I have published the presentation, it is not shown on the device, OR do I see a continuous loader on the screen?
Answer: Make sure that the devices have a stable internet connection so that the files can be downloaded and streamed.