Security Assertion Markup Language, aka SAML, simplifies federated authentication and authorization processes for users by implementing a secure method of passing user authentications and authorizations between the identity provider and service providers.
Scalefusion users can now be migrated to SAML-based Sign-in. This capability makes the Scalefusion application more robust in terms of the security of its users in the arena of Mobile Device Management.
How Does it Work
There are two main entities here - Identity Provider and Service Provider. In our case, Scalefusion is the Service Provider that needs authentication, and the Identity Provider is the one that grants this authorization. We use Okta as the Identity Provider, which performs the authentication for Scalefusion users.
When a user logs into a SAML-enabled application (Scalefusion), it requests authorization from Okta. Okta authenticates the user, returns the authorization for the user to Scalefusion, and the user gets logged in to the Scalefusion application.
There are a few configurations that need to be done both at the end of Identity Provider (Okta) as well as Service Provider (Scalefusion), which establishes a standardized communication between the two. The document describes in detail all the steps to integrate Scalefusion with Okta and make it SAML-enabled.
Before You Begin
- A valid Scalefusion Dashboard account
- A valid Okta subscription
Steps
In a nutshell, the following are the steps for SAML integration:
- Create an Application on Okta
- Add users on Okta
- Assign Applications to users on Okta
- Configure SAML-based Sign-In on the Scalefusion Dashboard
- Migrate Admins for SAML-based sign-in
Step 1: Okta SAML Setup for Scalefusion (Create SAML Integration)
Create Integration
- Sign in to Okta
- In the Admin Console, navigate to Applications.
- Click Add Application.
.png)
- On the Add Application page, click Create New App.

- This opens a dialog box Create a new Application Integration. To create a SAML integration, select Web as the Platform and SAML 2.0 for the Sign-on method.
- Click Create.

- This opens the General Settings page. Enter the following:
- App name — Specify a name identifier for your integration. Enter Scalefusion as app name
- App logo (Optional) — Add a logo to accompany your integration in the Okta org. The logo must be a .png, .jpg, or .gif file and have dimensions of less than 1400 by 400 pixels. It also must be smaller than 100 kilobytes in size.
- App visibility — Choose whether to hide your integration from your end-user homepage. Choose whether to hide your integration from the Okta Mobile Apps Store on your end-user's devices. You can keep both unchecked.
Click Next
8. Configure SAML Settings
For SAML 2.0 configuration, enter the following details:
- Single sign-on URL — This URL is required and serves as the default ACS URL value for the Service Provider (SP), that is, Scalefusion. This URL is always used for IdP-initiated sign-on requests.
.png)
- Use this for Recipient URL and Destination URL — Select this check box if you want the recipient and destination URL to be the same.
- Allow this app to request other SSO URLs — For use in SP-initiated sign-in flows. Select this option to configure multiple ACS URLs to support applications capable of choosing where the SAML Response is sent. Keep this unchecked.
- Audience URI (SP Entity ID)— The intended audience of the SAML assertion. This is usually the Entity ID of your application. It is available on the dashboard under Admins and Roles > Sign In Settings > Configure SAML Sign-In
.png)
- Default RelayState — The page where users land after a successful sign-in using SAML into the SP. This should be a valid URL.
- Name ID format — The username format you are sending in the SAML Response. Use the default (Unspecified) if the application does not explicitly specify a format.
- Application username — The default value to use for the username with the application.
Click Next
9. Feedback
Here, select any one option and click Finish. Your application is created in your Okta org.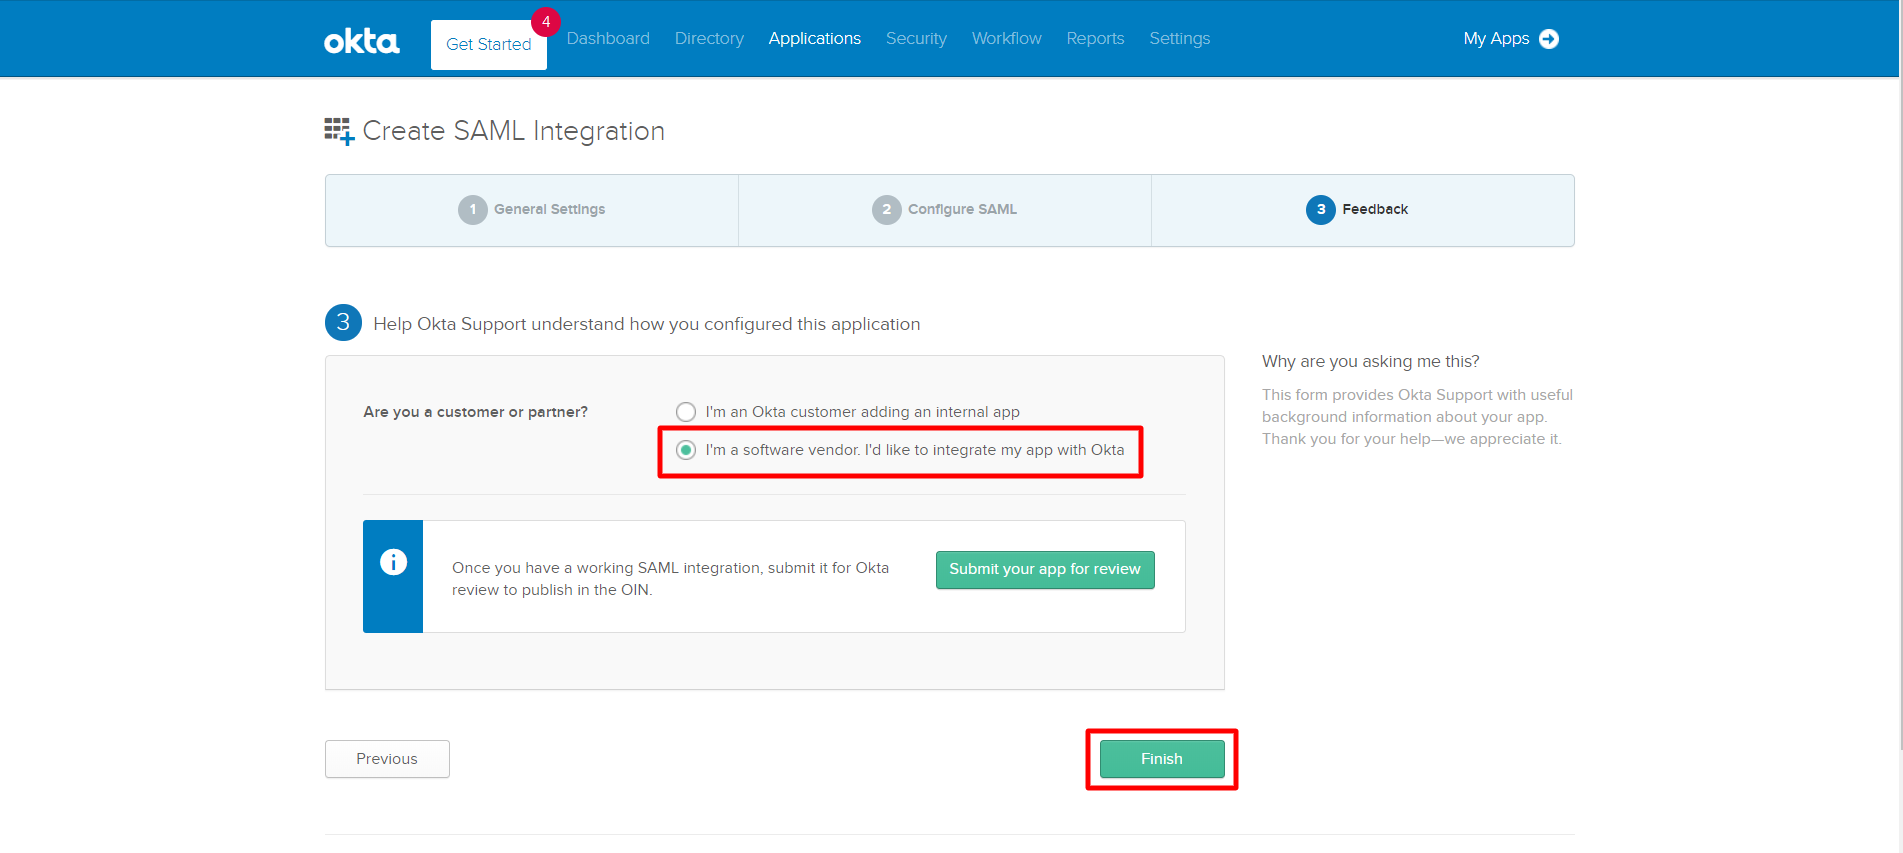
For more information on creating an application, please visit here.
Step 2: Add users to Okta
The users whose accounts would be enabled for SAML sign need to be added in Okta. To do so, follow these steps:
- On Okta Admin Console, go to Directory > People
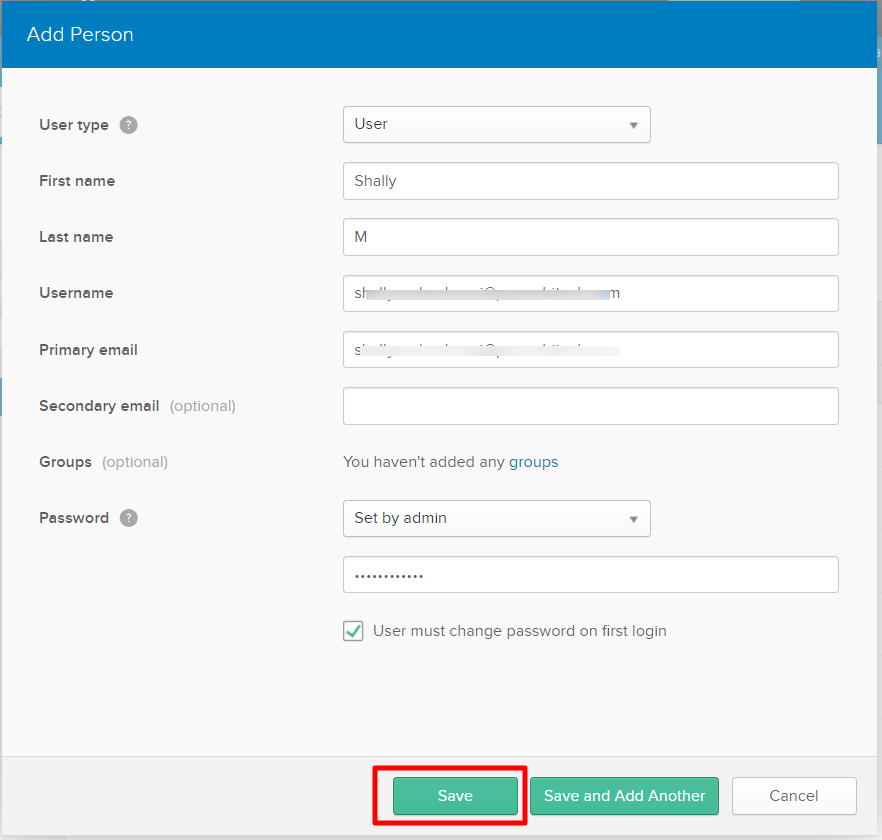
- Click on the button Add Person. This opens the Add Person window.

- Here, enter the required details like First Name, Last Name, username, password etc.The user is required to enter this username and password for authentication when he signs in to Scalefusion after his account is configured on SAML.
- Click Save
Step 3: Assign application to Scalefusion users
The application created and configured above needs to be assigned to Scalefusion users; only then they will be able to get access. To assign the application to an individual user, follow these steps:
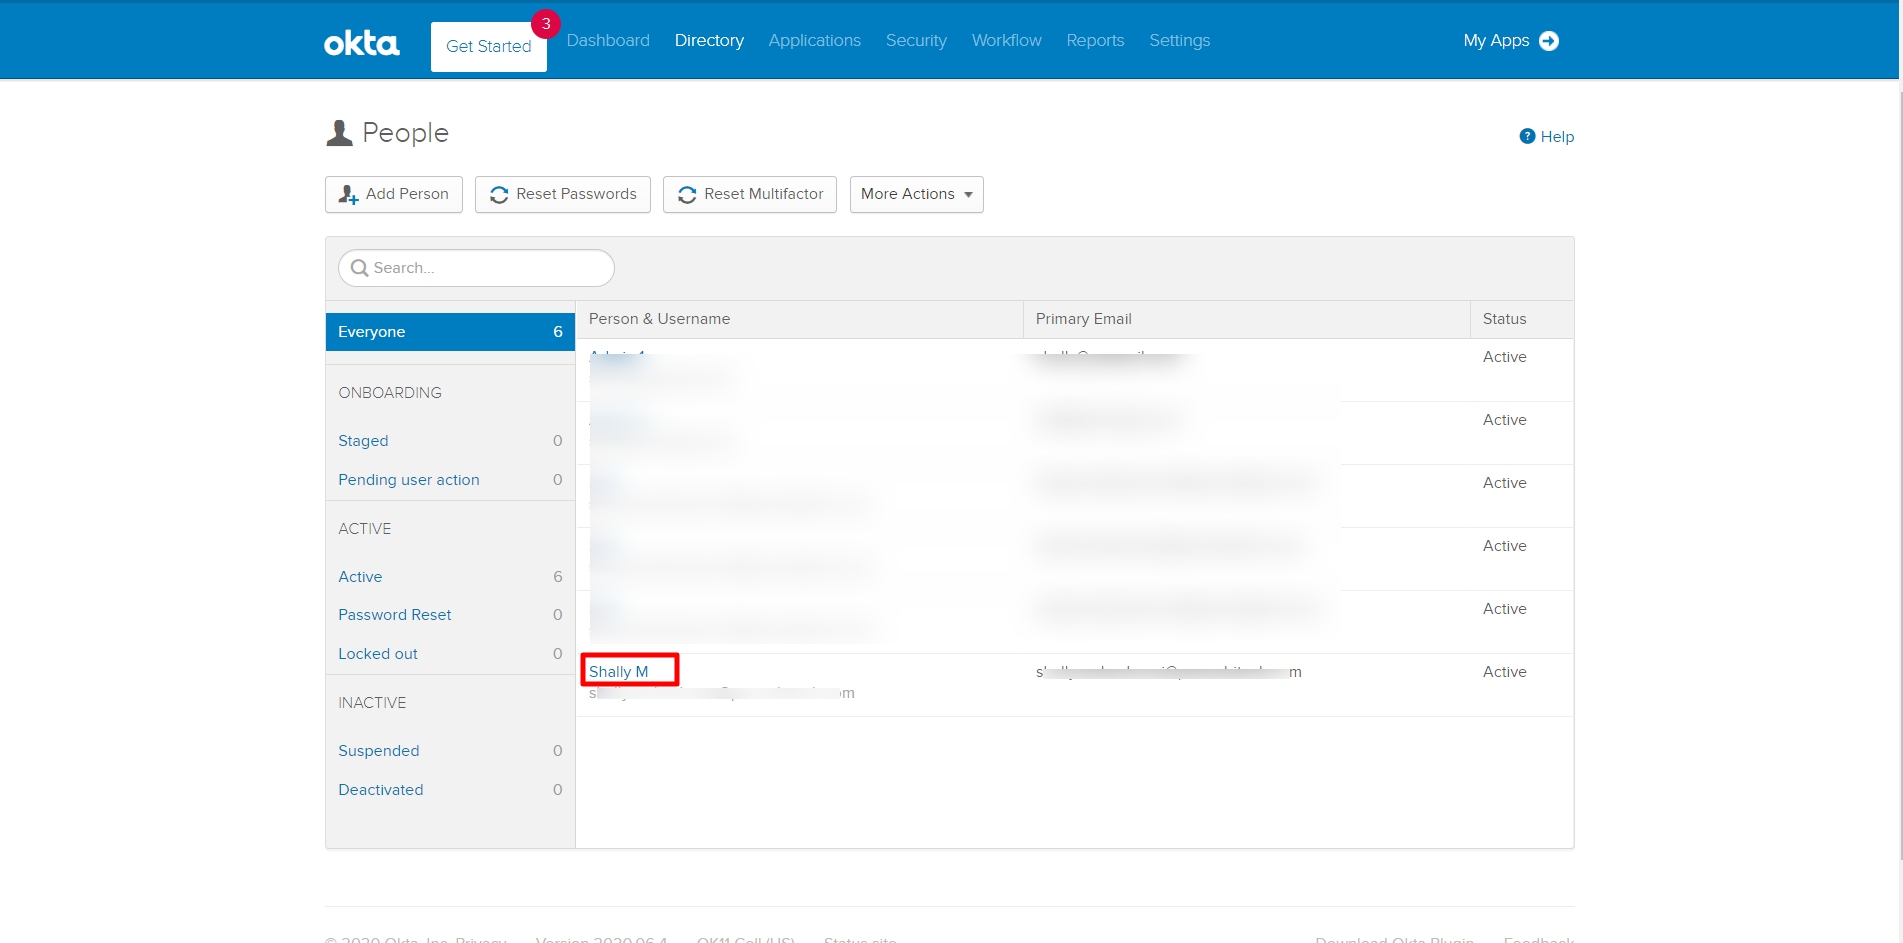
- On the Okta Admin Console, go to Directory > People.
- Click a user name in the Person & Username column.
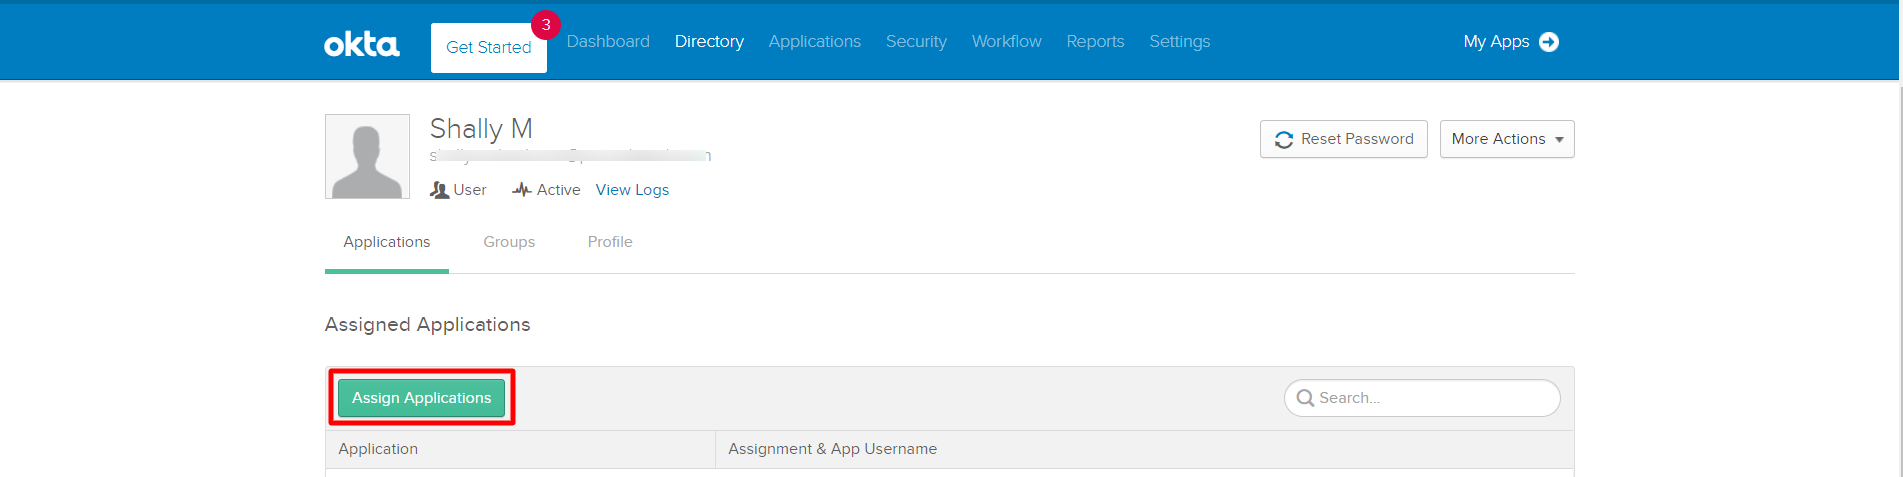
- Select the Applications tab.
- Click Assign Applications.
- Select the Scalefusion application from the list or enter the application name in the Search field.
- Click Assign
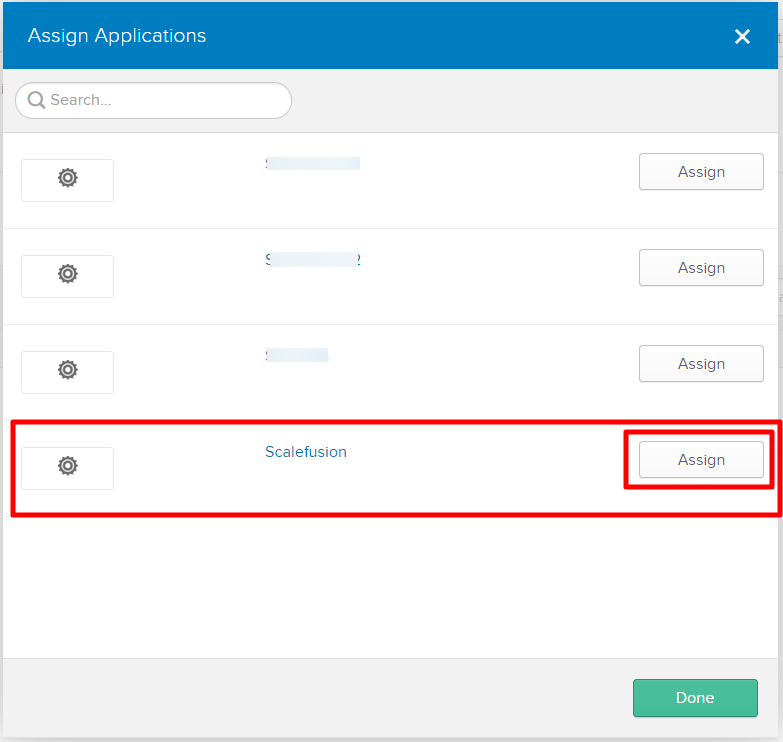
- When necessary, enter the user name and password, and complete any additional fields. The user name is not the user's Okta username but the username they use to sign in to the Scalefusion application.
- Click Save and Go Back.
- The Assign Applications box comes up again. Notice the button in front of Scalefusion changes to Assigned and is grayed out. Click Done

The application (Scalefusion) is assigned to the user and starts reflecting in the Assigned Applications area for that user.
Step 4: Configure SAML-based Sign-In on Scalefusion Dashboard
Scalefusion IT Admins need to configure SAML settings inside Scalefusion so that they can migrate to using SAML. This is the main step that associates an organization's accounts with SAML auth and also lets Admins control settings for Admins.
Prerequisites
Only the Account Owner or Co-Account owner can configure SAML settings on the Scalefusion dashboard.
Setup Instructions for Scalefusion Application
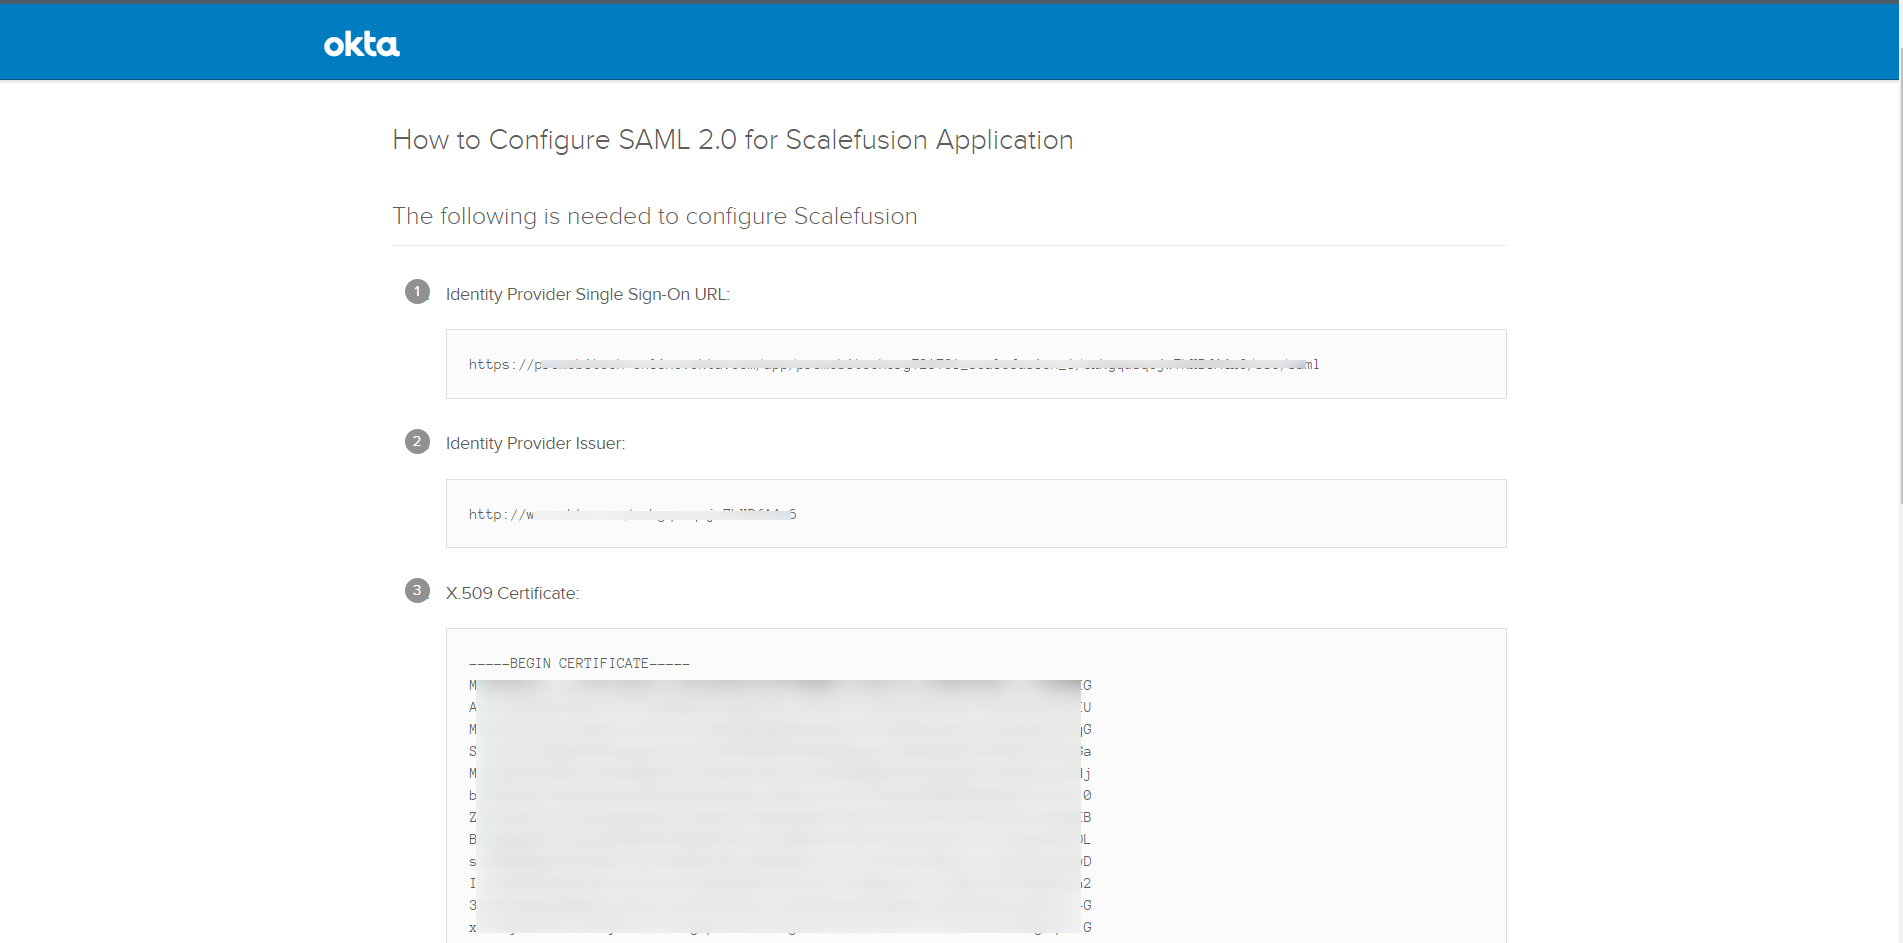
To configure settings on the Scalefusion application, certain details like Issuer URL, SSO/SLO Endpoint etc., are required. These are to be fetched from Okta.
- On Okta Admin Console, go to Applications
- Click on the application name Scalefusion (created above)
- Go to the Sign On tab, and under Sign On methods, click on the button View Setup Instructions

- This opens a new window with all settings required for configuration
Configuration steps on Scalefusion Dashboard
- On the Scalefusion Dashboard, navigate to Account Profile -> Admins and Roles -> Sign-in Settings
.png)
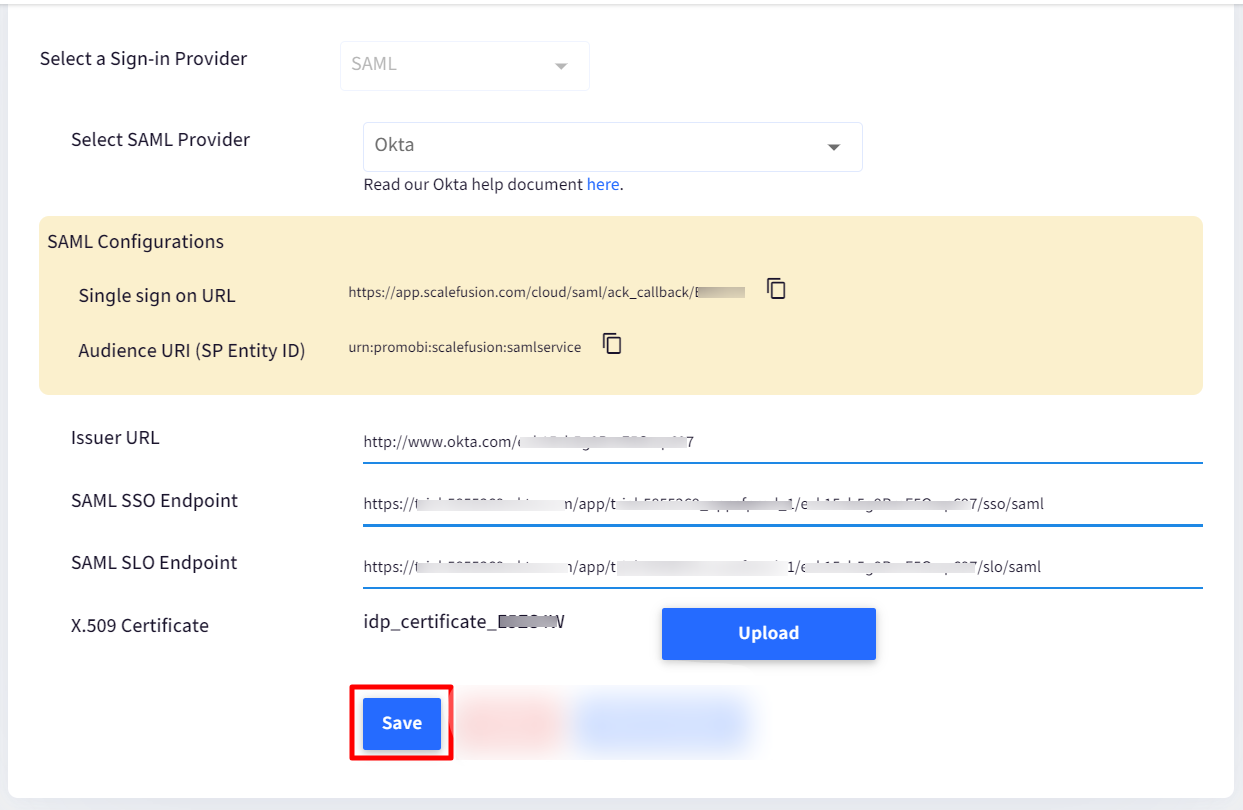
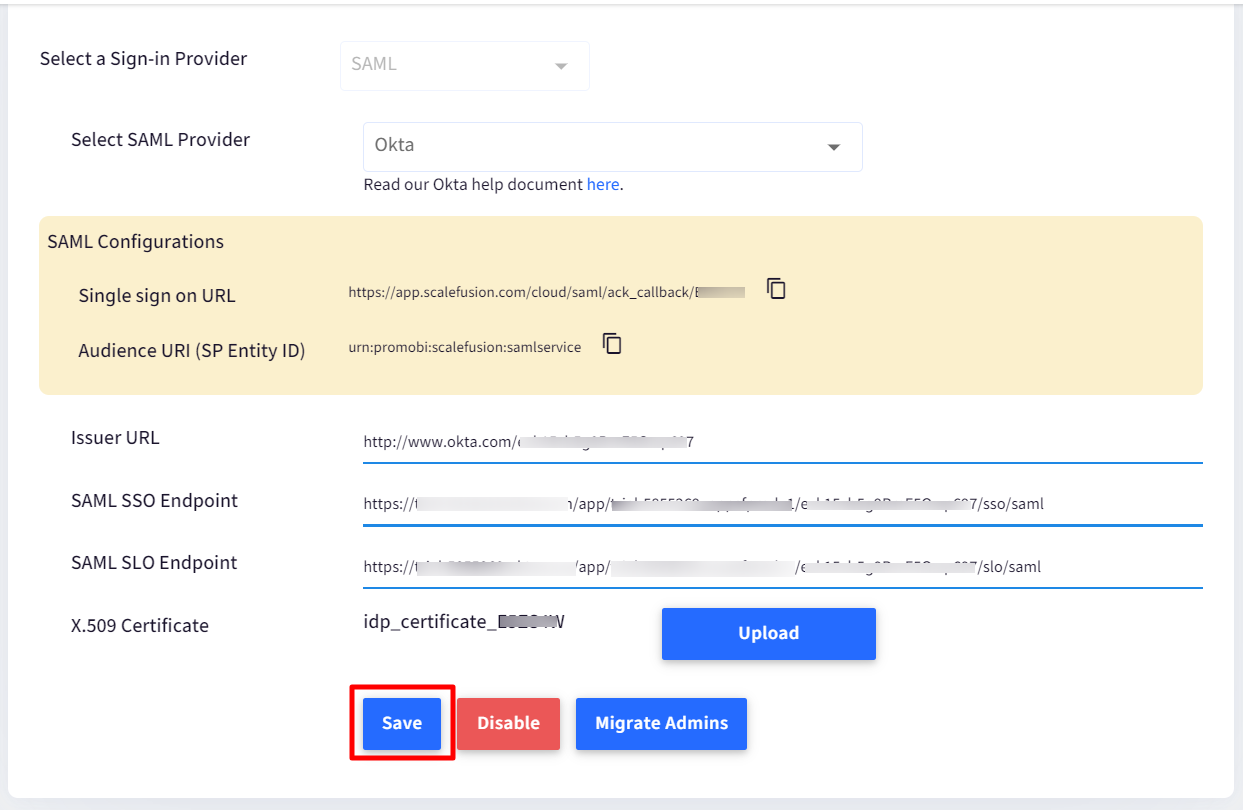
- Under Configure SAML Sign-In, enter the following:
- Select SAML provider: Select Okta
- Issuer URL: It is the Identity Provider Issuer URL (from the Setup Instructions page on Okta). Copy it and paste it here.
- SAML SSO Endpoint: It is the Identity Provider Single Sign-On URL (from the Setup Instructions page on Okta). Copy it and paste it here
- SAML SLO Endpoint: The URL to be entered here is the same as the SAML SSO Endpoint, with one change. At the end, replace /sso/saml with /slo/saml
- X.509 Certificate: The X.509 certificate has to be downloaded from the Setup Instructions page through the Download Certificate button. Upload the downloaded certificate here.
- Click Save
- You will get a confirmation box. Click OK
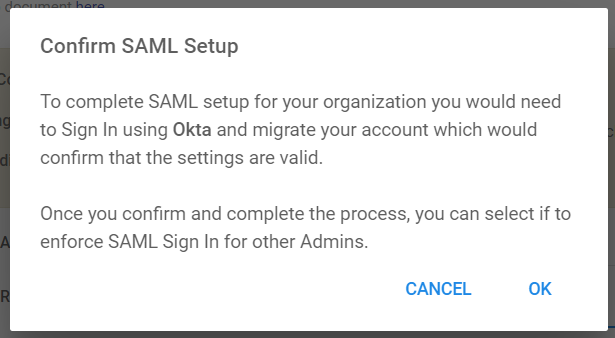
- You will be redirected to Okta sign-in for confirmation. Enter the Username and Password that you entered while adding users (Add Person) in Okta. This will come up if you are not signed in to Okta.
- Once the Authentication succeeds, you will get to the page where you need to set a PIN.
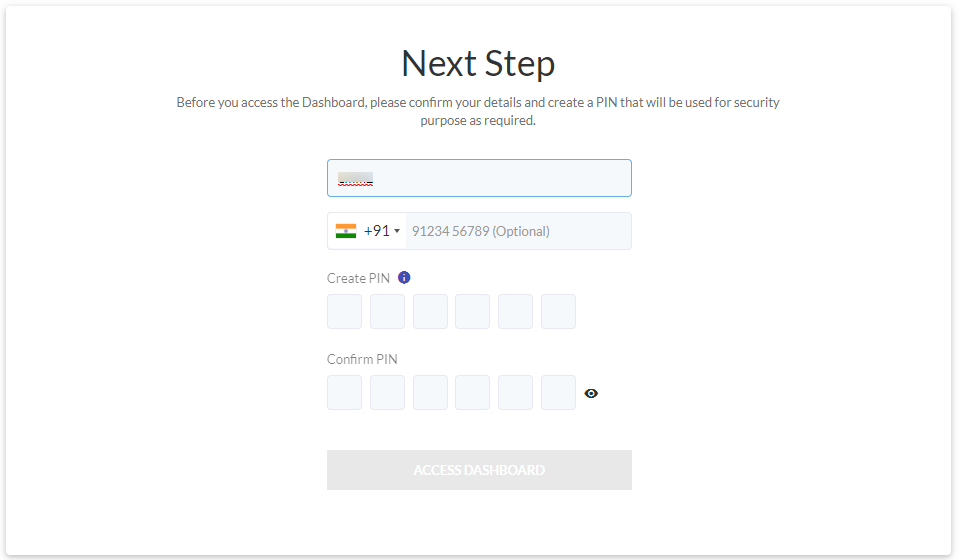 Setting up a PIN is a one-time step
 - Creating a Security PIN: A security PIN helps in authorizing certain actions on the Dashboard, which will require a two-step confirmation. This helps in preventing accidental deletes/edits of important data from the Dashboard. To create a Security PIN, please complete the steps below,
- Name: You can Add/Edit the name.
- Phone Number: This is optional. Here you can edit the phone number.
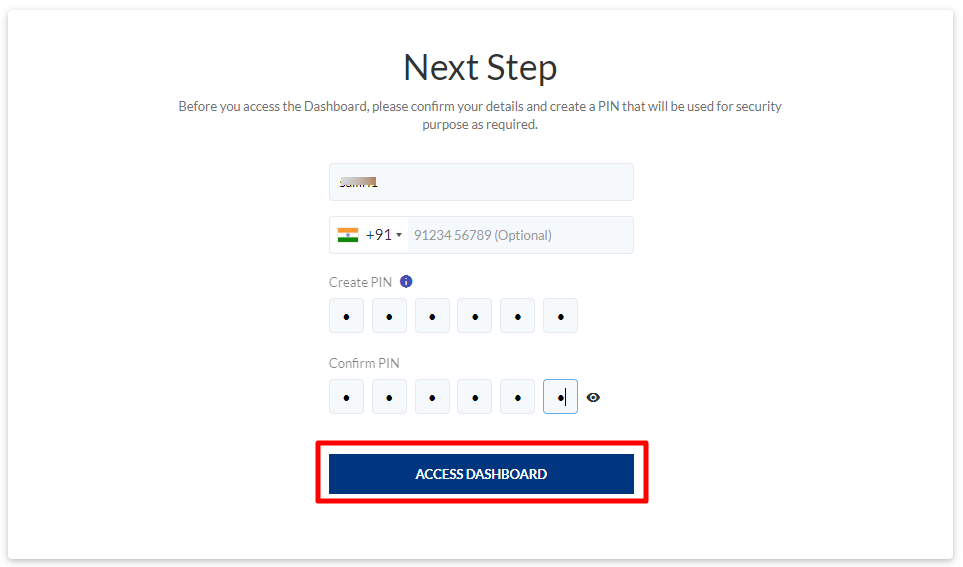
- Create New PIN/Confirm PIN: Choose a 6-digit PIN that will be required to authorize certain actions on the Dashboard as and when required.
- Click ACCESS DASHBOARD to complete the SAML setup.
Once the PIN is confirmed, the account is marked as an account. The next time whenever this user tries to Sign in, he will not be asked to enter a password because he is authenticated against the provider (Okta). This is also indicated on Scalefusion's Sign-In screen, where the Password field is not there.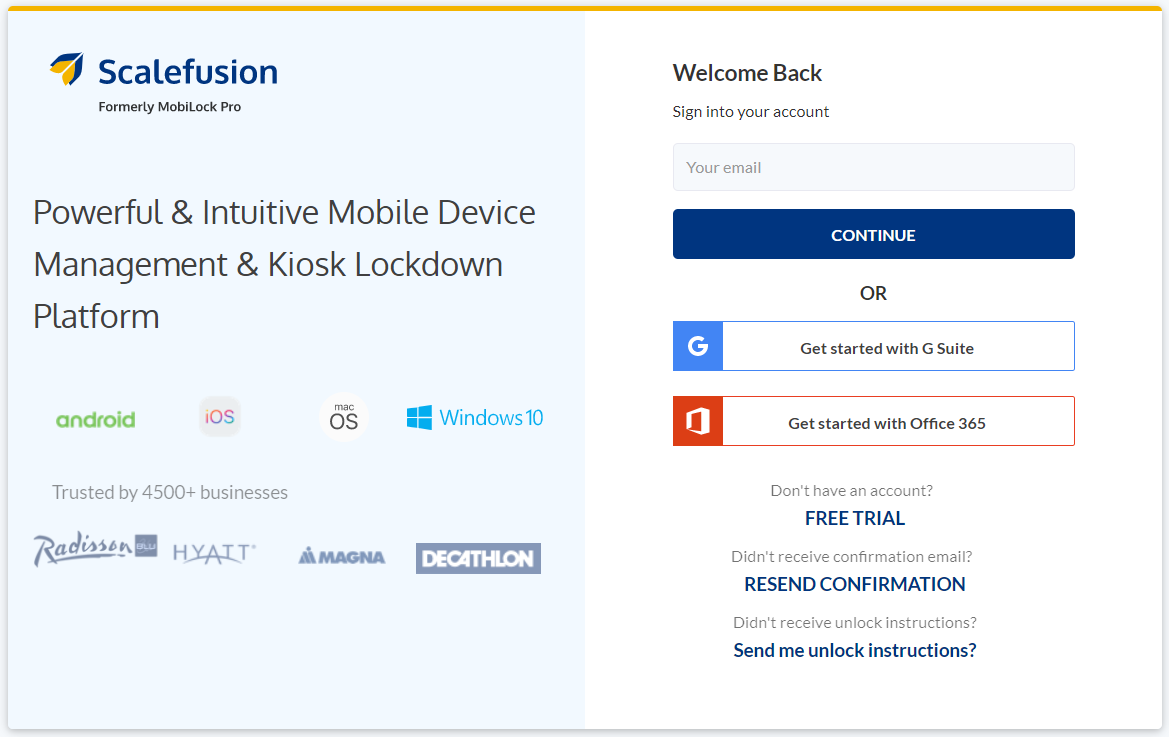
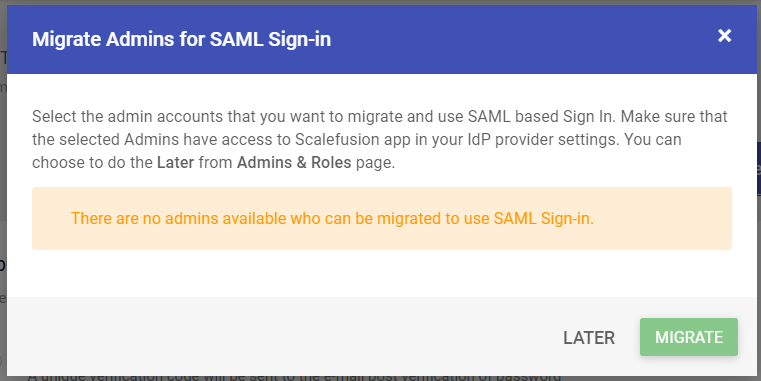
- After Sign-In, the user lands on Sign-In Settings with a dialog to select the admin accounts that he wants to migrate to use SAML-based sign-in. The user can choose to MIGRATE or choose the option LATER. The screenshot below has the Migrate button disabled because there are no admins available who can be migrated.
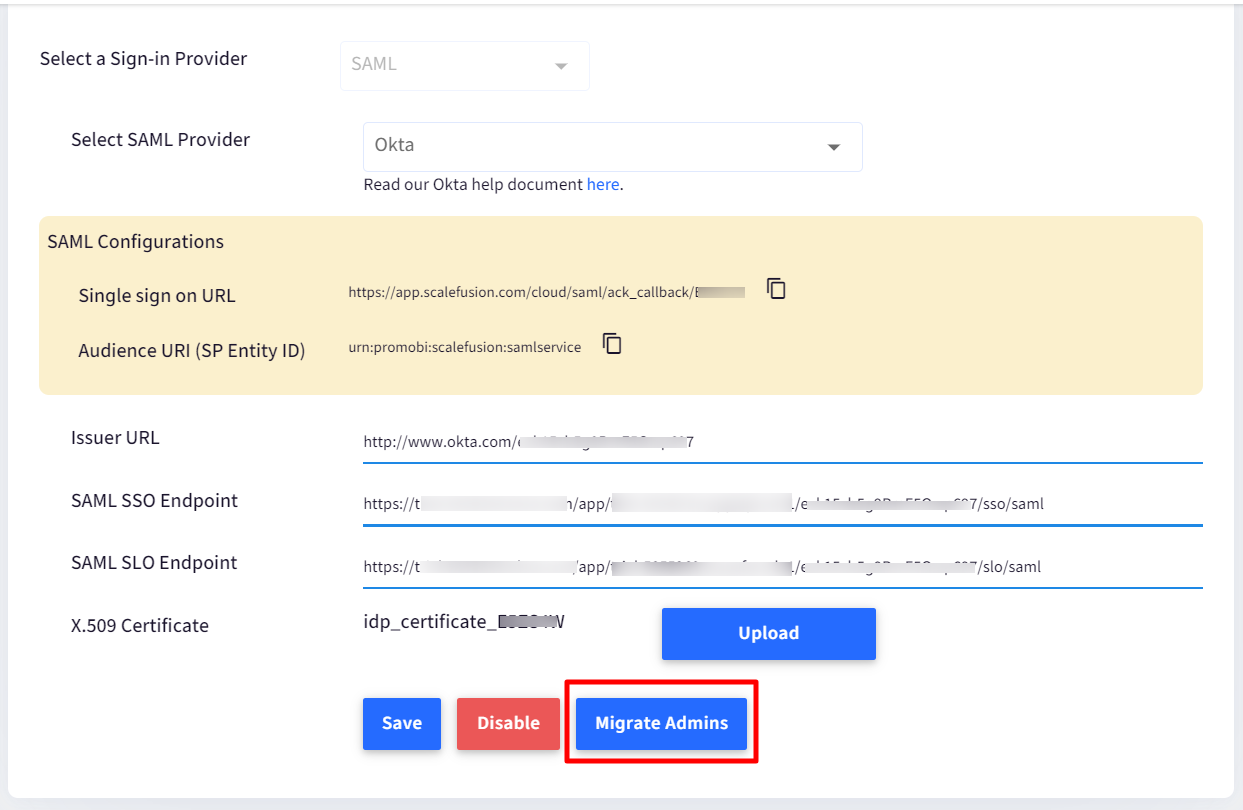
The SAML settings are successfully configured. On the Sign In settings page, you will see additional buttons to Disable SAML and Migrate Admins.
Migrate Admins to SAML based sign-in
Once an account admin chooses to migrate to SAML, there are options to migrate other admins post first-time setup configuration. However, they can choose to do it later as well.
There are two ways to migrate admins to SAML based Sign In:
Sign In the Settings page
- Navigate to Admins and Roles > Sign In Settings
- Under Configure SAML Sign In, click on the button MIGRATE ADMINS
- A dialog box comes up showing all those admin accounts that can be migrated to SAML-based sign-in. Select the admin accounts that have to be migrated and click on Migrate
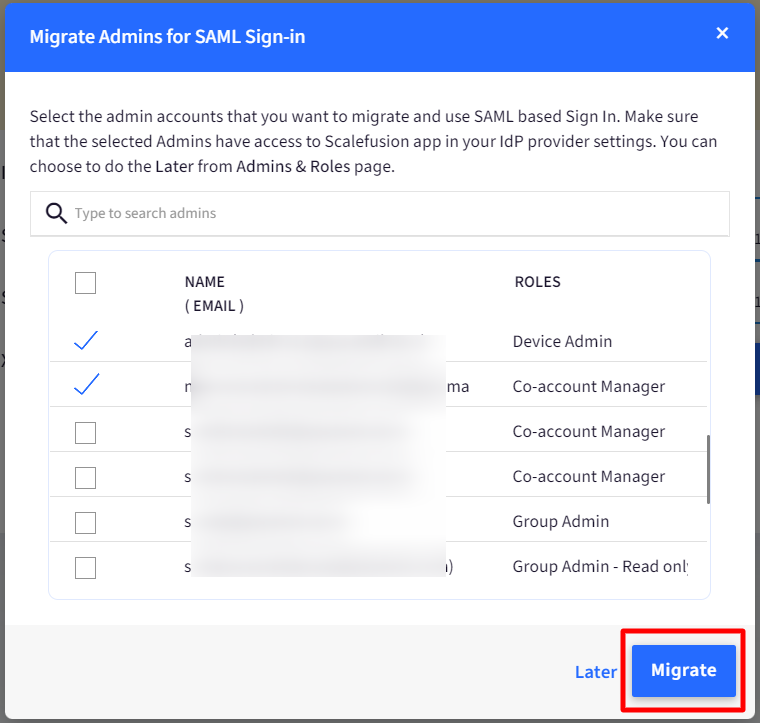
The admin gets migrated to SAML-based Sign In.
Administrators section
- Navigate to Admins and Roles > Administrators
- Click on the action menu in front of the admin for which SAML-based Sign In has to be enforced, and select Enforce SAMLSign In

- A dialog box comes up to ensure that the admin has access to the Scalefusion app. Click Ok

SAML sign-in is enforced for the admin.
An admin's account can be made SAML enabled at the time of his account creation. This can be done by following these steps:
- Navigate to Admins and Roles > Administrators
- Click on ADD NEW ADMIN
- This opens the Add Admin dialog box. In Admin Types, choose the option Allow Sign Up using SAML Sign In

- The Last Seen status for this admin will reflect as Not Logged In Yet until he signs in on the Scalefusion Dashboard.
Disable SAML
To disable the SAML configuration,
- Navigate to Admins and Roles > Sign In Settings
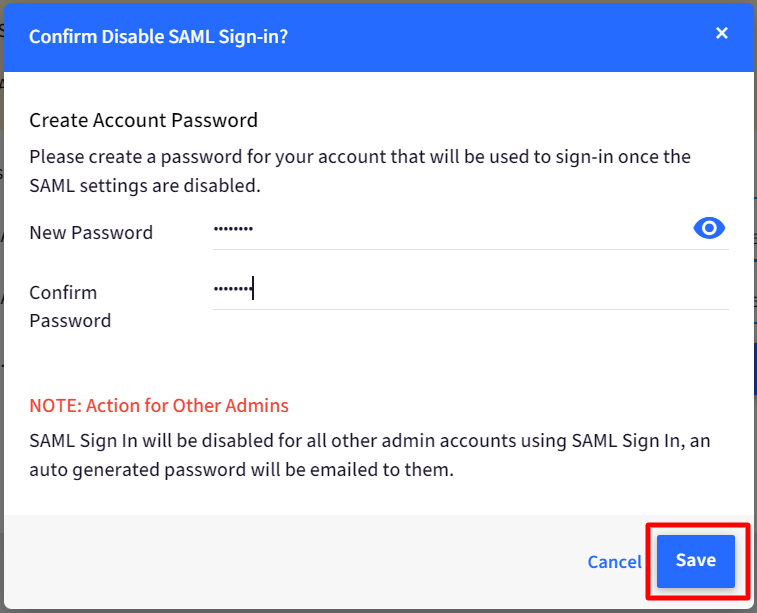
- Under Sign In Settings, click on the button DISABLE.
- You will be asked to enter a Security pin. Enter the security pin and click Submit
- The following dialog box comes up, asking you to set a password. This password would be used to sign in once SAML settings get disabled. Click Save after entering a password.
Behavior for O365/GSuite users
GSuite or O365 users can also be migrated to SAML-based configuration with the same process. Once migrated to SAML, they will not be able to use any GSuite / O365 features. However, after disabling the SAML configuration, all the features can be used.
Two Factor Authentication
If two-factor authentication is enabled on an account and SAML is configured, then at the time of sign-in
- The user is redirected to the Okta login page
- Once validation succeeds, the user lands on Scalefusion's 2-Factor Authentication page, where he would be required to enter a verification code for authentication and then get signed in.
On Device
In BYOD enrollments, with User Enrollment settings enforced, SAML users will be asked to authenticate at the time of enrollment with their respective credentials with which they have signed in and skip the OTP flow. Visit the Okta help document to learn more.