Datawedge is a pre-installed application on Zebra Devices that easily scans barcodes via integrated barcode scanner. It also captures data via attached peripherals, including magnetic stripe readers (MSR) and Bluetooth cordless ring scanners and sends the data directly to your application.
For using Datawedge on Scalefusion managed Zebra Devices, certain OEM Configurations need to be done which when applied on Zebra devices make DataWedge functional on them.
The document explains the OEM configurations for enabling DataWedge.
Prerequisites
- Scalefusion should be installed on device
- DataWedge Configuration file
- MX version on Zebra device should be 5.0 & above. To verify the MX version please visit https://techdocs.zebra.com/mx/mx-version-on-device/ MX version can also be verified on the managed devices from Diagnostics section.
- Android OS version on Zebra devices should be 8.0 and above
Overview
In a nutshell, following steps are required to be followed for DataWedge settings on Zebra Devices:
Step 1: Install Zebra OEM Config App on Scalefusion Dashboard
Step 2: Create Application Configuration
Step 3: Publish Configuration
These are explained in detail below.
Step 1: Installing Zebra OEM Config App
- Login to Scalefusion Dashboard.
- Navigate to Application Management > Play for Work Apps and Click on Add from Playstore
.png)
- Search for Zebra OEM Config and select it.
.png)
- Click on Approve
.png)
- In Approval Settings, keep the first option selected and click Done
.png)
- Once the app is approved, it will start showing up on Scalefusion Dashboard in Play for Work apps section.
.png)
Step 2: Creating the Application Configuration
- Navigate to Application Management > Play for Work Apps
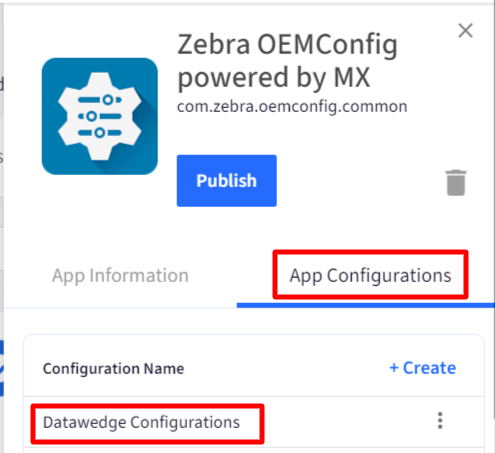
- Click on the Zebra OEM Config app
- From the wizard on the right hand side, click on App Configurations tab and click CREATE.
.png)
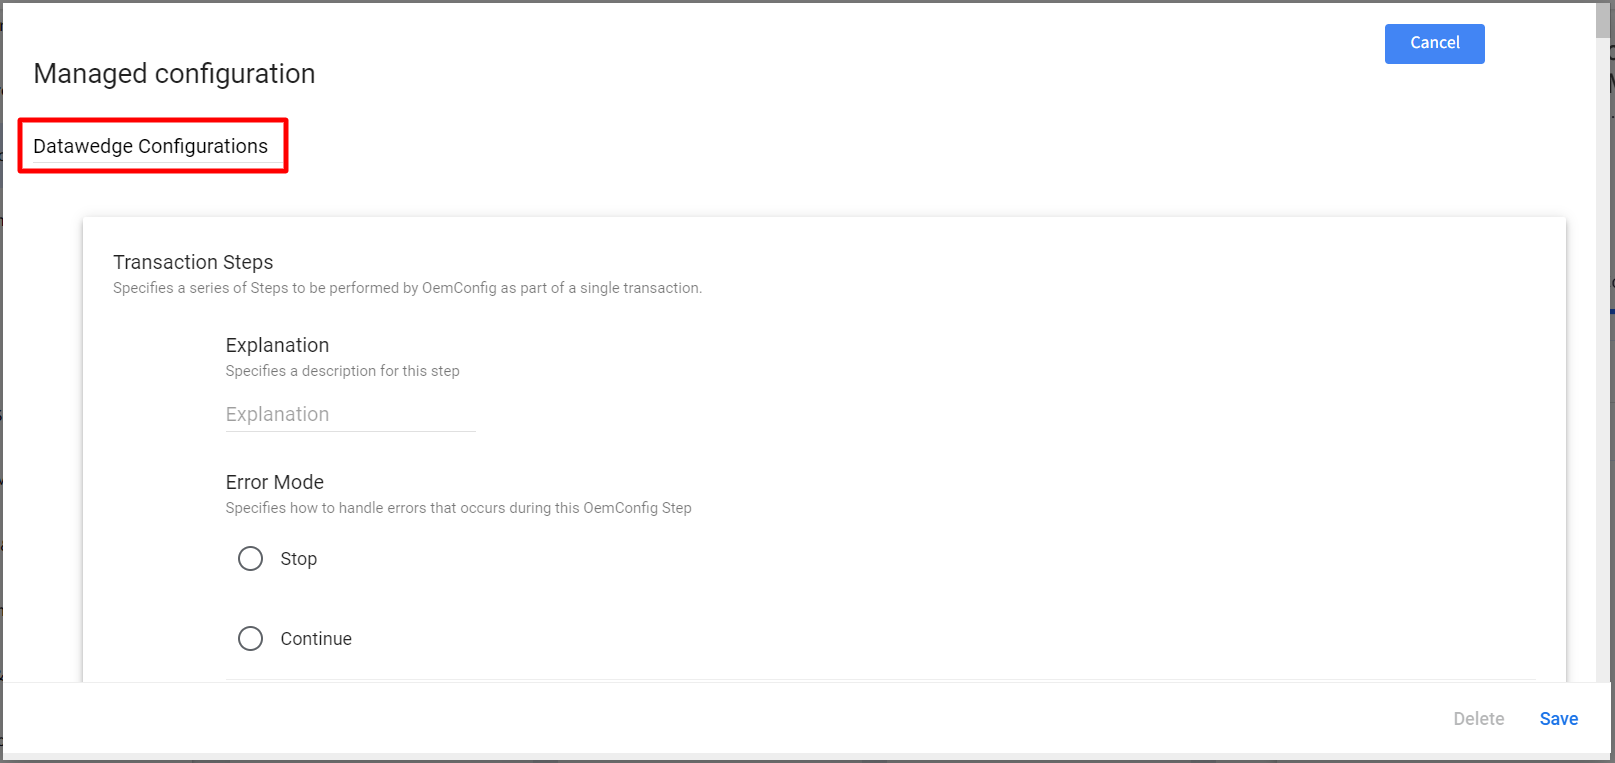
- The App Configuration wizard will be shown. For DataWedge settings, enter the details in the wizard, as provided below:
- Enter Configuration name. For eg. Datawedge Configurations
- Scroll down until you see the option File Management Settings. Here, enter the following:
- In Download File Source URI enter the path of the location where the DataWedge Config file resides.
- In Download Destination Path and File Name enter the following:
/enterprise/device/settings/datawedge/autoimport/datawedge.db
You can also copy and paste the following
/enterprise/device/settings/datawedge/autoimport/datawedge.db
This is the path of the default directory on Zebra devices where the config file will be stored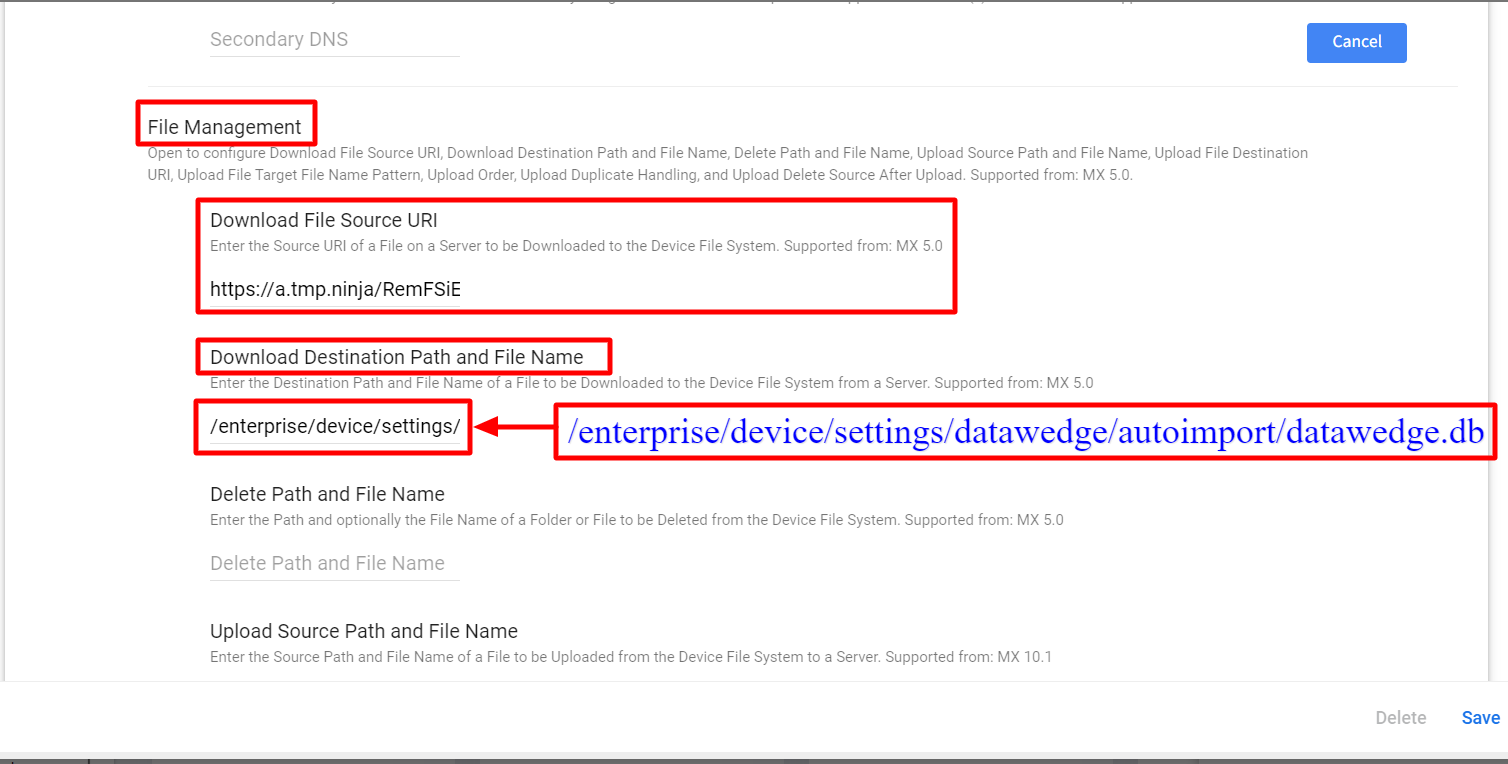
- In Download File Source URI enter the path of the location where the DataWedge Config file resides.
- Click on Save button to save the configuration. Once the configuration is saved, It will reflect on Dashboard under App Configurations.
- Enter Configuration name. For eg. Datawedge Configurations
Step 3: Publish Configuration
The last step is to publish this configuration on Zebra devices. To Publish,
- Click on the three dots in front of configuration name and click on Publish
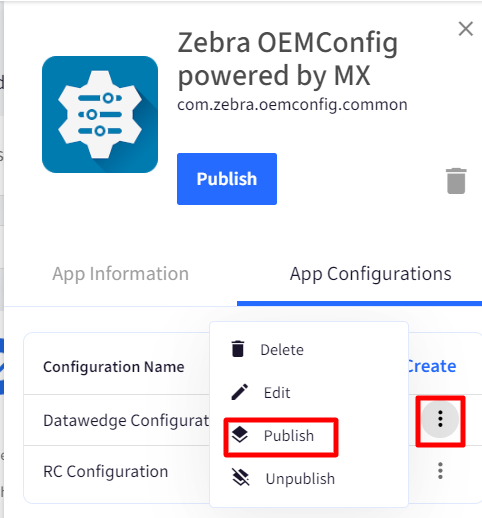
- This brings up the Publish App Configuration window. Select the Device Groups/Device Profiles/Device(s) on which you want to publish the configuration and click Publish.
.png)
- The OEM configurations get applied thus pushing DataWedge settings on Scalefusion managed Zebra Devices.
If you are still facing any challenges, please reach out to our support team at support@scalefusion.com for further help.