The devices section on the Dashboard gives an overview of the devices enrolled under Scalefusion. Along with this, there are certain additional features provided that facilitate admin in navigating for the enrolled devices. This document describes all such features that the Devices section offers.
Before You Begin
Have a valid Scalefusion Dashboard account
Devices should be enrolled with Scalefusion
How to Access
After logging in to Scalefusion, navigate to the Devices menu on the left panel.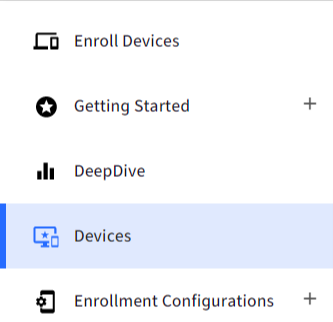
Features
The following features are available precisely:
Filters: Enables filtering of devices on the basis of different criteria
Search: Search for specific devices
Toggle between list view and grid view
These are explained in detail below:
Filters
There are various filters on the basis of which devices can be filtered for an organized view. Filters are available at the top in the Devices section

Filter | Description |
View |
|
Per Page | Choose the number of devices you want to view on one page from the following:
|
Groups | Lists all the device groups you have created. Based on the group chosen, the devices which are part of the group will be displayed. For choosing a group, when you click on this option, a dialog box comes up which lists all the groups. Select the group from here. Ungrouped devices: In the same dialog box, there is also a toggle to select ungrouped devices. If set to on, it displays devices that are not part of any group. |
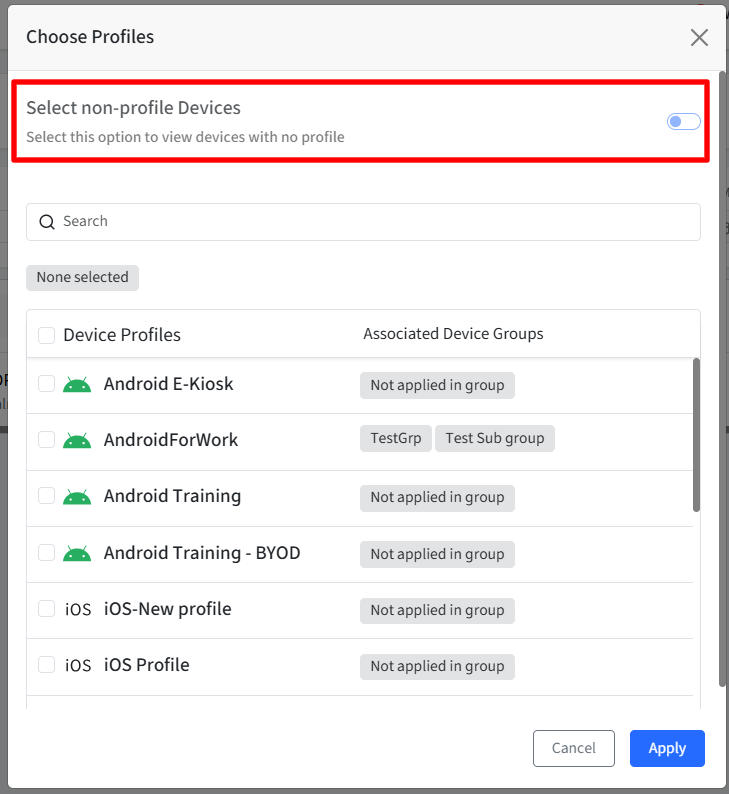
Profiles | Filters devices belonging to the selected device profiles. To do so:
|
QR Code | Lists all the QR codes created under Enrollment Configurations > QR Code Configurations allowing the admin to select and filter devices enrolled with a particular QR Code configuration. |
EMM | Lists devices on the basis of EMM-managed status. The following options are available:
|
Search for Devices
Admin can search for one or more devices. Click on the search icon on the top right side of the Devices page. This brings up a dialog box where you can perform a search for devices. There are two ways device search can be done:
Basic: Search by typing in any one of the following in the search box:
Name
IMEI Number
IMSI Number
License Key
Serial #

Advanced: There are a few advanced search filters where you can search by device properties like status, OS, build version, etc. and also provide specific values against the filter to make it more specific and confined. Click on the Advanced button next to the search box. This brings up a drop-down listing all the attributes. Select an attribute, the operator and the value, and the results will filter accordingly.

For example, if you select OS as the attribute to search, there will be a prompt to select the operator. After the operator is selected, select one OS from the list, and the results will be filtered.
Save Search Filters
You can also save a particular search for future reference. To do so,
Next to the search box, click on the Save search button

Give a name and click Save

Share and Manage Saved Search Filters
Saved search filters can be shared with other admins to help standardize device views and improve collaboration across teams.
This option is available under Devices → Saved Filters.
Share a Saved Search Filter
Each saved search filter includes a Share action. To share a filter:
Navigate to Devices → Saved Filters.
Click the Share icon next to the desired filter.

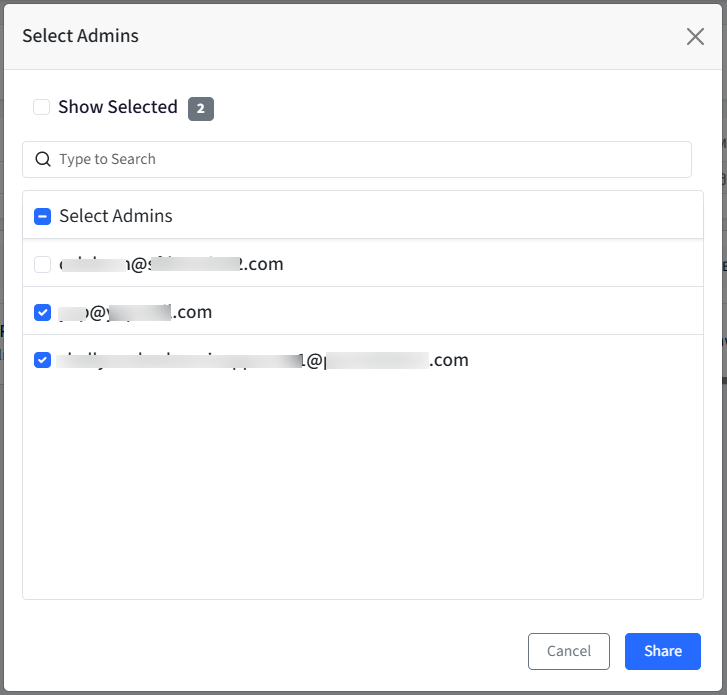
In the Select Admins pop-up:
Use the Search box to find admins.
Select one or more RABC admins from the list.
Click Share to confirm.
This shares the selected filter with the chosen admins.
Once shared, the filter will appear in the selected admins’ Saved Filters list.
Un-share a Saved Search Filter
You can remove access to a previously shared filter at any time. To un-share a filter:
In Saved Filters, click the Un-share icon next to the filter.

In the Select Admins pop-up:
View the list of admins the filter is currently shared with.
Select one or more admins to remove access.
If the filter is not currently shared, the following message is displayed:
No other admins are currently using this saved filter.
Click Un-share to confirm.
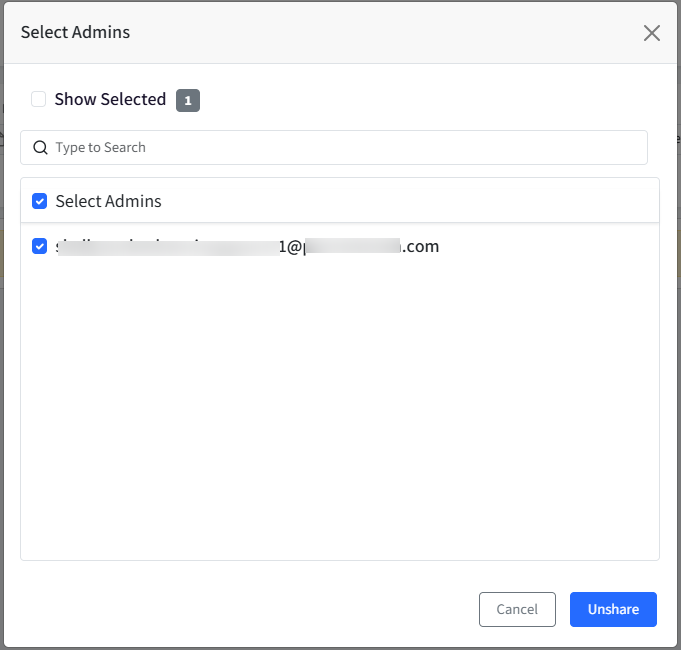
Removes the filter from the selected admins’ Saved Filters list.
Permissions and Access Control
Admins can share, un-share, and delete only the saved filters they have created.
Admins with whom a filter has been shared:
Cannot re-share the filter
Cannot un-share it further
Cannot delete it
Related actions will be disabled
Deleting a shared search filter
Deleting a saved search filter, removes the filter from the creator’s dashboard and from all admins with whom it was shared.
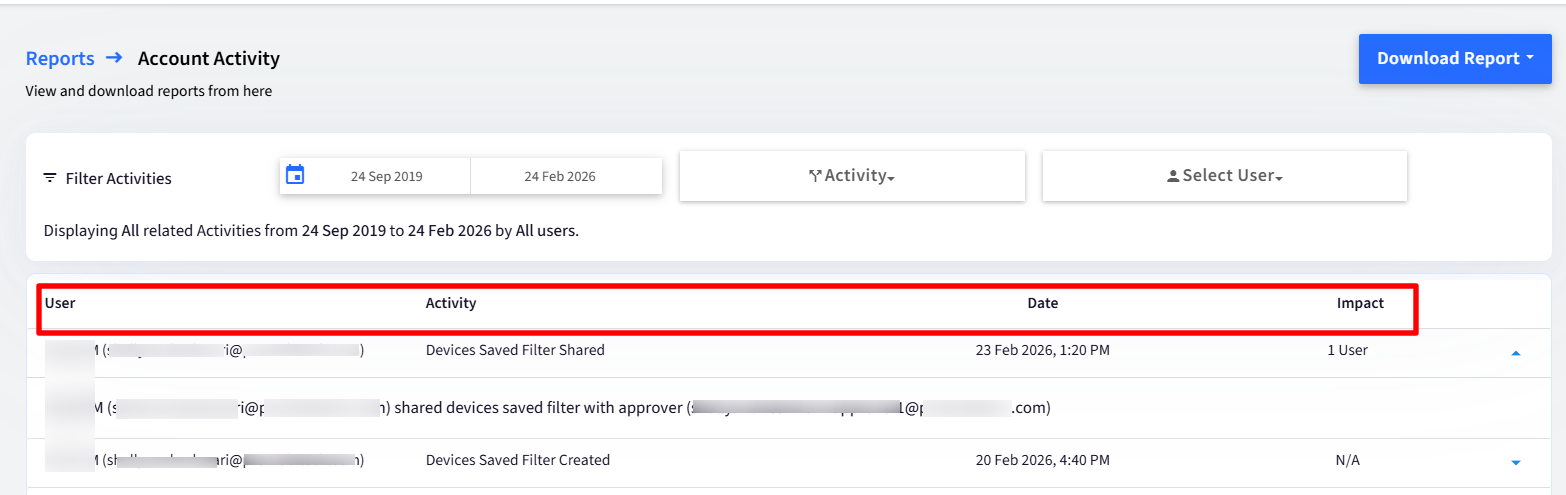
Audit Log of Devices Saved Filter
These audit events are available in the Account Activity Report. Audit events are generated when a Devices Saved Filter is shared or deleted. Following information is displayed:
User: Admin name and email who performed the action
Activity: Event type (Devices Saved Filter Shared / Devices Saved Filter Deleted)
Date: Action timestamp
Impact: Total number of affected admins
List View and Grid View
The devices can be viewed in the following ways:
List view
Grid view - By default, devices are shown in the Grid view
The icon to change the view is present next to the search. Simply click on it to switch from grid to list view and vice-versa.
Other features
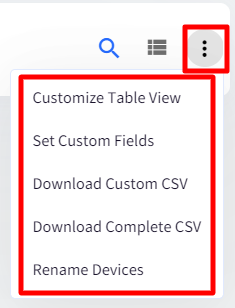
Click on the three dots next to view where you have access to the following features:
Customize Table View - If you are on a list view, you can even select the columns to be displayed. Click on this option and select the columns to be displayed when you are on the list view.
Set custom fields - From here, admins can define custom fields and set values against them for each device. These custom fields can be used as wildcards when defining configurations for Play For Work applications or used in Device Profile to override the default URL. Click here to know more.
Download Custom CSV - This allows you to download the list of enrolled devices in csv format, where you can select the fields that should be included in the downloaded csv.
Download Complete CSV - With this feature, you can download a report of all enrolled devices in csv format.
Rename Devices - Using this feature, the devices can be renamed in bulk.
Move Devices between Groups in Bulk - Use this feature to move devices or users between groups in bulk.
Device Level Actions
For a quick look, both Grid and list view give summarized information about the device, viz., device name, group name, last seen, status (locked/unlocked/inactive), charge remaining on the device, link to view other details of the device..png)
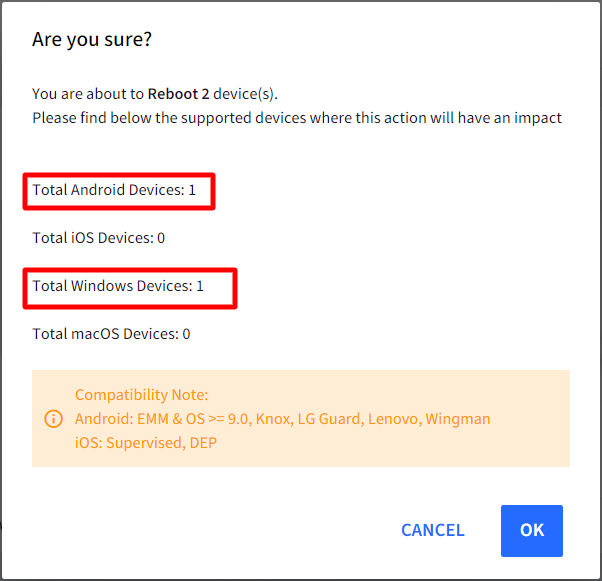
Bulk Actions - Admins can perform actions in bulk on devices like Reboot, Lock/Unlock, Refresh, Rename and more. To perform bulk action on devices:
Select the device(s) by putting a check in front of the device
The Actions menu will appear on the top bar before the search icon
From the actions menu, select the action to be taken on the device
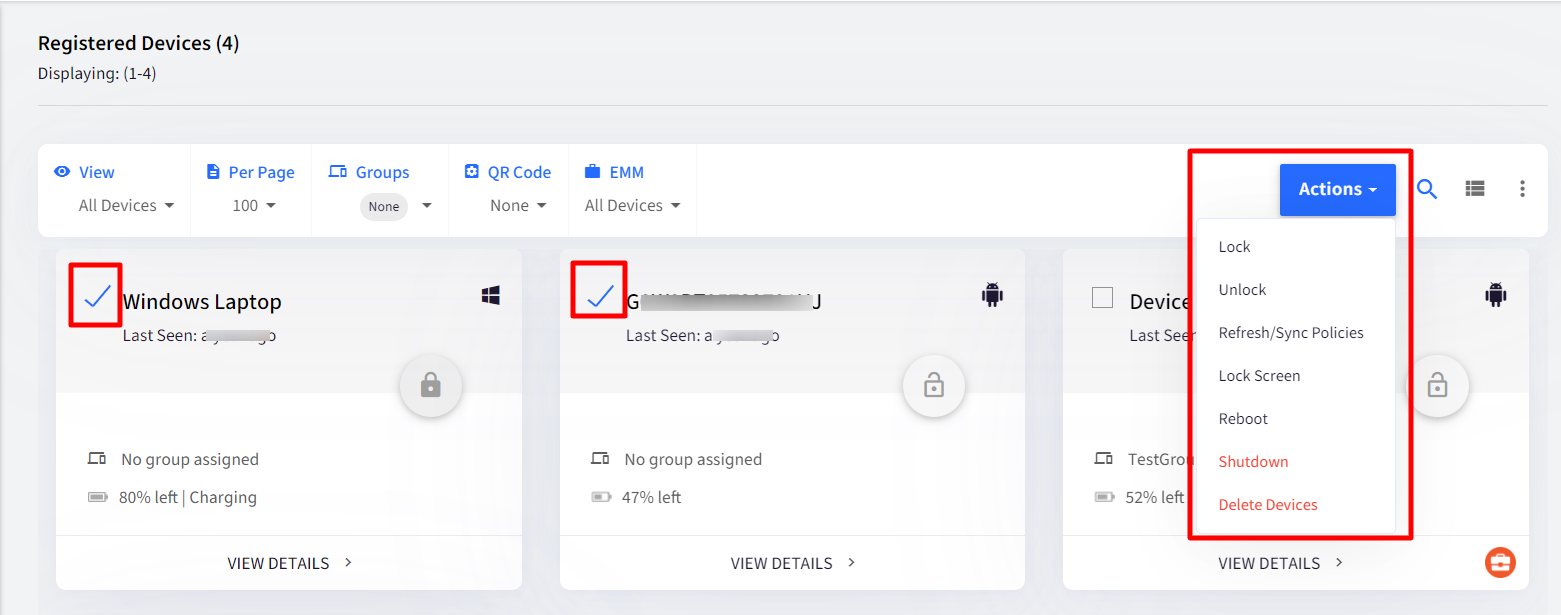
When the admins take this action, they will be told (in a dialog box) how many devices the action will impact where the number will show the supported devices. Click OK for the action will be implemented.