- 05 Jan 2024
- 4 読む分
- 印刷する
- PDF
Webhooks
- 更新日 05 Jan 2024
- 4 読む分
- 印刷する
- PDF
Webhooks integrated with Scalefusion, allows for real-time communication with external systems or applications. They enable Scalefusion to send notifications to external systems when certain events occur, such as when a device is enrolled, unenrolled, or has a configuration change.
Unlike Developer APIs where customers pull this kind of information by implementing their backend servers, we proactively notify them of such events with the help of Webhooks. As a result, Webhooks provides them with a push mechanism rather than only a pull mechanism.
The document below describes how Webhooks can be configured on Scalefusion Dashboard and the events supported.
How it works?
Scalefusion sends a POST request to a pre-set URL with event data, allowing external systems to react in real-time, enabling automation and integration. To receive data from a webhook, the URL must be public and owned by the receiving system. It must be set up as a webhook endpoint to ensure the system can receive notifications.
For example, Device Enrollment webhook, once configured will notify their systems of a device being enrolled whenever it is enrolled.
Pre-Requisites
- You should be subscribed to Enterprise 2023 plan.
- Devices should be enrolled with Scalefusion.
- The payload URL endpoint (URL of the server that will receive the webhook POST requests) should be configured.
- Secret key should be generated that will used to sign the request body that Scalefusion sends.
- You should have Write permissions for Integrations.
Configure Webhooks in Scalefusion Dashboard
Step 1: Activate Webhooks
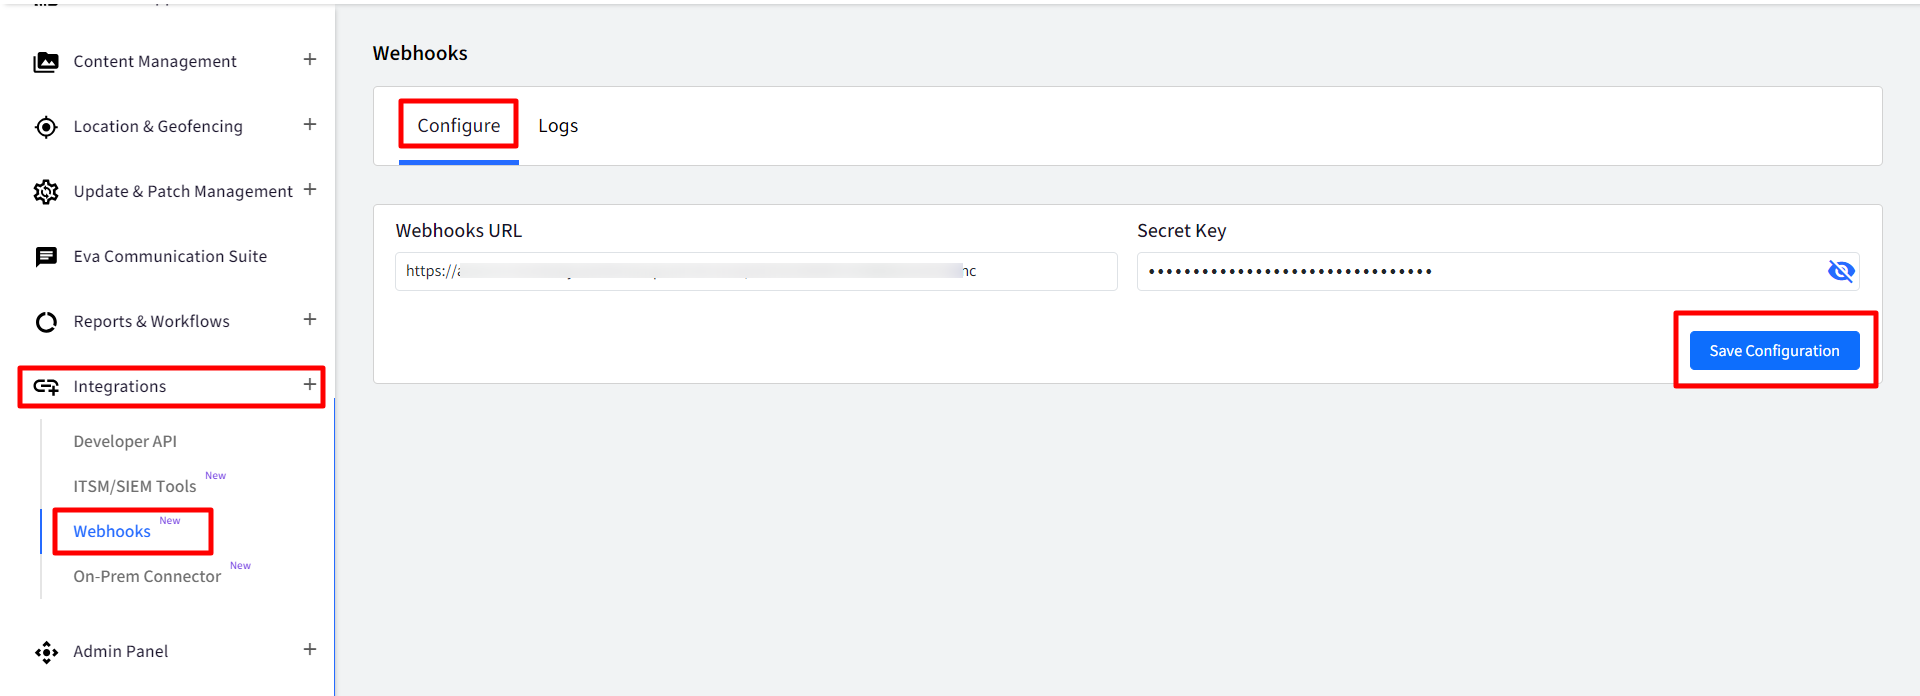
- Navigate to Integrations > Webhooks
- Under Configure tab, enter the following:
- Webhooks URL: URL of the endpoint server
- Secret Key: This is to ensure POST requests sent to your payload URL are coming from Scalefusion
- Click on Save Configuration.
- The configuration will be created. Click on Activate to activate configuration.

Step 2: Subscribe Events
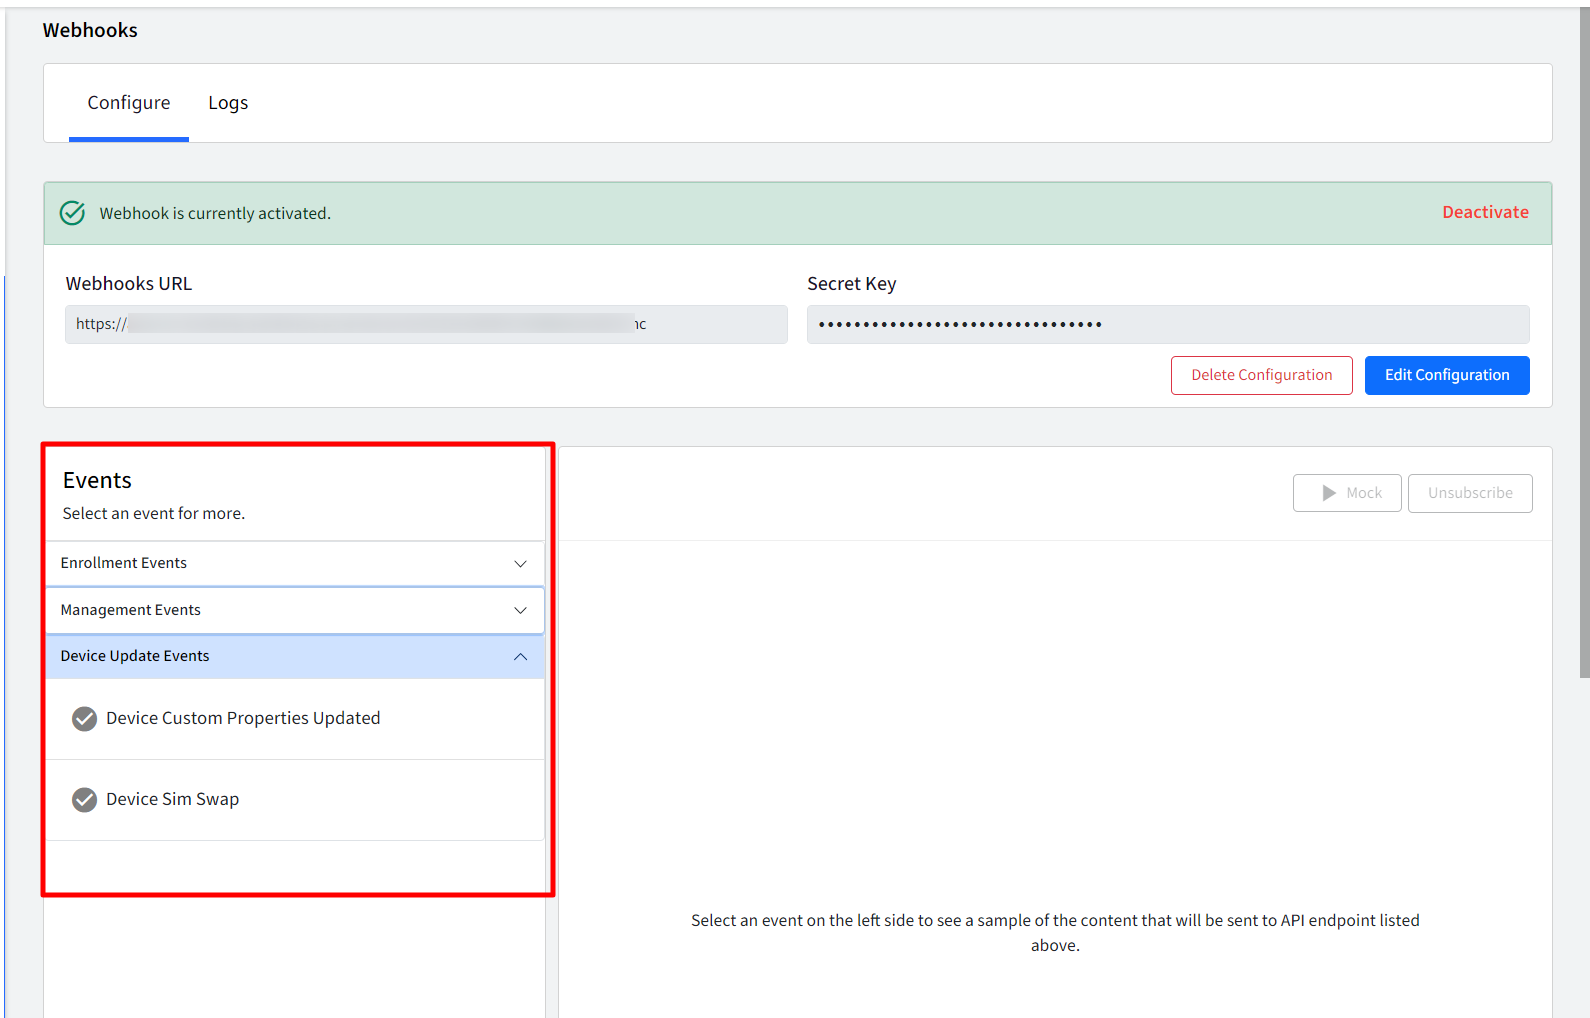
- Once a configuration is activated, the events will be listed on the left. The events are classified into three categories, viz.
- Enrollment Events
- Management Events
- Device Update EventsThe events along with platforms supported, are listed in the Events supported section below
- To trigger a webhook, you need to subscribe to the event.At least one device should be enrolled before subscribing to an event
- Click on an event to select it. The sample payload for the selected event is displayed on the right.The application/json is the default webhook content type supported by Scalefusion currently. You will receive the JSON payload as the body of the POST request.
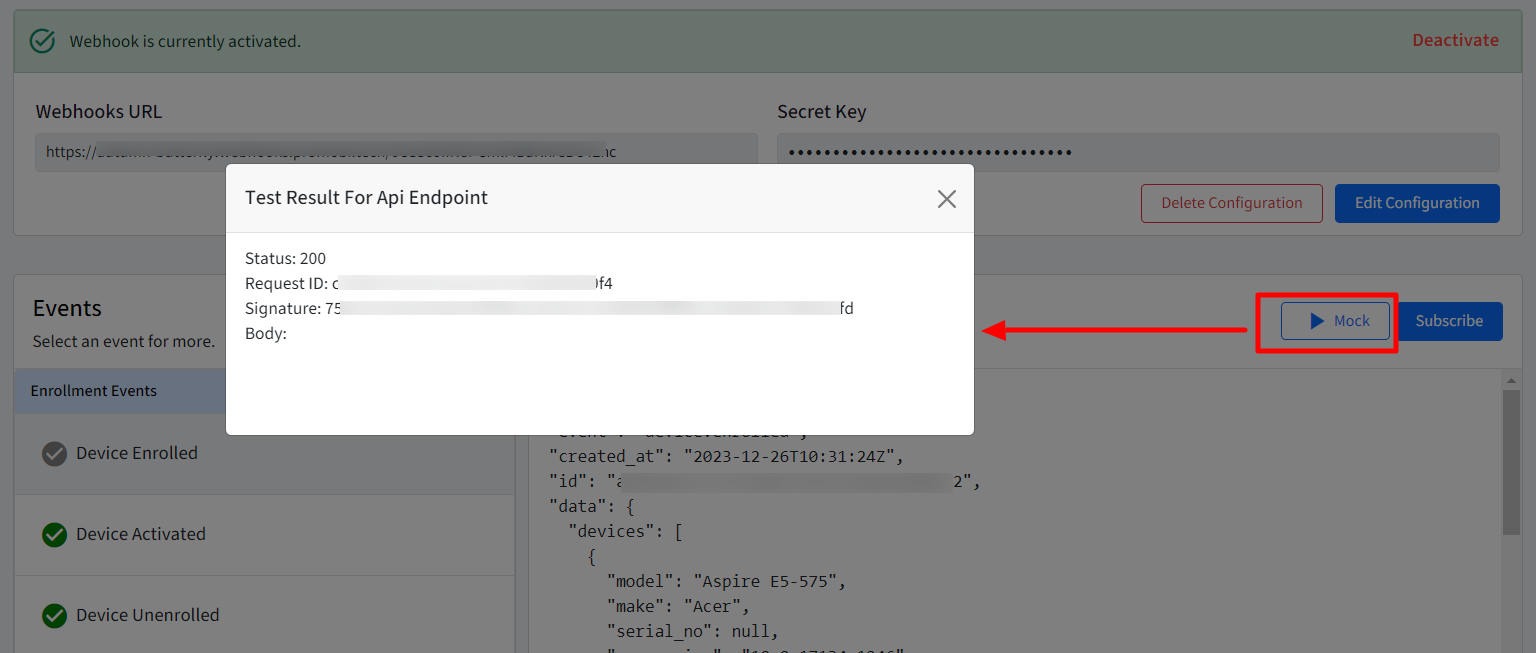
- Mock Event: To test the endpoint response and code, you can trigger a mock webhook before finally subscribing for a particular event, by clicking on the Mock button. Please note that mock events are not logged in webhooks event logs. The following type of response pops up on screen.
- Click on Subscribe button
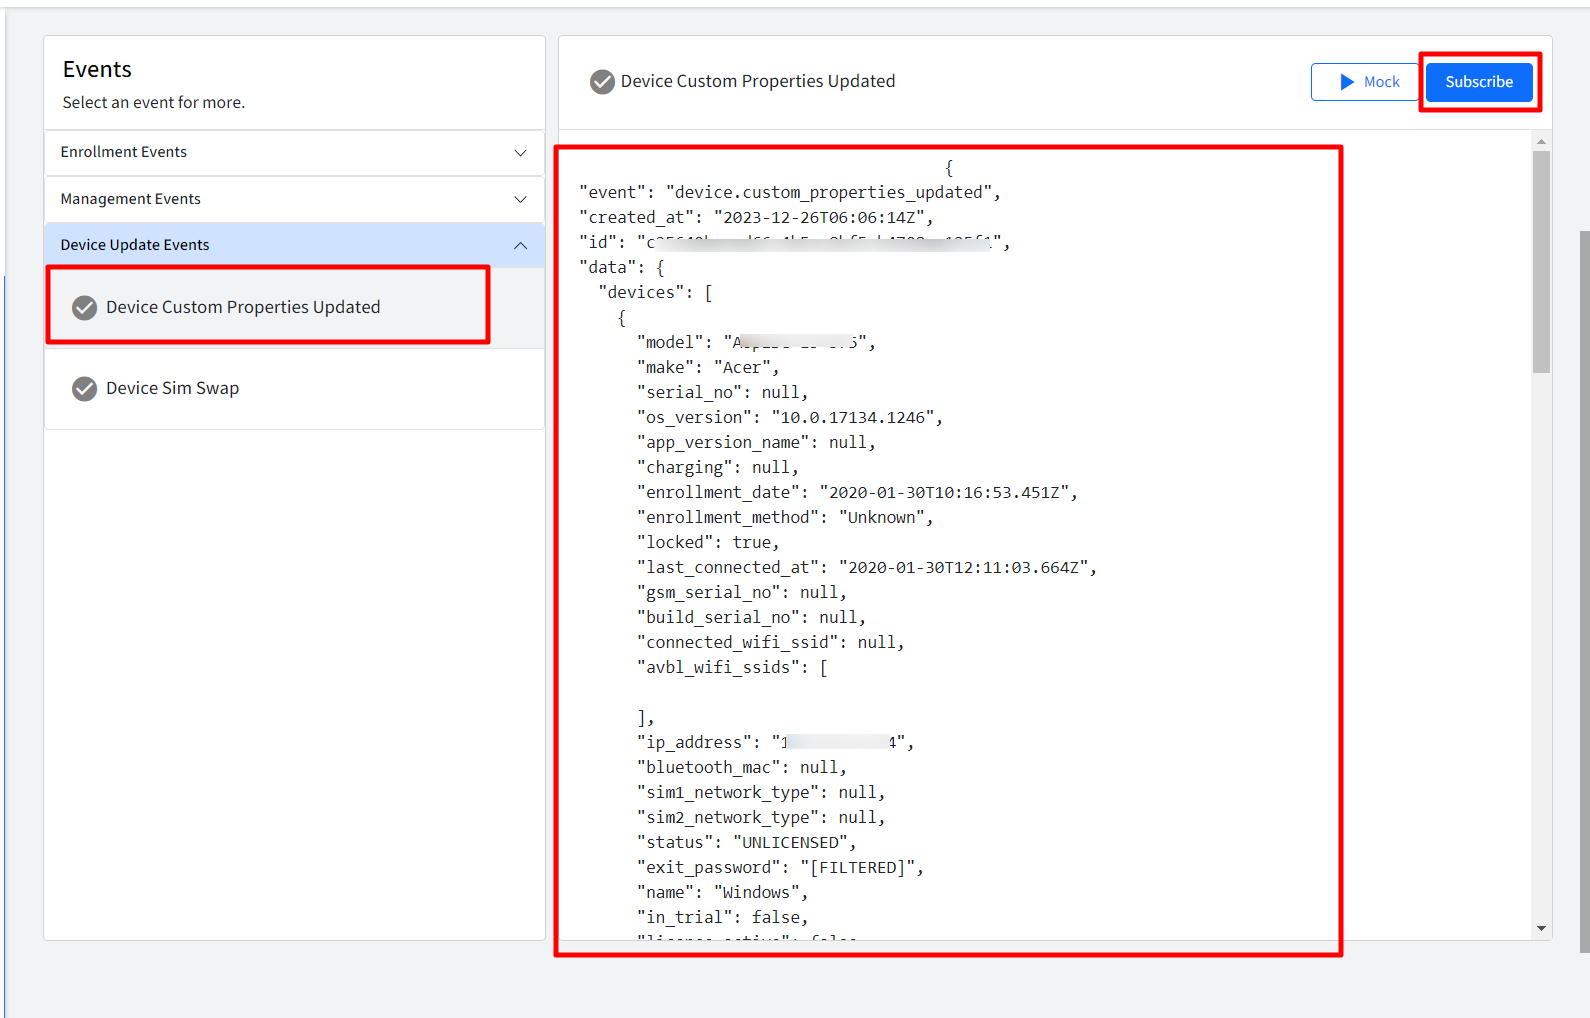
- Notice the event is marked by a green check in front of it indicating that it has been subscribed.
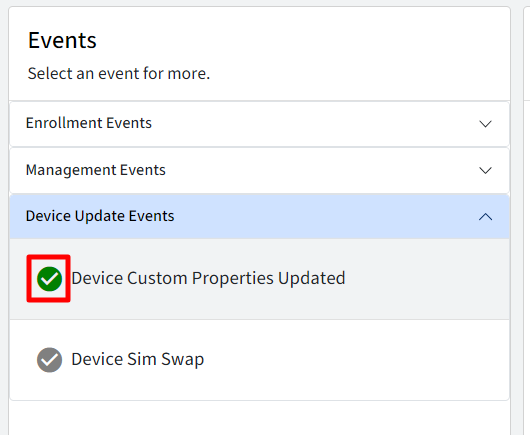
- At any point of time, you can unsubscribe the event by clicking on the Unsubscribe button if you don’t want to trigger a webhook.

Validating Payload
When you set a shared secret, Scalefusion uses it to create a hash signature of the payload. This hash signature is included with the headers of each request as a X-SF-Signature header to your payload URL. The following section describes how you can validate the payload to ensure that it is coming from Scalefusion
Note: This is just a sample code. Your language or technology stack of choice may differ from the example provided below.
# app/controllers/webhooks_controller.rb
class WebhooksController < ApplicationController
# Skip CSRF protection for this controller since it's receiving external webhooks.
 protect_from_forgery with: :null_session

 # This filter is executed before the 'payload' action to verify the payload signature.
before_action :verify_signature, only: :payload

  # Handle incoming webhook payload.
  def payload
   # Rewind the request body to read it again.
   request.body.rewind
   # Read the complete request body.
   body = request.body.read
   # Parse the JSON payload.
   json = JSON.parse(body)
   puts "Scalefusion Webhook Payload: #{json.inspect}"
   # Respond with HTTP 200 OK status.
   head :ok
  end

 private

 def verify_signature
# note ENV[SCALEFUSION_SECRET_KEY] it should return a secret key which is configured during webhooks configuration
signature = Utils::Security.hmac_256(ENV[SCALEFUSION_SECRET_KEY], request.body.read)

unless Rack::Utils.secure_compare( request.env['HTTP_X_SF_Signature'], signature)
render plain: 'Signatures mismatch!!', status: 406
end
end
end

# config/routes.rb
post '/payload', to: 'webhooks#payload'
Step 3: View Logs
On subscribing to events, webhooks will start triggering. The user can view all the webhook invocations made for the subscribed events, in the Logs section. Logs show following:
- Summary: Displays Summary of following:
- Total Events: Total number of webhook events invoked so far.
- Total Success Events: Total events for which invocation of webhooks returned a success response.
- Total Failed Events: Total events for which invocation of webhooks returned a failed response. There can be many reasons for failure of an event like SSL certificate expired or wrong endpoint / credentials configured or error in customer side code etc.
- Filters: Following filters can be applied:
- Start Date and End Date: This will display all the events triggered during the given start date and end date
- Response Code: Filters events with the specified response code
- Request ID: This represents the Unique UUID sent as part of webhook invocation. Event can be filtered based on Request ID.
- Events:The Events table displays all the events sent showing following columns:
- Event Type: The event for which the webhook was invoked.
- Request ID: The unique UUID associated with this request
- Response Code: The response code received after invocation of webhook
- Date & Time: The timestamp when the webhook was invoked for this event.
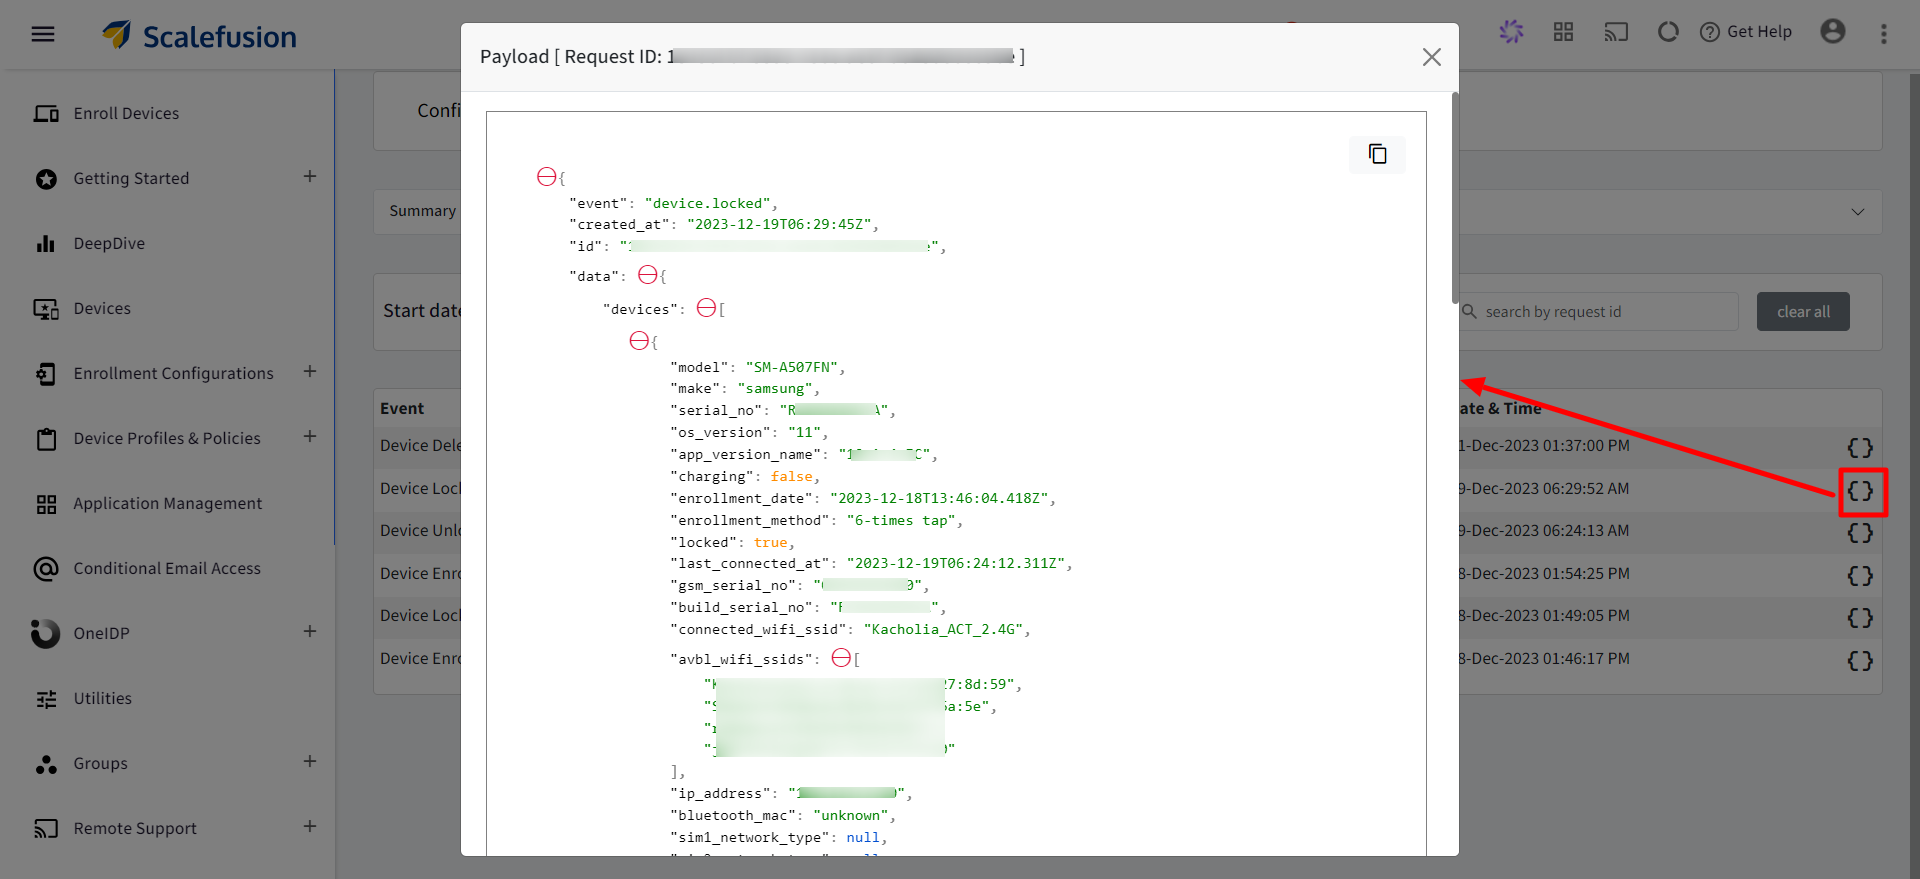
- Request Payload View: Clicking on this icon will display the contents sent in this request, in a pop-up window. This payload can be copied with the copy button.
Events supported
Scalefusion supports following events and platforms on which Webhooks can be invoked:
| Events | Android | iOS | macOS | Windows | Linux |
| Device Enrolled | Yes | Yes | Yes | Yes | Yes |
| Device Activated | Yes | No | No | No | No |
| Device Unenrolled | No | No | Yes | Yes | No |
| Device Deleted | Yes | Yes | Yes | Yes | Yes |
| Device Unlocked | Yes | Yes | Yes | No | Yes |
| Device Locked | Yes | Yes | Yes | No | Yes |
| Device Lost | Yes | Yes | No | Yes | No |
| Device Found | Yes | Yes | No | Yes | No |
| Device User Signed In | Yes | No | Yes | Yes | No |
| Device User Signed Out | Yes | No | Yes | Yes | No |
| Device Shutdown | Yes | Yes | Yes | Yes | Yes |
| Device Reboot | Yes | Yes | Yes | Yes | Yes |
| Device Custom Properties Updated | Yes | Yes | Yes | Yes | Yes |
| Device Sim Swap | Yes | No | No | No | No |


