- 05 Feb 2025
- 9 読む分
- 印刷する
- PDF
SSO Configurations for Cisco DUO
- 更新日 05 Feb 2025
- 9 読む分
- 印刷する
- PDF
This document provides a step-by-step guide for setting up SSO Configuration to configure Cisco DUO, allowing users to sign in to Cisco DUO services, using their OneIdP credentials and securely access these services.
Pre-requisites
The Custom Domain for which you are authorizing, should be verified through OneIdP.
Users belonging to custom domain should be added to Scalefusion Dashboard and migrated to OneIdP.
IT Admins should have access to Cisco duo admin console.
Users should be added to Cisco duo portal
Create SSO Configuration for Cisco DUO
Sign in to Scalefusion Dashboard and navigate to OneIdP > SSO Configuration
Click on New SSO Configuration button on top right.
.png)
Once you click New SSO Configuration, following window will pop-up. Locate to IdP → Select Cisco Duo and click Configure

This opens the SSO Configuration wizard with following tabs on the left panel:
User Facing Messages
Navigate to each tab and enter required details. You can navigate to next tab only after you have entered complete details in the current section. All are explained in detail below.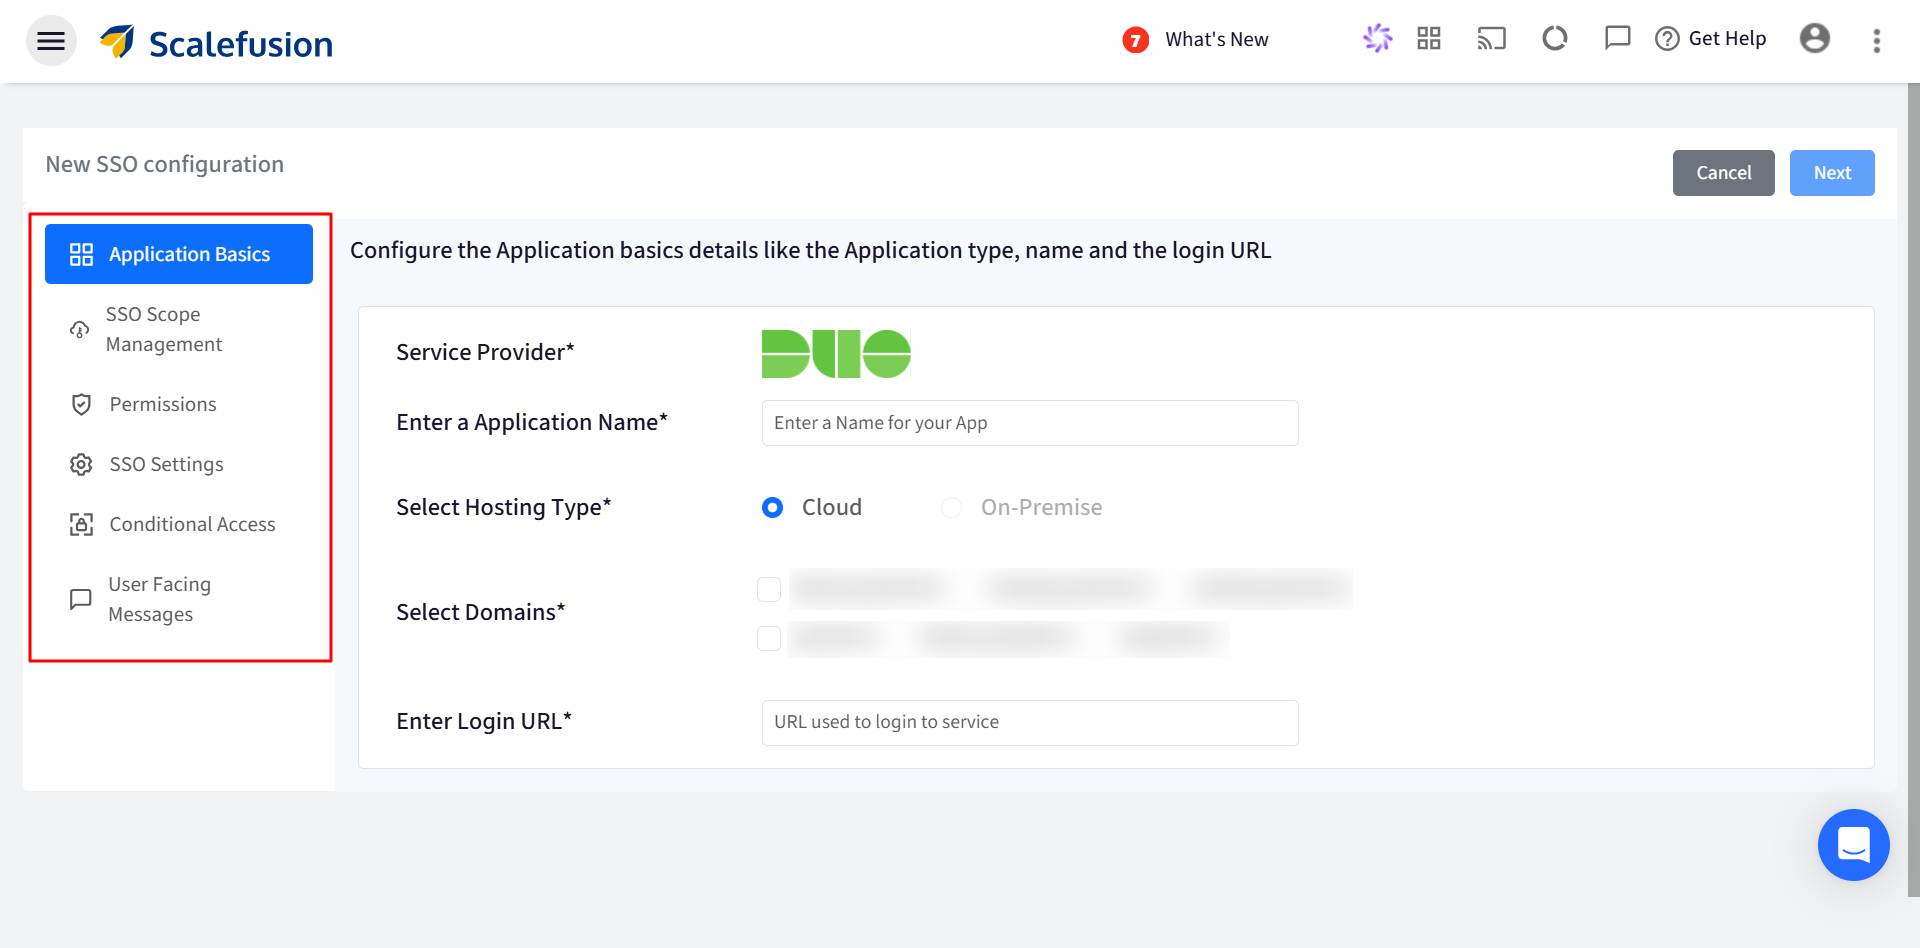
Application Basics
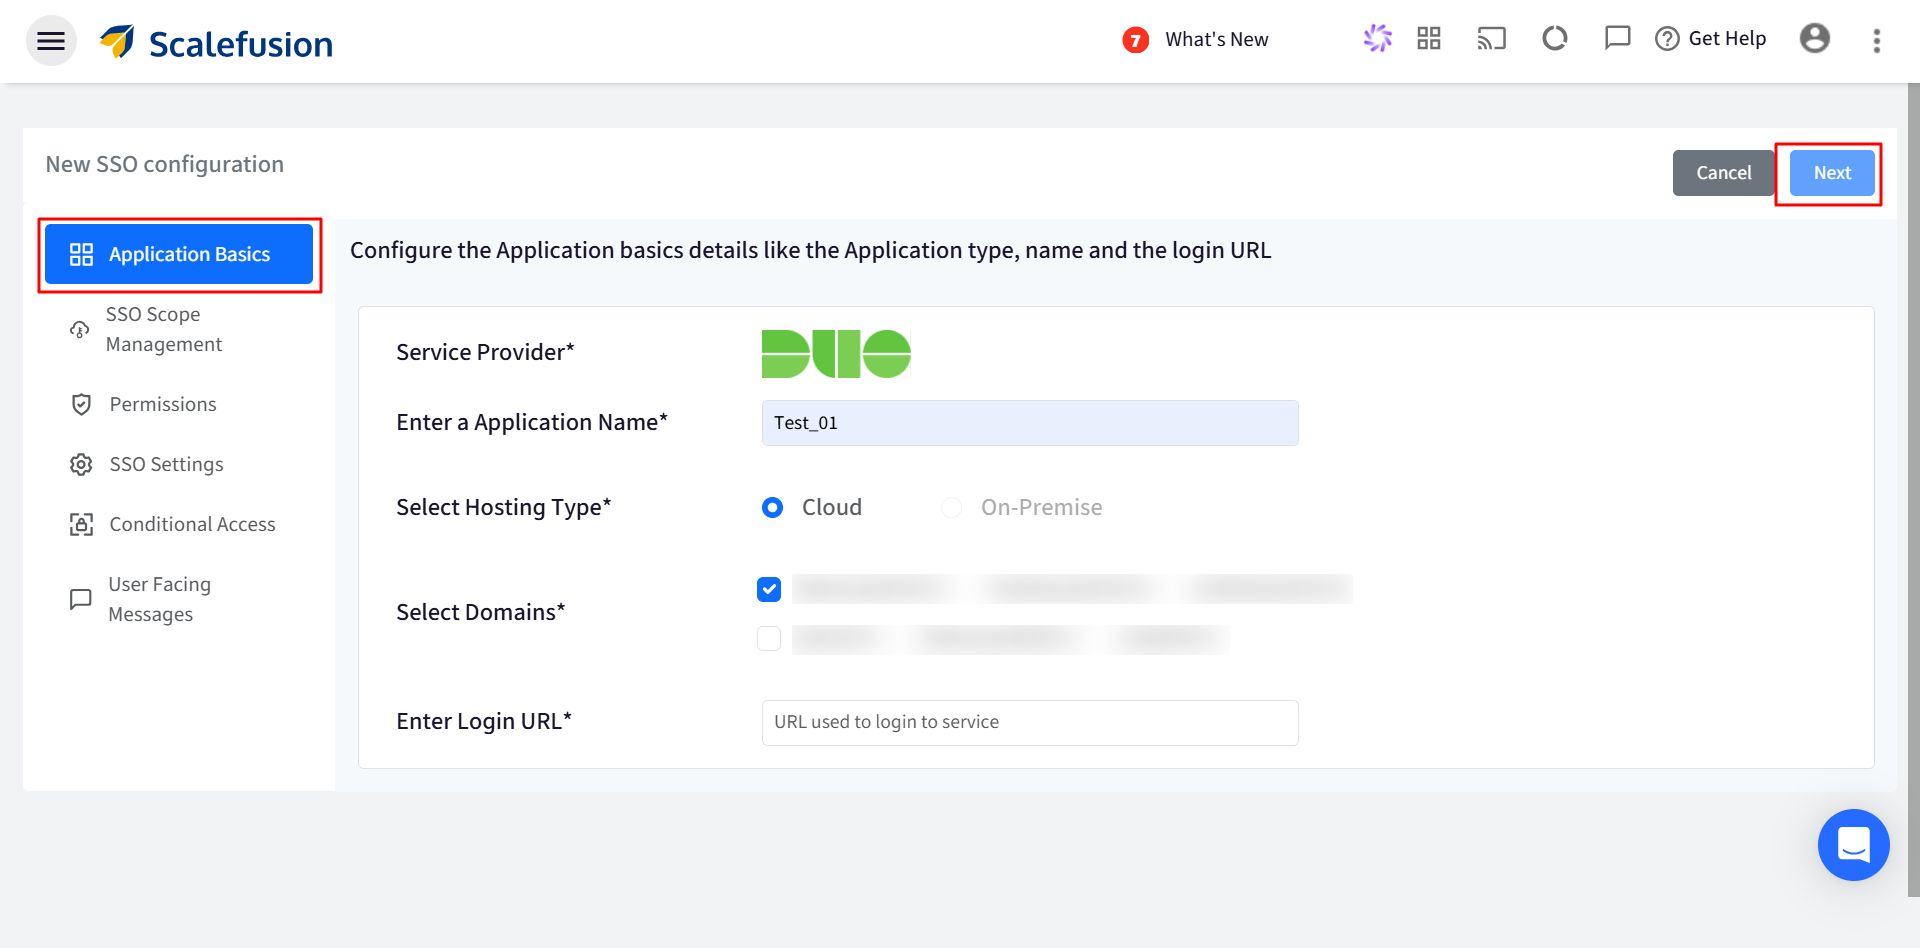
Configure basic application details by entering the following:
Enter Application Name: Enter a name for your App which will be an identifier for your configuration. The name must be at-least 5 characters long. The maximum allowed length is 128 characters.
Select Hosting Type: This will be pre-selected as Cloud
Select Domains: All the custom domains you have configured and verified using OneIdP, will be listed here. Select the domain(s) which you want to be SAML SSO enabled.
Enter Login URL: Provide URL that you use to sign in to that service. Once you have entered all details click Next
SSO Scope Management
With SSO scope management you can configure the procedure for managing the users who will be accessing this application. It basically allows how SAML settings for the users are going to be managed. Following are the settings:
User assignment
SSO Configuration would allow only assigned users to access the app. Choose one from the following options:
Allow all users imported to Scalefusion to access the application: All users (belonging to the domain) imported to Scalefusion and migrated to OneIdP will be allowed to access the application.
Allow only assigned users to access the application: Only the user(s) whom you have assigned the SSO configuration, will be allowed to access the application. With this option, after SSO configuration is created, you need to manually select and assign the users.
Revoke access for all users once when the configuration is saved: If this is checked, the access is revoked from the users who are currently assigned with the configuration. As a result, it will invalidate all user sessions and logout users from their current running session.

Enforcement Rules
From here, you can configure and enforce users that at what point of time SSO Configuration should invalidate the current session and logout users. Following options can be selected:
Immediately on User Assignment and post grace period if applied: Once SSO configuration is assigned to user
Immediately on User Un-Assignment: When user is unassigned the SSO configuration
Immediately on Deleting this configuration: When SSO configuration is deleted from Scalefusion Dashboard
Users will not get logged out in case of Cisco DUO

Permissions
Here, you do not need to grant any additional permissions. Click Next to go to the next step.

SSO Settings
This section allows admins to configure the Service Provider settings and obtain the SSO URLs which will be added on the Cisco DUO portal.
OneIdP SSO Settings
To complete this, follow these steps on Cisco DUO Portal:
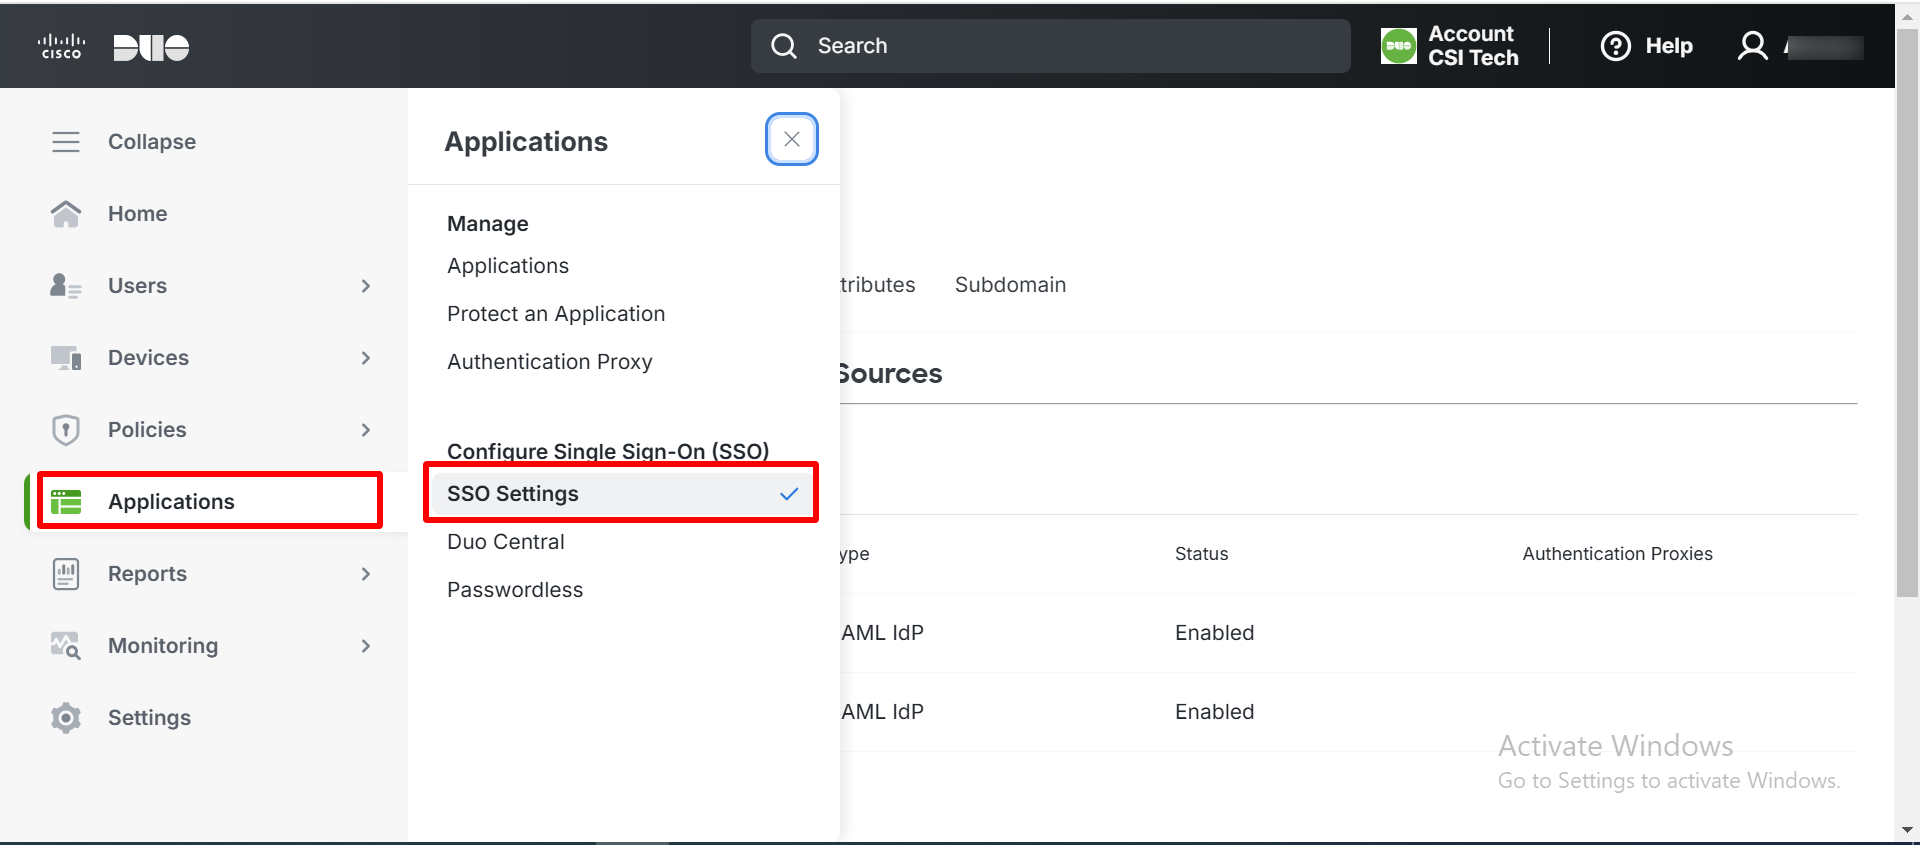
Login to Cisco DUO admin console and navigate to Applications > SSO settings
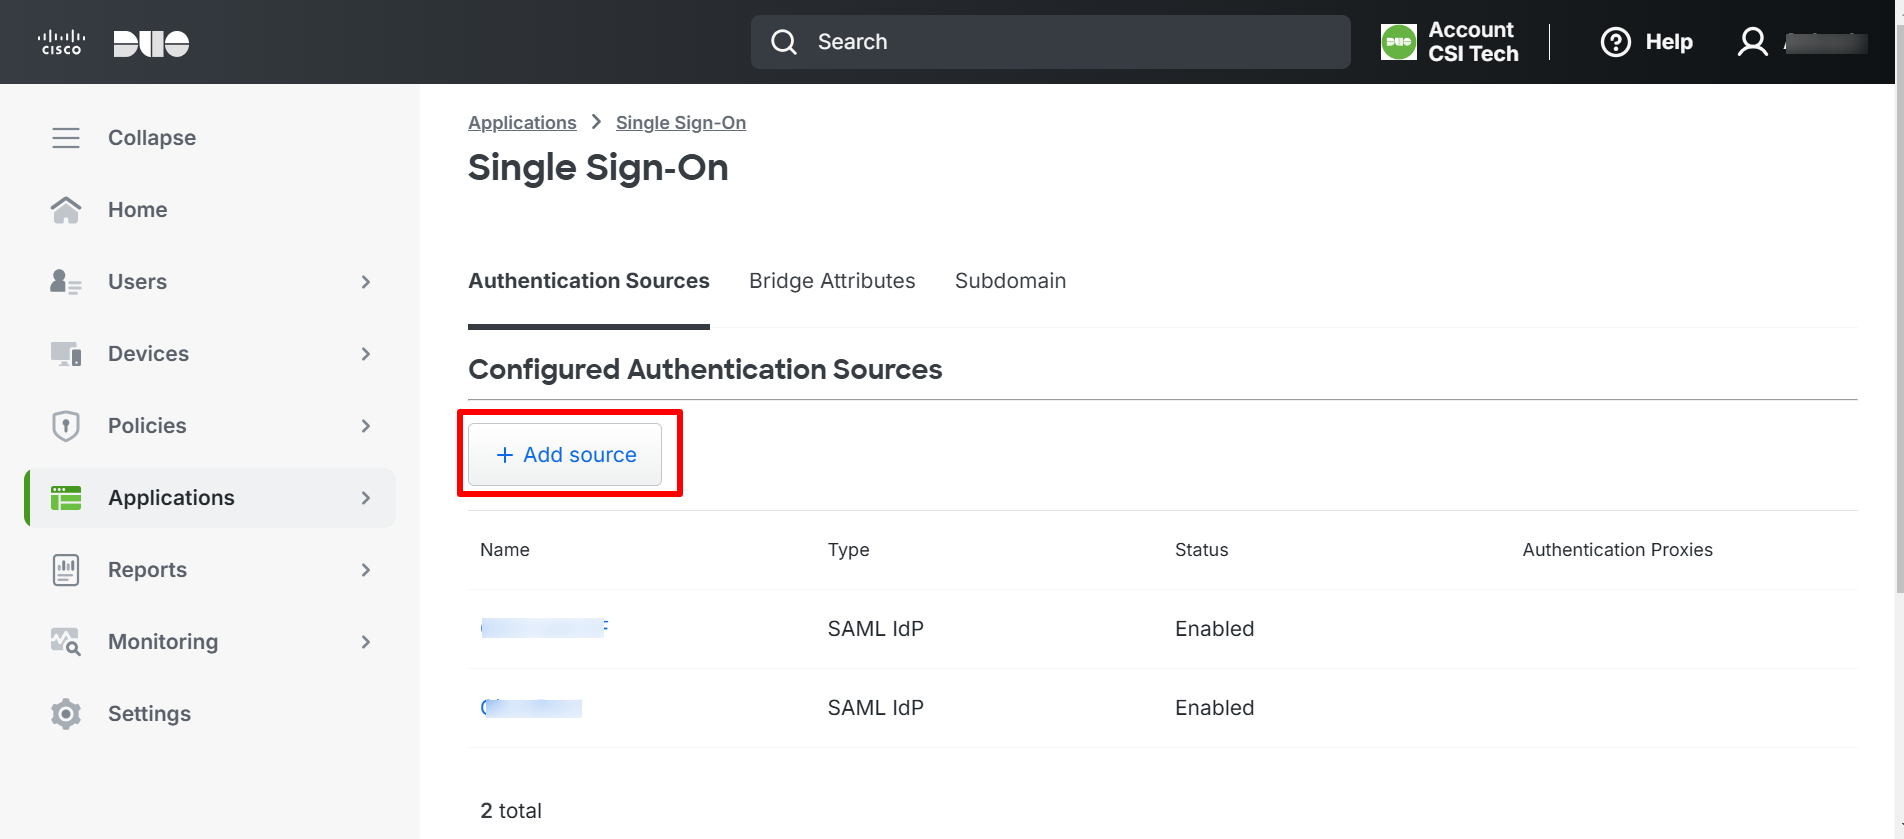
Click on Add Source
On the next page, click on Add SAML Identity Provider
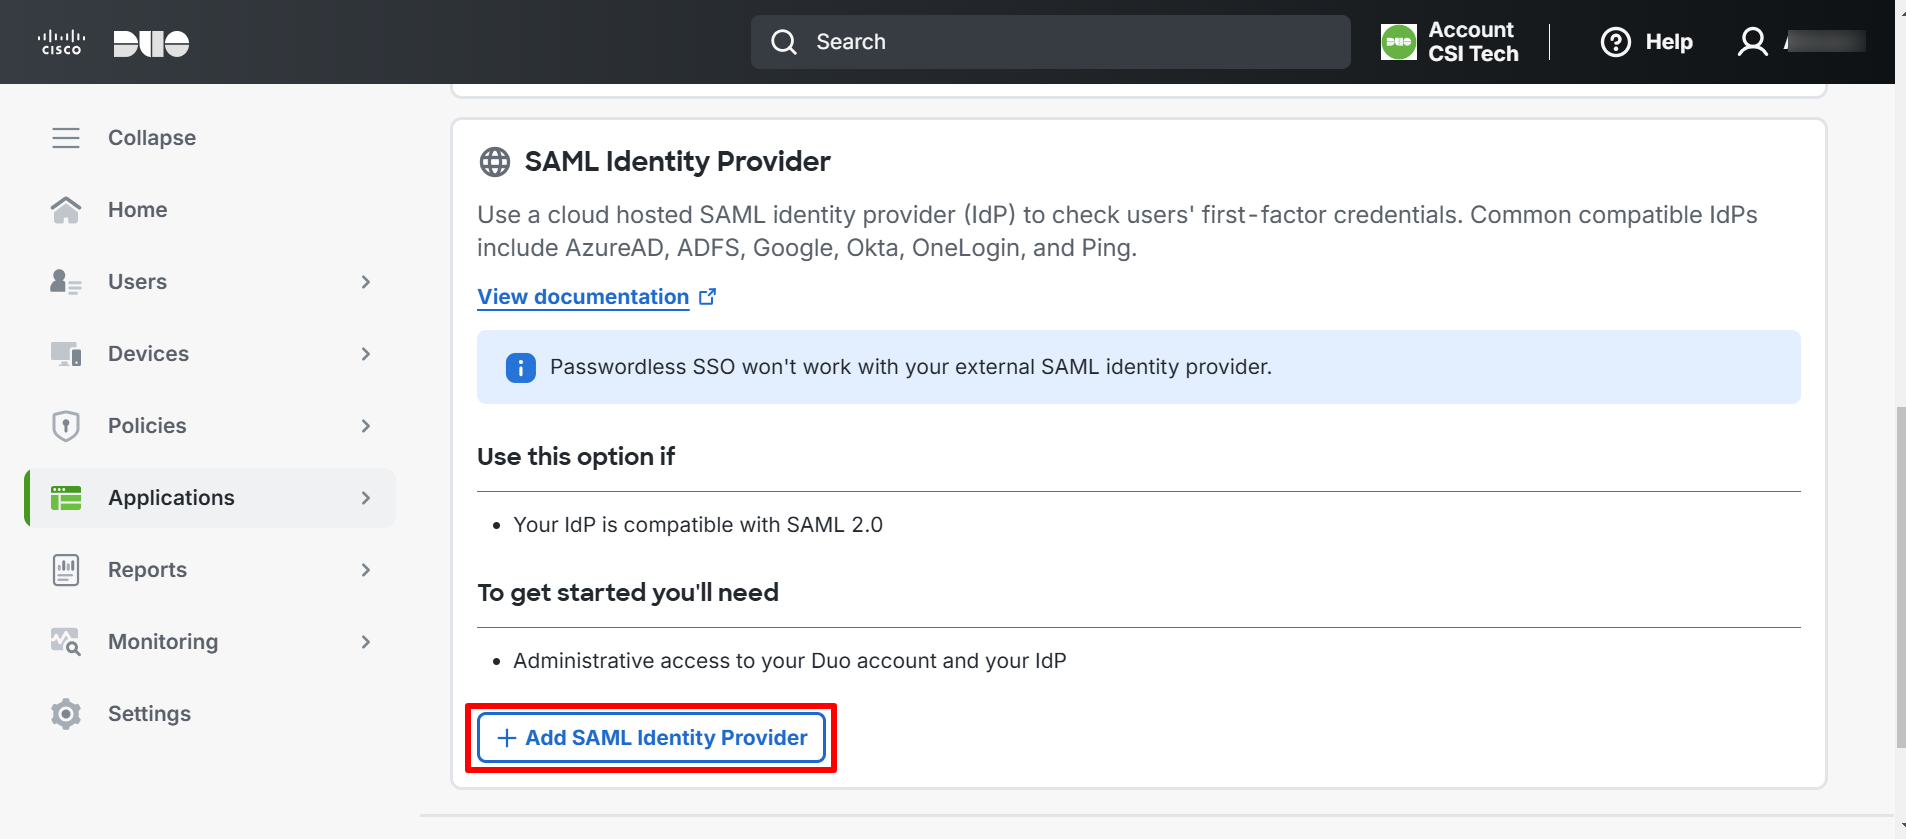
This opens the form for SAML Single-Sign On Settings. Here, enter the following information under the section Configure Duo Single Sign-On:
Display Name: Enter a unique name to identify the Identity Provider
Entity ID: Copy the OneIdP Entity ID/Issuer URL from Scalefusion Dashboard (under SSO Settings) and paste here.
Single Sign-On URL: Copy the OneIdP SSO URL from Scalefusion Dashboard and paste it here
Certificate: Download Verification certificate from Scalefusion Dashboard (SSO Settings) and upload it here.
Note: The other fields are optional
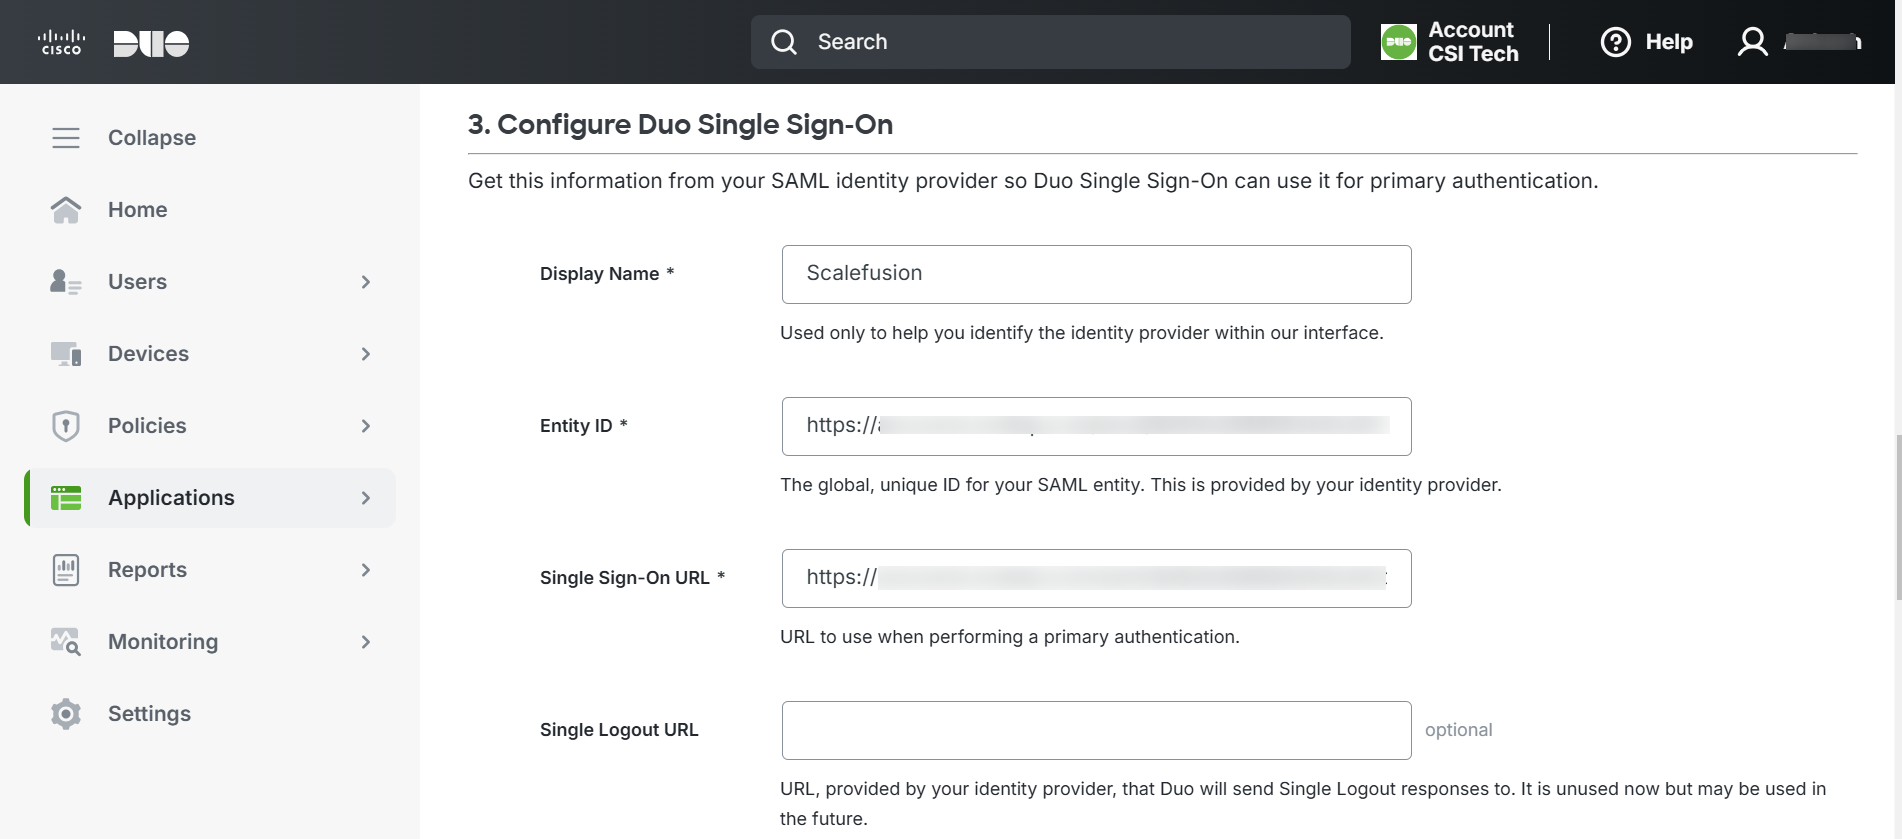
After entering all details, click Save.
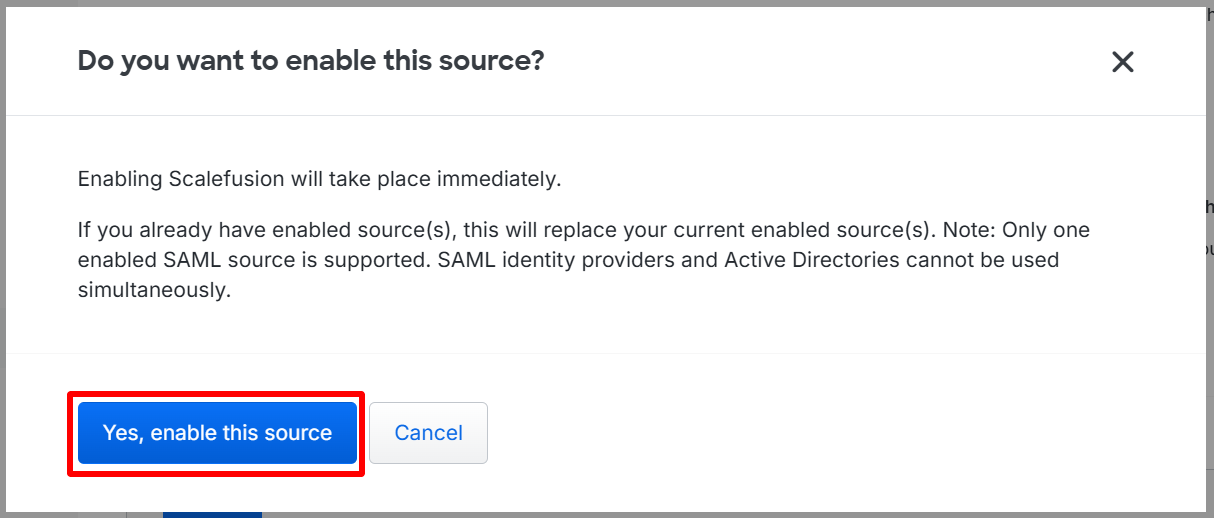
You will get a confirmation dialog. Click on Yes, enable this source
Now, navigate back to Scalefusion Dashboard and click on Custom Attributes tab under SSO Settings.
Custom Attributes
Navigate to SSO Settings > Custom Attributes and enter the following custom attribute. Click Next to go to next step

Conditional Access
From this section you can define the additional conditions on the basis of which users will be allowed/disallowed from accessing the application on device. This is divided into following sections:
Conditional Access Settings
Access Exceptions
Conditional Access Settings
Device Policy
For Android, iOS/iPad OS, Windows & macOS, Linux, Chrome OS: Choose one from the following two conditions:
Only if the device is managed by Scalefusion: The application will be accessible only on devices managed (enrolled) by Scalefusion.
If the device is managed by Scalefusion or an OTP using Scalefusion Authenticator app from a managed device: The application is accessible if any of the following conditions is met:
Device is managed by Scalefusion: If device is managed you will not be asked to enter OTP for authentication, or
If device is unmanaged, OTP is required for authentication. OTP can be taken from Authenticator app installed on a Scalefusion managed device.
Allow users to access by setting up MFA using third party authenticator app or OTP sent on email: This option is activated only when Multi-factor Authentication is enabled in Directory Settings.
Note: The left side panel is for configuring Device Policy on Android & iOS/iPad OS and right side is for Windows & macOS and Linux, ChromeOS below them. Hence, you can configure separate device policies based on platform.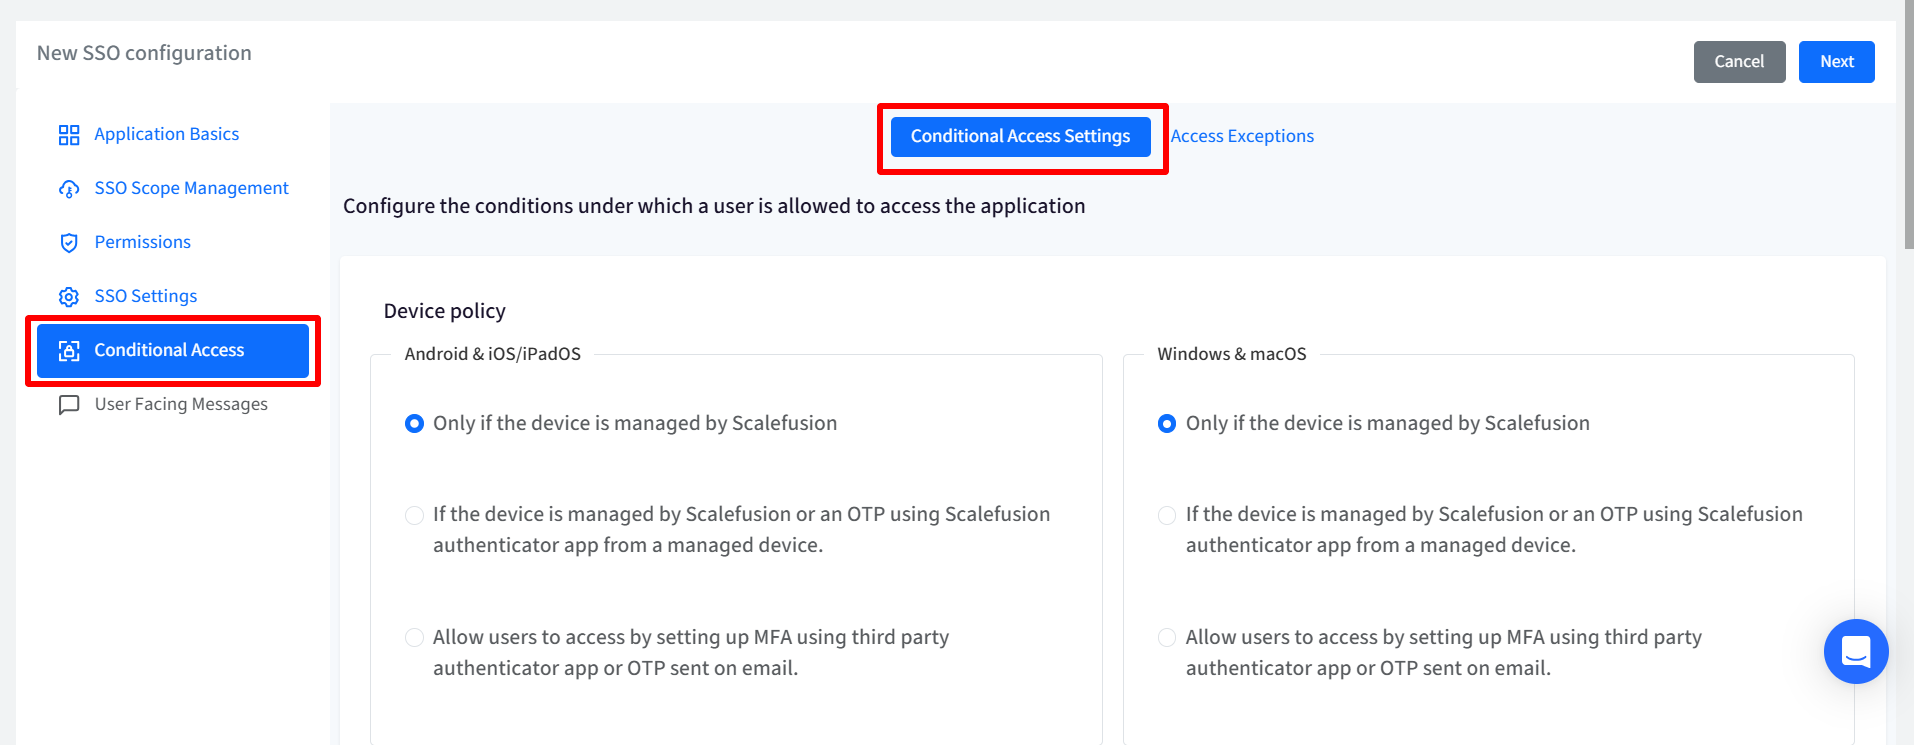
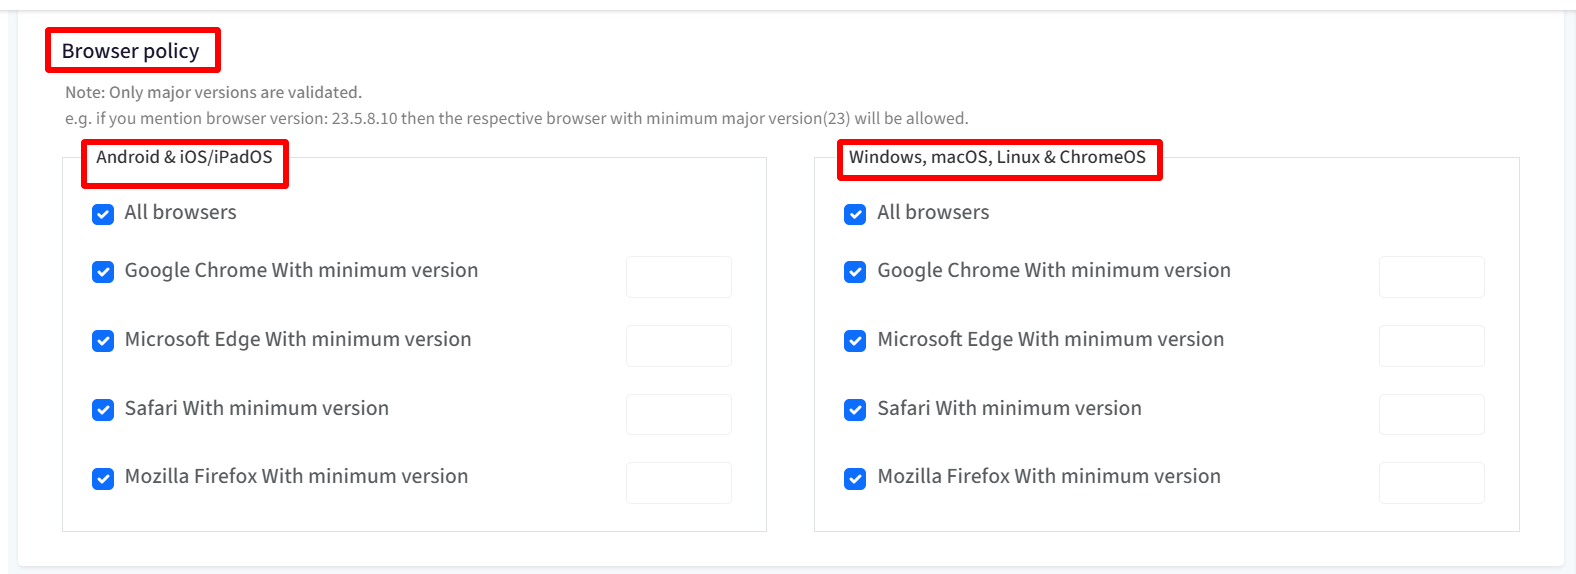
Browser Policy
From here, you can select one or more browsers and specify minimum versions on which you want to allow the access to the application. Following are the options:
All Browsers
Google Chrome with minimum version
Microsoft Edge with minimum version
Safari with minimum version
Mozilla Firefox with minimum version
Important Points on Browser Policy:
By default all browsers are allowed.
Only major versions are validated. For eg. if you mention browser version: 23.5.8.10 then the respective browser with minimum major version(23) will be allowed. After configuring Device Policy and Browser Policy, click Next
Access Exceptions
From this section you can configure the exceptions where the users are allowed to access the applications even if the conditions are not met. In general, these exceptions will be useful or addresses scenarios where :
IT Admins have setup Android Enterprise using Google Workspace Or
IT Admins have setup Apple User Enrollment with ABM/ASM federated to Google Workspace
Following are the exceptions that can be configured:
Enrollment Exceptions
Allow users to access the application till they enroll their first device: Allows users to access the application till they enroll at-least one device. This option is helpful in conditions where the enrollment steps requires them to authenticate with the service provider. With this, you can also configure the following:
Maximum sessions allowed per user: Configure no. of sessions that should be exempted. It can range from 1 to 3. Ideally 1 session per user is recommended.
Configure the OS where the exceptions are applied: Select the platform(s) on which this exemption would be allowed to users.
User Exceptions
Here you can add the users who are always exempted from the conditions and will never be asked to manage their device. Enter comma separated email addresses of users or click on Add Users on the right and in the new window, select the users who should be exempted.
Note: These users still need to sign in with their OneDirectory credentials if they fall under the SSO Scope, however the conditions will not be enforced.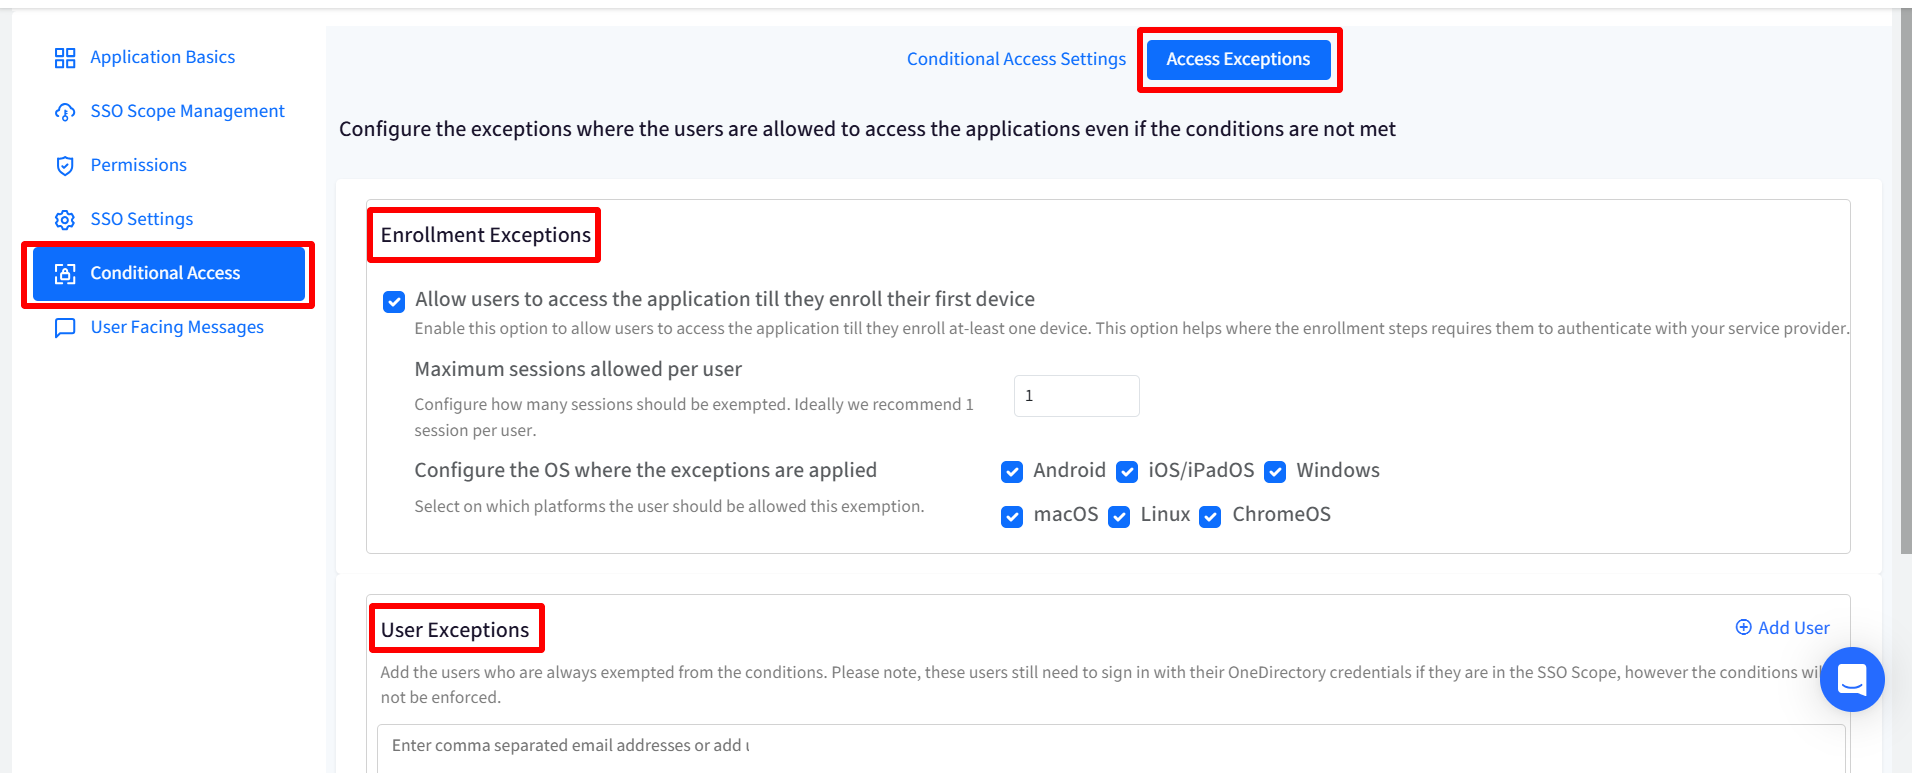
User Facing Messages
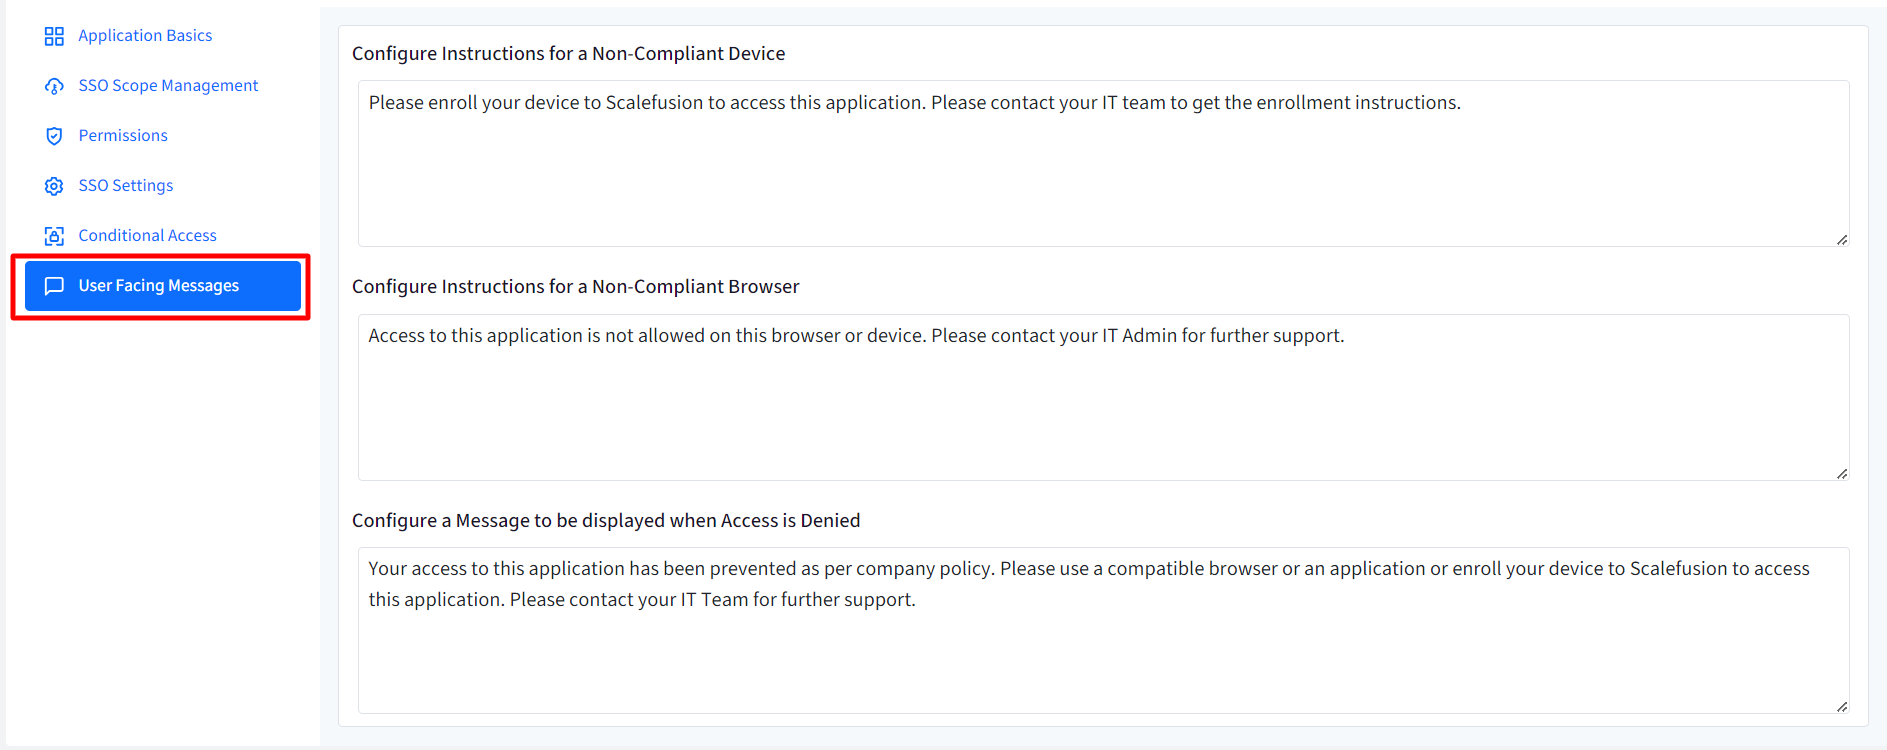
User Facing Messages helps admins configure messages that end users may be shown when they are unable to access the application if any of the compliance conditions are not met. You can configure messages under following:
Configure Instructions for a Non-Compliant Device: This message is shown when the device is not compliant and needs to be enrolled to Scalefusion
Configure Instructions for a Non-Compliant Browser: Shown when the browser is not compliant as per configurations
Configure a Message to be displayed when Access is Denied: Any other cases where access to application is denied.
There are some pre-configured messages displayed on Dashboard which you can edit as per requirement.
After configuring user facing messages, click on Save
The SSO configuration is created and listed on SSO Configuration page as a separate card with the name you have defined. You can create multiple SSO configurations in the same manner.

The next document explains how the configurations can be managed and other actions you can perform through SSO configurations.
Protect Application on Cisco CUO
To integrate OneIdP with Cisco DUO as an Identity Provider (IdP), you'll need to create an application within Cisco DUO. This application will serve as the target service that users will access using their OneIdP credentials. Once configured, users will be authenticated by OneIdP and then directed to the specified application, where Cisco DUO can apply additional security policies.
To protect any application on Cisco DUO, please follow these steps:
Note: The steps below explain how to protect Salesforce application, as an example. The same process can be followed for any application.
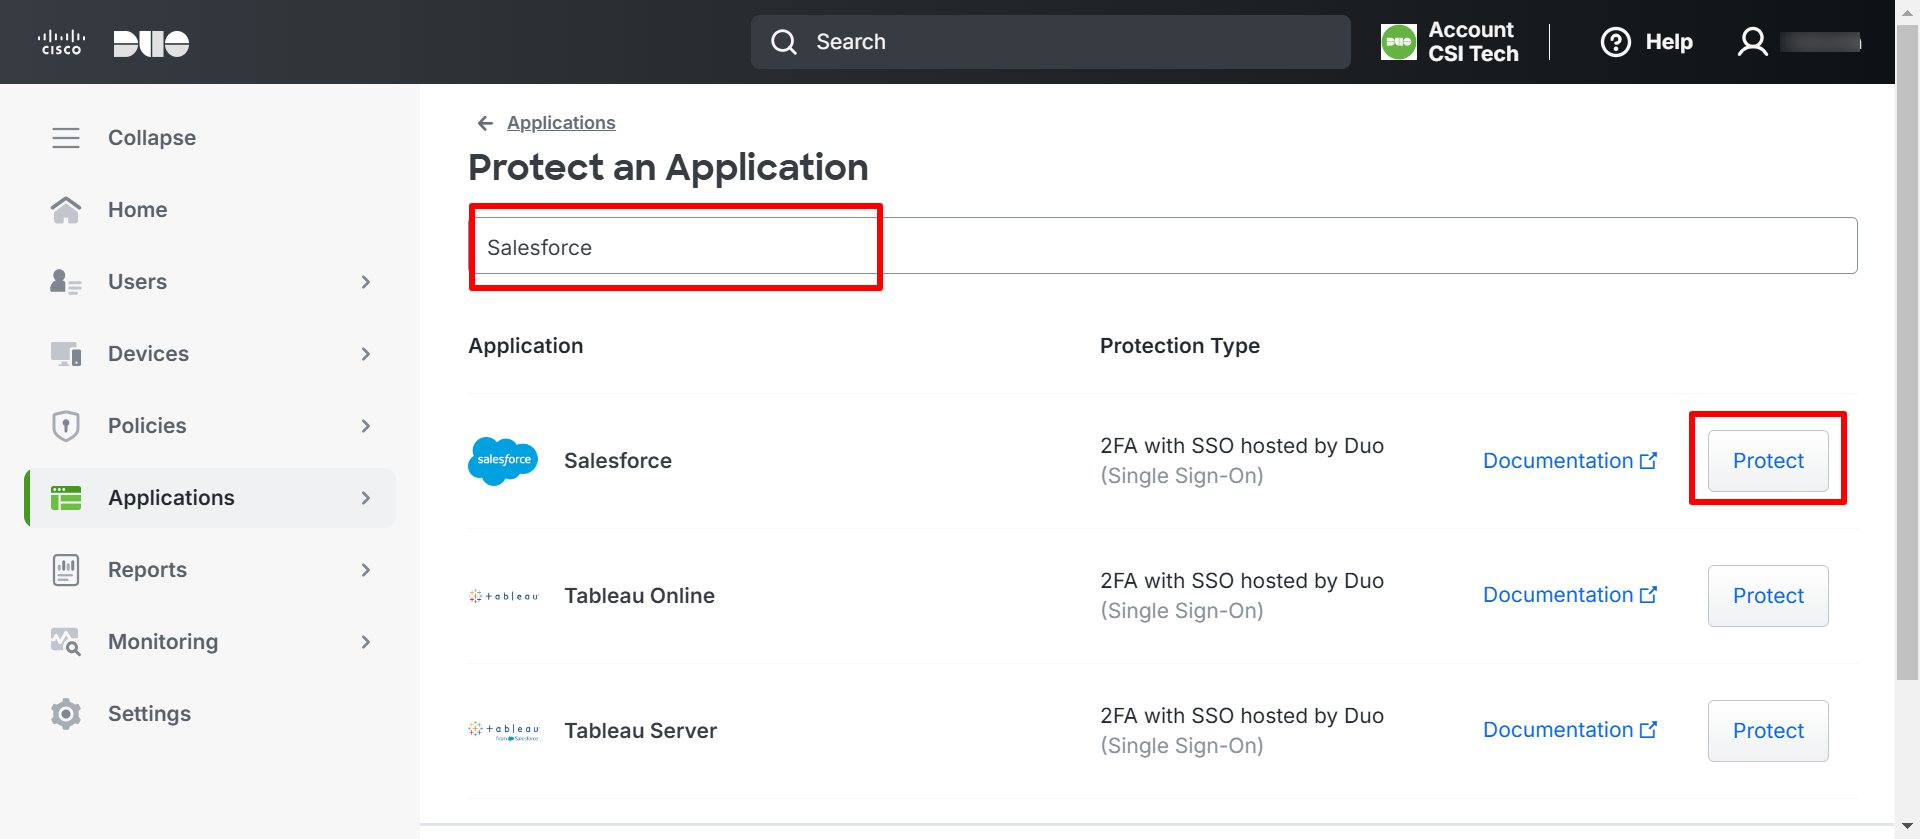
On Cisco DUO portal, navigate to Applications > Protect an application
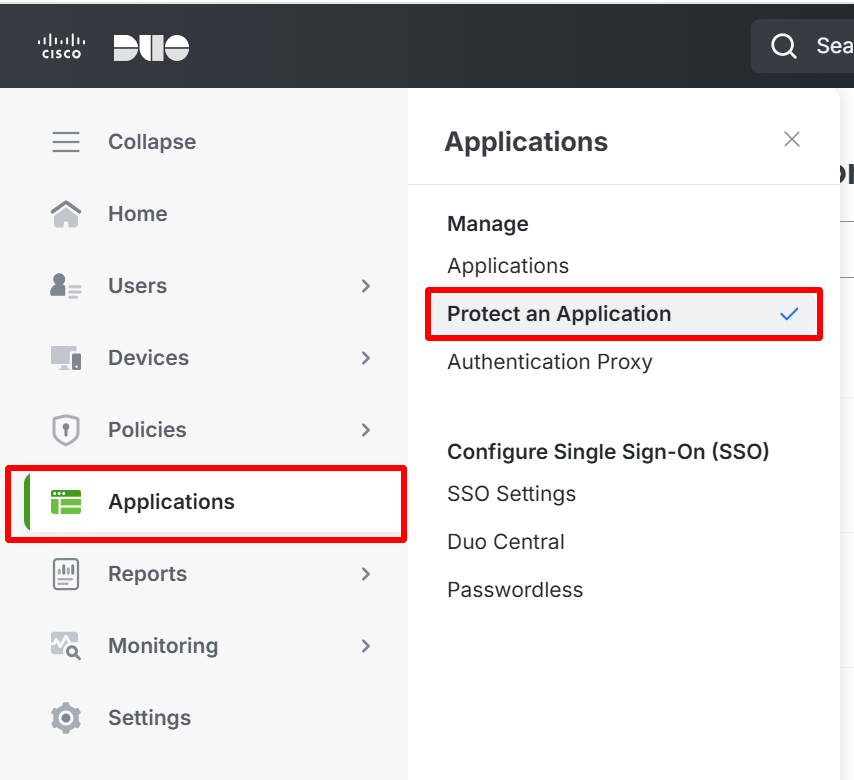
Here, look for the application by typing in the search bar.
From the search results, click on Protect in front of the application name.
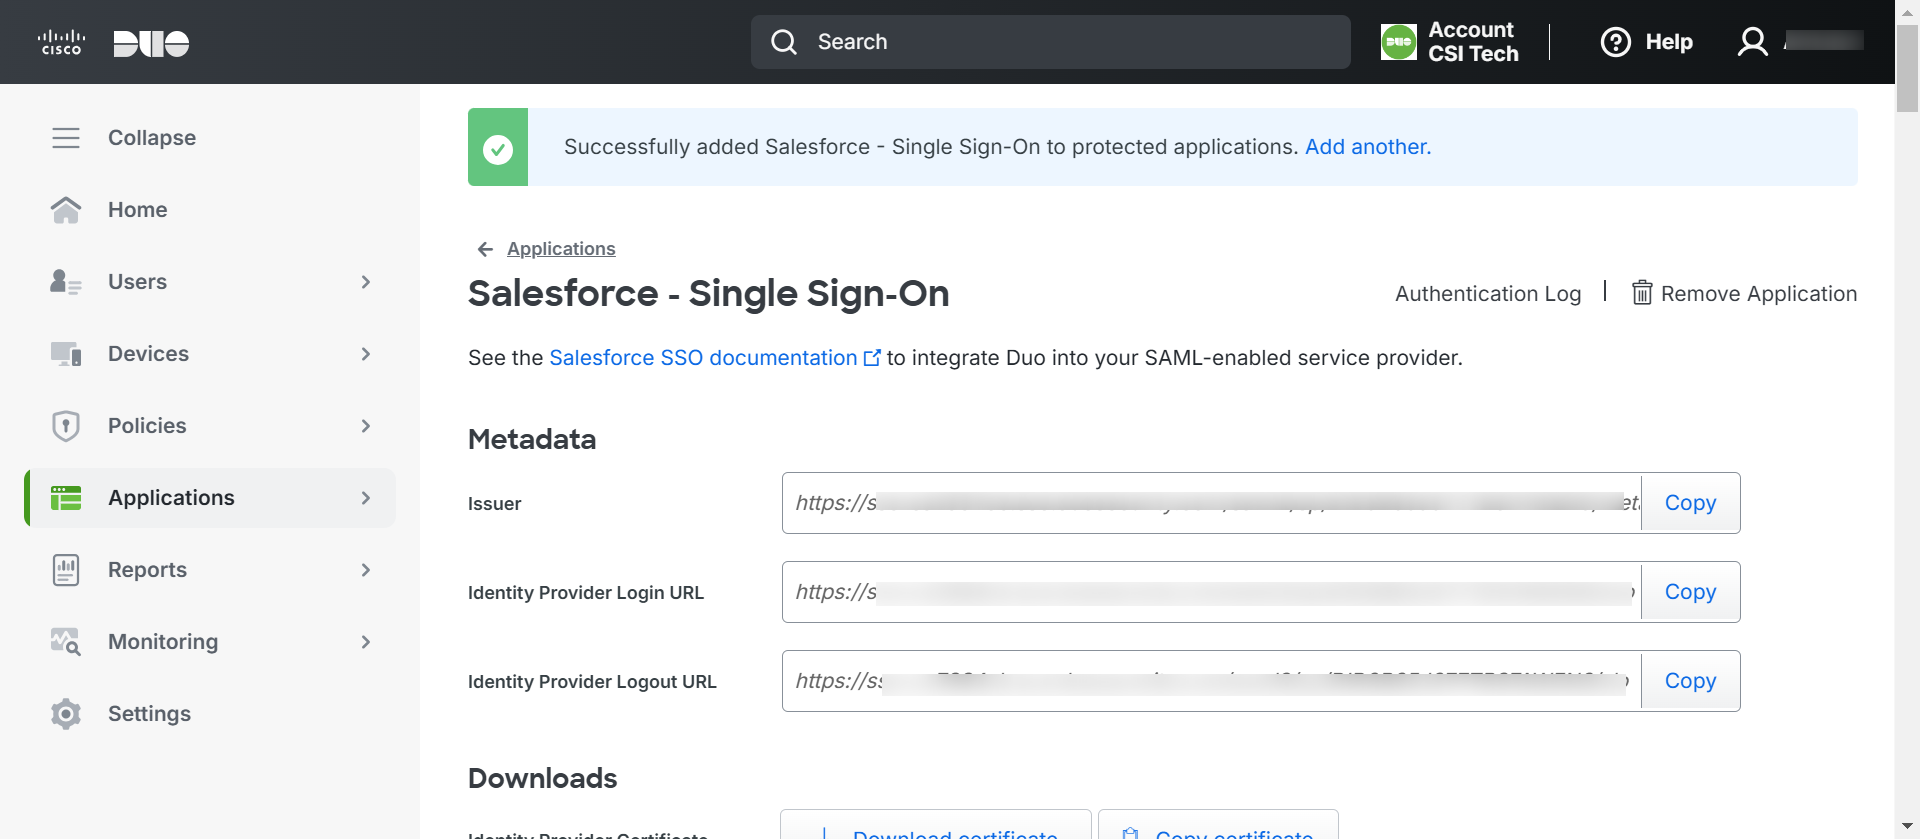
On the next page, enter the necessary details to integrate DUO with Salesforce. The configuration details should be taken from Salesforce admin console.
User Login into Cisco DUO after SSO Configuration
Once you have configured SSO and added application(s) for Cisco DUO, follow these steps:
Note: The steps below have been taken as an example describing the process of logging into Salesforce configured as an Identity Provider application on Cisco DUO. These steps may vary depending on your specific OneIdP and Cisco DUO configurations.
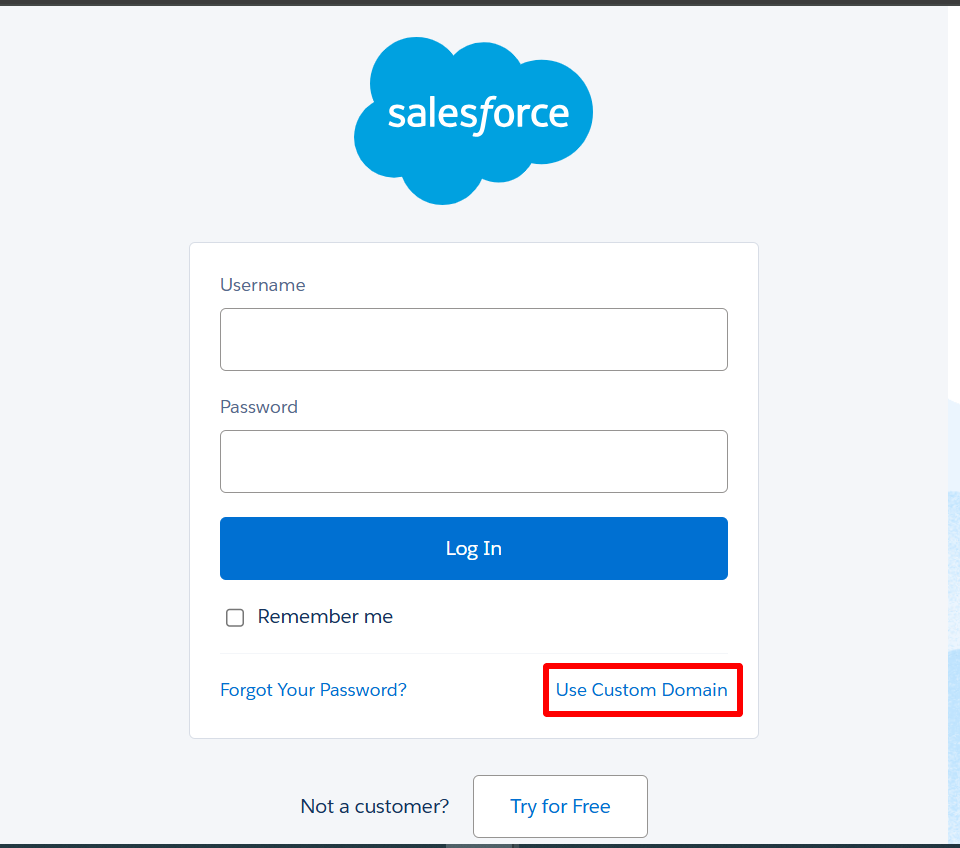
Go to the Salesforce Customer Secure Login Page
Here, click on Use Custom Domain
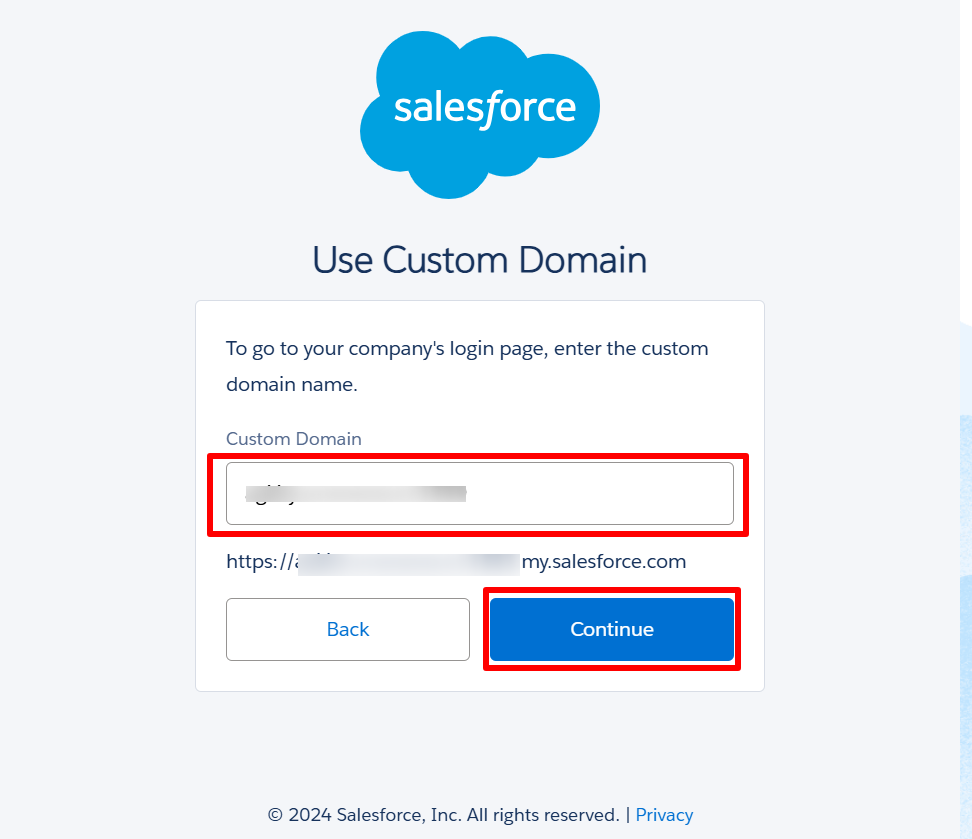
Enter the custom domain name to login with your company’s domain name. For Custom Domain,
On Salesforce admin console, Copy the URL from My Domain Name (Settings > Company Settings > My Domain)

Paste it on Salesforce login page and click Continue
On the next page, click on Login with a different provider
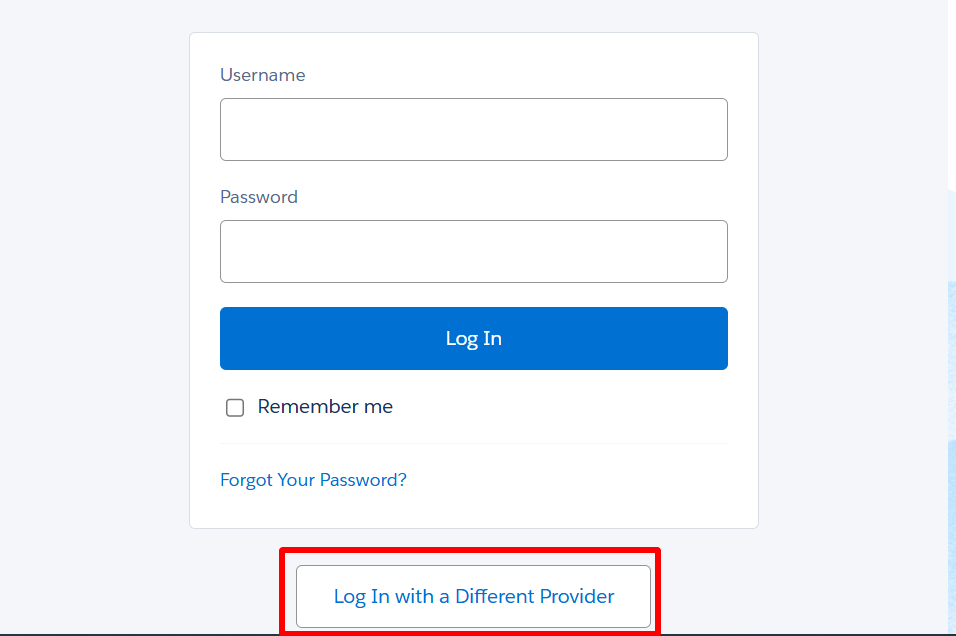
Here you will get the list of Single Sign-On Configurations created on Salesforce Admin Console. Choose the one that you have integrated under Cisco DUO.
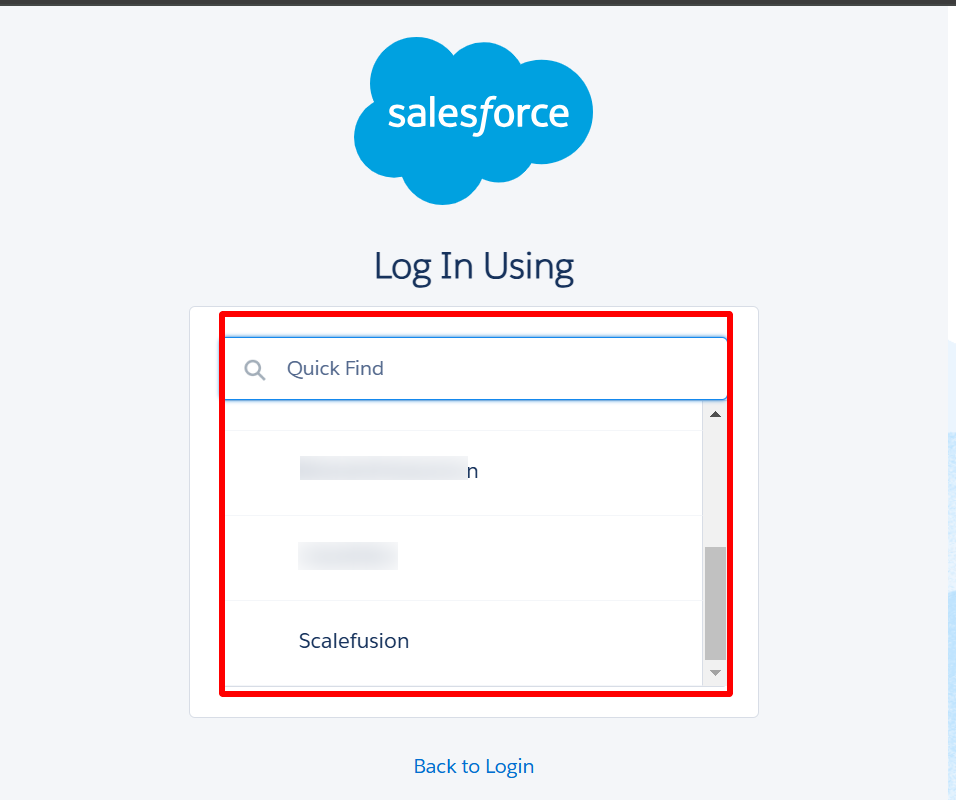
You will be redirected to Cisco DUO’s login page. Enter the credentials with the user details added in Scalefusion
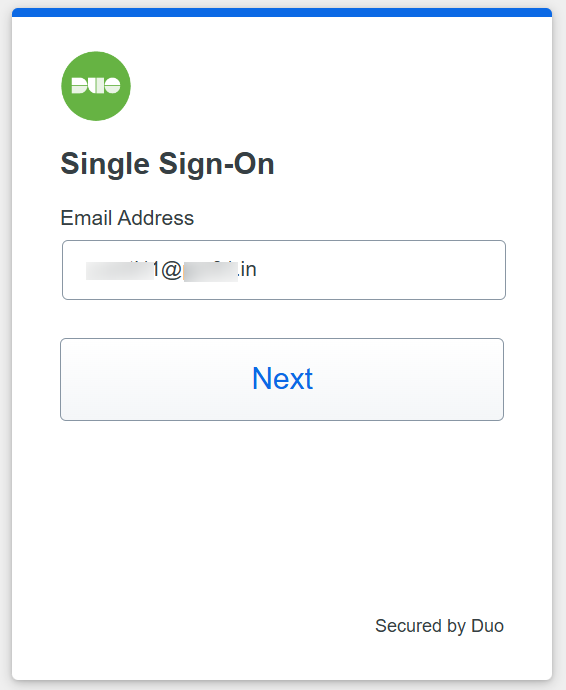
You will get the OneIdP page. Enter the credentials with the user details added in Scalefusion and Salesforce console and Sign In.
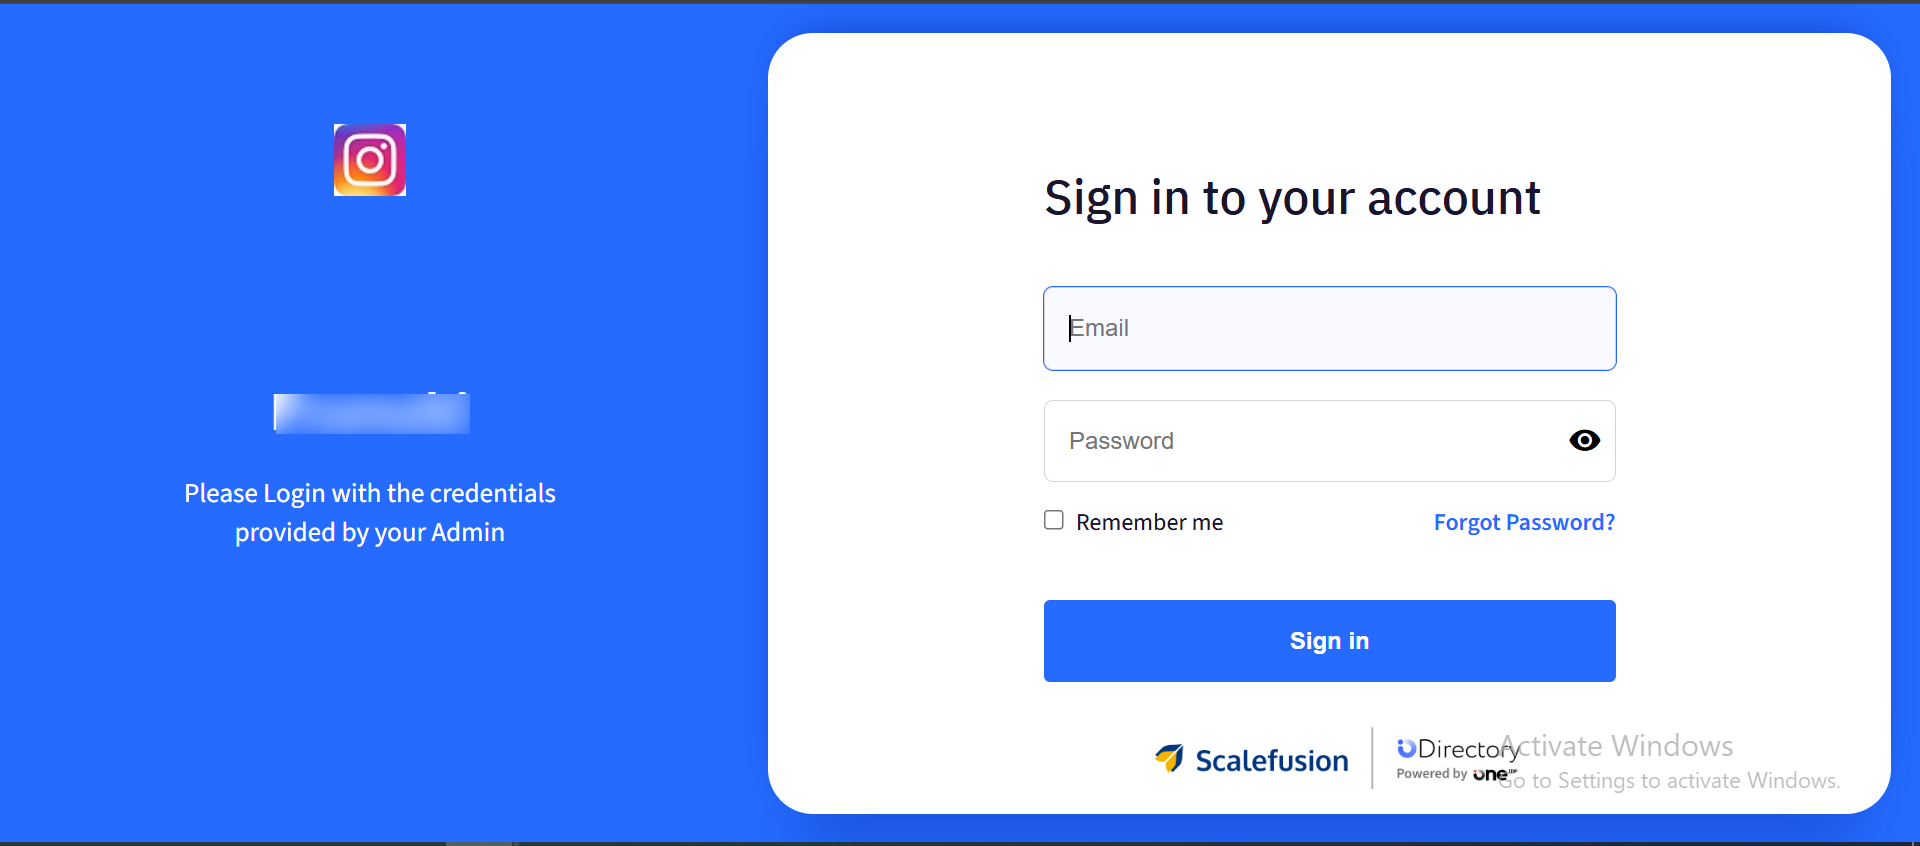
On verifying compliance with Scalefusion’s OneIdP, you will be redirected to Cisco DUO where you need to enter OTP for authentication.
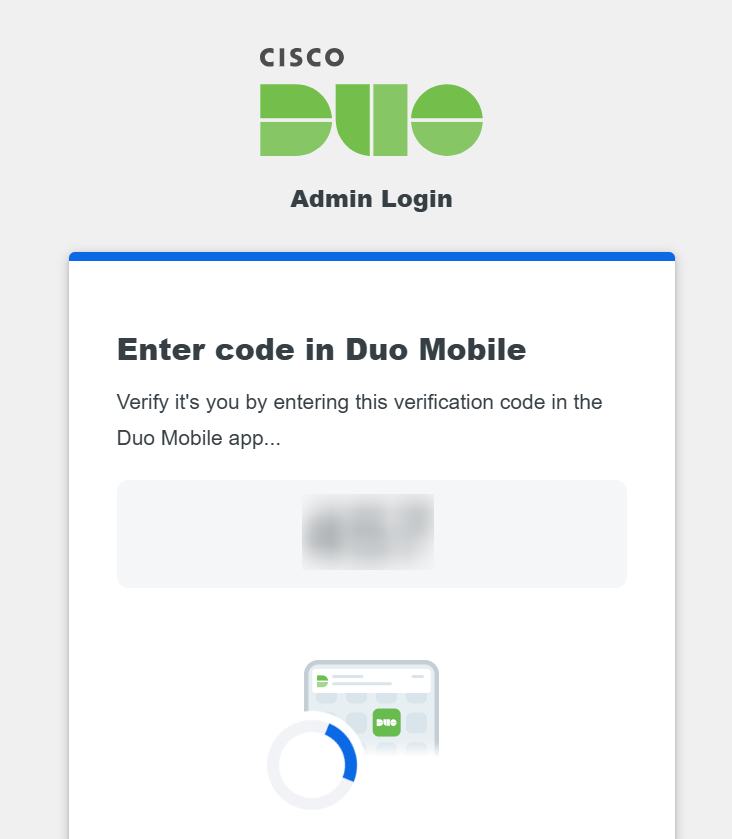
Once authenticated, you will be logged into Salesforce (the application configured and integrated with Cisco DUO).
FAQ
What if there are multiple SSO configurations on the Cisco DUO admin console? How can I ensure that the latest configuration is used?
You need to set default routing rule to apply the latest SSO configuration settings which will be used to authenticate via OneIdP. To set default routing rule:
On Cisco DUO admin portal, navigate to Applications > SSO Settings.
Under Authentication sources, select the SSO configuration you have configured previously.
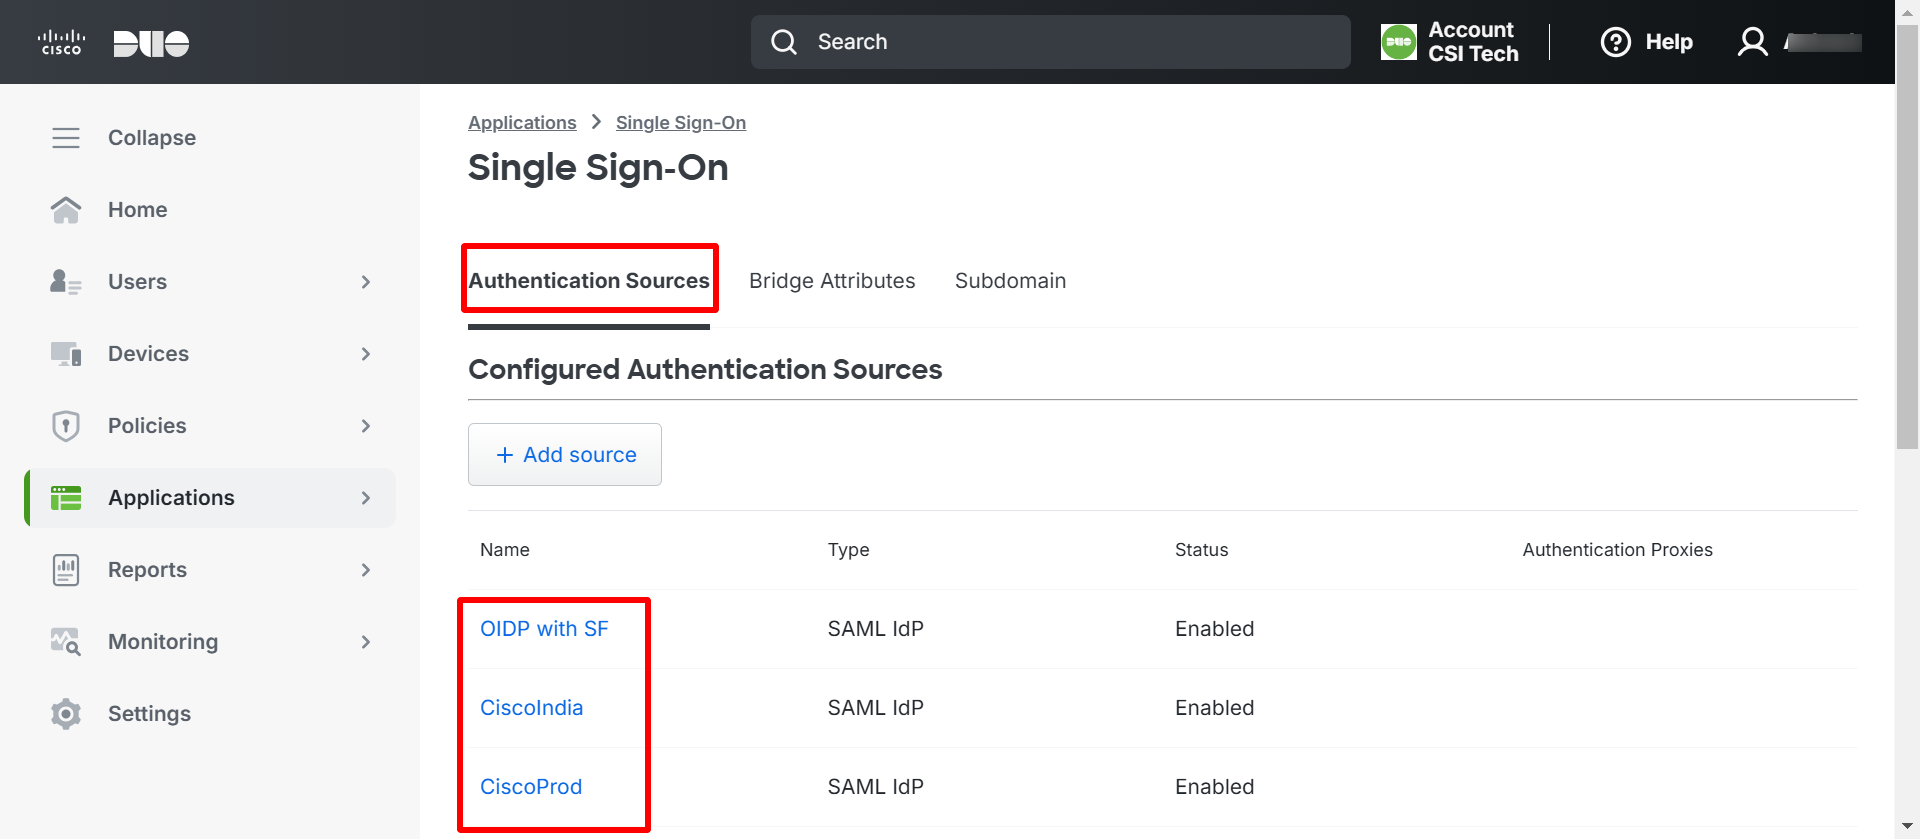
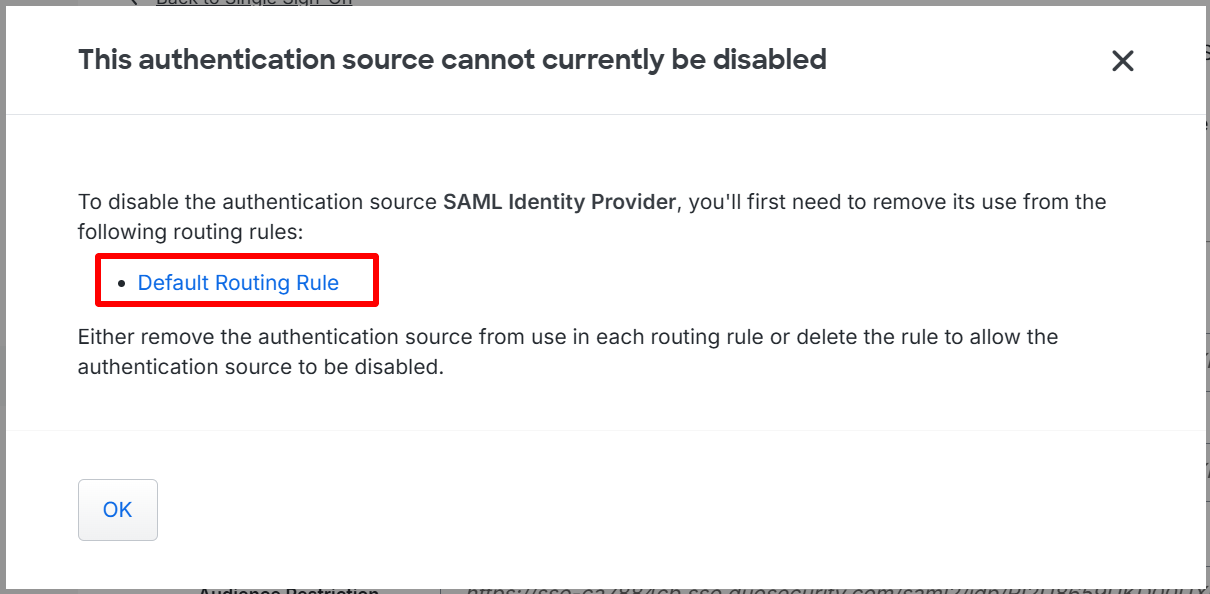
On the configuration page, click on Disable Source on top right.

In the dialog box that opens, click on Default Routing Rule
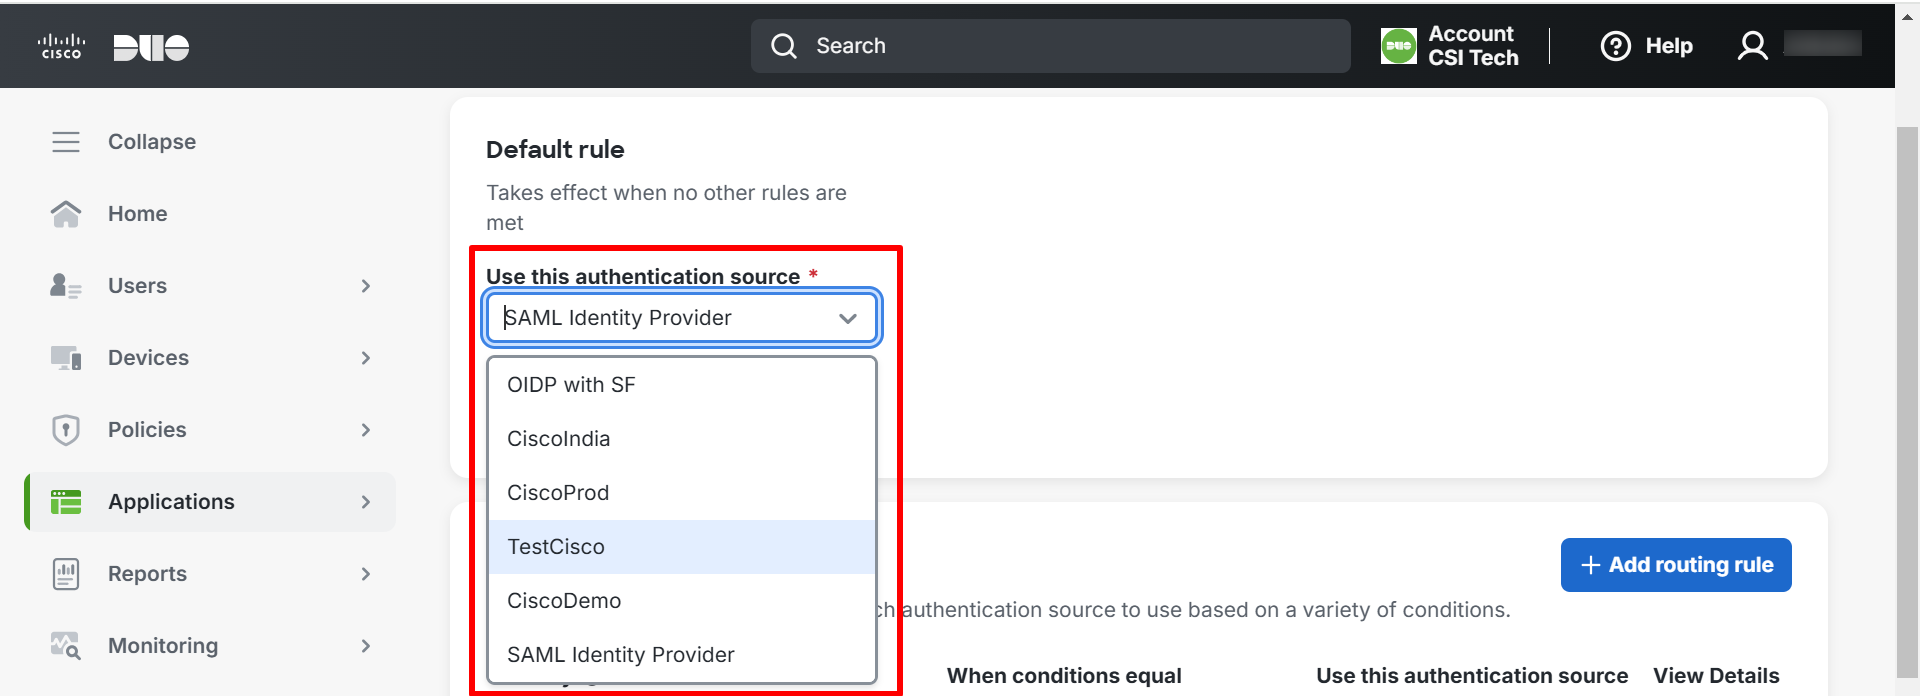
On the next page, click on the drop-down Use this authentication source and select the configuration which should be used for authentication. After selecting, click Save


.png)


