- 17 Jan 2024
- 12 読む分
- 印刷する
- PDF
Remotely Install Android Apps from Google Play Store
- 更新日 17 Jan 2024
- 12 読む分
- 印刷する
- PDF
Scalefusion integration with Google's Android Enterprise (Android for Work) gives you and the IT Admins the ability to Search, Approve, and Publish apps from the Google Play Store directly to the devices.
If you have set up Android Enterprise and have enrolled the devices using either afw#mobilock or Zero-touch or BYOD, then Scalefusion creates a managed Google Play Store account on these devices. This account is used to automatically install the applications that are approved by you.
Follow the steps below to remotely approve and install applications for your Scalefusion-managed devices.
Before you Begin
- Complete Android Enterprise Setup
- Enroll a Device using afw#mobilock or Zero-touch or BYOD
Approving Applications
The first step is to approve applications from the Google Play Store and add them to your enterprise repository of applications.
- Navigate to Application Management from the left menu or top navigation bar and click on PLAY FOR WORK APPS. Here click on Add from Playstore to view the Google Play Store wizard.
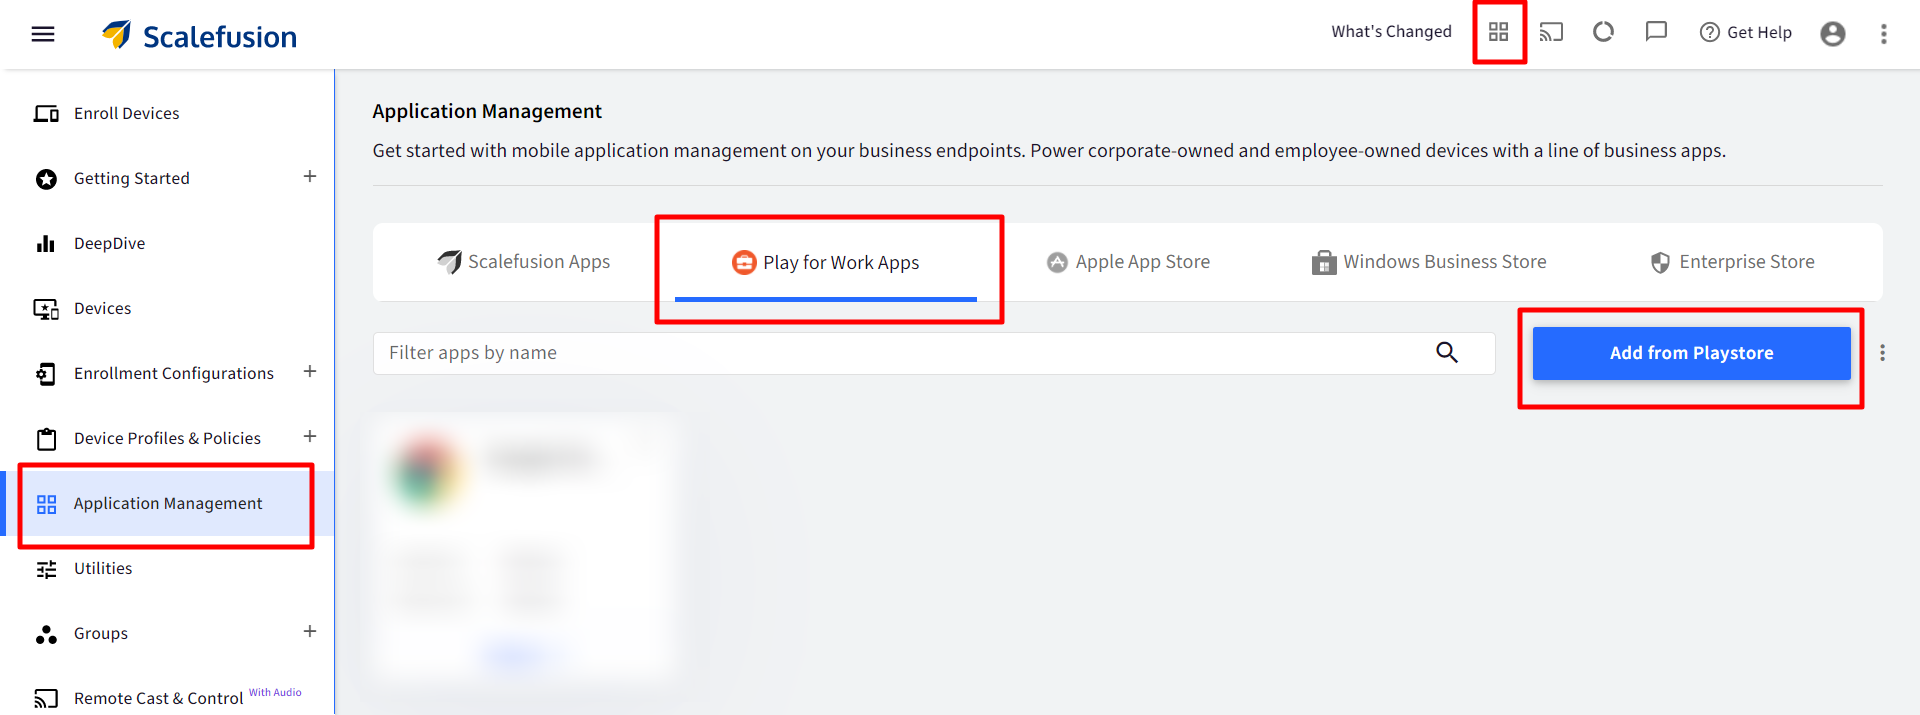
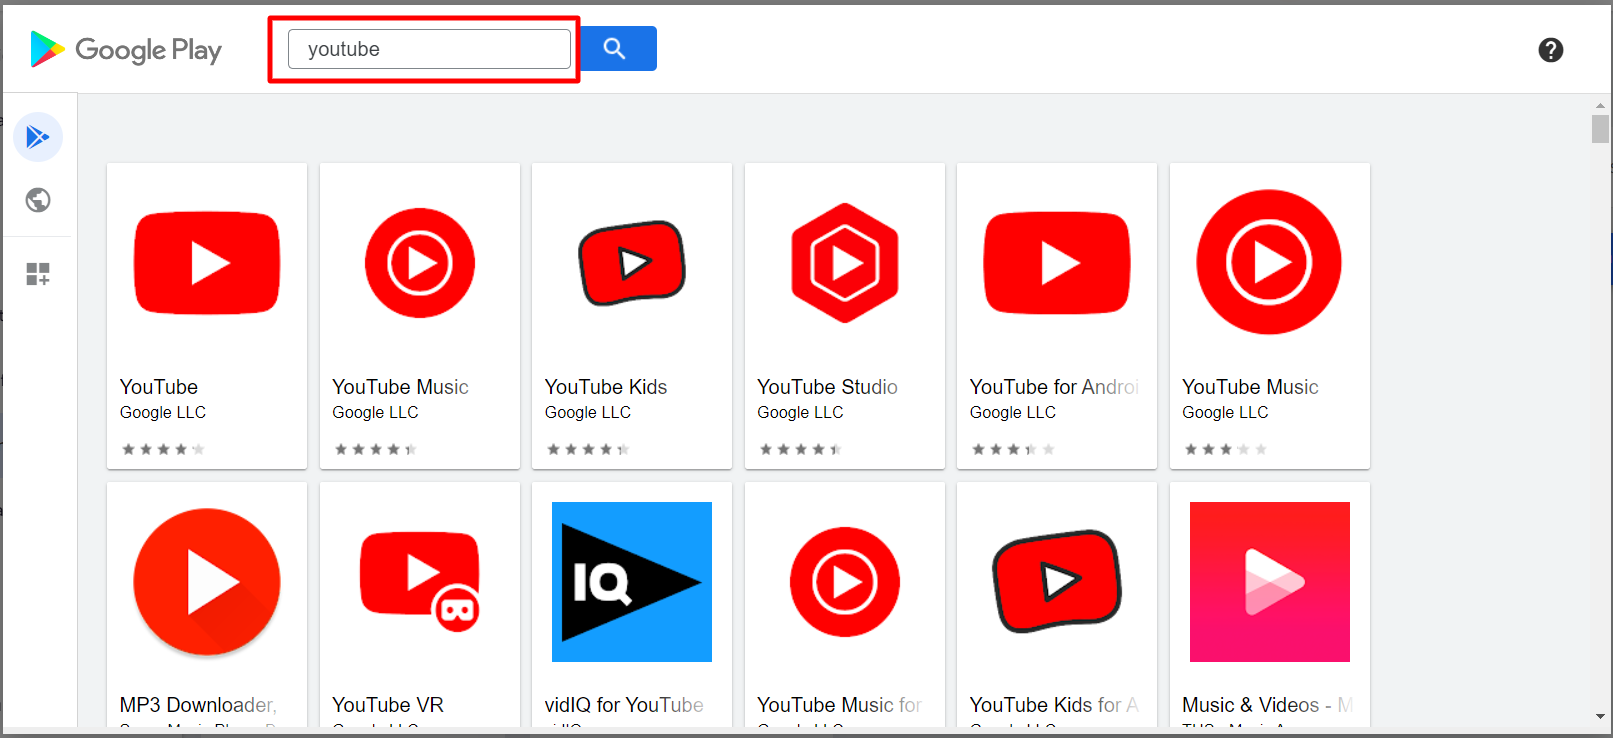
- Enter the name of the application in the Google Play Store wizard and hit the enter/return key to search for the application. This example shows how to add YouTube to your app repository, you can add any application available in Play Store.
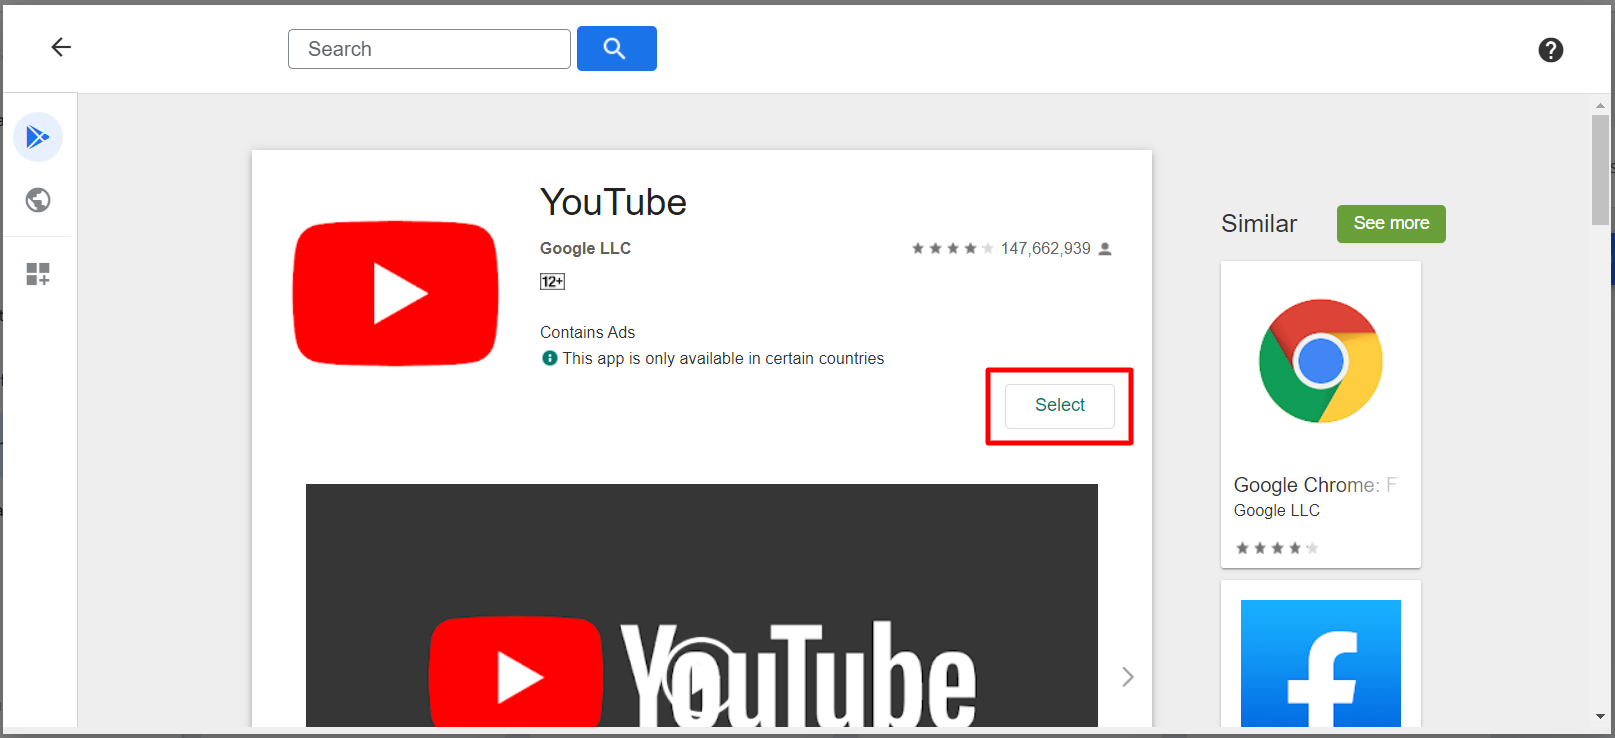
- Click on the application icon to see the app details. Click Select to add the application to your repository.
Installing Play Store Applications
Now that you have added the applications to your app repository, you can go ahead and enforce the installation of these applications on the devices.
- Navigate to Application Management from the left menu or top navigation bar and click on PLAY FOR WORK APPS. Here, click on the application and click PUBLISH
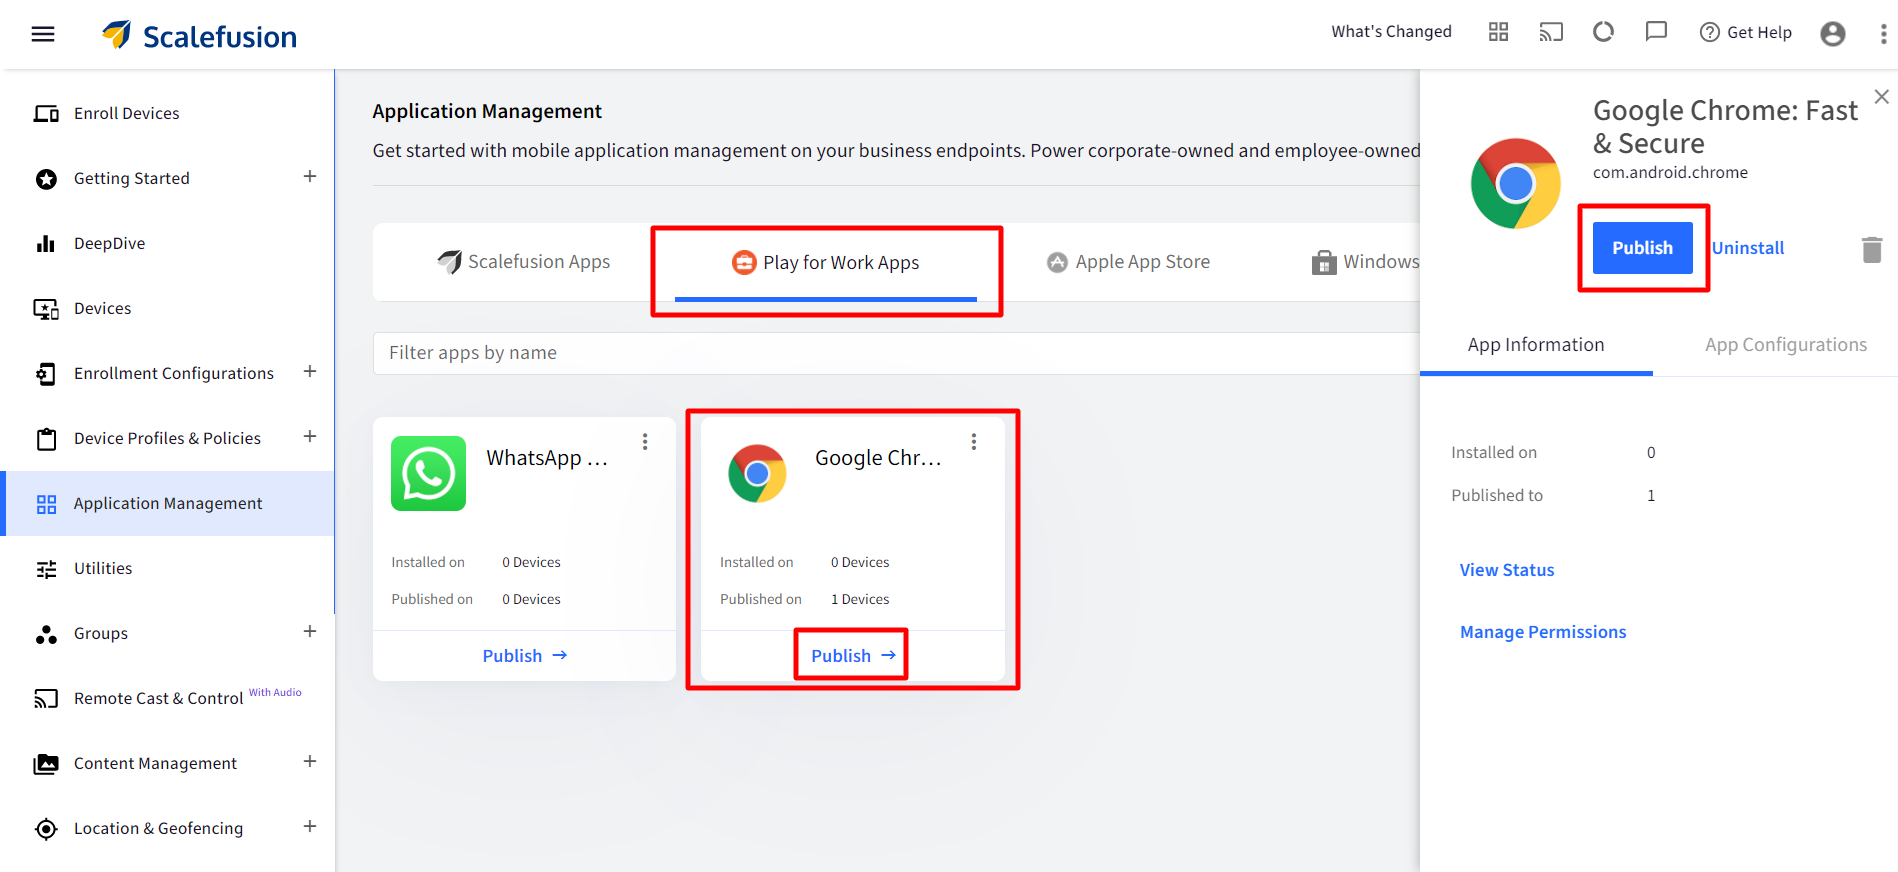
- In the Publish window, select the Device Groups or Device Profiles or Devices where you want to install this application and click PUBLISH. Please note that at any point in time, items in only one of the tabs can be selected for Publish. The publishing of apps can be overridden at the app level by giving the option to the admin to configure installation mode.
- Publish/Override this version on Devices with direct mappings: In the publish dialog, this flag will be visible when the setting Enable Applications to be published to Devices in a Group or profile is toggled on from Utilities > Global Settings > General Settings. If enabled, all direct mappings of this App from devices selected in Devices tab (older versions or newer versions), are removed and the currently mapped version is being pushed to the devices.
Application Install Behavior
For per-app control at the time of publishing the app, admins can choose to follow the profile setting or override it for this app by silently installing it or adding it to PlayStore. Hence, there are three options to choose from:
Mode as per Profile: The app would be either installed silently or added to the Play Store as per the settings in Profile. By default, this is selected.
Silent Installation: This would attempt a silent installation of the application and also make it available in the Managed Play Store for users to install it.
Add to Managed Play Store/App Catalog: This would make the application available in the Managed Play Store/App Catalog and enabled when a user installs it.

Application Install Status
After publishing, you can check the installation status of the app(s) from the Play for Work Apps section. For this, follow these steps:
The status of app installation is fetched from Google and not handled by Scalefusion. Scalefusion displays the status with some more information.
It generally takes 15 minutes for the updated status to be reflected on the Dashboard after the publishing of the app.
- Navigate to Application Management > Play for Work Apps and click on the app you have published
- On the right side panel, there will be a View Status button. Click on it.
.png)
- This opens the Installed App info wizard,
- Filters: You have the following filters available,
- Configuration package: Filter the list by the OEM Config apps that are configured in this profile.
- All App Status: Filter the list based on the installation state of the app on the devices. The possible states are,
- Published
- Installed
- Install Pending
- Install Failed
- Uninstalled
- All Config Status: Filter the list based on the configuration/settings delivery state. The possible states are,
- Pending: Shown when the Scalefusion backend is yet to push the configuration to the device.
- Unknown: Shown when the Android Enterprise APIs have returned no information
- Success: Shown when all the configuration parameters have been successfully applied.
- Failed: Shown when at least one of the configuration parameters could not be applied. Clicking on the status provides you with the details of the failure.
- Show Offline Devices only: If selected, this will only display devices that are offline.
- Device Information Panel: The table below displays the following information,

- Device Name: Name of the device on which the app is published
- Current Installed Version: The current version of the installed app
- Group/Profile: The device group and profile of the device
- H/W IDS: IMEI no. and other device details
- Install Status: Installation status of the application on the device
- Status Info: The meta-data on the installation status to help you understand the installation status better. Please see the Status Info section below to understand the various status info.
- Published Config: Displays the name of the configuration and its current status,
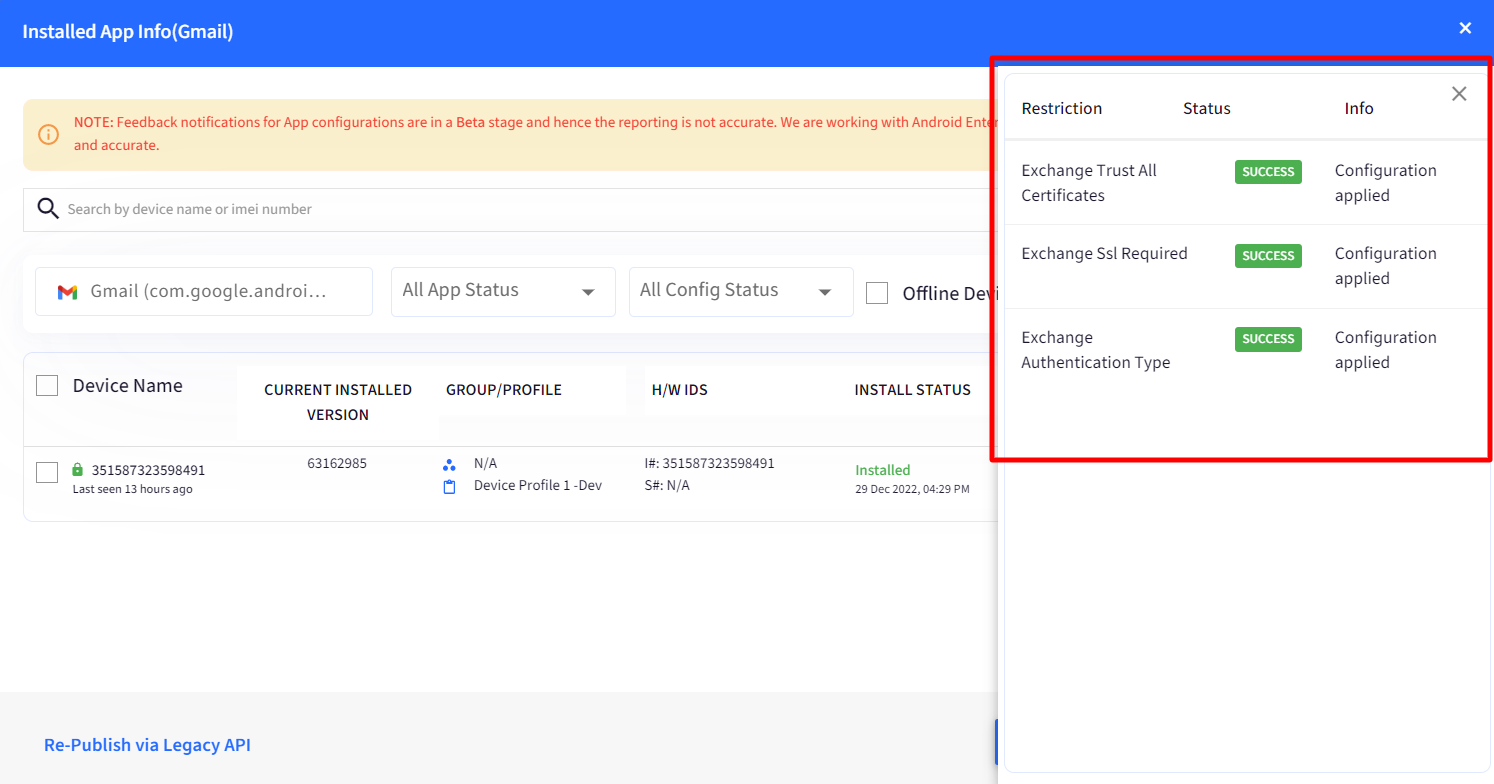
- Update Config: The Update configs you have created and published on the device
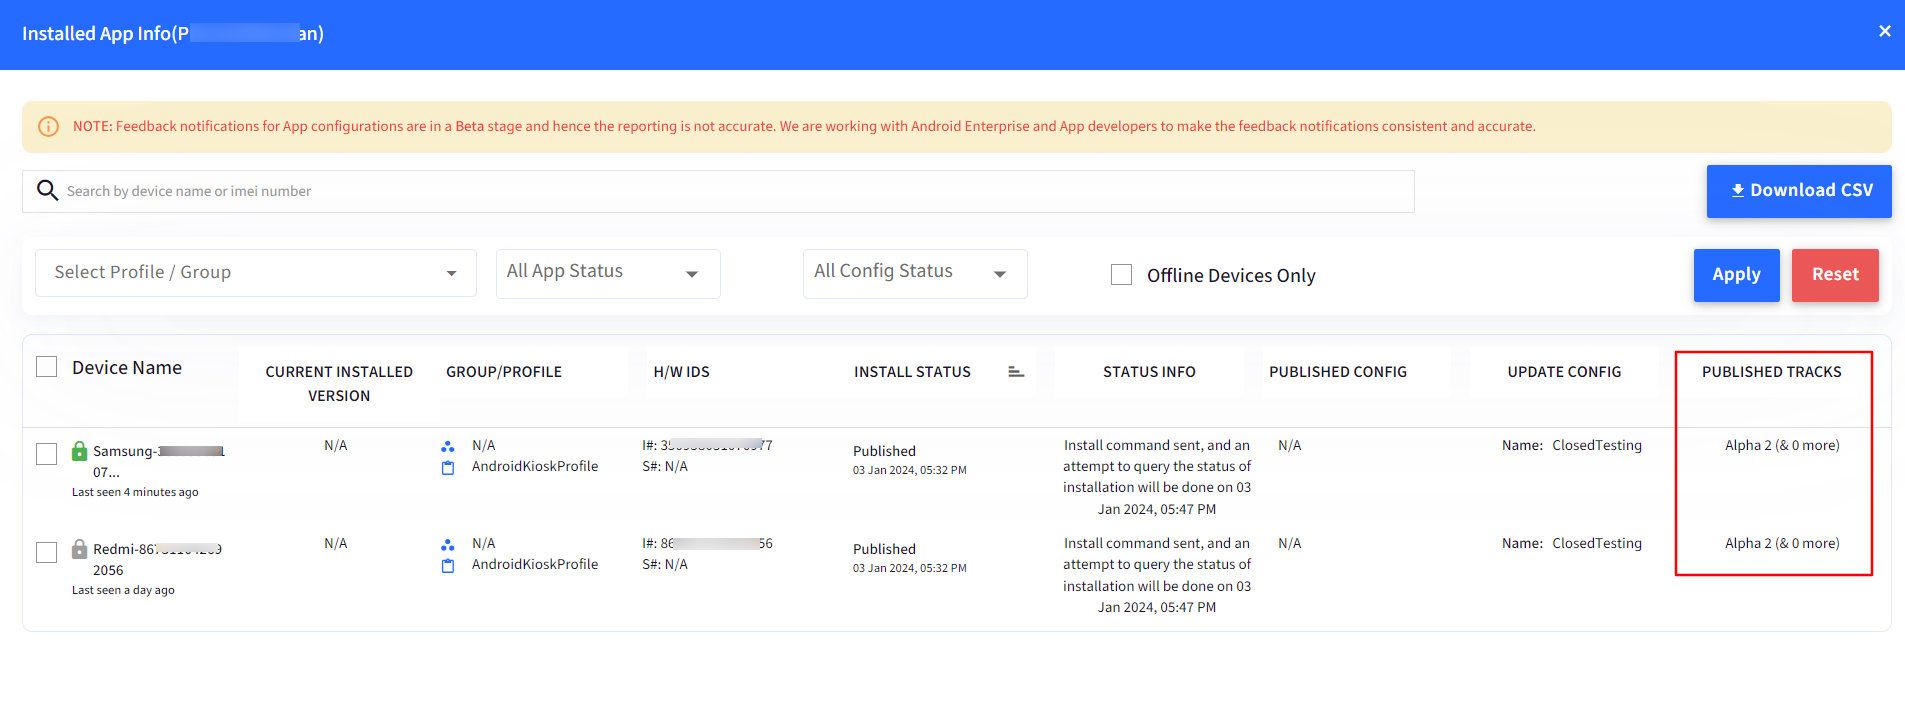
- Published Tracks: Information of tracks that are published for the app.
- Filters: You have the following filters available,
Additional Actions
You can perform the following additional actions from the status wizard,
- Download CSV: Download the installation and configuration status report in a csv format.
- Search: Search for devices by device name or IMEI number
- Re-Publish: Use this option to republish the application on the devices where the application is still in the pending state or has failed.
- Re-Publish via Legacy API: Use this option to republish the application using legacy APIs. Helpful on devices where the app is not getting installed even after multiple attempts.
- Sync Status: Manually sync the installation status of the application. Scalefusion automatically syncs the status after 15 minutes of app publishing, and hence this button gets enabled after 15 minutes of publishing the app.
- Sync Config Status: Force sync the status of the configuration
Status Info
The Status Info is reflected on the basis of the current Install Status of the app.
| Install Status | Status Info |
| Published | Displays the time when the next run will be executed.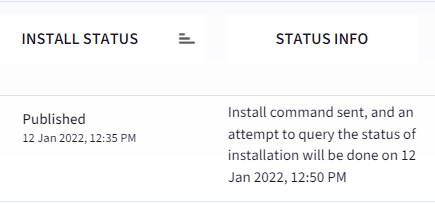 |
| Install Pending | Displays the time when the next installation retry will be executed.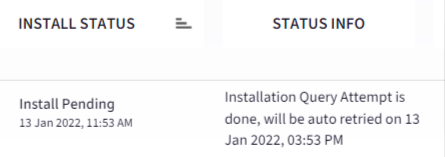 |
| Installed | Displays the app version installed on the device. |
| Publish Failed | Displays the reason as to why the publishing of app failed |
Uninstalled (When the user has manually uninstalled the app from the device) | NA |
Status of apps already installed on the device
If you are trying to publish any app that is already installed on the device, the status info would be different depending on the app version being installed. Here is how the mapping is:
| Published App Version | Device version | Status |
| Higher | Lower | The app on the device will get updated, and the status, along with the status info, will be displayed |
| Same | Same | When the same version of the PFW app is published, installation is skipped, and the status is updated as Installed along with the current version. |
| Lower | Higher |
|
Manage App Updates
The updates for apps can be controlled by admins, who can configure the Auto-Update Policy for the apps downloaded from the Play Store at the global level or per-app level.
Global Level
To manage app updates for all apps, that is, global level,
- Navigate to Application Management > Play for Work Apps
- Click on the three dots on the right side and select App Update Settings
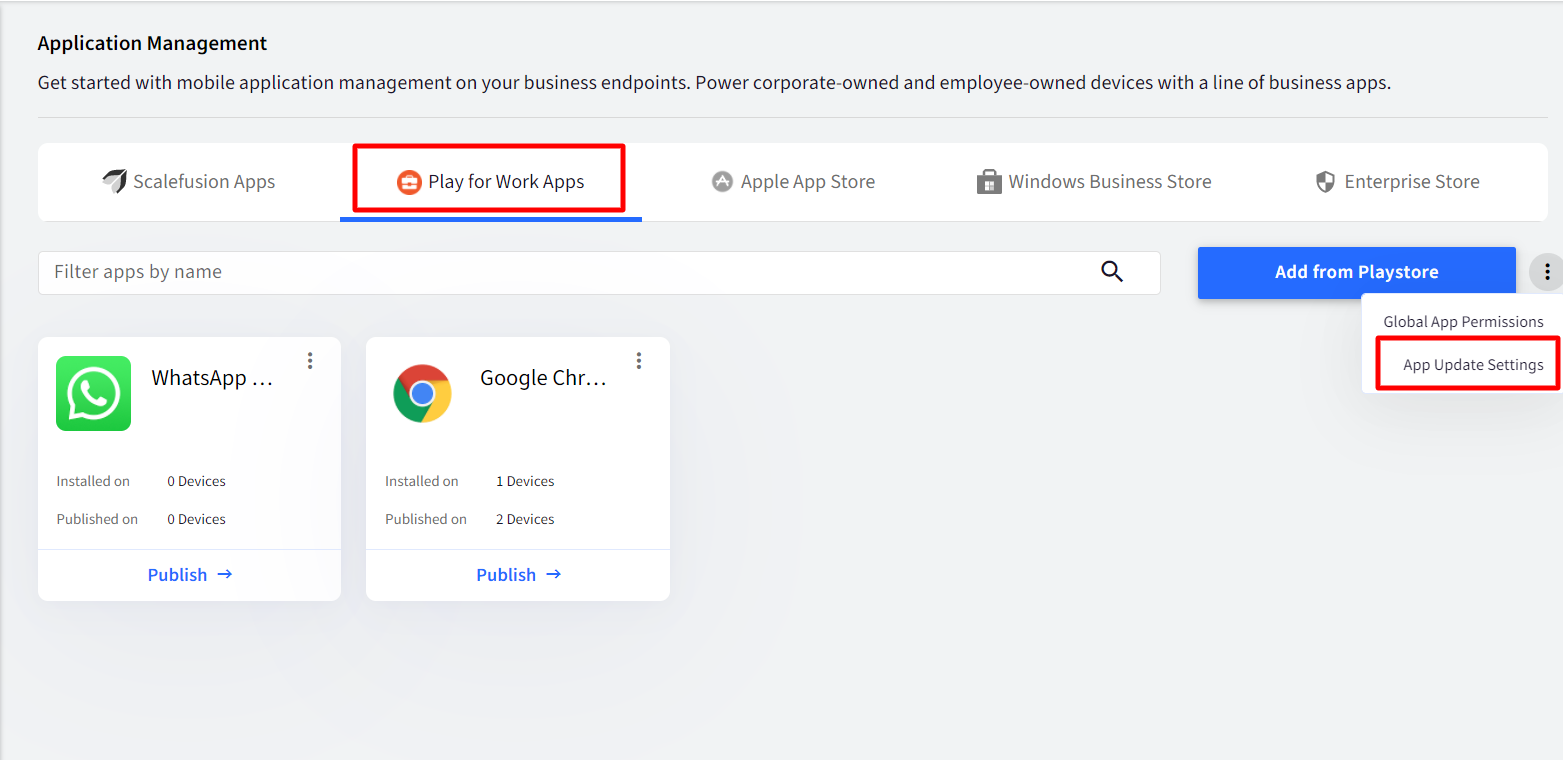
- This opens a new window with the following settings to choose from:
| Setting | Description |
| Allow user to choose | The end user decides whether to update the app or not |
| Never Auto-Update Apps | Apps will not update automatically when a new version of the app is released on the Play Store. |
| Always Auto-Update Apps | Apps will automatically be updated when a new version of the app is released on the Play Store. |
| Auto-update Apps on Wifi Only | Apps will update only when the device is connected to a WiFi network. There is an additional setting here Configure Update Window for Foreground Apps: If checked, you can set the start time and end time for the app updates to take place. |

Per-app level
To configure settings at per-app level,
- Click on the app for which the update settings have to be configured.
- On the right side panel, click on Update Configs
- Click on Create to create a new configuration
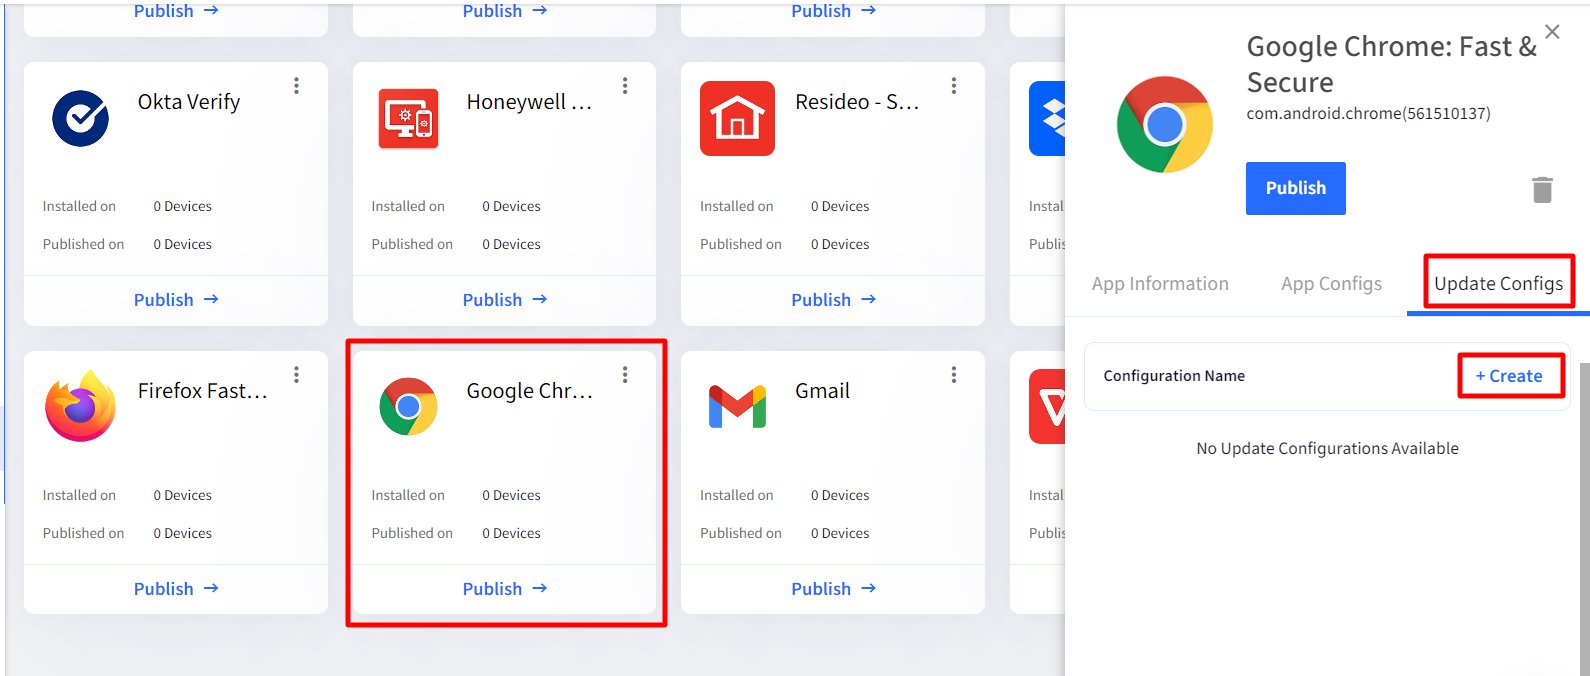
- This opens a window to configure settings. Enter a name for the Configuration. Two options to choose from:
- Use Global App Update Policy: Select this option to use the global app update policy for this application. If this is selected, it will take the settings configured using App Update Settings (described above).
- Use Custom Rules to update application: Select this option to define custom rules to be applied for updating this particular application. The settings will be enabled once you select this option. One or more settings can be chosen.
| Custom Setting | Description |
| Select App Update Mode | Select the app update mode from the following:
|
| Update Only if installed version is lower than the value | You can specify a particular version to which the updates would freeze or enter a large value so that the app is always updated to that value. Enter the version code. |
| Update Only if the selected constraint is met | You can set auto-install constraints from the options where you can select the device's state before it is considered to be updated, like Device Charging, Device Idle etc. |

- On saving, the configuration will get created and will be available in Update Configs section.
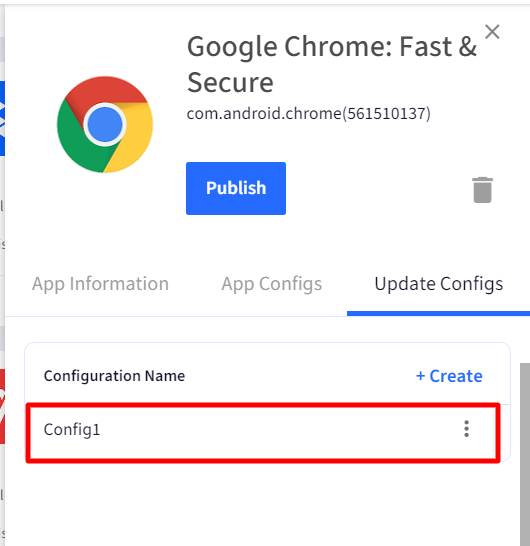
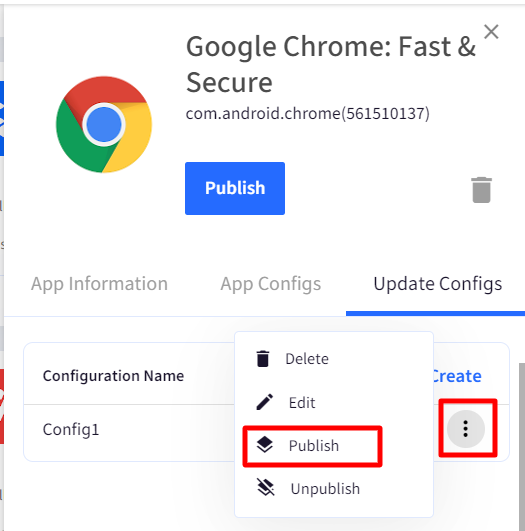
- You can publish this configuration on required Device groups / Device Profiles / Devices
Application Track Management
Scalefusion's Application Track Management leverages the Closed testing feature, often referred to as closed beta testing, within the Google Play Developer Console to empower IT Admins to generate test tracks and release trial versions of their applications for the enterprise ID of a managed organization.
These designated tracks can subsequently be assigned to specific profiles or groups during the app publishing process on the Scalefusion dashboard or at a later stage. This approach enables organizations to seamlessly distribute beta versions of their apps to users, facilitating a phased release strategy before initiating a widespread rollout.
Prerequisites
- Complete the Android Enterprise set up.
- Access to Google Play console Admin account.
Steps to add Closed Testing Track
- Create a Closed testing track for your Beta application in your Google Play console admin account and assign the Organization ID to it.
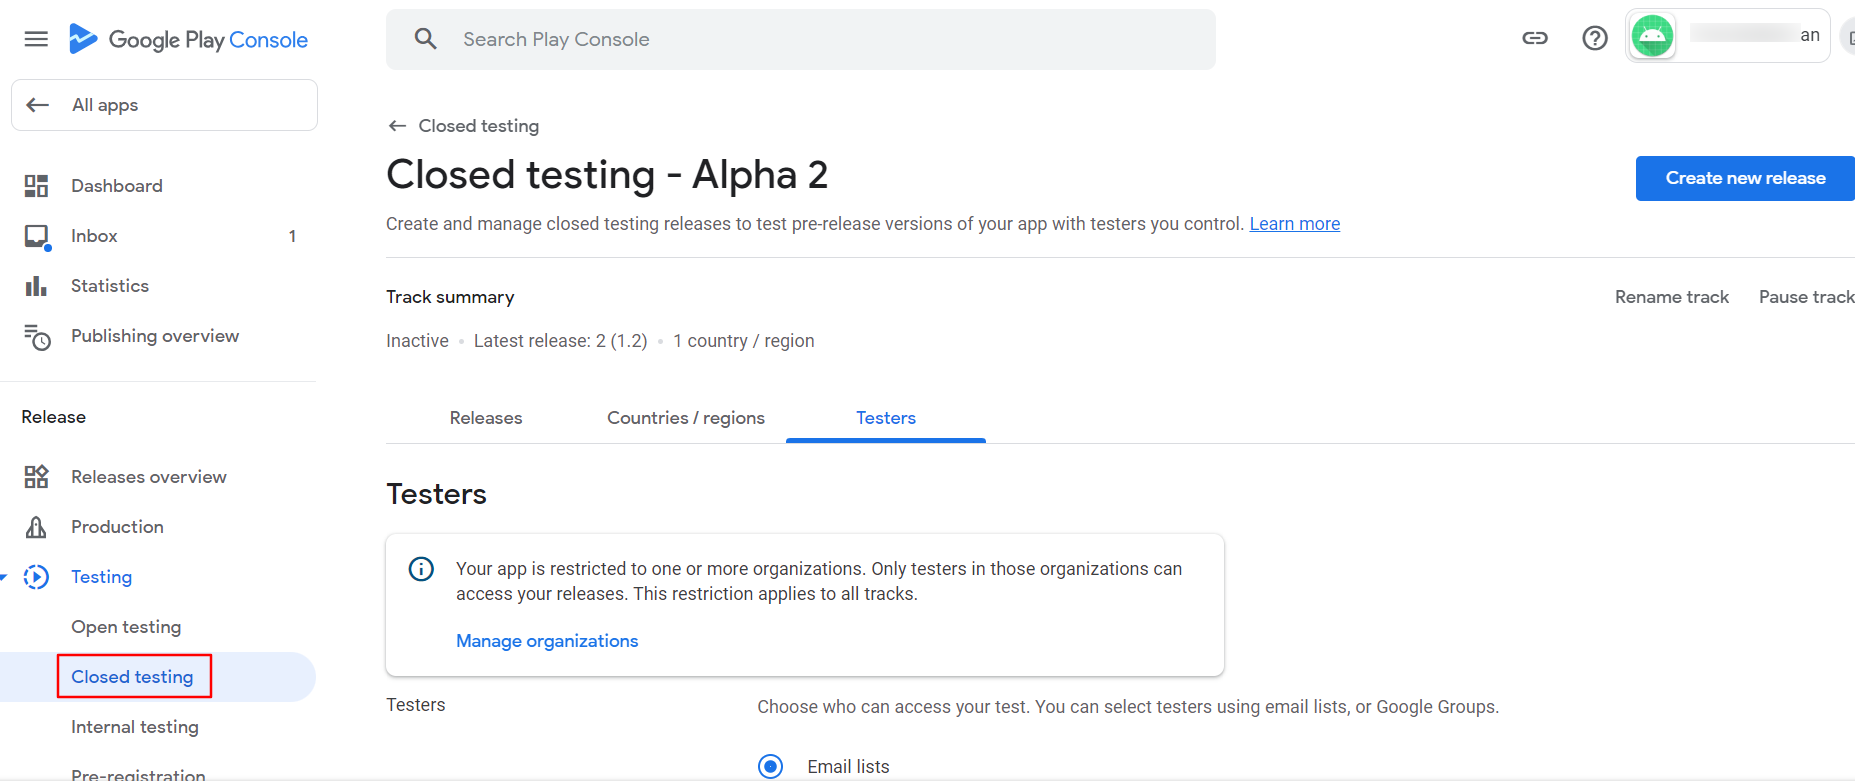
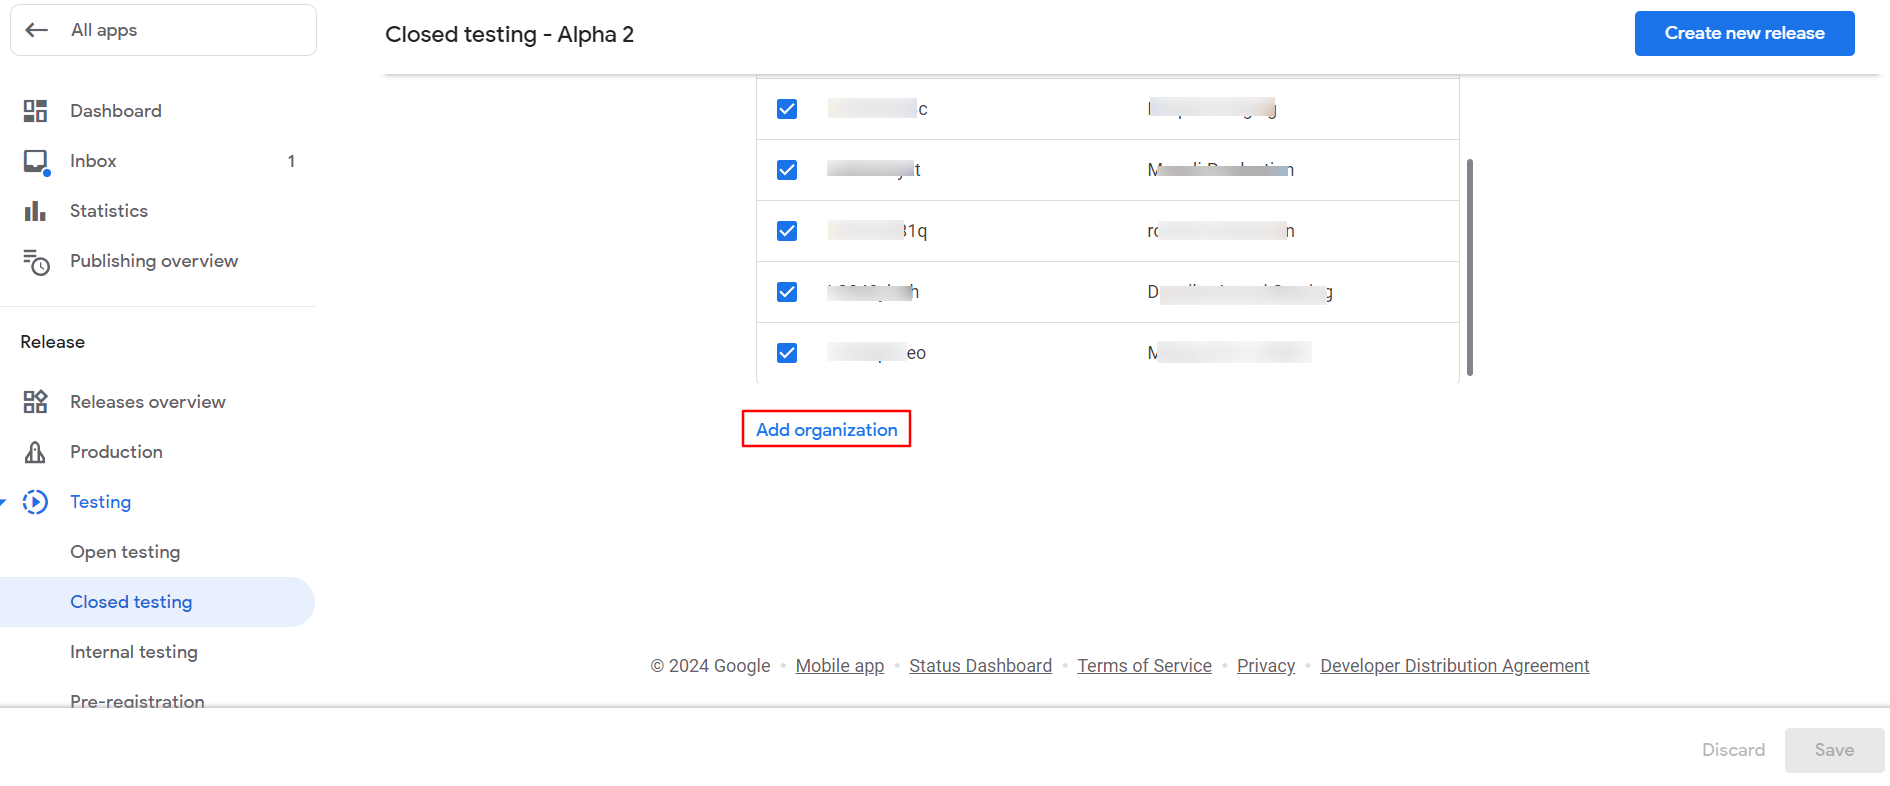
- You will find the Organization ID in the Play for Work apps section on the Scalefusion dashboard.
- Navigate to Application Management > Play for Work apps. Click on Add from Play store button.

- Click on the Organization details button which will display the ID.

- Navigate to Application Management > Play for Work apps. Click on Add from Play store button.
- Once the Organization ID is assigned to the testing track, come back to Scalefusion dashboard and click on refresh icon next to the Testing Tracks.
- You will be able to see the application that is part of the Closed testing track, and you are ready to create a configuration to push the testing track(s) to your managed devices.

Create an Update Config for the Testing track
- Navigate to Application Management > Play for Work apps section. Select the Beta app.

- In the right-hand side windows, go to Update Config tab and click on Create button.
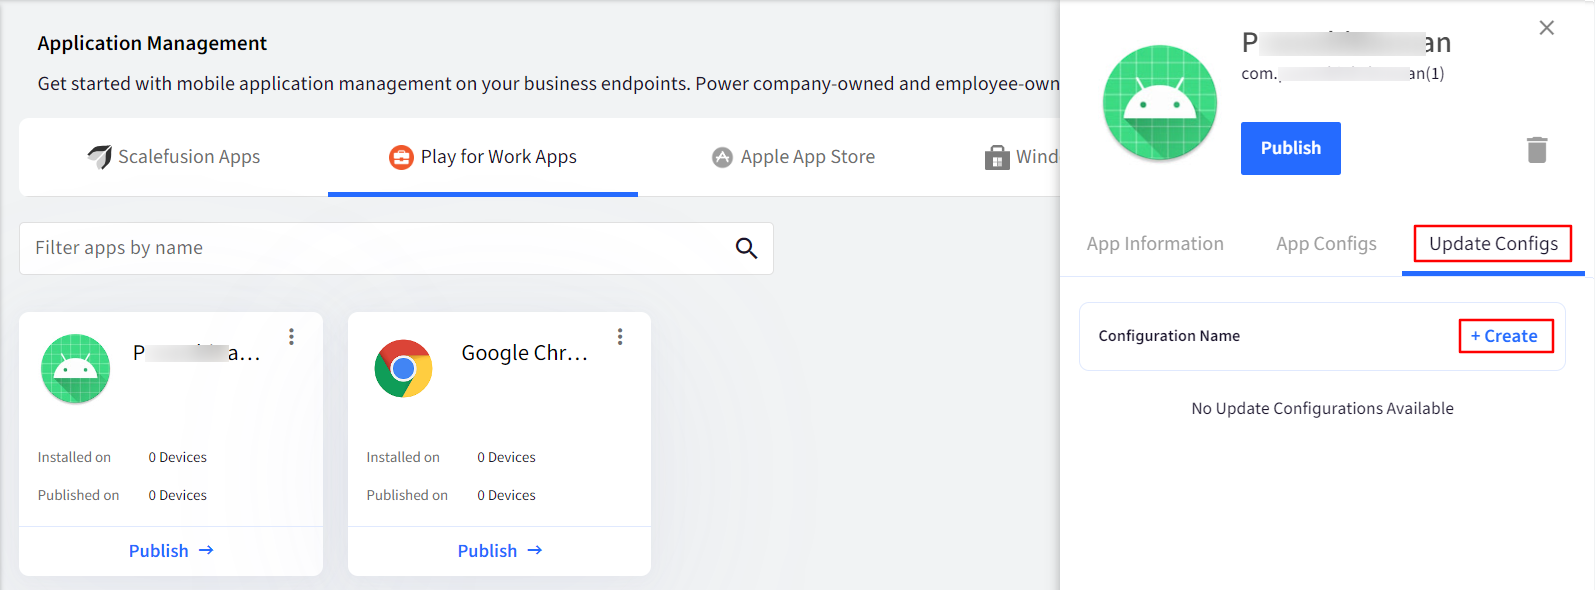
- Give this config a name and go to Testing Track tab.
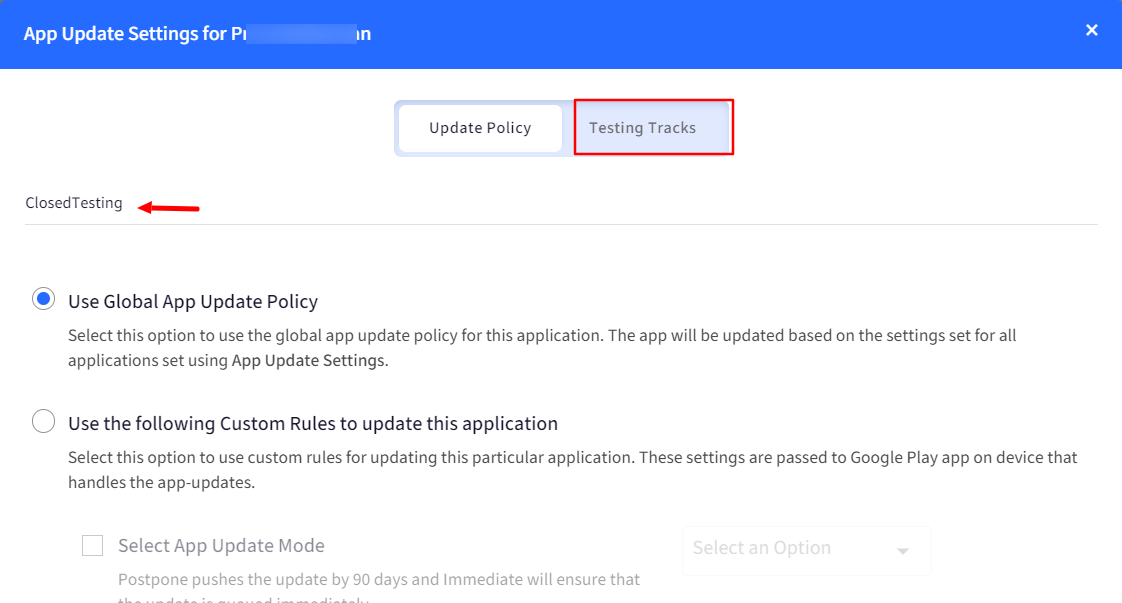
- Here you will be able to see all the testing tracks that you would have added from Google Play Console.
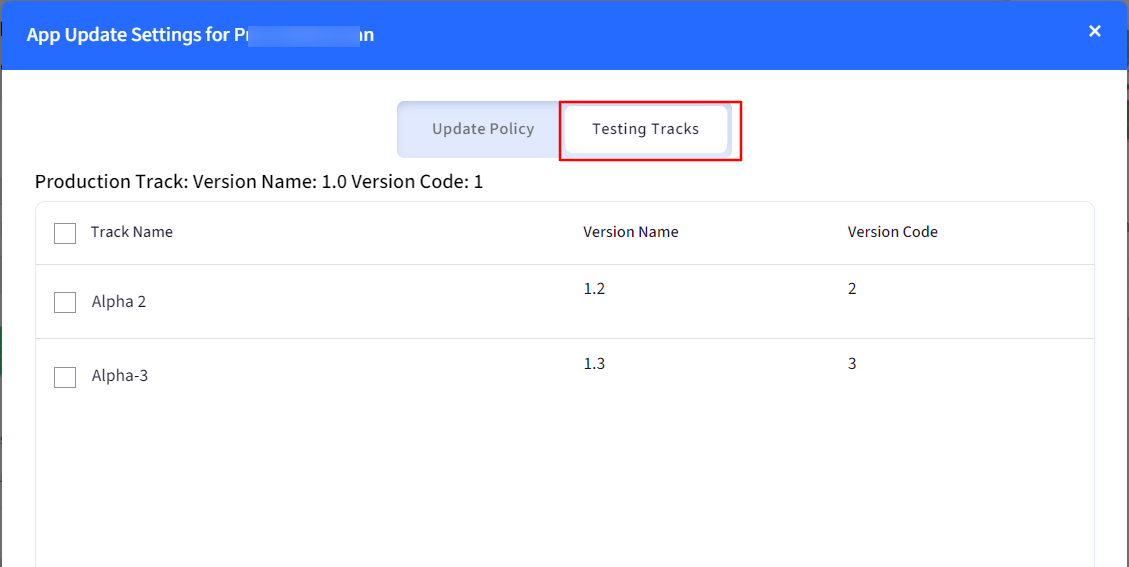
- Select the testing track that you would like to publish and click on Save.
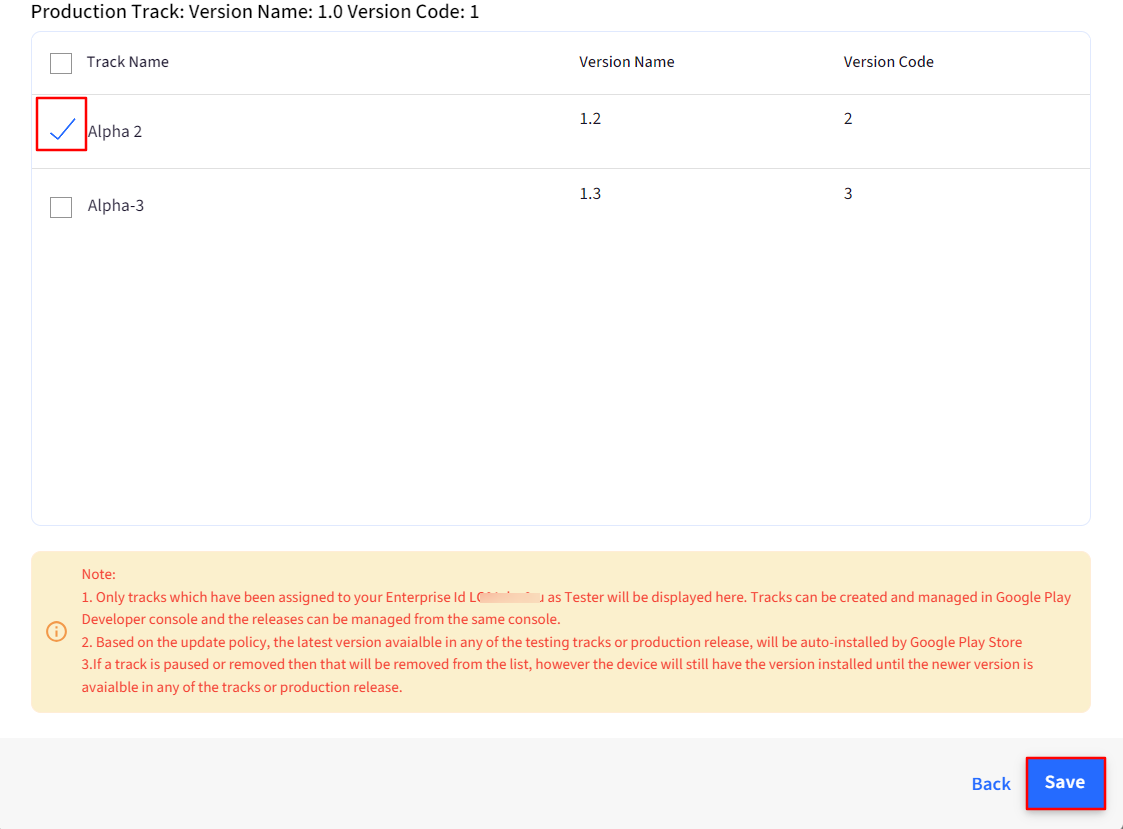
- Publish this config on the Device Profile or Group where you would like to test the beta app.

- You can create multiple configs for the different versions of your beta apps.
- Beta apps are available only for Play for Work apps which have testing tracks created and the organization is added as a tester using Organization ID.
- Not all apps on the Google Play Store will have beta versions available. Therefore, it is recommended to consult with the application developer if you require Track testing for a specific app.
You will be able to see the published Testing Tracks in the View Status report on the dashboard.
Frequently Asked Questions
Question: How do we uninstall a previously installed application from selected devices?
Answer: Navigate to Application Management > Play for Work Apps. Click on the application icon, and from the side panel, click on UNINSTALL. Select the Device Groups or Device Profiles or Devices and confirm the uninstallation..png)
Question: How do we completely delete and uninstall a previously installed application from all our devices?
Answer: Navigate to Application Management > Play for Work Apps. Click on the application icon, and from the side panel, click on the delete icon. From the options, select Delete & Uninstall.

Question: Our application requires a lot of runtime permissions like Storage, Camera etc. Can we auto-grant them remotely?
Answer: Yes. Navigate to Application Management > Play for Work Apps. Click on the application icon, and from the side panel, click on the Permissions button. Please refer to our document here.
Question: We need to remotely configure our applications by providing setup data. How do we do it?
Answer: Please refer to our Application Configuration guide to remotely configure apps.Application Configurations for Android Applications
If you still face any issues, please contact support@scalefusion.com or send your feedback on this article itself.Update configs


.png)


