- 06 Nov 2024
- 3 読む分
- 印刷する
- PDF
Managing SSO Configurations
- 更新日 06 Nov 2024
- 3 読む分
- 印刷する
- PDF
On creating SSO configuration, there are a number of actions IT admins can perform on a config. This document entails how SSO configurations can be managed and what actions you can perform once SSO configuration is created.
Pre-requisites
- SSO Configuration should be created on Scalefusion Dashboard
Card details
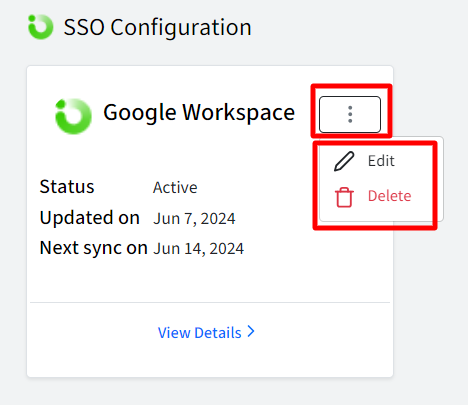
Once you have configured the application details and saved as a SSO configuration, it will be displayed as a card on the dashboard. The card will show following details:
- Name: The name which you have specified while creating config
- Type: The application type you have selected (Google Workspace, Microsoft Entra etc.)
- Status: Displays current status of the config. Status can be either Active or Draft. Draft status shows when the configuration is not complete and some sections are pending to be set up.
- Updated On: The date when the config was last updated
- Next Sync On: The date when the SSO configuration settings will be automatically applied on the device. Normally this is calculated by the number of days you have configured as grace period after which settings will be enforced.Next Sync On will appear only if SSO configuration is done for Google Workspace
Other Actions
By clicking on three dots you can perform following actions:
- Edit: Opens the SSO Configuration wizard with the configurations/selections pre-filled. You can edit the configuration by changing your selections/Conditions to access etc. and save it again.
- Delete: This will delete the SSO configuration and invalidate all SSO sessions for all users currently using this configuration. As a result, the users will be logged out from their current sessions.If SSO is configured for Microsoft 365/Entra, there will be additional options under three dots, viz. Update/Remove Federation, Update Immutable Ids

View Details
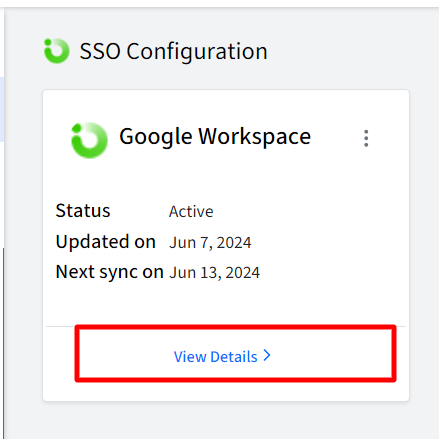
This is the section from where you decide and assign the SSO configuration to users. Clicking on View Details displays all users that match the domains of the selected config. If you have selected manual user assignment, then you need to click on Assign Users, select the user(s) whom you want to assign the config.
- Click on View Details on the SSO Configuration card

- The next page will list users based on the configuration defined in SSO Configuration under SSO Scope Management > User Assignment
- All Users: If the current SSO Configuration is configured to user assignment for all users, then all the users belonging to the matching domain will be assigned with the SSO Configuration. In this case, you will receive a dialog. Click on OK and the app will be assigned to all imported users of selected domains.
- Manually assign users: However, if the SSO Configuration is configured to manual user assignment, follow these steps to Assign Users to the current SSO Configuration:
- On View Details page, click on Assign Users button on top right

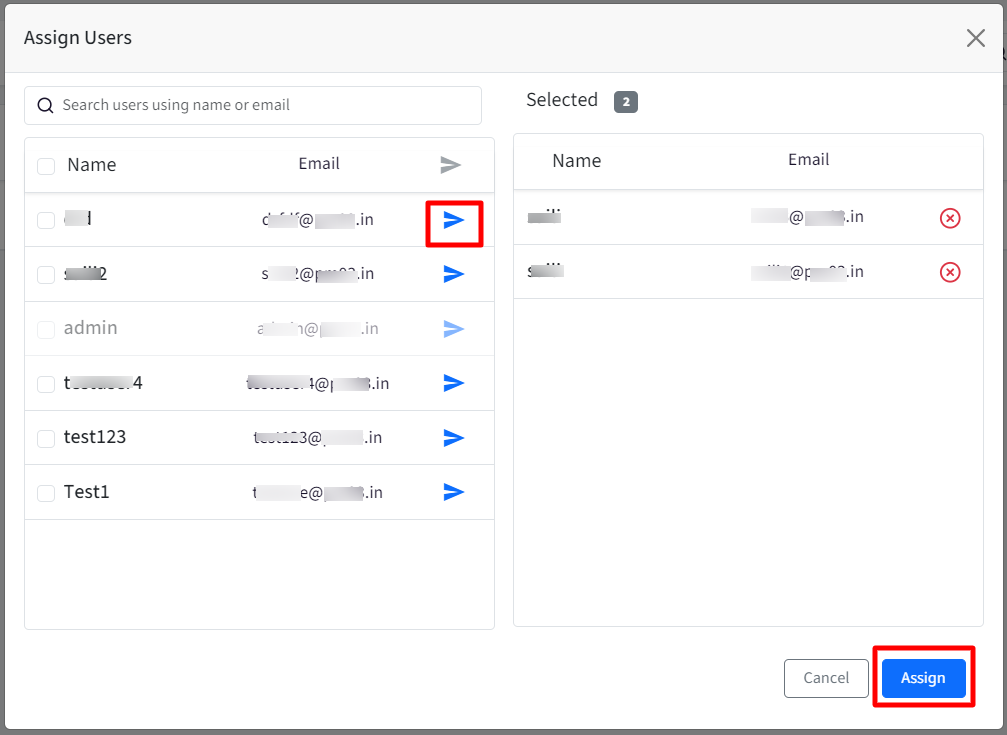
- This will open the Assign Users window. On the left side all the users belonging to domain will be listed.
- Click on the arrow next to the user(s) which are to be assigned with the config.
- The user(s) will get added to the right side section.
- Once you have added, click on Assign button.
Note: To assign all users, click on the check box on the top left. This will select all the users. Now, click on the arrow on the right. All the users will be listed on the right section. Next, click on Assign button A user can be assigned and associated with more than one SSO configurations
- On View Details page, click on Assign Users button on top right
Additional Details
Following are the additional details captured and shown with respect to each user who is part of the SSO Configuration:
- Name: Username of the user as defined in User Management
- Email: User's Email id
- Total Devices: Total no. of devices on which user is signed in.
- Managed Devices: No. of devices enrolled with Scalefusion
- OneIdP Authenticator: No. of devices which are not managed by Scalefusion but user is signed in on them using Authenticator (OTP)

Actions on Users
Following are the actions on users that you can perform from SSO Configuration:
- View Devices: Clicking on the eye icon gives details of devices which are enrolled with this user and using this SSO Configuration

- Logout: If you click on Logout, it means the current session on device becomes inactive. On device, you will see the user as logged in however sync will not happen.Logout is not applicable for Amazon Web Services (AWS)
- Block: Blocks the user from signing into the application. You can always unblock any blocked user.
- Unassign: Unassigns and removes the user from the config. Hence, user will not be able to sign in to the application.
Note: Unassign can be performed only if you have assigned the users manually


