General Settings
- 20 Feb 2025
- 8 読む分
- 印刷する
- PDF
General Settings
- 更新日 20 Feb 2025
- 8 読む分
- 印刷する
- PDF
The content is currently unavailable in Ja - 日本語. You are viewing the default English version.
記事の要約
この要約は役に立ちましたか?
ご意見ありがとうございます
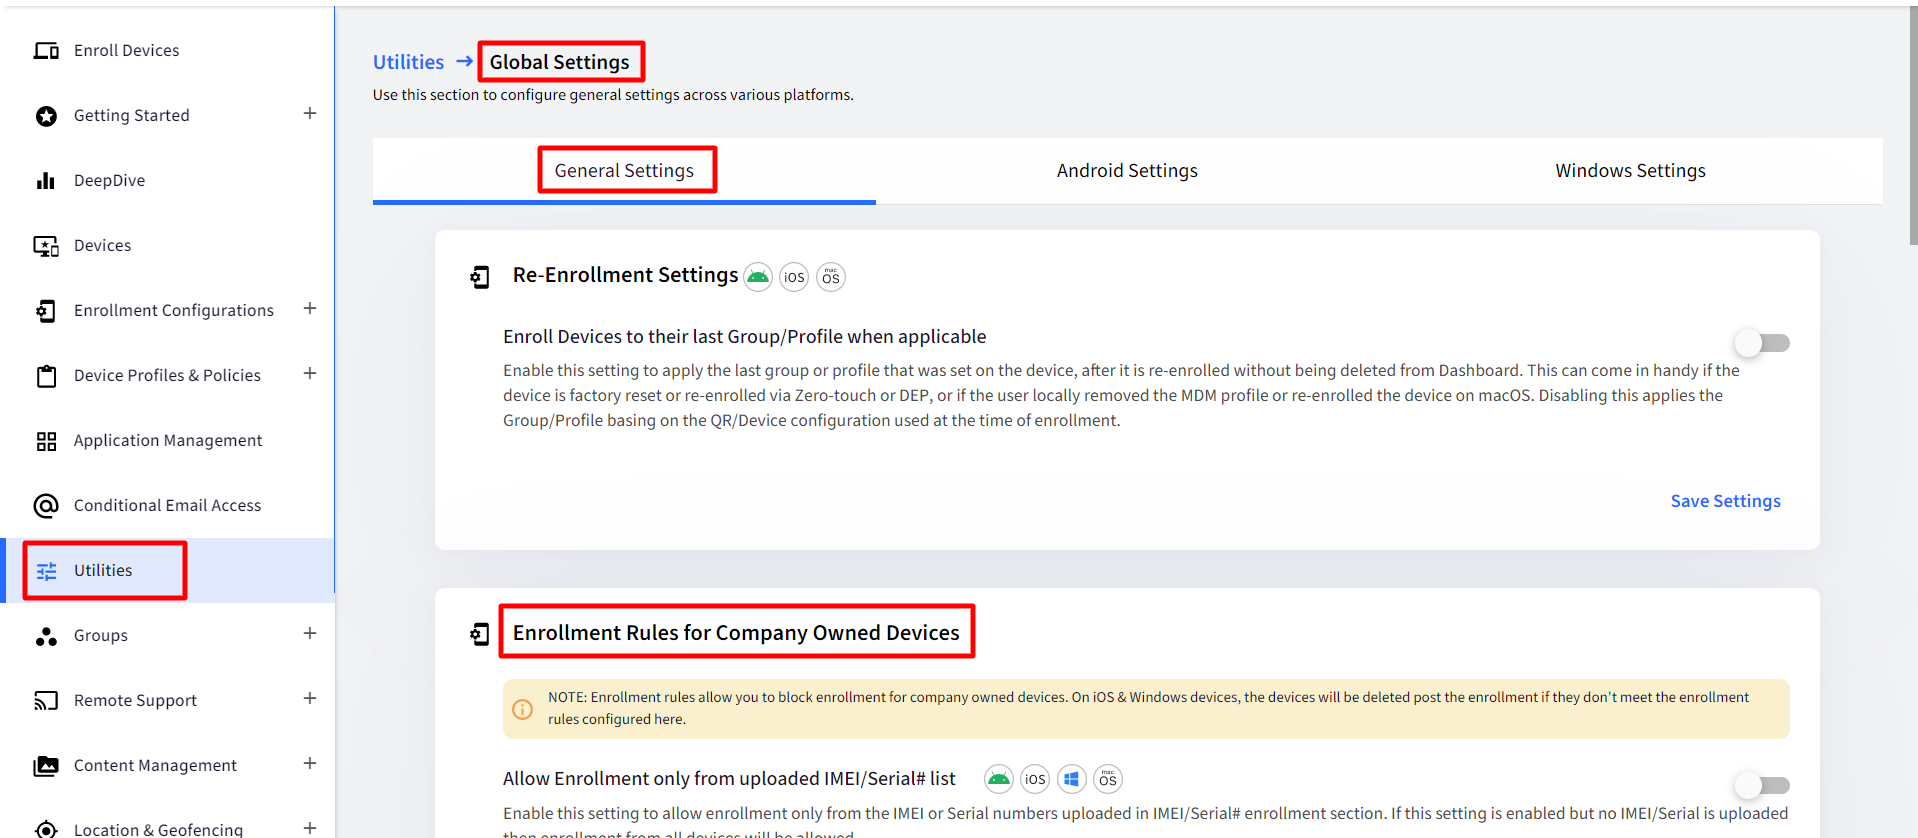
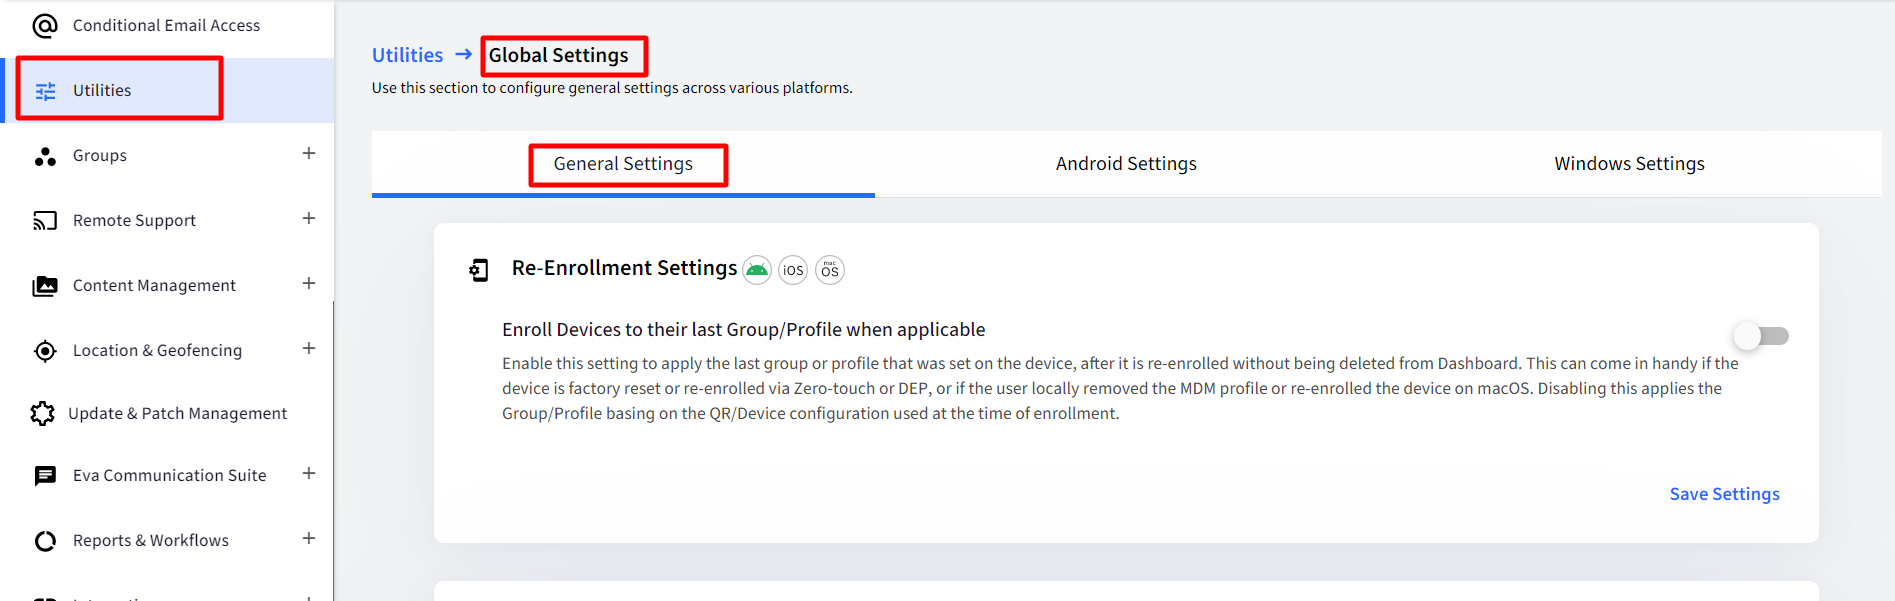
In this Global Settings section, you can configure general settings across various platforms. They are described below.
Re-Enrollment Settings
Enroll Devices to their last Group/Profile when applicable
Platforms: This setting is configurable for Android, Mac and iOS devices
To access, navigate to Utilities > Global Settings > General Settings > Re-Enrollment Settings
By default, it is toggled OFF. When enabled, it applies the last group or profile that was set on the device after it is re-enrolled without being deleted from the Dashboard. This is useful when the device is:
Factory reset, or
Re-enrolled via Zero-touch or DEP, or
If the user locally removed the MDM profile or re-enrolled the device on macOS.
Disabling this applies to the Group/Profile based on the QR/Device configuration used at the time of enrollment.
Simply toggle on the settings and click Save settings to enable it.
Enrollment Rules for Company-Owned Devices
With enrollment rules, the admins can restrict the enrollment of company-owned devices to a few by configuring certain checks. The devices that meet these configured rules get enrolled in Scalefusion, and the ones that do not remain unenrolled. With this, they can prevent enrollments from unauthorized devices.
In brief, the following rules can be applied to the enrollment of devices
For specified IMEIs/Serial Number
For specified make/models
These rules are applicable only on Company Owned devices (Kiosk Enrollment)
How to Access
On the Scalefusion Dashboard, navigate to Utilities > Global Settings.
Under General Settings, you will find the rules under the heading Enrollment Rules for Company-Owned Devices

Allow Enrollment only from uploaded IMEI/Serial# list
With this setting enabled, the enrollment of those devices is allowed, which are uploaded in the IMEI/Serial# enrollment section. If this setting is enabled, but no IMEI/Serial is uploaded, then enrollment from all devices will be allowed.
Platforms: This rule can be applied to Android, iOS, MacOS and Windows devices
How does it Work?
Toggle on the setting Allow Enrollment only from uploaded IMEI/Serial# list
This enables the following settings, viz
Use the IMEI/Serial# list for Android Devices: Pick up the IMEI or Serial# of Android devices uploaded under IMEI / Serial # Enrollment and enroll only those devices.
Use the IMEI/Serial# list for iOS/macOS Devices: Pick up the IMEI or Serial# of iOS and Mac devices uploaded under IMEI / Serial # Enrollment and enroll only those devices.
Use the Serial# list for Windows Devices: Pick up the Serial# of Windows devices uploaded under IMEI / Serial # Enrollment and enroll only those devices.
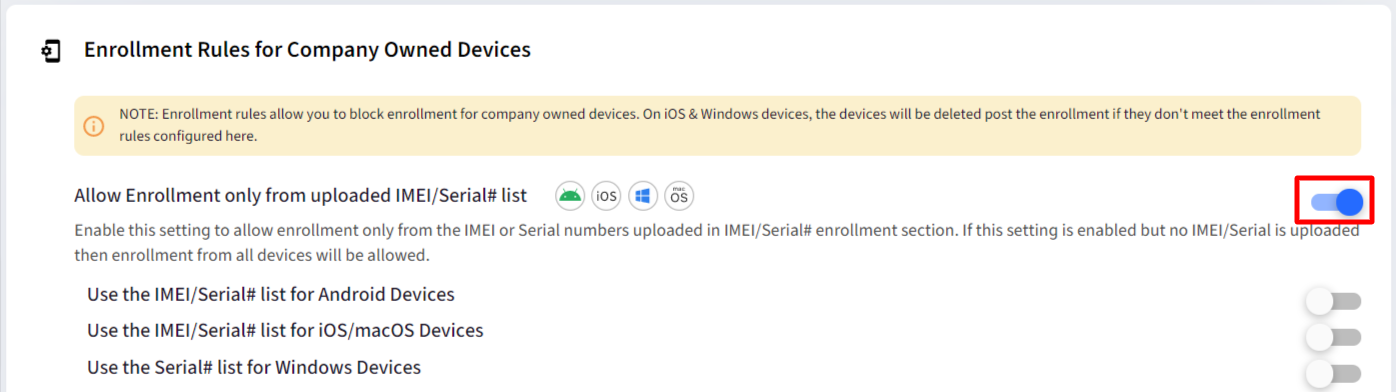
Toggle On the platforms for which you want to apply this rule
Click Save settings at the bottom

For example,
Enable the setting Use the IMEI/Serial# list for Android Devices and Save it.
From the Android device, scan the QR code. The setting Apply Enrollment Rule should be applied in that QR Code Configuration for Android Company-Owned Devices

Now the IMEI/Serial# uploaded under IMEI/Serial# Enrollment will be checked, and the device will get enrolled accordingly. The verification will be performed irrespective of what enrollment method you are adopting (6-taps etc.)
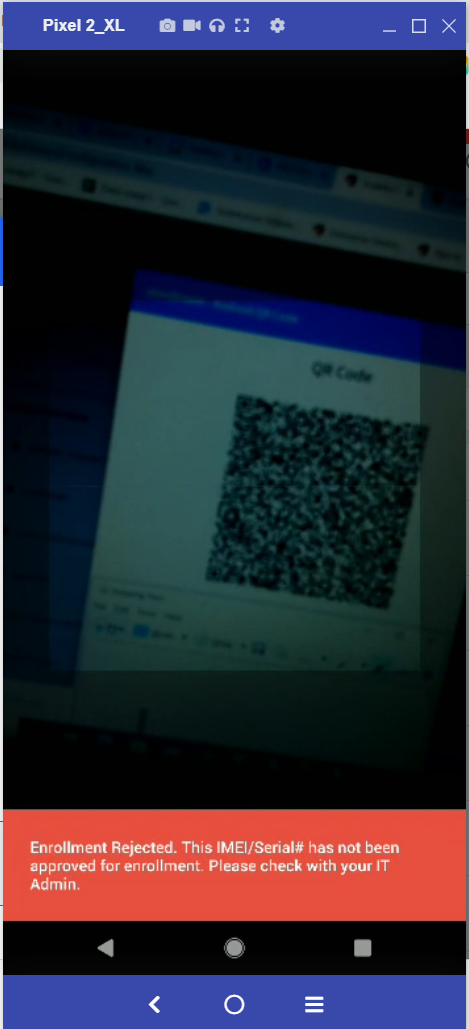
If the IMEI doesn't match, the following message will be displayed on the device


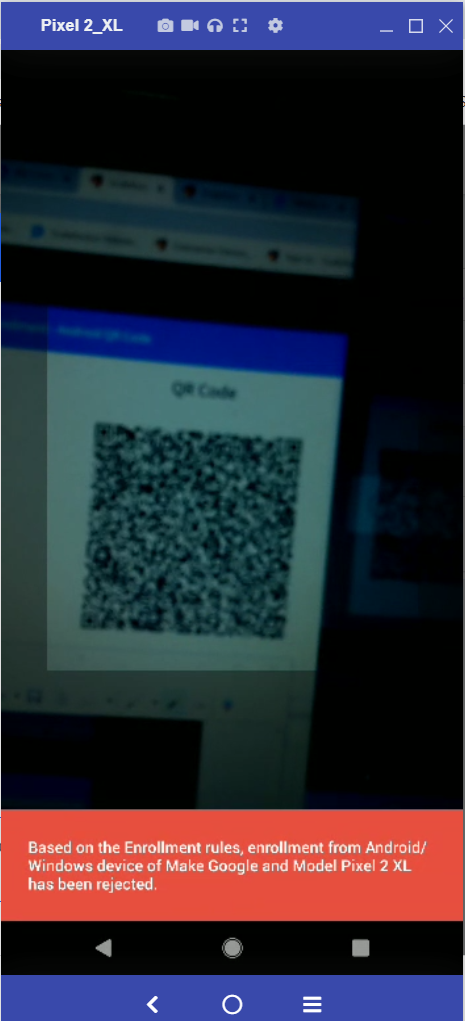
Allow Enrollment from configured Make/Models only
This setting allows enrollments of the specified make and model of devices.
Platforms: This rule can be applied for Android and Windows devices
How does it Work?
Toggle on the setting Allow Enrollment from configured Make/Models only
Click on the button Add Make/Model

This adds a row underneath the table where you need to configure (enter) the following:
OS: Select OS from the drop-down (Android or Windows)
Make: Enter the make of the device like Lenovo, Samsung etc.
Model: Enter the model of the device, For eg. SM-A920F
Note:
Ensure that the Make and Model are provided exactly as they are reported by devices, including spaces or hyphens (-).
If no make/model is specified for an OS, then enrollments from all make/model will be allowed for that OS.

To add more rows for entering device details, click on the button Add Make/Model again
After configuring settings, click Save Settings at the bottom
At the time of enrollment, the models specified will be verified, and those devices will be enrolled. The setting Apply Enrollment Rule should be applied in that QR Code configuration.
If you have enforced the IMEI/Serial# enrollment check (above), then both conditions will be applied.
If the make or model doesn't match as per the rule, the following message will be displayed on the device


Application Management Settings
These settings can be configured only by users who subscribe to Modern and Legacy enterprise plans
To access, navigate to Utilities > Global Settings > General Settings
Scroll down. You will find them under Application Management Settings
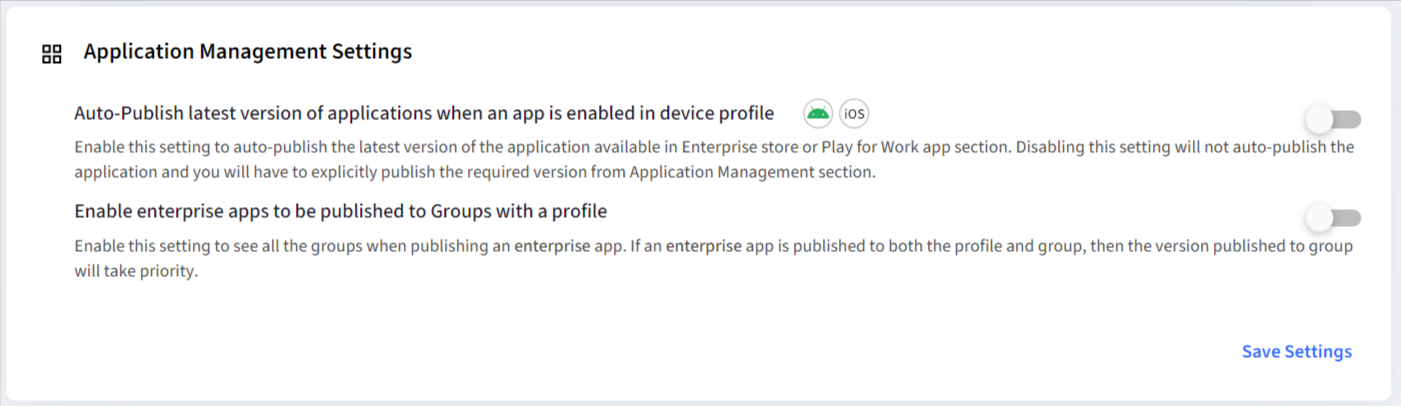


Auto-Publish the latest version of applications when an app is enabled in the device profile
Enabling this setting will automatically publish the latest version of the application (when enabled in the device profile) available in the Enterprise store or Play for Work app section.
Important:
To have the latest version auto-published, please ensure that the app is also enabled under Device Profile > Select Apps
This setting works on Android and iOS platforms
For users who are on a non-enterprise plan, this setting will be enabled by default. But they can disable it only if they upgrade their plan.
If this setting is disabled, the application will not auto-publish, and you will have to explicitly go and publish the required version from the Application Management section manually.
Enable apps to be published to Groups with a profile
This setting provides the ability to publish/unpublish apps to Groups with and without device profiles.
Enable this setting to see all the device groups when publishing an app. That is, once you toggle on this setting and go to publish an app, all the groups with or without a device profile will be displayed.
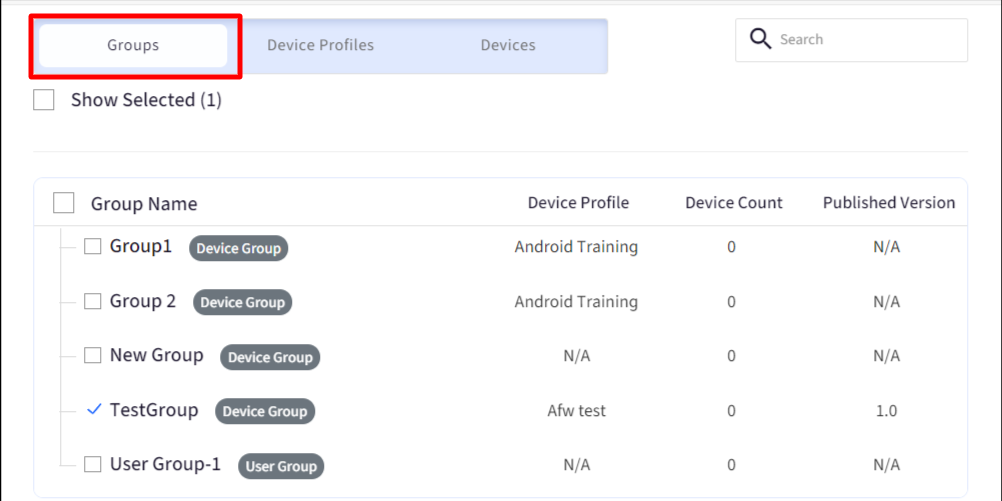
Device Profiles will only show profiles that are not associated with any group. Here, the published version displays the version of the app that is published to that device profile

If an app is published to the group and profile, then the version published to the group is given precedence.
With this setting, you can publish different versions of the same app on one single profile. Hence, the admin can publish different or the same versions of apps to the profile and group.
This setting applies to Enterprise apps, Devices and User Groups for all platforms.
They also apply to Scalefusion Apps for Windows, macOS and Android platforms.


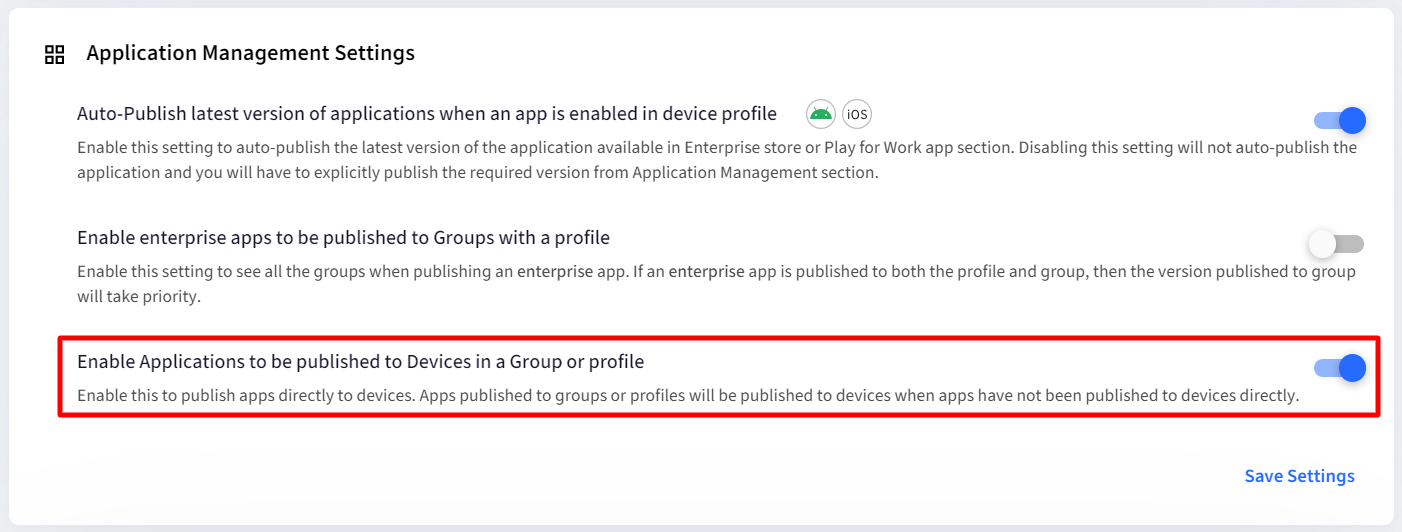
Enable Applications to be published to Devices in a Group or profile
Enable this option to directly publish apps to specific devices. With this, IT Admins can easily test Beta apps by initially publishing them on a few devices, and once they are sure of its functionality, they can roll it out to a wider group.
How it works
On publishing an app with this flag enabled, the Devices tab will display all the devices with or without device profile or group. From search bar, you can search for a particular device.
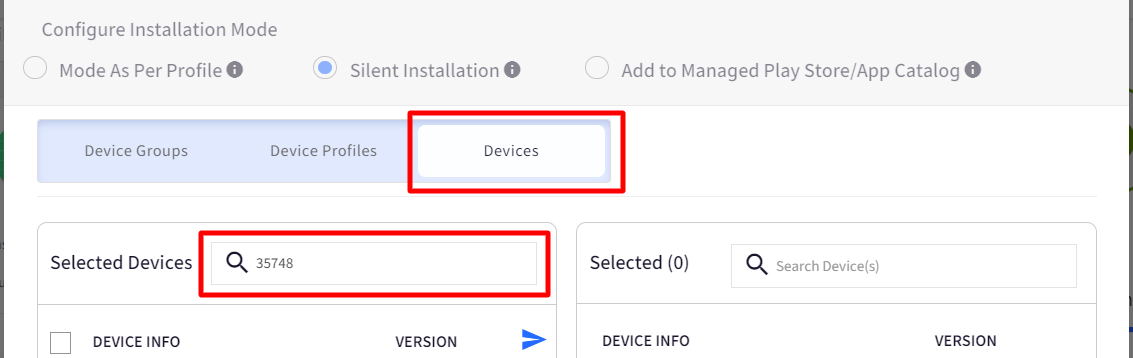
The device will appear on the left side of window on searching. Click on the arrow next to it to push it to the right panel.
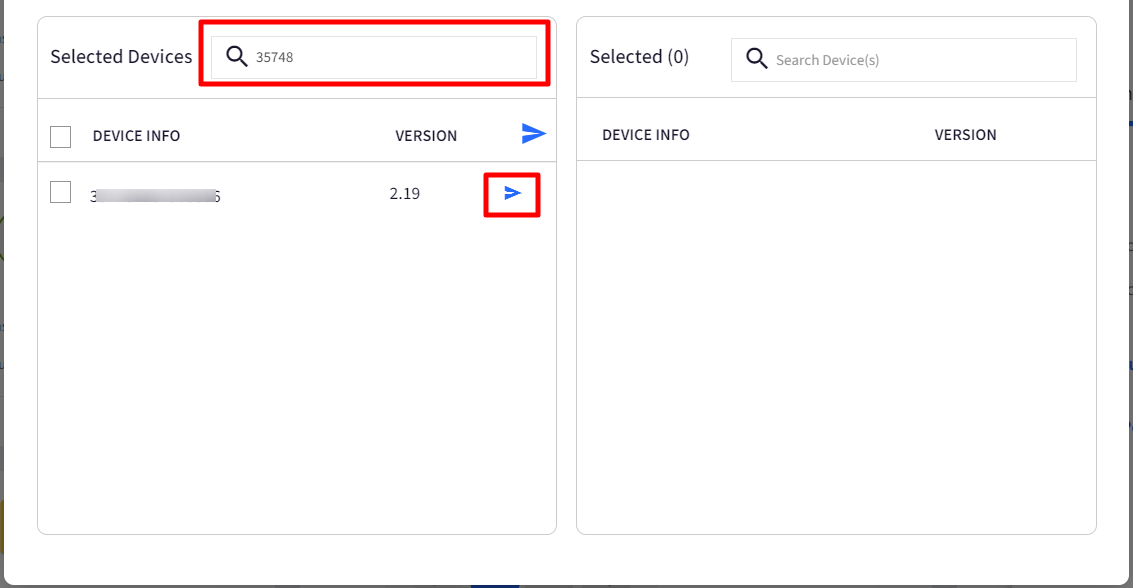
Once it appears on the right panel, click Publish.


Important Points to note:
You should be subscribed to Enterprise Plan.
Platforms supported: Android, Windows, iOS, macOS
Types of Apps supported: Android Play for Work apps, App configurations, Enterprise Store (APK files, MSI, EXE, UWP, Scripts)
You can also publish a downgraded version of an app to devices.
Reconcile app versions on Device
IT admins can also choose to reconcile devices to the app being published to override directly mapped version on the device, as there can be cases where a device may have a different version of the app compared to its profile or group. This can be done with the flag in Publish dialog box Publish/Override this version on Devices with direct mappings. It is enabled when the app is published to Device groups or Device profiles. If this flag is selected while publishing to a group or profile,
All direct mappings of this App from devices selected in Devices tab (older versions or newer versions), are removed and the currently mapped version is being pushed to the devices.
Publish/Override this version on Devices with direct mappings will be visible only when you have enabled applications to be published to devices in a group or profile.

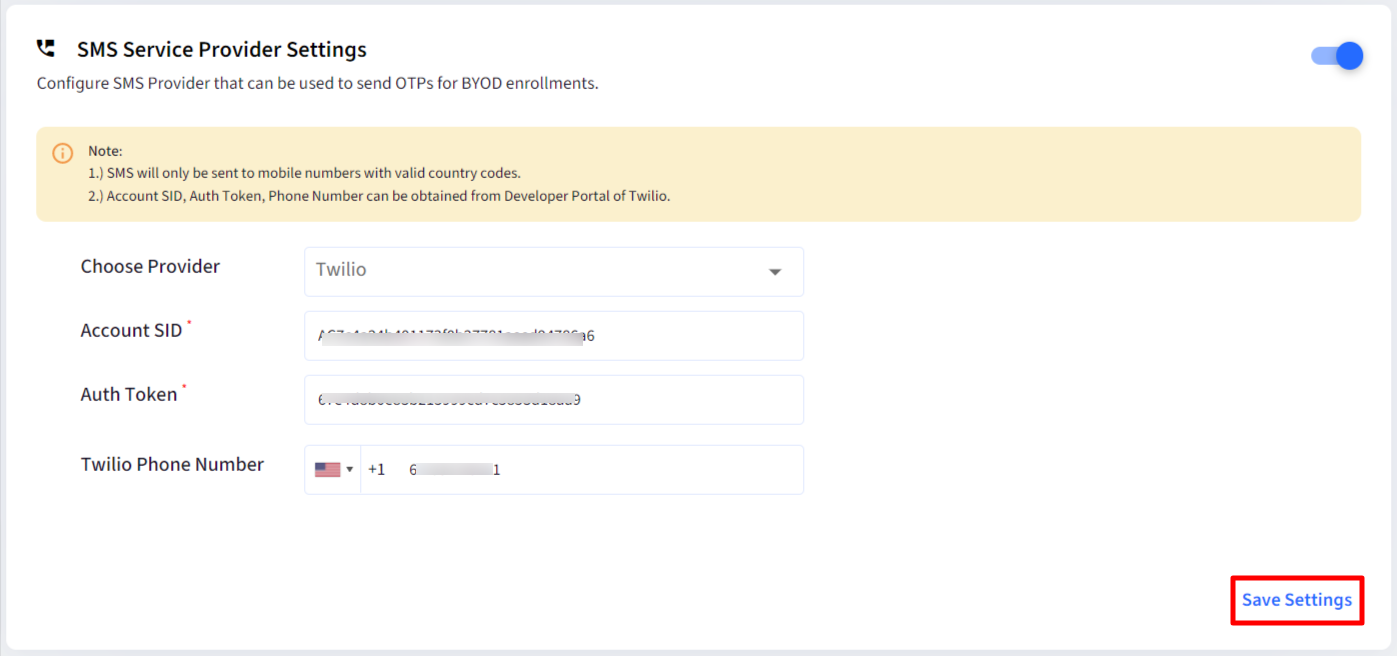
SMS Service Provider Settings
For BYOD device enrollment, the IT admins also get the option to send OTP over SMS, along with email. For that, you need to configure these settings:
Toggle this setting to On. Only then the rest of the settings be enabled.
Configure an SMS Provider that can be used to send OTPs for BYOD enrollments.

Now configure the following:
Choose Provider: Choose a service provider from the drop-down. Currently, we support Twilio.
Account SID
Auth token
Twilio Phone number
Account SID, Auth Token and Twilio Phone Number can be obtained from Twilio's Developer Portal. You should have an account created on Twilio.
Click Save Settings
Once settings are configured, the phone number (with country code) that you enter while adding a user for user enrollment will send the OTP over SMS on that phone number.


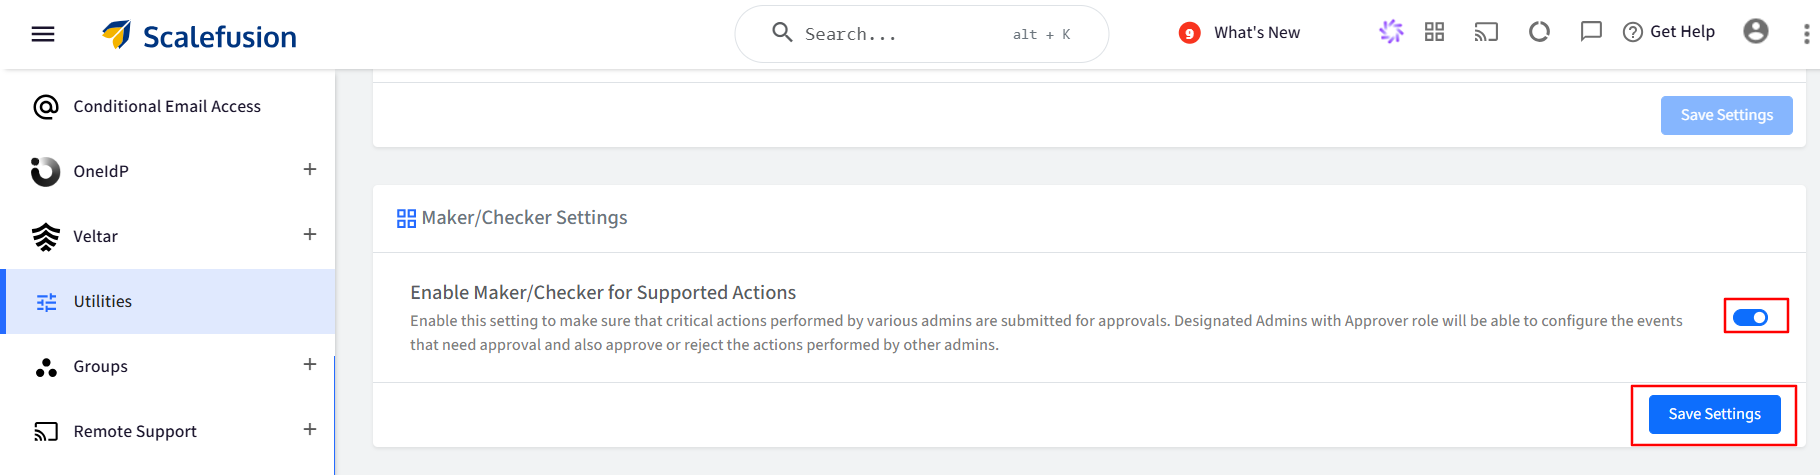
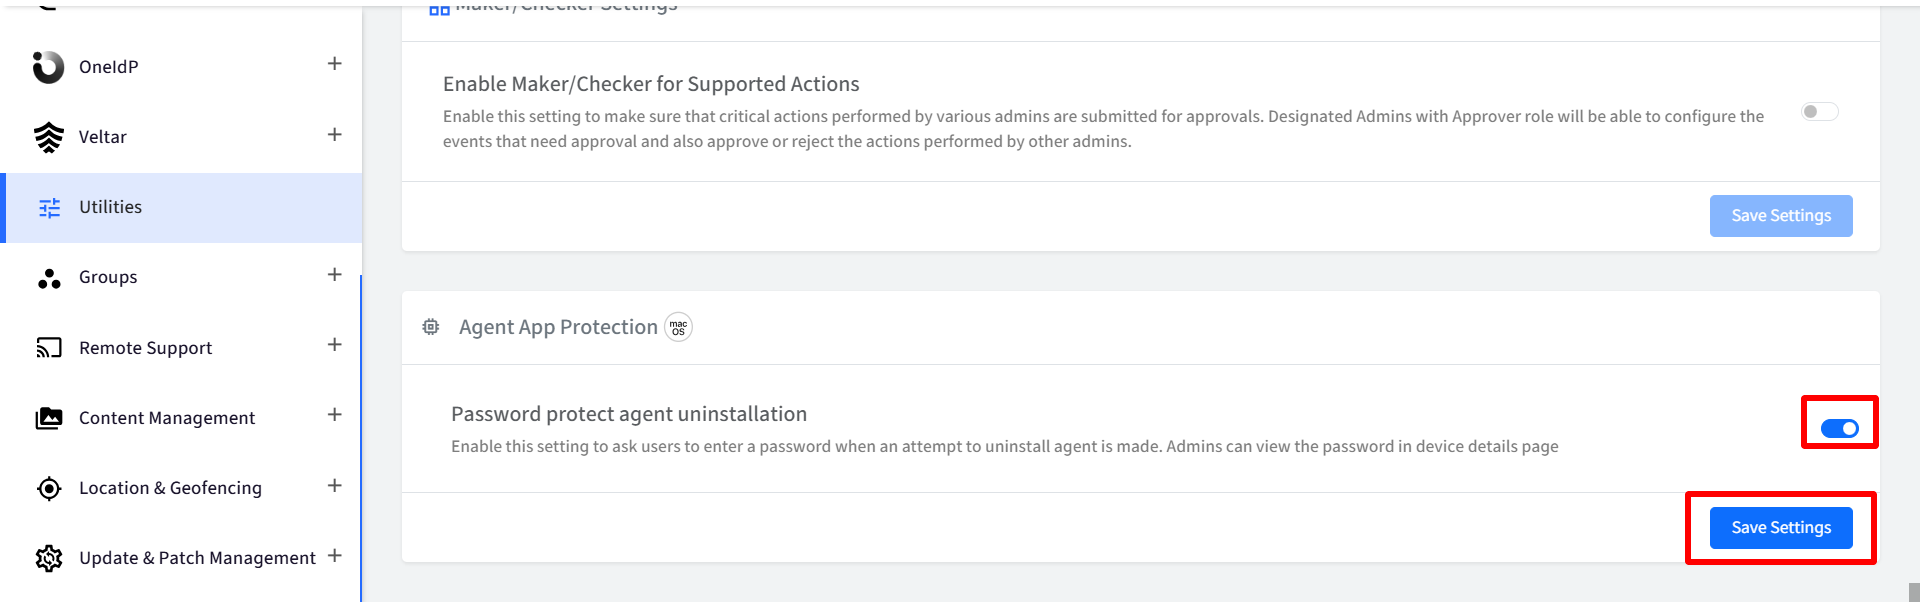
Maker/Checker Settings
Enable this setting to make sure that critical actions performed by various admins are submitted for approvals. Designated Admins with Approver role will be able to configure the events that need approval and also approve or reject the actions performed by other admins.
Agent App Protection
Password-Protect Agent Uninstallation
Platform supported: macOS
Enable this setting to require a password when a user attempts to uninstall the agent. This adds a layer of security, preventing unauthorized agent removal. The password can be viewed by administrators on the device details page.
Enable this setting to ask users to enter a password when an attempt to uninstall the agent is made.
Navigate to Utilities > Global Settings.
In General Settings scroll down to the Agent App Protection option and toggle it on.

Admins can view the password on the device details page.
Navigate to the Devices section and click on the concerned device.
Click on the gear icon > Full Device Information.
On the Management Info tab, you will find the Agent Uninstall Password.


Note:
Even if the user initiates it manually by running commands in the Terminal, they will be prompted to enter the password before proceeding.
Note:
Please ensure that the latest Scalefusion MDM Agent app is published and installed on the device(s).
この記事は役に立ちましたか?