- 22 Sep 2023
- 2 読む分
- 印刷する
- PDF
Enrolling Personal/Employee owned device for users enforced to sign in via PingOne
- 更新日 22 Sep 2023
- 2 読む分
- 印刷する
- PDF
This guide helps you to enroll your personal device to Scalefusion for SAML SSO users enforced to sign in with PingOne.
Before You Begin
- Make sure you have access to the corporate email.
- Make sure that your IT Admin has invited you to enroll in Scalefusion.
- Users should have accounts registered with the respective Identity Service Provider (PingOne)
- SAML settings for PingOne should be configured on the Scalefusion Dashboard
- The setting Enforce Users to sign in using SAML SSO is enabled in User Enrollment Settings on the Scalefusion Dashboard
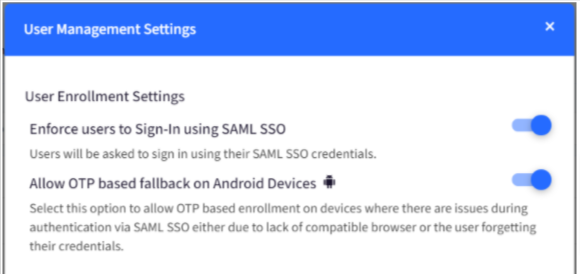
Steps to Enroll Your Personal Device
The users who have configured and signed in with PingOne, and have enabled the setting Enforce users to sign in using SAML SSO in User Management, will be asked to authenticate by signing in with their PingOne credentials. In this case, the following will be the process of enrollment:
- From the Google Play Store, install Scalefusion on your device and open it
- Scan the QR Code or select to Sign In via Email > BYOD
- Scalefusion app will try to access the device camera and the device information. Please grant the necessary permissions so that you can see the camera view. Open the email in which you have received the invite, and on your device, scan the QR Code that is there in the email.If you cannot scan the QR Code, then click on Sign In, enter your email ID on which you received the invite and enter the org-id that you see in the email.
- Once the QR Code is scanned and validated or the Sign values are validated, the Data Disclaimer screen will come. Click Agree on it.
.png)
- You will be taken to a Terms of Use page. These are the Terms of Use of your organization, read carefully and tap on I agree and choose Next
.png)
- After confirming terms of service, you will be asked to create a Work Profile.
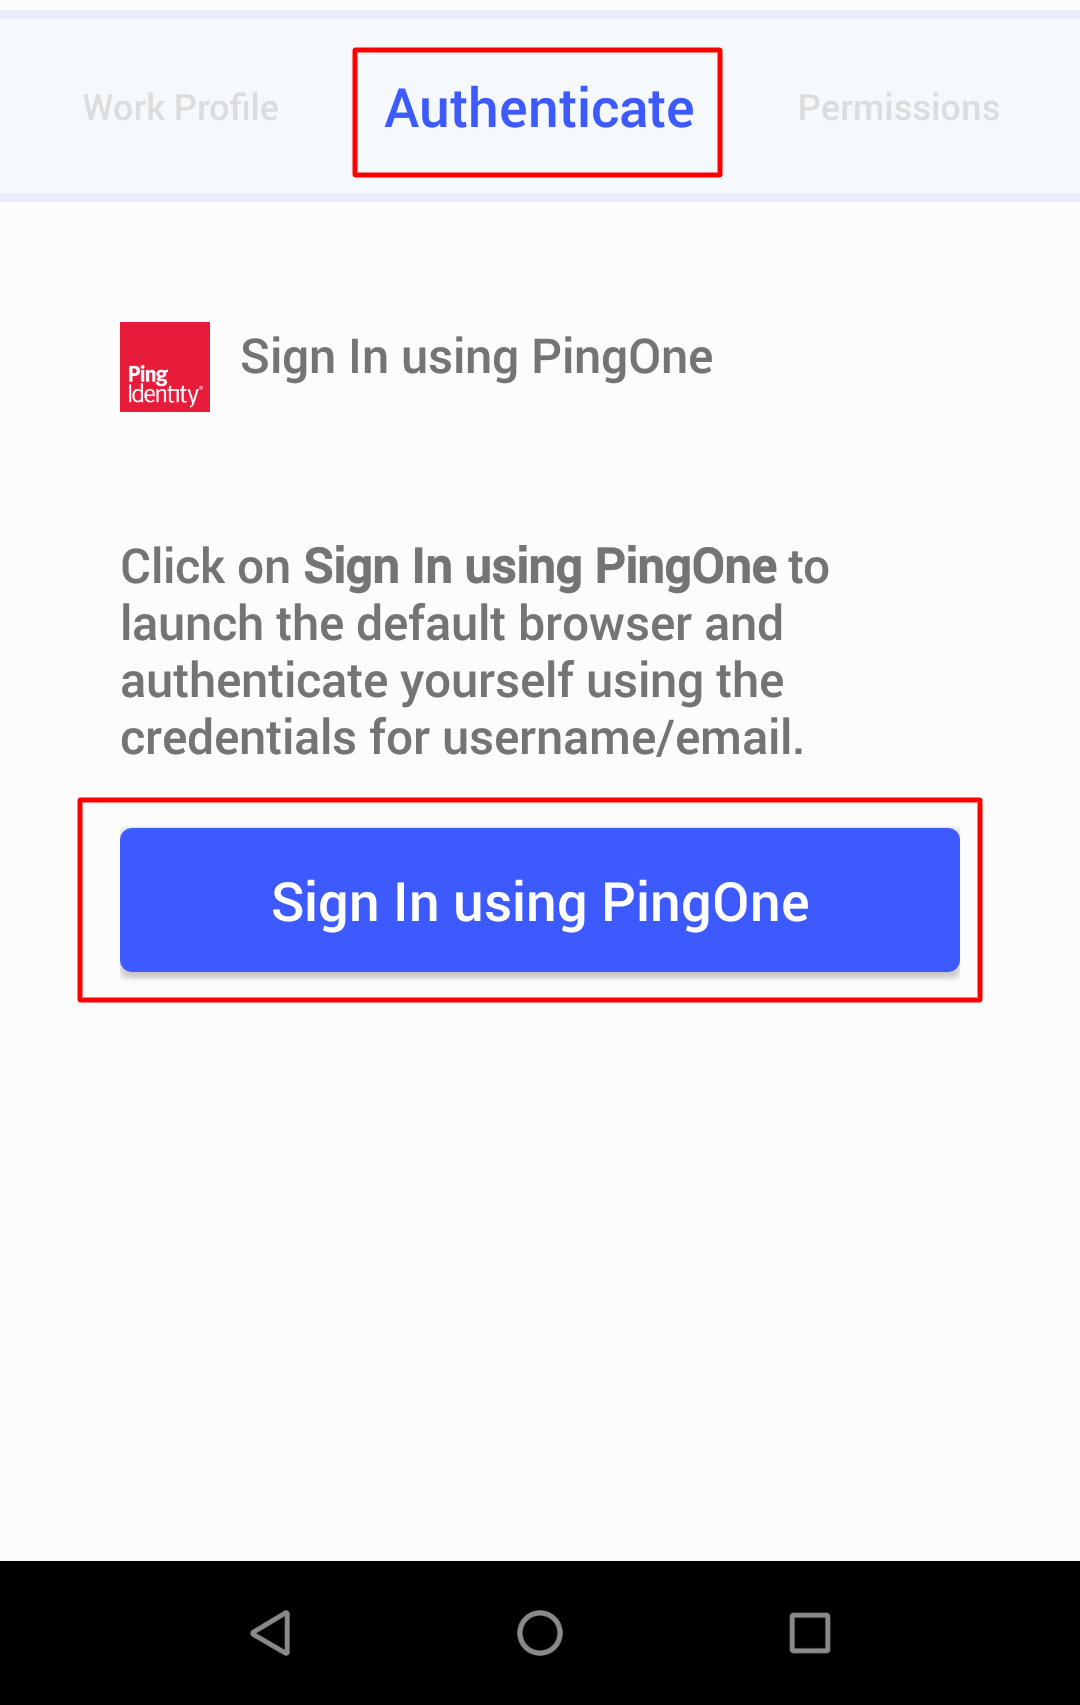
- Post Creation of Work Profile When the app is started in Container mode following screen will appear, asking you to authenticate.
- Tap on Sign In using PingOne to launch the default browser and authenticate yourself using the credentials for username/email.
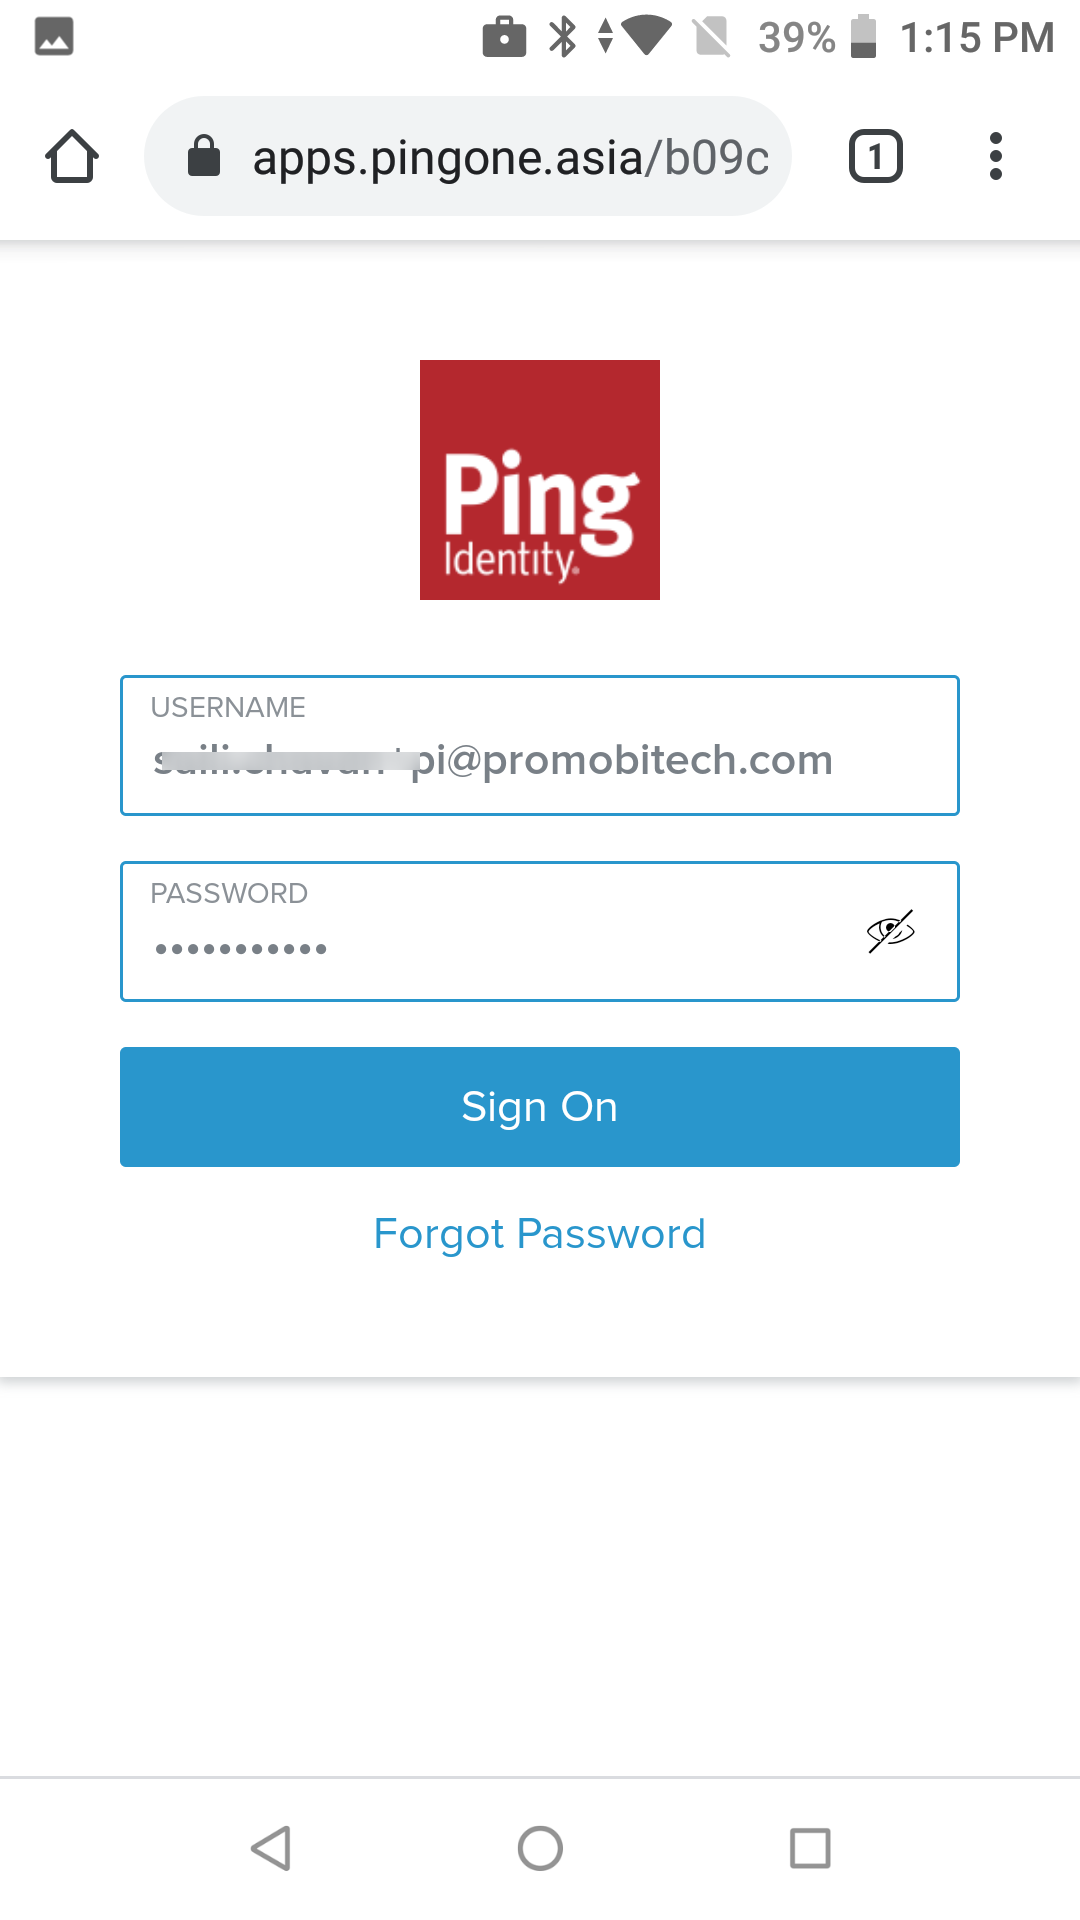
- At this step, the user would be taken to the login page of PingOne, where they have to complete login and further handling till authorization succeeds.
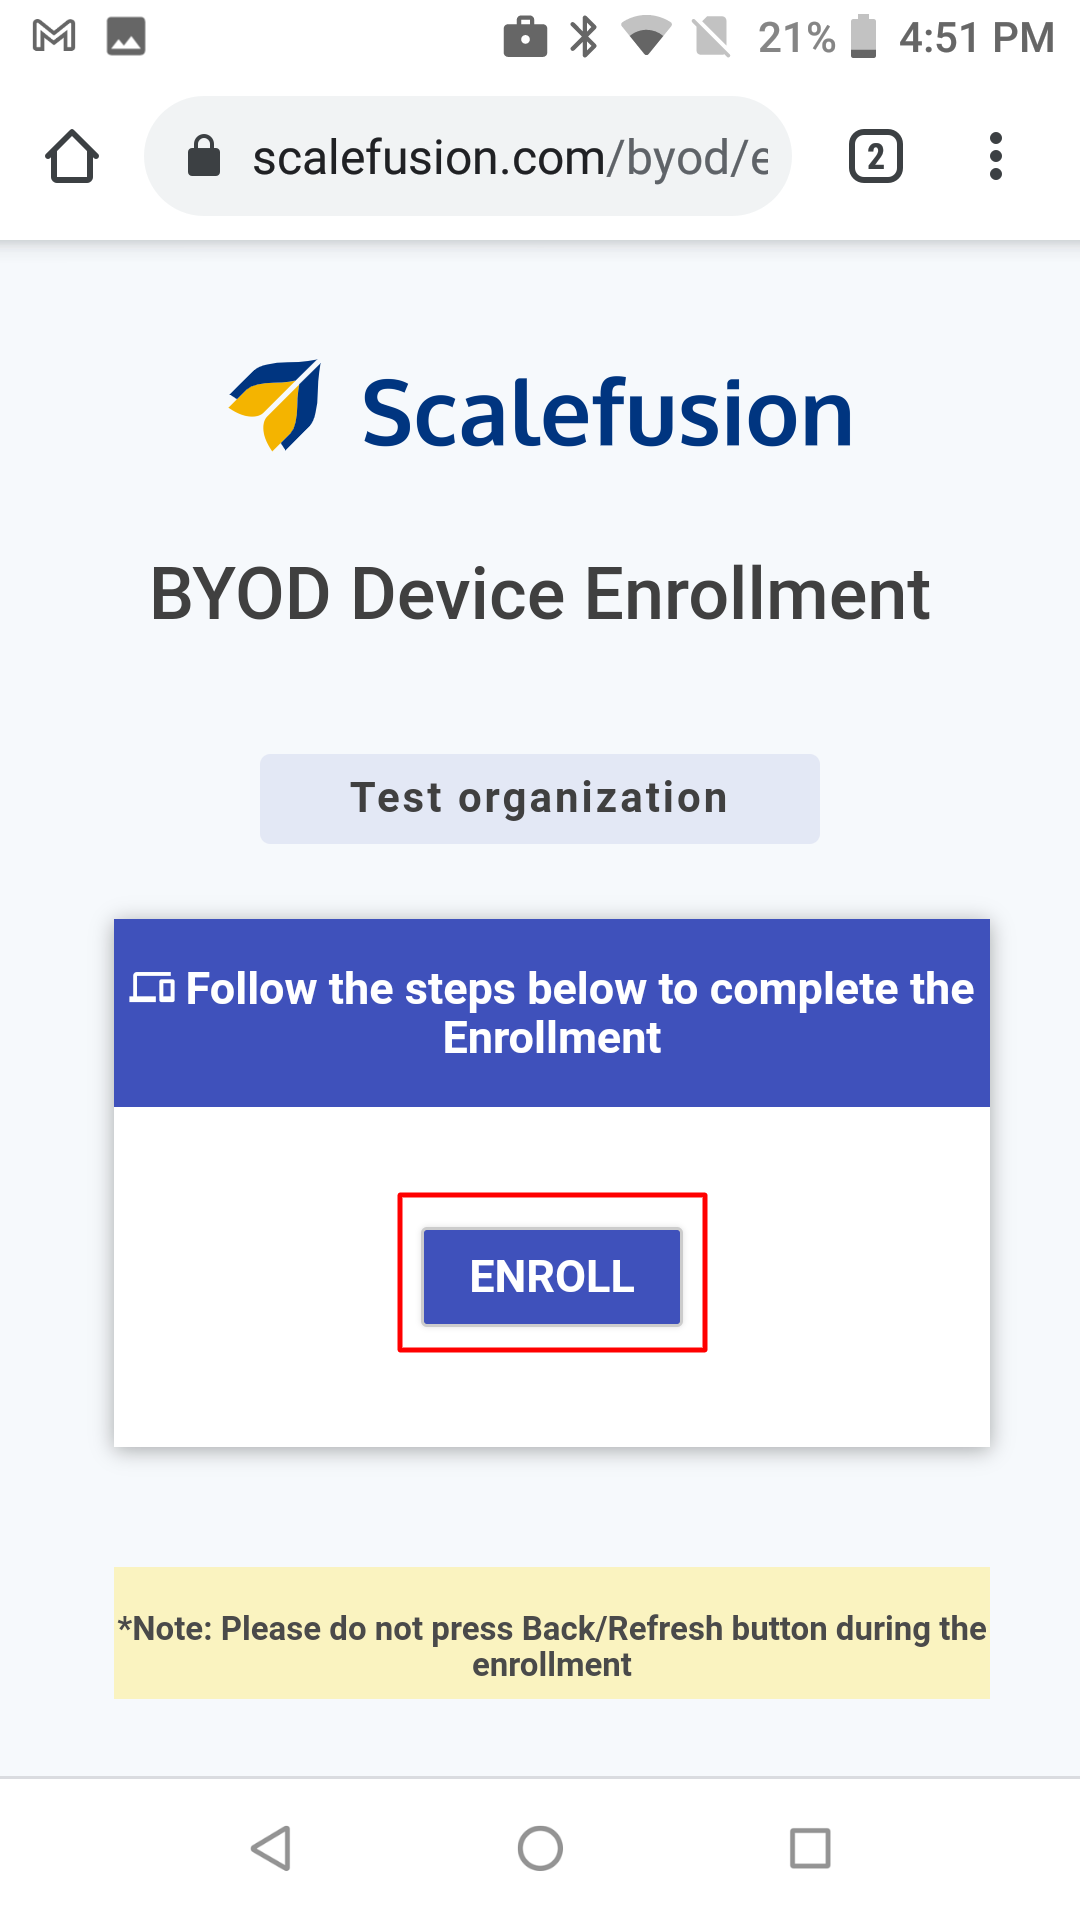
- Once authenticated, you will get the following screen. Hit ENROLL
- You will get the Permissions screen where you allow the permissions, and the device gets enrolled.
Device Enrollment in case of Authentication Failure
If authentication fails or, for some reason, you decide to enroll later or press back without confirming, you get the following authentication failure message
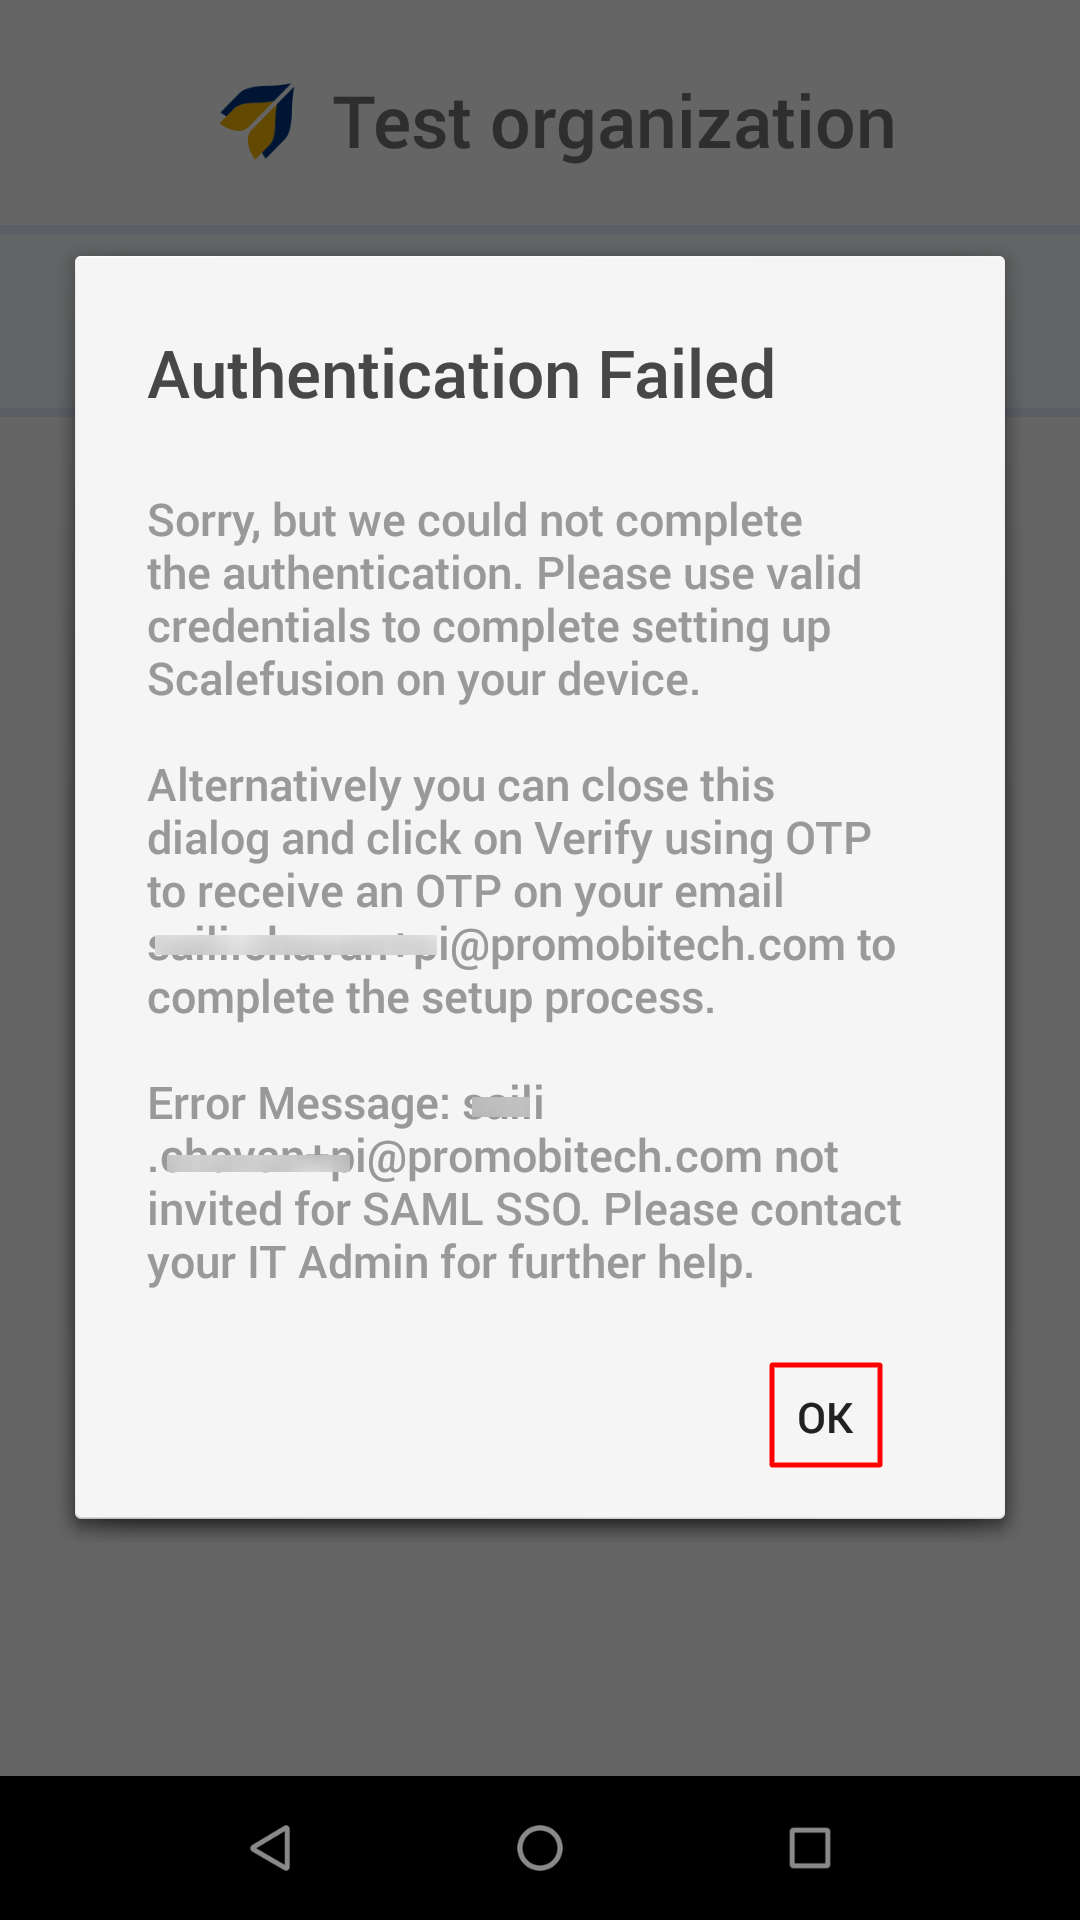
Tapping on OK will bring up the screen where you get to choose any authentication method from the following, that is,
- Sign in using PingOne
- Verify with OTP
From this point, you can try to authenticate again or use OTP (if Fallback to OTP is enabled) or even remove your work profile and start enrollment afresh..png)
After successful authentication, you will get the Permissions screen, where you allow the permissions and the device gets enrolled.


.png)
.png)


