- 21 Oct 2023
- 5 読む分
- 印刷する
- PDF
Device Renaming in Bulk
- 更新日 21 Oct 2023
- 5 読む分
- 印刷する
- PDF
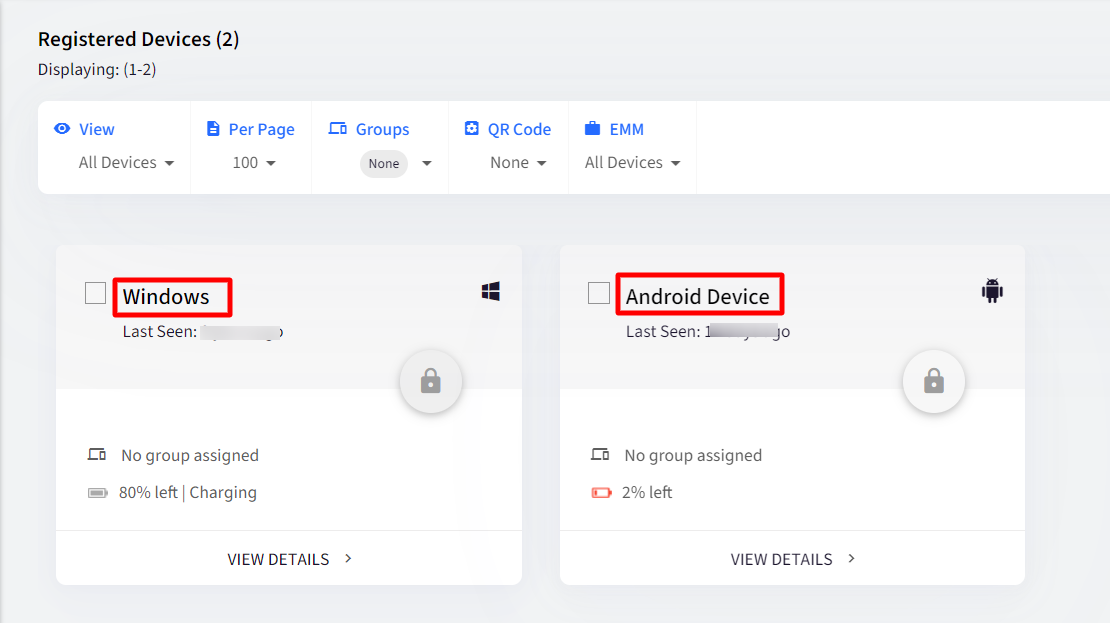
An additional action that can be performed on devices is renaming them in bulk, thus saving the time of going to details and renaming each device separately. From the Scalefusion Dashboard, admins can rename the devices all in one go.
This document describes different ways and from where all bulk renaming of devices can be implemented from the Dashboard.
Before You Begin
- Have a valid Scalefusion Dashboard account
- Devices should be enrolled with Scalefusion
From where can the devices be Renamed?
Bulk Renaming of Devices can be done from the following places on the Dashboard:
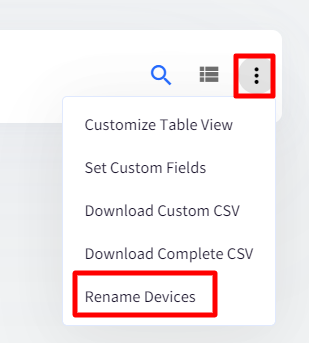
- Devices section: In the Devices section, when you click on the three dots on the right side, there is an option to Rename Devices
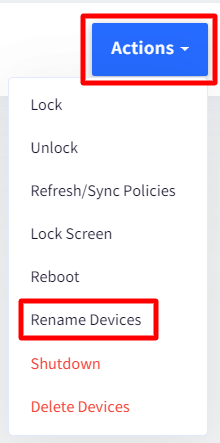
- Actions Menu: In the Devices section -> Actions menu
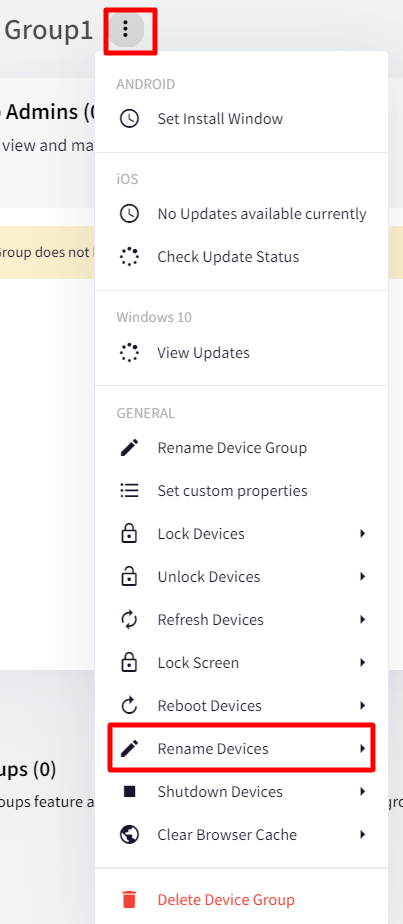
- Groups > Device Groups: In the Device Groups section, on the Device Groups / Sub-Groups actions menu
In all these cases, when you click on Rename Devices, the Rename Devices dialog box opens, displaying the options through which you can rename devices. These are explained below.
Option 1: Rename using CSV file
Using this option, you can download the list of enrolled devices as a CSV file and then upload it again with the new names. Follow these steps:
If you are using this option from:
a. Actions menu, only the devices selected in the devices section will be downloaded in the CSV file and will be renamed.
b. Device Groups, The devices that are part of device groups / Sub groups will be downloaded in a CSV file and will be renamed.
- In the Rename Devices dialog box, click on Rename using CSV file, which will bring up a dialog box as shown below.
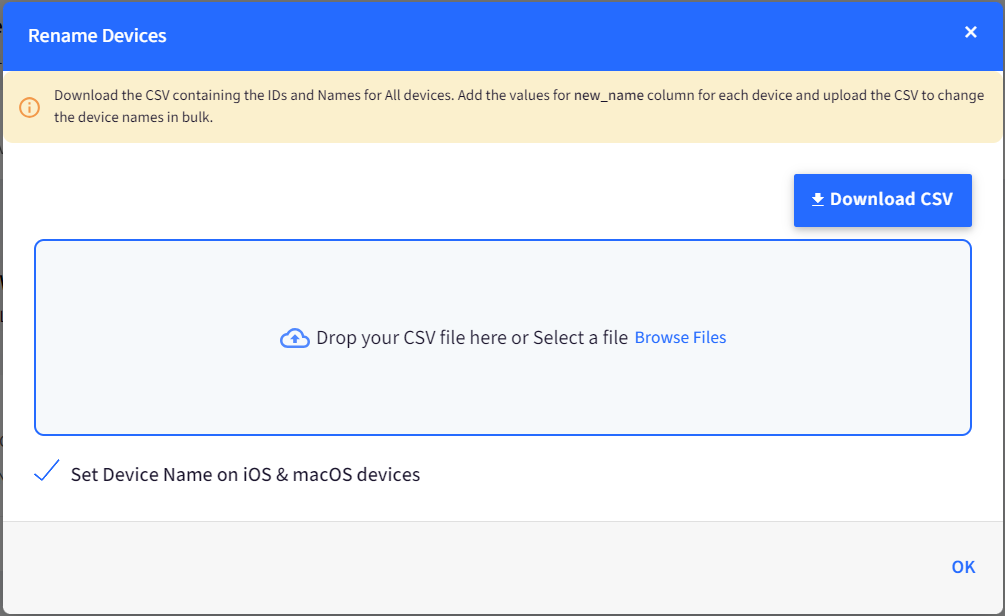
Set Device Name on iOS and macOS devices: If this flag is selected, the names will be updated on iOS & macOS devices also else only the names on Dashboard will get changed. - Now click on the Download CSV button. This downloads the CSV containing the IDs and current names for the devices. Add the new names under the New Name column for each device and save this CSV file.
.png)
- Now that you have added new names, upload the new CSV again by clicking on Browse files, locate the file that you have saved and upload it.
- You will get a confirmation message that the CSV has been uploaded successfully, and the new names of devices will be reflected in the Devices section immediately.
Option 2: New Custom Rule
Using this option, you can create a rule for changing the device names, like creating a rule to find a particular string or text and replace it with another or a rule for identifying complete names and changing them. When executed, rename the devices in bulk as per the rules defined. To define a custom rule and execute it, follow these steps:
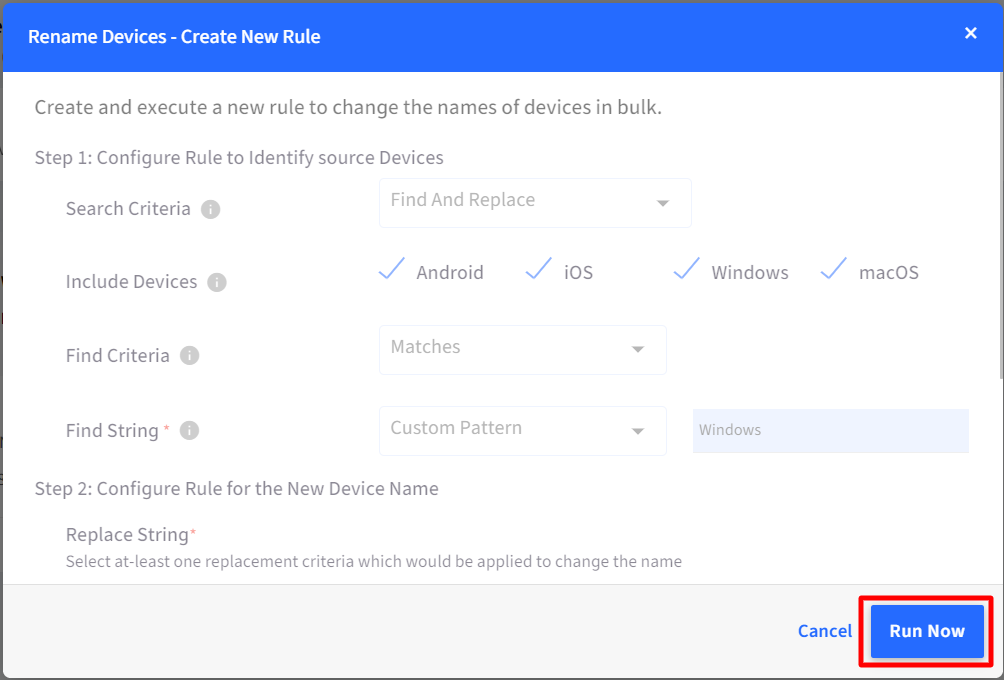
- In the Rename Devices dialog box, click on New Custom Rule, which brings up the following dialog box.
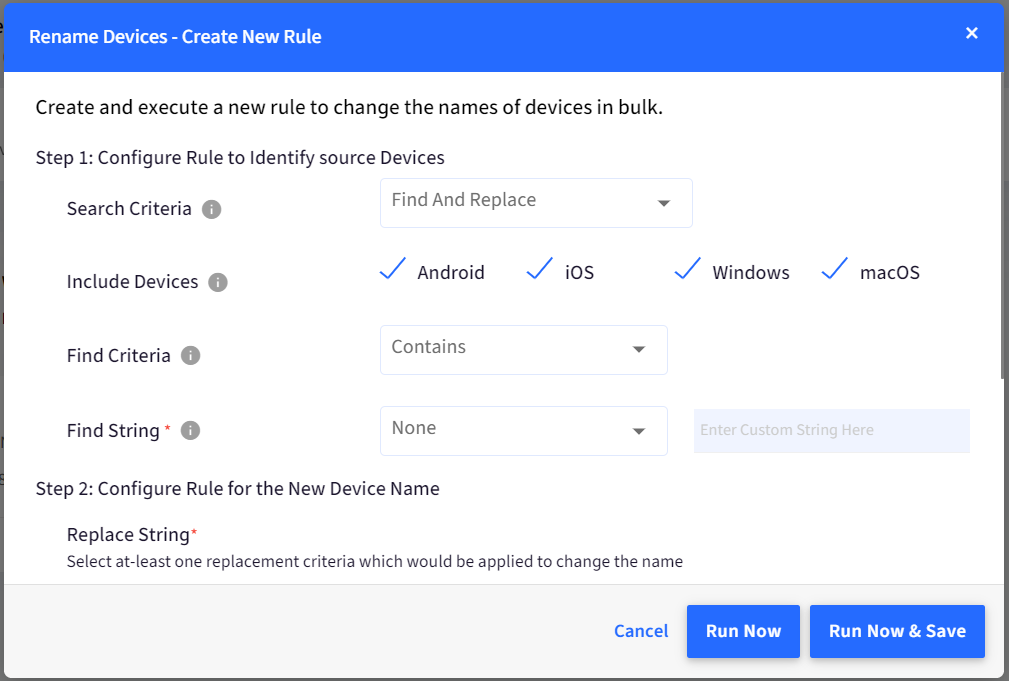
- In this, configure rules to identify the device's names and rules for replacing them with new names.
Step 1: Configure Rule to Identify Source Devices
Define the criteria to identify devices that have to be renamed.
| Criteria | Description |
| Search Criteria | The following are the options to choose from:
|
| Include Devices | Select the devices (basically platforms) that have to be targeted for renaming devices. |
| Select Criteria | The devices are filtered based on the criteria selected here. The following are the options to choose from:
|
| Find String | Provide the string that will be used to find the pattern with the below options:
|
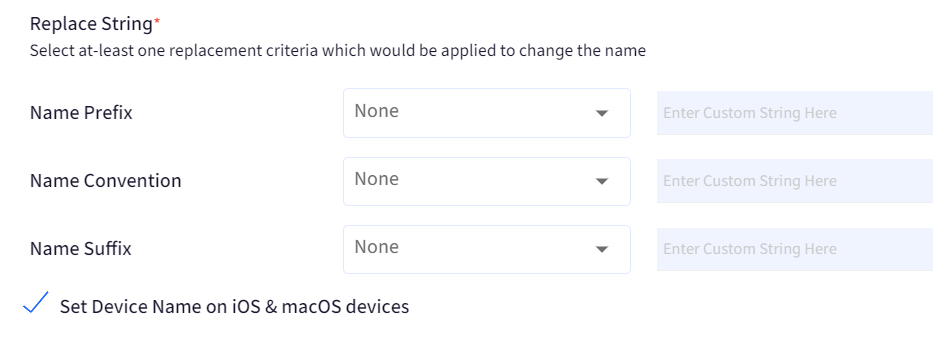
Step 2: Configure Rule for the New Device Name
Configure rules for renaming devices by selecting at least one replacement criteria from the following, which would be applied to change the name in conjunction with the rules defined for identifying source devices (Step 1 above):
- Name Prefix: Configure rule to set a prefix for the device name
- Name Convention: Configure the rule to set a middle part for the device name
- Name Suffix: Configure rule to set a suffix for the device name
- Set Device Name on iOS and macOS devices: If this flag is selected, the names will be updated on iOS & macOS devices also else only the names on Dashboard will get changed when the rule is run.
For all the replacement criteria, the following options are available to choose from
- None (selected by default)
- IMEI
- Serial
- Custom Fields (if any have been Defined)
- Custom String: Selecting this enables the text box next to itIt is mandatory to select at least one replacement criteria
Step 3: Enter a Rule Name to save
Here, you can provide a name for this rule so that it can be used later. With this, the rule gets saved and is available under the Saved Rules section (explained in a later section).
Once rules are configured, click on one of the following:
- Run Now: The rule gets executed, and devices are renamed with immediate effect
- Run Now & Save: The rule is executed, and devices are renamed with immediate effect. In addition, this rule gets saved so that it can be used later. It is visible in the Saved Rules section, where it can be applied for renaming other devices later.
- Cancel: Cancels the process of renaming of devices using the given rules
Saved Rules
If you have saved a new custom rule (using Run Now & Save), the same appears in the Saved Rules section. All you need is to just select the previously saved rule and execute it. This will help the same renaming strategy being used always.
Using Saved Rules
- In the Rename Devices dialog box, click on Saved Rules (The last one in the Rename Devices dialog box)
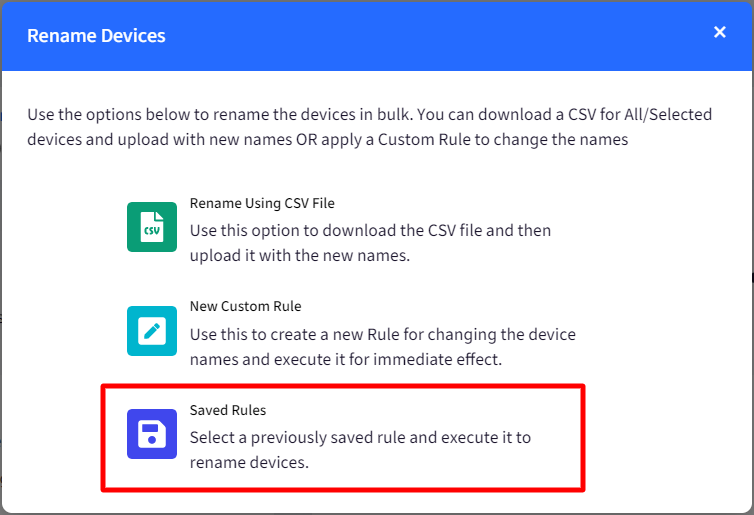
- This brings up a dialog box listing all the Saved rules
- Click on the icon Run Now on the right side of the rule name to execute it.

- A window (in read-only mode) comes up showing the details of the rule defined. Click on the Run Now button to apply the rule.
The devices will be renamed.


.png)


