- 26 Sep 2023
- 2 読む分
- 印刷する
- PDF
Custom Payload for iOS
- 更新日 26 Sep 2023
- 2 読む分
- 印刷する
- PDF
Configuration profiles streamline the process of setting up a large number of devices. Custom calendar and email settings, network settings (like WiFi and VPN settings), certificates, and device restrictions, are some of the properties you can configure using configuration profiles. Scalefusion provides IT Admins the option of deploying configuration profiles onto the devices.
By using the Custom Settings feature of a Scalefusion iOS Profile, IT Admins can use a top-notch XML editor and push a Custom Payload directly to the devices. Hence, with this, admins will now be able to add those features for Mac and iOS that are not yet offered under Scalefusion.
In this document, we will understand how to configure and push a custom settings payload to the device.
Prerequisites
- Understanding of Apple MDM Protocol
- Ability to create XML payloads basing on Profiles created using Apple Configurator 2 or as listed here.
Steps
- Sign In to Scalefusion and navigate to Device Profiles.
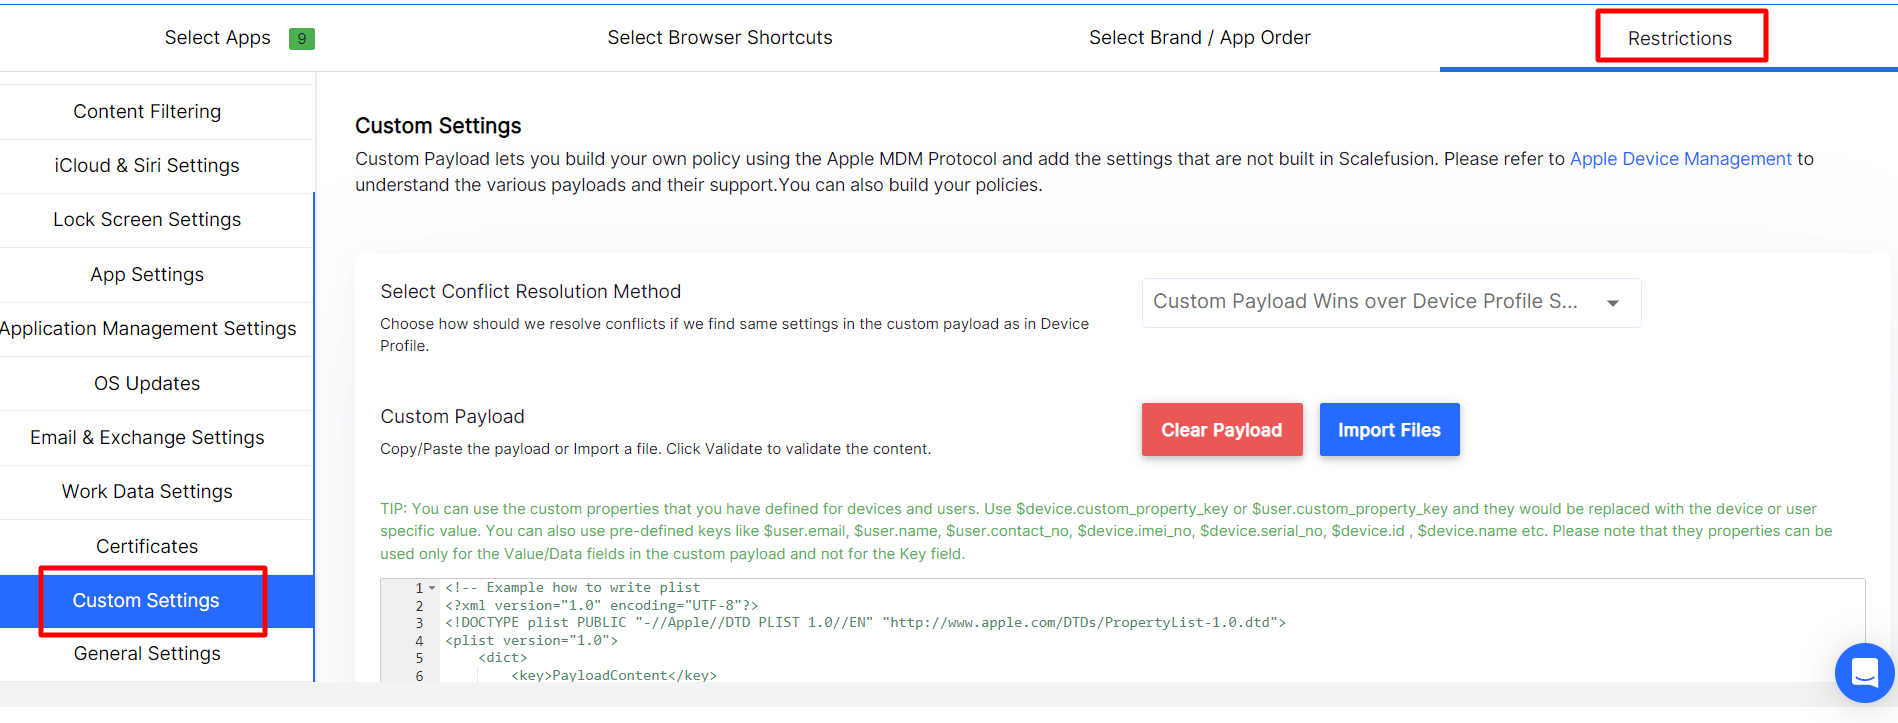
- Select an iOS device profile and edit or create a new iOS profile to start adding the custom settings. Navigate to Restrictions > Custom Settings.

- Select Conflict Resolution Method: In case the custom payload that you upload conflicts with the rest of the settings in the Device Profile (like Wifi, Exchange settings etc.), this setting decides which one to use to resolve those conflicts. The options are,
- Custom Payload Wins over Device Profile Settings: The settings in custom payload are given preference over Device Profile.
- Device Profiles Wins over Custom Payload: The settings in Device Profile are given preference over Custom Payload.
Select an option based on your payload, If you want to override what is being set from Device Profile, choose Option a else choose Option b
- Custom Payload: This is the actual payload editor, and you can either choose to Type In your payload or Import an XML file using the IMPORT FILESoption.
- Payload Editor: Here is an example of a payload for configuring Wi-Fi on the device.

- Validate: Once you have entered the payload click on VALIDATE tomake sure there are no other syntactical/validation issues.
- ALL OK: If the entered payload is all good a green tick is displayed on the top-right section of editor.

- ERRORS: If there are errors then a red cross is displayed on the top-right section of editor and the first error will be displayed below the editor,

- ALL OK: If the entered payload is all good a green tick is displayed on the top-right section of editor.
- Payload Editor: Here is an example of a payload for configuring Wi-Fi on the device.
- Update Profile: Once you have made the required changes, click on UPDATE PROFILE to save the changes and push them to all the devices associated with this profile.
Custom Properties in Custom Payload
Custom Properties, defined for devices and users, can also be used in custom payloads.
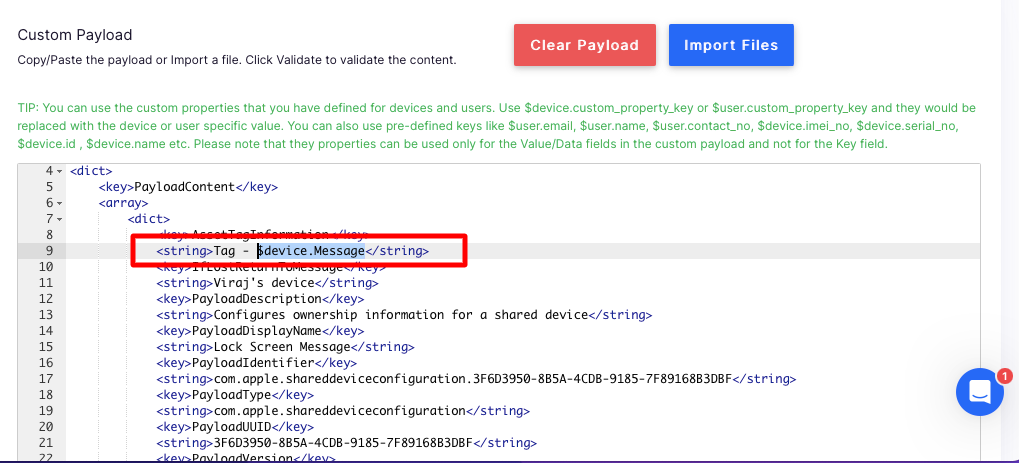
- Use $device.custom_property_key or $user.custom_property_key and they would be replaced with the device or user-specific value.

- You can also use pre-defined keys like $user.email, $user.name, $user.contact_no, $device.imei_no, $device.serial_no, $device.id , $device.name etc.
Please contact us at support@scalefusion.com if you have any questions or need support on using this feature.


