Configuring any SAML 2.0 service as Identity Provider
- 10 Feb 2025
- 1 読む分
- 印刷する
- PDF
Configuring any SAML 2.0 service as Identity Provider
- 更新日 10 Feb 2025
- 1 読む分
- 印刷する
- PDF
The content is currently unavailable in Ja - 日本語. You are viewing the default English version.
記事の要約
この要約は役に立ちましたか?
ご意見ありがとうございます
SAML 2.0 (Security Assertion Markup Language 2.0) is an open standard for single sign-on (SSO) and identity federation. It is widely used for securely exchanging authentication and authorization data between identity providers (IdPs) and service providers (SPs).
This article provides a step-by-step guide to any SAML 2.0 service as the Identity Provider for all the services you use.
Prerequisites
Please ensure you have created the SSO configuration for the service you want to access and set the SAML service as its Identity Provider.
Also, ensure that the user(s) is present in the SAML service and the respective service portal you are trying to access.
The same user(s) must be present in Scalefusion and the SSO configuration of the respective service is applied to it.
Step 1: Configuring SAML 2.0 as an Identity Provider on Scalefusion dashboard
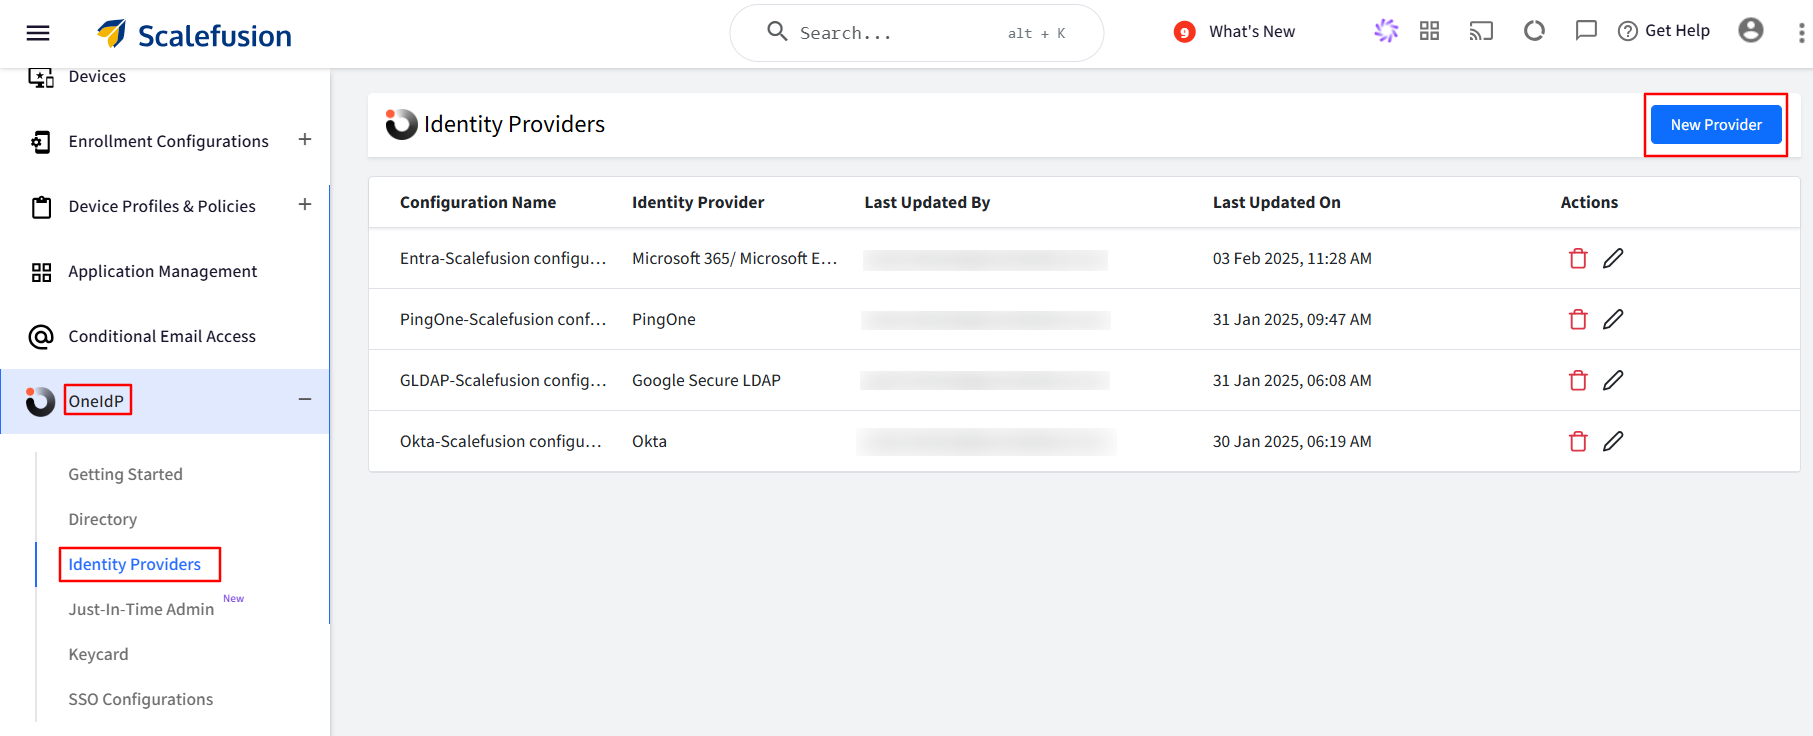
Navigate to OneIdP > Identity Providers.
Click on the New Provider button.
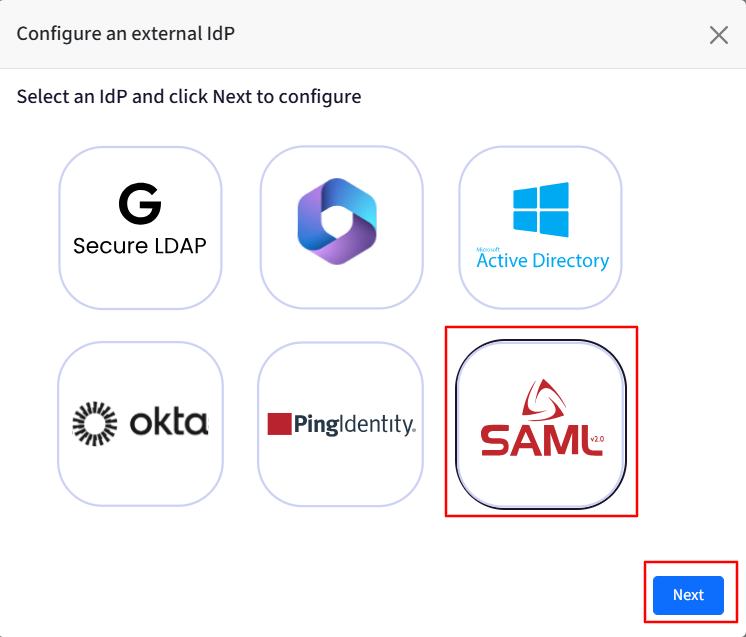
Select SAML 2.0 and click on Next.
Provide a name to this configuration for easy identification.
You will need to add the OneIdP Service Provider Details in the SAML service portal that you are setting as the Identity Provider.
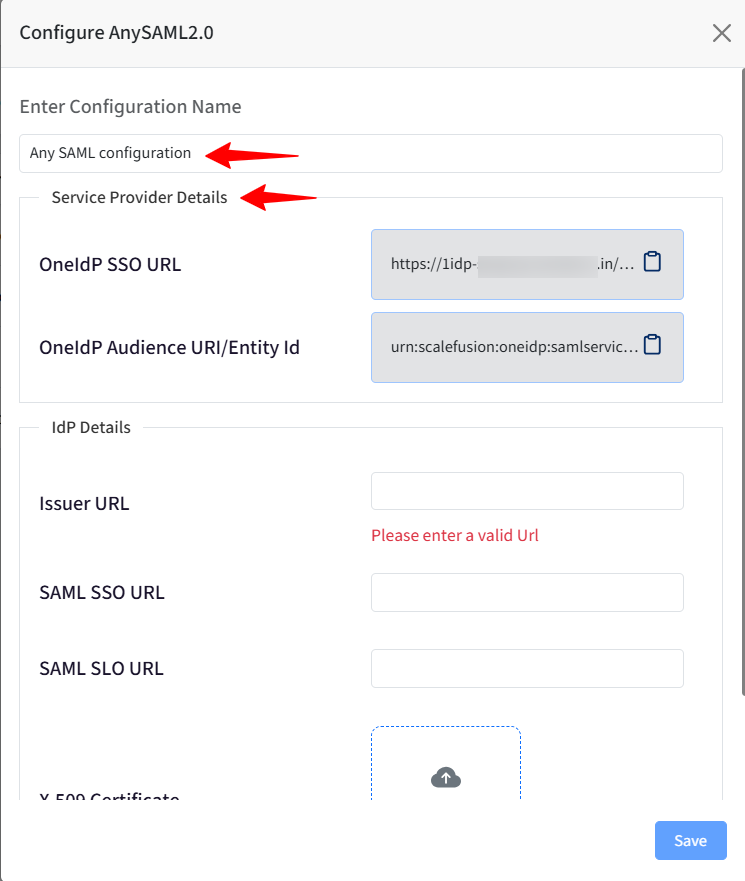
You will need to copy the IDP details from the SAML service portal that you are setting as the Identity Provider and add them to the Scalefusion dashboard.


Step 2: Associating any SAML Identity Provider with a Directory
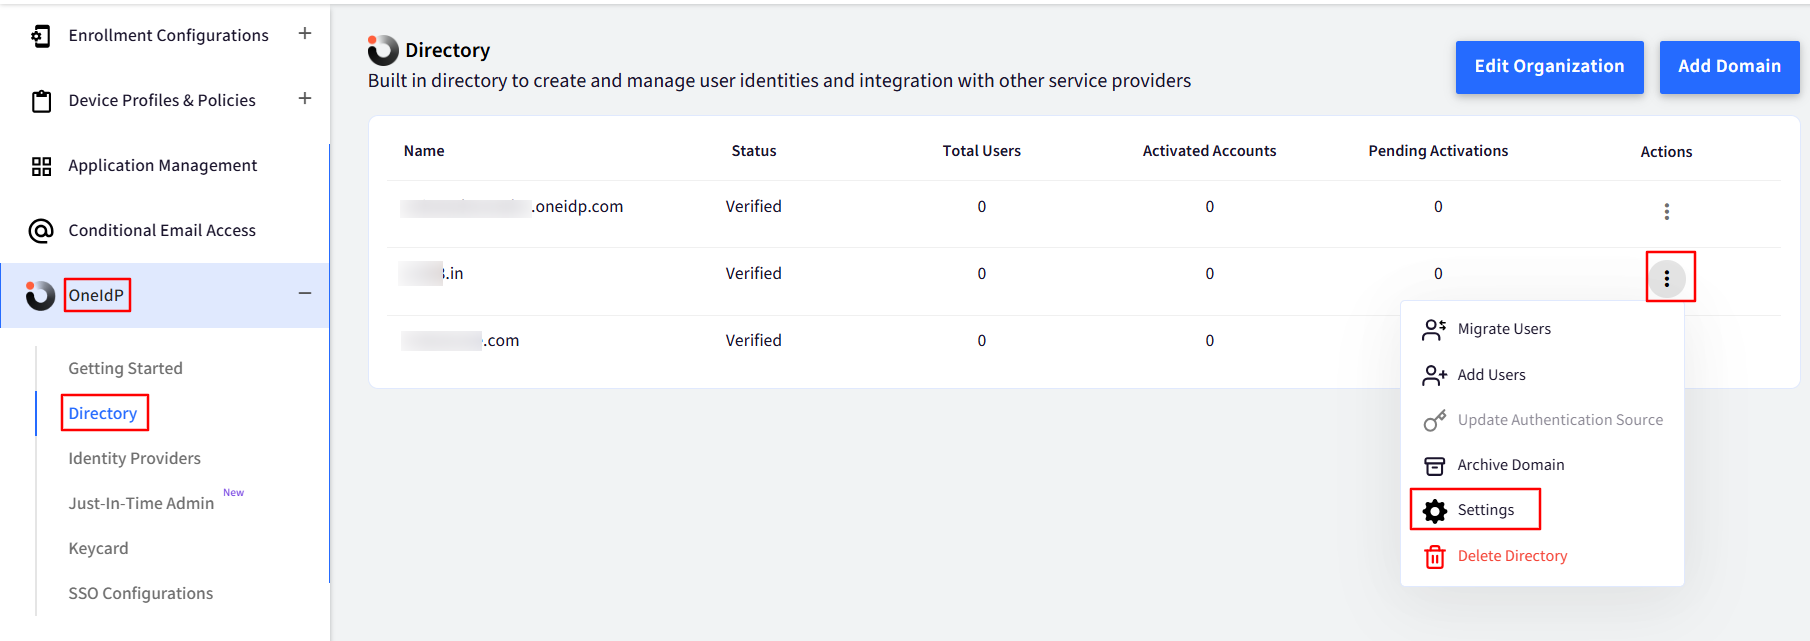
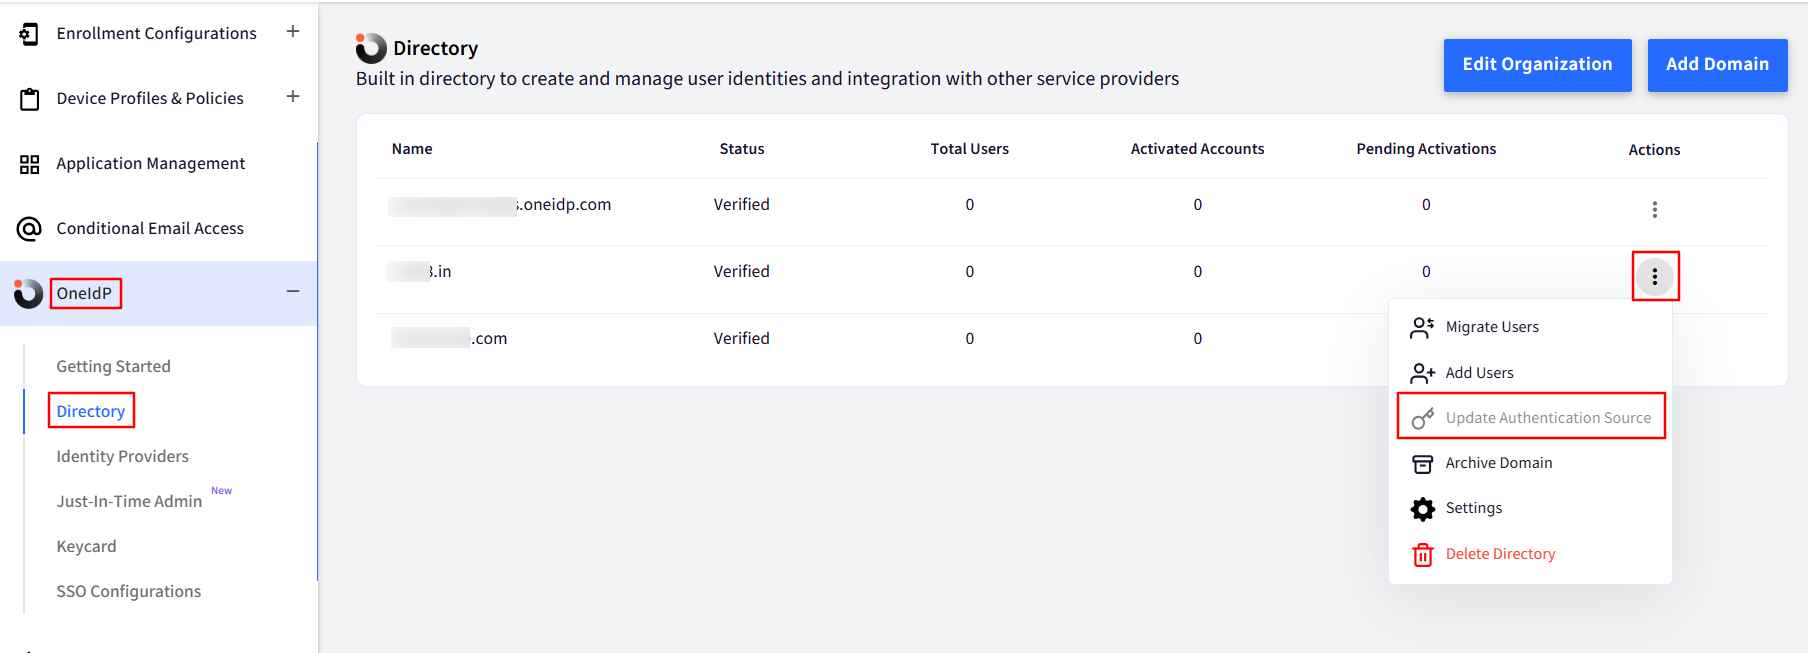
Navigate to OneIdP > Directory.
Click on the 3-dots under Actions for the concerned Domain.
Click on Settings.
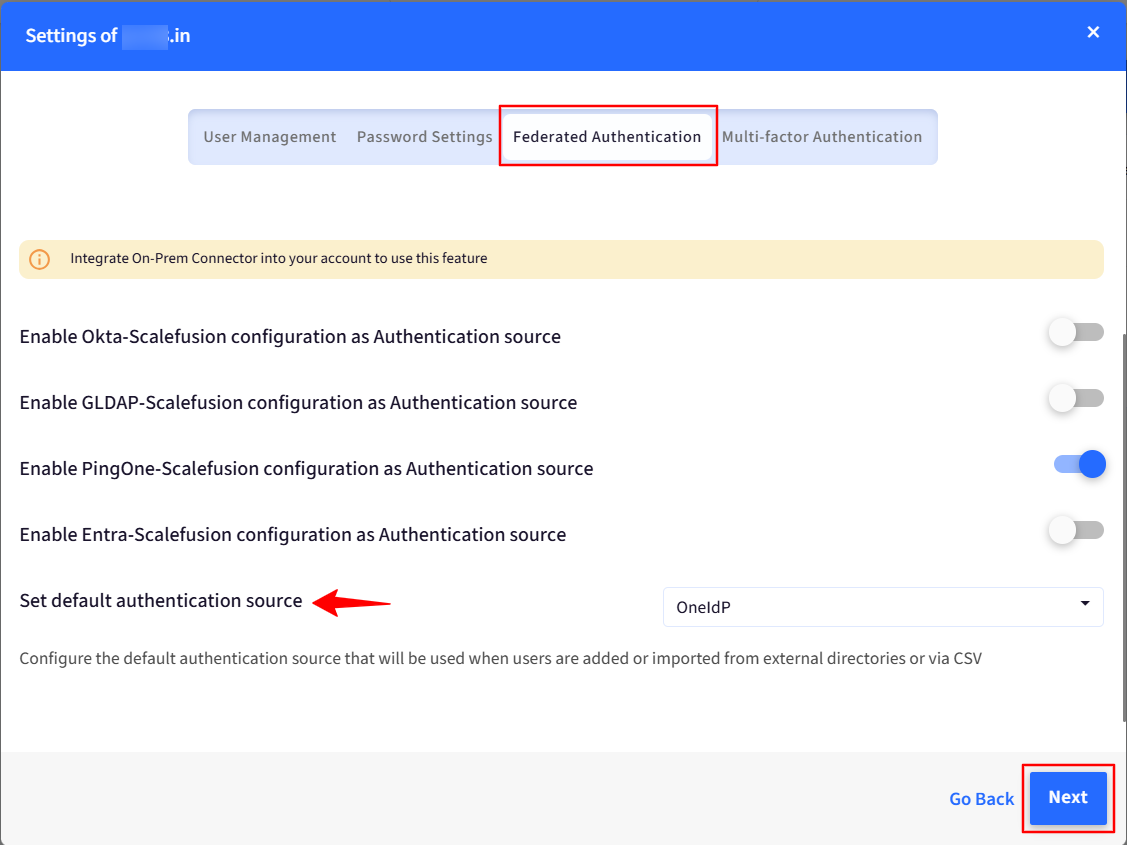
Go to the Federated Authentication tab and toggle on the button for the configured SAML service as an Authentication source.
You can also “Set default authentication source”.
On setting a default authentication source, whenever you add any new user in the Scalefusion dashboard and migrate it to OneIdP, the default Authenticator would be the configured SAML service.
Click on Next and Save.
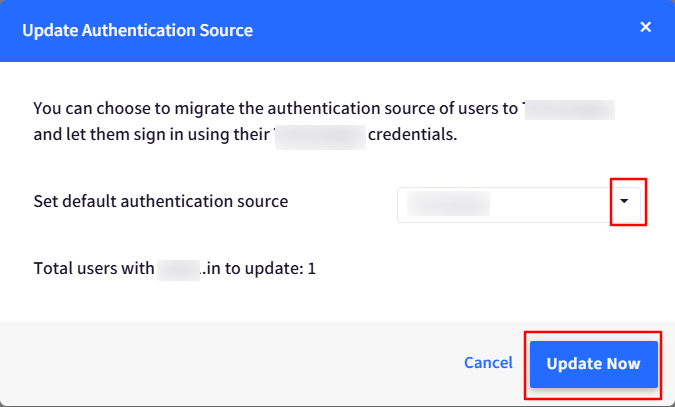
For existing users that are present in the Scalefusion dashboard, you can change the default authentication source by going to 3-dots under Actions > Update Authentication Source.
Select the configured SAMl service from the drop-down list for “Set Authentication Source” and click on Update Now.


User Login Flow
When the user enters their email on the service login page, they will be redirected to OneIdP. From there, OneIdP will redirect the user to the chosen identity provider (SAML 2.0, in this case) for authentication. Once the identity provider authenticates the user, they will be granted access to the service.
この記事は役に立ちましたか?