- 28 Oct 2024
- 9 読む分
- 印刷する
- PDF
Configure Browser Configurations on Windows 10 and above Devices
- 更新日 28 Oct 2024
- 9 読む分
- 印刷する
- PDF
Google Chrome, Microsoft Edge and Firefox are a couple of the widely adopted browsers. If you are an organization where either of the browsers is being widely used, then Scalefusion's management console offers you a myriad of settings that lets you control and provide a safe and secure browsing experience.
Scalefusion offers the following features that can be controlled for these browsers:
Allow Websites: Please refer to our help document on how to allow websites in Google Chrome, Microsoft Edge and Firefox.
Browser Configurations: A collection of settings divided into the multiple sections to get a granular control on Google Chrome, Microsoft Edge and Firefox. This document helps you understand the various settings and how to use them.
Before you Begin
Create a Windows Device Profile
Ensure that Google Chrome or Microsoft Edge or Firefox is installed on all the Windows 10 devices.
Configuring Browser Configurations
Navigate to Device Profiles & Policies > Device Profiles and either edit an existing Windows profile or create a new Windows profile.
Click on Browser Configurations to configure these settings.

Browser Configuration settings
Note:
In the Settings wherever you see the Chrome and Edge icons
, those settings are only supported on Chrome and Edge browsers.
1. Policy Targets
Here you can select on which browser the configurations should apply. You can select either Chrome, Edge or Firefox. Or you can select all.

2. Start Up
This section offers you the settings to control the startup experience. The options are:
HomePage: Choose to
Allow users to Control.
Open a New Tab.
Launch below URL.
Home Page URL: Enter URL of website that should open when you click on Home button of chrome/edge/firefox browser.
Launch URLs: Enter URLs of websites that should open on launch of chrome/edge/firefox browser. You can add multiple URLs which will open in separate tabs at the launch of browser. The URLs you enter should be separated by comma.
HomeButton
Configure if you want to enforce the "Home" button or hide it.

3. User Experience
This section lets you control the various user experience related items:
Bookmark Folder Name: Provide a name for the bookmark bar.
Note: Empty bookmark folder names will not show up until a bookmark is added.
Bookmark Bar: Configure Bookmark bar visibility, you can either enforce it or disable it or let users control it. This setting is supported only on Chrome and Edge.
Developer Tools: Choose to Allow or Disable developer tools. Allowing it will allow the use of F12 key or Inspect option on webpages.
AutoFill: Select AutoFill behavior by enforcing it, disabling it or having users control it.

4. Content
This section lets you control the policies related to web content. The options are:
Cookie Policy: Define a Cookie policy by allowing or blocking them. You can also choose to delete them once the browser is closed.
Run Javascript: Configure if Javascript is allowed to run. Please note that most modern websites need Javascript to be allowed.
Popups: Configure of popups are allowed to be displayed or blocked.
Flash Plugins: Allows you to set whether websites are allowed to automatically run the Flash plugin.
Google Web Search: Configure if SafeSearch in Google Search is always active.
YouTube Restriction Mode: Enforces a minimum Restricted Mode on YouTube and prevents users from picking a less restricted mode.
Extend Allowed Website List Rules: You can choose to extend the Allowed Websites that you have allowed by the following options:
Allow only the URLs in Allowed Website section: Default option.
Allow the domains of the URLs in Allowed section: Allows the domains of the URLs that are allowed. e.g: If https://scalefusion.com is allowed, then all URLs from "scalefusion" domain are allowed.
Allow All Except below: Allow all websites except the ones entered in the text input below, that is specify a blocked list. Please enter the websites in the format https://www.chromium.org/administrators/url-blacklist-filter-format

5. Security
Use this section to enforce the following security policies:
Password Manager: If this setting is disabled, users cannot save new passwords, but they may still use passwords that have been saved previously.
Incognito Mode: Specifies whether the user may open pages in Incognito mode.
Browser History: Control if browsing history should be saved.
Clear Browser History: Control if users can delete browsing and download history.
Note that even with this policy disabled, the browsing and download history are not guaranteed to be retained: users may be able to edit or delete the history database files directly, and the browser itself may expire or archive any or all history items at any time.
Malicious Sites: Prevent users from proceeding anyway from the warning page to the malicious site.
Note: This policy only prevents users from proceeding on Safe Browsing warnings (e.g. malware and phishing) not for SSL certificate related issues like invalid or expired certificates.
Note:
This is a Google Chrome specific setting and DOES NOT work on Microsoft Edge.
GeoLocation: Allows you to set whether websites are allowed to track the users' physical location. Tracking the users' physical location can be allowed by default, denied by default or the user can be asked every time a website requests the physical location.
Browser SignIn: This policy controls the sign-in behavior of the browser. You can Allow, Block or Force the users to SignIn using their managed account.
Force Ephemeral Mode: If set to Erase after session, then the profile data is persisted on disk only for the length of the user session. Features like browser history, extensions and their data, web data like cookies and web databases are not preserved after the browser is closed. However, this does not prevent the user from downloading any data to disk manually, save pages or print them.
Configure Sidebar Visibility in Microsoft Edge: This policy controls hiding or showing the sidebar. This will disable/enable sidebar containing copilot or any other quick links.

6. Network
Use these settings to configure proxy settings. The options are:
User Control: Let users control the setting.
Never Use Proxy: Enforce direct connection.
Auto-Detect Proxy: Auto-Detect proxy based on system settings.
Use Proxy URL: Specify a valid https(s) URL defining the proxy rules.
Provide the proxy URL in the Proxy URL field.
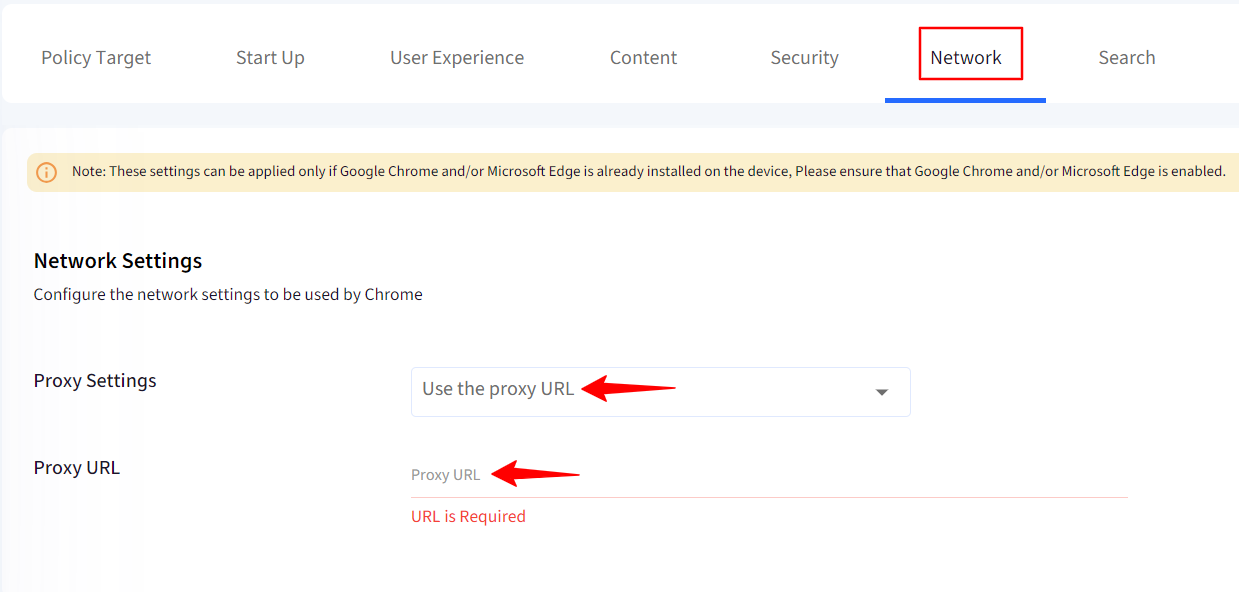
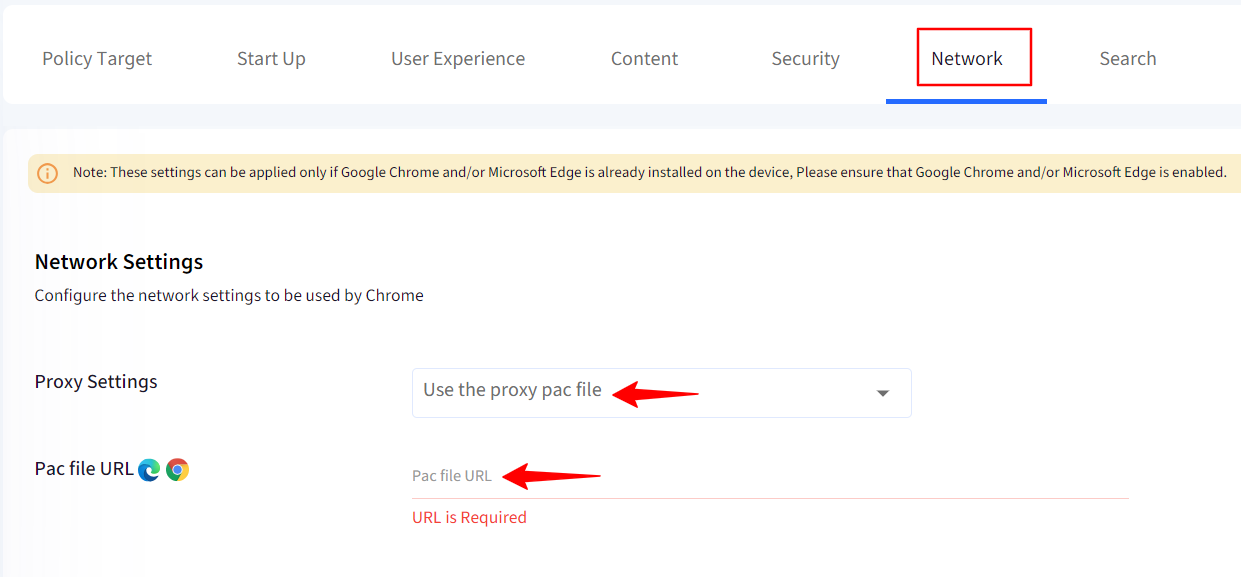
Use the proxy Pac File: Provide a URL for a file containing the proxy rules.
Provide the Pac file URL in the Proxy URL field.
7. Search
Configure the search settings.
Search Suggestions: Enable or disable search suggestions in omnibox and prevents users from changing this setting.
Default Search Provider: Lockdown the default search provider by providing the following details.
Search Provider Name: The Search provider’s name.
Search Provider Keyword: Specifies the keyword, which is the shortcut used in the omnibox to trigger the search for this provider.
Search Provider URL: Should be in the format of https://<url>q{searchTerms} e.g: https://bing.com/search?q{searchTerms}
Search Provider Icon: Optionally provide the icon for the search provider.

8. Printing
Use this section to configure the Printing options.
Printing Settings: If this setting is enabled or not configured, users can print. If this setting is disabled, users cannot print from the browser. Printing is disabled in the wrench menu, extensions, JavaScript applications, etc.
Note: It is still possible to print from plugins that bypass Google Chrome while printing. For example, certain Flash applications have the print option in their context menu, which is not covered by this policy.
Google Cloud Print: Allow or Block documents to be submitted to Google Cloud Print.
Cloud Printer Management: Allow or Block users to add or remove cloud printers.
Note:
Google Cloud Print and Cloud Printer Management are Google Chrome specific setting and DOES NOT work on Microsoft Edge and Firefox.

9. Extensions
In this section configure extension management settings.
Extension Management Policy: You can choose to keep:
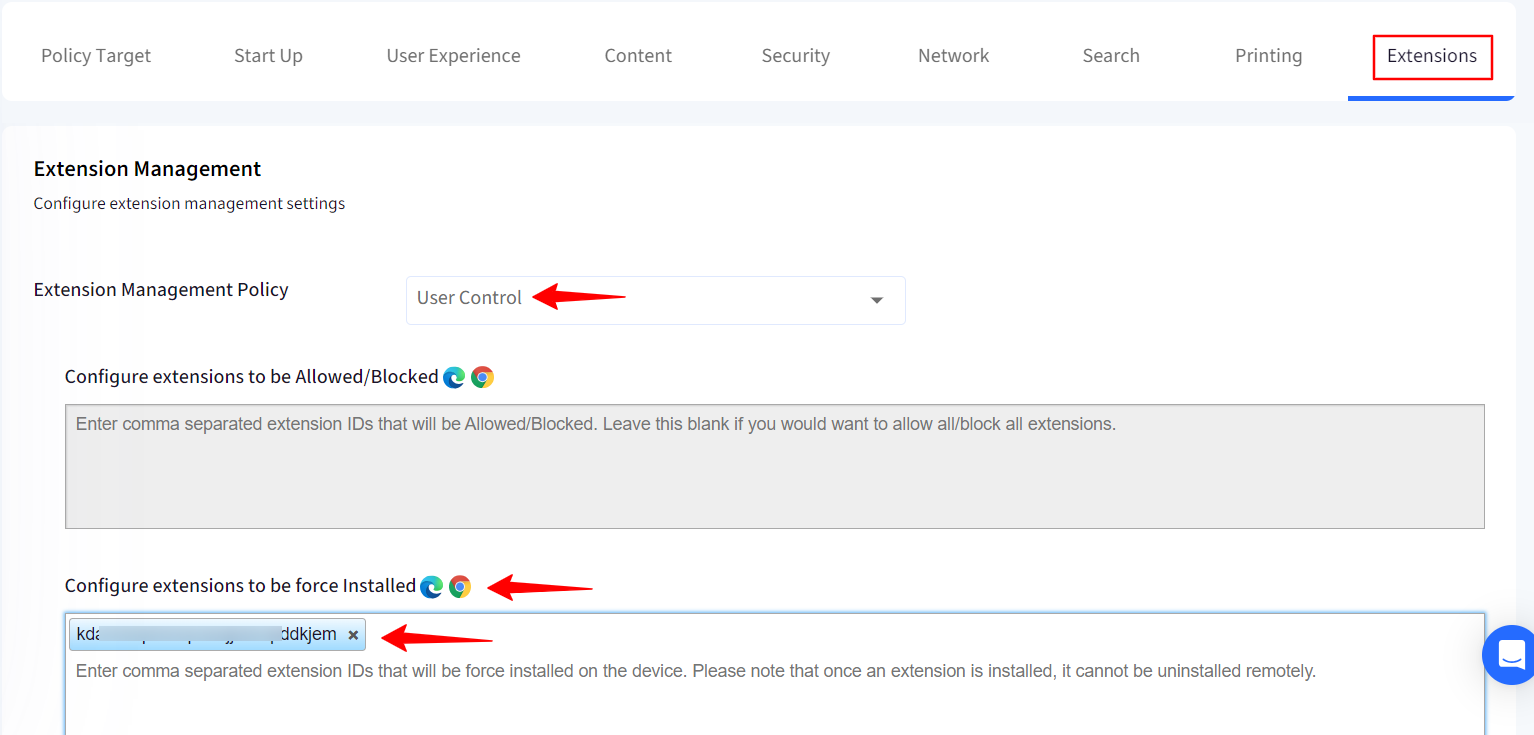
User Control: Give users the control to add extensions of their choice.
Additionally, you also force install the extensions by adding extension IDs to Configure extensions to be force Installed field.
The Configure extensions to be Allowed/Blocked field will be greyed out if User control is selected.
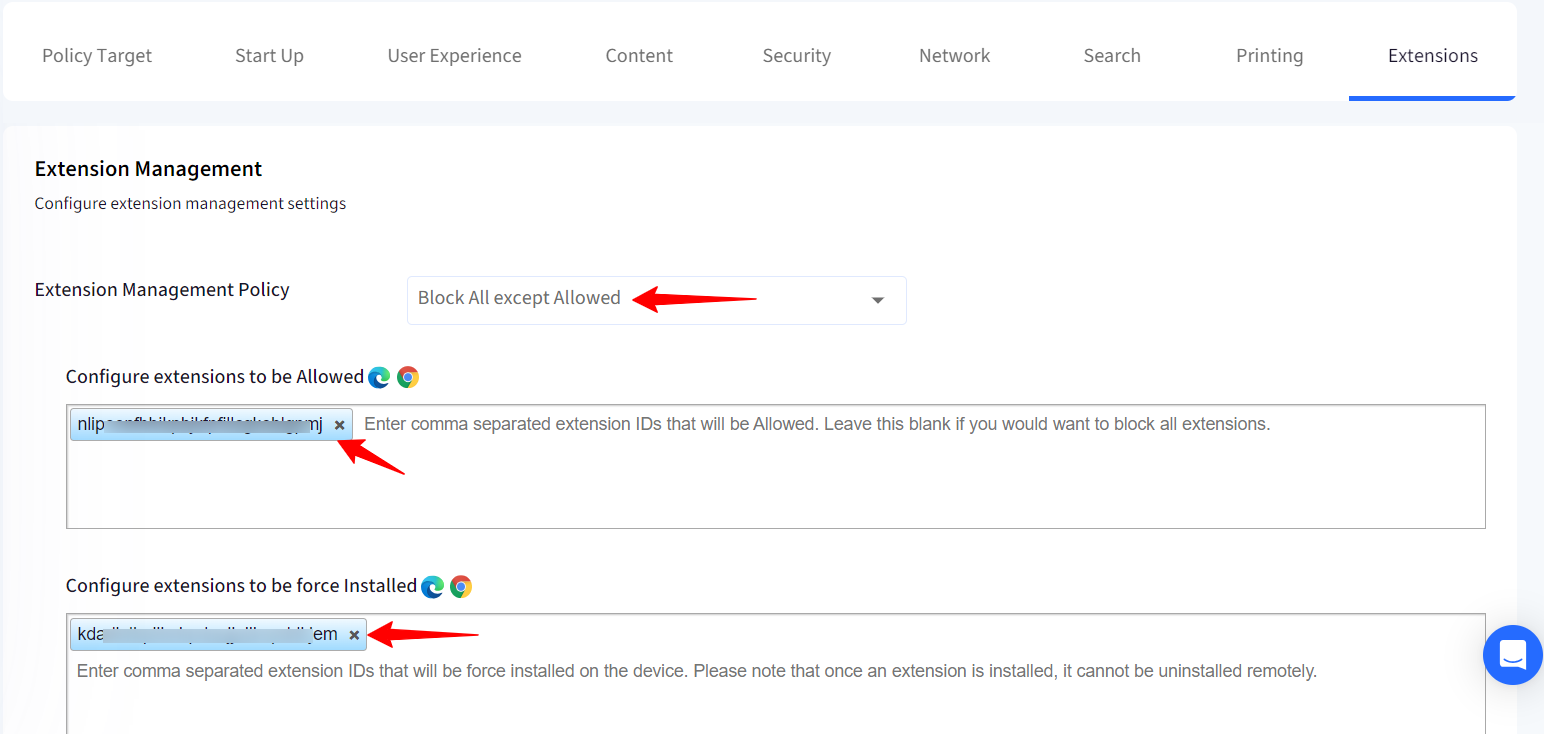
Block All except Allowed: You can block the users from adding any extension which is not allowed. Add the allowed extension IDs in Configure extensions to be Allowed field.
Alternatively, you can leave this field blank if you want to block all extensions.
Additionally, you also force install the extensions by adding extension IDs to Configure extensions to be force Installed field.
Allow All except Blocked: You can allow users to add any extension while making sure certain extensions are blocked. Add the blocked extension IDs in Configure extensions to be Blocked field.
Alternatively, you can leave this field blank if you want to allow all extensions.
Additionally, you also force install the extensions by adding extension IDs to Configure extensions to be force Installed field.
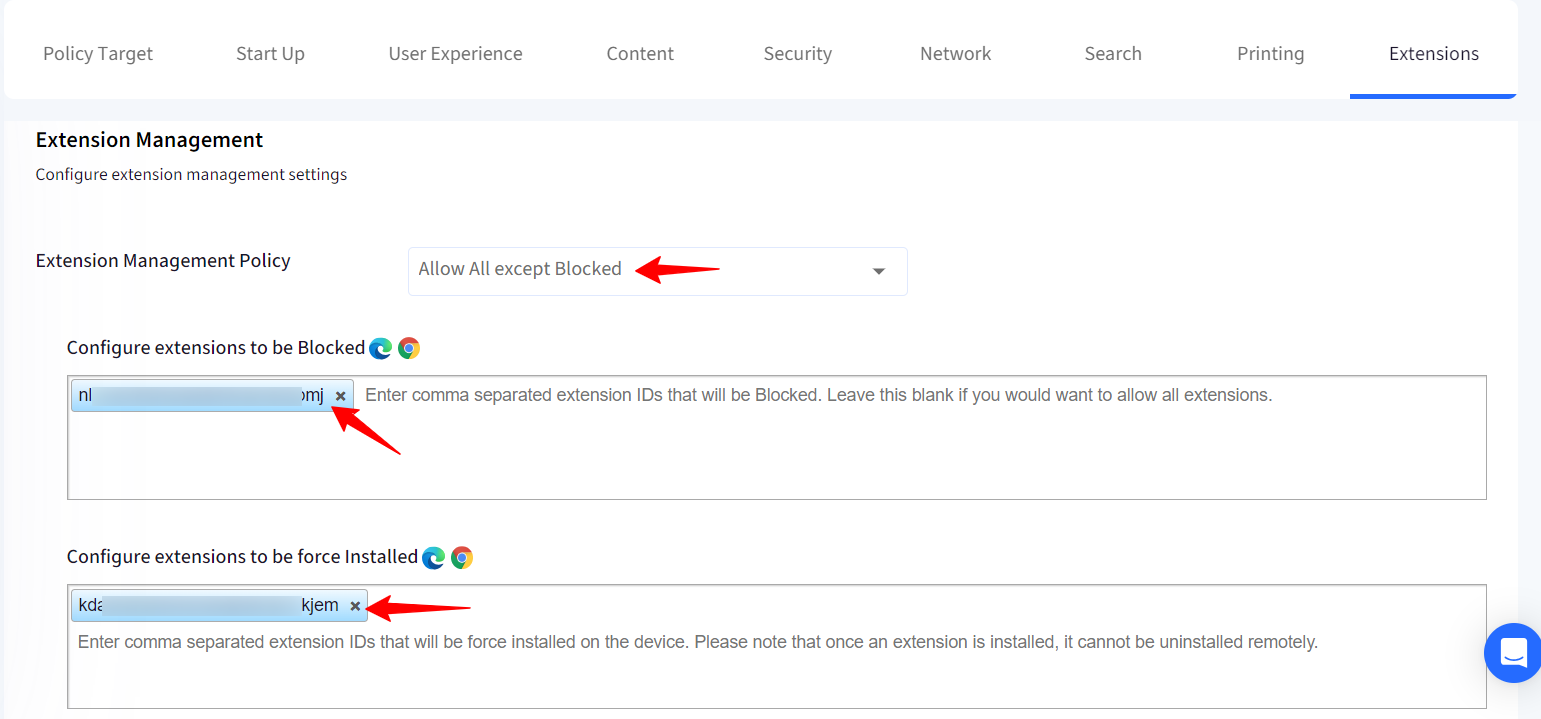
Configure extensions to be Allowed/Blocked/Installed (Firefox): Mozilla Firefox uses XPI file format to Allow/Block/Install extensions. Please generate and upload XPI files to Content Management section. All XPI files will be listed here for selection. Based on the selection in the Extension Management Policy, the options in this section will become active.
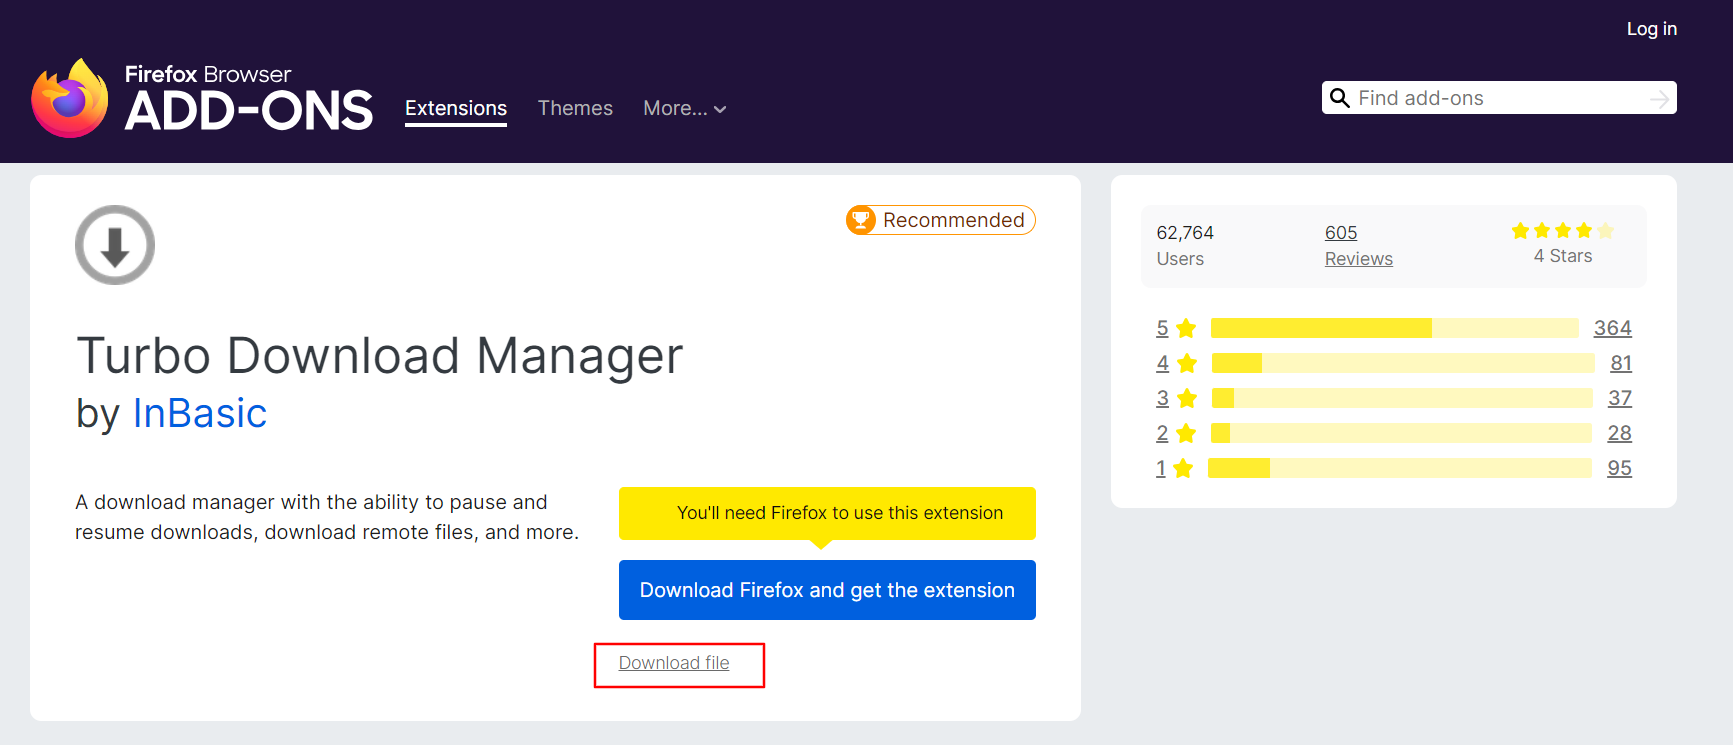
Add-ons for Firefox browser: You can easily find and download the add-on (extensions) for Firefox browser by going to https://addons.mozilla.org/en-US/firefox/
Search for the add-on that you would like to allow/block/install on the browser. For example,

Click on the Download File hyperlink to download the XPI file.
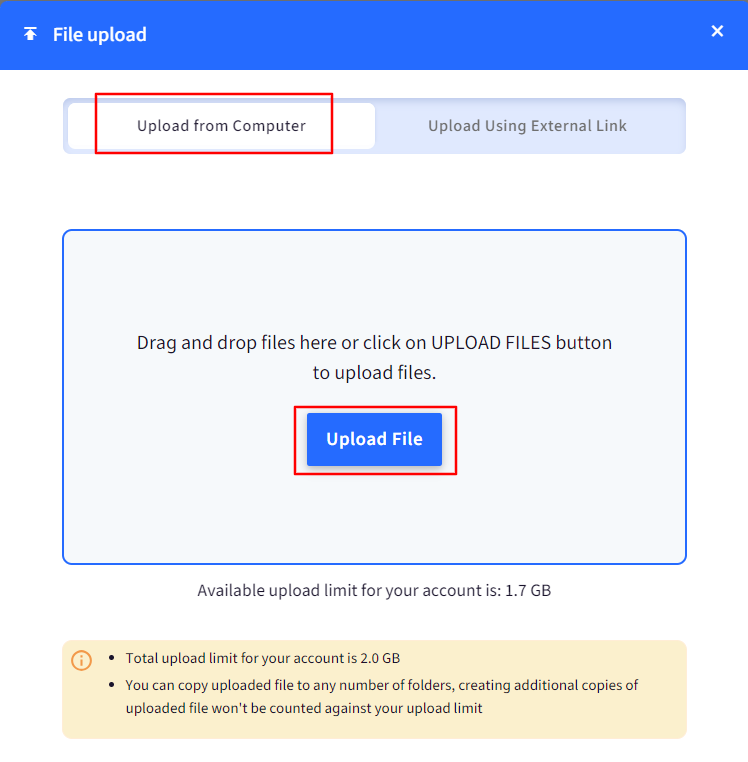
Upload the XPI file in Content Management: Once the XPI file is downloaded, upload it in Content section on the dashboard.
Navigate to Content Management > Content > click on Upload File button.

Click on Upload file to upload the XPI file from your computer.
Once the file is uploaded, go back to Windows Device Profile > Browser Configuration > Extensions.

In the Configure extensions to be Allowed/Blocked/Installed section you will see the uploaded XPI file, and you allow/block/force install it for Firefox browser.
If you have selected User Control in Extension Management Policy, then you will see the option to Install next to the XPI file name.

If you have selected Block All except Allowed in Extension Management Policy, then you will see the option to Allow/Install next to the XPI file name. Hence, you can either allow users to install this extension or you can force install it.

If you have selected Allow All except Blocked in Extension Management Policy, then you will see the option to Block/Install next to the XPI file name. Hence, this extension will be blocked, that it, users will not be able to add it, or you can force install it.

Note:
To search for the Chrome Extension ID, go to https://chromewebstore.google.com/ and search the respective extension.
Select the extension and copy the ID from the address bar as highlighted in below image.
Note:
To search for the Edge Extension ID, go to Microsoft Edge Add-ons and search the respective extension.
Select the extension and copy the ID from the address bar as highlighted in below image.
Once you have made the required settings, click on NEXT > UPDATE PROFILE to save the changes to the profile. Once a profile is saved the changes are pushed to all the devices in the profile.
Note:
1. The policies are applied only to the devices where Google Chrome, Microsoft Edge and Firefox is pre-installed.
2. Some policies require the Google Chrome and/or Microsoft Edge to be restarted and are applied only on browser restart.
Known Issues
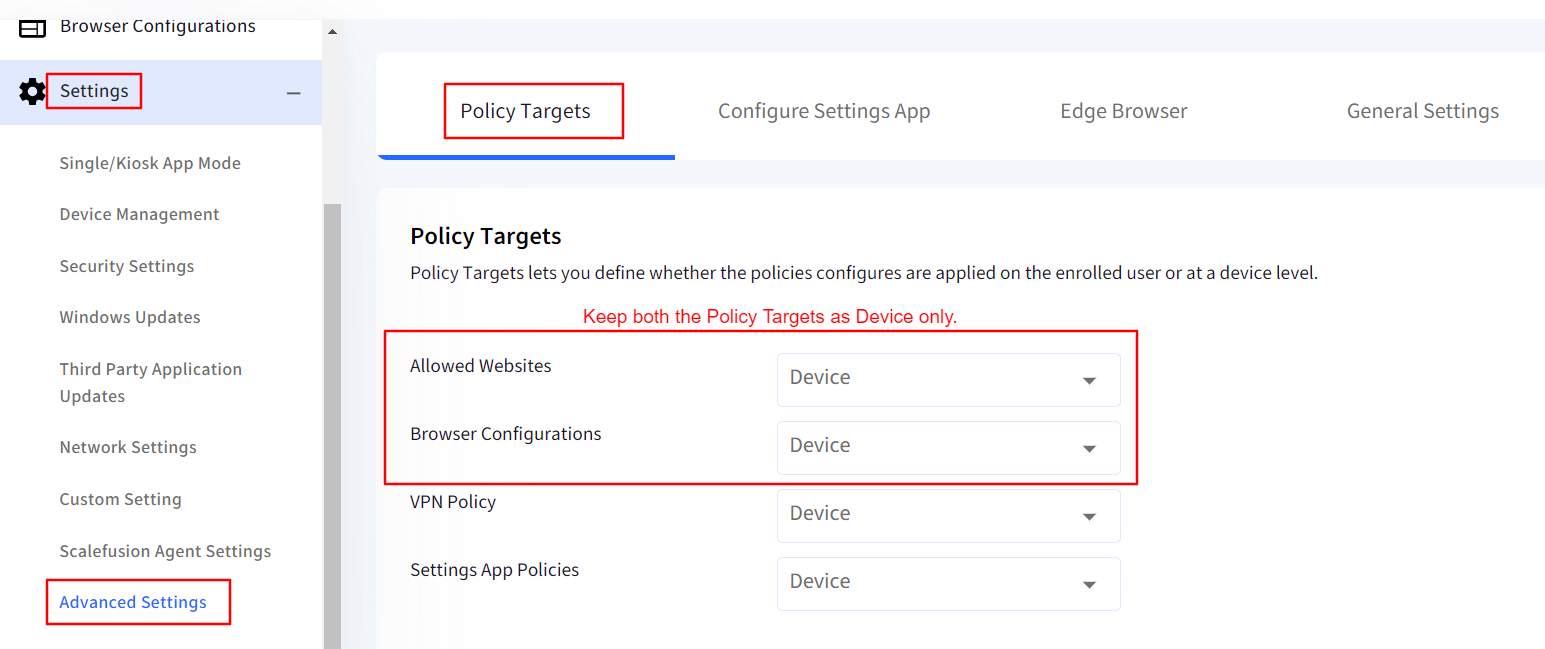
In the Policy Targets if the Allowed Websites is selected as Enrolled User, then the Allowed websites settings in Firefox will not work on the device for any user. You will need to keep this at Device only.
In the Policy Targets even if the Browser Configurations is selected as Enrolled User, it will not make any difference as the configurations will work at a Device Level only in Firefox, that is, it will be applied on the all the users on the device.
Frequently Asked Questions
Question: Can we enforce users to use Google Chrome instead of Microsoft Edge?
Answer: Yes. You can choose to block Microsoft Edge using the Application Policy in Device Profile. This will force the users to use Google Chrome.


 , those settings are only supported on Chrome and Edge browsers.


