- 27 Sep 2023
- 4 読む分
- 印刷する
- PDF
Application Management via Windows Business Store
- 更新日 27 Sep 2023
- 4 読む分
- 印刷する
- PDF
Scalefusion allows you to distribute your Enterprise Applications or Line of Business applications that are not available on Windows Business Store by allowing you to upload your applications to Scalefusion and then deploying them to managed Windows 10 devices.
However if your organization uses Azure Active Directory and the Windows 10 devices are managed using Azure AD then you can leverage Windows Business Store and push applications from Windows Business Store. Scalefusion integrates with Windows Business Store and allows IT Admins to sync the application inventory and install them to managed Windows 10 devices.
In this document we would see how to integrate Windows Business Store in Scalefusion and deploy applications.
Prerequisites
- Sign in to Scalefusion using Office 365/Azure AD
- Complete Azure AD setup and enroll the devices using Azure AD.
- Have access to Windows Business Store
Step 1: Integrate Windows Business Store in Scalefusion
The first step is to integrate Windows Business Store in Scalefusion. Assuming that you have completed the prerequisites as mentioned above, perform the one time step below to integrate Business store.
- Navigate to Enterprise > My Apps > Store. Here, click on Microsoft Business Store. Scalefusion requires additional permissions to sync applications from your Business Store. Click Authorize to provide Scalefusion the required permissions.

- You will be redirected to Office 365 sign in page. Select your account and click on Accept to grant the permissions,
(1).png)
- You will be redirected to Scalefusion portal and the screen will be updated to as shown below, indicating that this Windows Business Store is integrated.
 NOTE: Sometimes even after granting the permissions, you might still see the Authorize screen. Click on Authorize and perform the same steps as above.
Step 2: Activate Scalefusion in Business Store
The next step is to Activate Scalefusion as the distribution source for your business applications. This one time step needs to be done in Windows Business Store.
- Sign In to Windows Business Store using the same credentials that you use on Scalefusion portal. Once signed in click on Manage
(1).png)
- Click on Settings > Distribute
(1).png)
- Scroll down on the distribute screen to find + Add Management Tool option and click on it.
(1).png)
- In the Add management tool option search for Scalefusion and click Add
(1).png)
- Once Scalefusion is added, click Activate next to the Scalefusion listing in the management tools list
(1).png)
- Once activated the list is updated to as shown below,
(1).png)
Step 3: Adding applications in Windows Business Store
Once you have completed Step 1 and Step 2, you can proceed to add/approve your business applications in Windows Business Store. Scalefusion can sync only the approved applications.
- Sign In to Business store using your Office 365 credentials.
- Click on Shop for my Group
(1).png)
- Search and Add the applications that you want to add/approve for your organization. In this example we demonstrate how to add Dropbox.
(1).png)
- To check if the approval is complete, click on Manage > Order History to check your purchases, approvals. and refunds.
(1).png)
Step 4: Syncing Applications in Scalefusion
The applications that you have added and approved in Windows Business store can be synchronised in Scalefusion. Follow the steps below,
Navigate to Enterprise > My Apps > Store. Here, click on Windows Business Store and click Sync Now . It may take around 5 to 10 minutes for newly approved applications to be synced.
This completes the setup of Windows Business Store with Scalefusion. You can now use Scalefusion portal to install and/or uninstall synced applications.
Installing Business Store applications
Now that you have synchronised the applications, you can manage these applications from Scalefusion Dashboard.
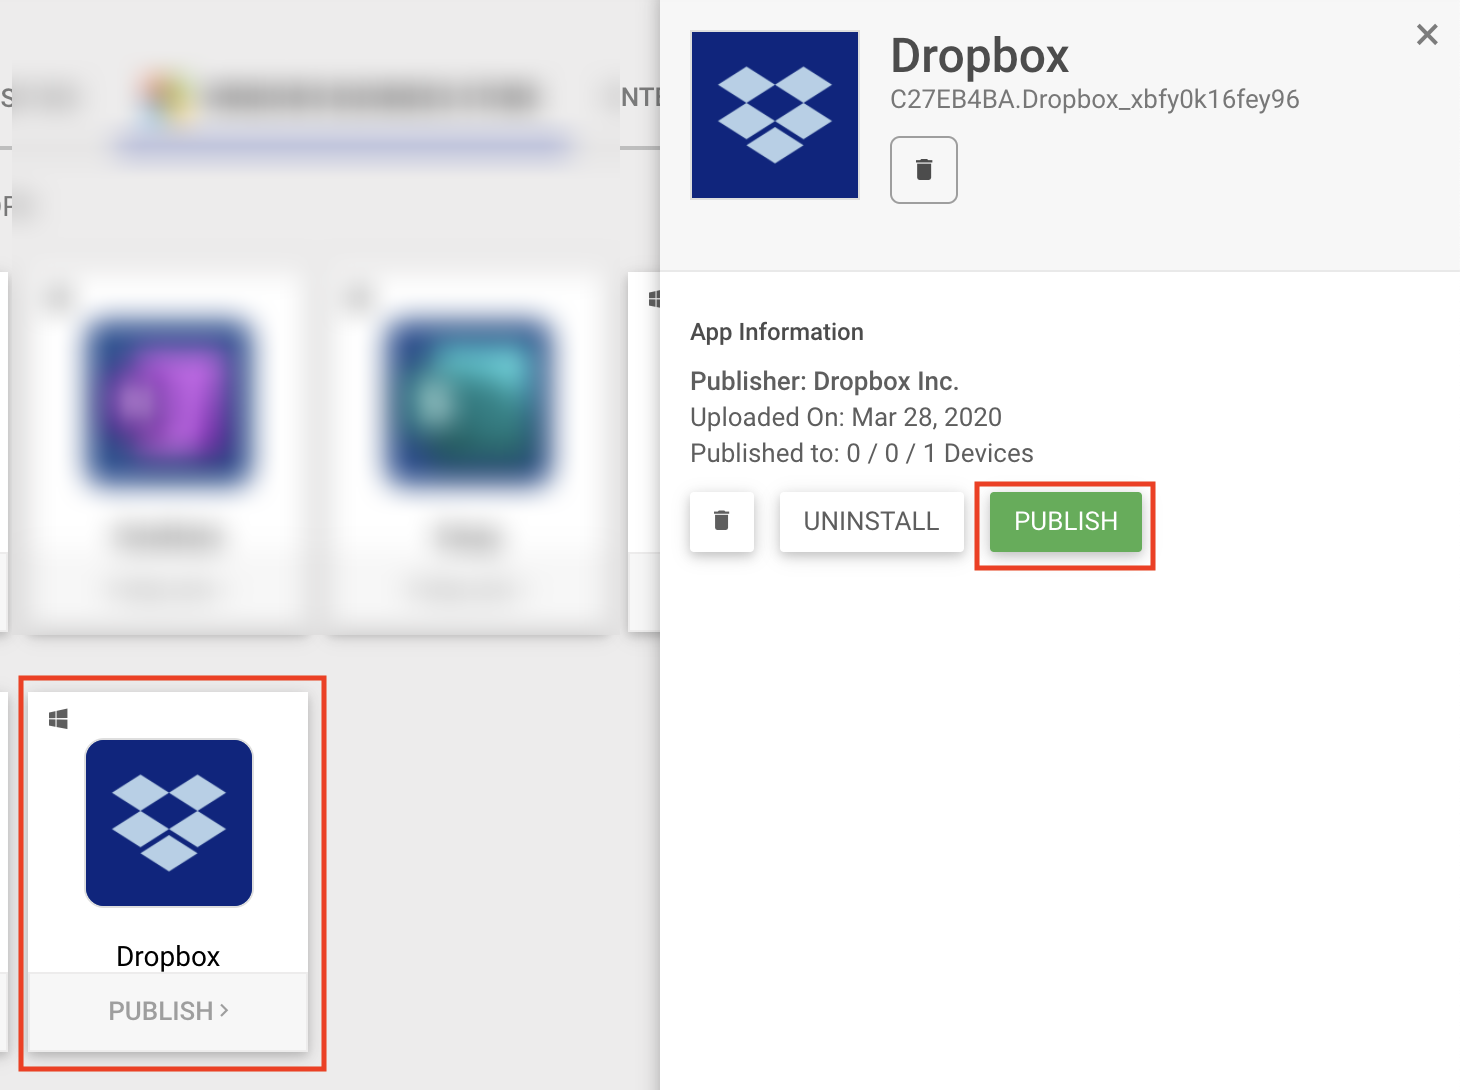
- To Install an application, navigate to Enterprise > My Apps > Store. Here, click on Windows Business Store and click on application tile. From the side panel, select PUBLISH

- Select the Device Profiles where you want to install this and click PUBLISH
(1).png)
- Once published, you can click on View Status to view the status of installation.
(1).png)
.png)
UnInstalling Business Store applications
- To UnInstall an application, navigate to Enterprise > My Apps > Store. Here, go to Windows Business Store and click on application tile. From the side panel, select UNINSTALL
(1).png)
- Select the Device Profiles where you want to install this and click UNINSTALL
(1).png) Please note that the application may have to be manually uninstalled on the device. Uninstall will prevent publishing of this application on this device and will not be published on future devices that enroll.
Please note that the application may have to be manually uninstalled on the device. Uninstall will prevent publishing of this application on this device and will not be published on future devices that enroll.
Frequently Asked Questions
Question: How do we Delete or get a Refund for an application?
Answer: Delete or Refund is a Windows Business Store functionality. To do so Sign In to Windows Business Store and navigate to Manage > Order History. Click on the application that you want to delete and from the actions menu select Refund


(1).png)

(1).png)
(1).png)
(1).png)
(1).png)
(1).png)
(1).png)
(1).png)
(1).png)
(1).png)

(1).png)
(1).png)
.png)
(1).png)
(1).png)
