An Enterprise Application or Line of Business app are the applications developed in-house and typically not deployed to Windows Store. The installation of these files is done via installing them manually on the devices.
Scalefusion allows IT Admins to upload and deploy Windows Enterprise applications and PowerShell scripts remotely on the Windows 10 managed devices. Windows Enterprise Applications can be of the following types,
- APPX Bundles or MSIX Bundles: These are also called modern windows applications or Universal Windows applications.
- MSI Installers: Popular format used by applications providing Enterprise installers like Microsoft Edge, Mozilla Firefox, Google Chrome, Zoom etc..
- Desktop/Win32 applications (EXEs): These are also called Legacy or Classic Windows applications.
Scalefusion supports the remote installation of APPX/MSIX package bundles and MSI Installer packages. In both types of apps the installation is completely silent and does not require user intervention irrespective of whether the user is admin or not.
The same flow works for devices enrolled as Corporate owned (Kiosk) or Personal (BYOD).
Before you Begin
- Create a Windows Device Profile
- Enroll a Windows 10 and above device.
- Make sure that you have required storage in Enterprise Store. To know more about space allocation, please visit here.
- Enterprise App package and the following details from the application developer,
- For Universal Windows App (UWP)
- Package Family Name (PFN)
- Application User Model Id (AUM Id)
- App Signing Certification
- For MSI Installers
- MSI installer for 64 bit and 32 bit or a single MSI installer file
- Optionally any Command Line Arguments and configuration that the app supports.
- For Universal Windows App (UWP)
Steps
Uploading and Installing an Enterprise Application
Follow the steps below to upload and install an enterprise application,
- Sign In to Scalefusion Dashboard. Navigate to Application Management > Enterprise Store
- Click on Upload New App > Upload Windows App
(1).png)
- Choose the type of Application that you would want to upload
(2).png)
- Universal Windows Apps (UWP): Select this if you plan to upload APPX or MSIX bundles.
- Windows Enterprise Installer (MSI): Select this if you plan to upload an MSI file.
- PowerShell(PS1): Select this if you want to execute a Powershell script
- EXE: Select this if you want to update an Exe application
Uploading a Universal Windows App (UWP)
Selecting the Universal Windows Apps would start the UWP app upload wizard. Follow the steps below to upload the file.
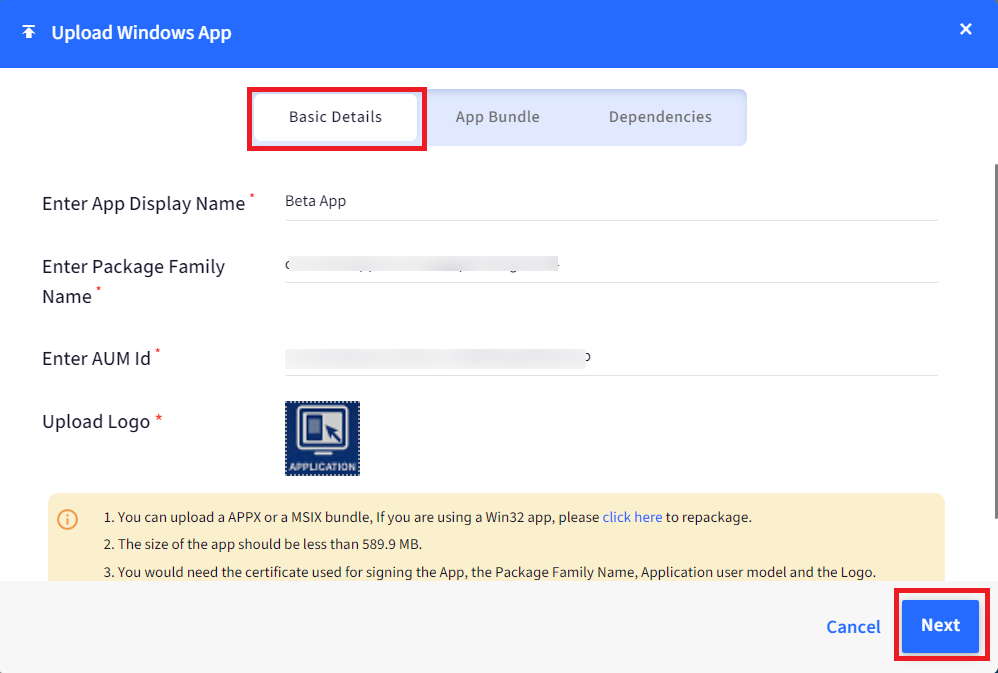
- In the Basic Details section enter the following details and click Next.
- App Display Name: Used to identify the application in Device Profiles.
- Package Family Name: As provided by the application developer.
- Application User Model If or AUM Id: As provided by the application developer.
- Application Logo: As provided by the application developer
- In the App Bundlesection select how you want to upload the application,
- Upload File: Use this option if you have the APPX/MSIX bundle available locally.
- Provide URL: Use this option if you have hosted/uploaded the file on your servers and have a link that is accessible publicly. 
- Upload File: If you have selected the Upload Fileoption then you would have to upload the following two files,
- Package File (APPX/MSIX Bundle): Drag and Drop the APPX/MSIX bundle or click on the Browse option and select the file from file chooser.
- Certificate File: Click on Choose File and select the certificate that was used to sign the application.
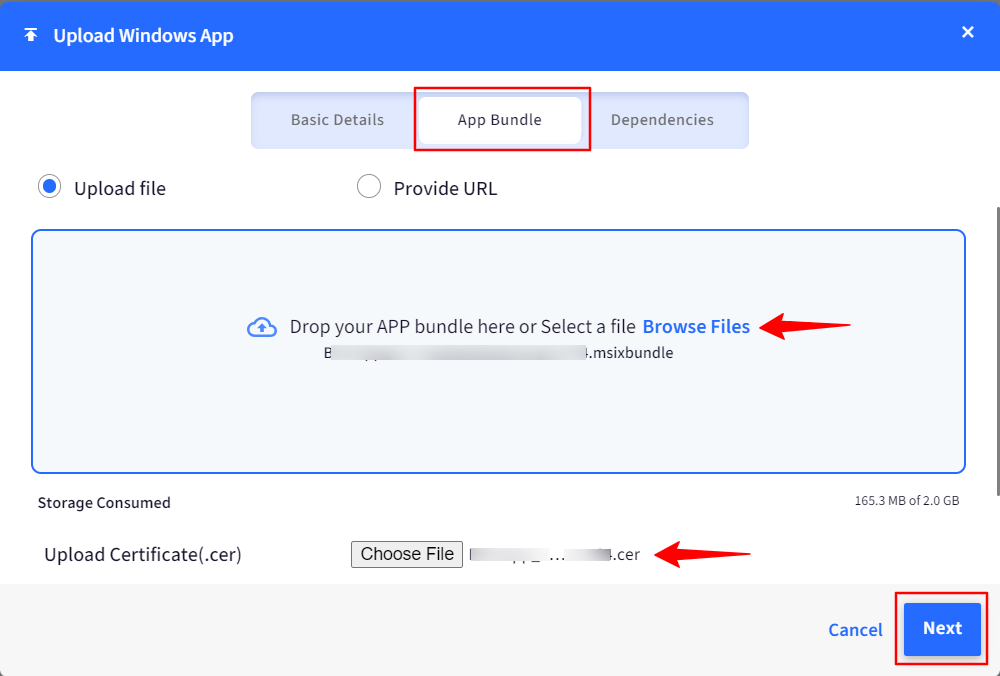
- Click SAVE once you have uploaded the files.
- Provide URL: If you have selected this option, then you would need to provide the following details,
- URL: Provide the URL to the externally hosted file. This URL should be publicly available and should return the APPX/MSIX bundle when an attempt to download is done.If the URL is not accessible or if the file at the URL is not valid then an error will be shown once we process the file.
- Certificate File: Click on Choose File and select the certificate that was used to sign the application.
- Click SAVE
- URL: Provide the URL to the externally hosted file. This URL should be publicly available and should return the APPX/MSIX bundle when an attempt to download is done.
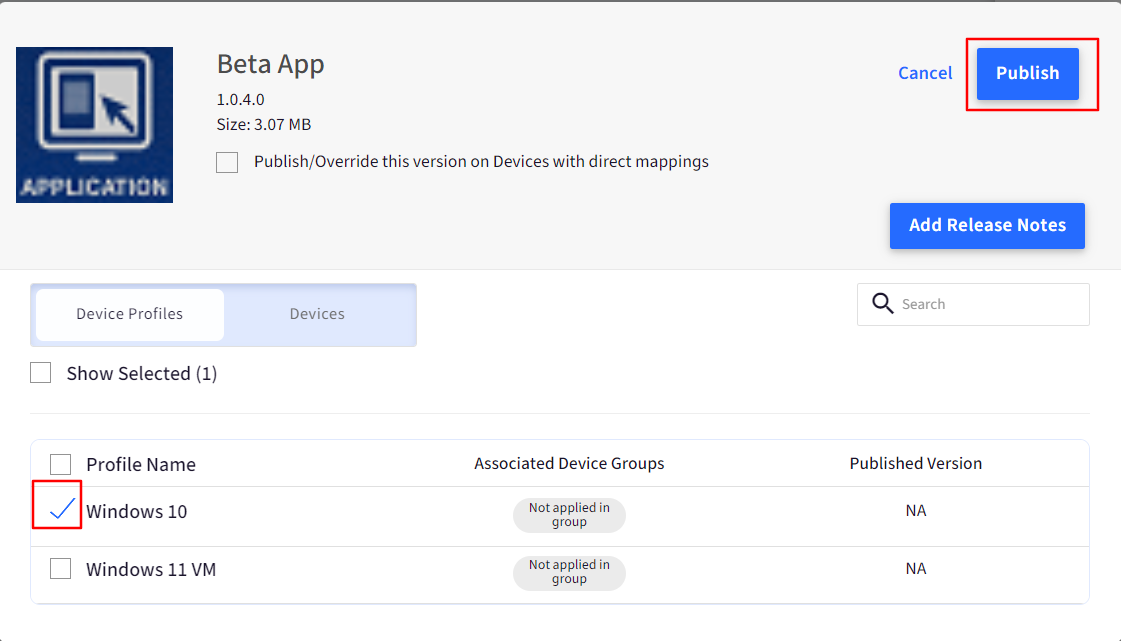
- Once you click on SAVE, Scalefusion will process the file and if the processing succeeds then the following dialog will be shown. Here you can select the Device Profiles where you want to publish the app and click Publish
- Publish/Override this version on Devices with direct mappings: In the Publish dialog, this flag will be visible when the setting Enable Applications to be published to Devices in a Group or profile is toggled on from Utilities > Global Settings > General Settings. If enabled, all direct mappings of this App from devices selected in Devices tab (older versions or newer versions), are removed and the currently mapped version is being pushed to the devices.
 Note:The UWP apps cannot be enabled in multi-app kiosk mode on Windows 11 (Pro, Enterprise, Education, or Business Editions) and Windows Home (10 & 11).
- Publish/Override this version on Devices with direct mappings: In the Publish dialog, this flag will be visible when the setting Enable Applications to be published to Devices in a Group or profile is toggled on from Utilities > Global Settings > General Settings. If enabled, all direct mappings of this App from devices selected in Devices tab (older versions or newer versions), are removed and the currently mapped version is being pushed to the devices.
Uploading a Windows Enterprise Installer (MSI)
Selecting the Windows Enterprise Installer (MSI) would allow you to upload the MSI. Follow the steps below to complete the process.
- Upload MSI File: The first step is to upload the MSI file. Basing on the application, choose an appropriate option and upload the file. In this section you can upload a file from your local computer or provide a link to externally hosted file.
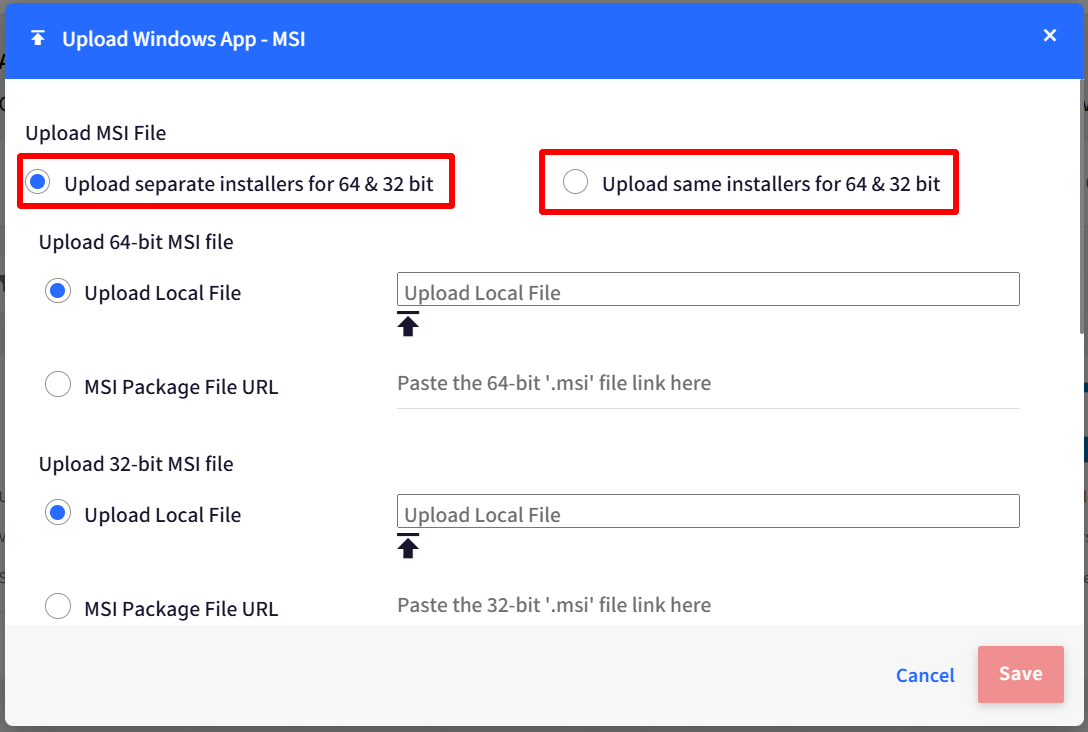
- Upload separate installers for 64 & 32 bit: Use this option if you would like to upload separate installers for 64 & 32-bit.
- Upload same installers for 64 & 32 bit: Use this option if you have same file for both 64 & 32-bitIf you have separate installers for 64 & 32-bit, it is a better idea to upload them separately as two different apps and choose the correct architecture. If you have the installer for only one architecture, we advise you to upload it only for the supported architecture.
- Installation Target: Select the installation target,
- Device: This would install the app for all the users. Useful if the enrolled user is not an admin user.
- User: This would install the app for current logged in user. Useful if the enrolled user is an admin user.
- App Publish Action: Select one from the following:
- Install Immediately: Installs the app immediately on publishing
- Add to Catalog: This will add MSI to the self-service app (i.e. under MDM agent) on device and MSI will be visible to all users on device.
- Upload Logo: An optional step that lets you upload a logo. Note that this logo is for your reference on the Dashboard, it has no impact on the target devices.
- Command Line Options: Any Command line arguments that needs to be passed along with the installation of the MSI. These are the options that are provided by the developer of the application.
- SAVE: Once you have provided all the details, click on SAVE,
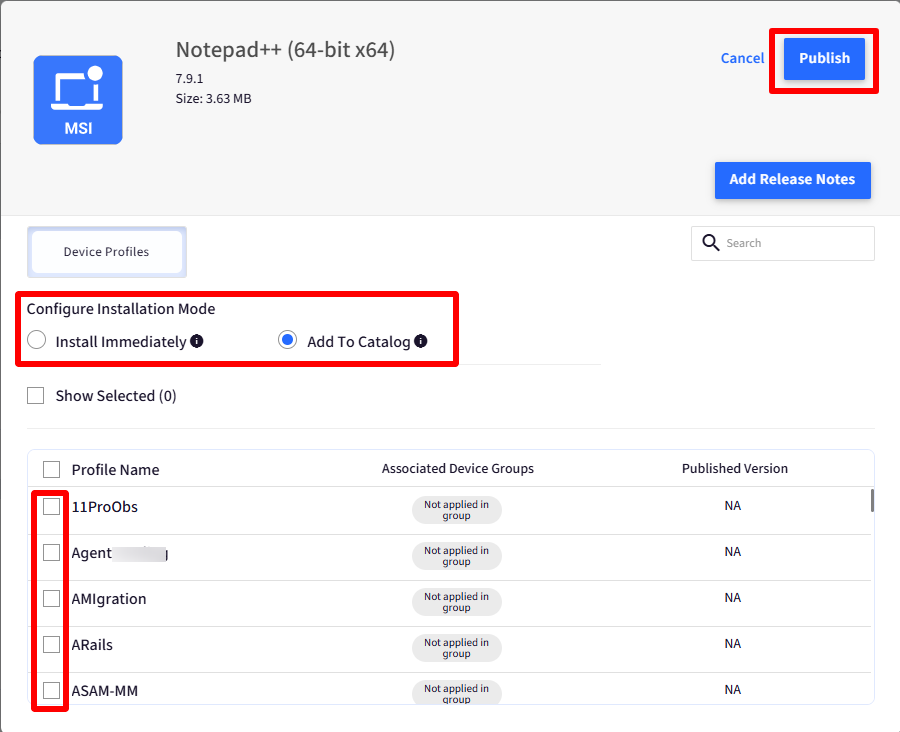
- On clicking SAVE, Scalefusion will validate the MSI, and if the processing succeeds then the following dialog will be shown. Configure the following:
- Configure Installation Mode:
- Install Immediately: This will install the app immediately on the device
- Add to Catalog: This will make the script file available inside Self-Service app on the device from where user can install it later.The selected Installation Mode overrides the Publish action chosen during file upload.
- Select the Device Groups / Device Profiles / Devices where you want to publish the script and click Publish.
- Configure Installation Mode:
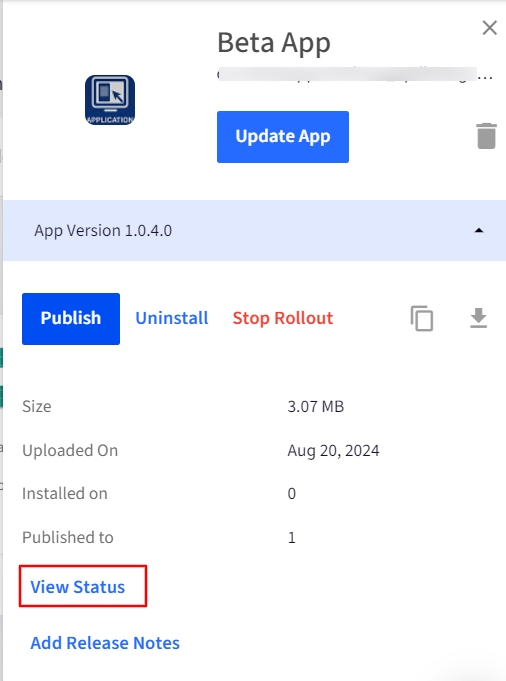
Checking Installation Status
You can check the Installation status of an enterprise application pushed from enterprise store by using the View Status option.
(1).png)
Updating an Enterprise Application
Follow the steps below to update an enterprise application that you had uploaded earlier,
- Navigate to Application Management > Enterprise Store
- Click on the application that you uploaded earlier to see the application information wizard, Click on Update App button.
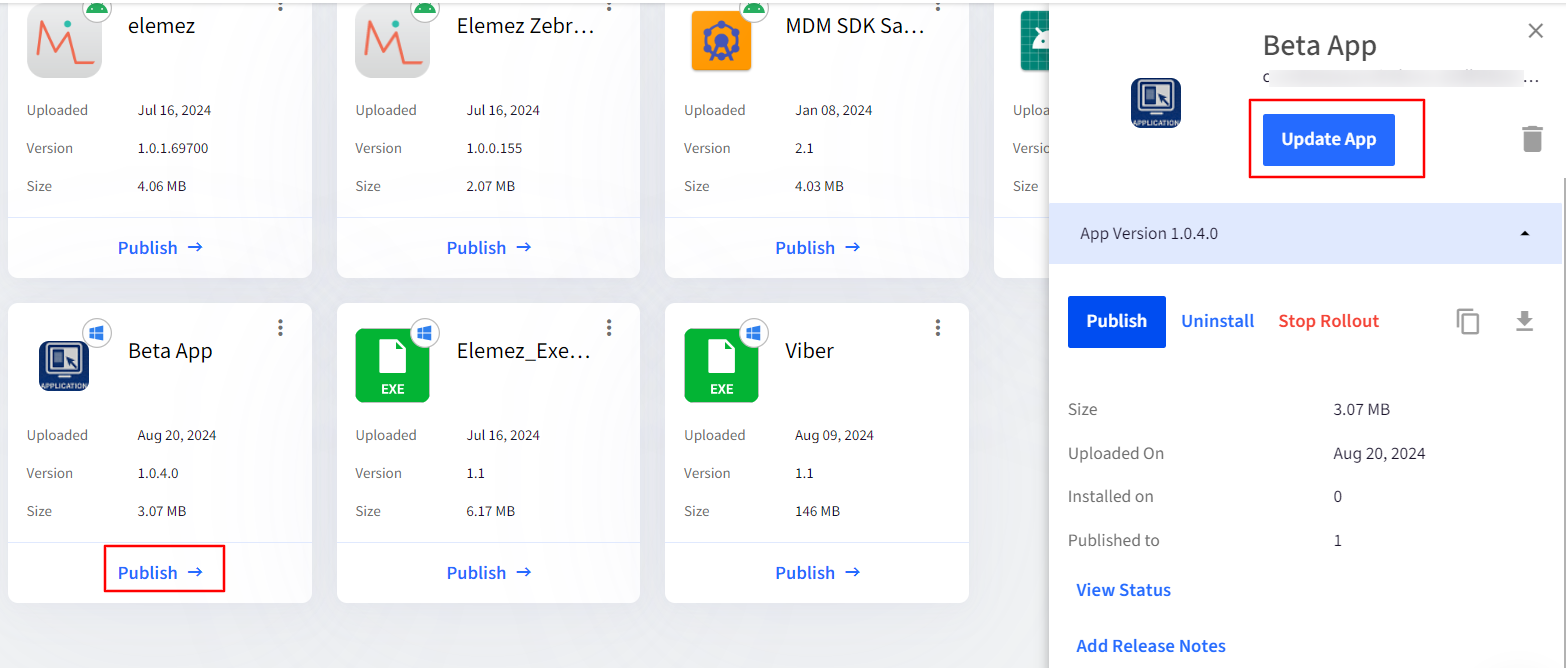
- Basing on the type of current application, App update wizard will be shown. For UWP application you can upload the new App Bundle and for MSI applications you can upload the new MSI file.
- Once the new version of the application is processed and saved, you will be shown the application publish wizard to publish the new version. Select the Device Profiles and click Publish
UnInstalling an Enterprise Application
Windows applications cannot be uninstalled from the devices remotely. However you can block the installation of the applications on devices that are yet to enroll. Follow the steps below to Uninstall a previously installed application,
- Navigate to Application Management > Enterprise Store.
- Click on the application that you uploaded earlier to see the application information wizard, click on Uninstall option.
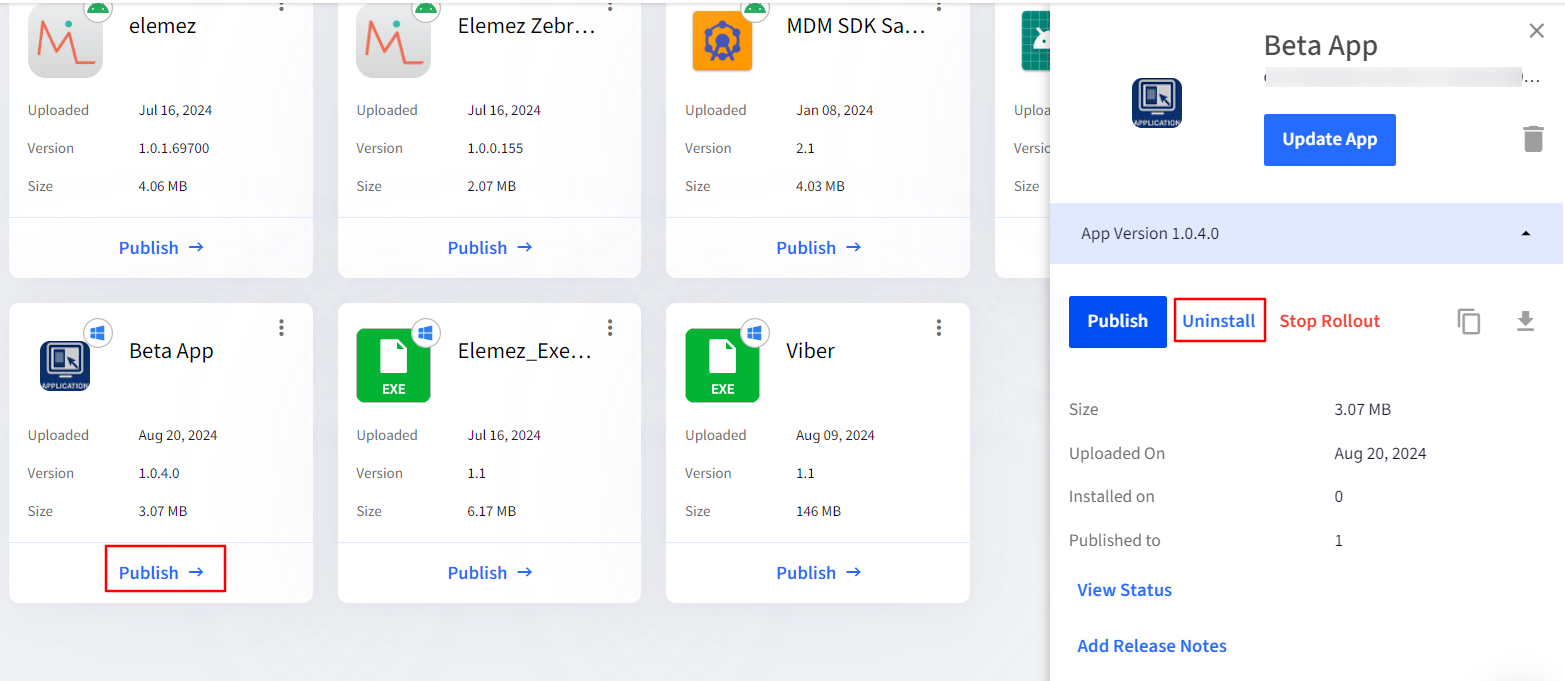
- Select the Device Profiles where you want to uninstall the application from and click on Uninstall.
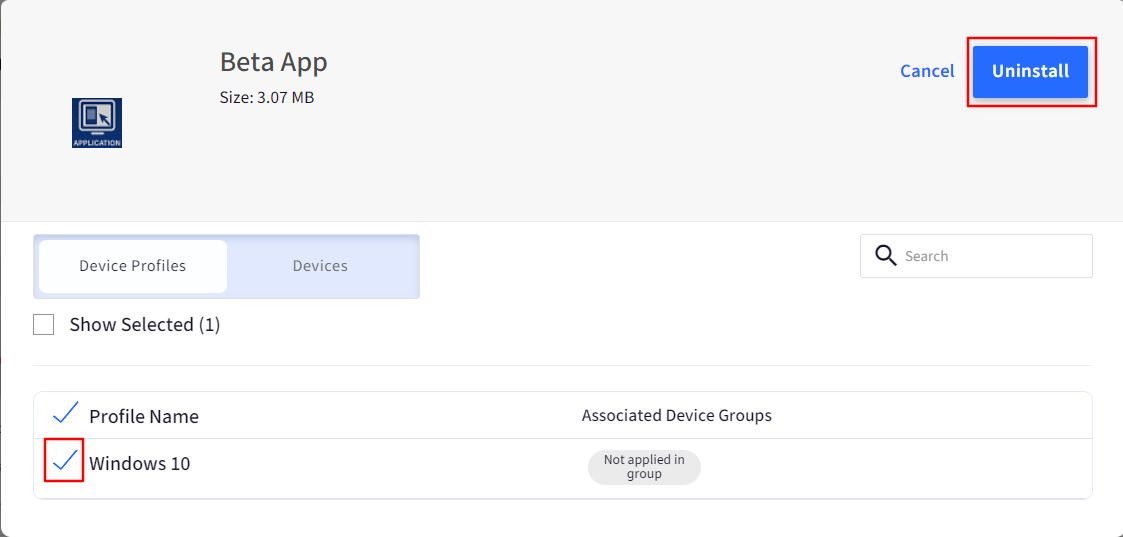
- Once this step is done, the application will no longer be force installed on the devices. However the users need to Uninstall the application on the device.MSI Applications do not support uninstallation and you can opt to delete the package altogether to avoid installing on newer devices.
Stop Rollout of an Enterprise Application
Sometimes you may want to stop the rollout of Enterprise applications that have been published to groups or profiles, for example if a wrong version is being pushed. You can stop the rollout of such apps which only unpublishes the app from selected Groups or Profiles.
To stop rollout,
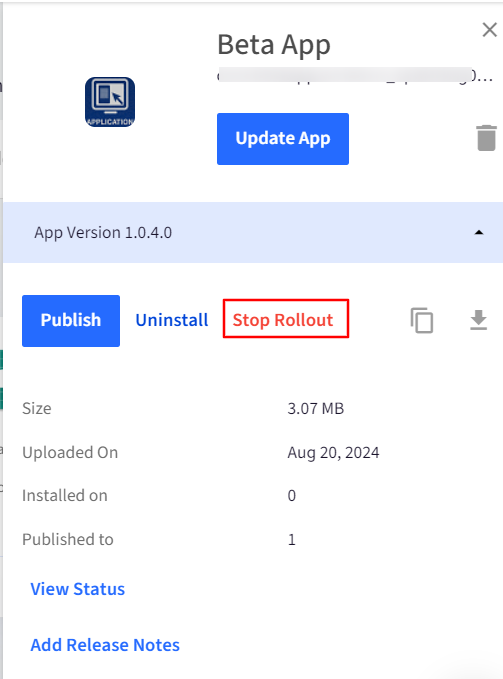
- Select the Enterprise app and click on Stop Rollout in the right side panel.
 Stop rollout appears if the app version has been published on at least one device group/profile.
 - This opens the following dialog box. Choose the Group or Profile on which you want to stop the app's rollout. Only the entities where the app has been published will be displayed here.
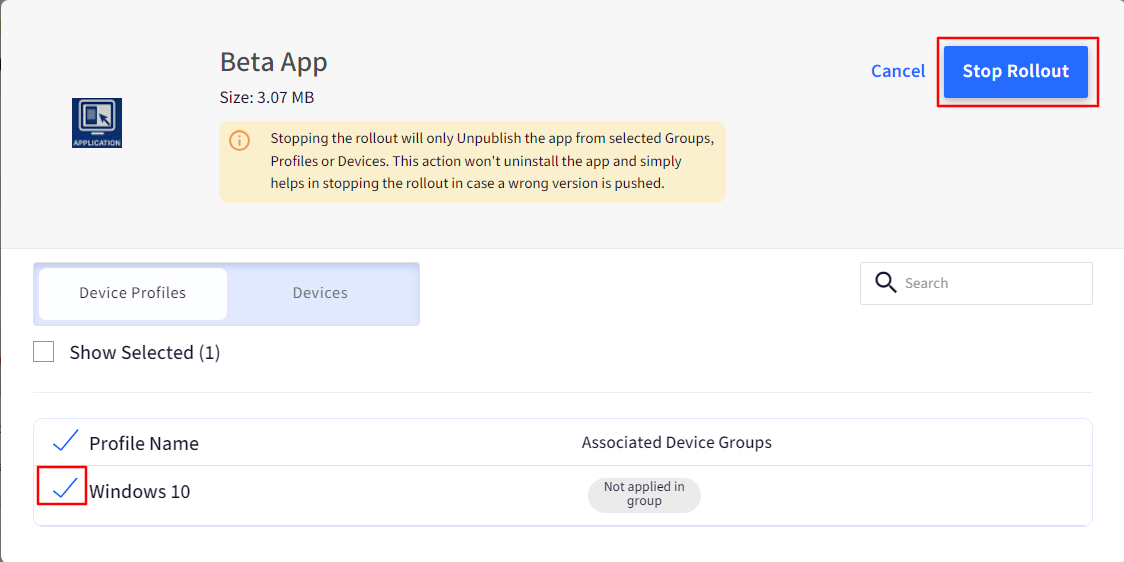
- After selecting, click on the button Stop rollout
- When executed,
- The application will be unpublished, and it will not be installed on devices where it is not installed yet.
- The Stop rollout button will no longer be visible in the right-side panel
Important Points on Stop Rollout's execution
- You cannot stop rollout of an app that is already installed on device.
- On devices where downloading of app has not started, app will not be installed.
- On devices newly enrolled or moved to a device profile, the app will not be installed after stop rollout.
- On such apps, View Status shows the App Status as Rollout Stopped.

Frequently Asked Questions
Question: Why does the remote Uninstallation of Windows application not work?
Answer: Scalefusion uses the Windows 10 MDM protocol to send the Uninstallation command. However, we have seen that in some cases the Uninstall command does not succeed. Hence we recommend Uninstalling the applications manually on the managed devices once the Uninstallation has been done from the Dashboard.
Question: We are trying to upload the 64-bit and 32-bit MSI installers of the same application but we see the error below. How do we resolve it?.png)
Answer: This can happen if the Product code of both the installer files is different. In this case please cancel the process and upload the MSIs individually as two different apps and select the appropriate architecture. Scalefusion would deploy the files based on the enrolled device's architecture.
FAQs
Q: How does app configuration publishing work when both DBAP (Enable Applications to be published to Devices in a Group or profile) and GBAP (Enable Enterprise apps to be published to Groups with a profile) are enabled, and Enterprise App is published?
A: When both DBAP and GBAP are enabled, and a PFW or Enterprise App is published with any of the methods, the following applies to app configuration:
If the app is published directly to a device/device group (by selecting specific devices/device groups in the publishing dialog), the associated app configuration should also be published in the same manner, that is, by choosing either device or device group. This ensures consistency in how the app and its configuration are mapped and delivered.
Q. How can I determine whether an Enterprise App was published to a device using Device-Based App Publishing (DBAP) or Group-Based App Publishing (GBAP)?
A. To identify the publishing method, follow these steps:
- Click Uninstall for the app
- In the Uninstall dialog, check the Devices tab
- If the device is listed here, the app was published using DBAP
- If the device is not listed under Devices tab, check the Device Groups and Device Profiles tabs.
- If the device is listed under Device Groups, the app was published using GBAP.
- If the device is listed under Device Profiles, the app was published at profile level
Q. I have published an App Config, but it's not visible on the device. What should I do?
A. Kindly ensure that the app config is published using the same method that was opted while publishing the associated app.