Progressive Web Apps are modern lightweight web applications that provide the end user an app-like application using web technologies like HTML5, CSS among others. These are like any other native applications and have their own App-Icon, which can be configured to open in full screen.
Scalefusion allows you to remotely install PWAs on your EMM-managed devices using the managed Google Play Store. Furthermore, you can set these applications in Single App Mode as well.
If your web application is optimized for Google Chrome and you are looking to give direct access to your application using Scalefusion, then follow the steps below to configure and publish a web app.
Prerequisites
- Complete Android Enterprise setup.
- Setup and Android Device using one of the EMM methods.
Step 1: Create a Web-Application
The first step is to create a web application using the URL for your Web-App. Follow the steps below to create a website,
- Login to Scalefusion Dashboard.
- Navigate to Application Management from the left menu or top navigation bar and click on PLAY FOR WORK APPS. Here click on Add from Playstore to view the Google Play Store wizard.
.png)
- From the left-hand side menu, select Web-Apps and click on the + sign on the bottom right to create a new Web-App

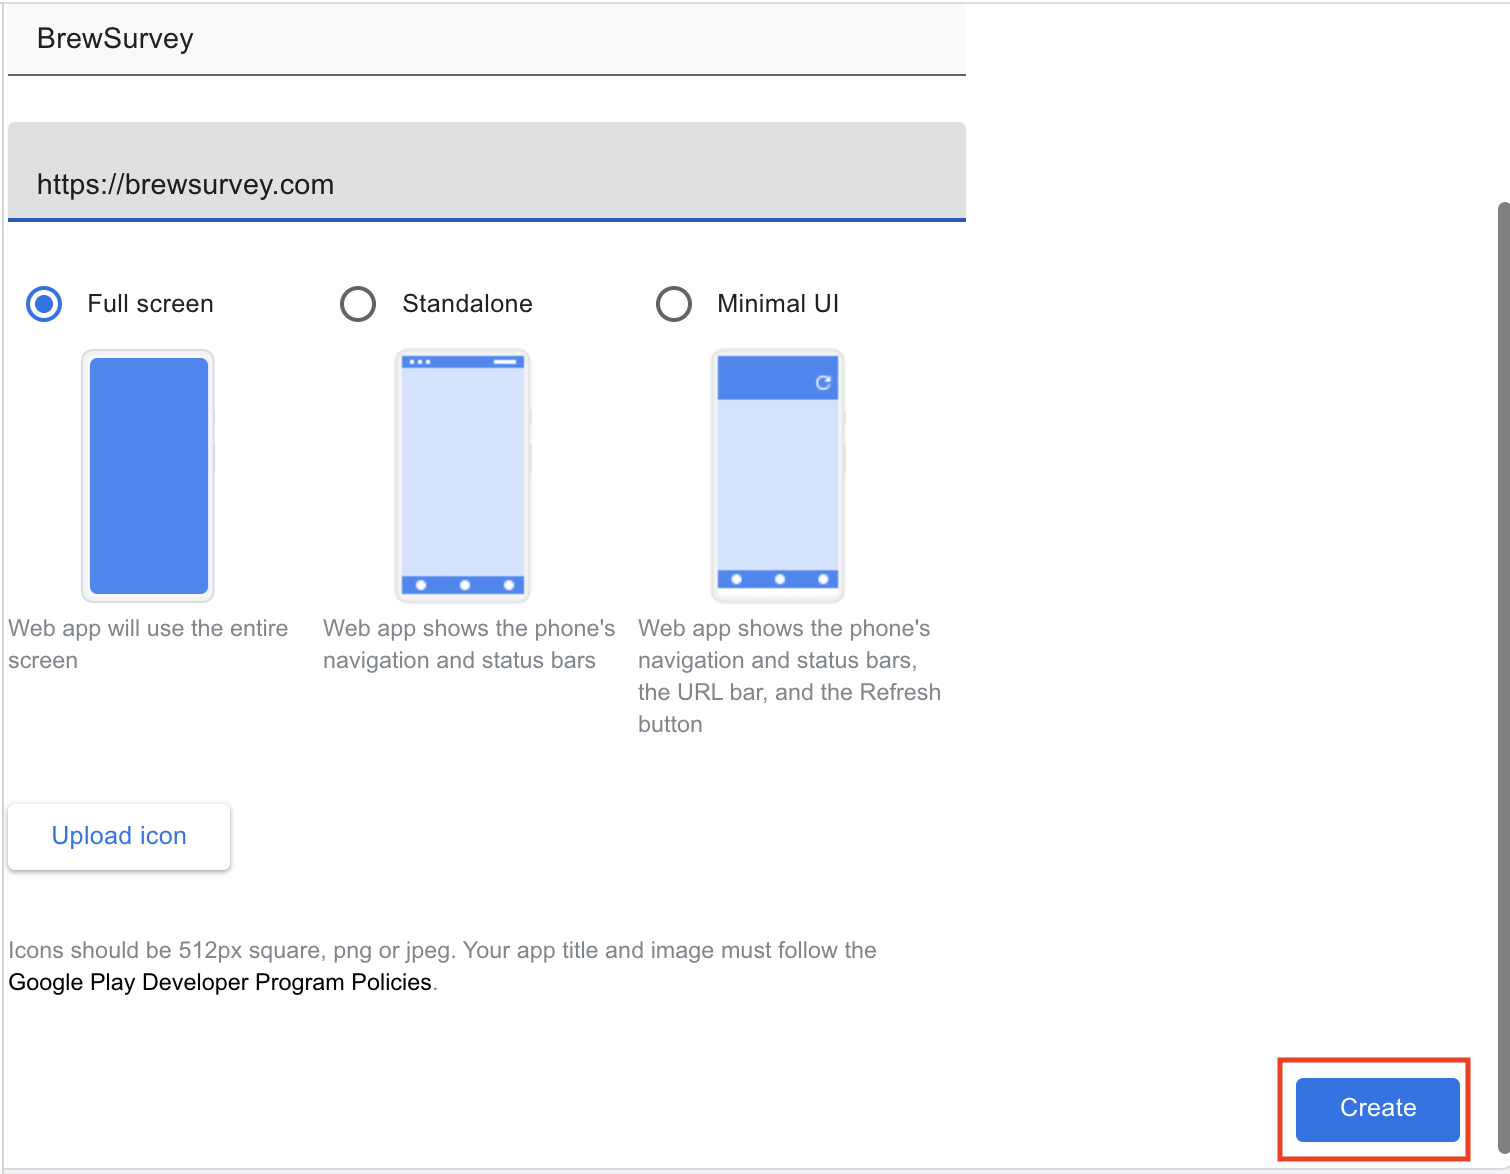
- In the New Web App, enter your web app details
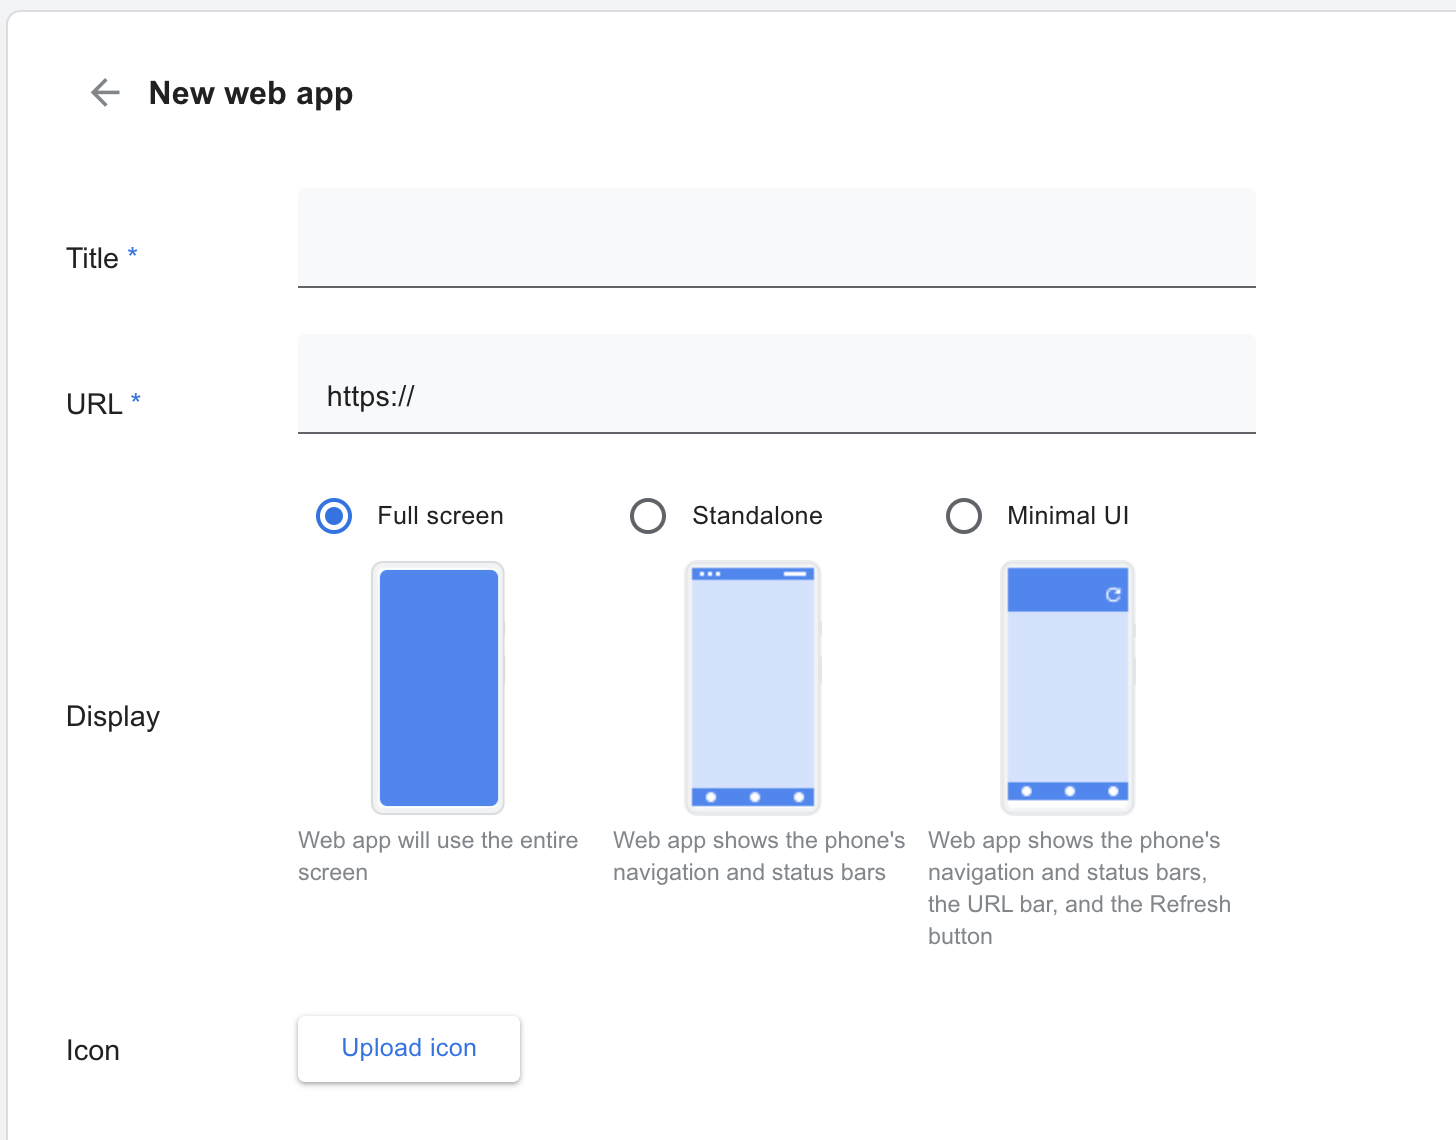
- Title: Provide a title for your web app. This will act as the name of the app when its shortcut appears on the Home screen.
- URL: Enter the URL from your web app.
- Display: Select the display mode from Fullscreen or Standalone or Minimal UI. Please note that for Standalone and Minimal UI to work properly, your web app should use the HTML5 APIs as required.
- Icon: Provide an icon for your web app that will be used for display purposes.
- Once you have provided the details, scroll to the right horizontally and click CREATE
- It takes about a minute for the newly added web app to appear in the list, however, it takes about 15 minutes for the application to be approved. The web app will be shown as Not available yet. Unless it is available, it will not be listed in Scalefusion's list of Play for Work Apps.
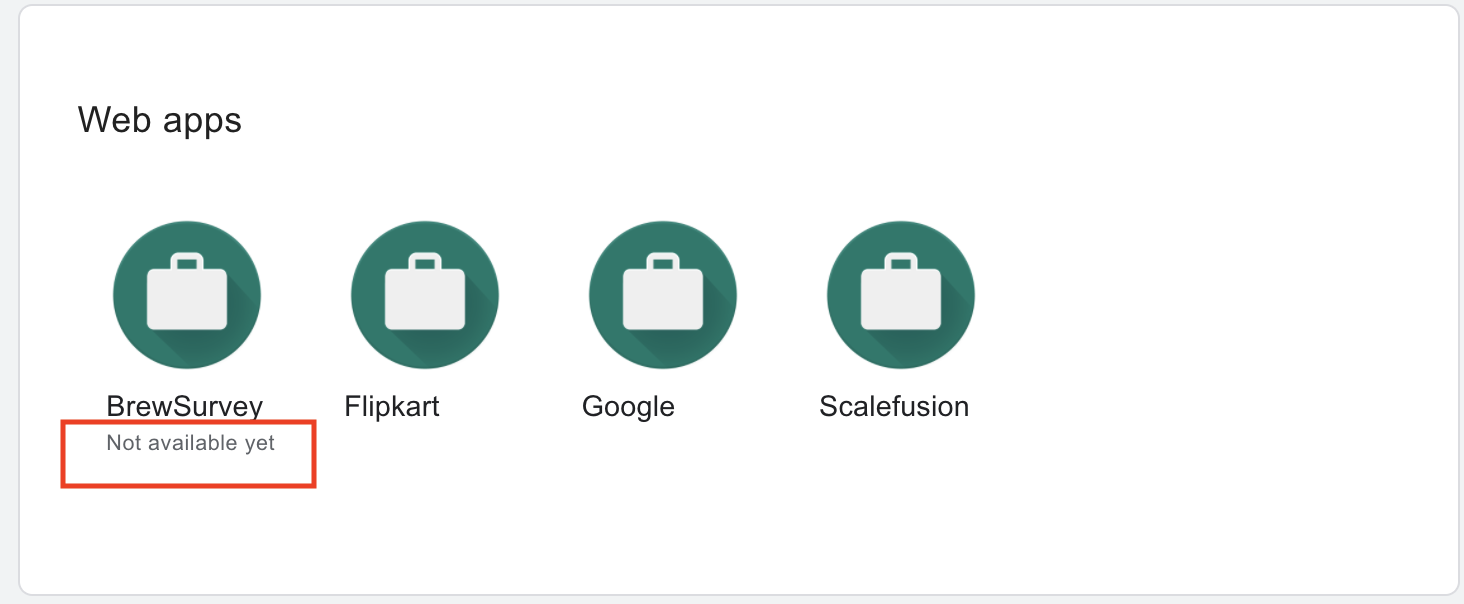
- Once your Web-App is approved, it will start showing up in Scalefusion in the Play for Work apps section and is ready for deployment to devices.
Step 2: Publish a Web Application
Once your Web-App is approved, it can be pushed to devices like any other application from Play for Work Apps.
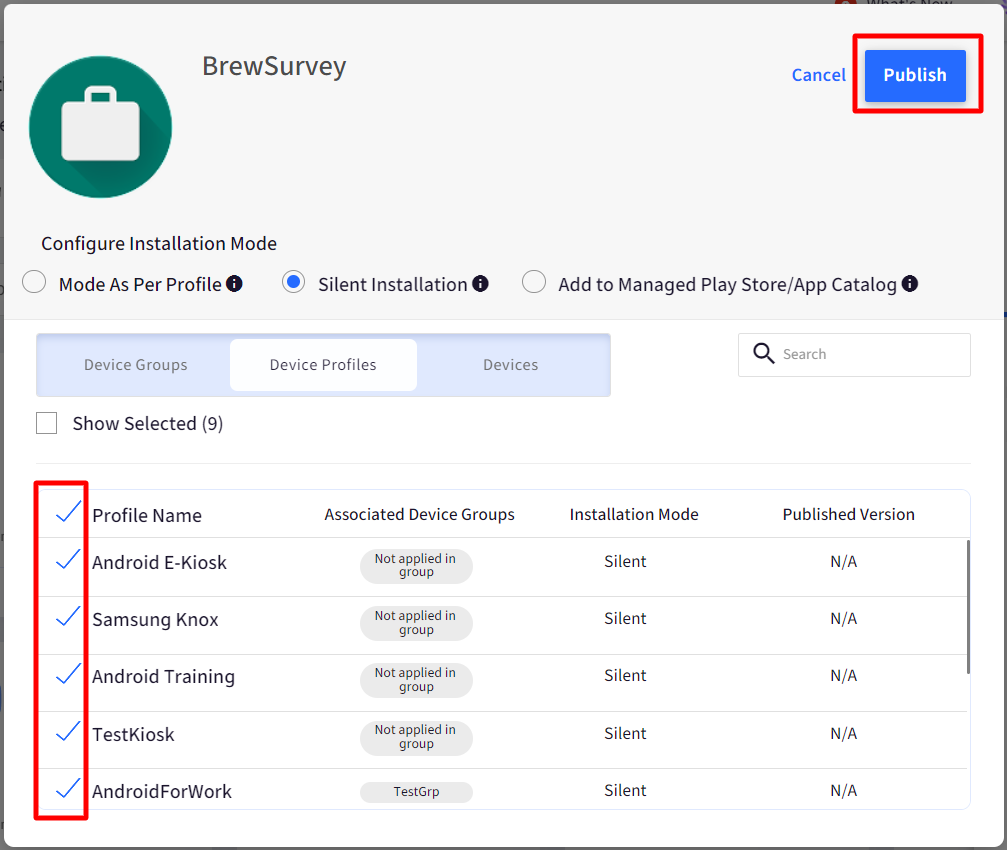
- Navigate to Application Management > Play for Work Apps, Click on the Web App and click PUBLISH
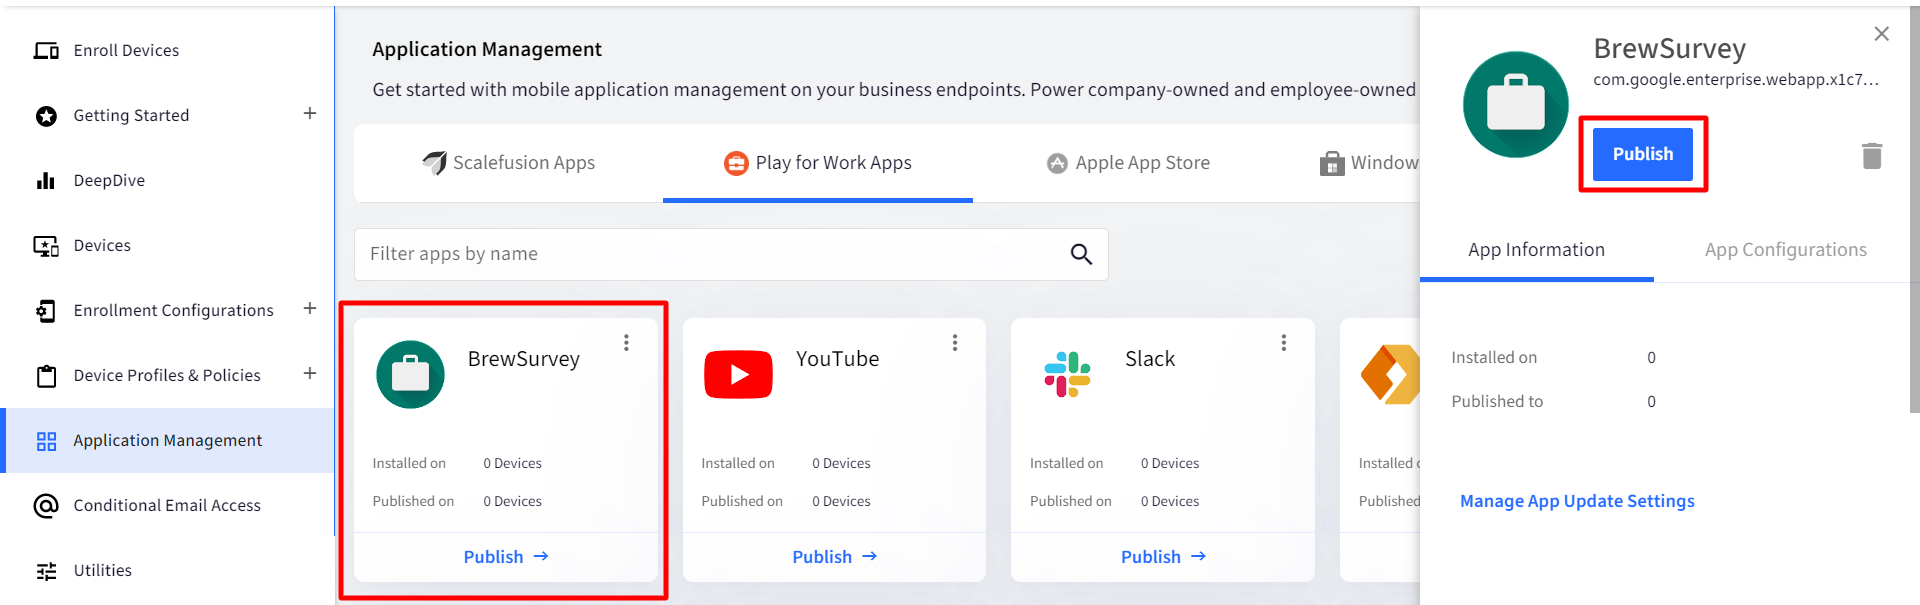
- Select the target Device Groups / Device Profiles / Devices and click PUBLISH
- Once the application is installed, it will appear on the Scalefusion Home screen (kiosk mode) or default launcher app (agent mode).
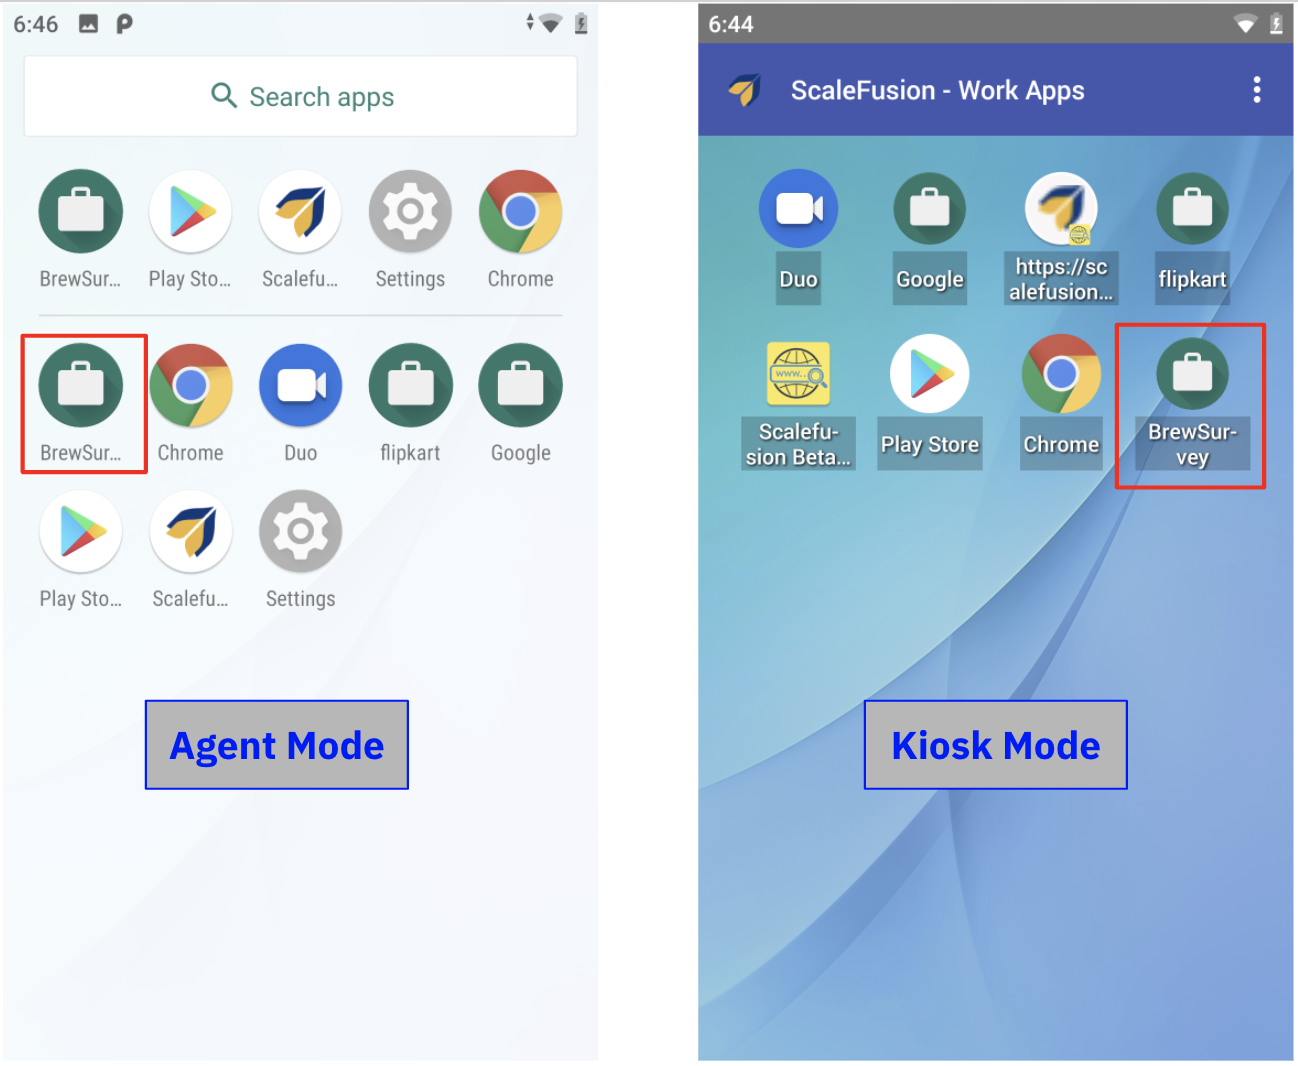
- Clicking on the app icon will open it like a normal application.
 You can set this Web App to run as the Kiosk app or Single App mode by using the settings in Android Device Profile > Kiosk/Launcher Settings.