A Supervised iOS device allows you to enforce stricter policies and control more features on the device. For a corporate-owned iOS device, it is quite helpful to make a device supervised so that you can get enhanced control of the device.
Apple has provided a mechanism to convert any device to a Supervised device using the Apple Configurator2 (AC2) software. In this guide, we will walk you through how to make the device Supervised and enroll into the Scalefusion Dashboard at the same time.
Goals
- Make the device Supervised.
- Enroll the device in Scalefusion Dashboard.During this process, the data on the device will be erased. Please take a backup of the data.
Before you Begin
- Make sure you have a valid Scalefusion Dashboard account.
- You have created an iOS Device Profile in Scalefusion Dashboard.
- You have created a QR Code configuration in the Scalefusion Dashboard.
- You have created a Wi-Fi configuration on the Scalefusion Dashboard. The Wi-Fi config will be used during AC2 provisioning.Wifi configuration can be created from All Configurations > Global Settings > Wifi Settings or can be added at the time of creating QR code configuration for iOS/macOS.
- You have an iPhone or iPad and a lightning USB cable.
- You have a Mac computer with Apple Configurator 2 installed.
- Backup your iPhone or iPad data as the process is going to erase the device.
- Sign out of the iTunes Account and iCloud if you are signed intoIf you try to set up the device without signing out, then the device will be activation locked, will ask you for the iTunes account and password after reset, and will not allow you to complete the setup.If you would want to Supervise an iOS Device without data loss or restore a backup, please follow Supervising iOS device without Data Loss.
Video Guide:
Please watch the video below to get a visual walkthrough.
Steps
On Scalefusion Dashboard
- Login to Scalefusion Dashboard.
- Navigate to Enrollment Configurations > QR Code Configurations. Expand the QR Code that you want to enroll the iPhone into.
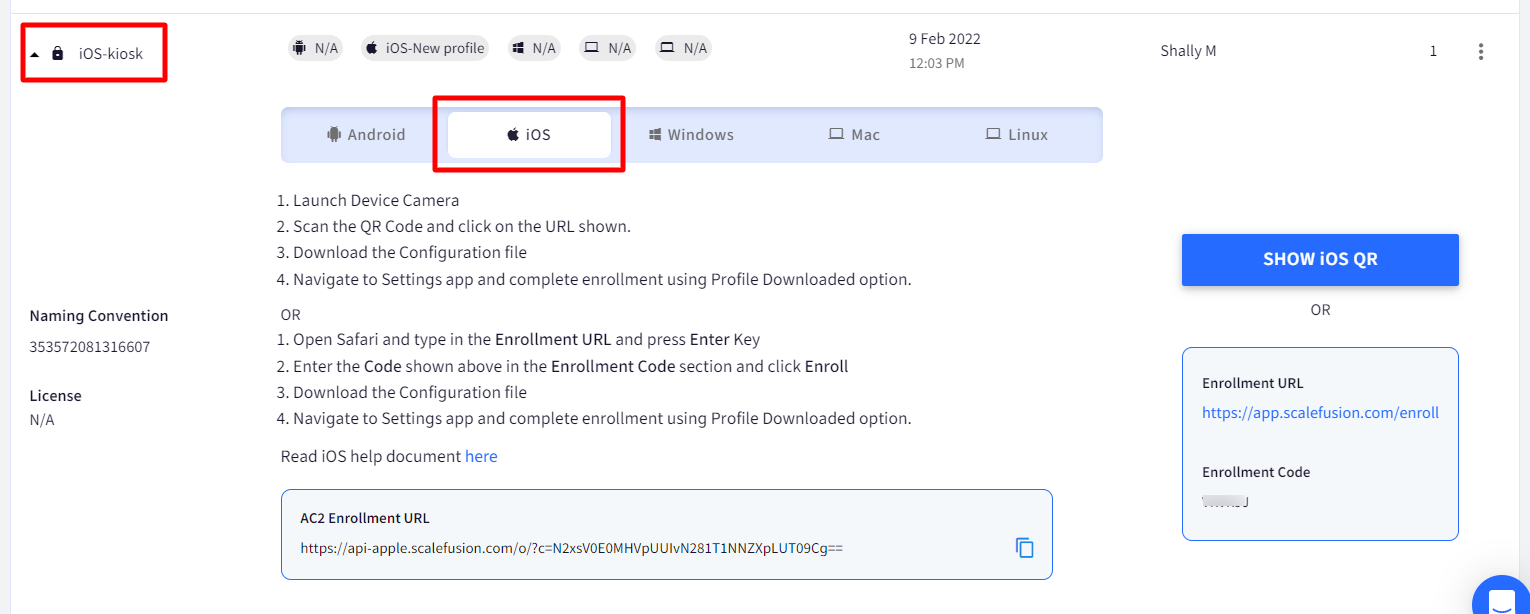
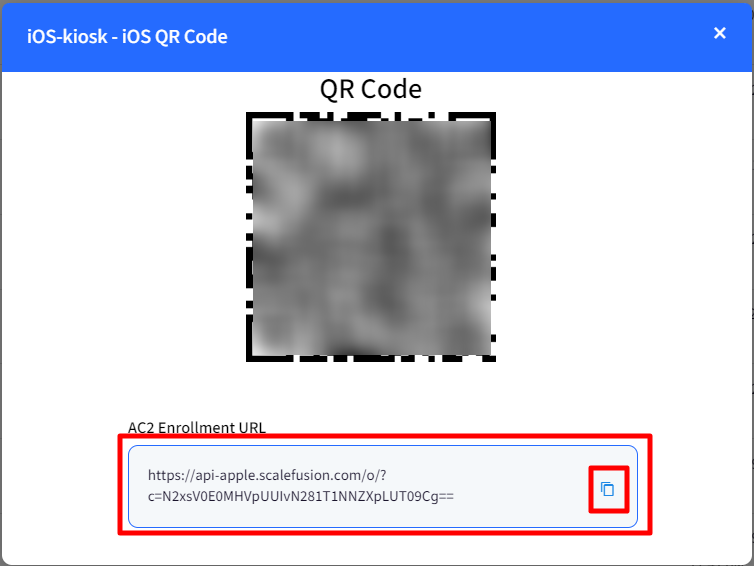
- Under the iOS tab, copy the AC2 Enrollment URLeither by:
- Clicking Show iOS QR
- From the bottom, when you expand the configuration.
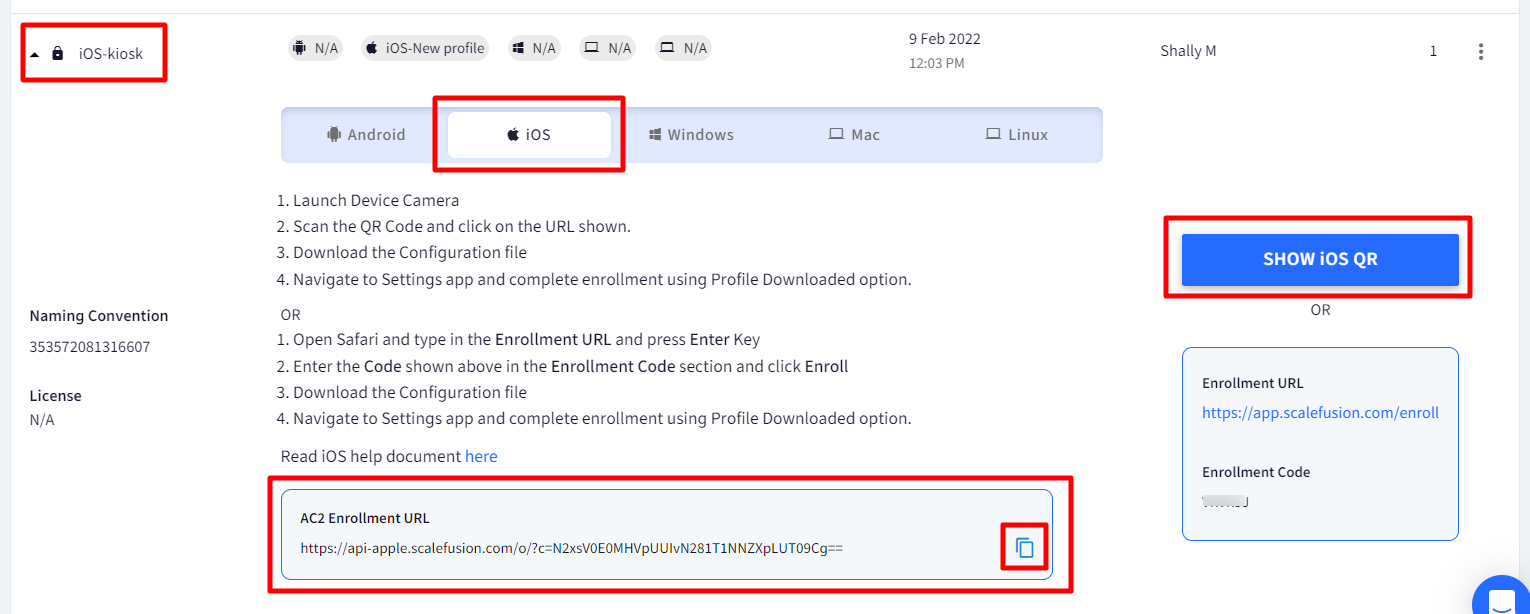
- Clicking Show iOS QR
On Mac Machine
- Connect your iOS device to your Mac machine.
- Launch Apple Configurator 2. Click on Trust if your Mac machine shows the prompt.
- You should see your device in the AC2 tool.
- Right-click on the device frame that you see in AC2.
- Select Prepare.
- You will see a screen with the following options, make sure you have selected the following options,
- From the Prepare With dropdown, select Manual Configuration.
- Uncheck Add to Device Enrollment Program.
- Check Supervise Devices.
- Check Allow Devices to Pair with other computers.
- Uncheck Enable Shared iPad.
- Click Next.
- Here you will be asked to choose if you want to Enroll in an MDM or Not. Choose New Server from the server dropdown. Click Next.
- You will be shown a screen to Define the MDM server.
- In the Name field, enter Scalefusion.
- In the URL field, enter the URL that you had copied from Scalefusion Dashboard.
- Click Next.
- AC2 will validate the URL and ask you to confirm if you trust the server. Click Next.
- You will be asked to enter the Apple ID. Click Skip.
- You will be asked to enter the Organization details. This is your organization details, so enter the relevant fields and click Next.
- You can choose a Supervisioning identity, that is, what are the options that you want to skip during erase and setup. Choose an existing one or define a new one.
- Once you are ready, Click Prepare.
- Click Erase on the warning that appears. This will Erase the date, so make sure that you have taken a backup of data.
- The device will now reboot and enroll to Scalefusion and, at the same time, become supervised.For supervising devices and quickly enrolling them in Scalefusion, you can also opt for Apple's DEP process
Frequently Asked Questions
Question: If I have multiple devices, do I have to repeat the above steps for each one of them?
Answer: Technically Yes. Each device needs to be supervised separately. However, Apple Configurator 2 can detect multiple devices, so you can use a USB Hub and connect multiple iOS devices. Once all the devices appear in Apple Configurator 2, hold down the shift key to select those devices and then perform the same steps as mentioned above.
Question: Can I just make the devices Supervised first and enroll in Scalefusion later?
Answer: Yes. In fact, if you are enrolling multiple devices at one shot using a USB Hub, then we would recommend that you select "Do Not Enroll in MDM" ate step 8 above and skip step 9 and 10. This will erase the device and make it supervised, You can then Enroll the device using a QR Code.
Question: How do we retain or restore the date on the Supervised device?
Answer: Restoring a backup on a Supervised device is not possible. However, you can perform some special steps to restore the backup and Supervise the device at the same time. Please follow our Supervise iOS Devices without Data Loss guide.