A certificate authority server (CA server) offers a secure and user-friendly solution for creating and storing asymmetric key pairs used in public-key infrastructure (PKI), decryption, signing, and validation. Similarly, Okta's Certificate Authority (CA) server is a trusted entity that issues and manages digital certificates. Digital certificates represent a device's online identity and show ownership of public keys.
Scalefusion now provides a solution for IT admins to automate certificate deployment on Windows devices by integrating Okta's SCEP-based CA server with Scalefusion. This article explains the methodology for automatically generating certificates with Okta CA Server Integration from Scalefusion Dashboard and ultimately deploying on Scalefusion-managed devices.
Prerequisites
Global Admin access to Okta portal.
How does it work?
Step 1: How to create the SCEP URL and Secret Key
Step 2: Setup OKTA SCEP CA Server
Step 3: Add Template(s) or the blueprints to generate a certificate
Step 4: Enable Template(s) from Device Profile
These are explained in detail in the below sections.
Step 1: How to create the SCEP URL and Secret Key
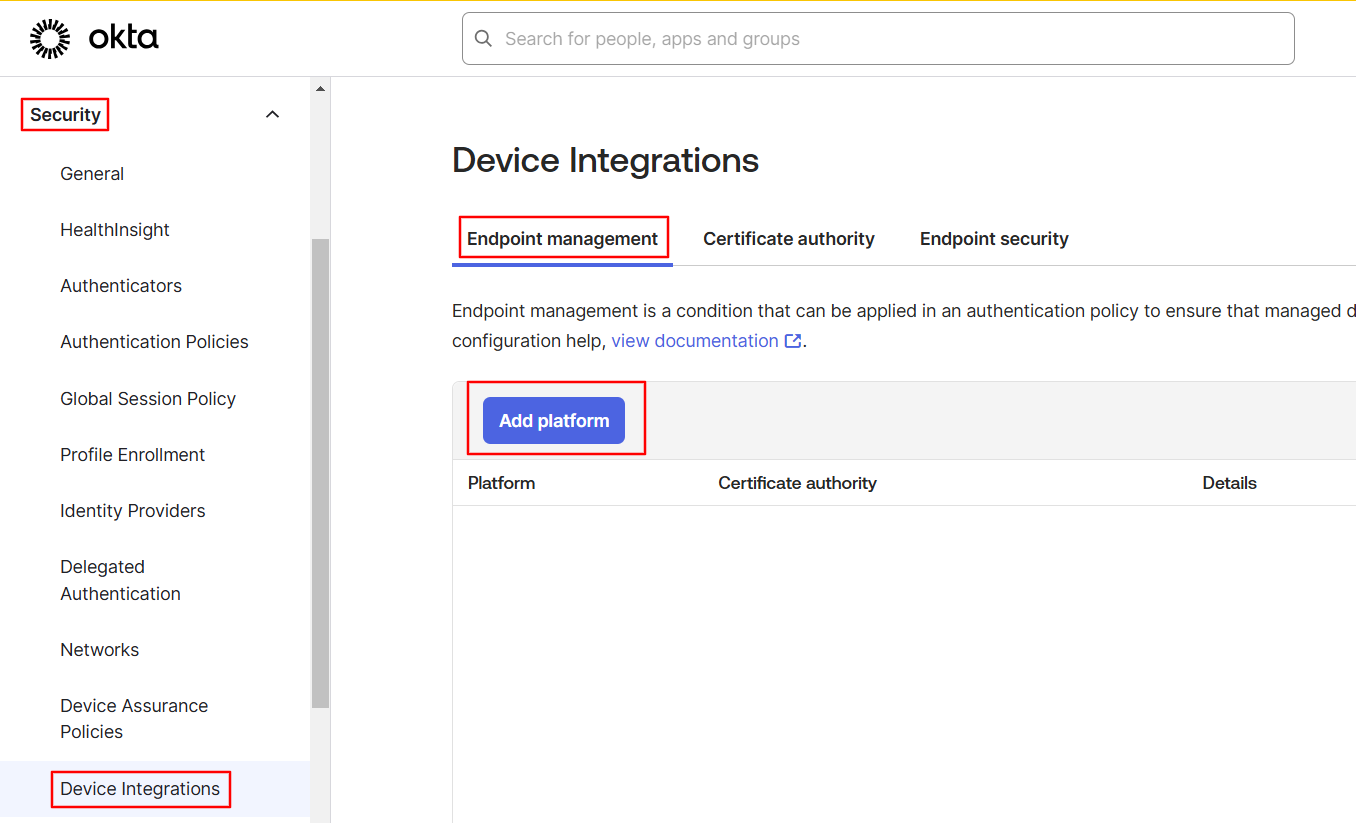
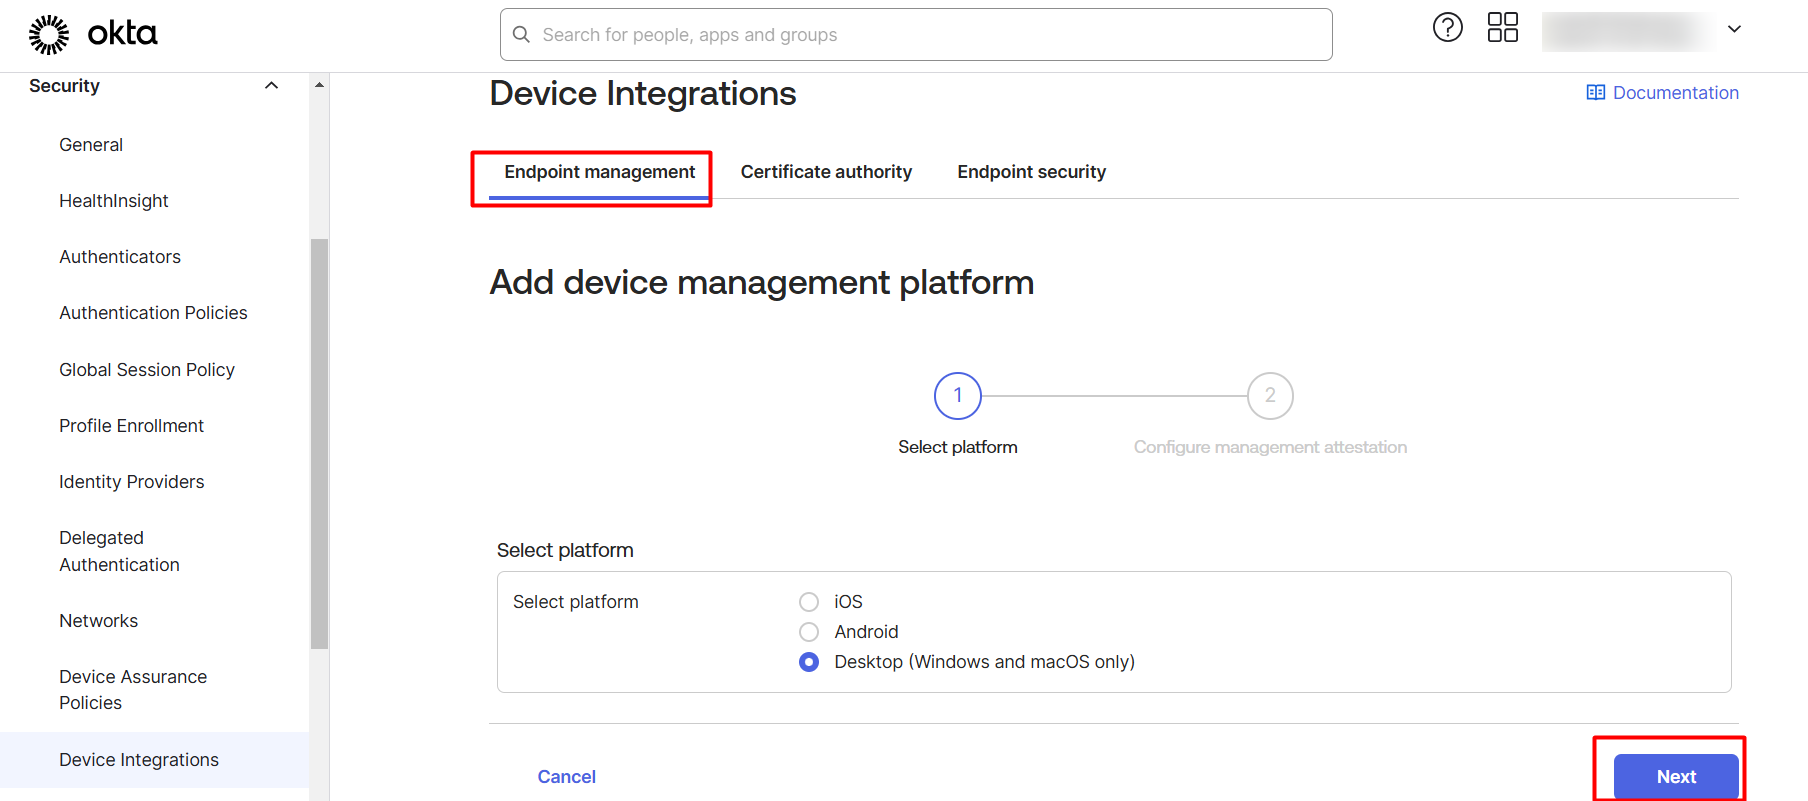
Login to your Okta Admin portal and navigate to Security > Device Integrations > click on Endpoint Management button.
Select the Platform in this screen and click on Next.
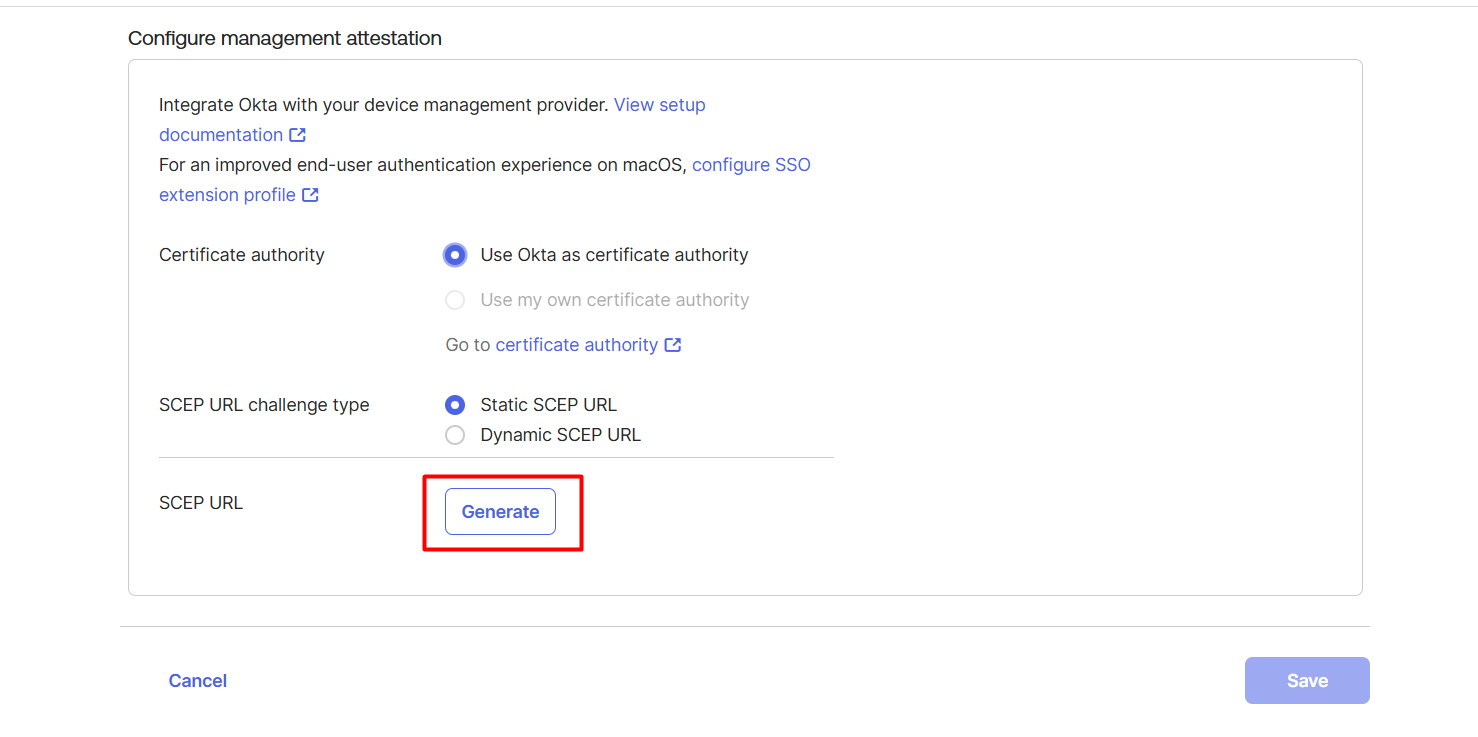
On the next page, select Static SCEP URL in the SCEP URL challenge type option and click the Generate button.
Note:
As of now only the Static Challenge is supported, hence you will need to select Static SCEP URL option only.
This will generate the SCEP URL and the Secret Key. Click on Save.
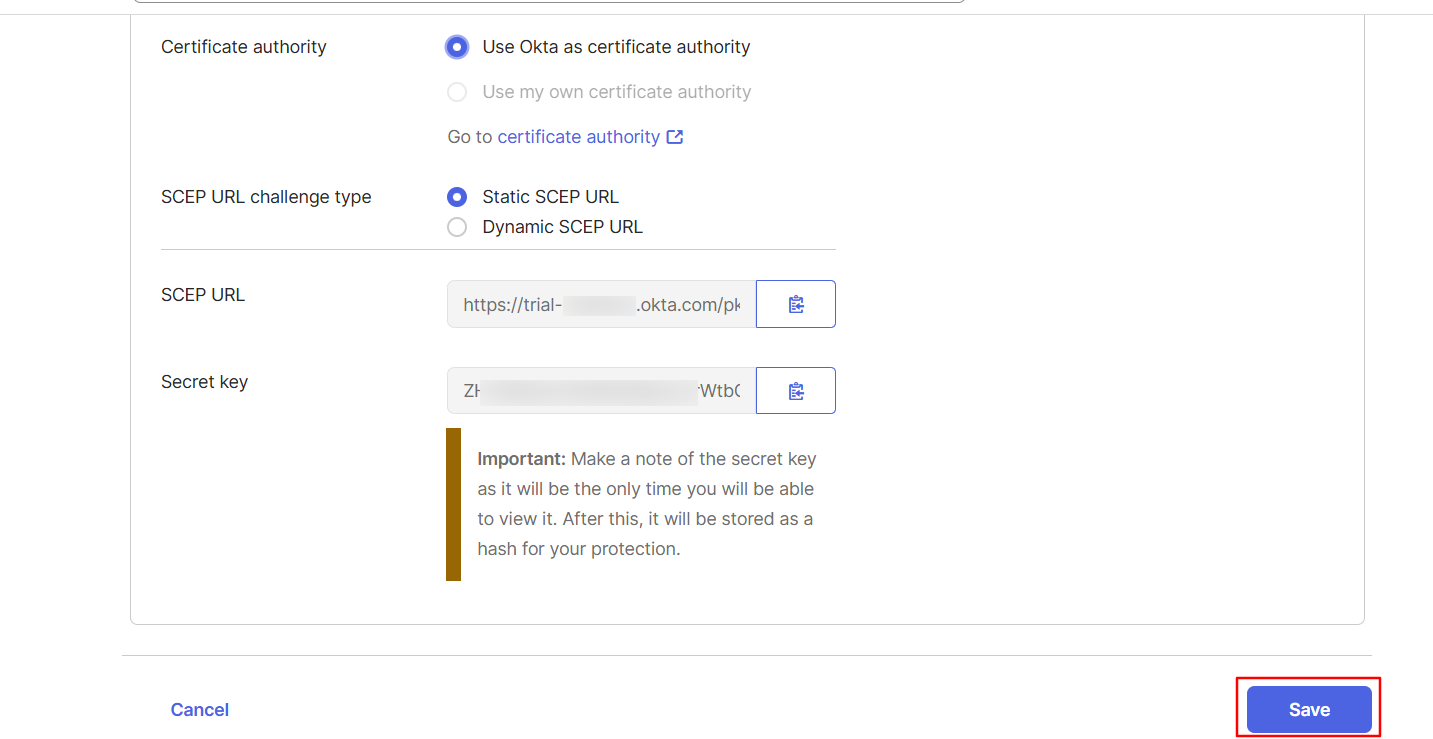
Use these details while creating the CA server configuration (as shown in Step 2) template (as shown in Step 3) on the Scalefusion dashboard.
Step 2: Setup OKTA SCEP CA Server
To configure a Certificate server for automatic deployment of certificates:
On the Scalefusion Dashboard, navigate to Device Profiles & Policies > Certificate Management
Under the Certificate (CA) Servers tab, click on Add CA Server
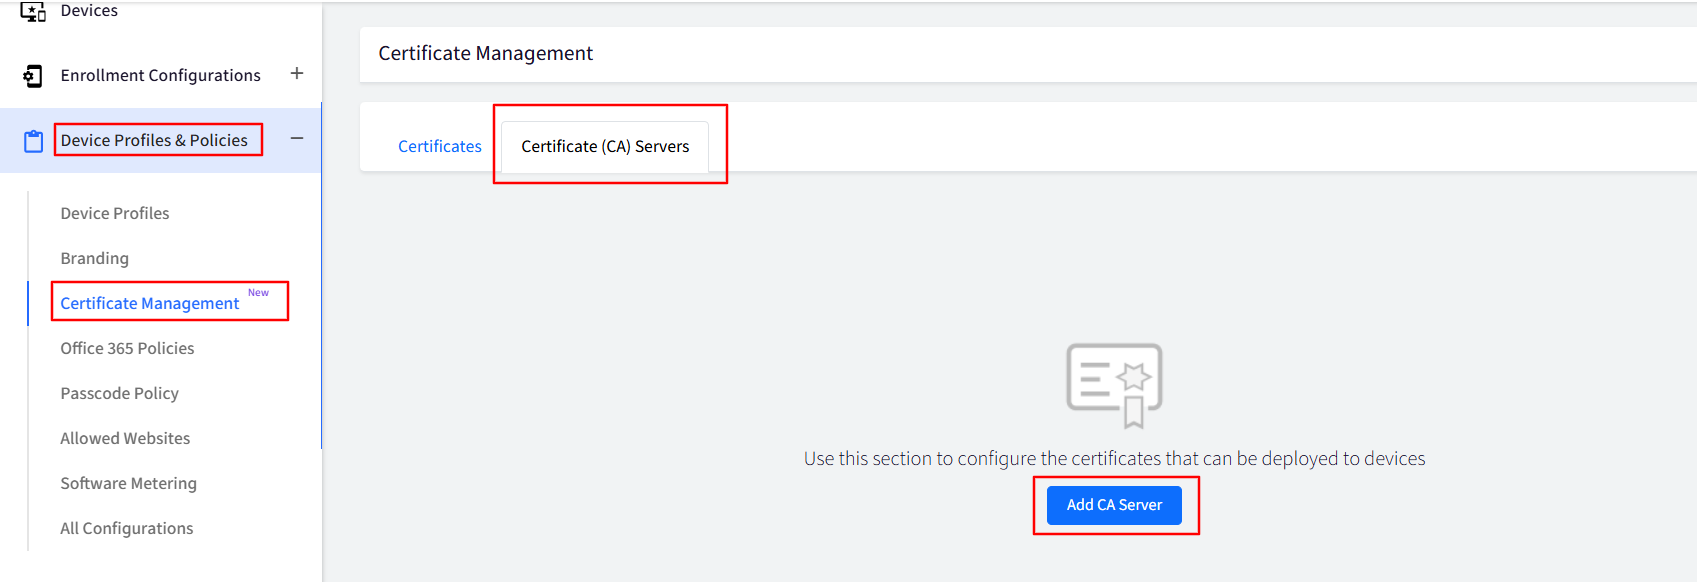
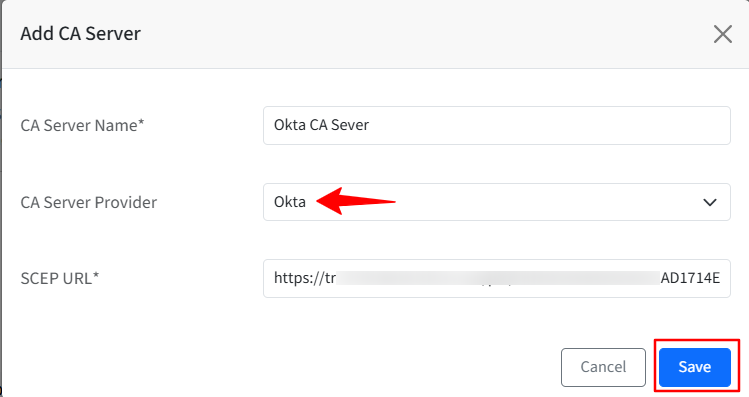
This will open the Add CA Server window. Enter the following:
CA Server Name: Enter a name for the CA Server
CA Server Provider: Choose OKTA from the drop-down menu list.
SCEP URL: Provide SCEP URL that you would have created in Step 1. It is the URL to reach the Certificate Authority (CA) Server and its shared secret key
Click Save.
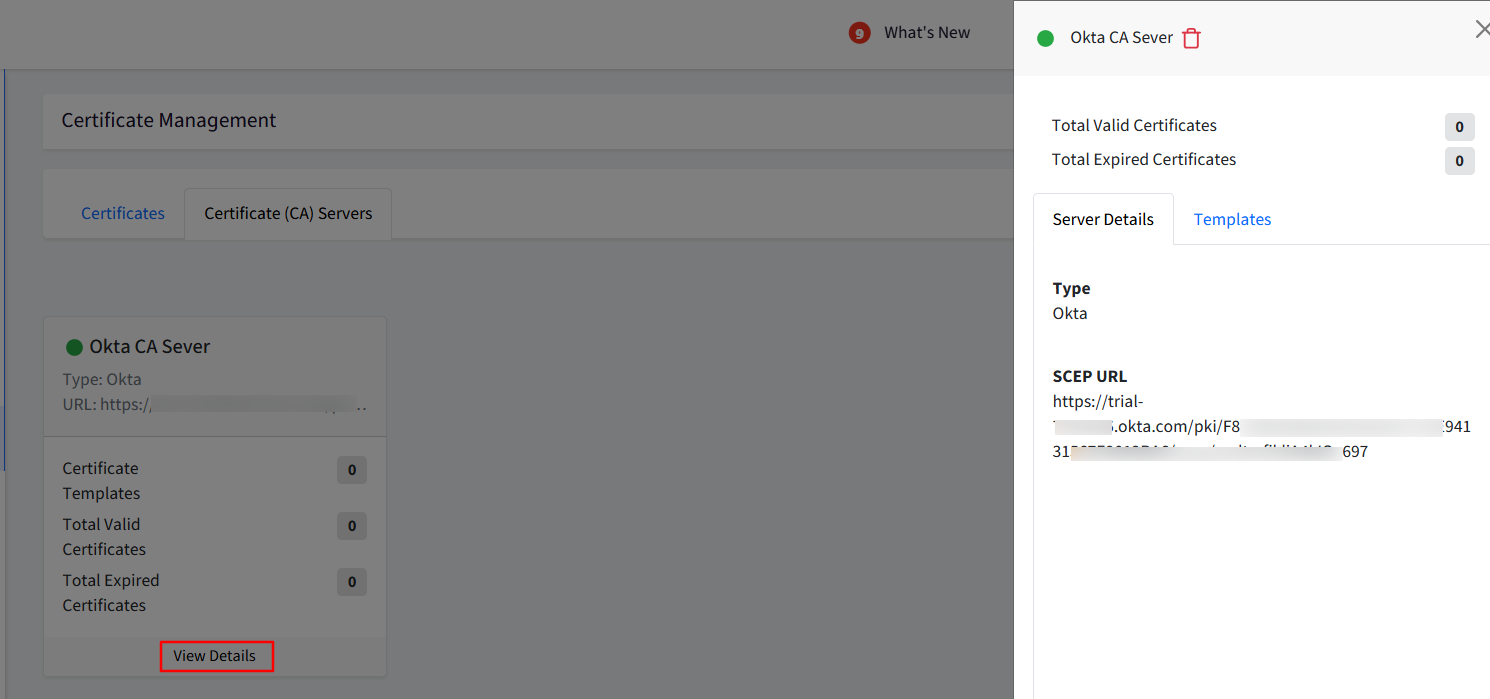
The CA server (you have added) will display as a card on the Dashboard under the Certificate (CA) Servers tab with details like active/expired certificates, certificate templates, etc.
Clicking on View Details will show the server details on the side card.
Step 3: Add Template
Add a Template to start generating certificates using the CA server. To do so, follow these steps:
On the side card, click on Create under the Templates tab.
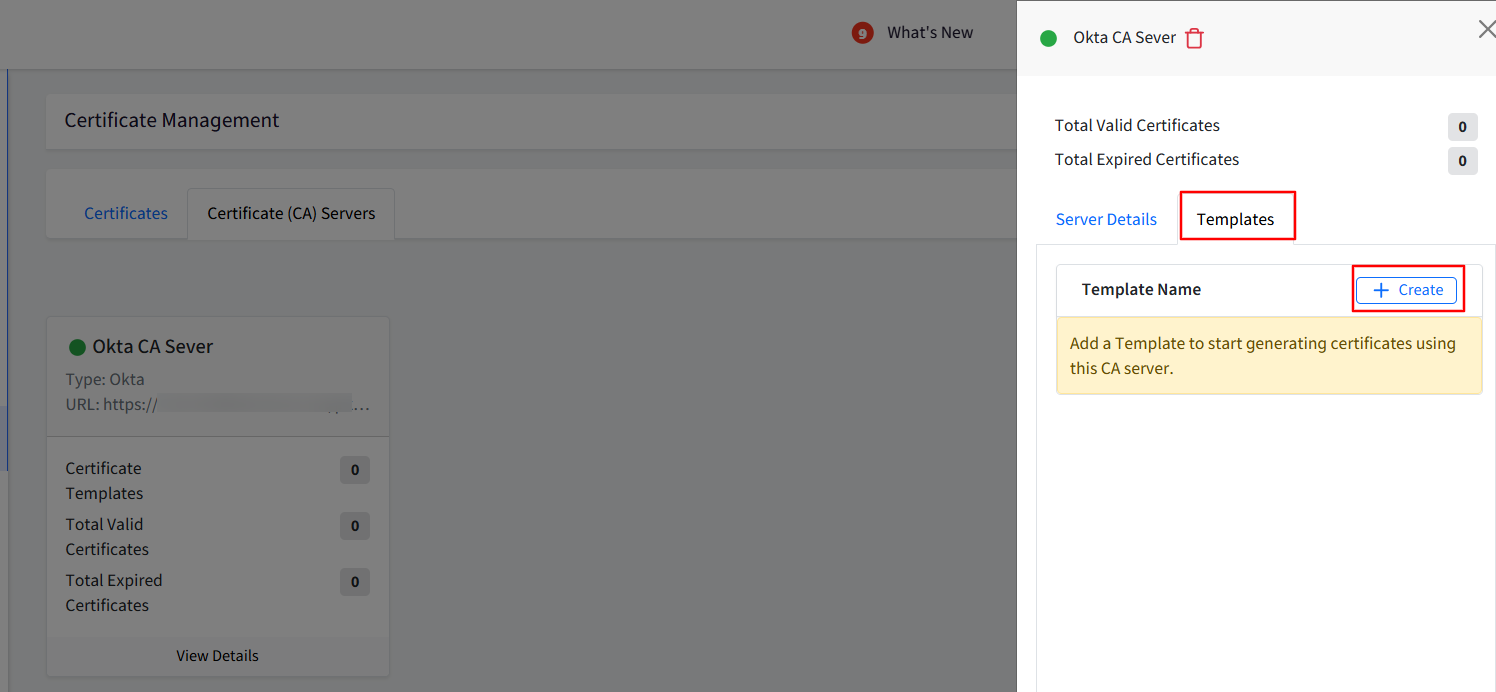
This opens the Add Template window having three sections:
Subject
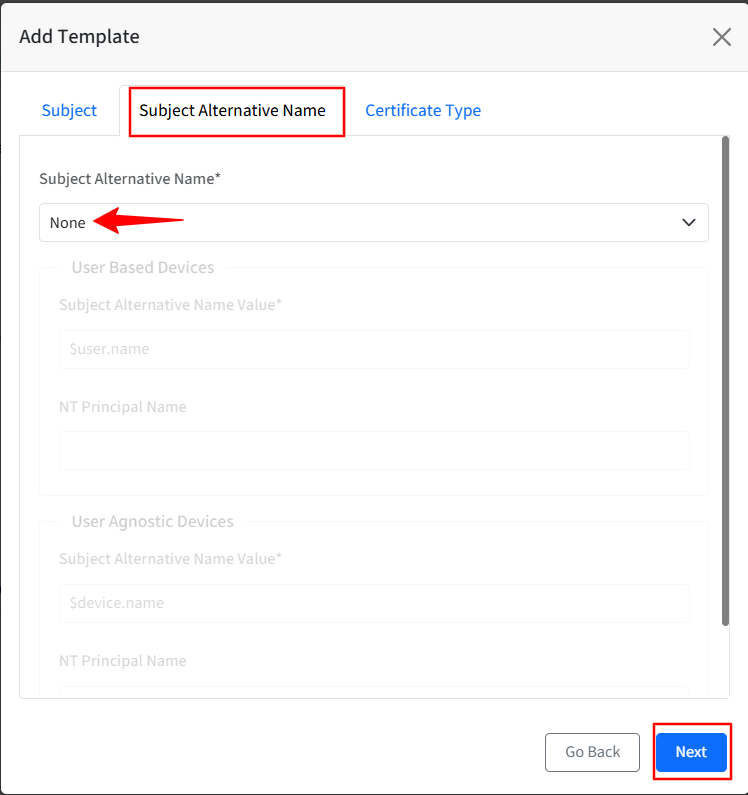
Subject Alternative Name
Certificate Type
Points to Note:Subject and Subject Alternative Name are a part of these details that need to be provided in the request.
The Subject is the name of the end entity for whom the certificate is being generated.
The certificate's Subject info is expected to be in a specific format called LDAP DN format. It works similarly to the format of a key value where each key means something. For Eg. CN=$user.email,OU=Engineering,O=Example Corp,C=US. ere, CN stands for Common Name, C is Country, O is Organization, etc.
Subject: This section allows admins to define a subject for their user-based devices and user-agnostic devices. Enter the following details:
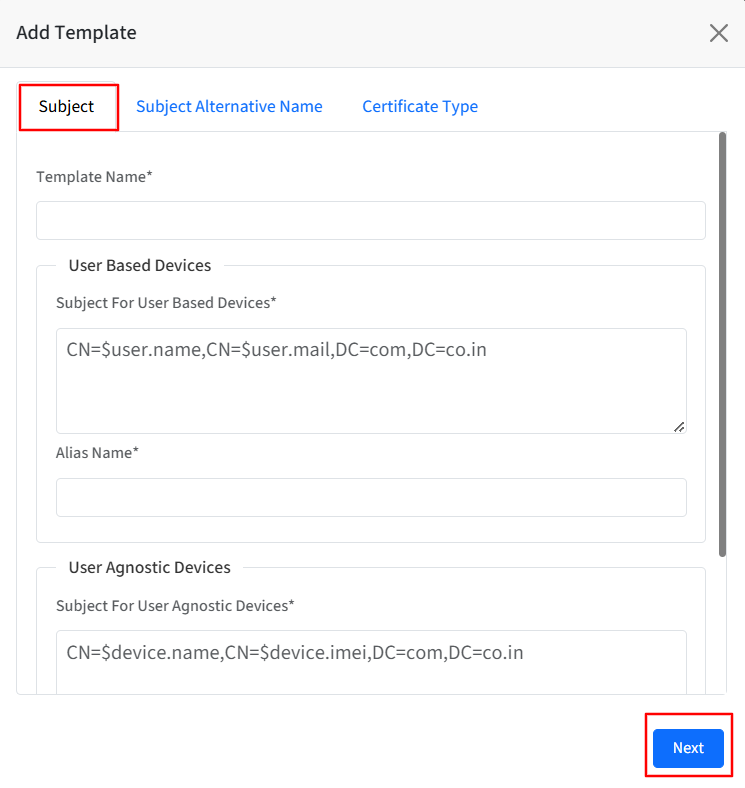
Template Name: Provide a name for the template
For User Based Devices, enter the following in User Based Devices section:
Subject: The subject should be in a valid LDAP DN format. For example, CN=$user.name,CN=$user.mail,DC=com,DC=co.in. As these are user-based certificates, therefore we need to allow only $user.
Alias Name: Enter the alias name under which the certificate should be installed.
For User Agnostic Devices, enter the following in the User Agnostic Devices section:
Subject: The subject should be in a valid LDAP DN format. For example, CN=$device.name,CN=$device.imei,DC=com,DC=co.in. As these are user-agnostic certificates, therefore we need to allow only $device.
Alias Name: Enter the alias name under which the certificate should be installed.
It is mandatory to enter at least one subject name
Subject Alternative Name: Keep the selection as None only.
Certificate Type: From this section, admins can define the properties of the certificate
Challenge / Secret Key: Select Static from the drop-down and enter the certificate Enrollment challenge in the text box.
Choose Static from the drop-down menu list, you will have to enter the SCEP URL and Secret Key that you have created in Step 2.
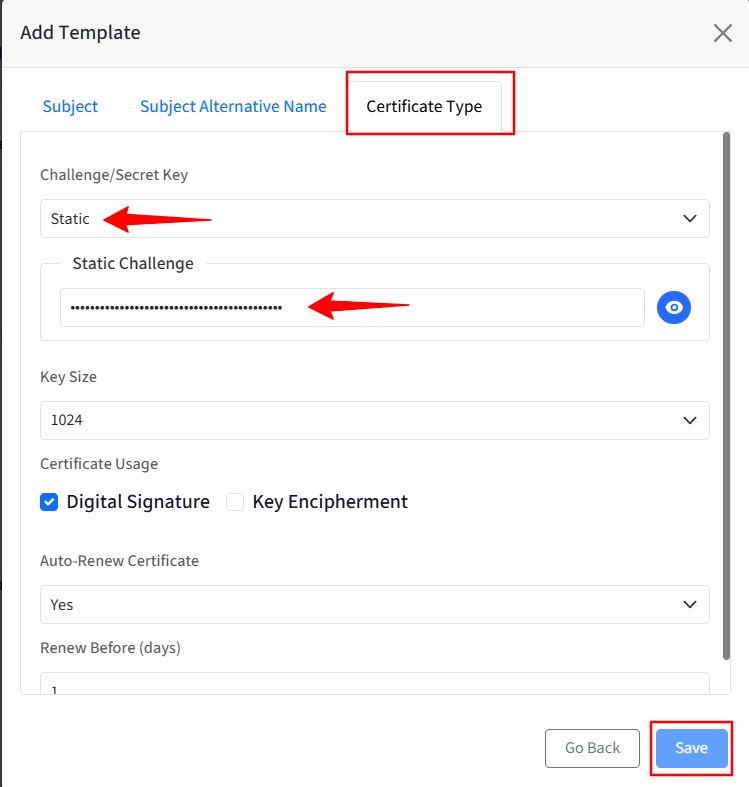
Once you have configured the CA server template on the Scalefusion dashboard, click Save.
The template gets created and is listed under Templates.
Step 4: Enable certificate template from Device Profile
Next step is to associate templates with Device Profiles. Once the profile is saved, a certificate is generated for the devices in the profile. Follow these steps:
Navigate to Device Profiles & Policies > Device Profiles and edit an existing Device Profile.
Navigate to Certificates section in the profile.
On the template which you want to grant access, enable the Install toggle. On enabling, the row will become expandable downwards.

Select Policy Target by choosing one of the options from the drop-down:
Device: When you select Device as the policy target, user certificates will be installed at the device level upon user login.
Enrolled User: Choosing Enrolled user as the policy target will deploy the certificate to the specific user who initially enrolled the device.
Once you have provided necessary grants, click on Update Profile
On the devices associated with the profile, certificates will be generated, and the apps will now be granted certificate.
Notice the CA server certificates that are generated will be listed under Certificate Management
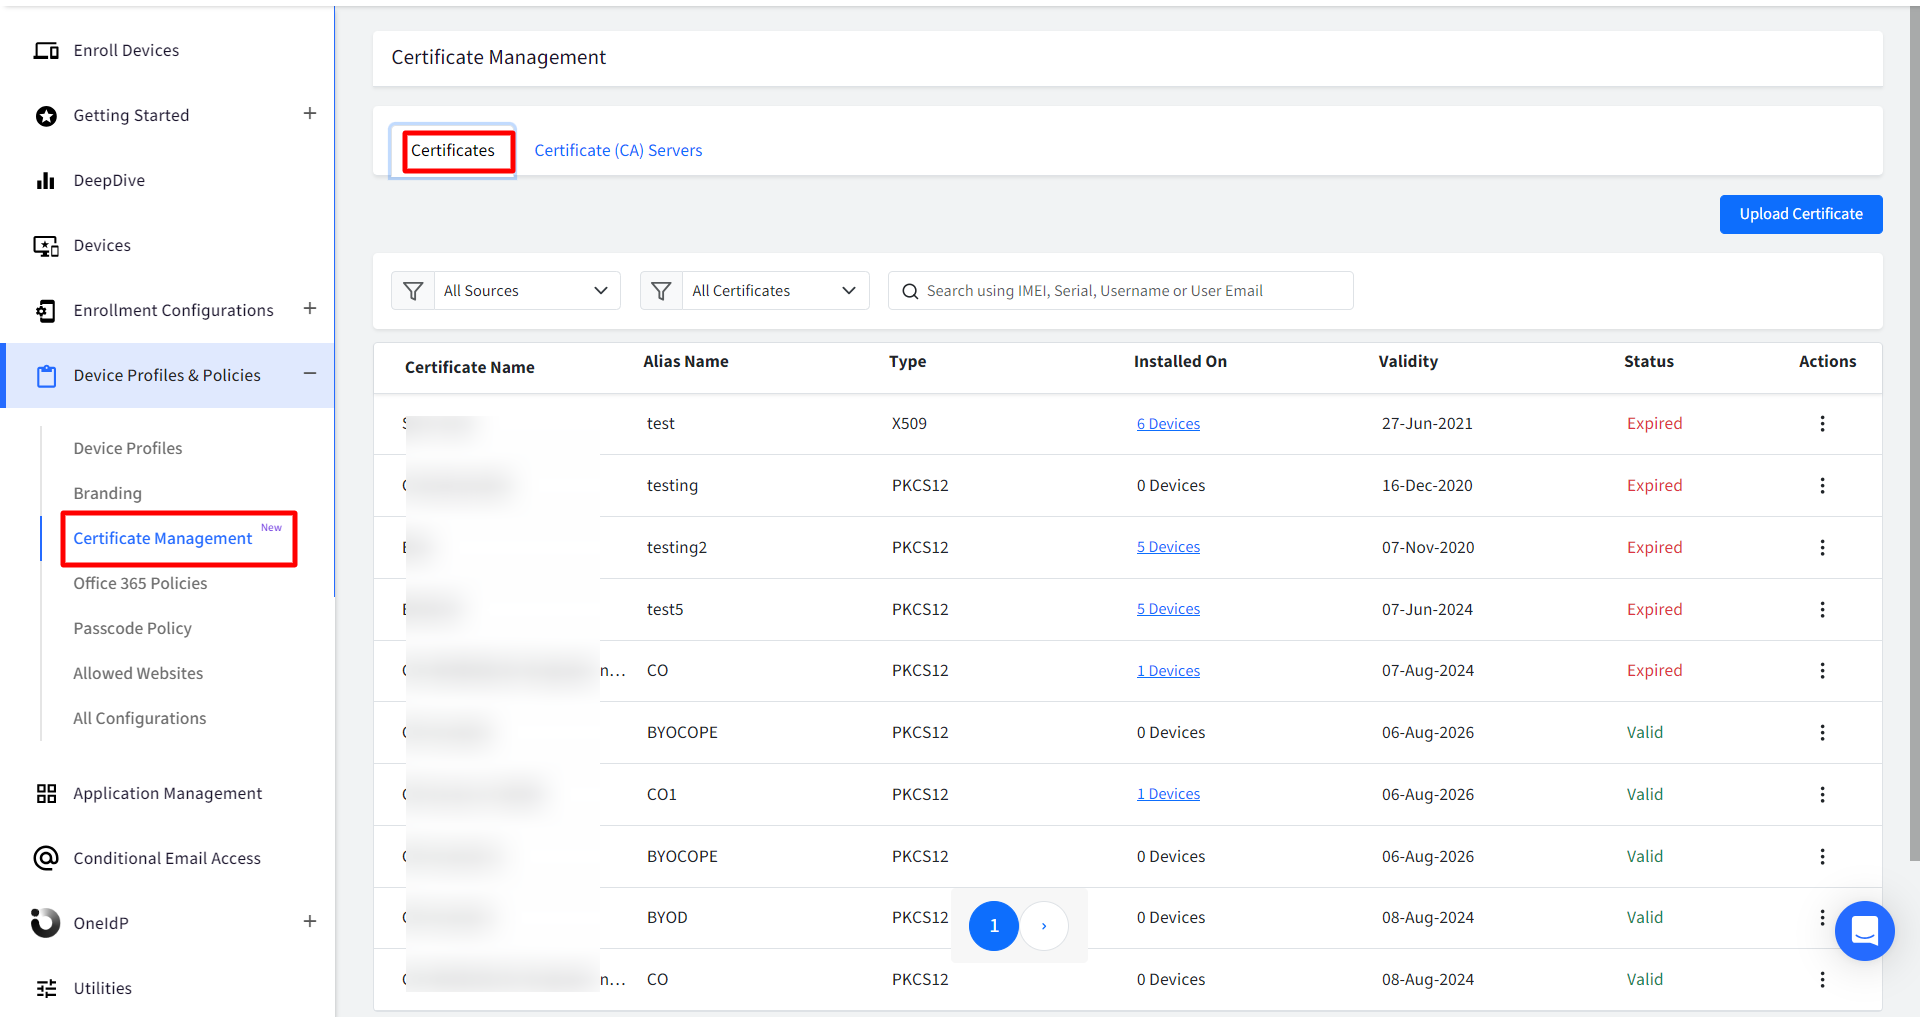
Actions on CA Certificates
Following actions can be taken on CA certificates:
Renew: Renews the certificate on an immediate basis
Deactivate / Activate: The certificate can be deactivated or activated. If you deactivate, it will be uninstalled from the device on which it is installed.
Download: Downloads the certificate in zip format.

CA Certificates on device
On Windows devices:
Device level CA Certificates are stored in Certificate Manager on your system. You can check and validate whether certificates are installed on the device through Certificate Manager application on your device.
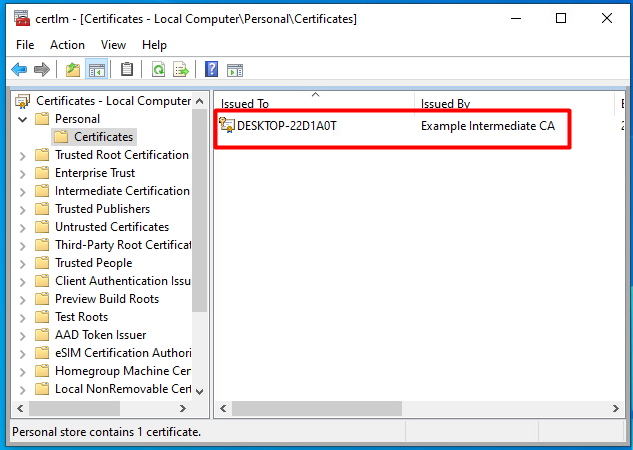
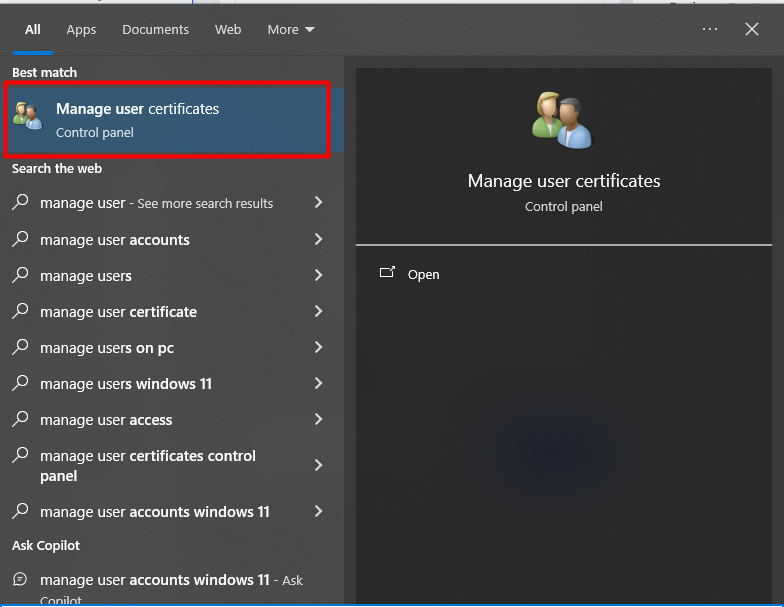
Enrolled User level certificates are available in Control Panel
On Android devices:
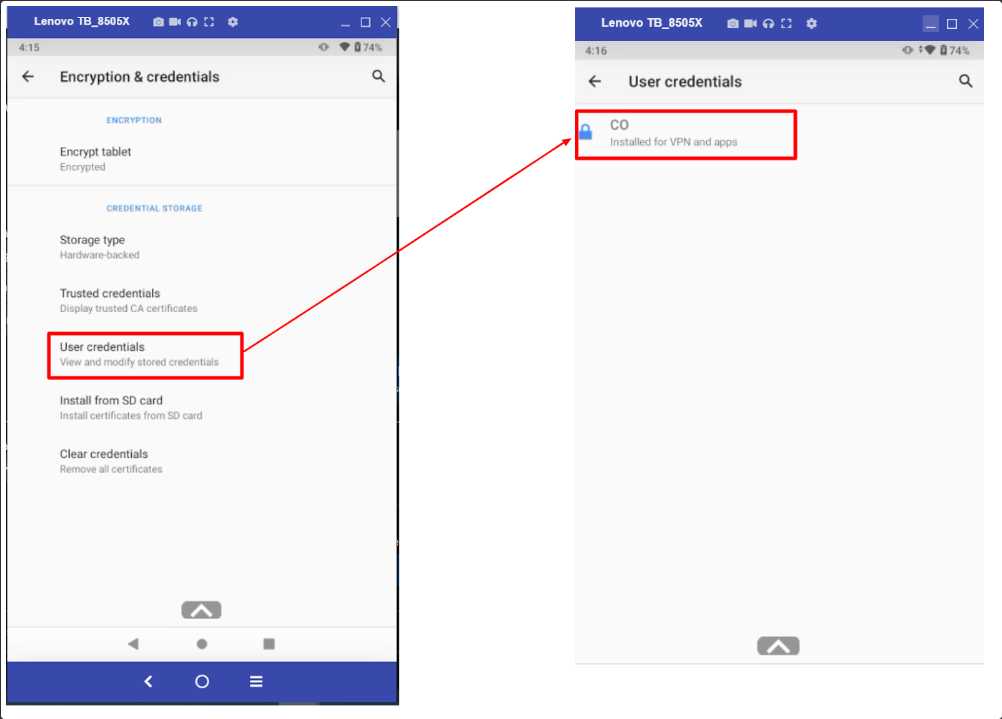
On Android devices, CA Certificates are stored under Settings > Security & Location > Encryption & Credentials > User Credentials.
On iOS devices:
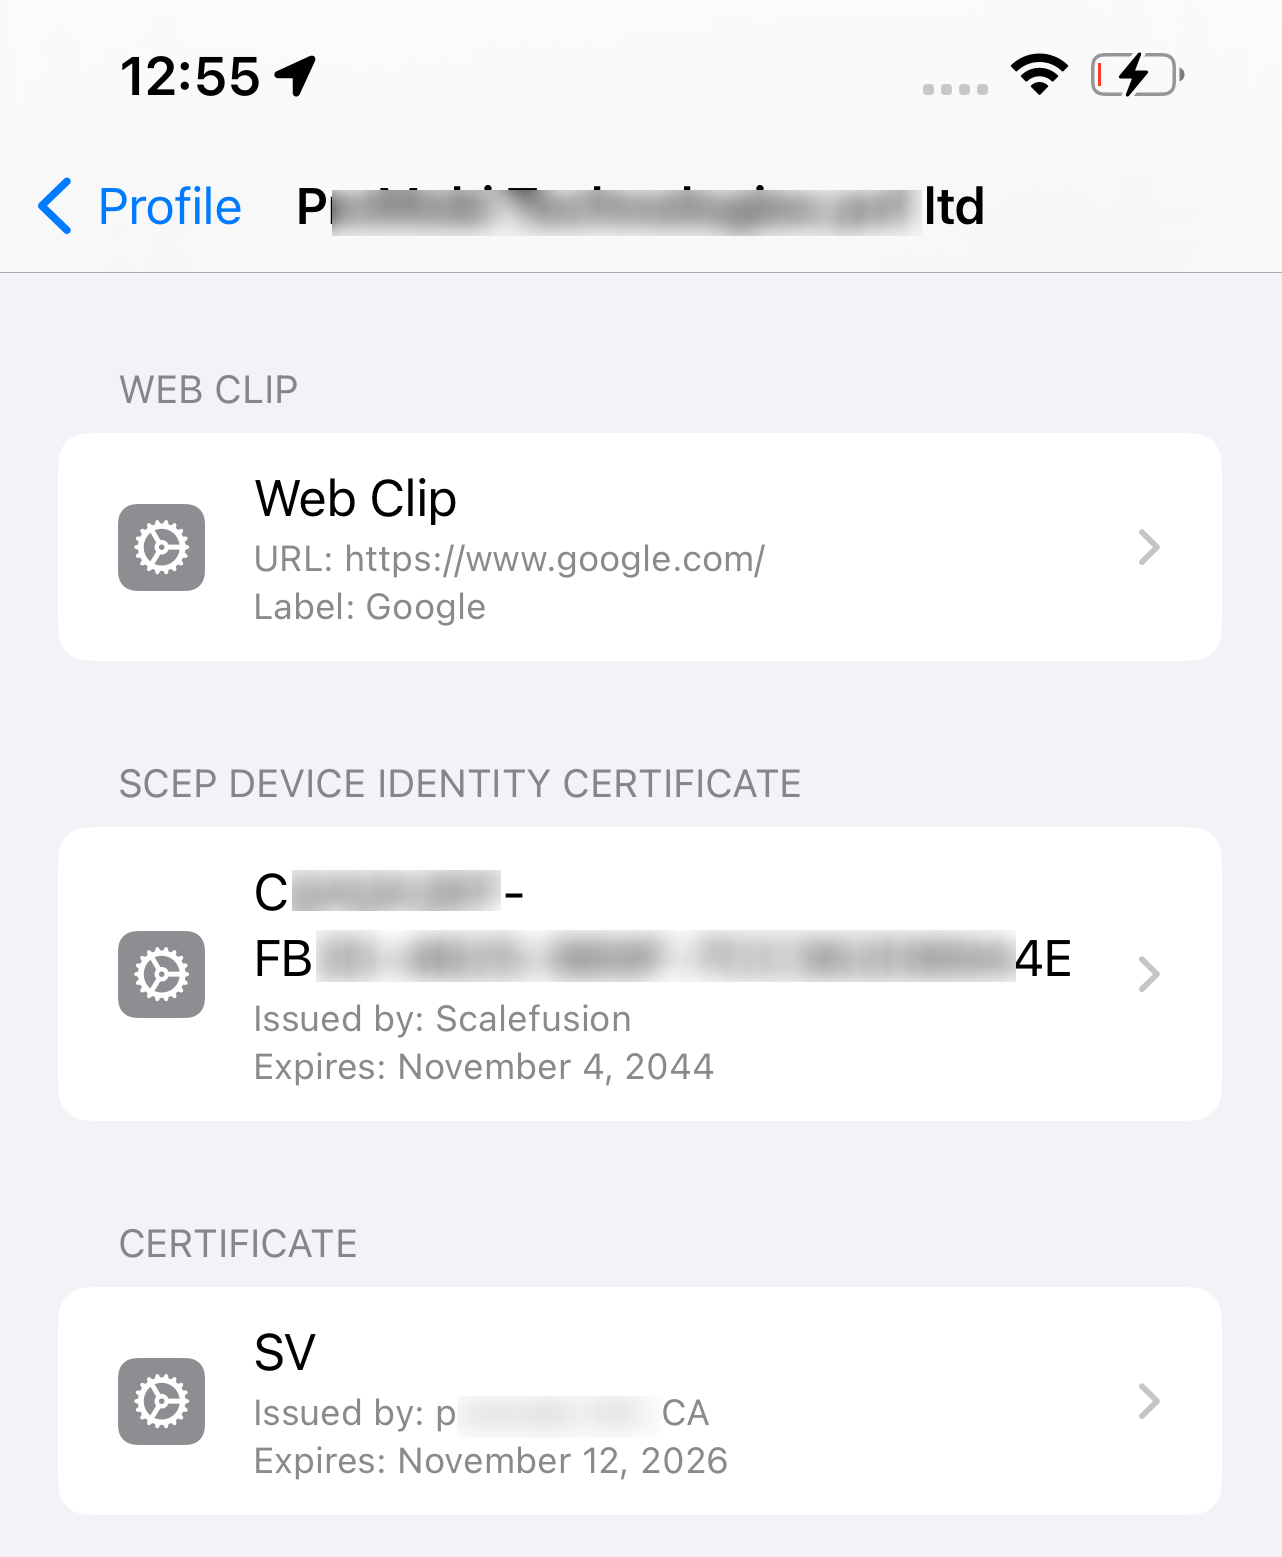
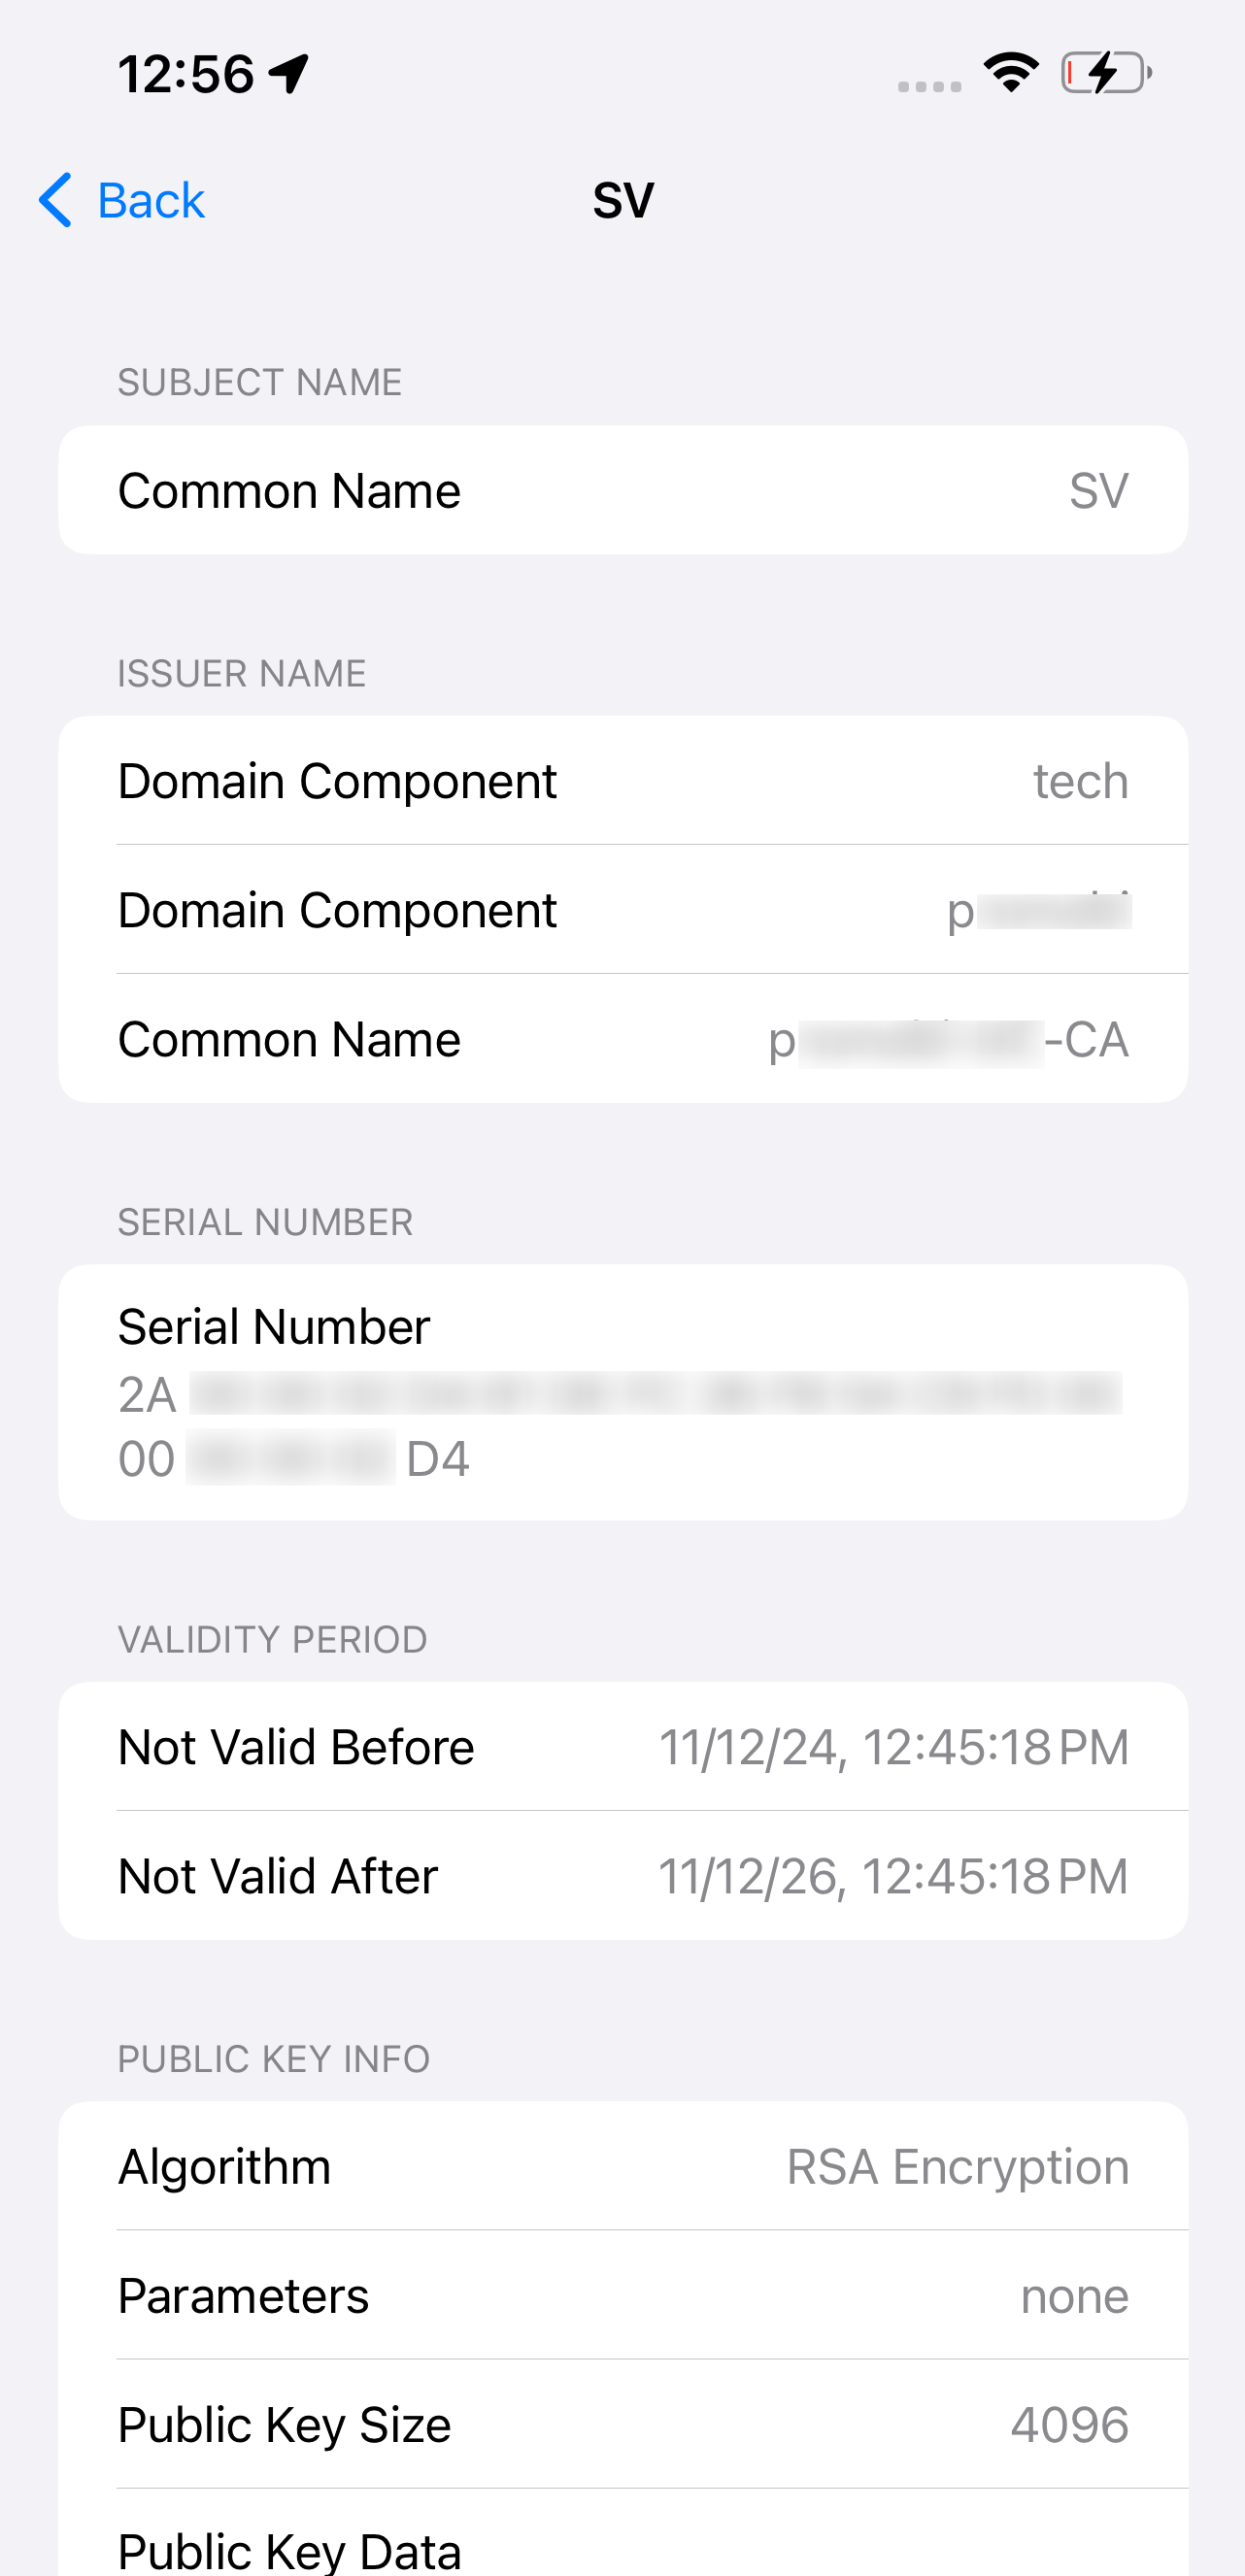
On iOS devices, CA certificates are stored under Settings > General > VPN & Device Management > Profile > More Details.
On macOS devices
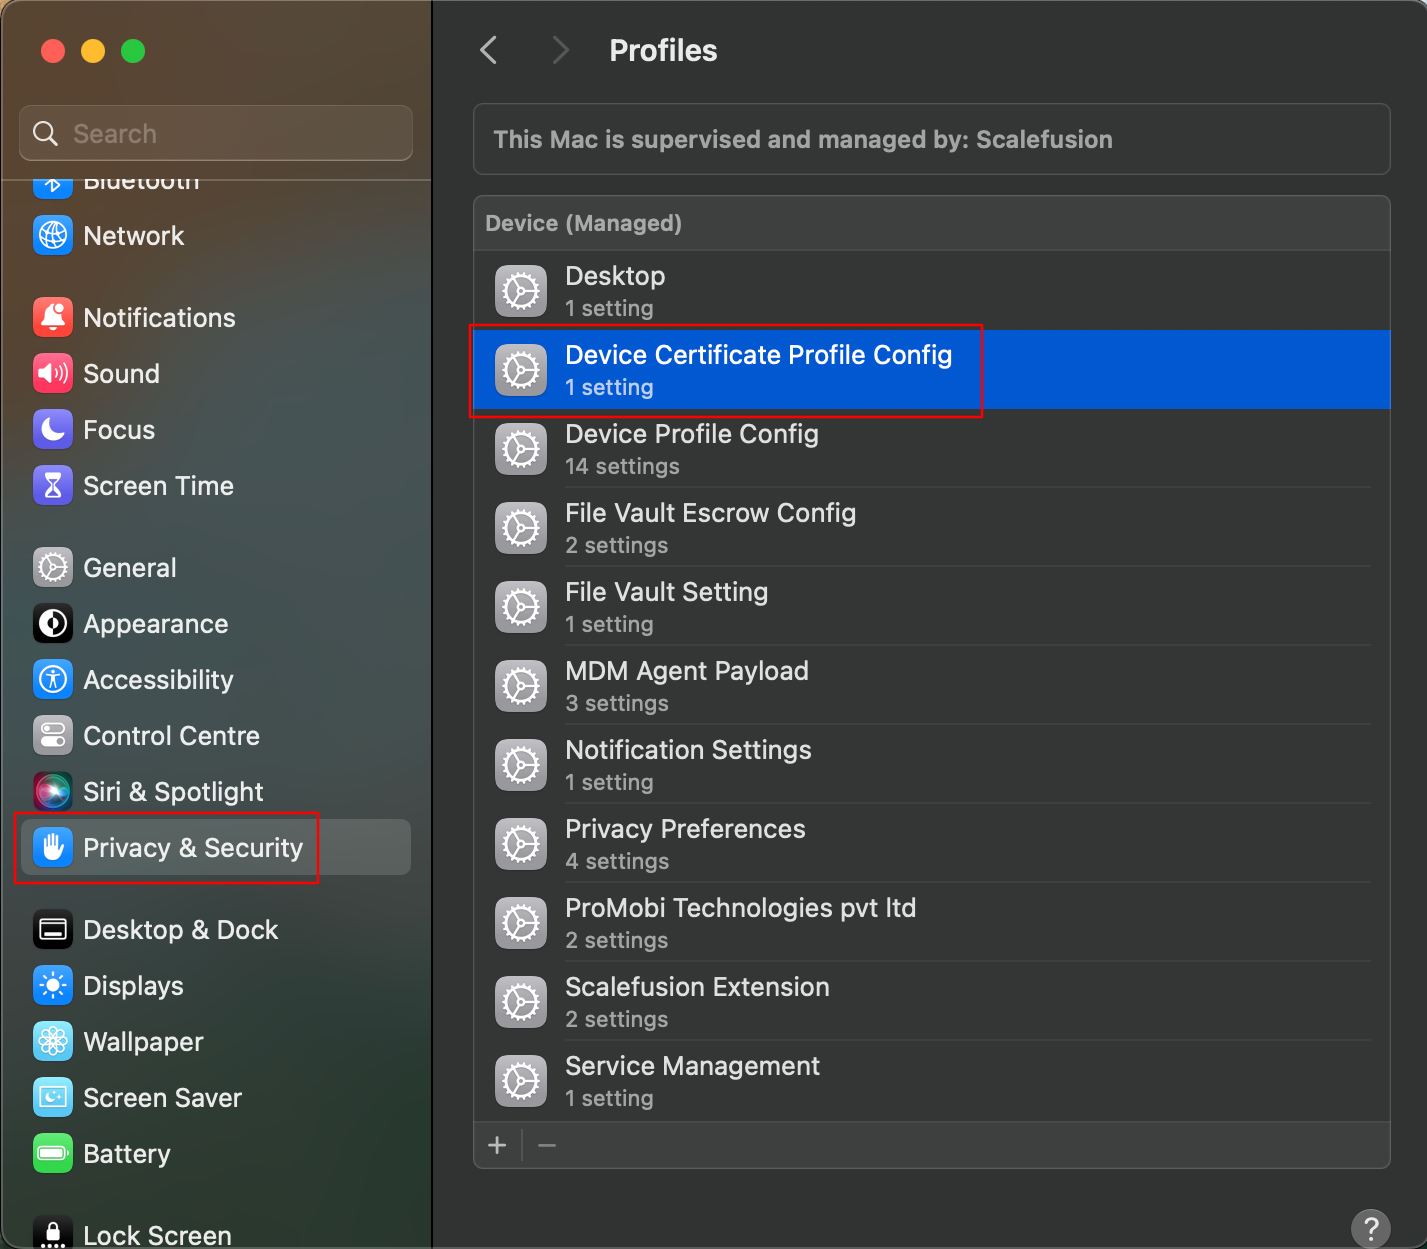
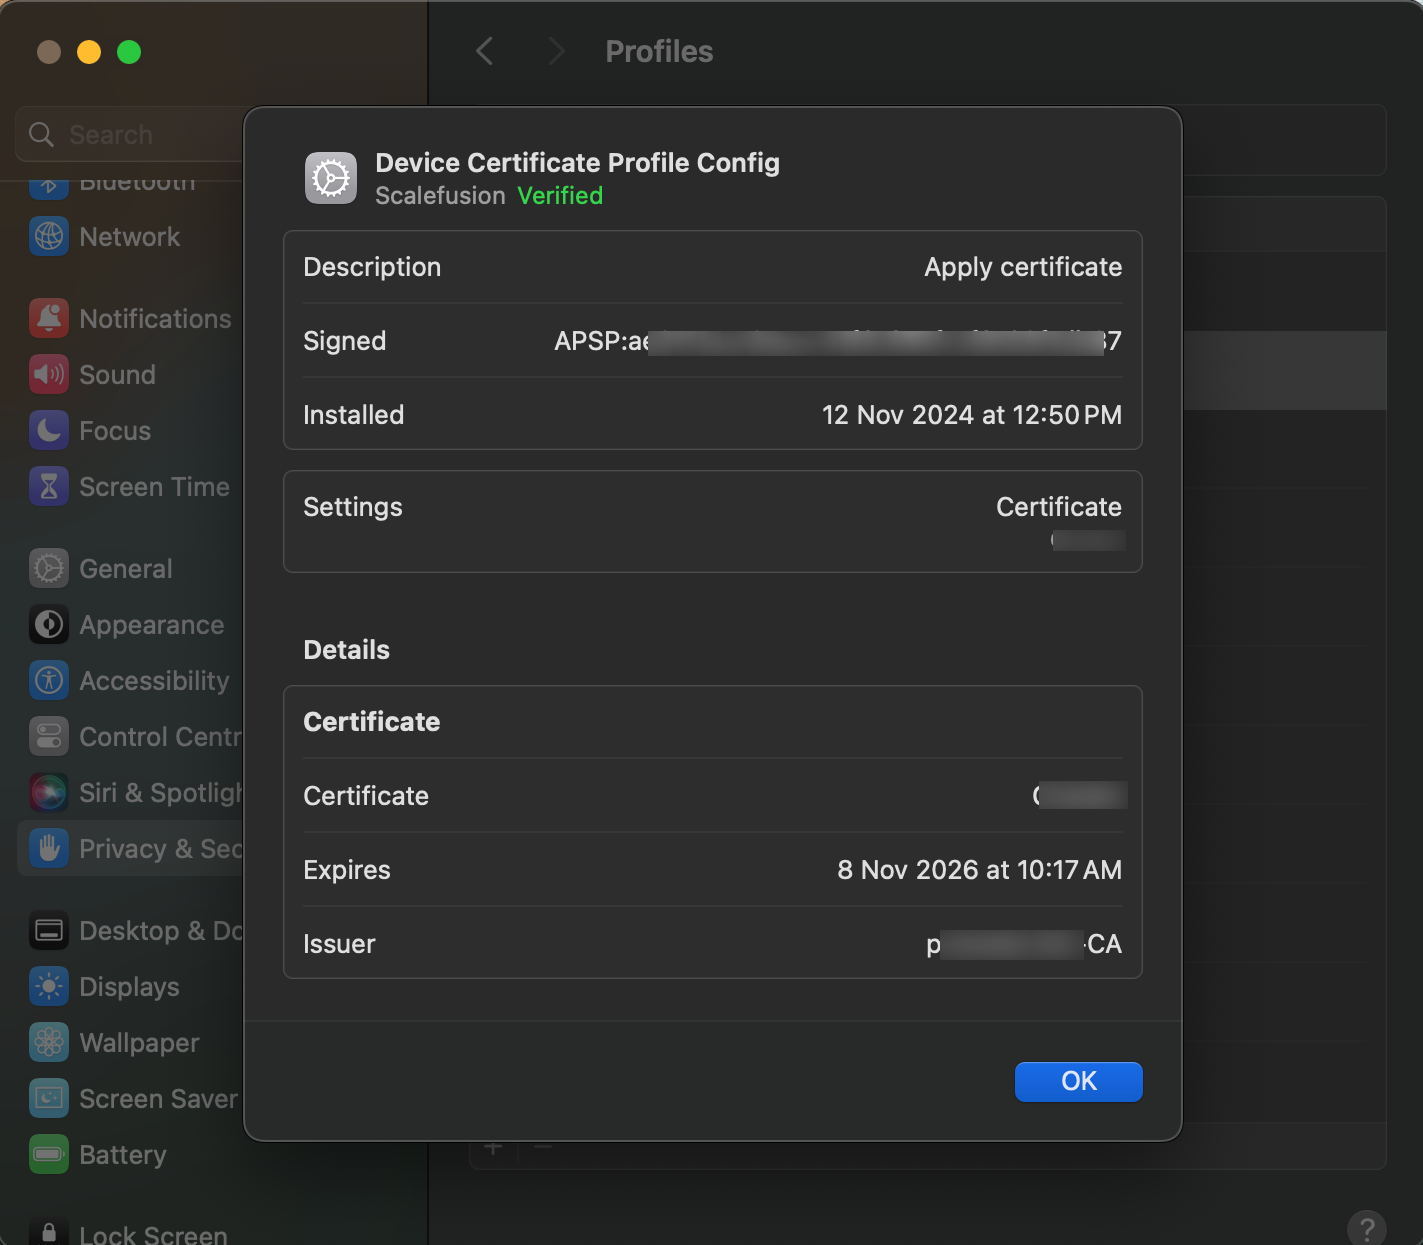
On macOS devices, Certificates & Templates are Visible under Privacy & Security > Others > Profiles.
