- 30 Dec 2024
- 5 Minutes to read
- Print
- PDF
Getting Started with Scalefusion OneIdP
- Updated on 30 Dec 2024
- 5 Minutes to read
- Print
- PDF
Get started with Scalefusion's OneIdP feature, a powerful solution for managing user identities across applications. This guide will take you step by step through the setup process, allowing you to leverage the full benefits of OneIdP.
Steps to creating and deploying successful configuration
Step 1: Sign in to your Scalefusion account with your Google Workspace or O365 account
Step 2: Import Users
Step 3: Set up Directory
Step 1: Sign in to your Scalefusion account with your Google Workspace or O365 account
If your organization uses a Google Workspace account or a Microsoft O365 account, it is recommended to sign in to your Scalefusion dashboard using your Google Workspace account or a Microsoft O365 account.
For example, the below steps show how you can sign in using your Google Workspace account. The same will apply for a Microsoft O365 account also.
Navigate to https://scalefusion.com
Log out of the Scalefusion Dashboard if you are already signed in.
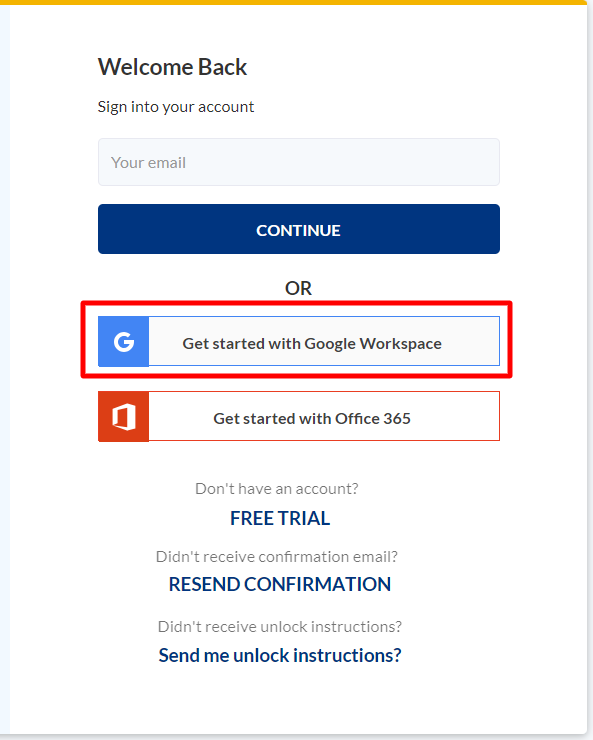
Click Login on the Scalefusion landing page.

Click on the Get Started with Google Workspace button
You will be redirected to the Google Sign-In page
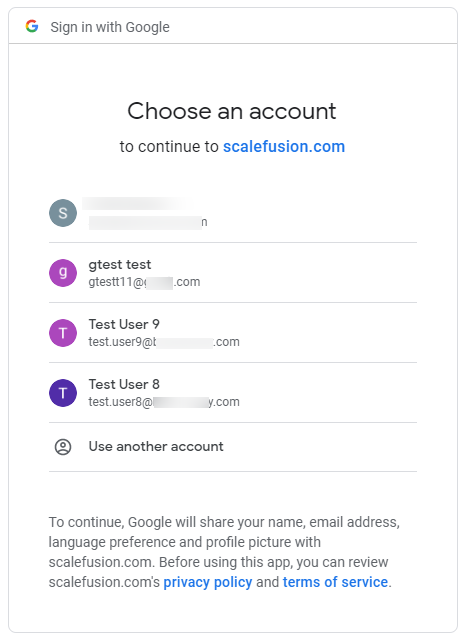
Please enter your Google Workspace credentials (username and password) and complete the sign-in process,
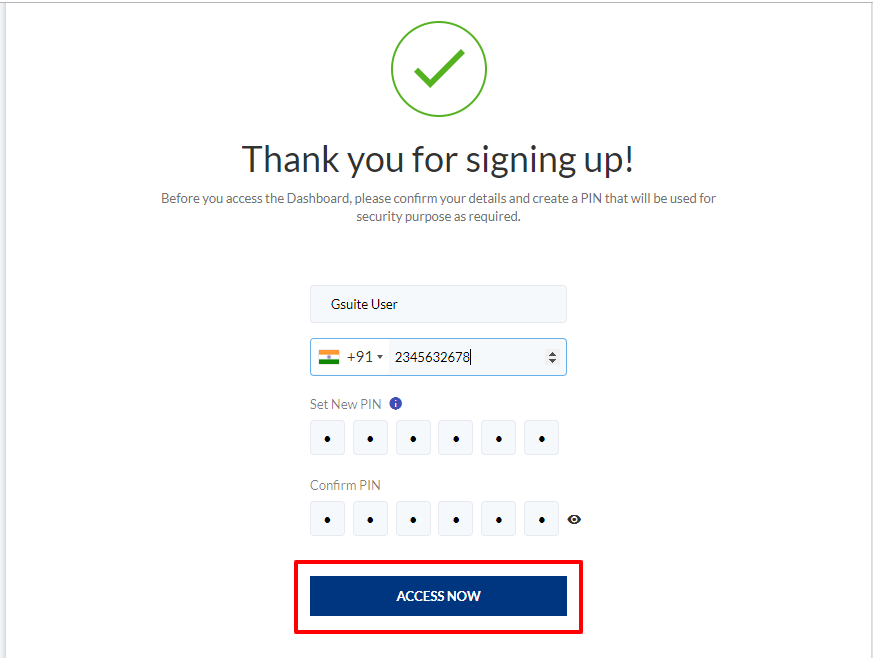
Next, you will be taken to a Thank you page where you will have to create a security PIN.
Creating a Security PIN: A security PIN helps in authorizing certain actions on the Dashboard, which will require a two-step confirmation. This helps prevent accidental deletes/edits of important data from the Dashboard. To create a Security PIN, please complete the steps below,
Name: We try and fetch the name from the GSuite username. You can Add/Edit the name.
Phone Number: We try and fetch the phone number from GSuite credentials. Here you can edit the phone number.
Create New PIN/Confirm PIN: Choose a 6-digit PIN that will be required to authorize certain actions on the Dashboard as and when required.
Click ACCESS NOW to complete the migration and start accessing the Dashboard.
Once you have completed these two steps, you can now start using Google Workspace credentials to sign in to Scalefusion.
Step 2: Import Users
You can easily import your Google Workspace or Microsoft O365 account users directly to the Scalefusion dashboard. For example, the below steps show how users can be imported from a Google Workspace account. The same will apply to a Microsoft O365 account also.
Navigate to Enrollment Configurations > User Enrollment.

Click on Import Users > click on Import from O365/Gsuite.

In the next page, you will see the list of users and you can select the users and click on the Import button.
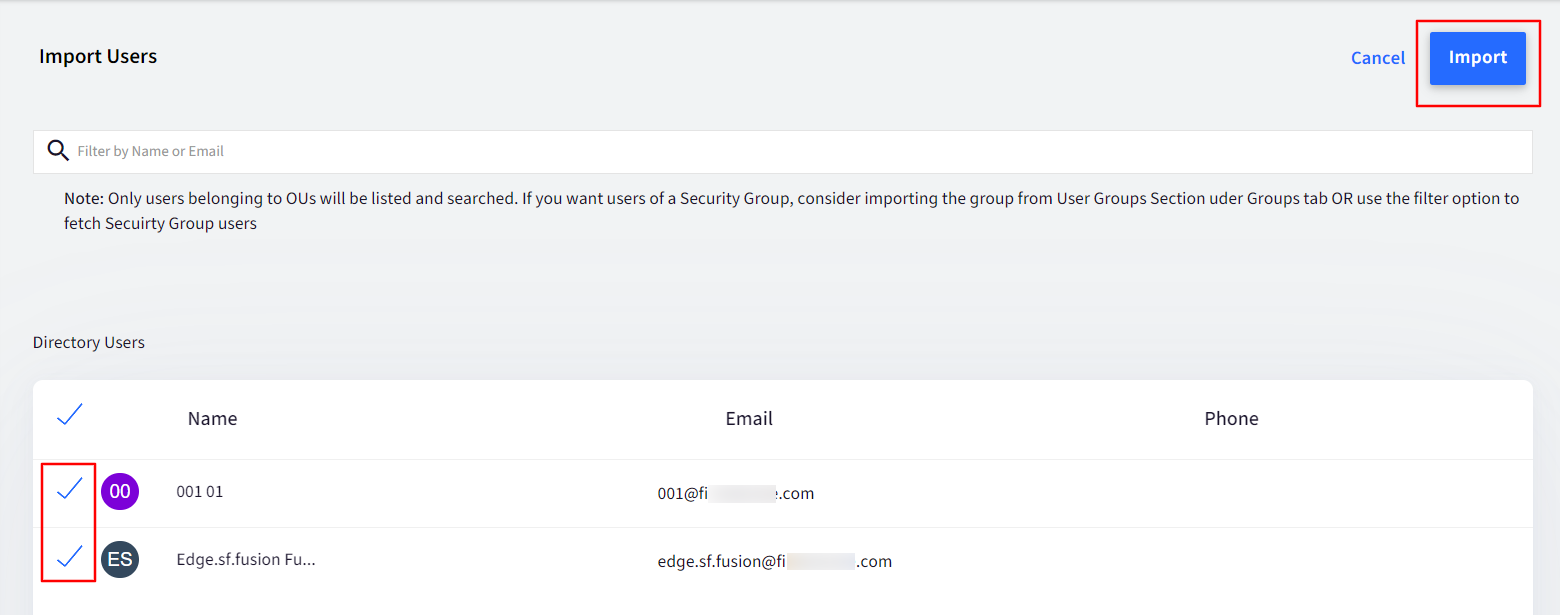
The selected users will be imported to the Scalefusion dashboard.

Step 3: Set up Directory
Scalefusion allows you to create a user directory with your company’s domain name while also supporting user authentication from other service providers.
1. What is Directory (OneIdP)?
Directory is an inbuilt directory of users powered by Scalefusion that stores, verifies and manages user identities, user authentication, and integration with other service providers. With OneIdP, Scalefusion not only offers the capability to create a directory of users having their own domain name but also authenticates users belonging to other Service providers.
2. What are the uses of Scalefusion's Directory?
OneIdP compliments Shared Devices for Android, Windows and macOS with following additional features:
Offers a free subdomain of *.oneidp.com
IT admins can add their own domains and add users
Each user is given a unique id and password that can be used for authentication while enrolling Windows, macOS machines or Android devices
The next set of documents provides detailed process of configuring Directory, User Management and enrollment of devices.
3. What are the advantages with Directory?
As Scalefusion offers a bundled directory of users and passwords so no need to invest in Google Workspace/Azure Active Directory etc. if you don't need email or other services
Suitable for frontline workers
Handle User based enrollments and Shared devices without additional investment
Choose to integrate with your Service Provider to deploy Conditional Access Policies.
4. Which are the supported Identity Providers which can be integrated with Scalefusion's Directory (OneIdP)?
Google Workspace
Microsoft Entra (formerly Azure AD)
Okta
PingOne
On-Premise AD
5. On which subscription plan is OneIdP available?
OneIdP is not available in any of the plans. Subscription for the OneIdP product suite has to be purchased separately.
Configure Directory
On Scalefusion Dashboard, navigate to OneIDP > Directory
Click on Get Started
This will bring up the configuration page. Configuration is a four-step process

The steps are explained in detail below
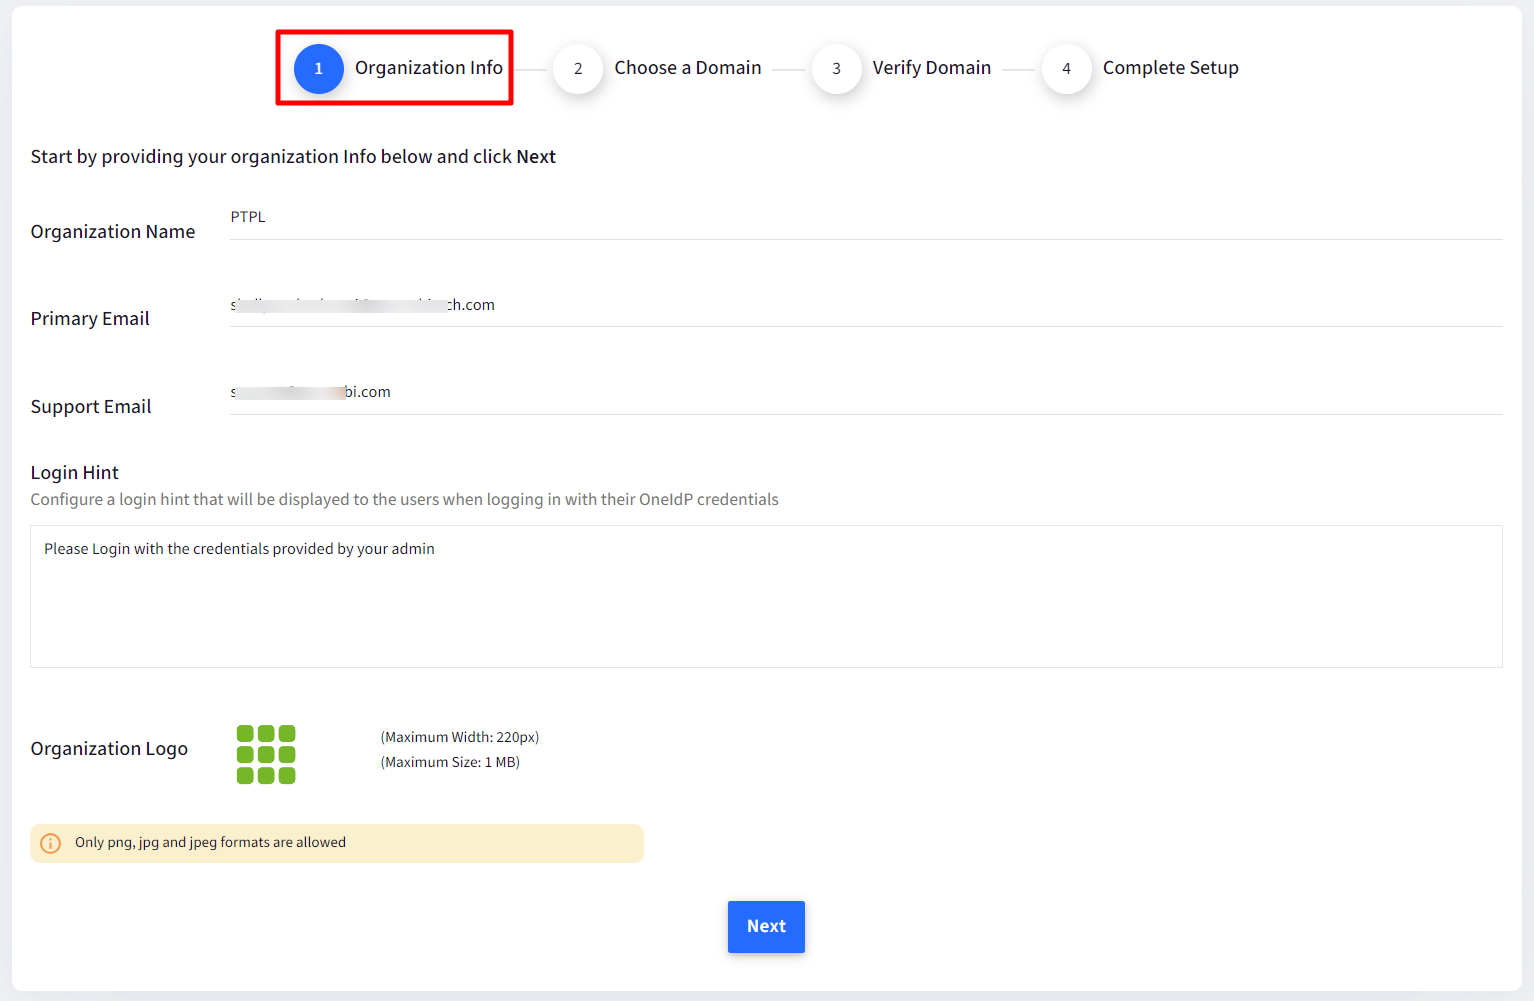
Step 1: Organization Info
Provide your Organization Info with following details:
Organization Name: Enter the Organization name
Support Email: Enter support email id
Login Hint: Configure a login hint. This will be displayed to the users when logging in with their OneIdP credentials
Organization Logo: Upload Organization logo. The maximum dimensions should be 300*300. Only .png, .jpg, .jpeg images are allowed
By default The Organization Name, Support Email and Organization Logo are taken from Organization Info on Dashboard. You can replace them.
Click Next
Step 2: Choose a Domain
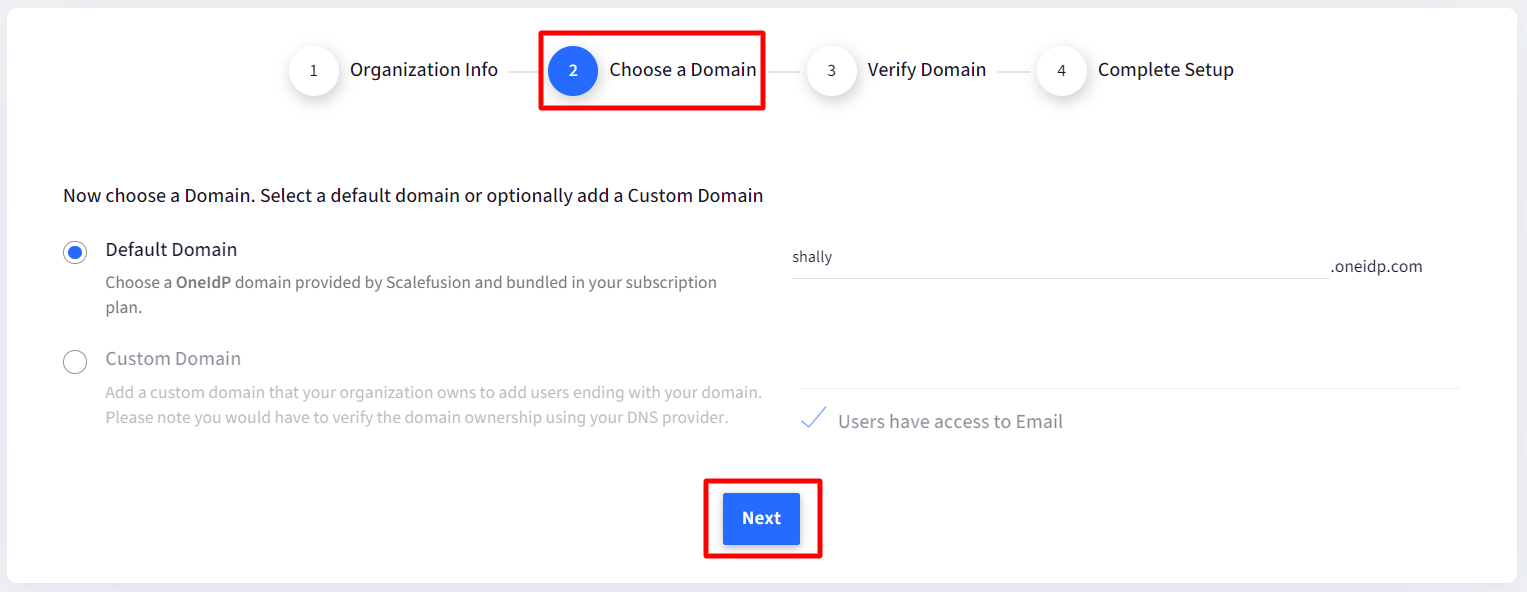
Choose a domain for the directory. There are two types of domains to choose from:
Default domain: This is the default domain provided by Scalefusion. The users will be identified with .oneidp.com as the extension. The domain should be unique and of 4 or more characters.
Custom Domain: You can optionally add a custom domain that your organization owns to add users ending with your domain. You would have to verify the domain at the next step using your Domain provider. This is optional, and can be verified later as well.
Users have access to Email: Enable this if the users to be added under custom domain, will have access to their email for authentication
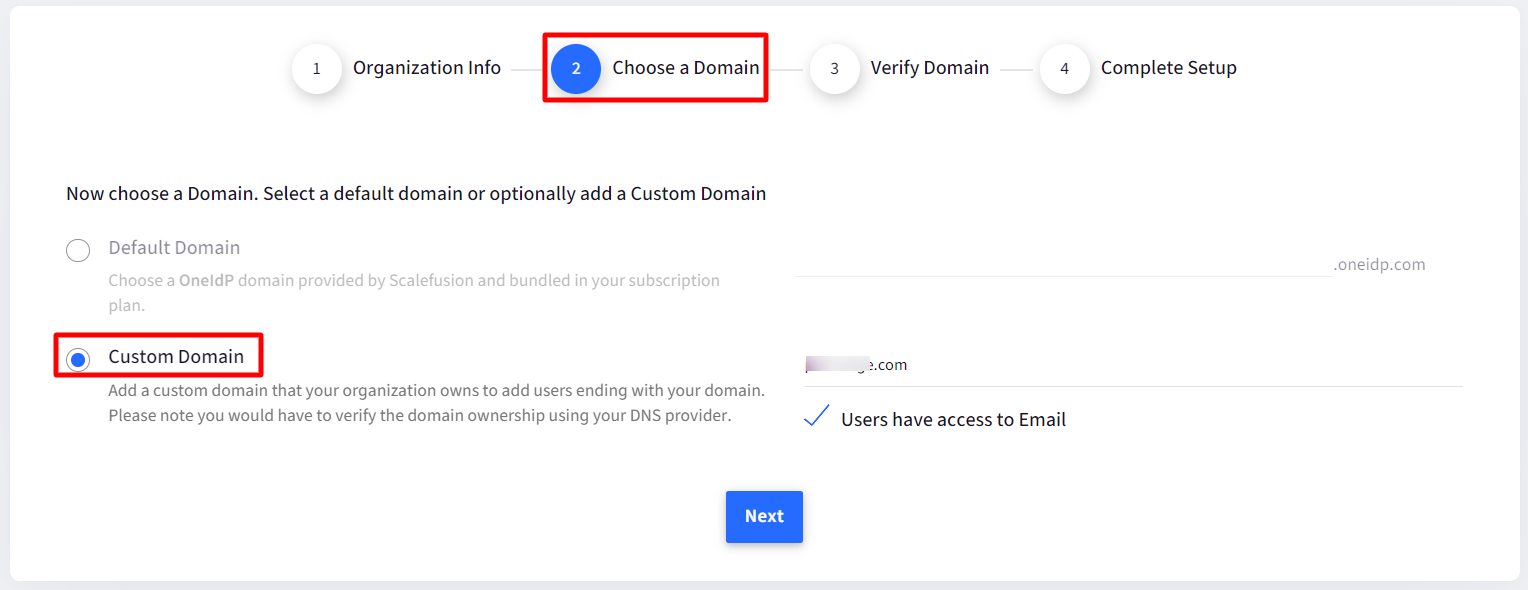
Default domain or custom domain can also be added later.
Click Next
Step 3: Verify Domain
This step is based on your selection at Step #2.
Default domain
If Default domain is selected, then it will be verified as per basic validations and you will get a confirmation screen of domain being setup. Click Next

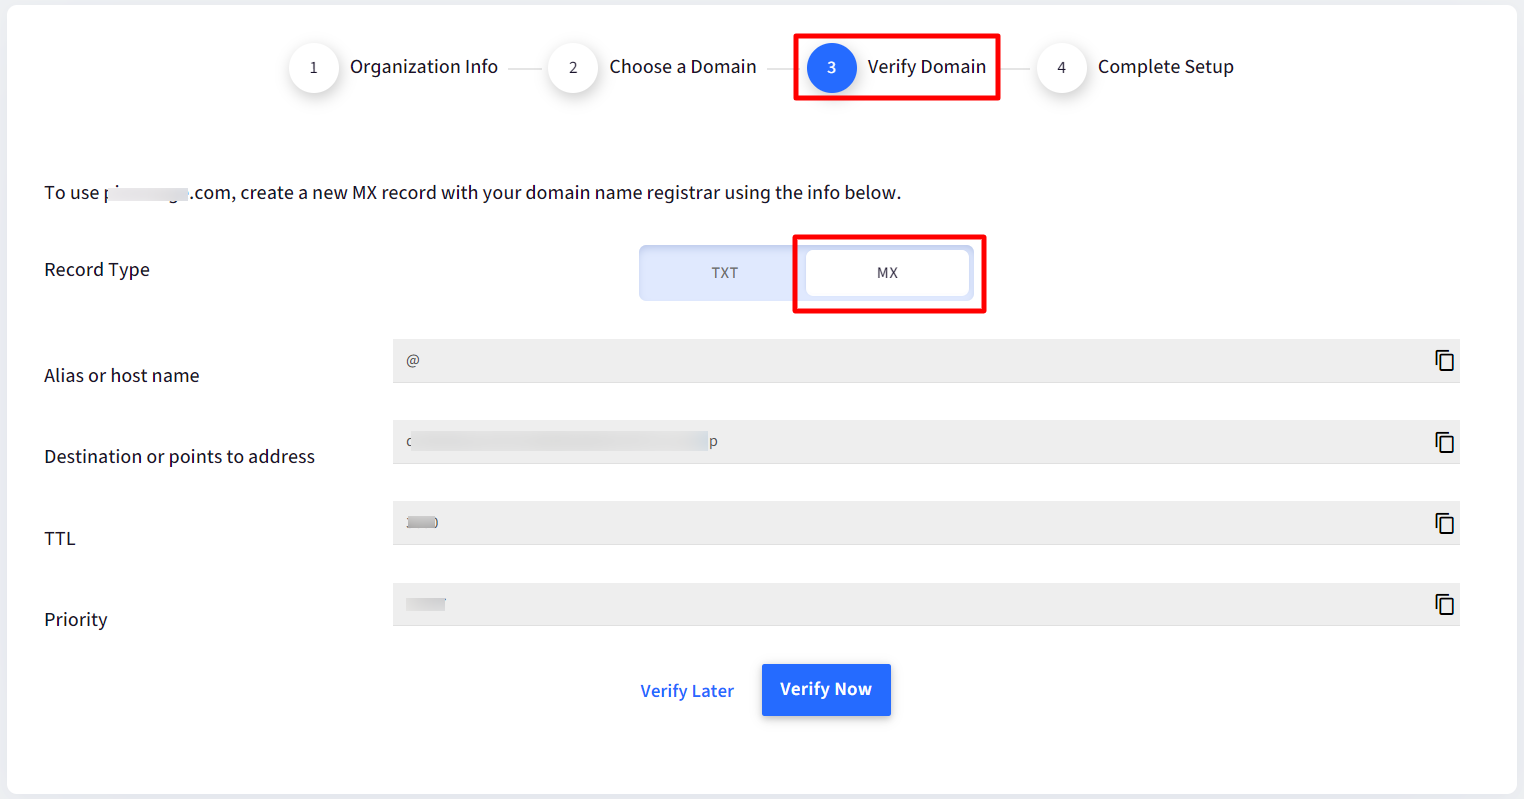
Custom Domain
If you have selected custom domain in Step #2, you would have to verify the domain ownership using your DNS provider. Hence, you will get a different screen to Verify Domain. The details have to be added to record with your domain name registrar for verification. After adding click on Verify Now to verify:
You can choose to Verify Later also. With this selection, on OneIdP main page there will be an icon displayed over domain name indicating that it is unverified. You can then verify it later.

Step 4: Complete Setup
On successful verification of the domain, you will get the Complete Setup screen. This completes the setup and configuration of OneIdP in your Scalefusion account. Click on Finish
Points to Note:
One default domain can be created under a directory
There can be multiple custom domains
On clicking Finish, the domains in the directory will be displayed on the Directory main page. Here,
Activated Accounts: Displays count of users who have activated (either reset their password from invitation email or enrolled atleast one device) their accounts.
Pending Activations: Displays count of users who have not yet activated their accounts. You can view the list of such users and also send reminders from here. Click on Pending Activation user count which will bring up a small window with list of users. Click on Send Reminder to send reminder for activating the account(s).
This helps to plan a migration for users to SSO powered by OneIdP.


