Scalefusion Dashboard enables IT admins to track the movement of devices in and out of defined boundaries. This can be achieved through the Geofence feature. Geofence lets you create a virtual fence around a geographical region that helps in tracking the movement of Scalefusion-managed devices in and out of the fence.
Geofences can be applied on Android, iOS, macOS and Windows devices. Scalefusion allows the creation of two types of geofences, viz. circular and polygonal. The document below explains how you can create geofences, apply them on devices and other features related to it.
Prerequisites
- Devices should be enrolled with Scalefusion.
- You should be subscribed to a Business or Enterprise plan.
- Requires following client versions for multiple geofence features:
- Scalefusion Android client: v4.0.0 & above
- iOS client: v2.3.0 & above
- macOS Agent application: v1.1.0 & above
- Windows MDM agent: v15.6.0 or above
- Polygonal geofence requires Scalefusion Android client v8.7 & above, iOS client 3.0.0 & above, macOS Agent application (1.1.0 & above) and Windows MDM agent v15.6.0 or above.
- On Mac devices, Location permissions and notification permissions should be granted.
- Windows
- It is recommended that location is enabled on the device.
- Device must be connected to WiFi
Creating a Circular Geofence
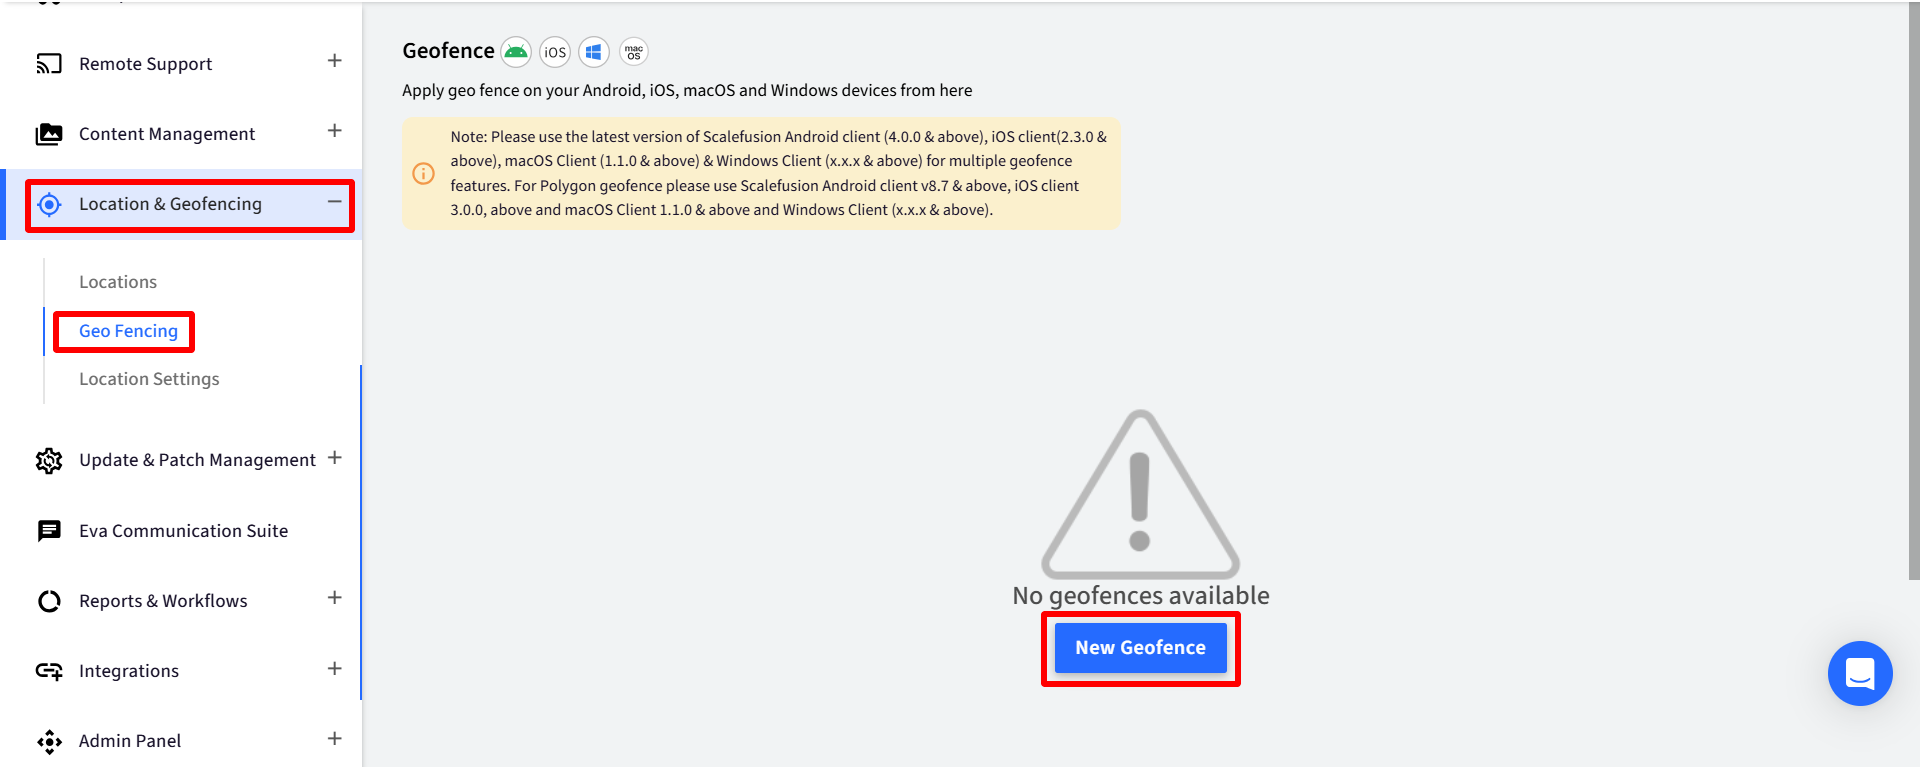
- On the Scalefusion Dashboard, navigate to Locations & Geofencing > GeoFencing
- Click on New Geofence
- Search Location: Type in the address to bring up a region on the map below.

- Alternatively, click and drag the circle at the desired location on the map. Once the location is marked, a prompt appears on the right side panel with Radius, Latitude and Longitude details of the selected area.
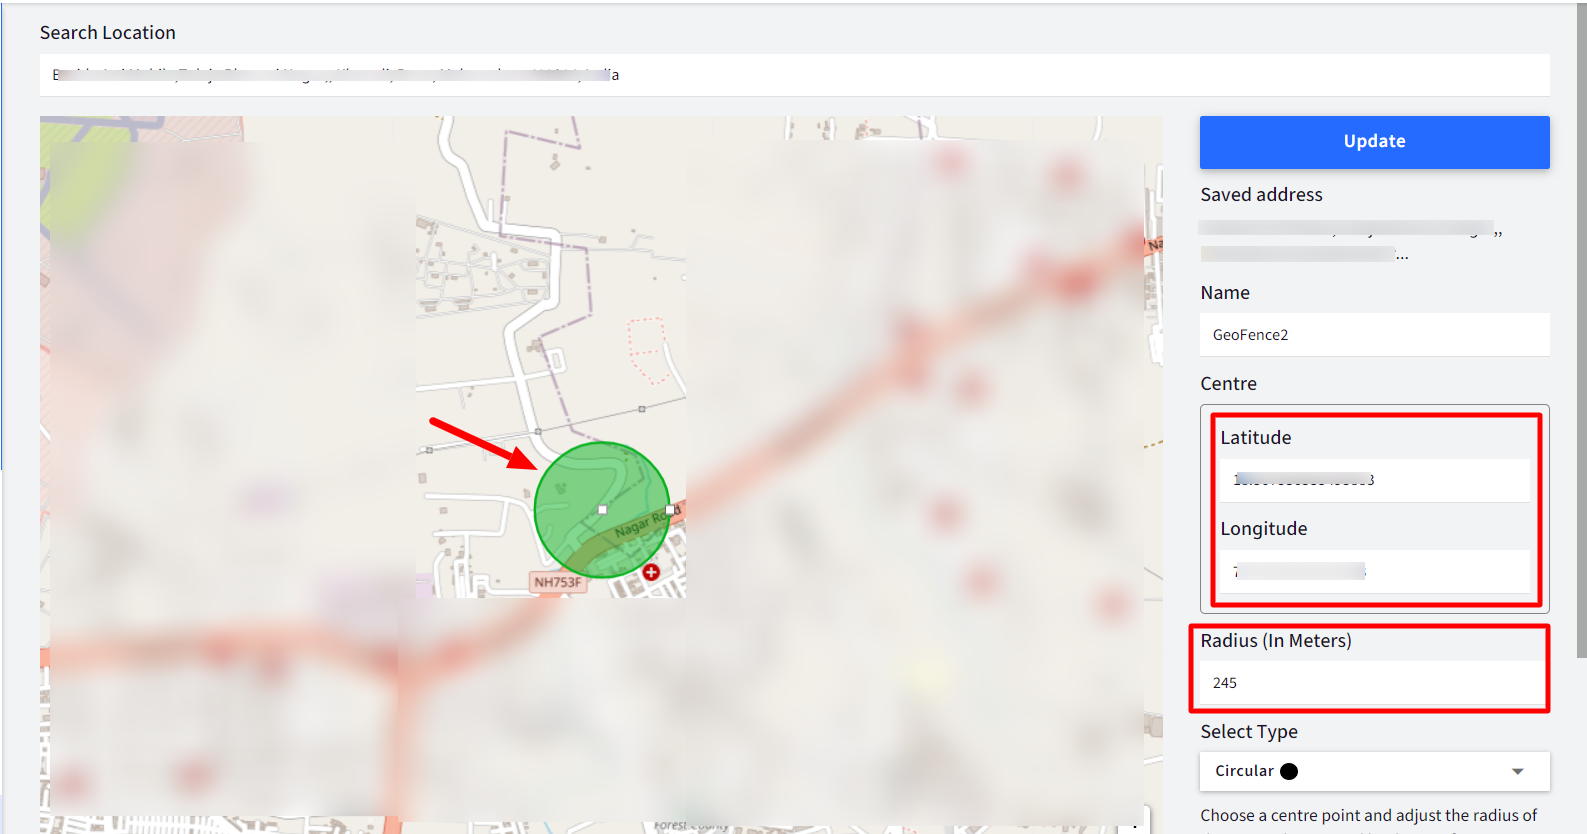
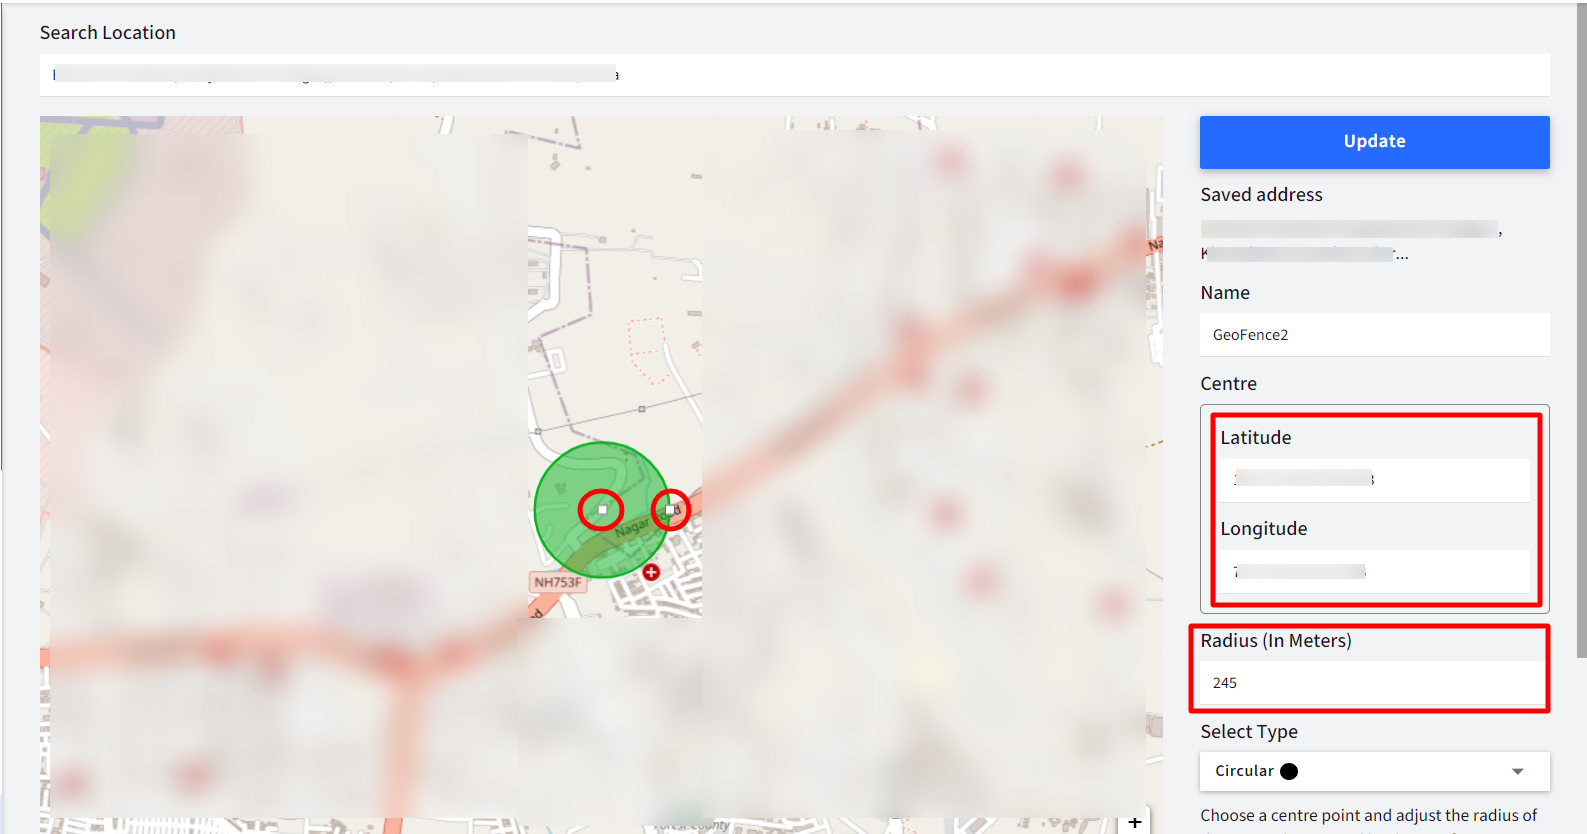
- If you want to re-adjust the geofence area, drag the center point of the circular area on the map to move the location and drag the right handle to adjust the radius. Radius, Latitude and longitude details can also be changed from the respective fields on the right.
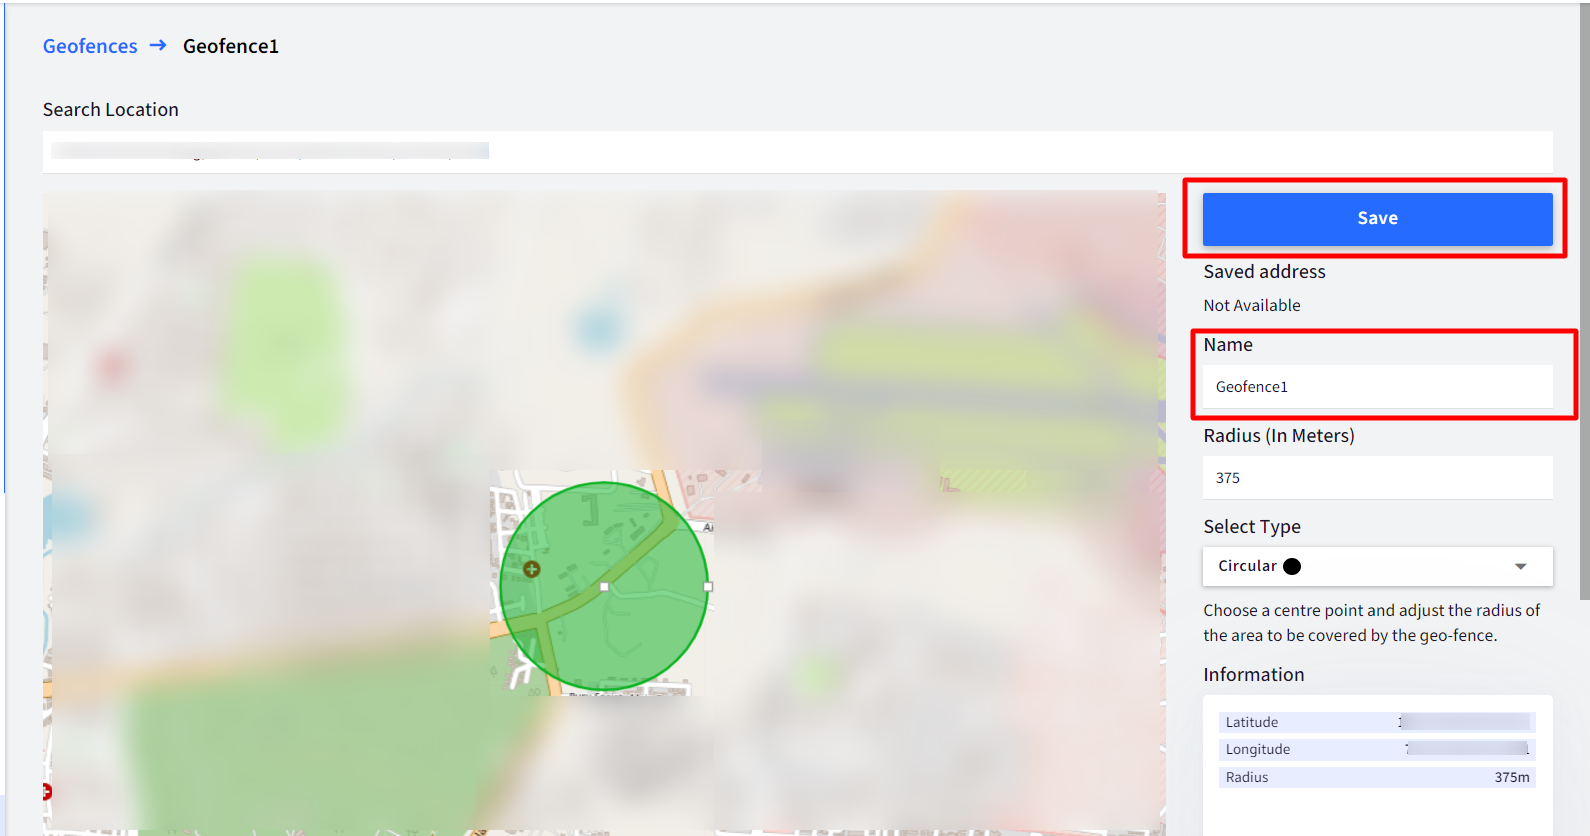
- Enter a Name for the geofence and click Save.
Creating a Polygonal Geofence
In certain locations, circular geofence does not serve the complete purpose like for a school complex or factory area. You can create a polygonal geofence to define the geofence area more explicitly.
- On the Scalefusion Dashboard, navigate to Locations & Geofencing > GeoFencing
- Click on New Geofence
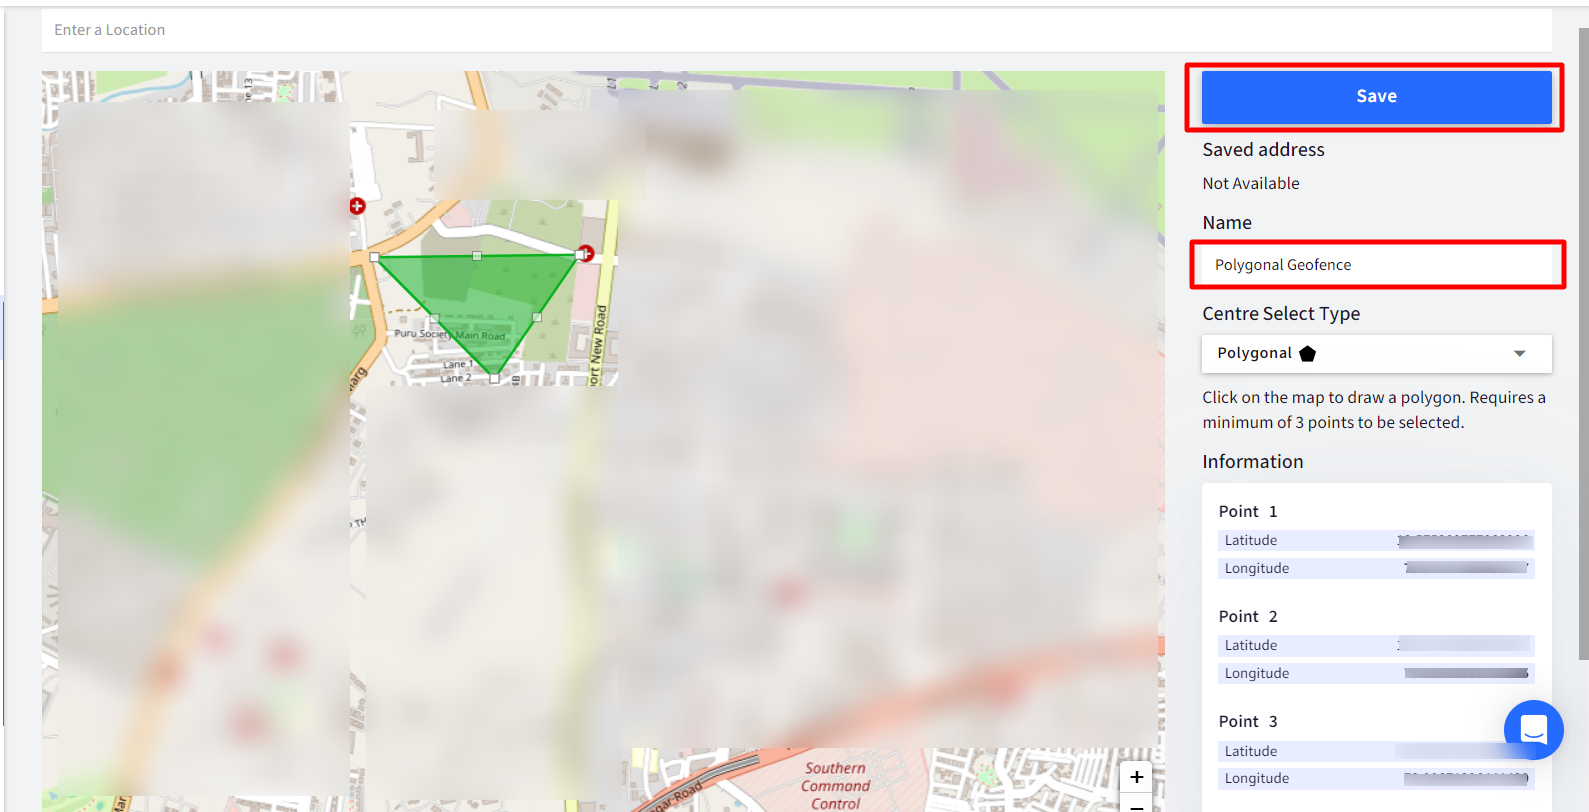
- In the Select Type drop-down on the right, select PolygonalBy default, it is the circular type of geofence that is selected.
.png)
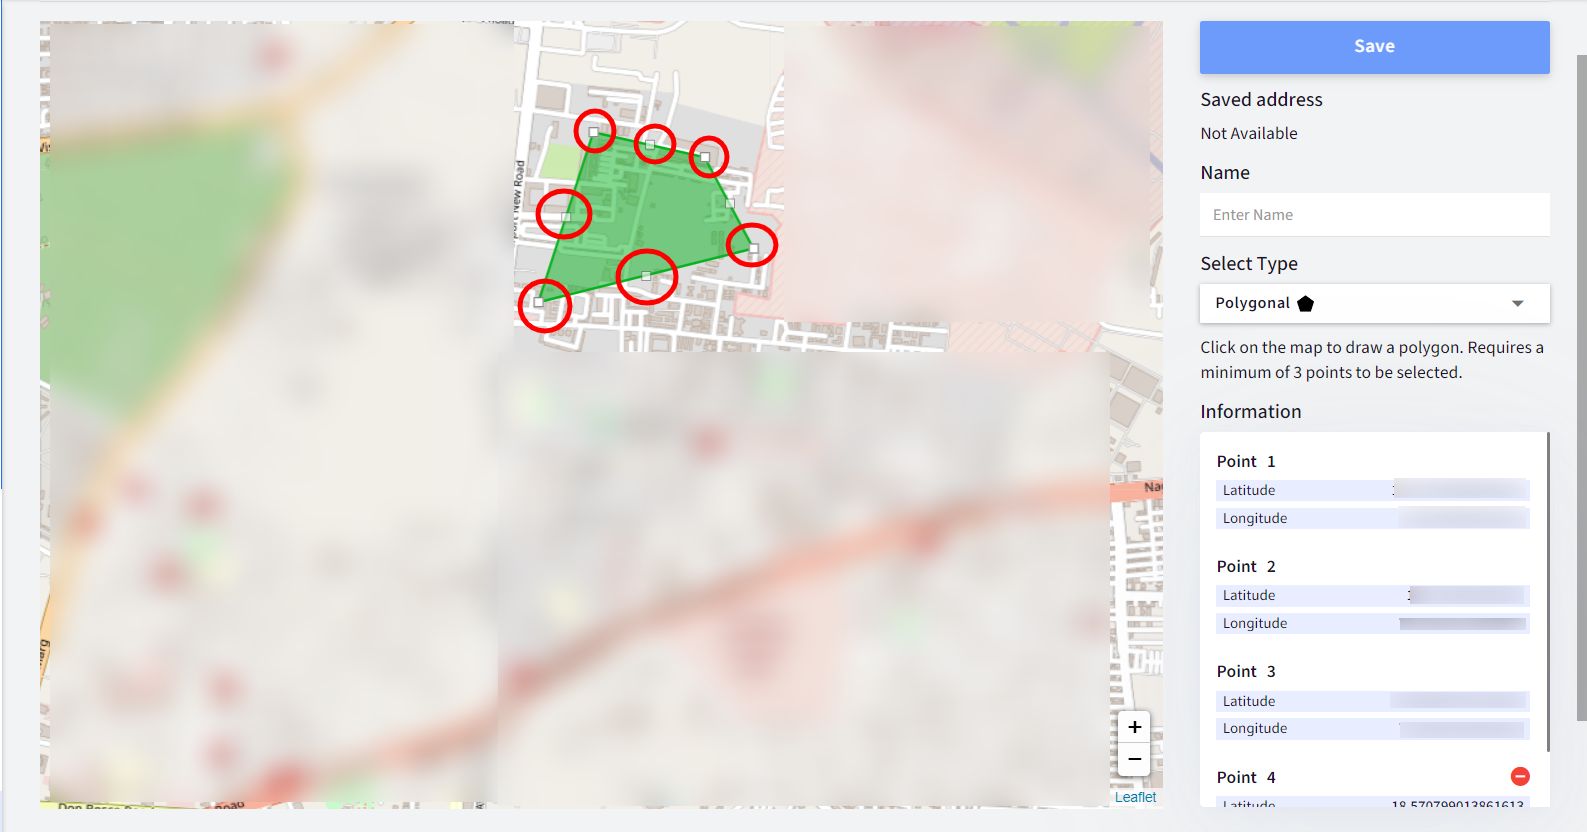
- Click on the map to draw a polygon of the area to be marked under geofence. Requires a minimum of 3 points to be selected. To close the shape, click on the first point.In the search location box, you can enter the address to bring up a region on the map below and then select location points.
- Once the location is marked, a prompt appears on the right-side panel with the Latitude and Longitude details of each point. If you want to remove a particular location point, click on the Delete icon next to it.
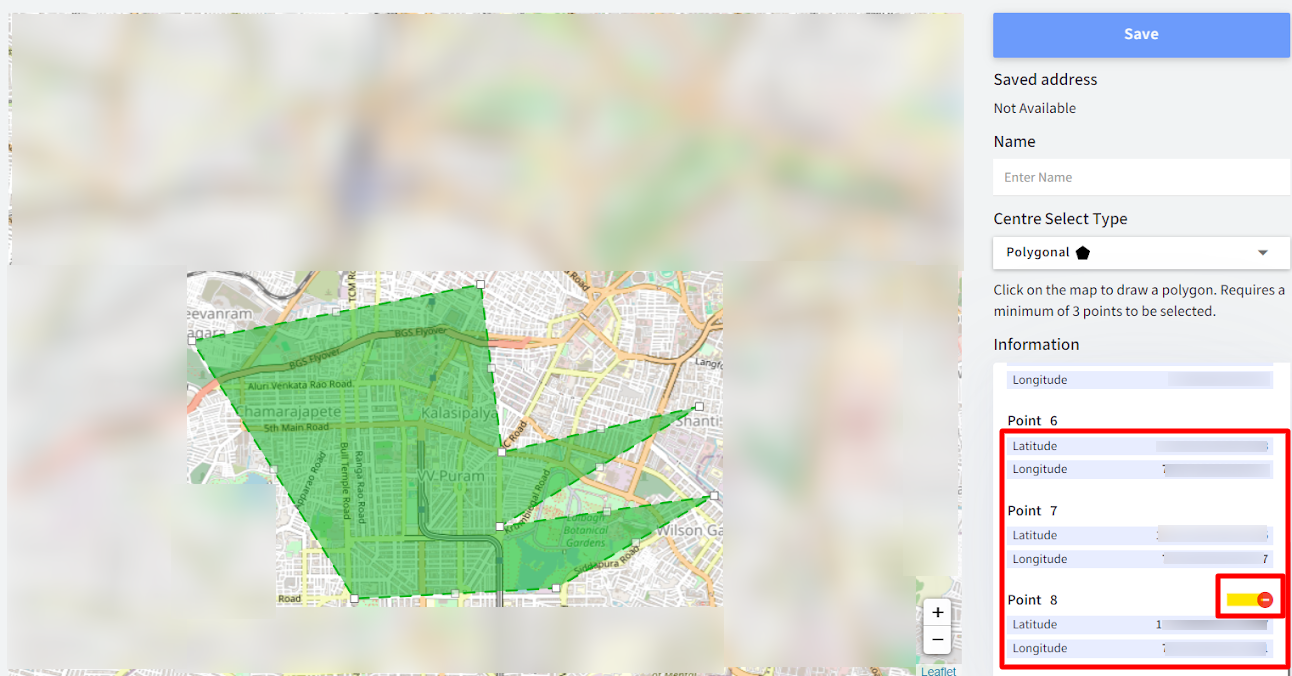
- On the map, drag the polygonal points if you want to re-adjust the geofence area or add additional points. Notice the lat and long details get automatically updated as you drag the points.
- Enter a Name for the geofence and click Save.
Applying Geofence
Once you have created a geofence, apply it to devices or device groups. To do so,
- Click on the Apply button on the top right. This opens the Apply geofence dialog.

- Select the Device Groups or Devices and click Apply
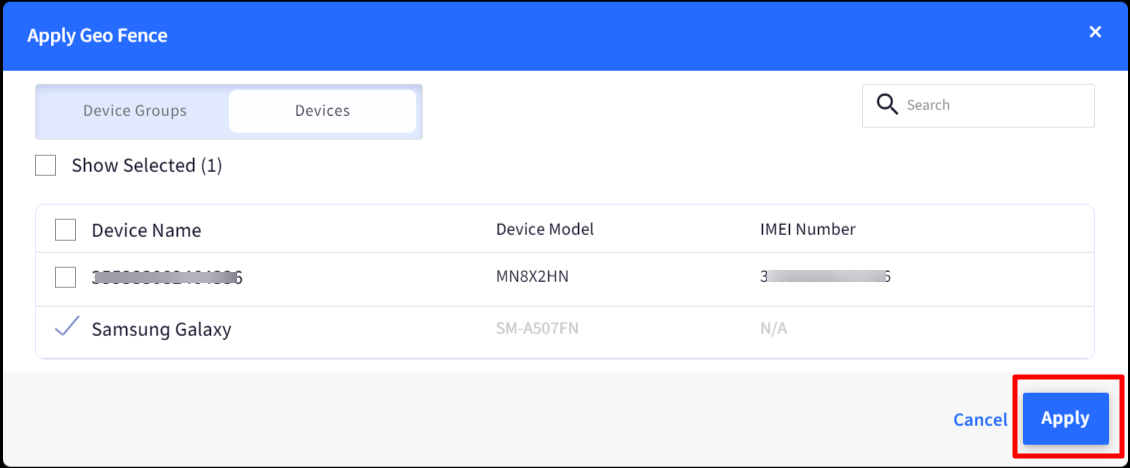
- The geofence gets applied.
- You can view the status by clicking on the Published status placed before the Apply button. The Active status implies that the geofence has been applied on selected devices/device groups.
Checking device activity
The logs are captured based on the activity of the device if a device enters a fenced area, it is considered as moved in, and when it exits the fenced area, it is moved out. To check logs,
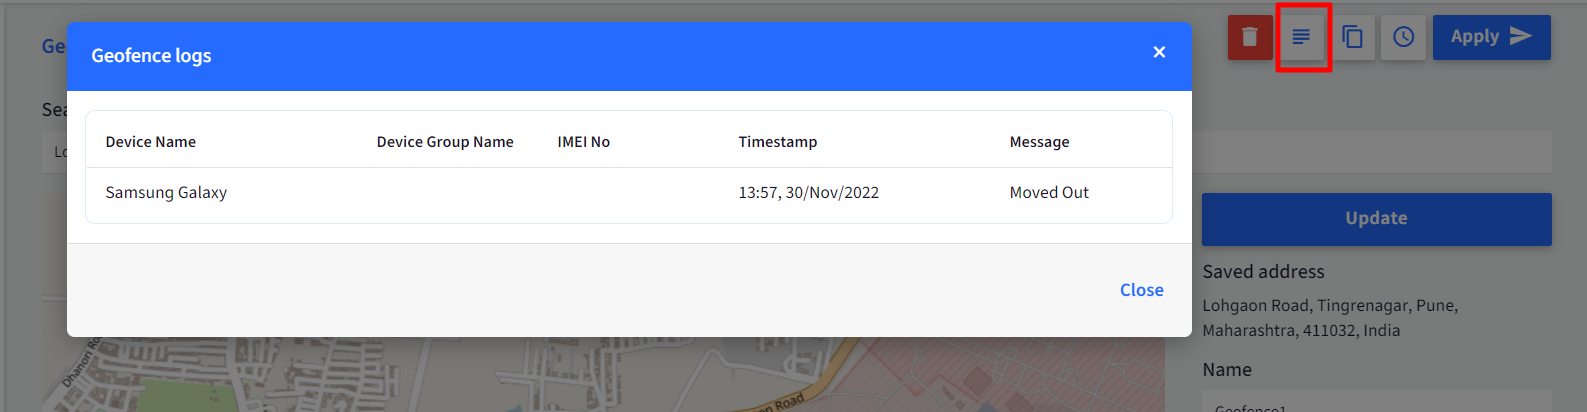
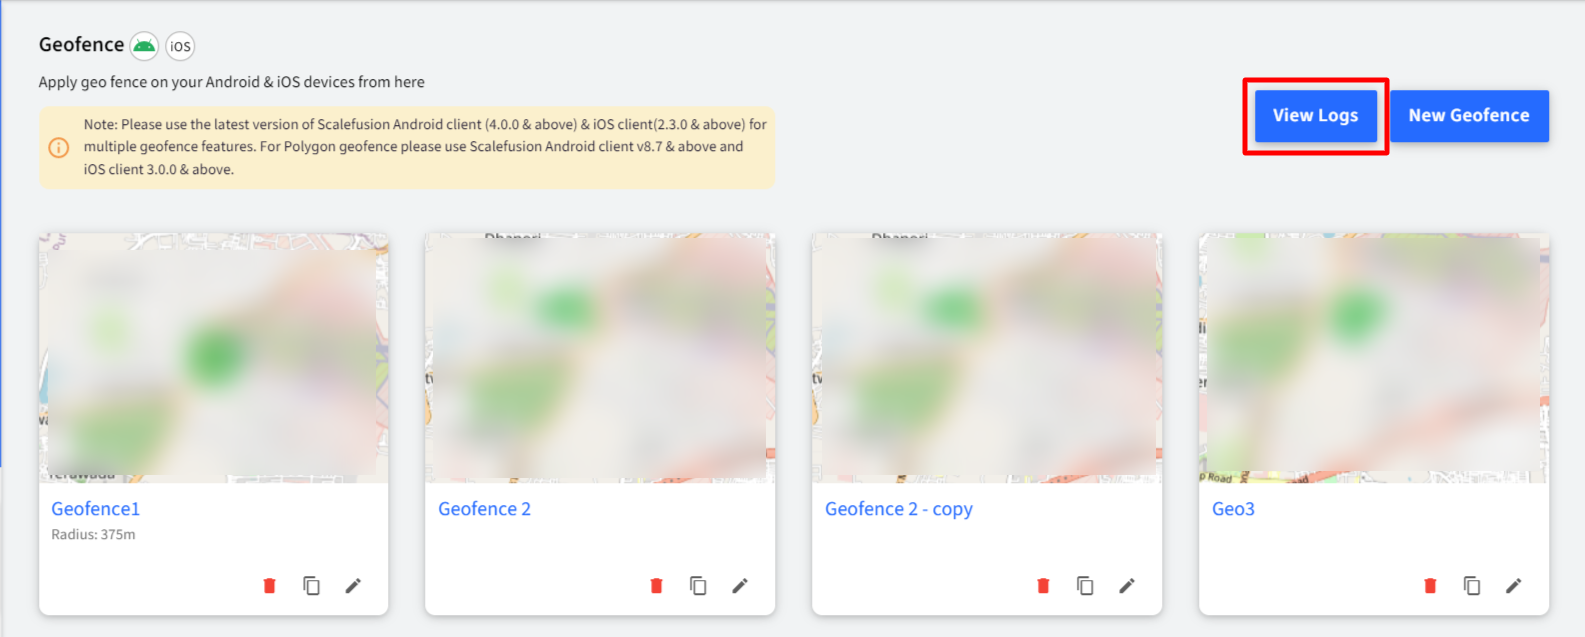
- Go to the geofence and click on View Logs on the top bar. This opens the Geofence logs window showing the timestamp and date with the status when the device moved in or out of the geofence area. This is shown for one particular geofence.
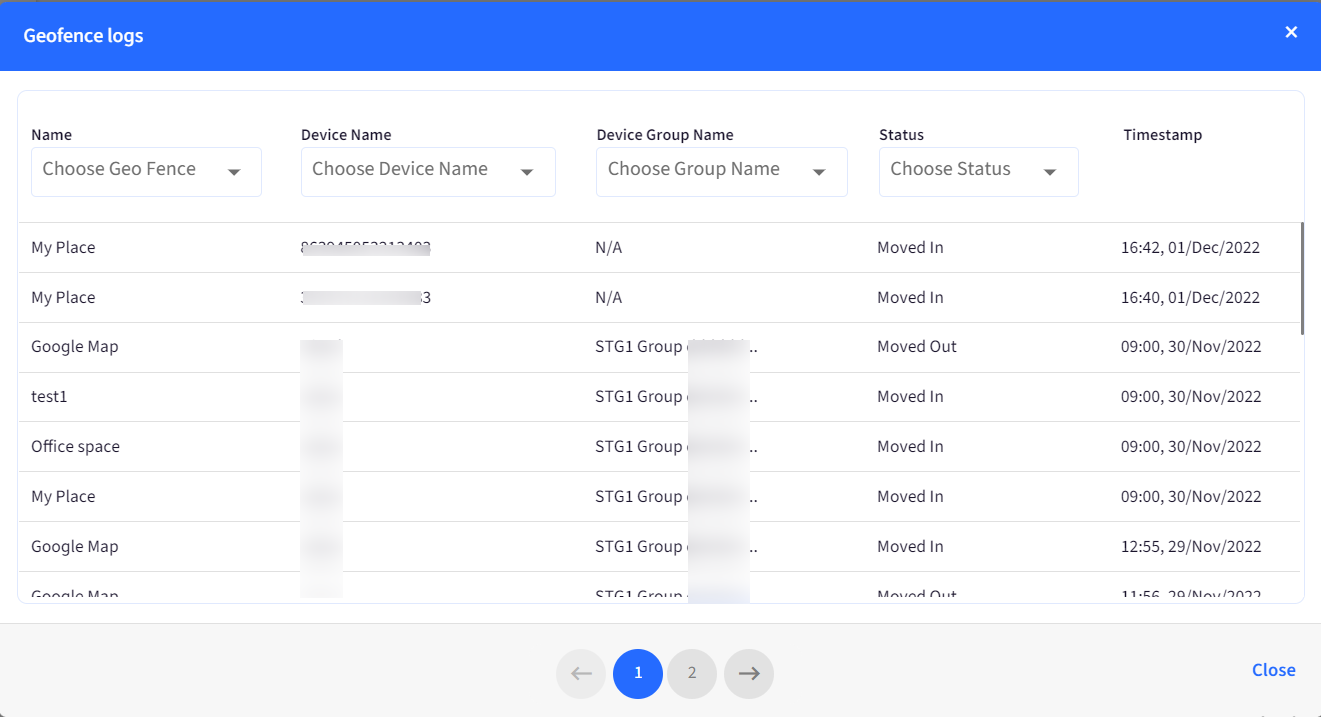
- Logs can also be viewed from the main section, where all geofences are listed. From here, you can see the activities of devices for all geofences.
Here, the geofences can also be filtered on the basis of various filters available.
Deleting a geofence
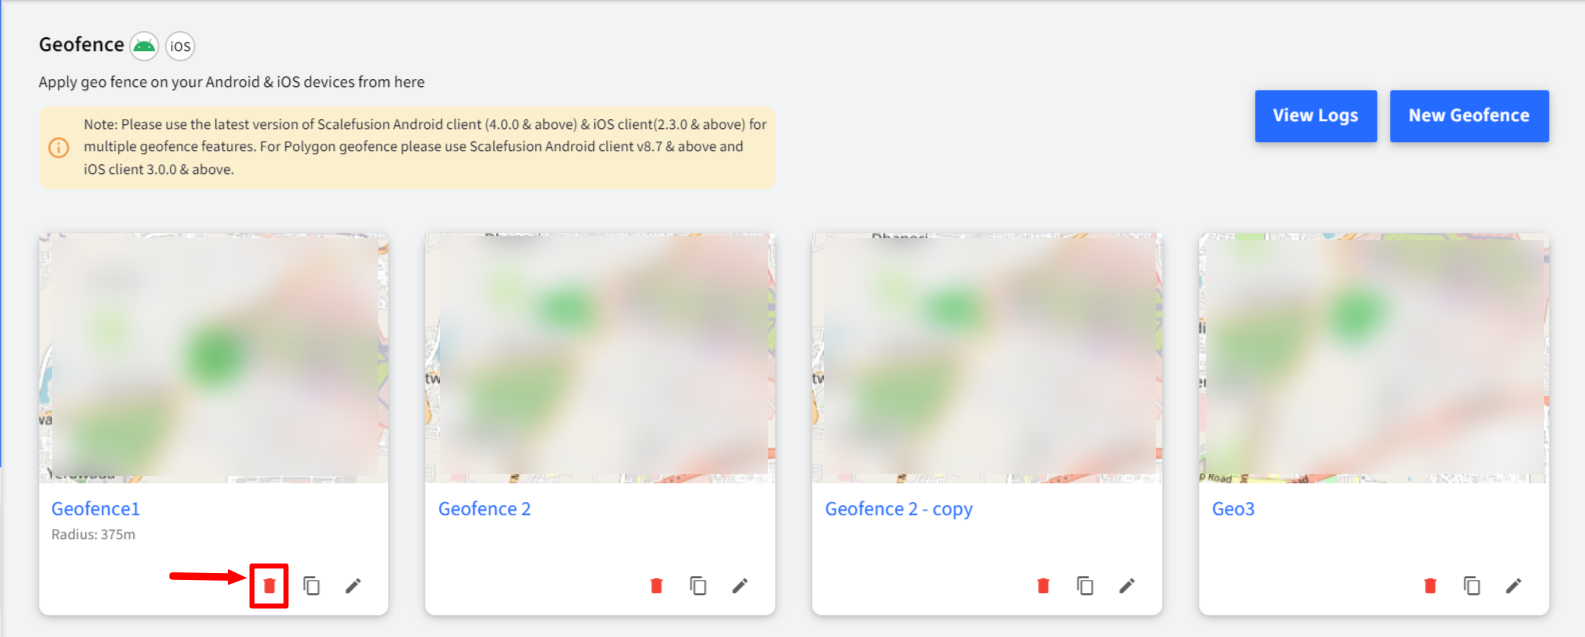
If you want to delete the complete geofence, click on the deleteicon below the geofence in the main section where all geofences are listed. Once deleted, it cannot be recovered.
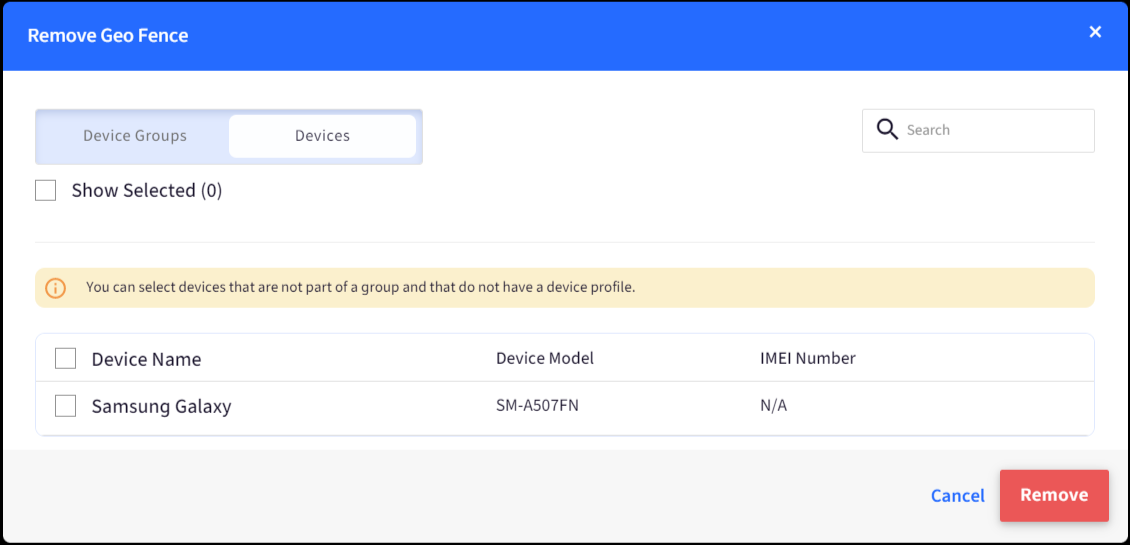
Remove/Unpublish Geofence
To remove the geofence from a select few device groups/devices, click on the delete icon on top inside the geofence, select the device groups/devices from which you want to remove the geofence and click Remove.

Other features
- Edit: At any point in time, you can edit a geofence by clicking on the Edit icon, making changes to name/type/location and clicking Update.
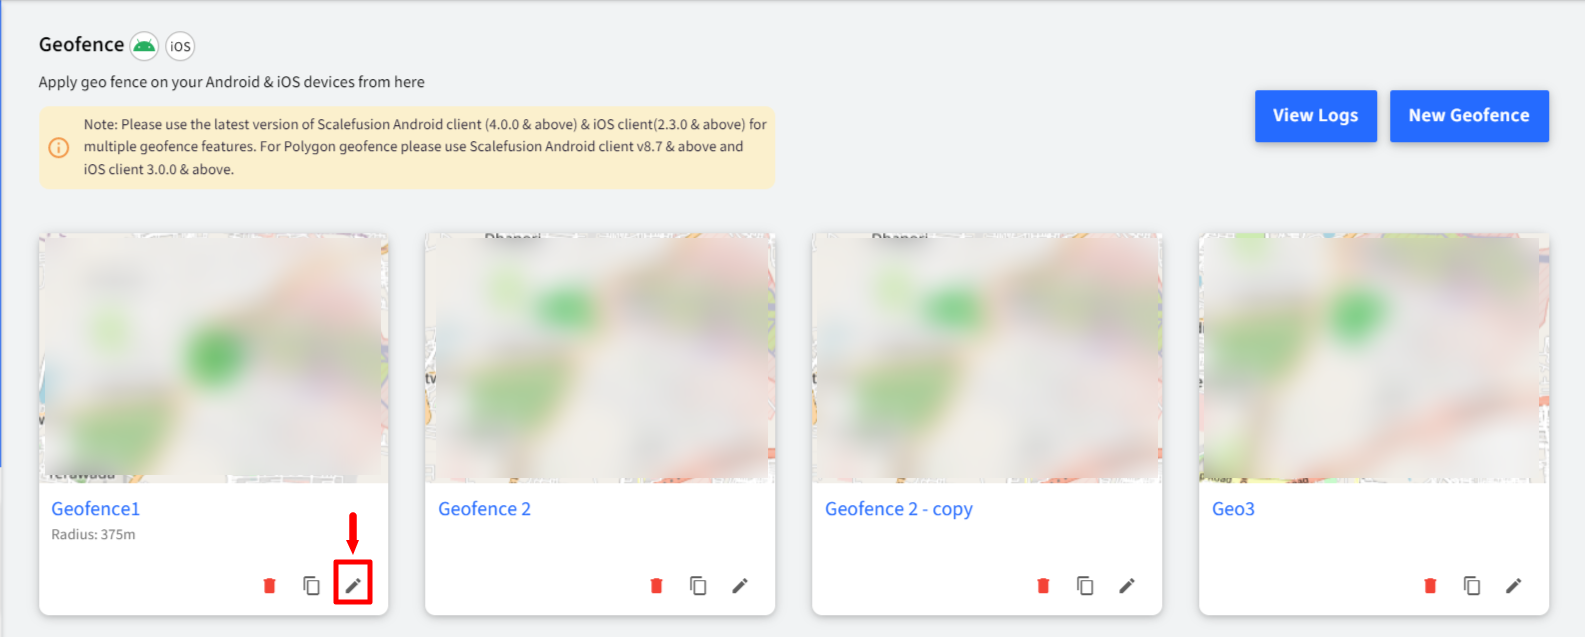
- Make a Copy: You can also create a copy of the geofence. This helps in minimizing the effort of recreating a new geofence from scratch. Click on the Make a copy icon below the geofence or Make a copy on the top bar inside a geofence, and a copy of it gets created. You can make changes if required or save it as is. Notice that the geofence name has a copy word appended to it if you have created a copy.
Once geofences are created and applied, different device policies can be applied on Android devices based on geofence events (move in and move out). This can be achieved through Geofence-based Switch Profile workflow.
Known Behaviors
macOS
- On Mac devices, Location cannot be tracked if the device is in sleep mode or the device's lid is closed. As a result, geofences, even if applied, will not work.
Windows
- WebKit Location API:
- Inaccurate Location Data: If a device is in sleep mode or the user is logged out, the WebKit method may not be able to accurately capture the device's location.
- Delayed Updates: When using WebKit as the Location API, changes to geofence settings may not be immediately reflected after a user logs out and then logs back in. There might be a delay until the system updates the database and applies the new settings.
- Location Tracking with other APIs:
- If you choose to use alternative location APIs like .NET API or WinRT, changes to geofence settings will be applied even when the user is logged out. This ensures consistent and accurate location tracking, regardless of the user's device state.
- Enabling Location Services on LTSB Devices:
- As LTSB machines have restricted access to registry settings, you need to allow location services from Scalefusion Dashboard:
- Navigate to Device Profile > Settings > Advanced Settings > General Settings > Security and Search > Location Services.
- Allow Location Services: Enable this setting to permit location tracking on the device.
- As LTSB machines have restricted access to registry settings, you need to allow location services from Scalefusion Dashboard:
- Multi-App Kiosk (MAK) and Single App Mode (SAM) in Modern Management (MM) mode:
- MAK-MM: The messages for compliance will pop-up on the screen only when applications are running else not.
- SAM-MM Mode:
- Actions like Keep Ringing and notification sounds for workflow alerts may not function as expected.
- Devices may not be blocked as intended when they move out of a geofence. Instead, the user might be automatically signed out.