Scalefusion offers an easy Freshservice integration module that, once activated on the Scalefusion Dashboard, allows the IT Admins to create tickets from the Scalefusion Remote Cast feature. This means that you can cast the device screen, record the video or take a snapshot and raise a support ticket all from Scalefusion Dashboard. We add the device-specific information to the ticket that is useful in giving the complete context to the IT Team. Once a ticket is created, it will be reflected in the Freshservice system for further action.
In this document, we will learn how to integrate Freshservice and then create a support ticket from Scalefusion Dashboard.
Before You Begin
- You would need a valid/active Freshservice account with details of your organization's Freshservice Domain name and Developer API Key.
- You would need a valid/active Scalefusion account with access to Remote Cast.
Setup/Activate Freshservice Integration
The first step is to set up/activate Freshservice integration, which will authenticate Scalefusion to use Freshservice APIs that are needed to create support tickets. Follow the steps below to perform this one-time step before you start using integration features.
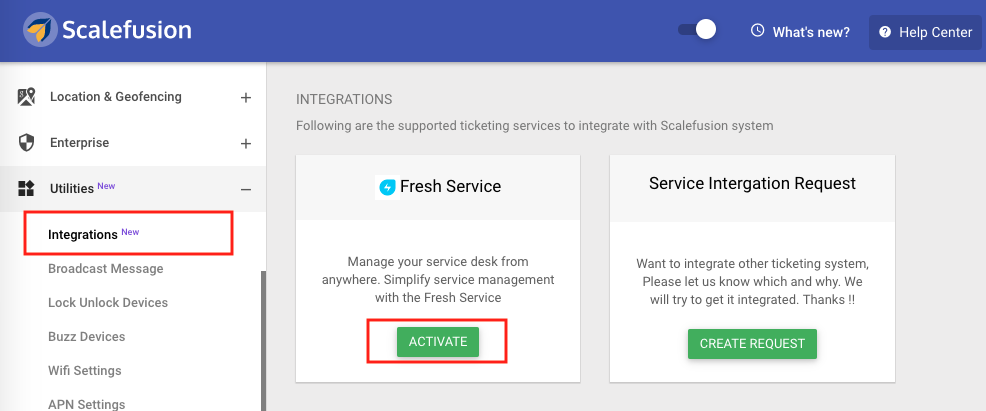
- SignIn to Scalefusion Dashboard and navigate to Utilities > Integrations
- Click on the Freshservice card. Click on the ACTIVATE button to launch the integration wizard.
- Enter the following information in the integration wizard, and click on AUTHENTICATE to complete the setup
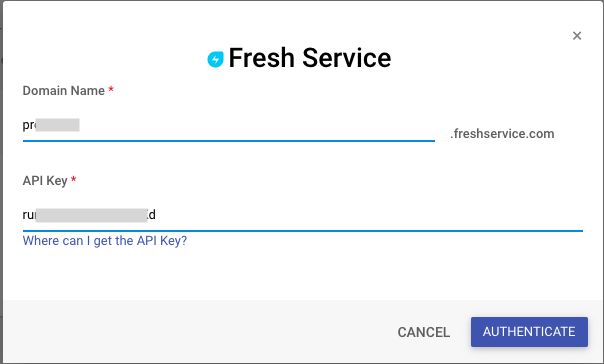
- Domain Name: The domain name provided by Freshservice for your organization.
- API Key: The API Key provided by Freshservice that can be used for third-party integrations.
- Clicking on AUTHENTICATE will attempt to authenticate the API key with Freshservice, and if it succeeds, then the activation is complete, and the card is updated, as shown below.
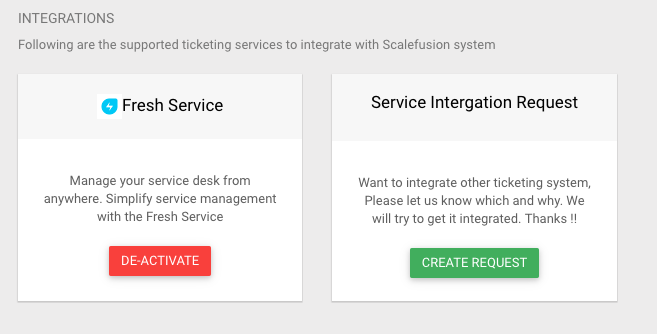
- DE-ACTIVATE: Use this option to deactivate Freshservice integration at any point in time.Deactivating Freshservice integration will not allow you to create support tickets from the Scalefusion Dashboard. It will not impact the tickets that are already created.
Creating Tickets
Once the setup is done, you can start creating tickets. The steps below guide you through how to create a ticket.
- Navigate to the Remote Cast & Control section. Choose a device & click on Start Session. This will open the Remote Cast screen.
- Click on Start Session to start the remote cast session. You can record a video or take screenshots during the session that can be used later in the support ticket.
- Once the session is done, click on the CREATE TICKET.

- On clicking the Create Ticket button, the following wizard will be displayed,
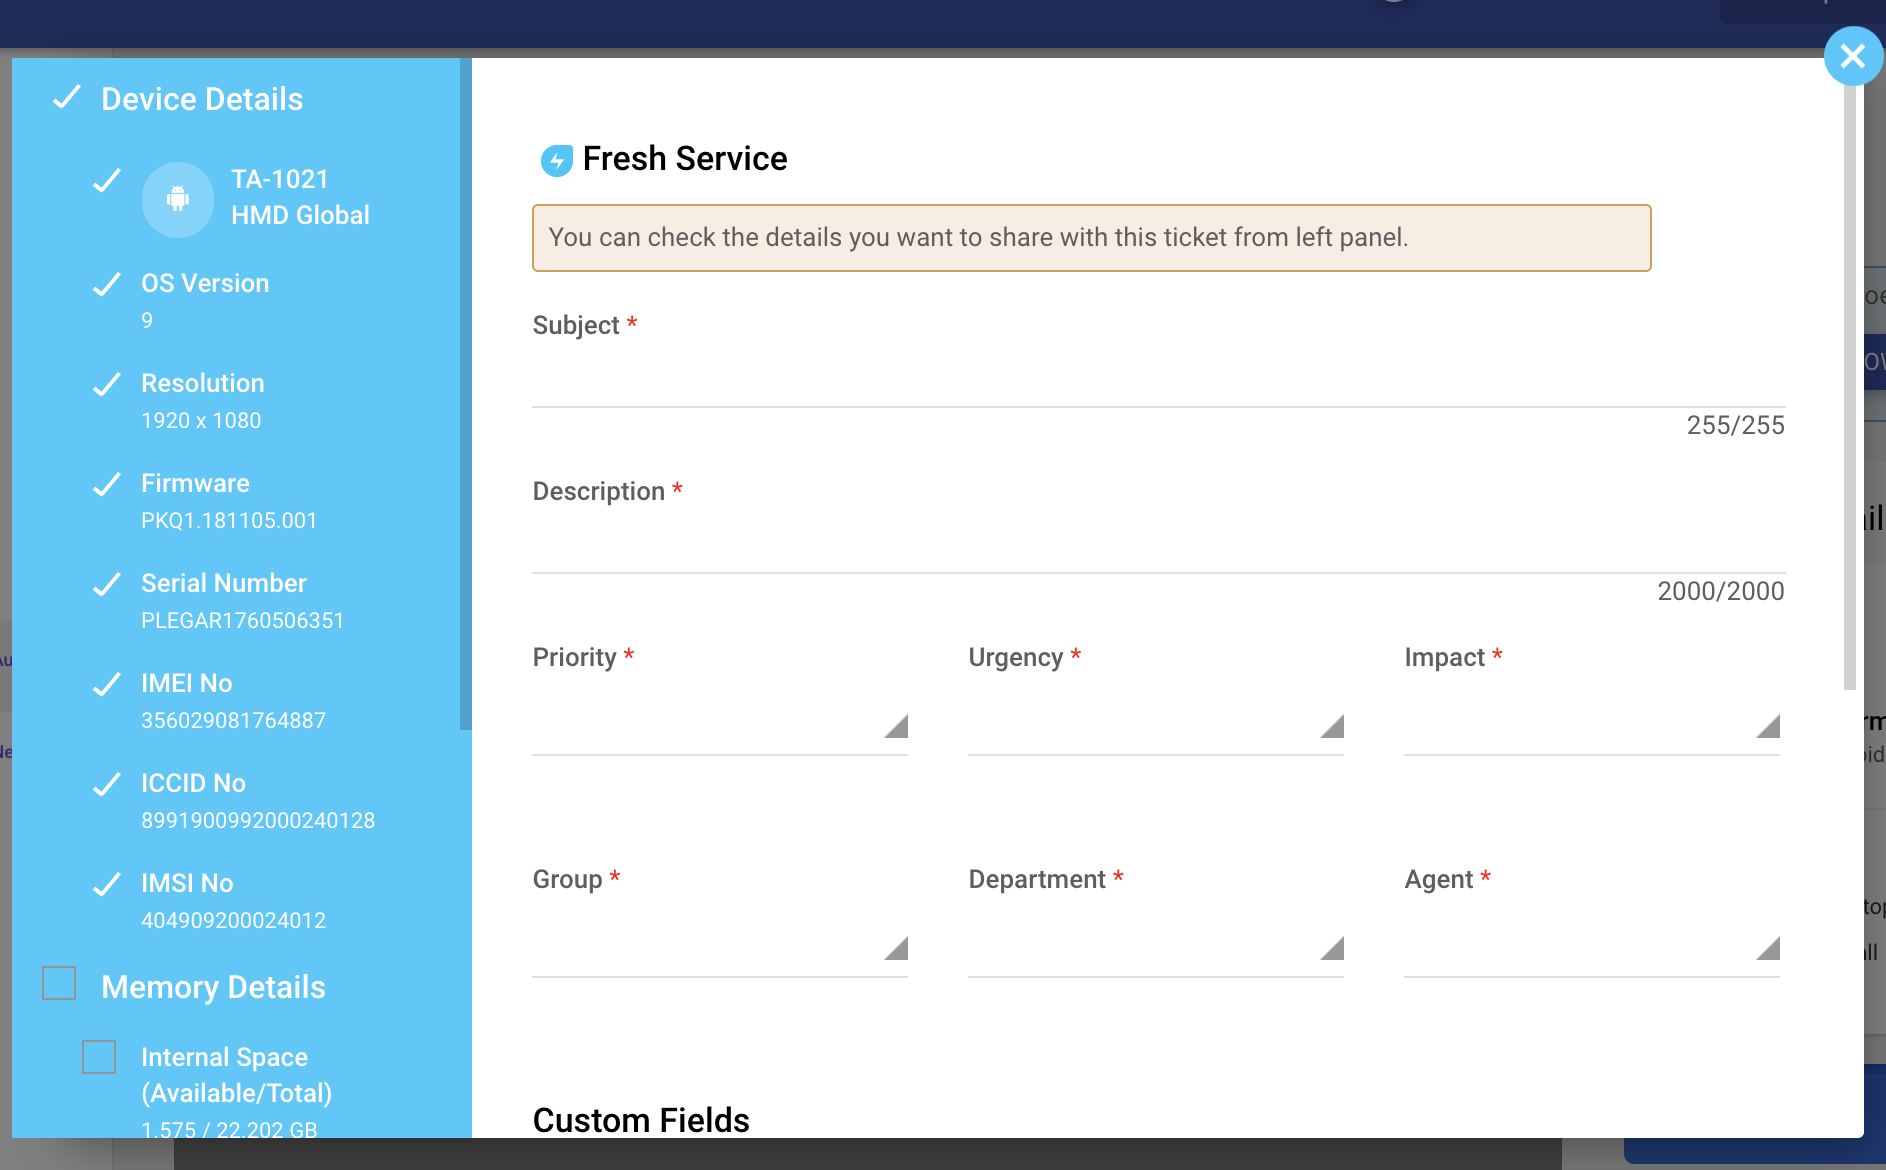
- Admin needs to fill the form fields like Subject, Description, Priority & so on. These fields will be based on the fields configured on the Freshservice system.
- From the left side panel of the wizard, customize the device information that is added along with the support ticket by selecting/unselecting the checkboxes.
- Configure additional email IDs with the ticket. These email IDs will receive timely updates on the status of the ticket.
- You can also choose to upload a session recording or screenshot of the issue taken during the Remote Cast.
- Click on GENERATEbutton once you have filled in all the details in the wizard,
- If there is an error, an error is displayed. Continue editing the form and submit it again.
- On successful creation of a ticket, a success message is displayed, and the wizard is closed.
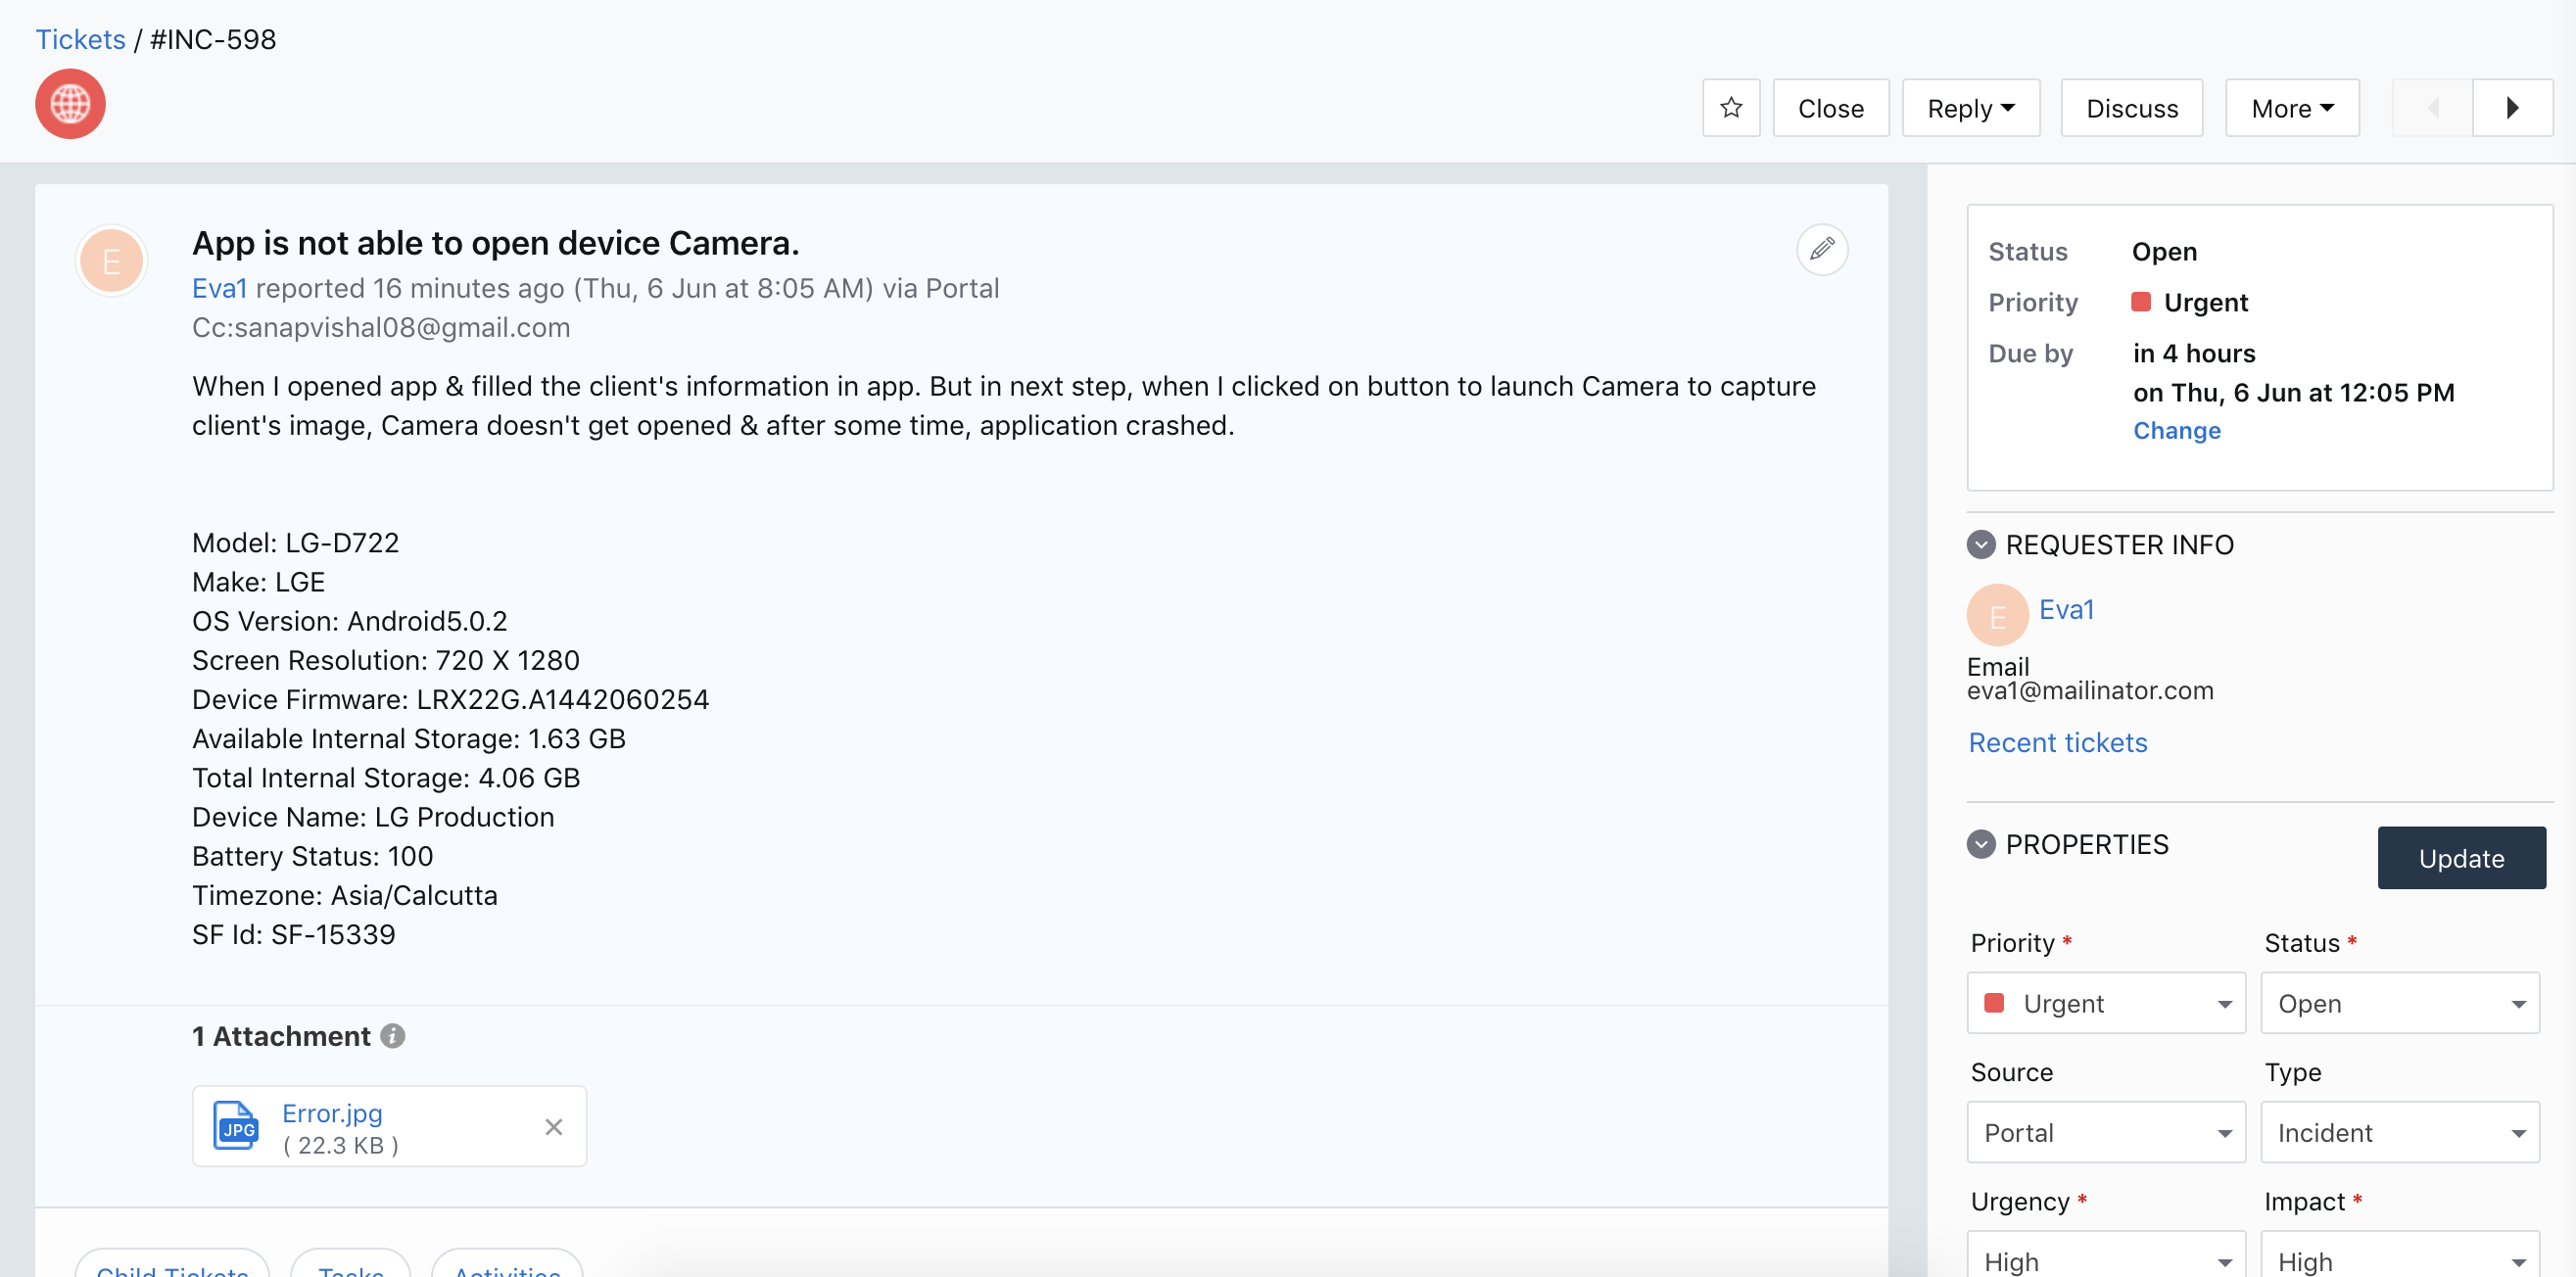
All the newly created tickets from the Scalefusion dashboard are visible under Freshservice. To see these tickets, just log in to your Freshservice account and go to the Freshservice Dashboard. It will show the list of tickets, including the tickets created from the Scalefusion dashboard. This is what a support ticket logged from Scalefusion looks like.