FileDock is an enterprise application that extends the kiosk feature set offered by Scalefusion and a gateway into content management on a locked device.
Any content that IT admins upload via Content Management on the Scalefusion dashboard, is visible on the device only through the FileDock app. Hence FileDock is a medium that provides a source enabling you to upload any file/folder/presentation on your managed devices through the Scalefusion dashboard. Your content is secure and can be shared over the air right from your desktop.
This document describes how FileDock application works on managed Windows devices.
Before You Begin
- Supported OS: Windows 10 (version 1803 and above), Windows 11. Windows Pro, Enterprise, Home edition.
- The devices should be enrolled with Scalefusion.
How to Install FileDock
- Login on Scalefusion Dashboard
- Navigate to Application Management > Scalefusion Apps
- Under Scalefusion Apps, click on FileDock card with the Windows icon.
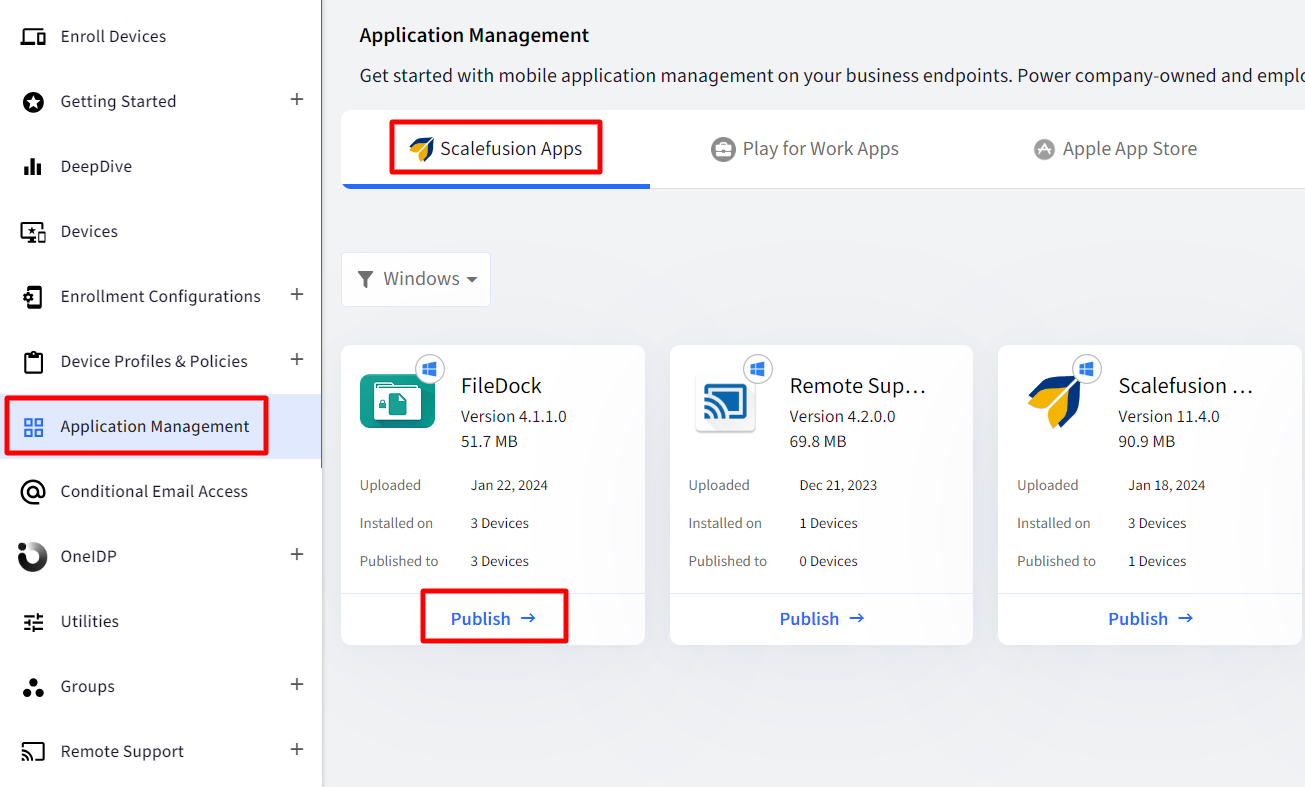
- This opens a new section on the right side. Here, click on the Publish button.

- While installing Filedock App, you can view its Status while installation. On clicking Publish, a View Status link comes up clicking on which shows the status.
- A new pop-up opens where you need to select the Device Groups / Device Profiles / Devices on which FileDock has to be published. Select the device profiles and click PublishDevices tab will be available if you have enabled Device Based App Publish in Utilities > Global Settings
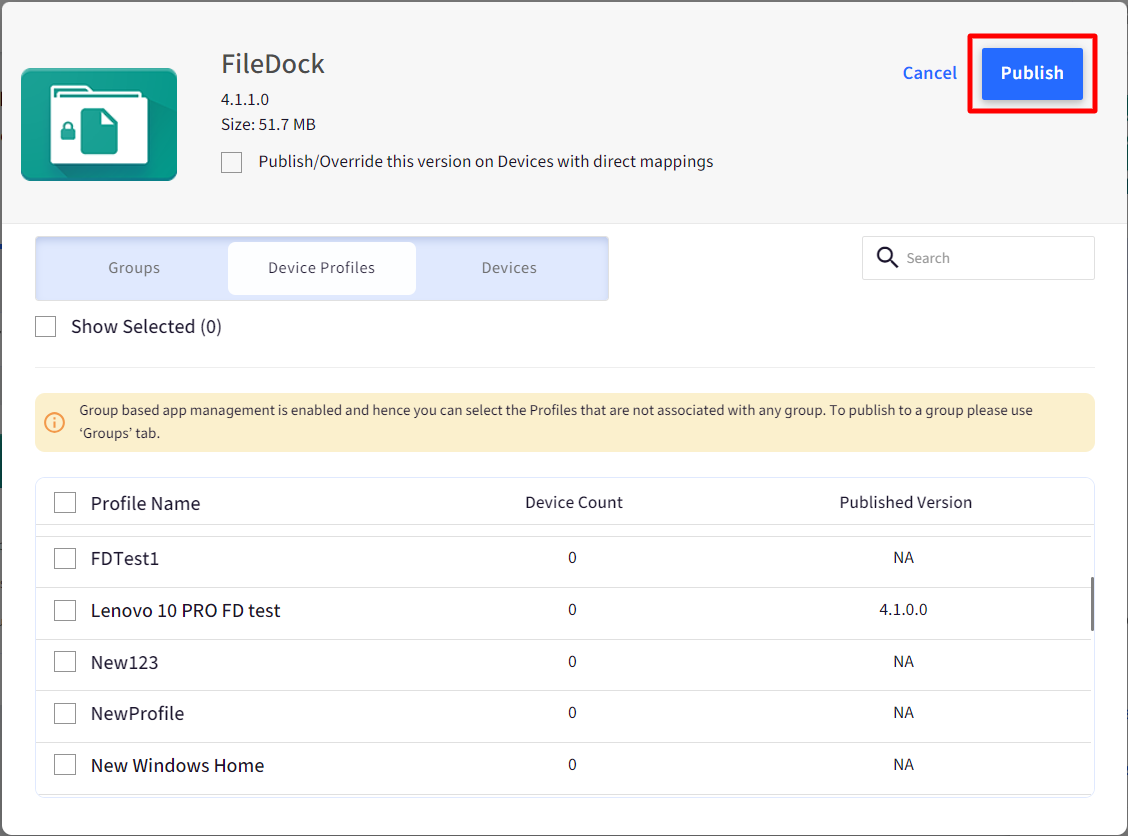
- FileDock gets installed on the device(s) on which the selected device profile / device group is applied.
With FileDock installed:
- Users can view and open respective files and folders (on their devices), which are published through the Content section in the Scalefusion Dashboard (explained in section below).
- Users can view, not control, the content of a presentation that is published through the Presentations section in the Scalefusion Dashboard.
Status while Installing
You can always view the Status while installing the FileDock App from My Apps. On publishing, a View Status link comes up.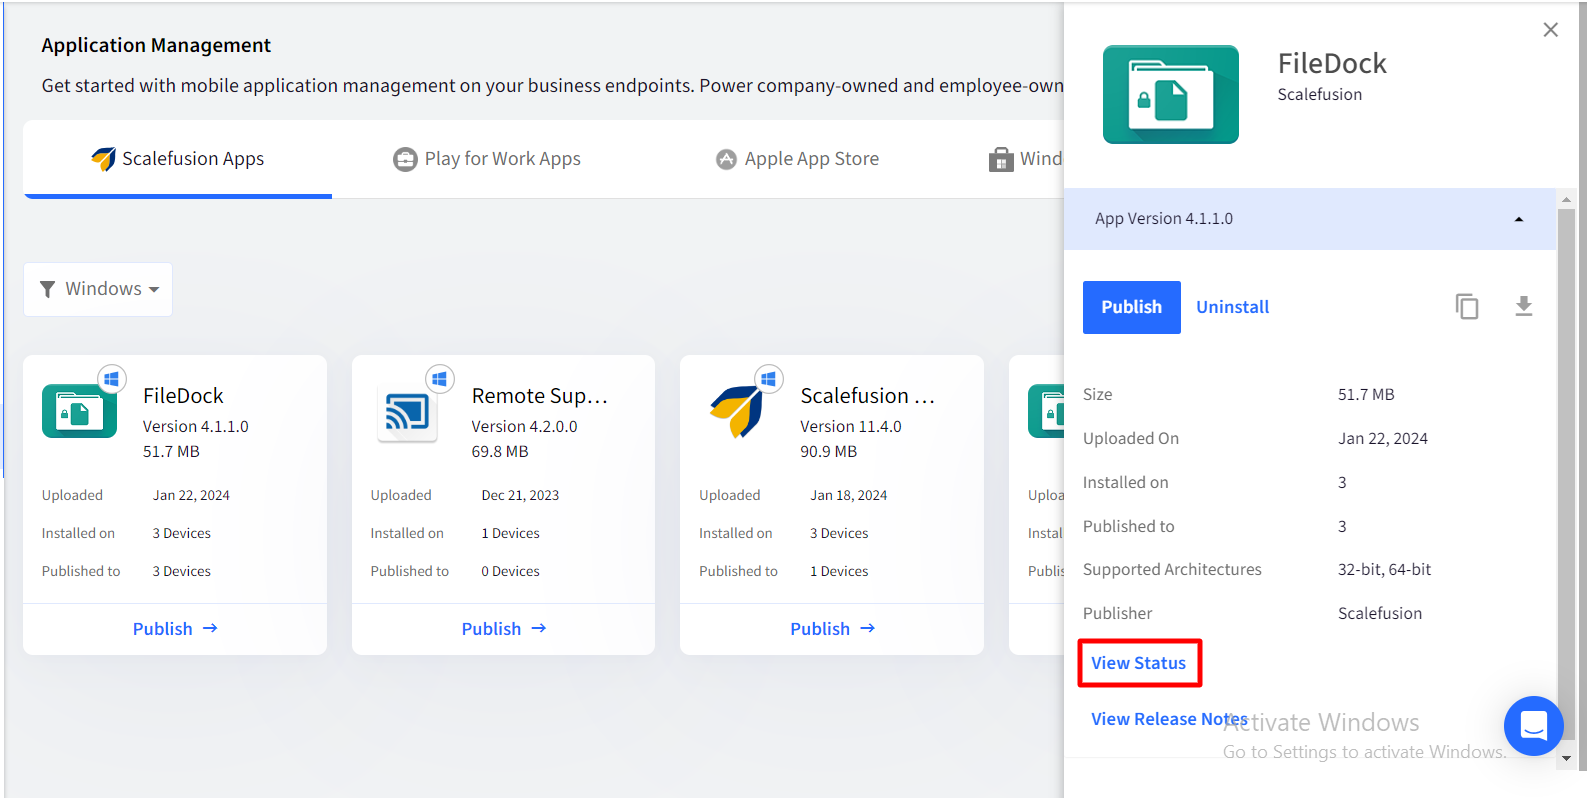
Clicking on View Status opens a new popup window. Three types of Status have been defined:
- Pending: When you click Publish to install FileDock.
- Download Complete: Once FileDock gets downloaded.
- Installed: When FileDock is successfully published and accessible on the device.
For some reason, if FileDock does not get installed, the App Status shows Download Failed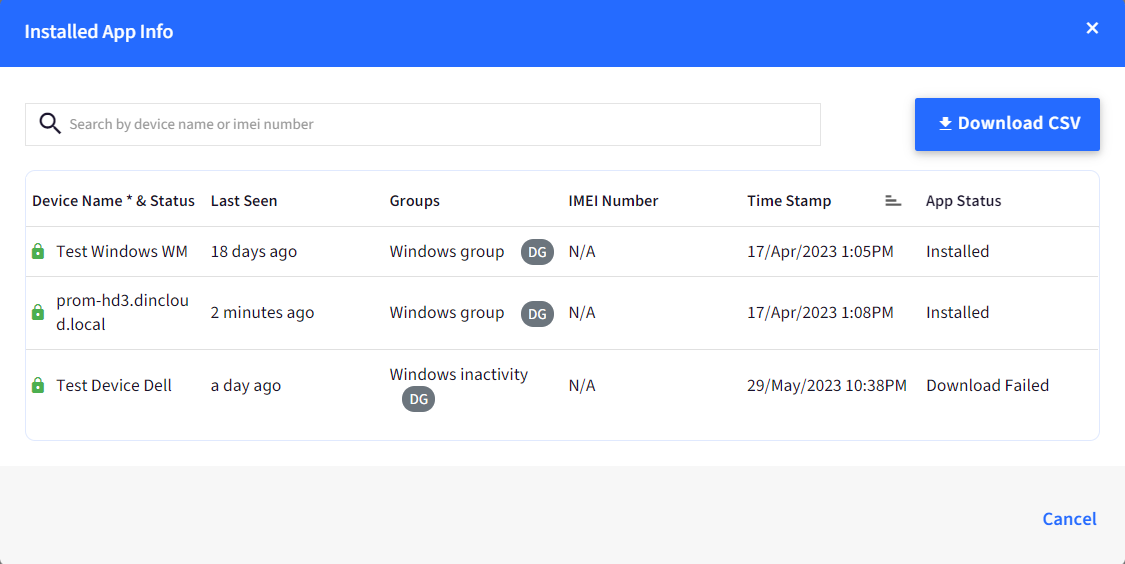
Once FileDock is installed, you can push the content on your devices. To learn more about how to push content, click here.
FileDock is also used to make any Presentation run on your Windows device, turning your device into a Digital Signage Kiosk. To learn more about this, please visit Scalefusion Presentation mode for Digital Signage Kiosks.
How FileDock works on Windows Devices
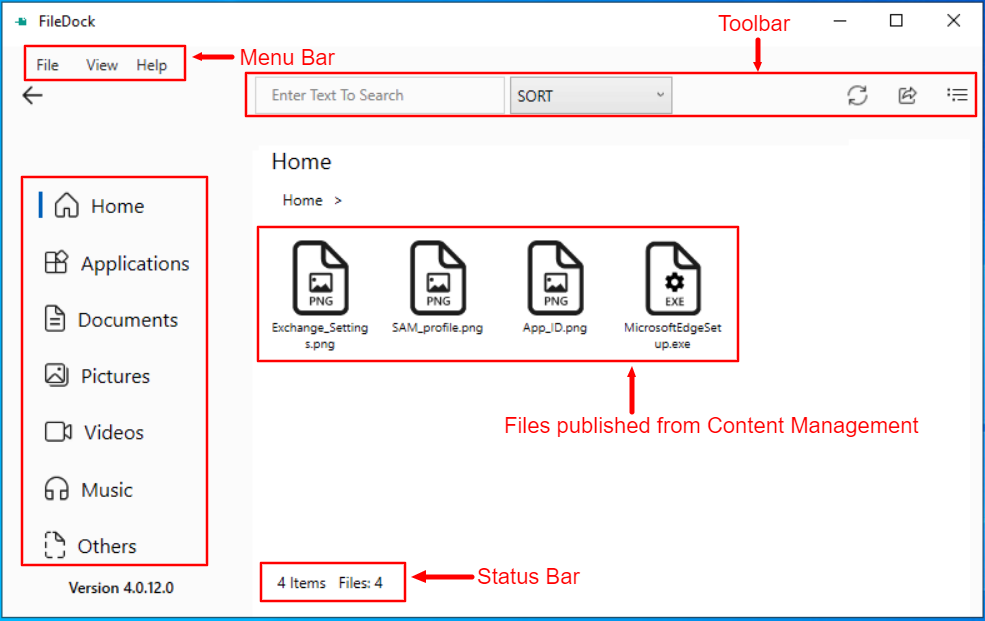
Once installed, FileDock application will be available on the desktop. Double-click to open it.

The view is similar to any file explorer window. Following are the major components/sections in FileDock:
- Menu Bar
- Left panel listing categories into which files will be displayed
- Section to display list of files
- Toolbar
- Status Bar
Here is a description of each:
- Menu bar
- File
- Sync Files: Syncs files and folders with device
- Sync Analytics: Syncs analytics for reporting
- Upload Logs: Uploads FileDock logs from device

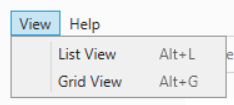
- View
- List View: Displays files and folders in list view containing Name, size, type and path
- Grid View: Displays files and folders in a grid view
 These actions can also be performed from the icons on the right side.
- Help
- Show Logs: Shows FileDock logs
- About: Displays FileDock version info

- File
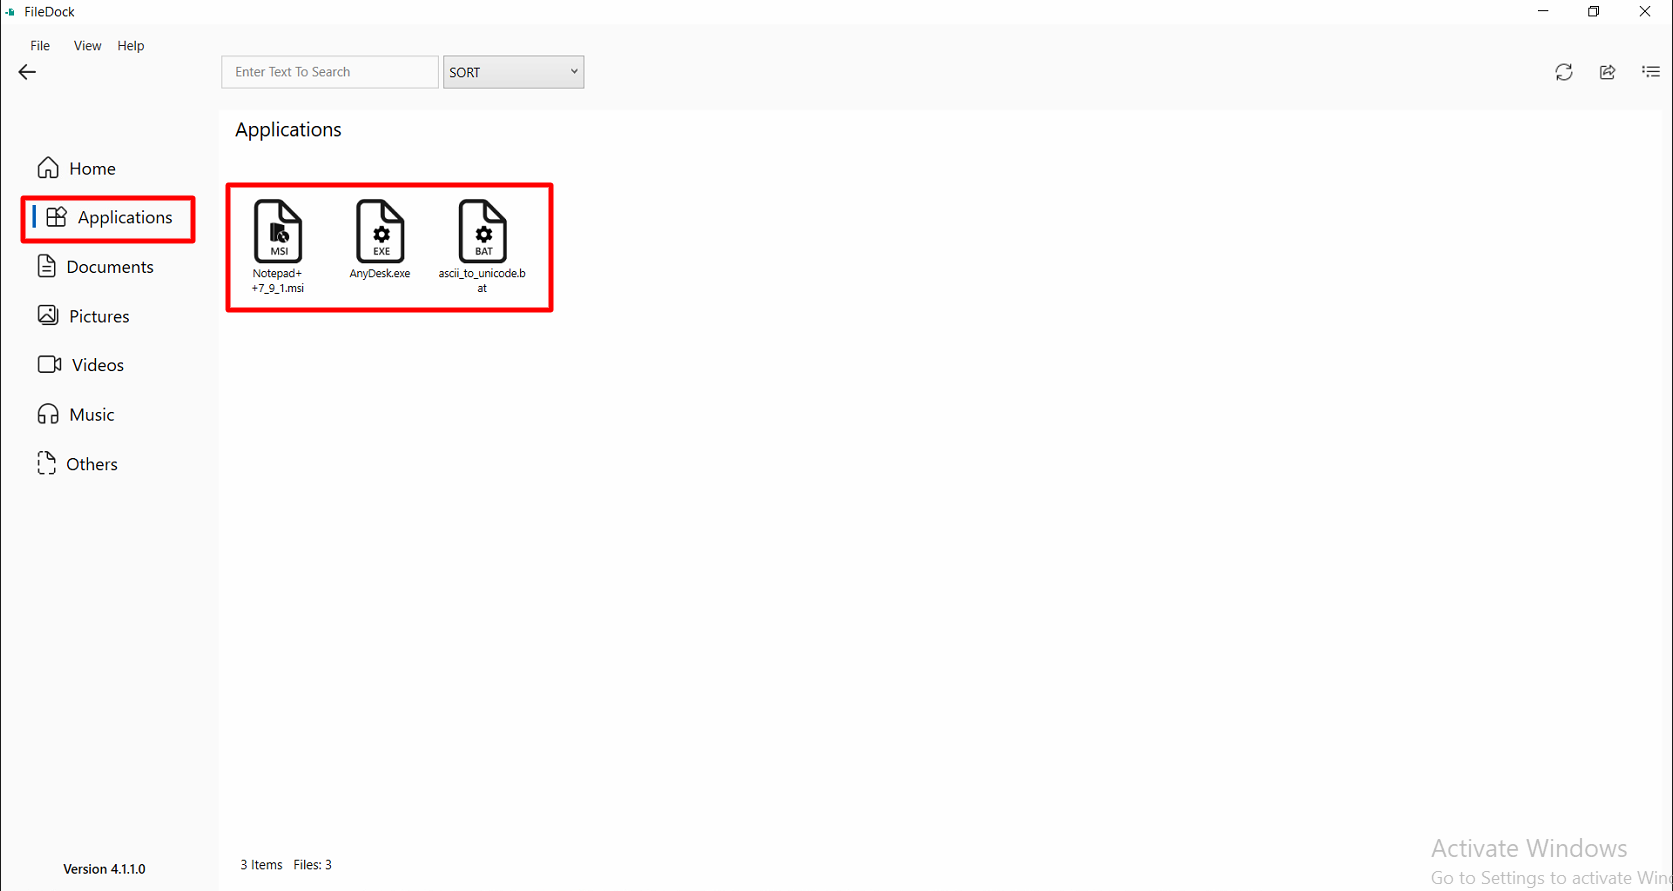
- Categorization of files: On pushing content to devices from Content Management, the files will be segregated on the basis of their type:
Category Description Supported File Types Shortcut Key Home All folders and files published from Dashboard All CTRL+H Applications all files from folders and subfolders of application type .msi, .exe, .msixbundle, .cmd, .bat CTRL+L Documents all files from folders and subfolders of document type .zip, .ps1, .txt, .doc, .docx, .xlsx, .csv, .pdf, .ppt, .pptx, .xml, .json, .properties, .p12, .odt CTRL+D Pictures all files from folders and subfolders of picture type .jpeg, .jpg, .png, .ico, .gif CTRL+P Videos all files from folders and subfolders of video type .avi, .mp4, .mkv, .ogg, .3gp CTRL+V Music all files from folders and subfolders of music type .wav, .mp3, .3ga, .aac, .amr, .m4a CTRL+M Others Any other type of files which do not belong to any of the above categories CTRL+O - Section to display files: The files pushed from Content Management are available on the right side section. For example, application file types will be displayed under Applications.
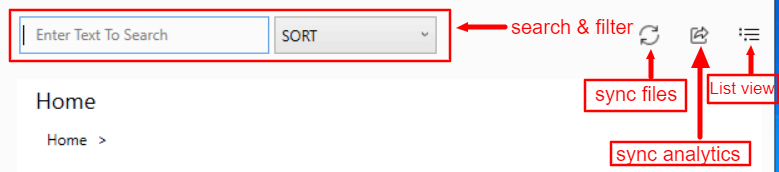
- Toolbar
- Search: Search for folder and file name (Keyboard Shortcut: ALT+S).
- Filter: Filters the list of displayed folders and files based on the following:
- Type (Keyboard Shortcut: ALT+T)
- Name (Keyboard Shortcut: ALT+N)
- Size (Keyboard Shortcut: ALT+Z)
- Sync Files, Sync Analytics, List View
- Sync Files: Click to sync folders and files from backend (Keyboard Shortcut: ALT+F)
- Sync Analytics: Click to sync analytics (Keyboard Shortcut: ALT+A)
- List View: Click to change view type from grid (default) to list view and vice versa (Keyboard Shortcut: ALT+L)
- Status Bar: Displays total no. of items (files and folders) and also total files/folders in the currently selected section

Additional FileDock Settings for Windows
Sometimes you may want the Files to be downloaded to a custom location instead of Scalefusion’s default folder. We allow IT Admins to configure additional settings for Windows devices using the Settings option in the Content Management screen. Clicking on the Settings button initiates the flow,
- On the Scalefusion Dashboard, navigate to Content Management > Content
- Click on the SETTINGS icon

This opens the FileDock settings dialog box. Following are the settings you can configure:
Expiry Period for Published Files
You can configure an expiry period for the published files after which they will be deleted from the device locally, based on the download date. Such files become inaccessible on expiry although they are visible on the device (marked with an expired icon). To configure expiry period for files, click on the drop-down in front of Set Expiry time and select one of the options:
- Don't Auto Expire: The files published will not auto expire
- After Configured Days: Enter the no. of days after which the file should expire. You can set anywhere from 1 to 180 days.

Important Points to Note:
- The expiry period is at a file and not a folder level.
- The expiry period is not applicable to files at additional locations. It is applicable only for files published at default location i.e. Home
- Files deleted locally will not be downloaded again, until they are unpublished and republished to the device.
- On the device, expired files will be visible on clicking Show/Hide Expired Files option under View menu in FileDock app. By default they are set to be hidden.
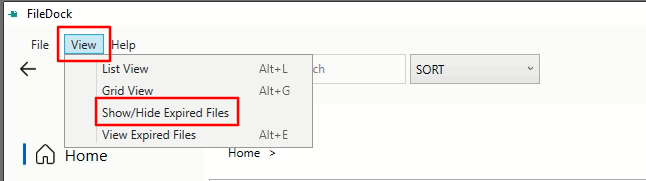
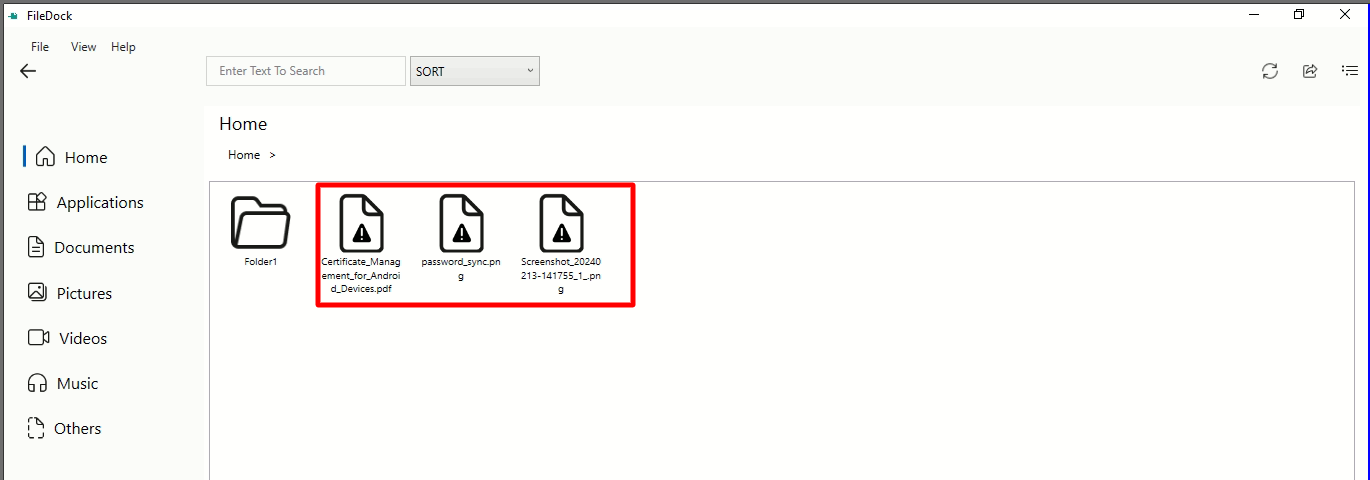
In FileDock app, this is how the expired files will appear on the device when you select Show/Hide Expired Files in View menu.
View Expired Files: Clicking on View Expired Files under View menu opens a new windows listing all expired files with additional details like file location, expiry date etc.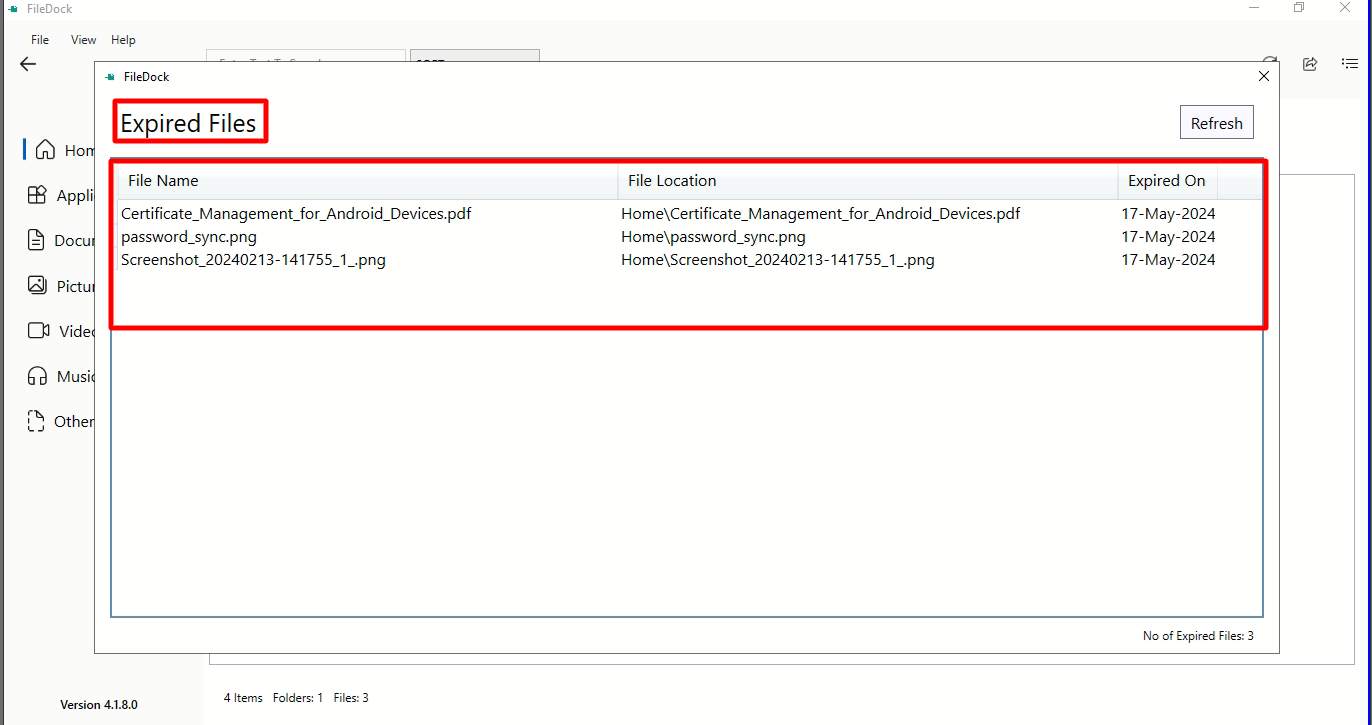
FileDock Usage Scope
You can control which files/folders should FileDock display on the device by configuring the scope of FileDock. Choose one of the following options to define FileDock usage scope:
- Show only the files/Folders Published from Dashboard: The files/folders published from the Dashboard will be displayed on the device, inside FileDock app.
- Show Published & Files/Folders from selected Additional Locations: If you have defined additional location for the files to be published, selecting this option will show up those files from the Additional locations you have selected. The flag Show Files/Folders should be checked in front of the defined Additional Location, to be shown inside FileDock.
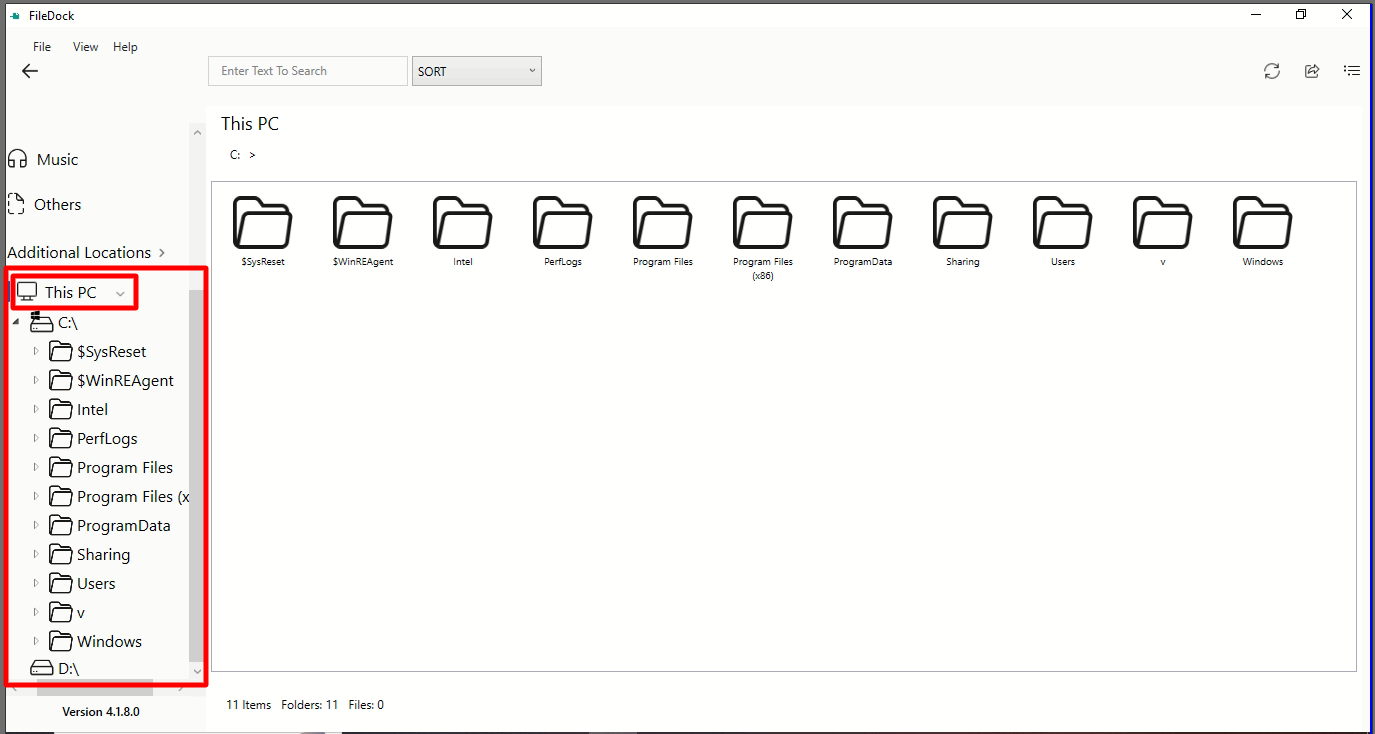
- Show All Files/Folders on Device: All Files/Folders including system files/folders are visible inside FileDock. When this option is selected, a new folder with the name This PC gets created on the device inside FileDock app with all the fixed drives listed under it.
Important Points to Note:- The files and folders are in read-only mode. You cannot make any changes such as editing file contents, right clicking the file, copy, move, delete file, etc.
- Device drives, Network drives as well as hidden files and folders will be visible under This PC.
- System files are not visible (e.g. FileDock Folder inside C:\Program Data).
- Removable drives will not be visible
- No files or folders will be visible within a drive in This PC if that drive is locked with BitLocker. It will appear empty.
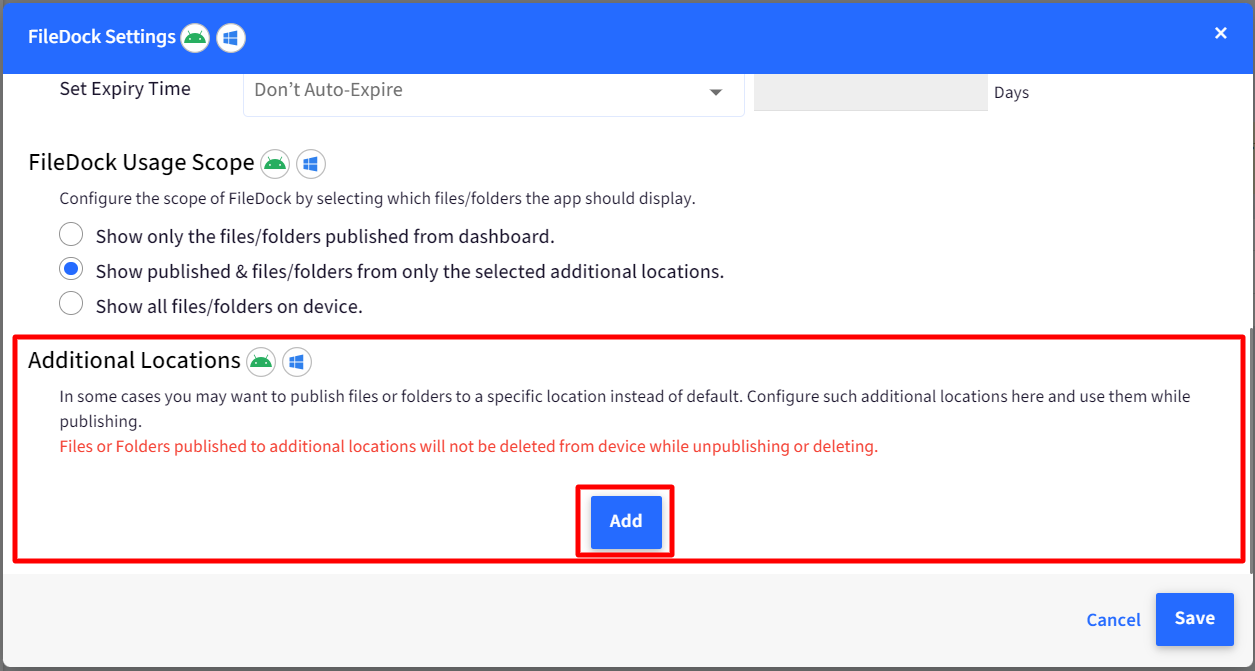
Define Additional Locations
IT Admins can also pre-define the additional targets (specific location) that can be used during Publishing files.
- In the FileDock settings dialog box, under Additional Locations, click on the Add button
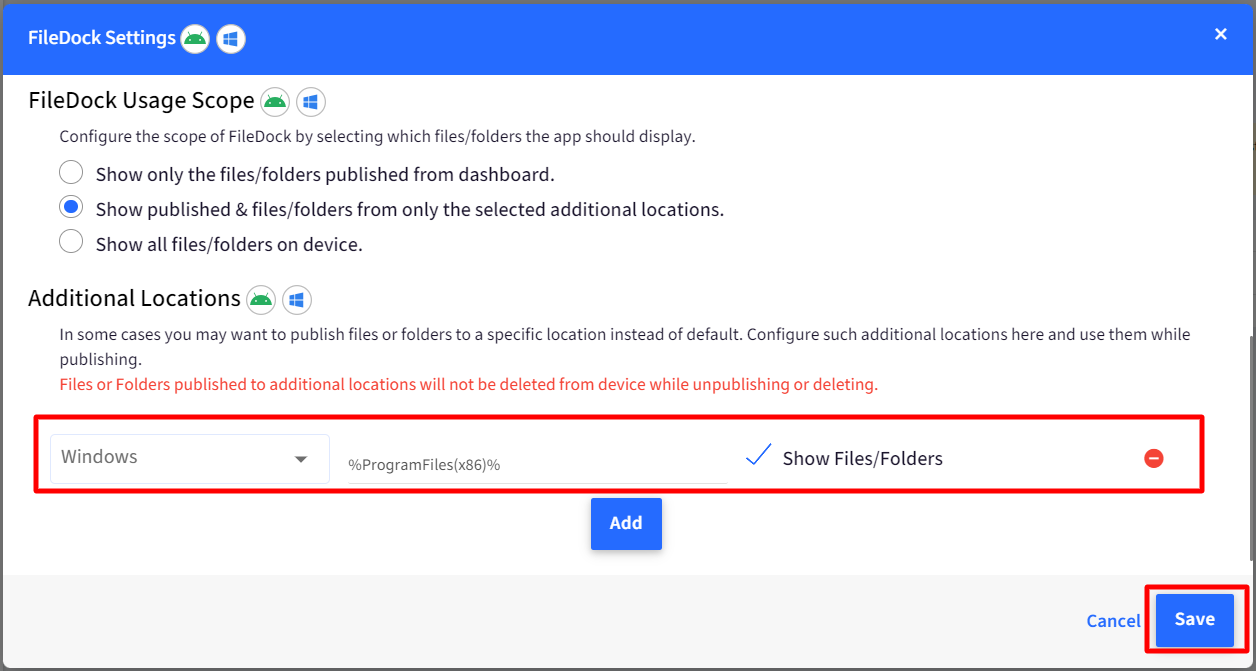
- Select Windows from the drop-down.
- In the input area next to the drop-down, enter the location's path. The path should be in the format %<foldername>% For eg. %ProgramFiles(x86)%
You can also create folders inside this by putting a back slash followed by the folder name. For eg. %ProgramFiles(x86)%\Folder1You can also use custom properties like $device.properties in defining additional targets - Click SAVE
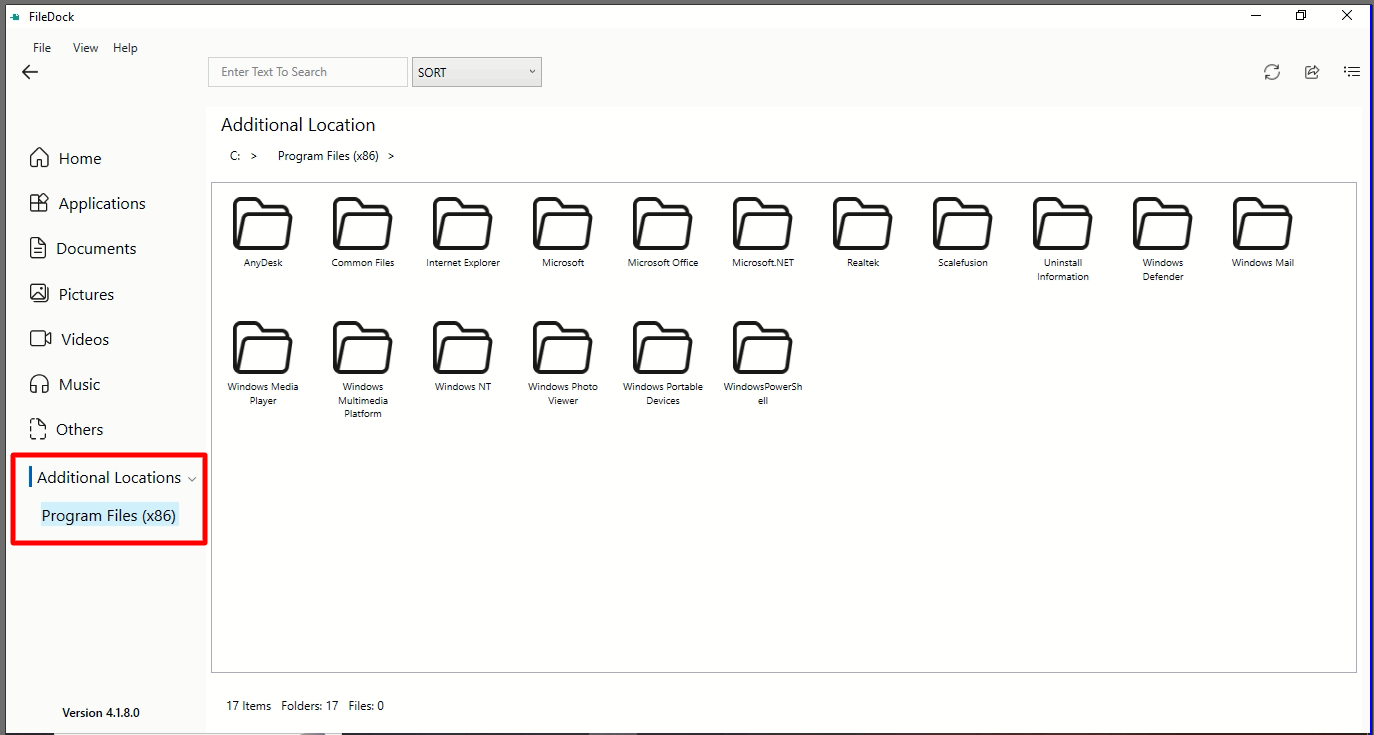
The additional location gets configured. Notice on the device, Additional Locations is displayed on the left menu bar, under that it shows Program Files and on the right side all the folders that exist inside Program Files on your Windows device.
Following Environment variables are supported and can be defined under Additional Locations:
- %temp%
- %appdata%
- %LocalAppData%
- %ProgramFiles%
- %ProgramFiles(x86)
- %ProgramData%
- %windir%
- %userprofile%