Microsoft Exchange is one of the most frequently used email and calendar software. Hence it becomes important to be able to configure and control the Exchange settings on the fly.
Scalefusion addresses this by providing you with an easy-to-use Exchange Settings section, where you can configure the Exchange policy for your organization and then push it to Scalefusion-managed macOS devices. In this guide, we will see how to create, configure and publish an Exchange ActiveSync settings from Scalefusion Dashboard.
Creating a Exchange Configuration
The first step is to create an exchange configuration that can then be pushed to devices. Follow the steps below to create a exchange configuration,
- Navigate to Device Profile & Policies > All Configurations > Global Settings > Exchange Settings. This section will display all the existing configurations and the actions that can be performed on them.
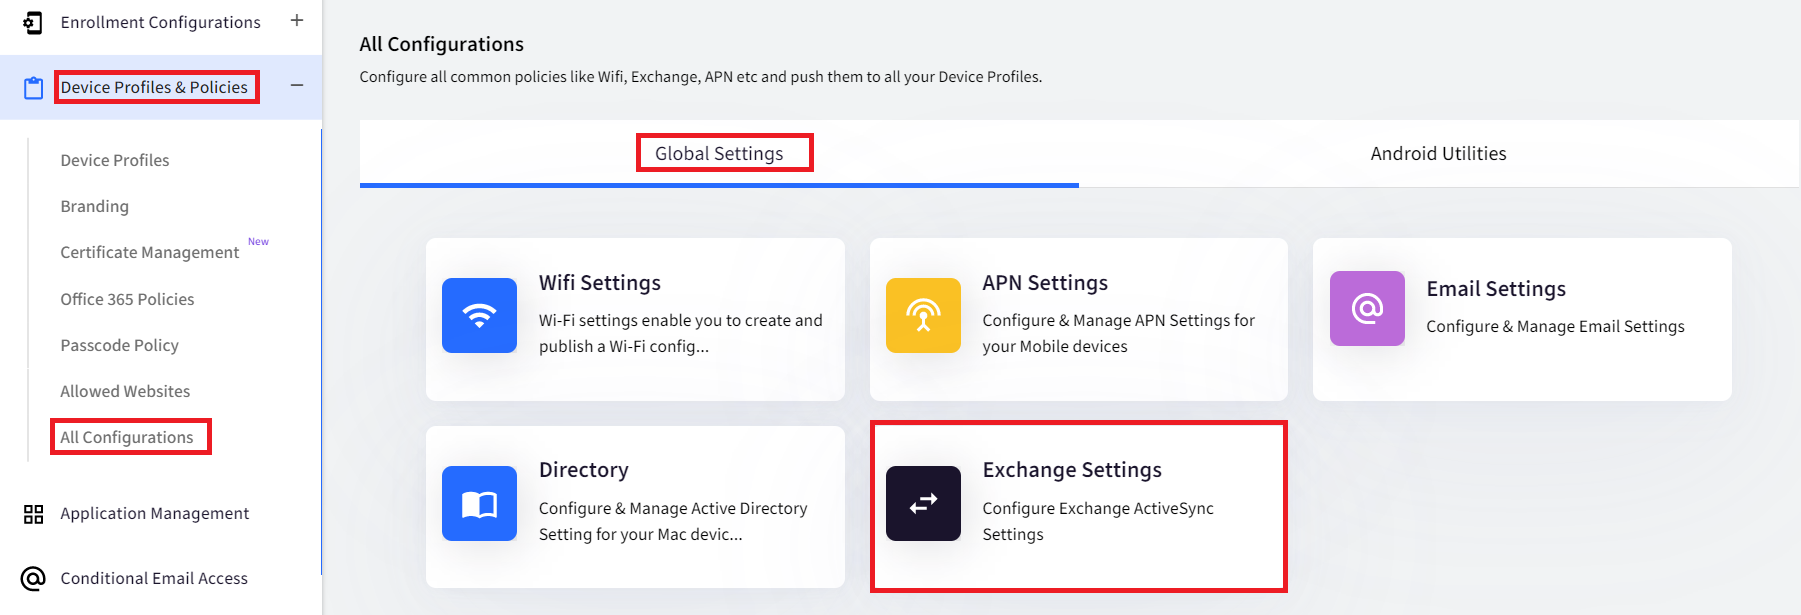
- Click on Add New to start adding a configuration.
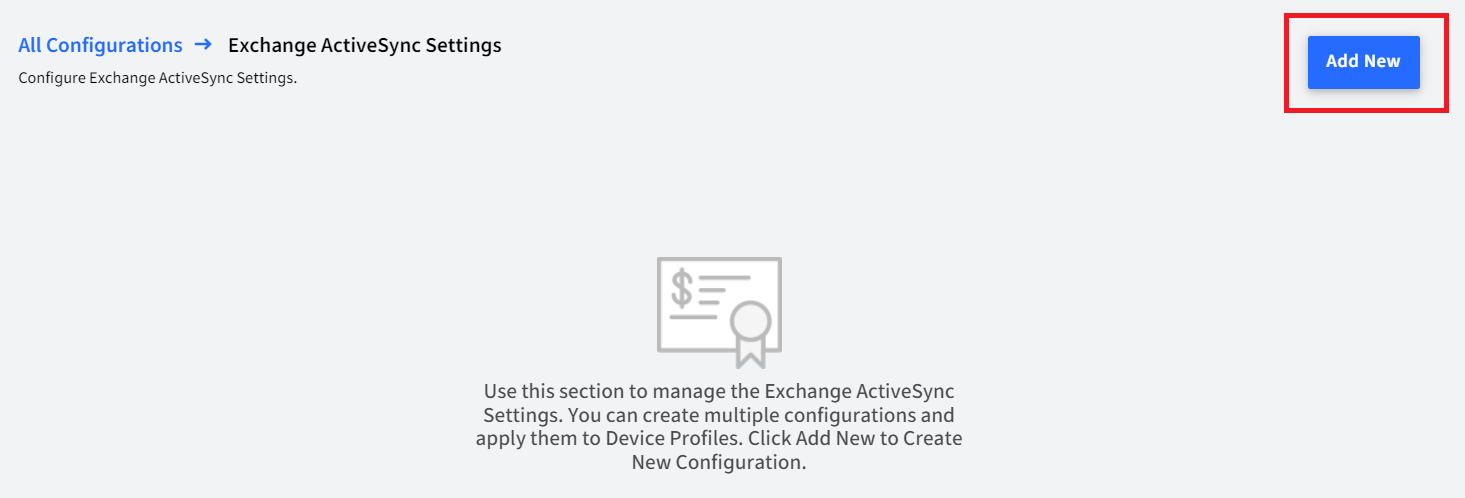
- The New Exchange Settings dialog box will be displayed. The dialog has three tabs,
- Basic: Configure the mandatory settings in this tab. Here you can use the custom fields/properties that you might have defined for the devices. Click NEXT

- Apple Settings: Set the OAuth URLs and also some additional privacy settings for email access via Mail app on Apple devices. OAuth helps in enabling modern auth for email access and is the only way to make exchange configs work for email providers which use/support modern auth. The following are the configurable settings:
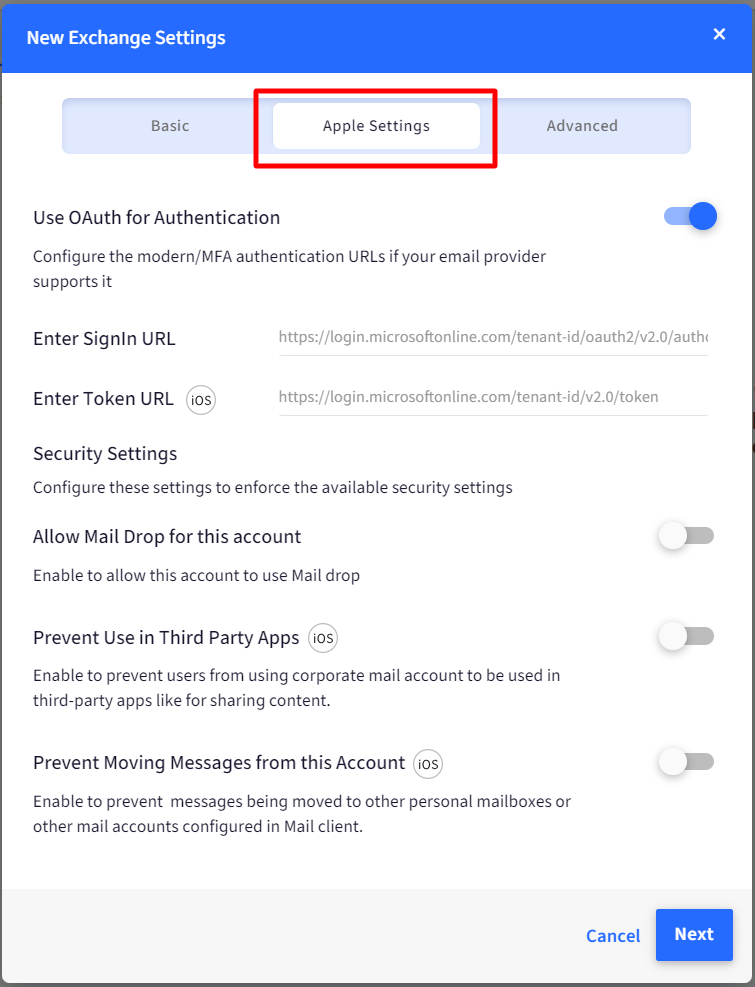
- Use OAuth for Authentication: Enable this setting to configure the modern/MFA authentication URLs if your email provider supports it. After toggling on, enter the following for authentication:

- Sign In URL: https://login.microsoftonline.com/tenant-id/oauth2/v2.0/authorize
- Token URL: https://login.microsoftonline.com/tenant-id/v2.0/tokenThe Sign In and token URLs above are sample URLs as these are commonly used for Microsoft
- Security Settings: Configure the following to enforce security settings for the account:
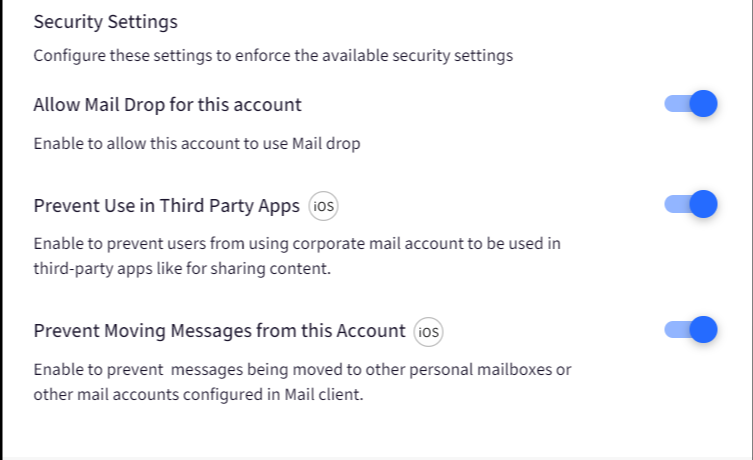
- Allow Mail Drop for this account: On enabling this setting, the Mail Drop feature (through which you can insert external links like iCloud for sending large-size attachments) will be allowed for use on the mail account configured via MDM, else it will be blocked.
- Prevent Use in Third-Party Apps: Enabling this setting prevents users from using corporate mail accounts to be used in third-party apps for sharing content. This will prevent unwanted content from being shared within the organization or distributed from official email.
- Prevent Moving Messages from this Account: Enabling this prevents messages from being moved to other personal mailboxes or other mail accounts configured in the Mail client. This prevents data leaks.
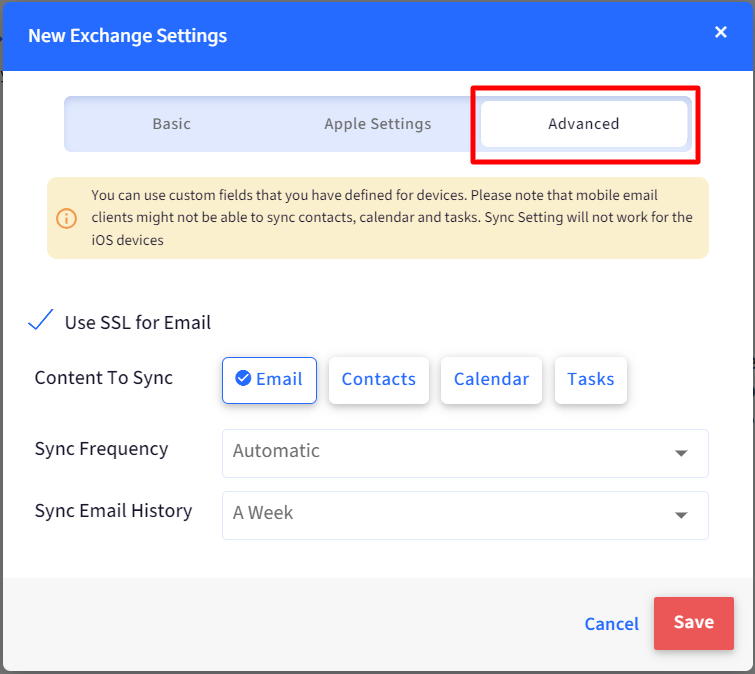
- Advanced: Choose the content you want to sync.
The native Mail app will not sync Contacts, Calendars, and Tasks.
- Basic: Configure the mandatory settings in this tab. Here you can use the custom fields/properties that you might have defined for the devices. Click NEXT
- Click on Save. Once the configuration is saved, it will display in the list as shown below. The following actions are supported for a saved configuration,
- Edit: Allows you to edit the configuration.
- Publish: Allows you to publish the configuration directly to device profiles from this screen.
- UnPublish: Choose this option to remove the configuration from a Device Profile.
- Delete: Choose this option to remove the configuration from all Device Profiles and also delete it from Scalefusion Dashboard. 

Publishing an Exchange Configuration to a Mac Device Profile
Now that we have created an Exchange ActiveSync configuration, let us look at the steps to publish it to a Device Profile.
- Navigate to Device Management > Device Profiles section.
- Launch the Device Profile Wizard, by clicking on CREATE NEW PROFILE or select a Mac Device Profile and Edit it from the action panel.
- Click on the Exchange & Email section.
- Under Choose Exchange ActiveSync Configurations, select the newly created exchange configuration,

- Click SAVE on the top right corner to save the changes to the profile.
- Once the configuration is published, the Mail client on the macOS device is configured with the email settings.
NOTE: The end-users will have to enter the password of their account for the email sync to start working as explained below.
Authorizing On Device
Whenever exchange settings are pushed or modified, users would need to authorize the account on the device. To do so,
- On your Mac device, navigate to System Preferences > Internet Accounts
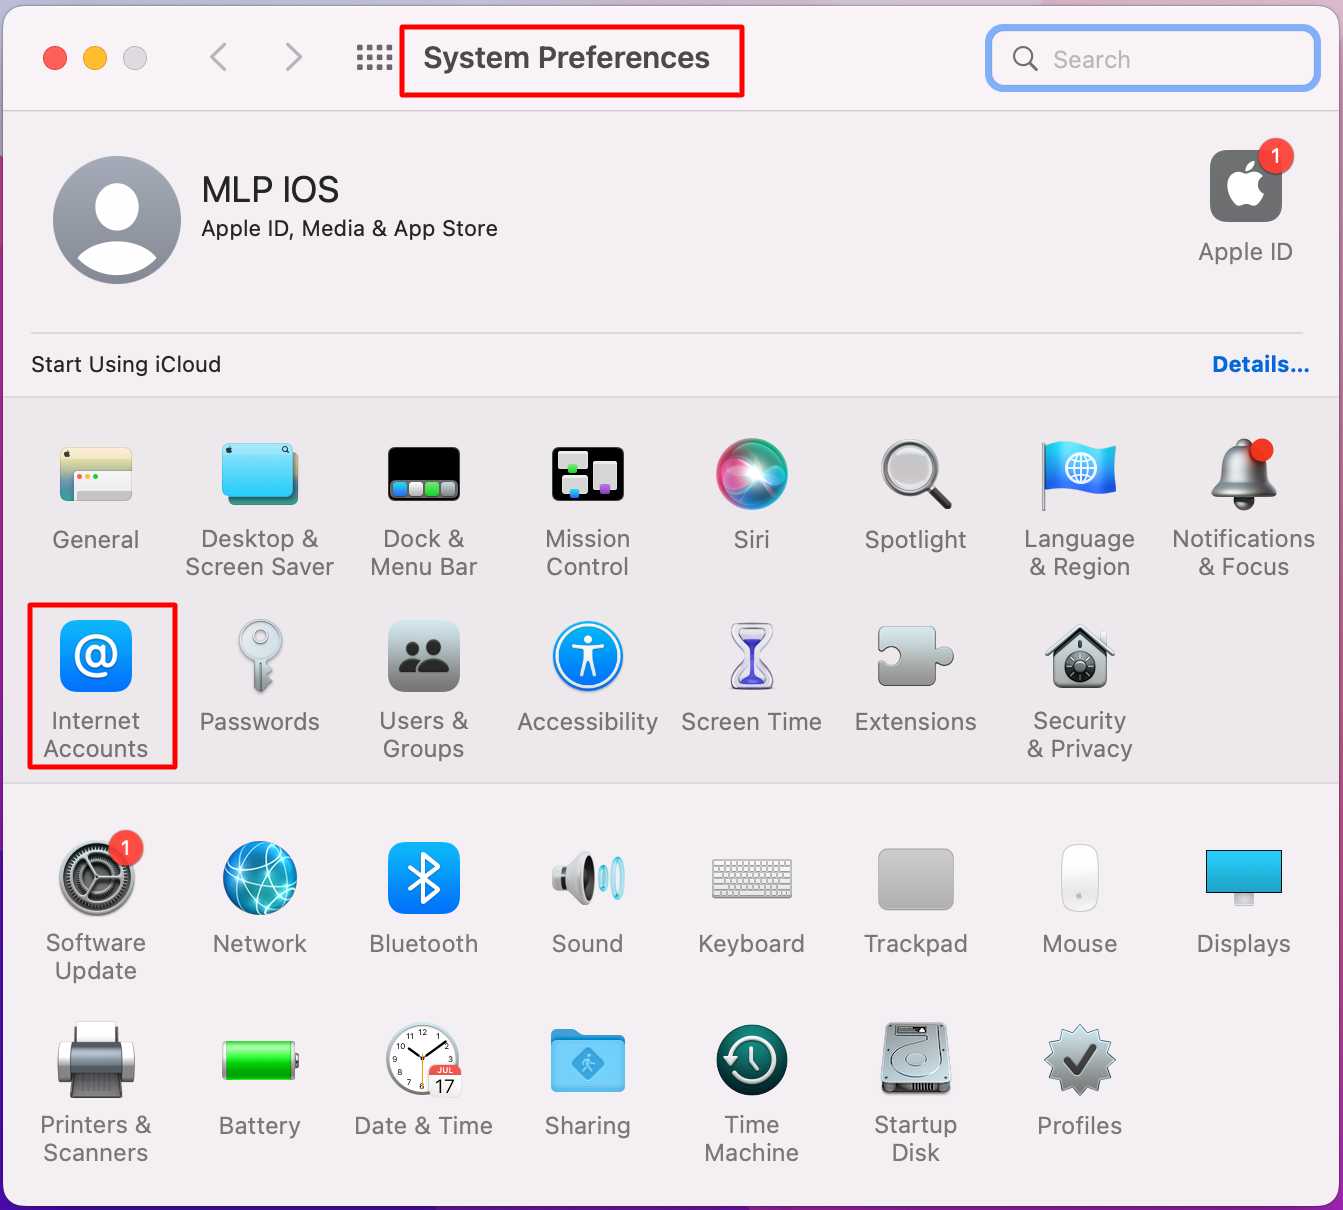
- The exchange account you have configured from the Scalefusion Dashboard will be visible here. Select and double-click on it.

- You will get a prompt to enter password for the account. Enter the password and click on Sign In to authenticate.

Frequently Asked Questions
Question: What would happen if I moved the Device from a Device Profile with an Exchange configuration to a Device Profile without exchange configuration?
Answer: This will cause the Exchange settings to be removed from the device.